The most “meaty” part of following the wiring instructions for a new Honeywell thermostat, is correctly connecting it to the HVAC system. One useful feature about these t-stats, is that they generally use the same wire labeling as their older models.
Today’s WiFi t-stats still use the R, Rx, C, W, Y1, Y2, et al wires in the same way. Their remote access functions need no other connections. This is true of the Honeywell RTH9580WF smart thermostat that we recently installed, and that we’ll discuss here.
Unlike many older thermostats though, this smart thermostat does need the C (common) wire. Through this wire, it gets its 24 volt AC power for running its WiFi, internet, and program functions. Not a problem if you replace another programmable thermostat with this one. Indeed, most of those also use the C wire.
But if you upgrade from a non programmable model that not use the C wire, then you may have to improvise. I.e. You might need to run the C wire power to your new t-stat. We discuss how to do this in more detail below.
1. Honeywell Thermostat Wiring Instructions Prep
WARNING!
If you’re replacing a thermostat that has a glass tube with mercury in it, then do recycle it properly.
1-1. Get Tools Together
Gather the necessary tools and supplies together, including:
Philips and straight screwdrivers. Use these to loosen / tighten screws and wire connections.
Diagonal and long-nosed pliers (for wire cutting, shaping, and stripping).
Wall anchors (for mounting the t-stat’s wall plate, just in case you cannot use the existing mounting screw holes).
Drill and bits, (in case you have to install the wall anchors) If you must apply new anchors, follow the included instructions with those, to select the proper size drill bits.
Pencils and pens (for marking places on the wall to drill holes for the anchors);
A level, to check that the mounting plate is plum and completely horizontal. Check this before marking the places on the wall for the anchors.
Wire nuts (for connecting two or more wires together, as your specific installation dictates).
Hammer (for tapping pilot holes at the chosen spots on the wall where the anchors will go, prior to drilling).
Electrical tape (to cover any unused bare wires behind the thermostat).
1-2. Turn off Power to Furnace / Central Air Unit
Do this at your home’s main breaker panel. But sometimes, furnace installations provide a separate power switch for this purpose. Our furnace has a standard 120 volt AC mains plug that interrupts mains power to it when pulled out.
Verify that power is off by inspecting any pilot lamps on furnace or old thermostat. These should all be dark, and no hum or other running sounds from the furnace should be heard.
2. Honeywell Thermostat Wiring Instructions: Remove Old Thermostat and Any Face Plate
Remove the old thermostat unit from its holder plate. Most thermostats nowadays detach from a wall mounting plate. This allows simple wire hookups, with low risk of thermostat damage.
2-1. Take Picture of Old Thermostat Wiring
2-2. Label the Wires
New thermostats usually come with a sheet of wire labels. They often print these with the wire letters found in most t-stats.
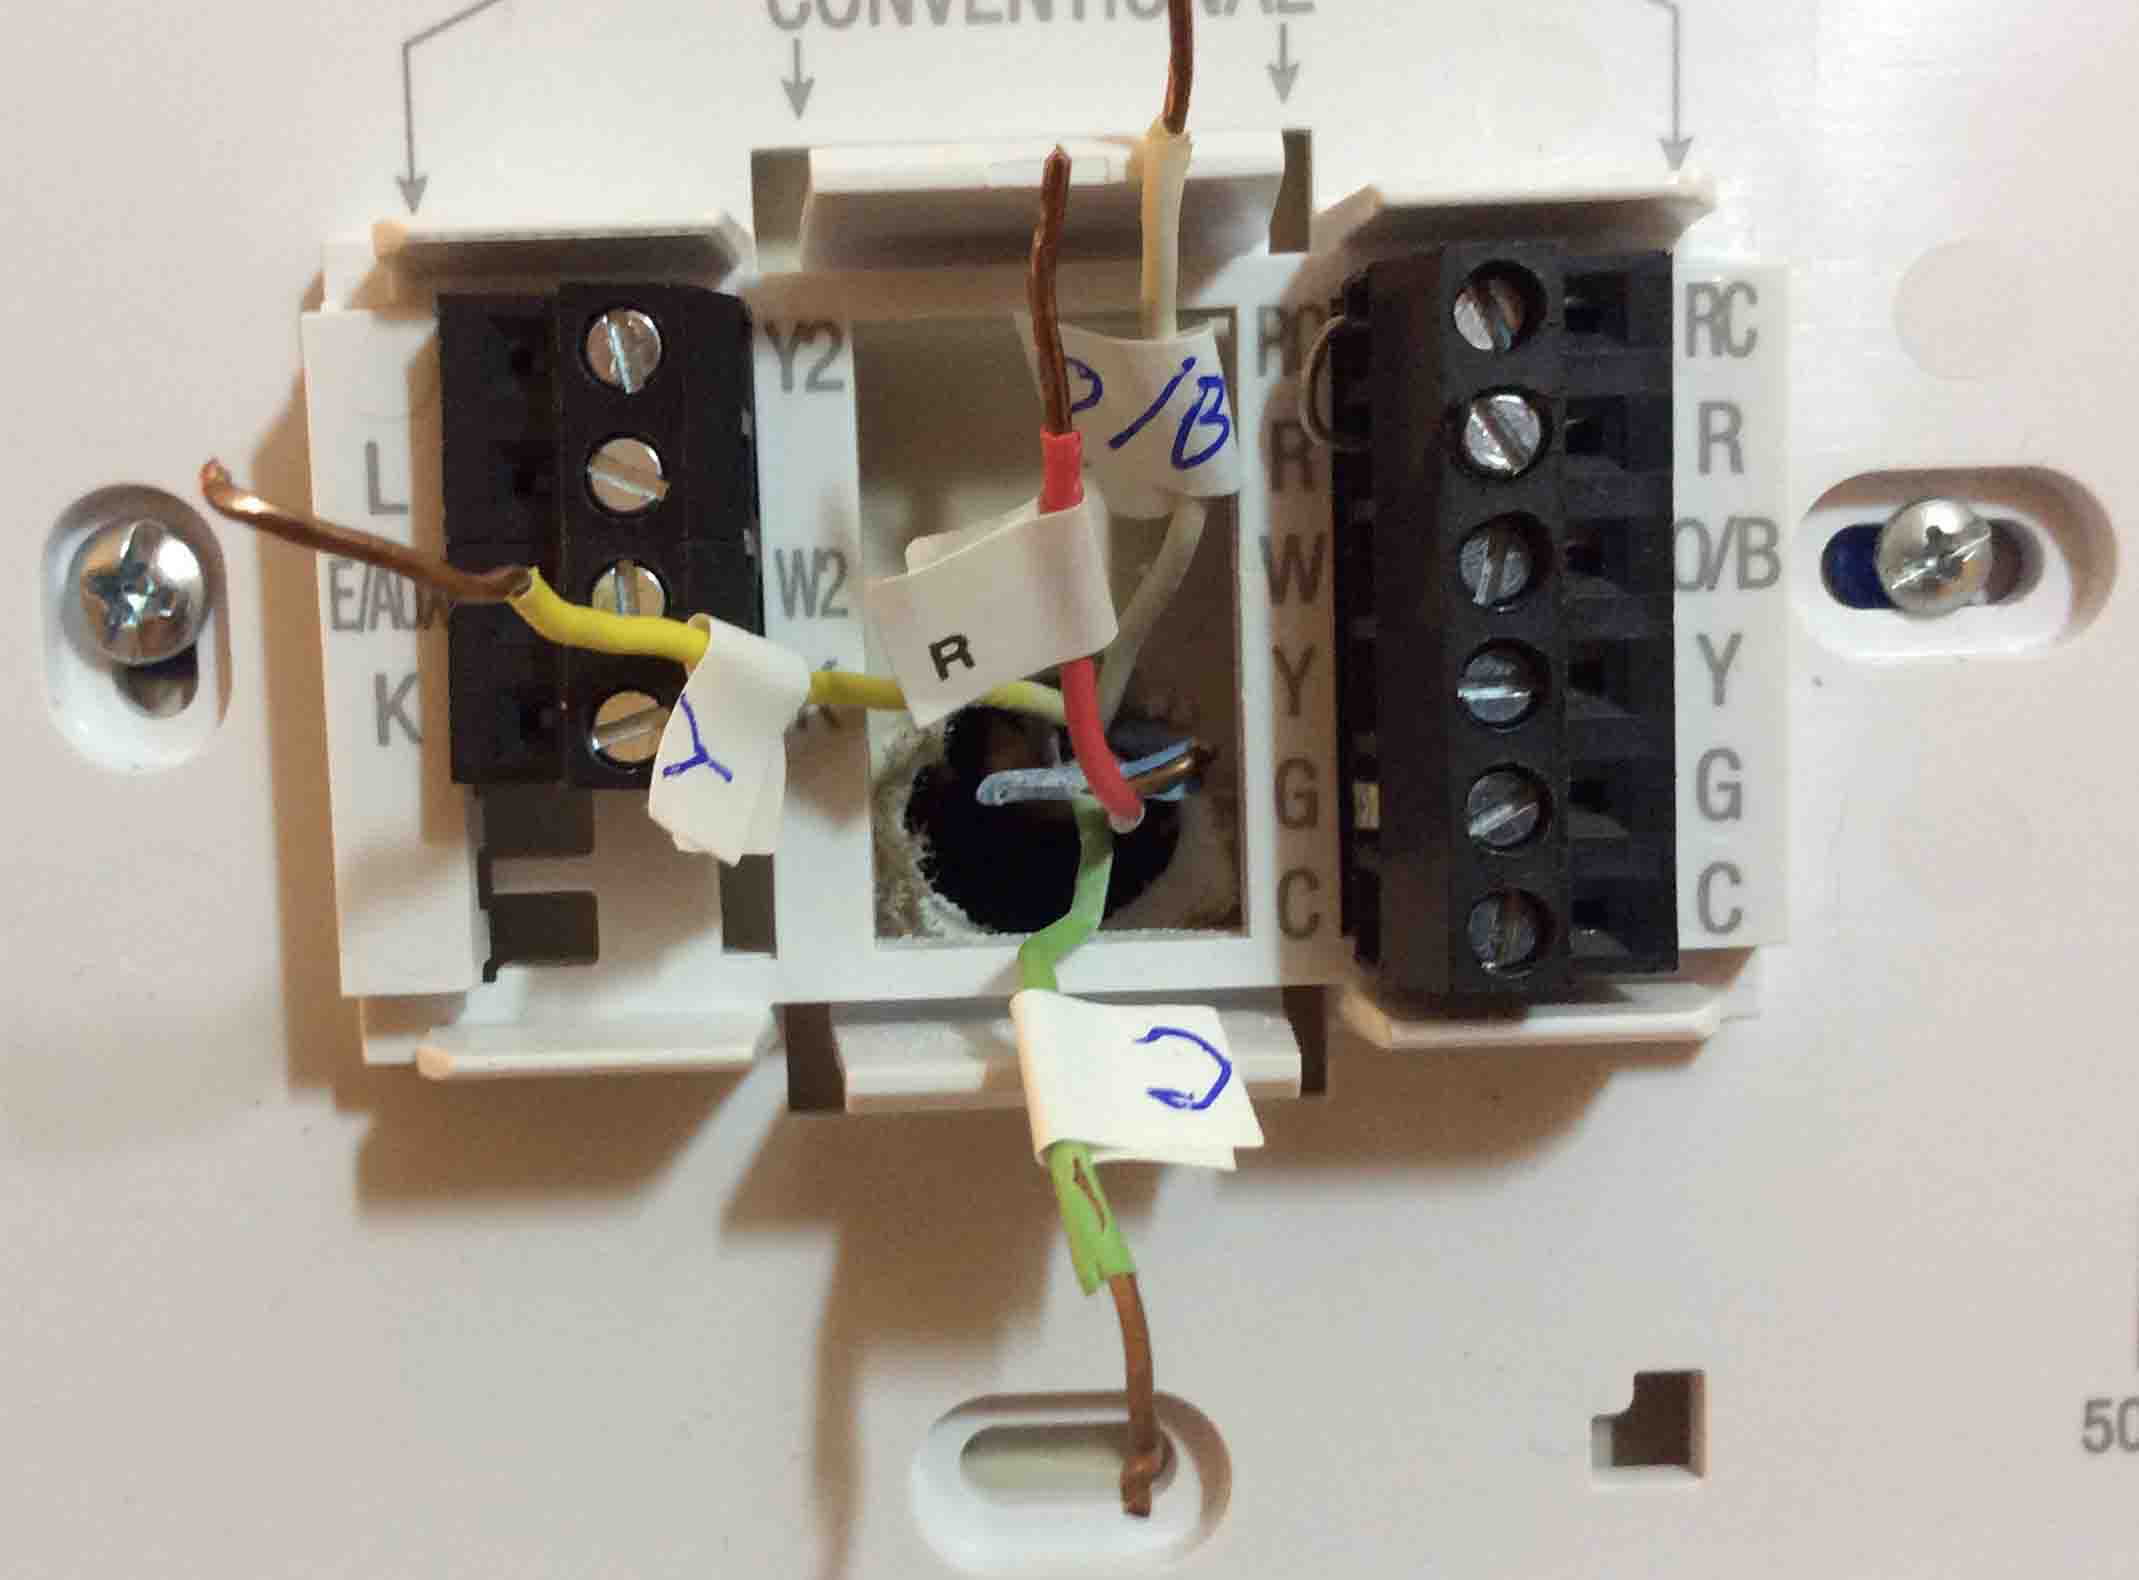
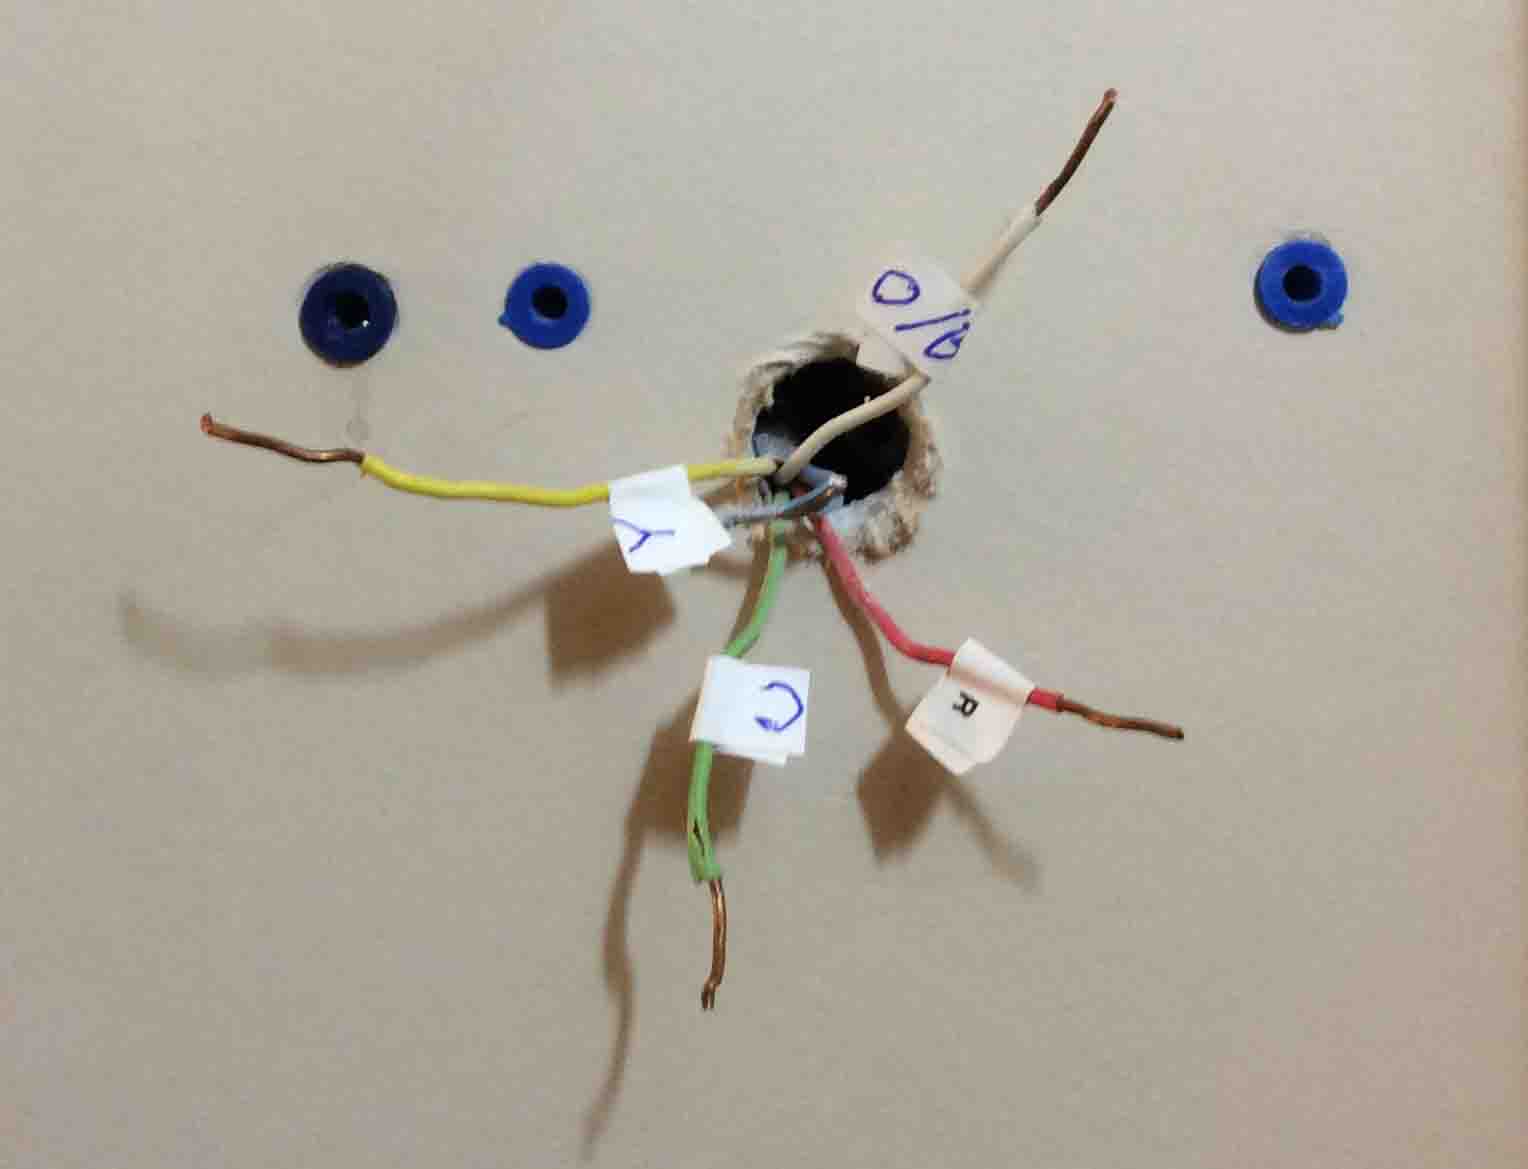
Label each wire with the latter of the terminal to which it connects. In our case…
- The green wire connects to the C terminal.
- Yellow wire connects to the Y terminal.
- The white wire connects to the O/B terminal.
- Red wire connects to the R terminal.
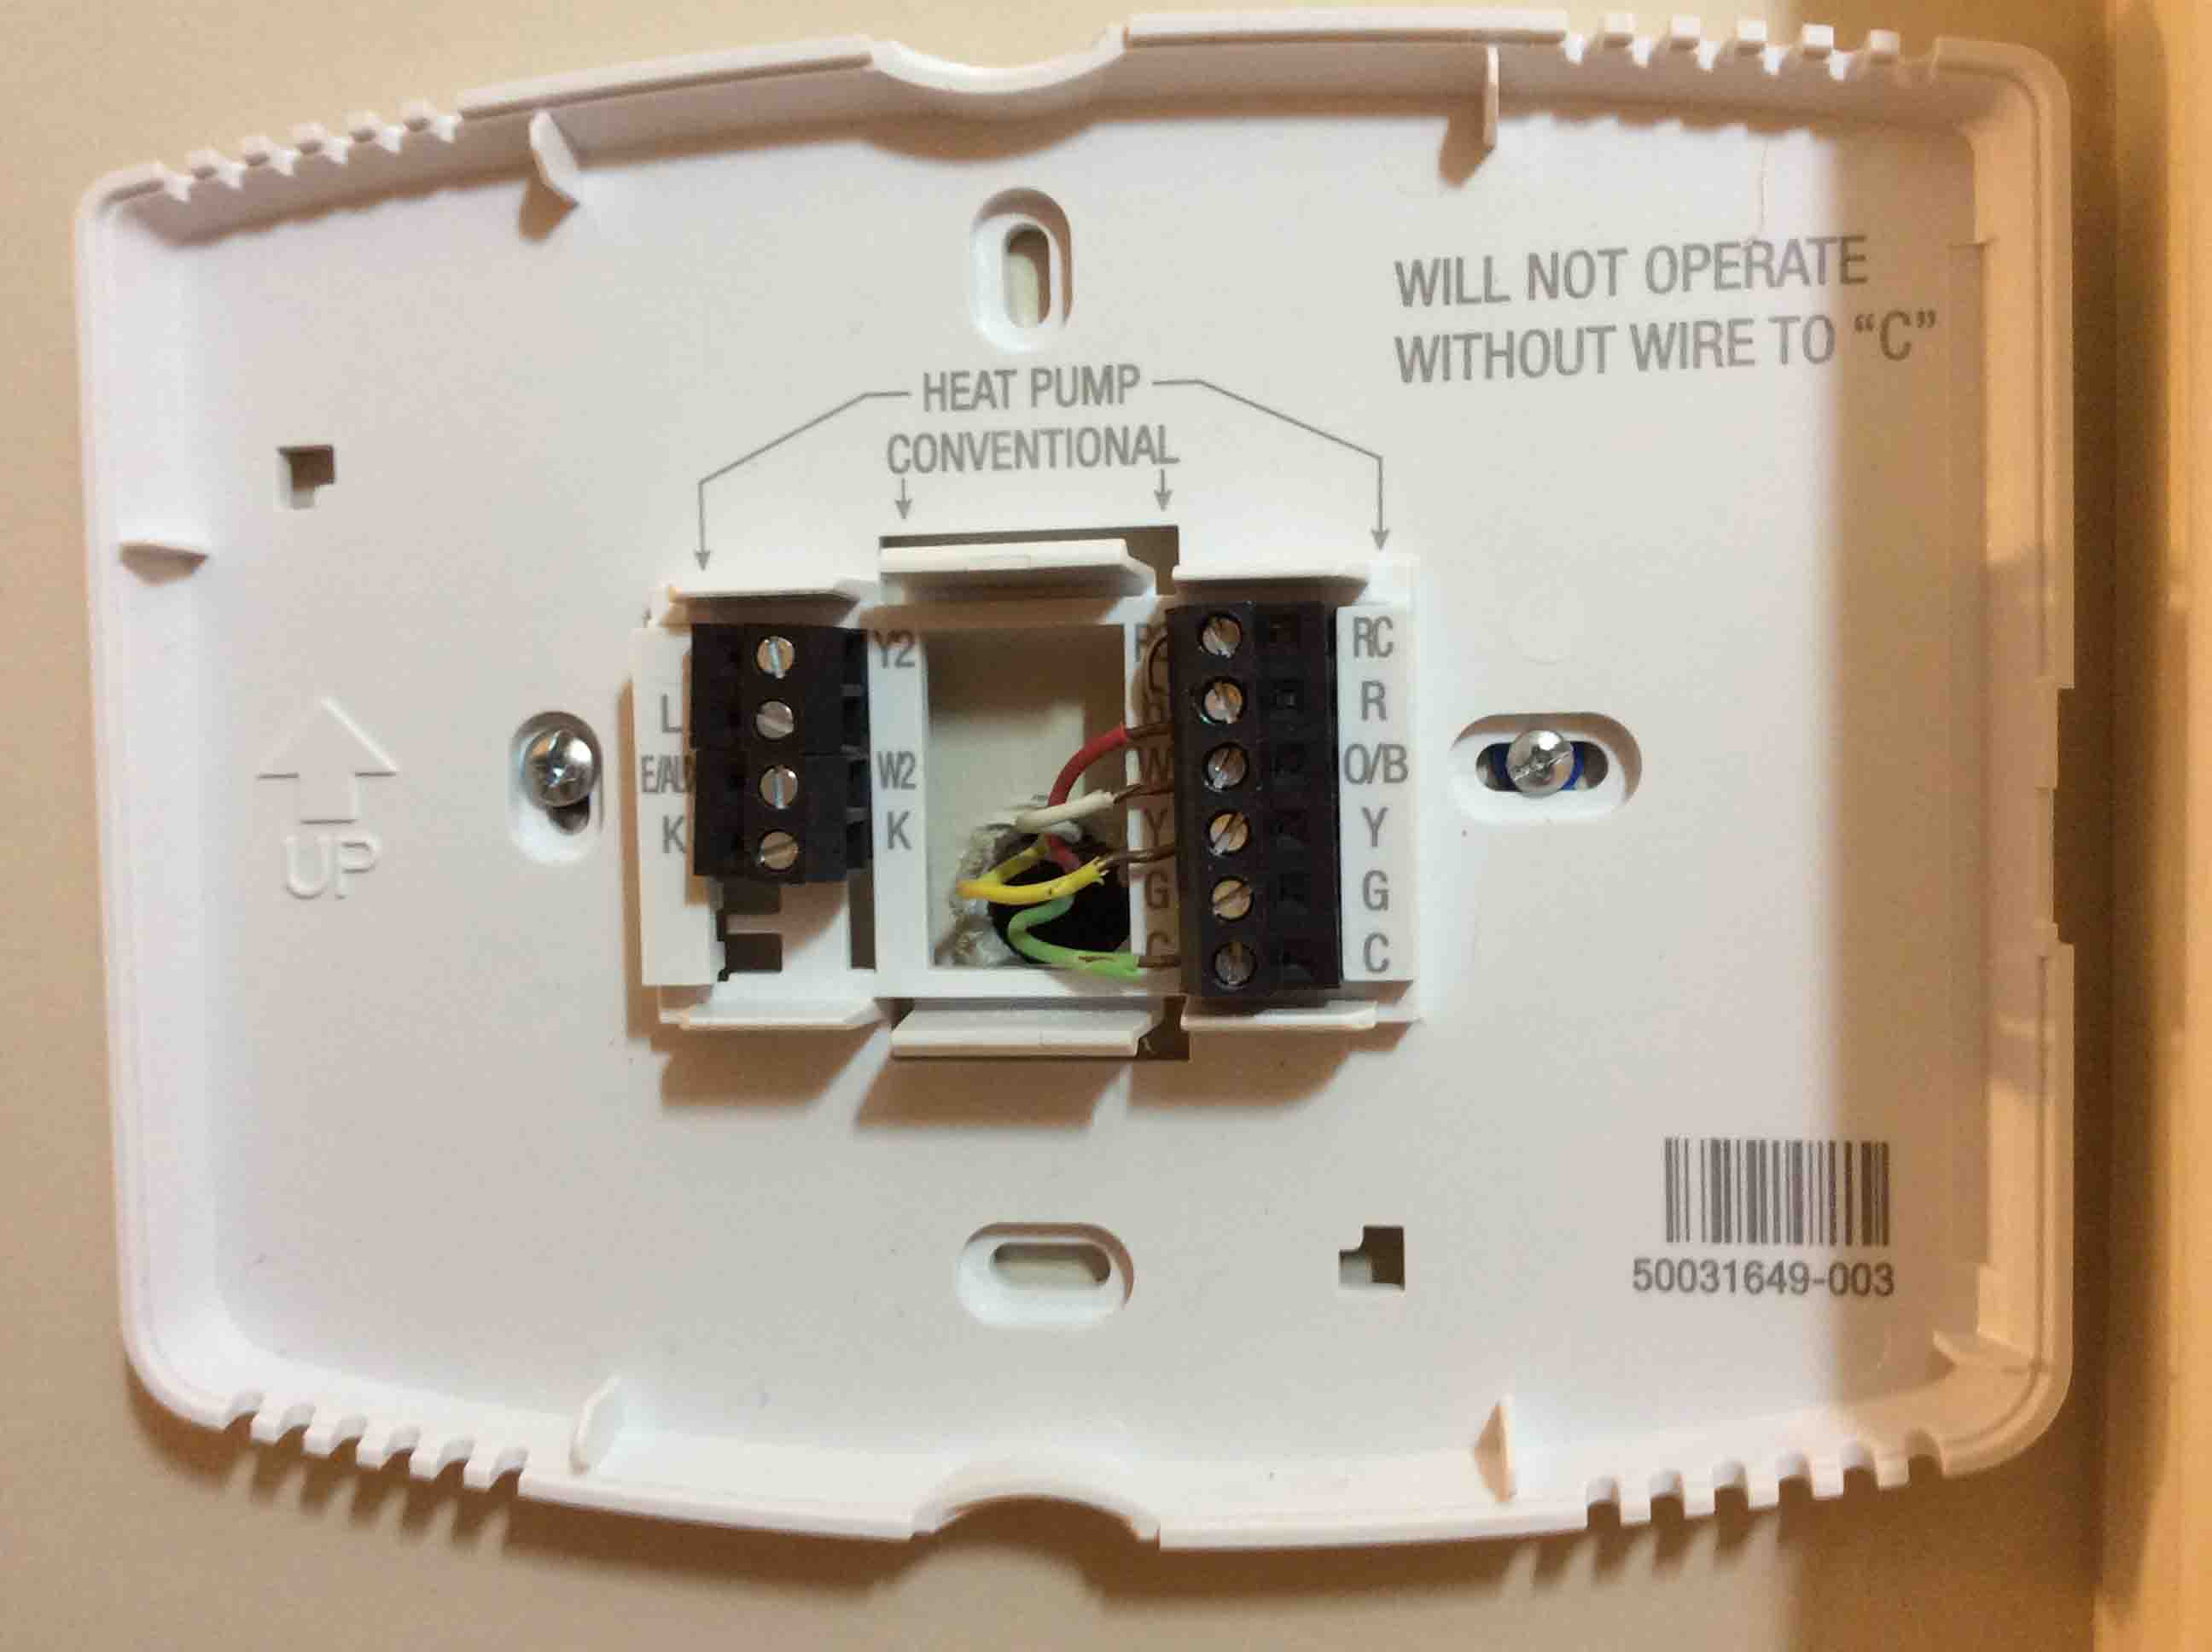
Note in the picture below, the white labels we’ve added. These will be most helpful when wiring the new wall plate for this Honeywell thermostat.
3. Honeywell Thermostat Wiring Instructions: Remove the Old Wall Plate
Unscrew the screws that fasten the old thermostat’s mounting plate to the wall.
Then, slide the old wall plate over the wires.
WARNING!
Be careful not to catch and pull off the labels as you pull the plate over the wires.
Also, do not let the wires to fall inside the wall. Doing so will create major headaches for you. Why? Because you’ll need to fish them out or run new cable. So to prevent losing the cable into the wall, wrap it around a pencil or nail. This should hold it in place until you install the new wall plate.
4. Provide a C Wire if None Exists
WARNING !
The Honeywell thermostat in this demo must have a C wire to work. So if you cannot add a C wire, then return the thermostat for a refund. We discuss next some options for adding a C wire.
Add a C wire using the following tips and procedures.
4-1. Make an Existing but Unused Conductor Your C Wire
Look for Unused Wires
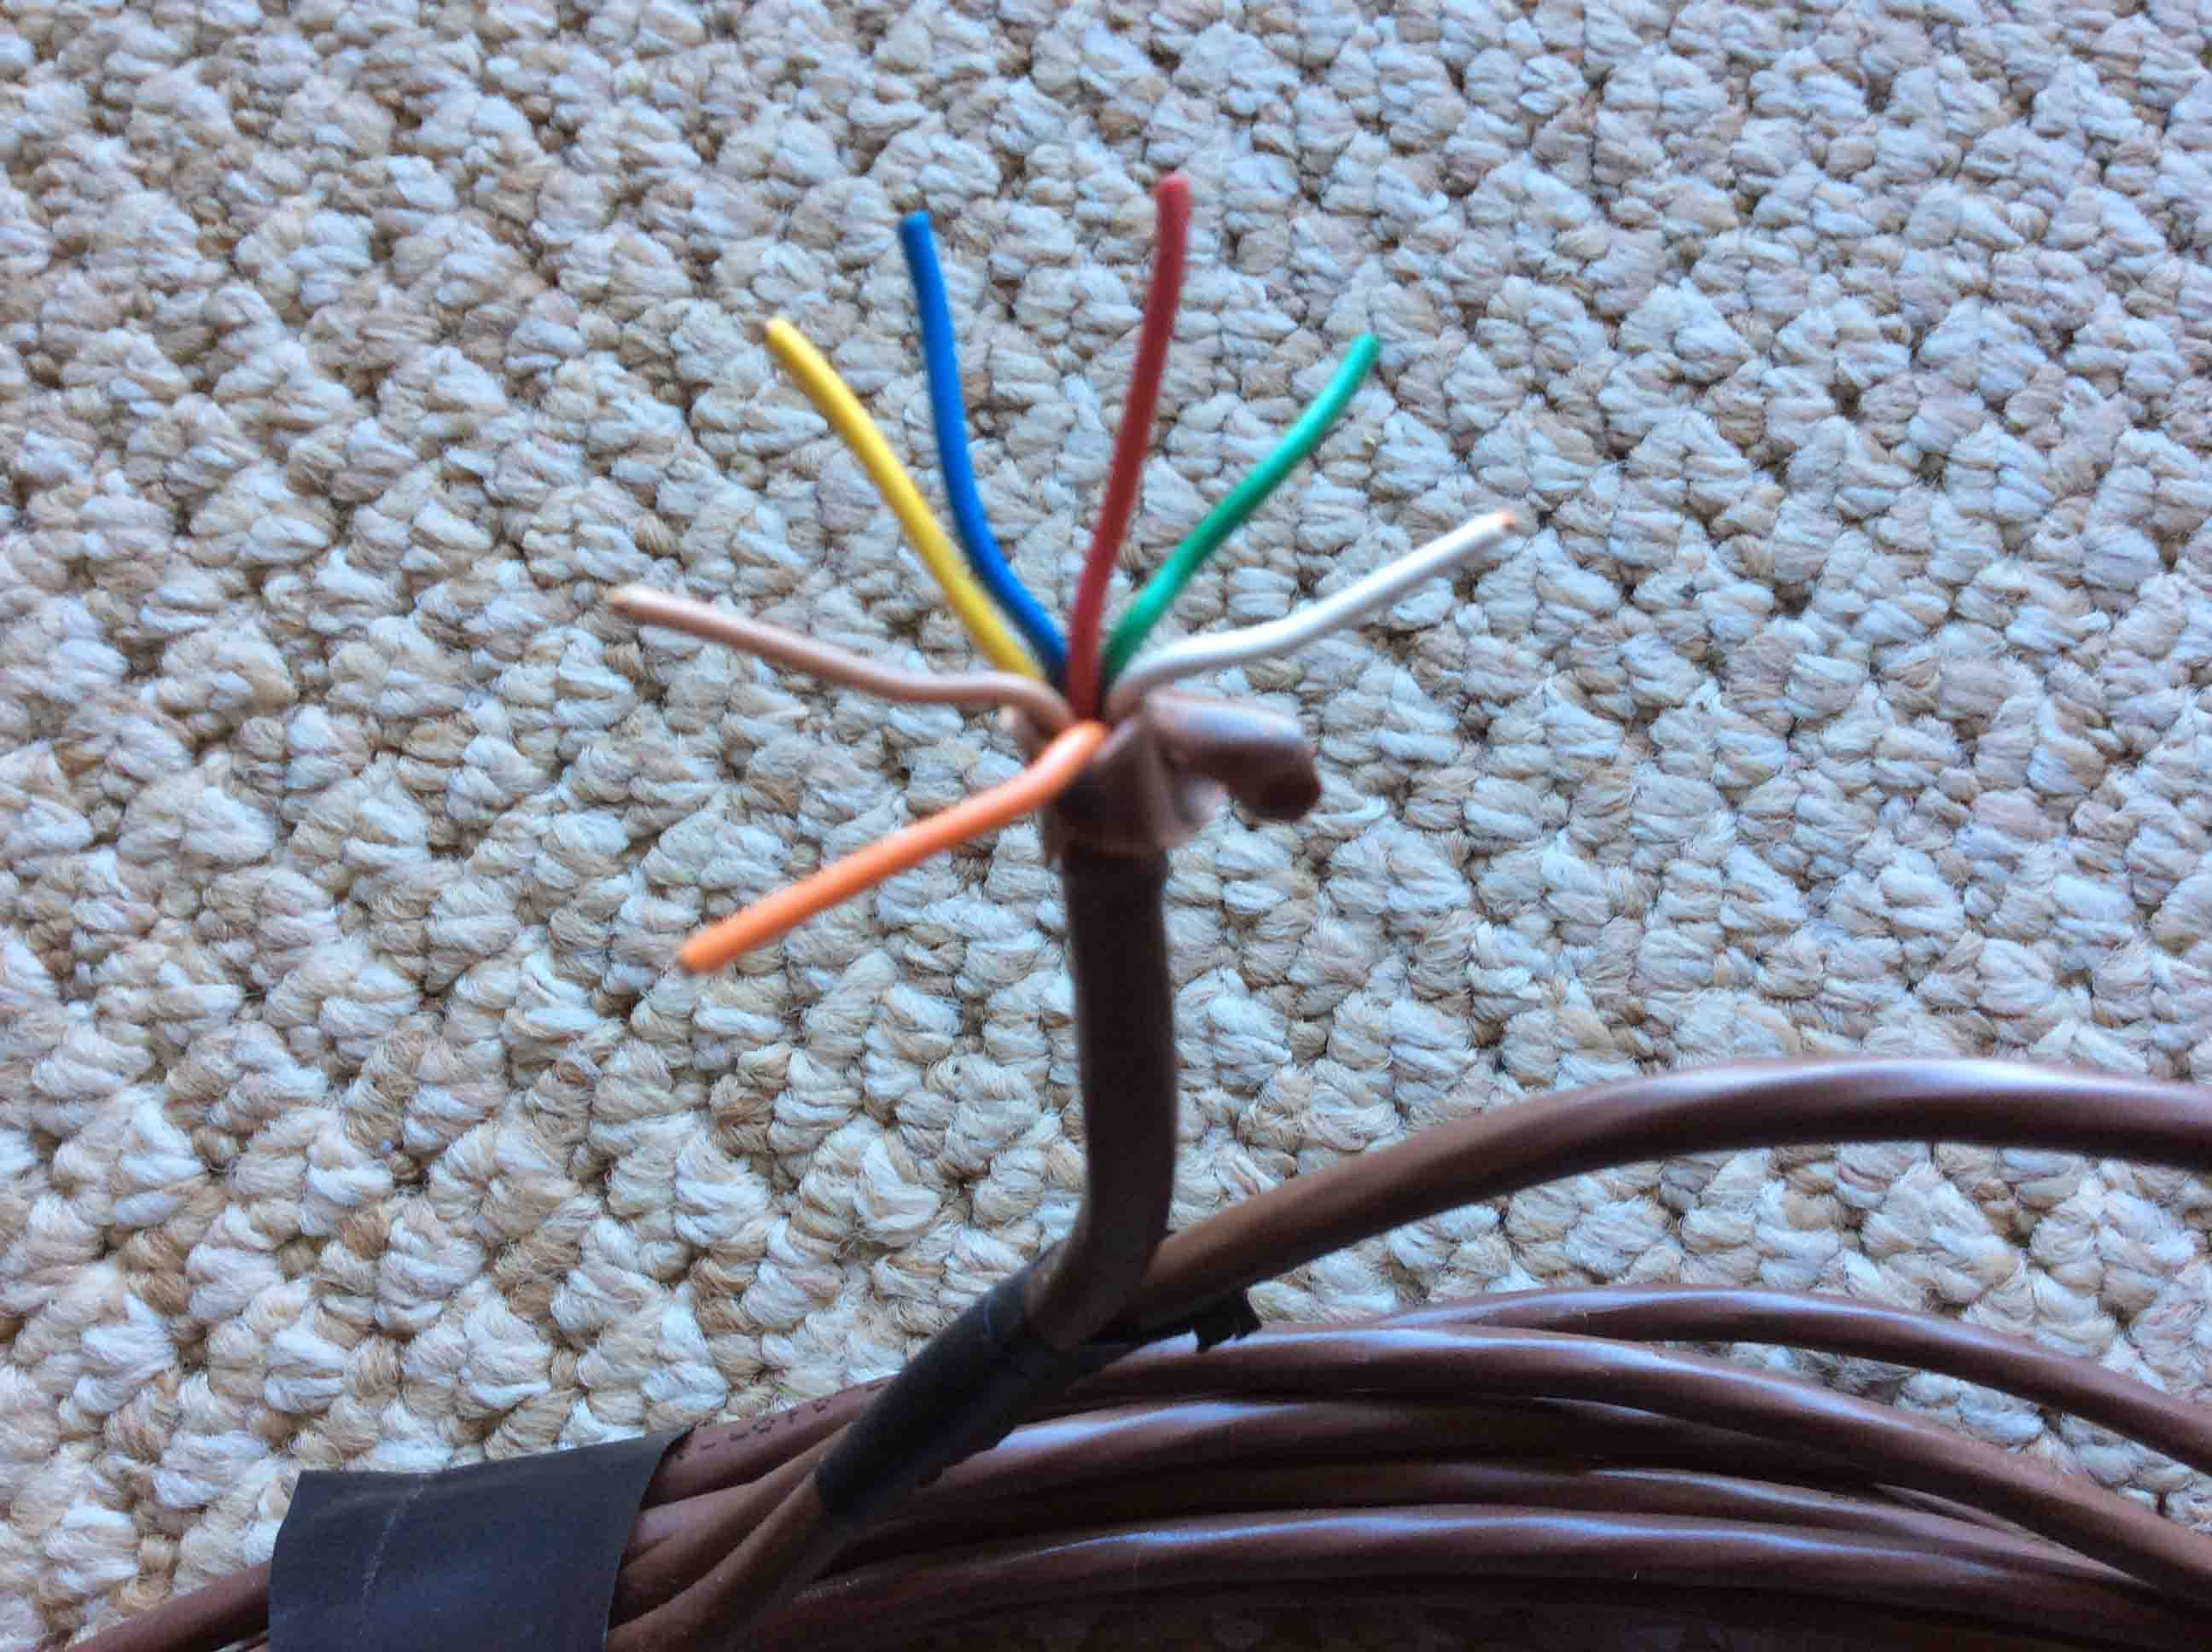
Check for any unused conductors (single wires) in your existing thermostat cable. They bundle these wires into a single cable (four, five, seven, or eight wire cables). See the picture above that shows a common seven wire thermostat cable. Often, installers use a cable with extra free wires to permit easy expansion later. So, EXPAND, if you must, and use one of these free wires as the C wire.
To find an unused wire, look at the wire layout at your thermostat wall plate. See the example shown above for our old thermostat. See if there are any free wires behind the wall plate.
Note That Wire’s Color
If so, pick one, and note its color. If not, use one of the used wires like the fan wire. We explore this option in the next sections.
Find That Unused Wire in HVAC System
Assuming that you’ve indeed found an unused wire, go to your heating / cooling system. Open its access door. Then find the thermostat cable hookup block inside. This is a group of screws in a single or double row on a plastic form. They label these screws with the same letters found on your t-stat wall plate.
Find the same color wire from the t-stat that you identified as free at the other end. Next, remove this wire from any terminal. Then connect this up to the C terminal on the wiring block. Check with your heating / cooling system installation guides if its wire block has no C label.
Once you connect your new C wire at the furnace, go back to your old thermostat. Continue wiring your new Honeywell thermostat from there, as we discuss in the next section.
4-2. Use an Already-Used Conductor for Your C Wire
Now your current thermostat cable may not have any extra wires. So you can use the fan wire as the C wire. But with this approach, you no longer will be able to turn the fan on and off manually.
Look for the fan wire at the old t-stat, and note its color. It’s usually the one green wire on the G terminal.
Now, go to the heating / cooling system, and find that same wire inside at the thermostat wiring block.
Disconnect that wire from the G or FAN terminal, and connect it to the C terminal.
4-3. Run a New Conductor as the C Wire
Or, perhaps you do not wish to give up fan control. But have no unused wires in your thermostat cable. In this case, run a “chaser” wire from your furnace to the thermostat if you can.
Use number 20 to 24 gauge solid insulated wire for the chaser. The bigger the number, the thinner and more flexible the wire. But don’t make it too thin, lest it break too easily.
Fish the wire from the furnace to the thermostat location; not always easy.
Once done, label both ends of the new wire as, “C.”
At the furnace, attach the new wire to the C terminal.
Then continue to the Prepare for Mounting the New Thermostat section below.
4-4. Replace Your Thermostat Cable
It might be easier than fishing an extra chaser wire, to simply replace the entire existing cable. You can buy seven conductor cables at larger home centers.
Remove Old Cable
Now they may not have stapled the old cable inside the wall anywhere along its path. So you might be able to use it to pull the new cable from the furnace through the wall.
Unwrap the New Cord
At the furnace, uncoil enough cable to reach the thermostat. Then, lay it loosely on the floor.
Record All Old Cable Connections
Take a picture of the old cable connections in the furnace.
Detach Old Cable from HVAC
Disconnect all conductors of the old cable from the terminals. Remove any wire ties and tape that secure the old cable in place.
Tie the New Cord to the Old One
Tie the end of the old cable with the now-loose wires to one end of the new cord.
Try Pulling Old Cable Out, at T-Stat End
Go to the thermostat location and see if you can pull the old cable out. Doing so also pulls the new cable through and into place.
Fish the New Cable if you Must
But if you cannot yank the old cable through, it may be fastened somewhere inside the wall. In this case, you’ll need to fish the new cable through using fish tape or some other means.
At this point hopefully, you were able to pull the old thermostat cable out. Plus, you also have the new cable end jutting from the wall. If so, then you’ve done the hardest part (the fishing) of replacing the cable.
Connect New Thermostat Cable to Furnace / HVAC
Now go back to the furnace. Then strip the outer cover off of the new cable. Next, strip the ends of the number of wires you need. Finally, connect those wires to the wiring block.
Note what color wire you attach to each terminal. C is often red. Y is often yellow. G is often green, R is often orange. You need not follow this convention, although it’s best for anyone else who might work on your HVAC system someday if you do follow it. If you don’t though, just make sure you correctly note which wire color you attach to which terminal.
Take Picture of these New Cable Connections
Take a picture of the wiring block when you’ve finished connecting all the wires.
Prepare New Cable at Thermostat End
Return to the thermostat location. Then cut and strip the new cable and its wires to the right length. Leave a few inches extra, just in case you cut off too much wire.
You are now ready to connect the new cable to the new thermostat’s wall plate. Re on for details.
5. Honeywell Thermostat Wiring Instructions: Prepare for Mounting the New Thermostat’s Wall Plate
Make sure you have holes in the wall that line up with the holes in the new wall plate. In our case, the Honeywell thermostat has identically spaced holes to our old thermostat.
If you do not have properly spaced holes, you’ll need to make some. We suggest using small wall anchors. Ours are blue in the pictures above. Then, follow the procedures that come with the anchors for putting them in.
Once you have the mounting holes for the wall plate, mount the new wall plate. We discuss this next.
6. Honeywell Thermostat Wiring Instructions: Mount the New Thermostat Wall Plate
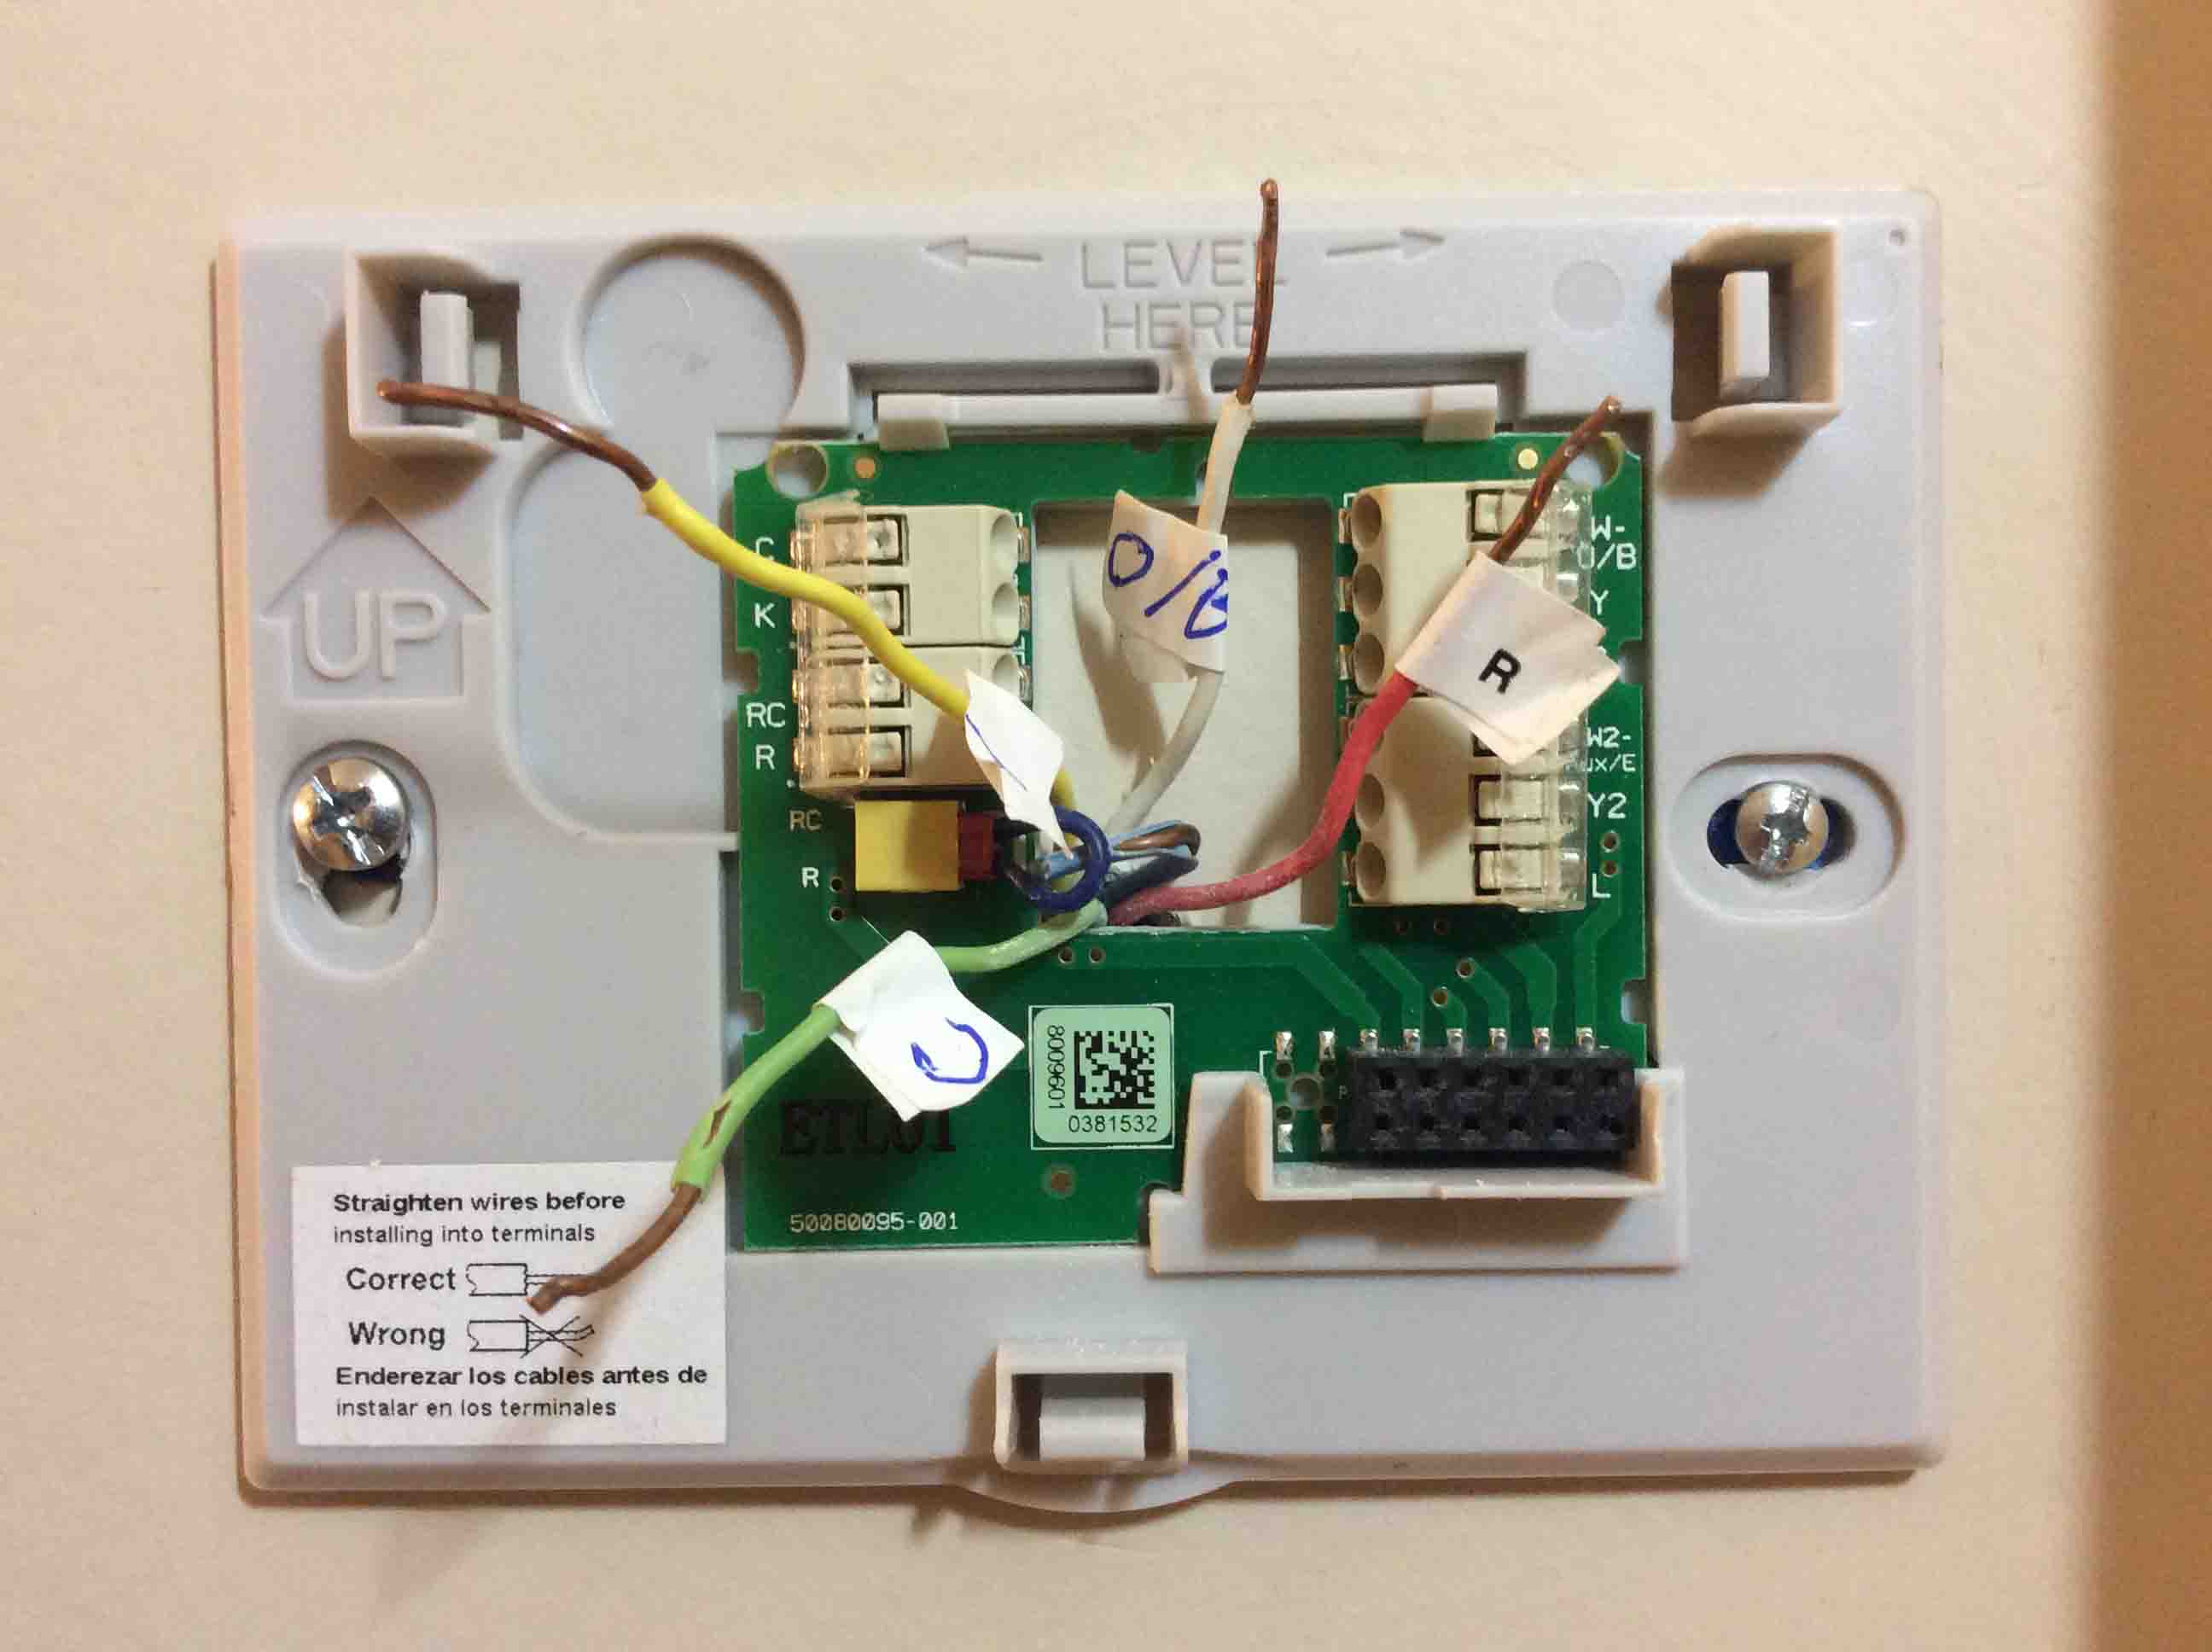
Slide the new wall plate over the wires. Again, be careful not to lose the tags you affixed earlier. This also keeps the cable from falling into the wall. Also, check that the UP arrow on the plate points up. In the above picture, this arrow shows which way you should mount the plate.
Position the mounting holes in the wall plate over the anchor holes in the wall. You should be able to see the wall anchor holes through the wall plate’s mounting holes.
Insert and tighten anchor screws. You have now completed mounting of the new thermostat’s wall plate. Your installation should look a lot like the one shown in the last picture. Connect the wires next.
7. Connect the Wires
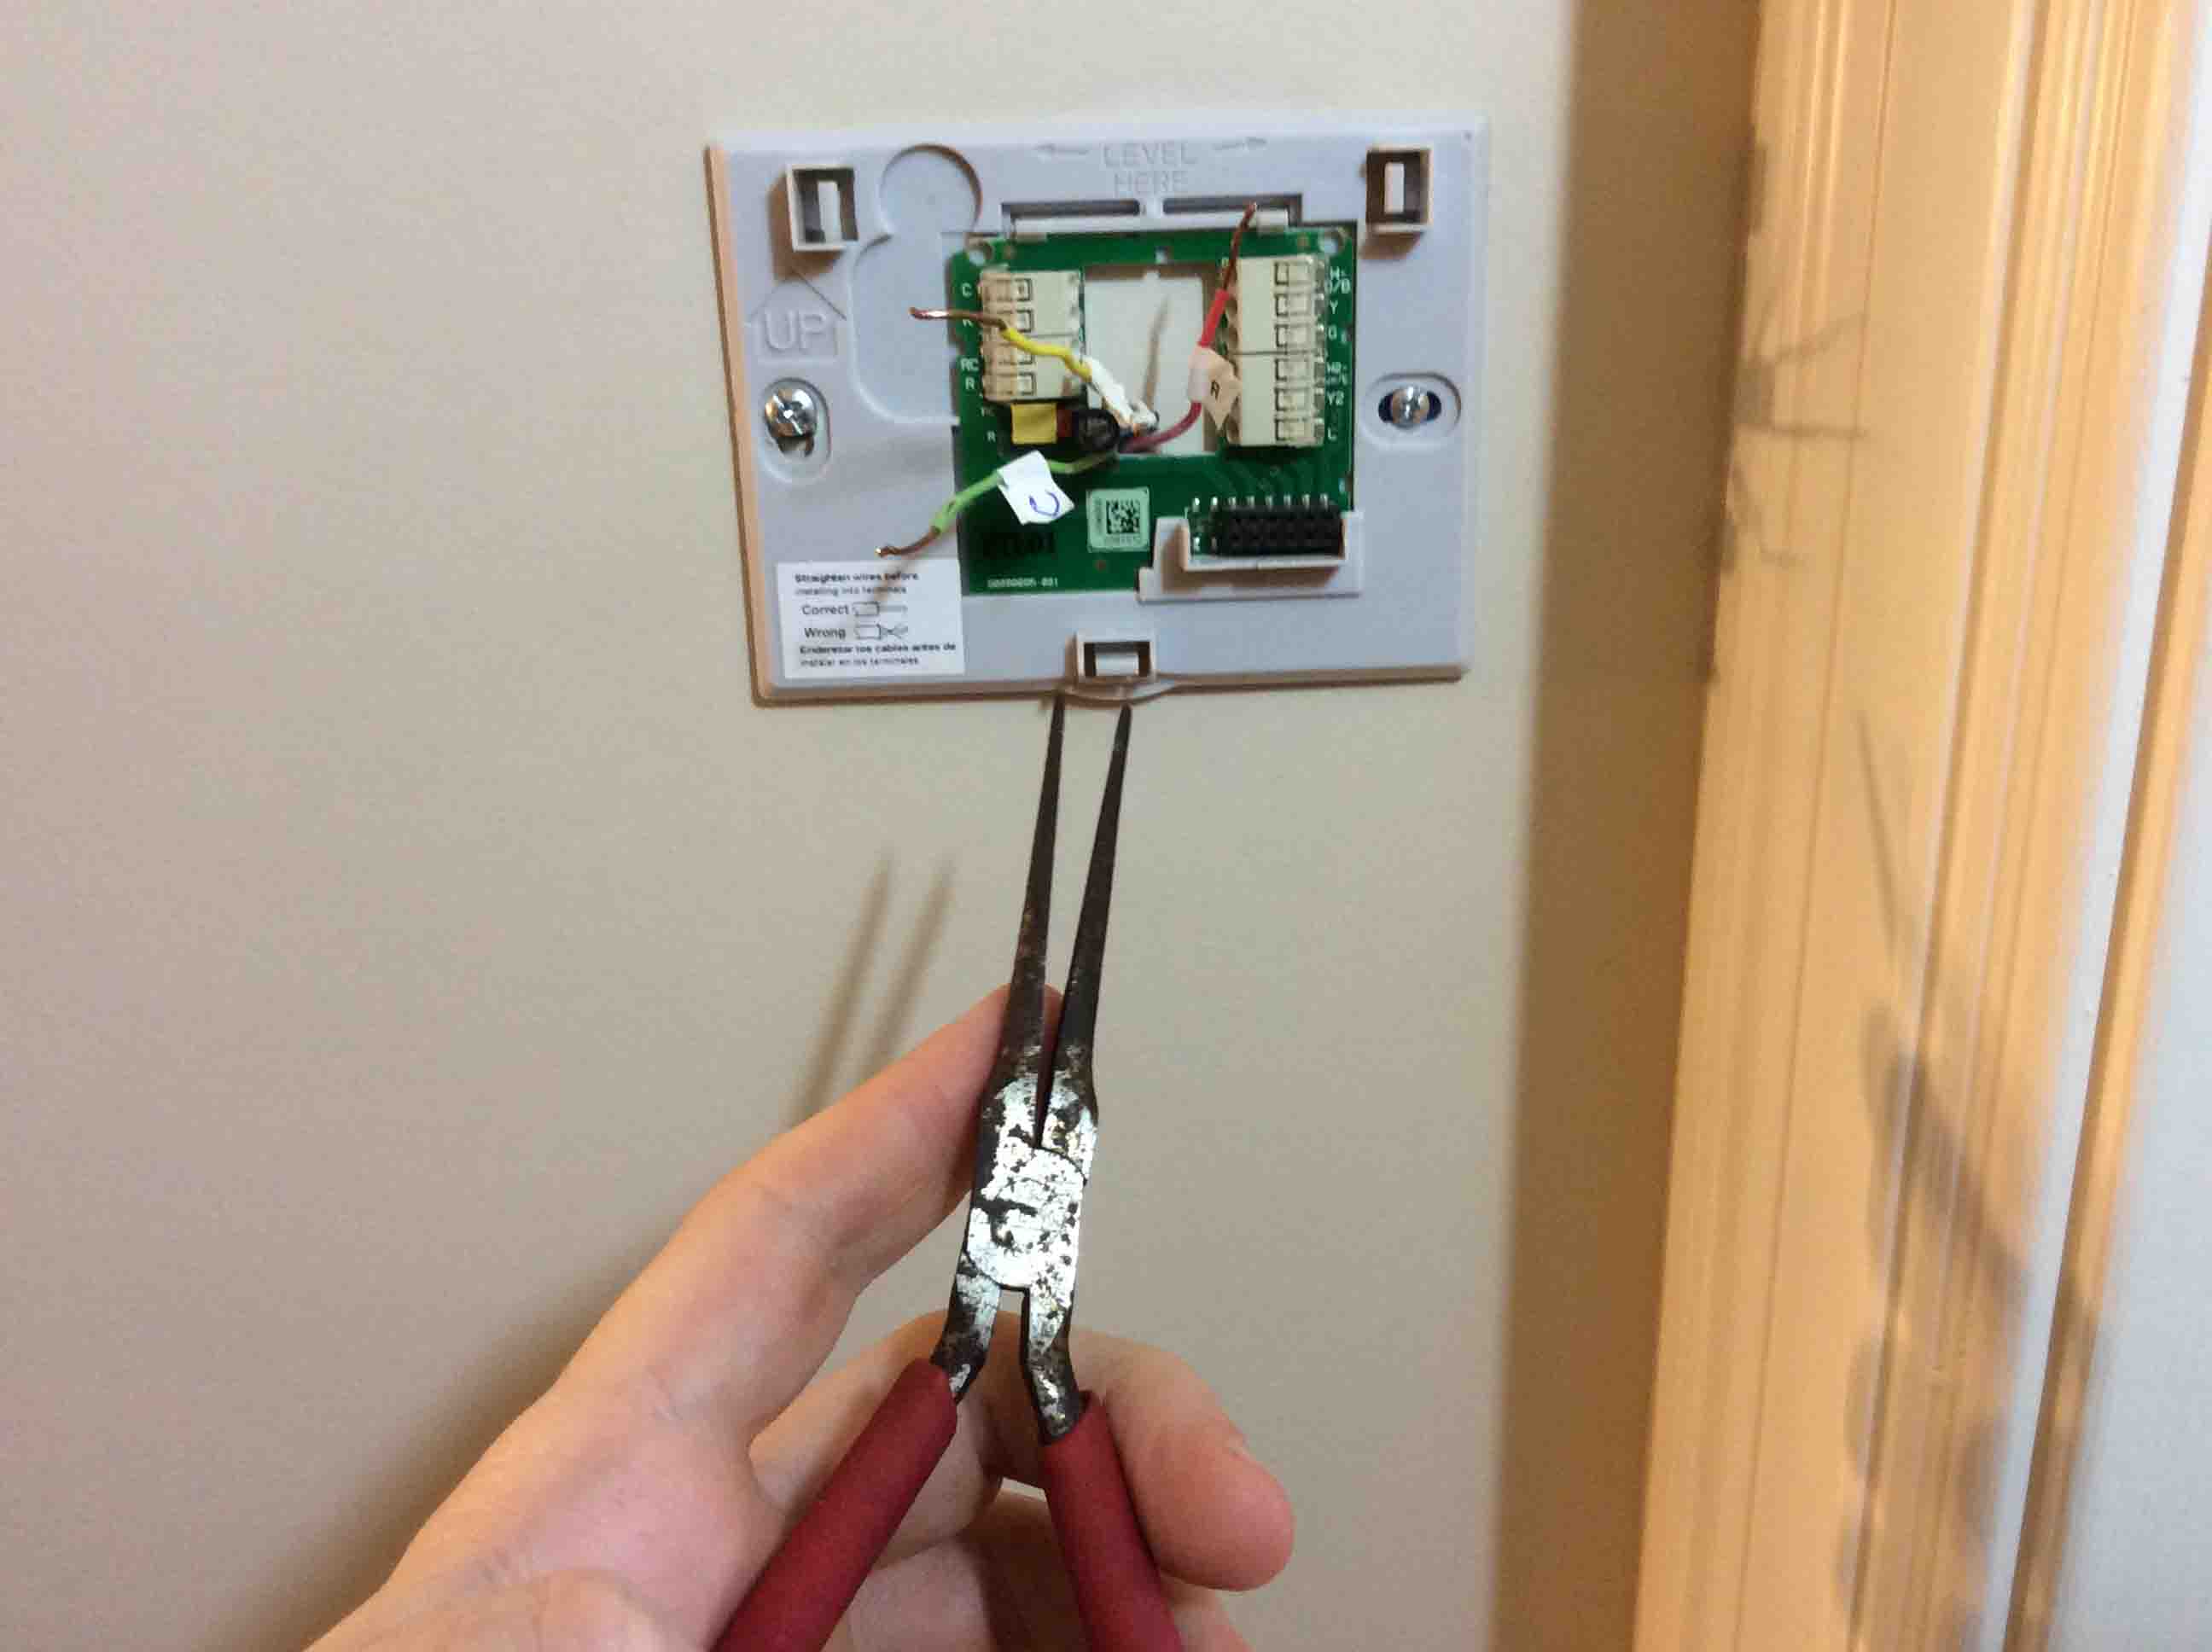
A pair of needle nose pliers is helpful here, for straightening the conductors.
Cut the bare part of the wires to length. Make them just long enough to reach the whole way into the push-in terminals.
Now, insert the bared end of each labeled wire into its corresponding terminal on the wall plate. That is: Insert the Y wire into the Y terminal, the C wire into the C terminal, and so on.
Now you accidentally push a wire into the wrong terminal hole. If so, press with a small screwdriver on the wire release. Find the wire release on the other end of the terminal from where you inserted the wire. While pressing, pull the wire back out.
Push any excess cable into the wall. No wires stick out past the black connector plug (lower right in the next picture).

8. Honeywell Thermostat Wiring Instructions: Snap the T-Stat Onto the Wall Plate
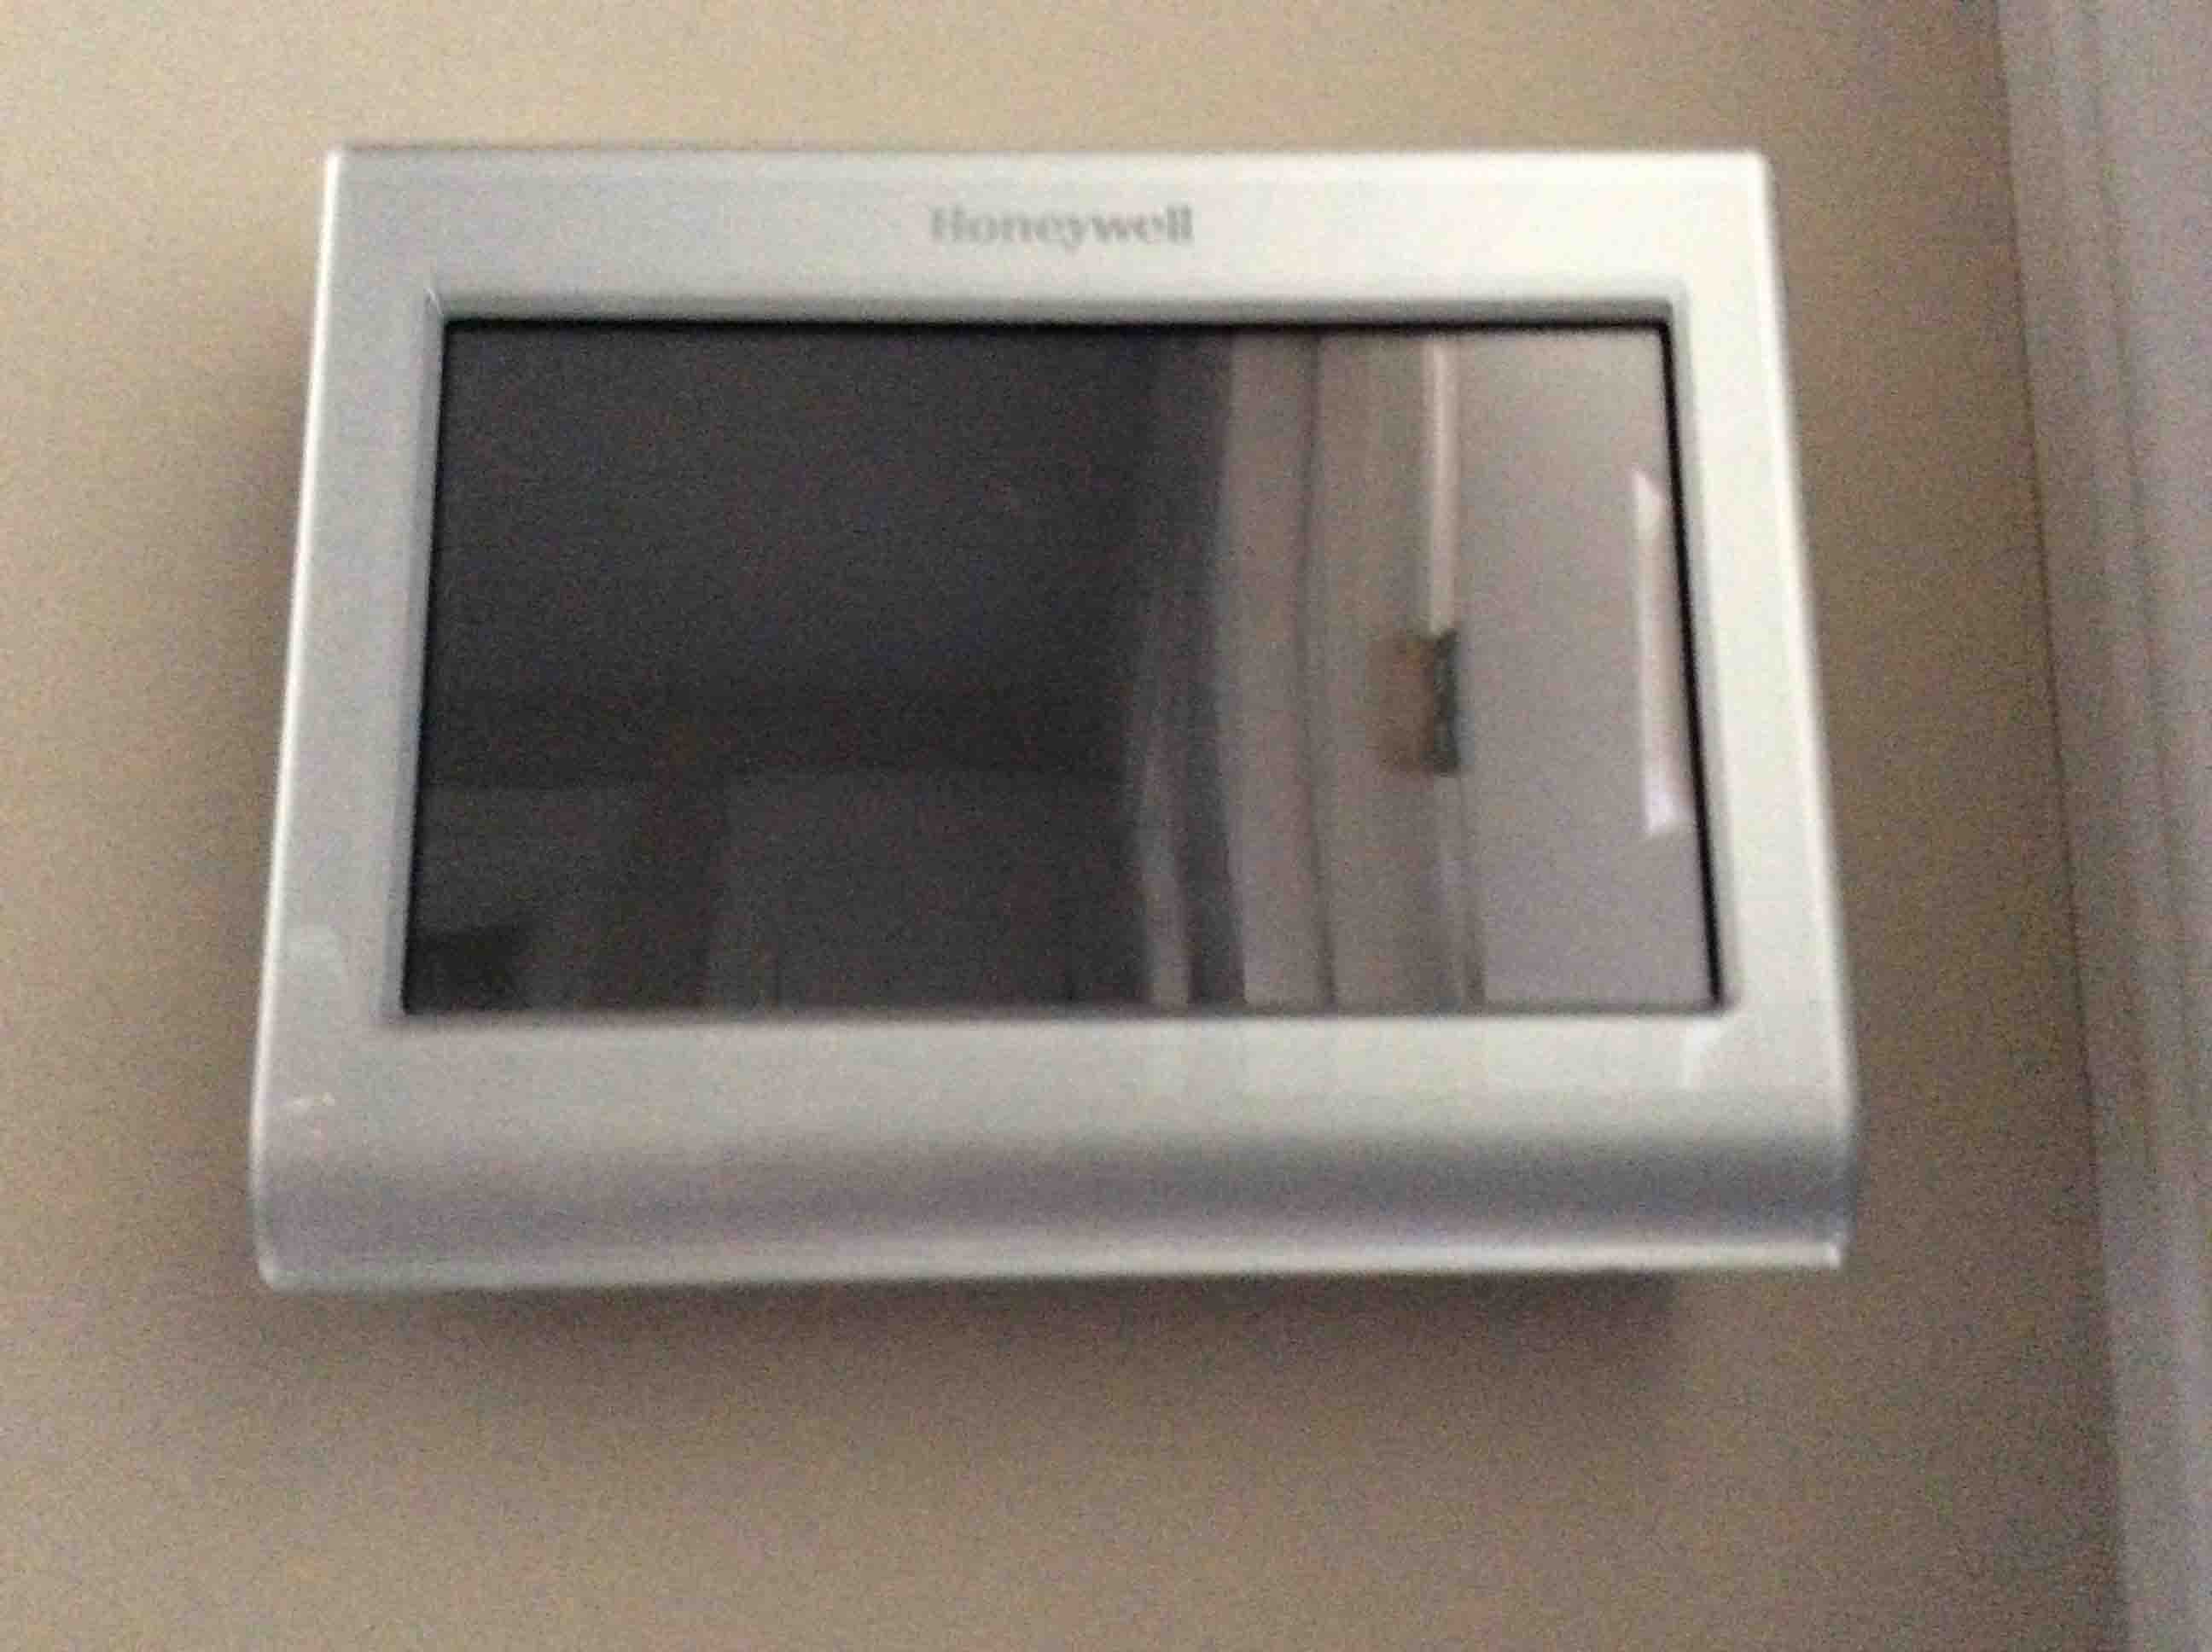
Line up your new thermostat with the wall plate, as shown next.
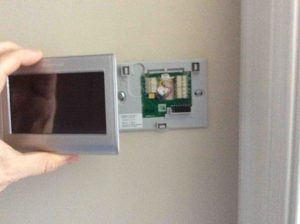
Then, gently push onto the plate until you hear a click. The completely mounted Honeywell thermostat should look as it does in the next picture.
You have now wired and mounted your new Honeywell thermostat. So, go back to your furnace and close the access panel door if still open. You are then ready to resume power to the system, as detailed next.
9. Power Up Your Heating / Cooling System
Flip on the furnace breaker or switch.
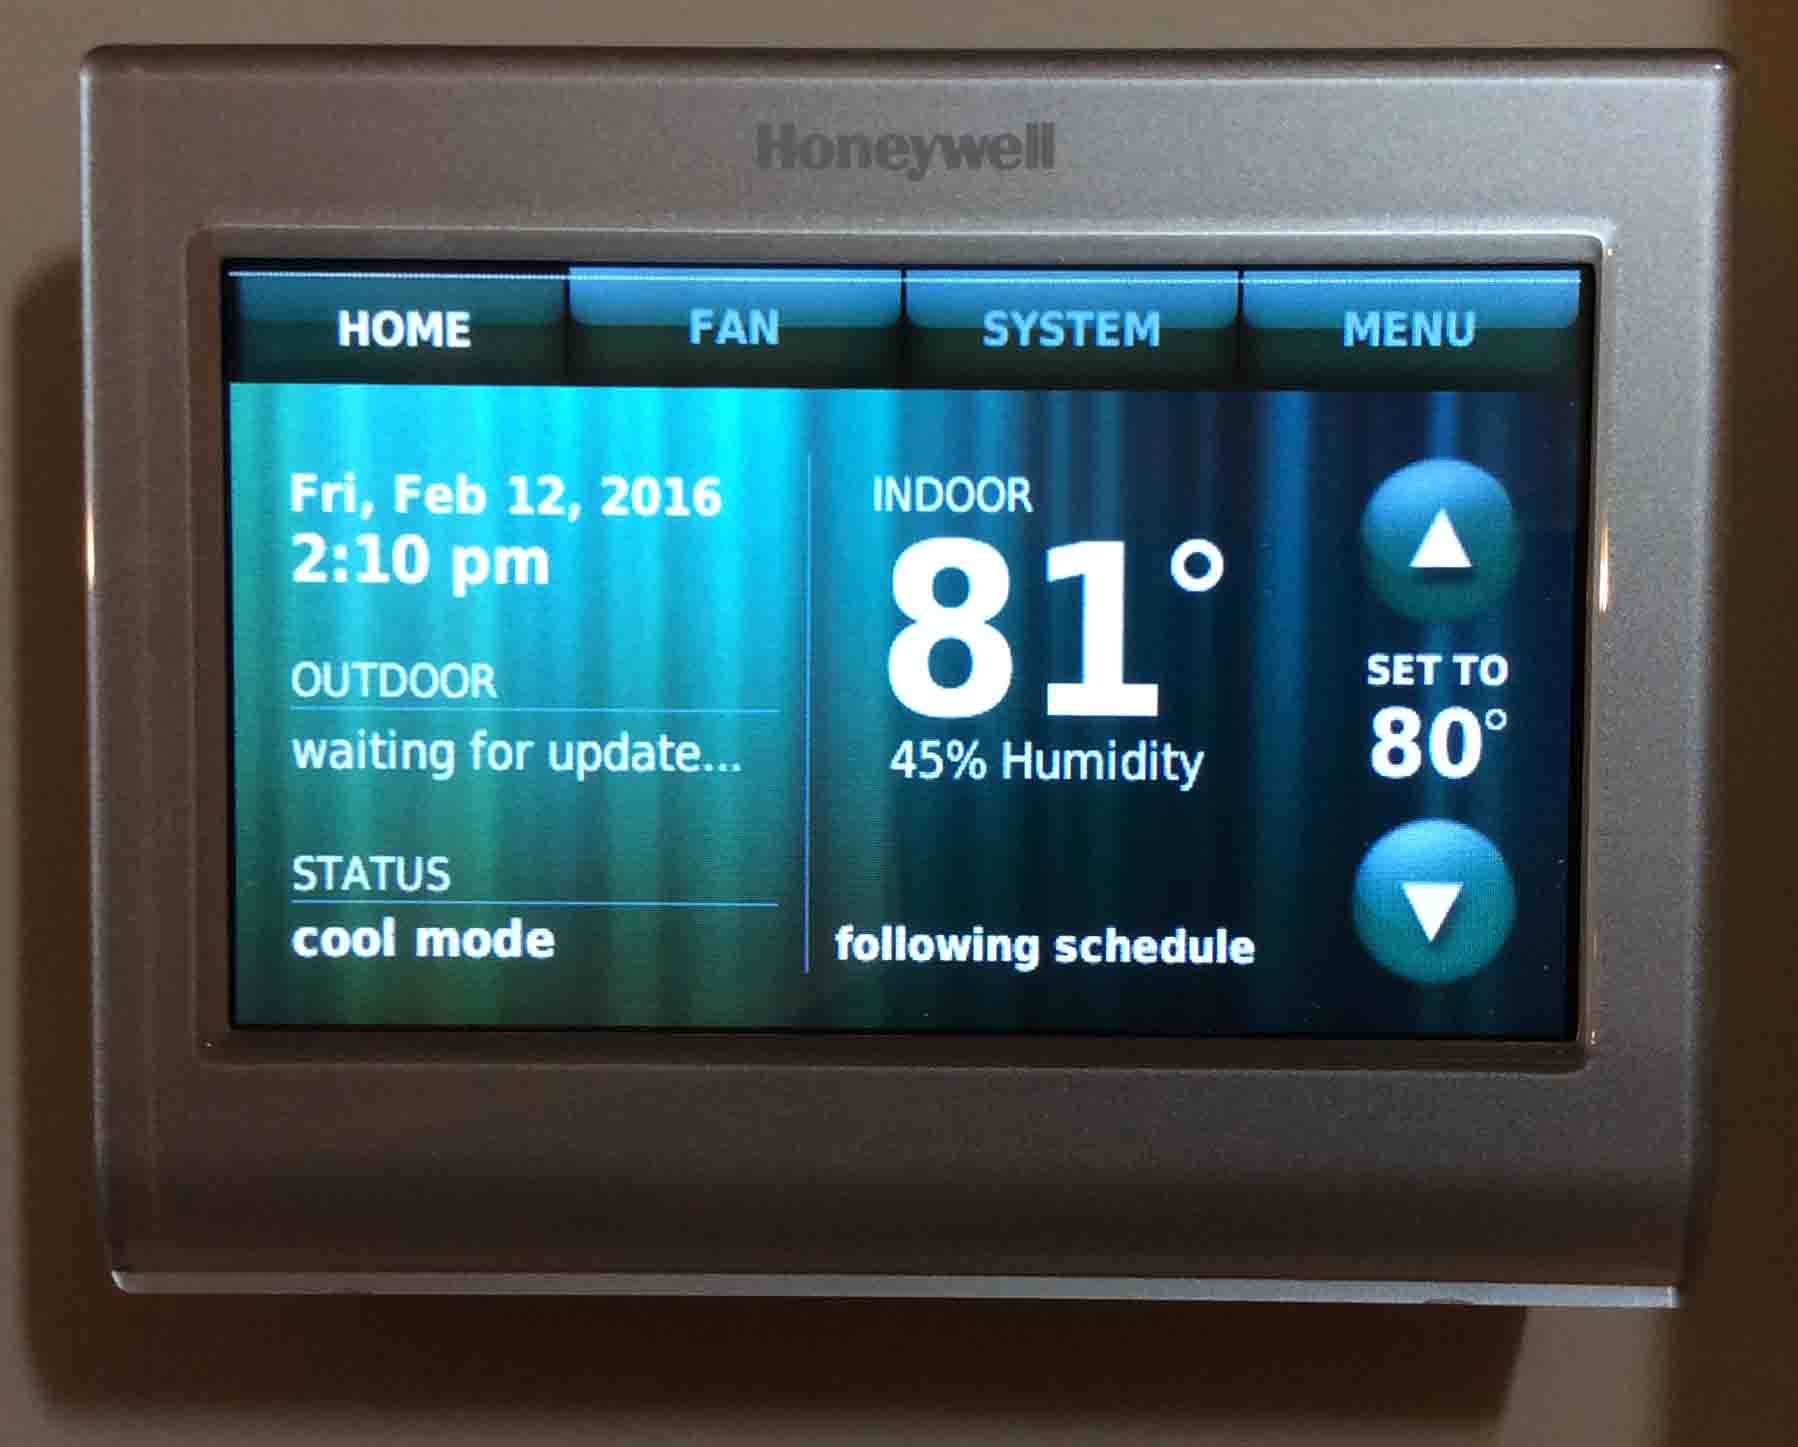
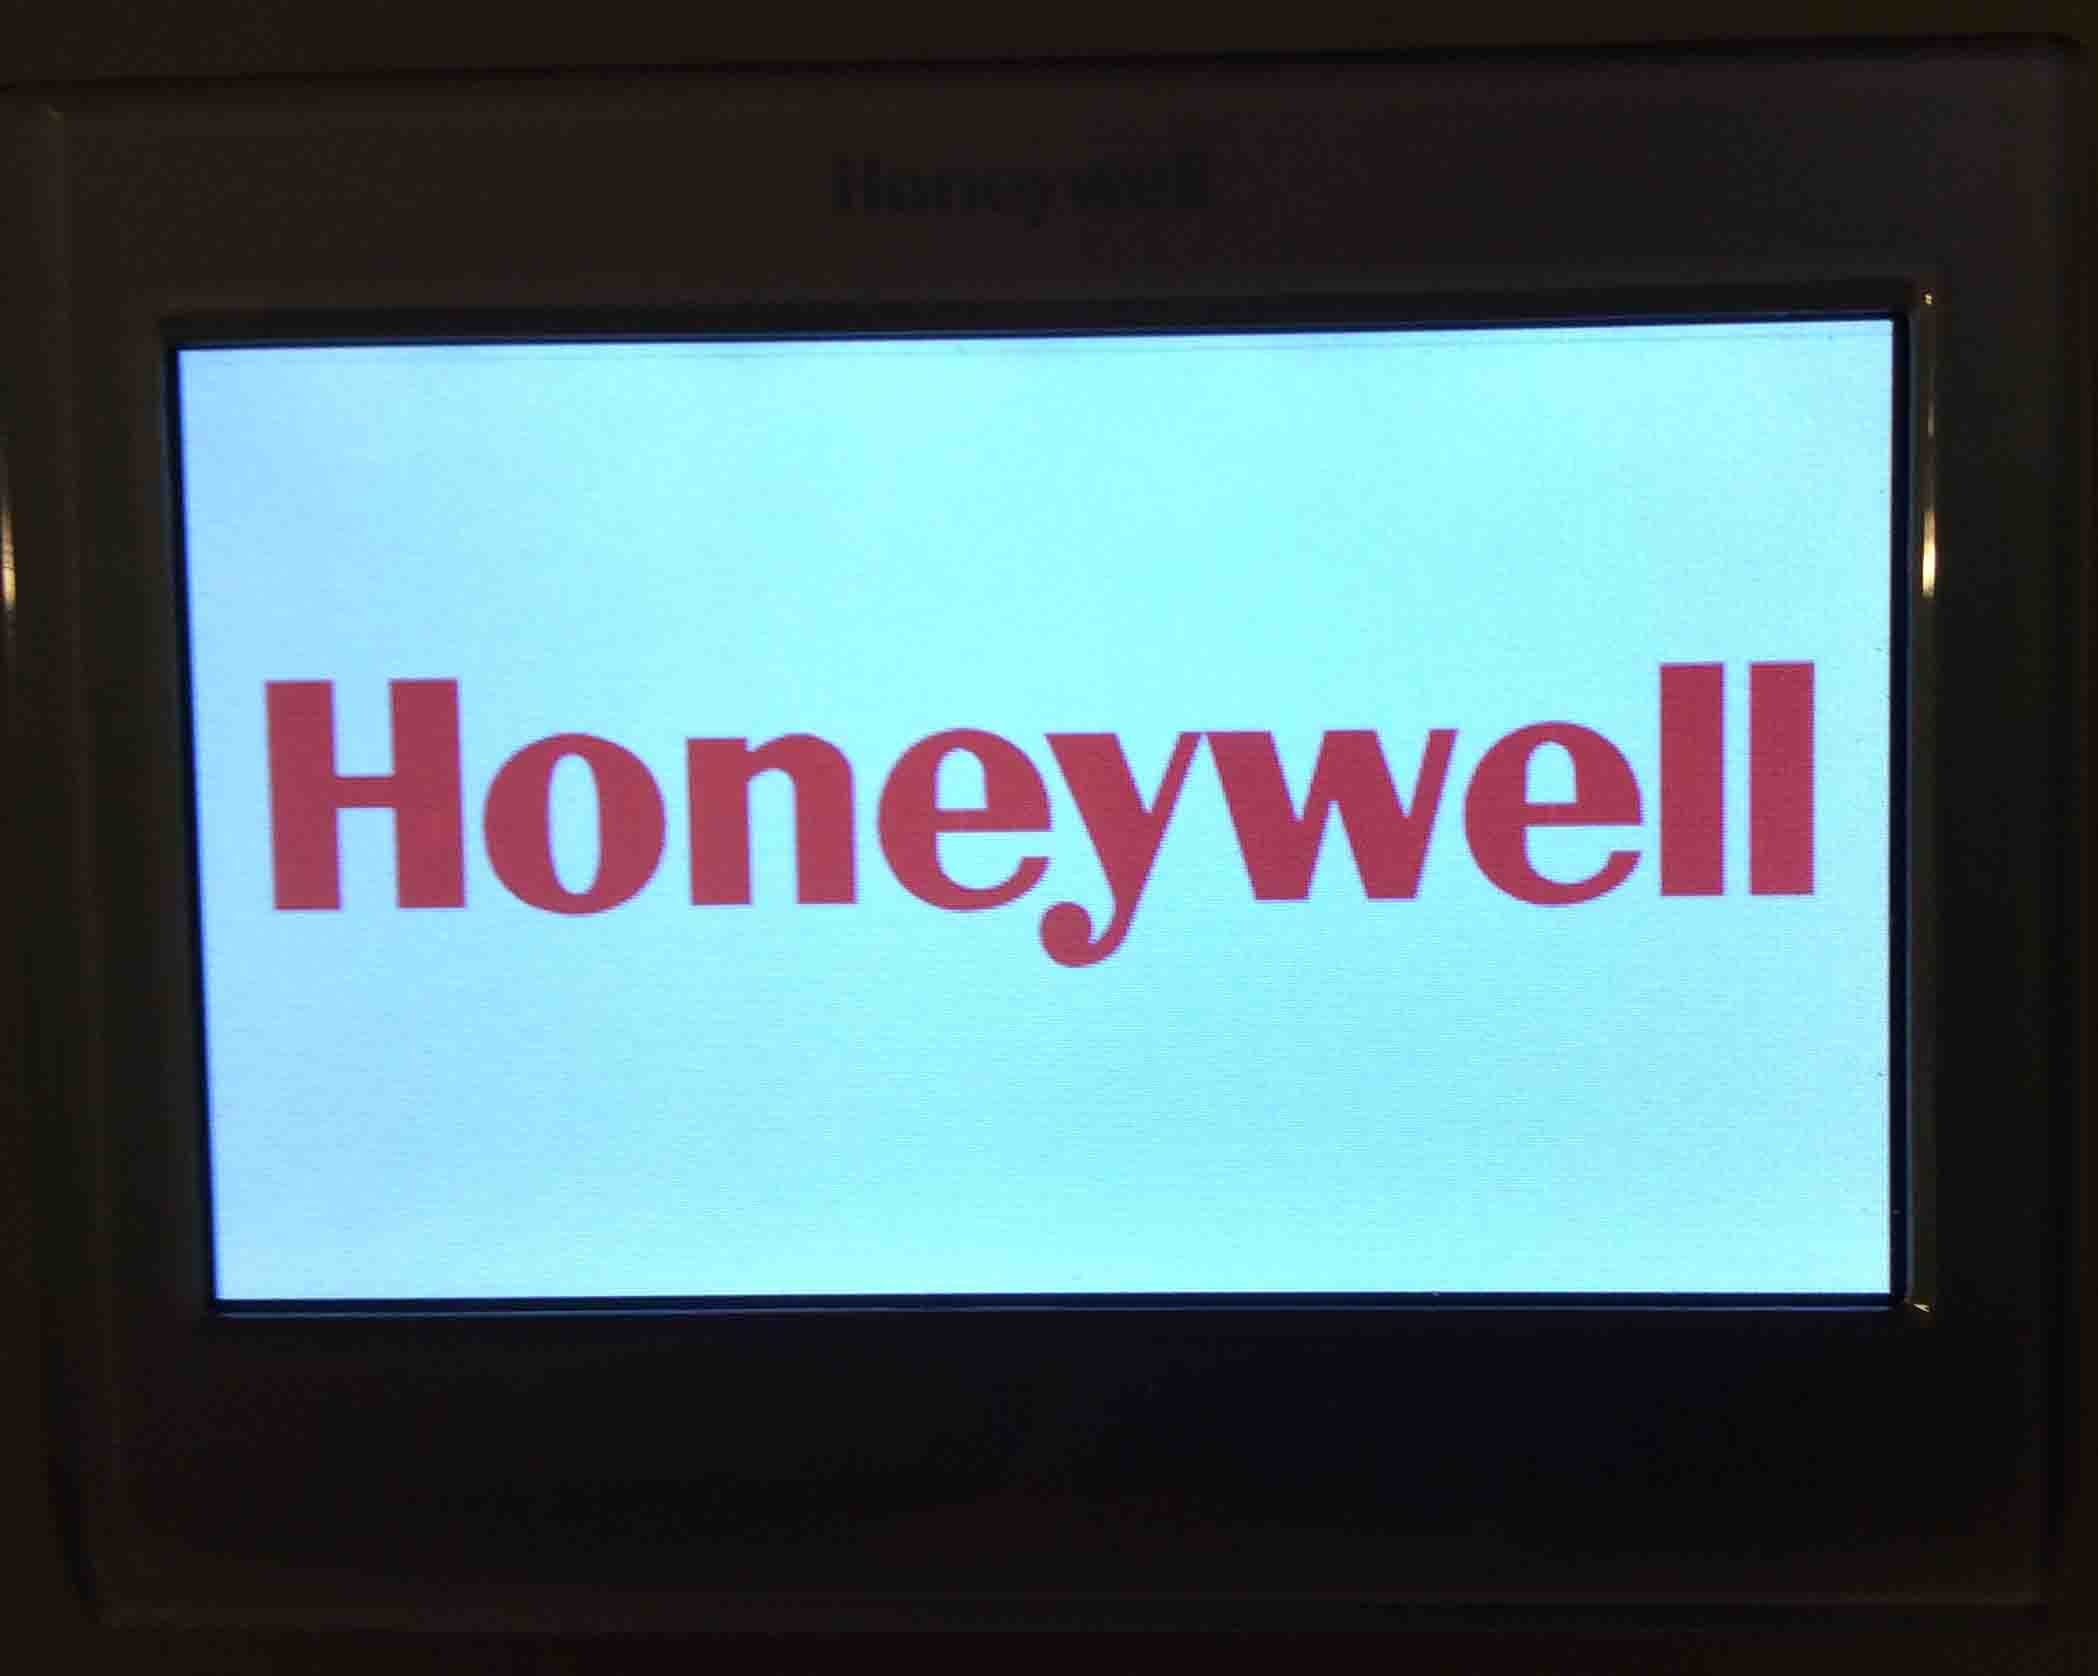
If all is well, the thermostat displays the following startup screen.
Finally, answer the prompts that this thermostat issues as it powers up. Check the user’s guide for details about how to…
- Set the temperature.
- Enter program schedules.
- Set up a WiFi connection.
- Access this thermostat remotely.
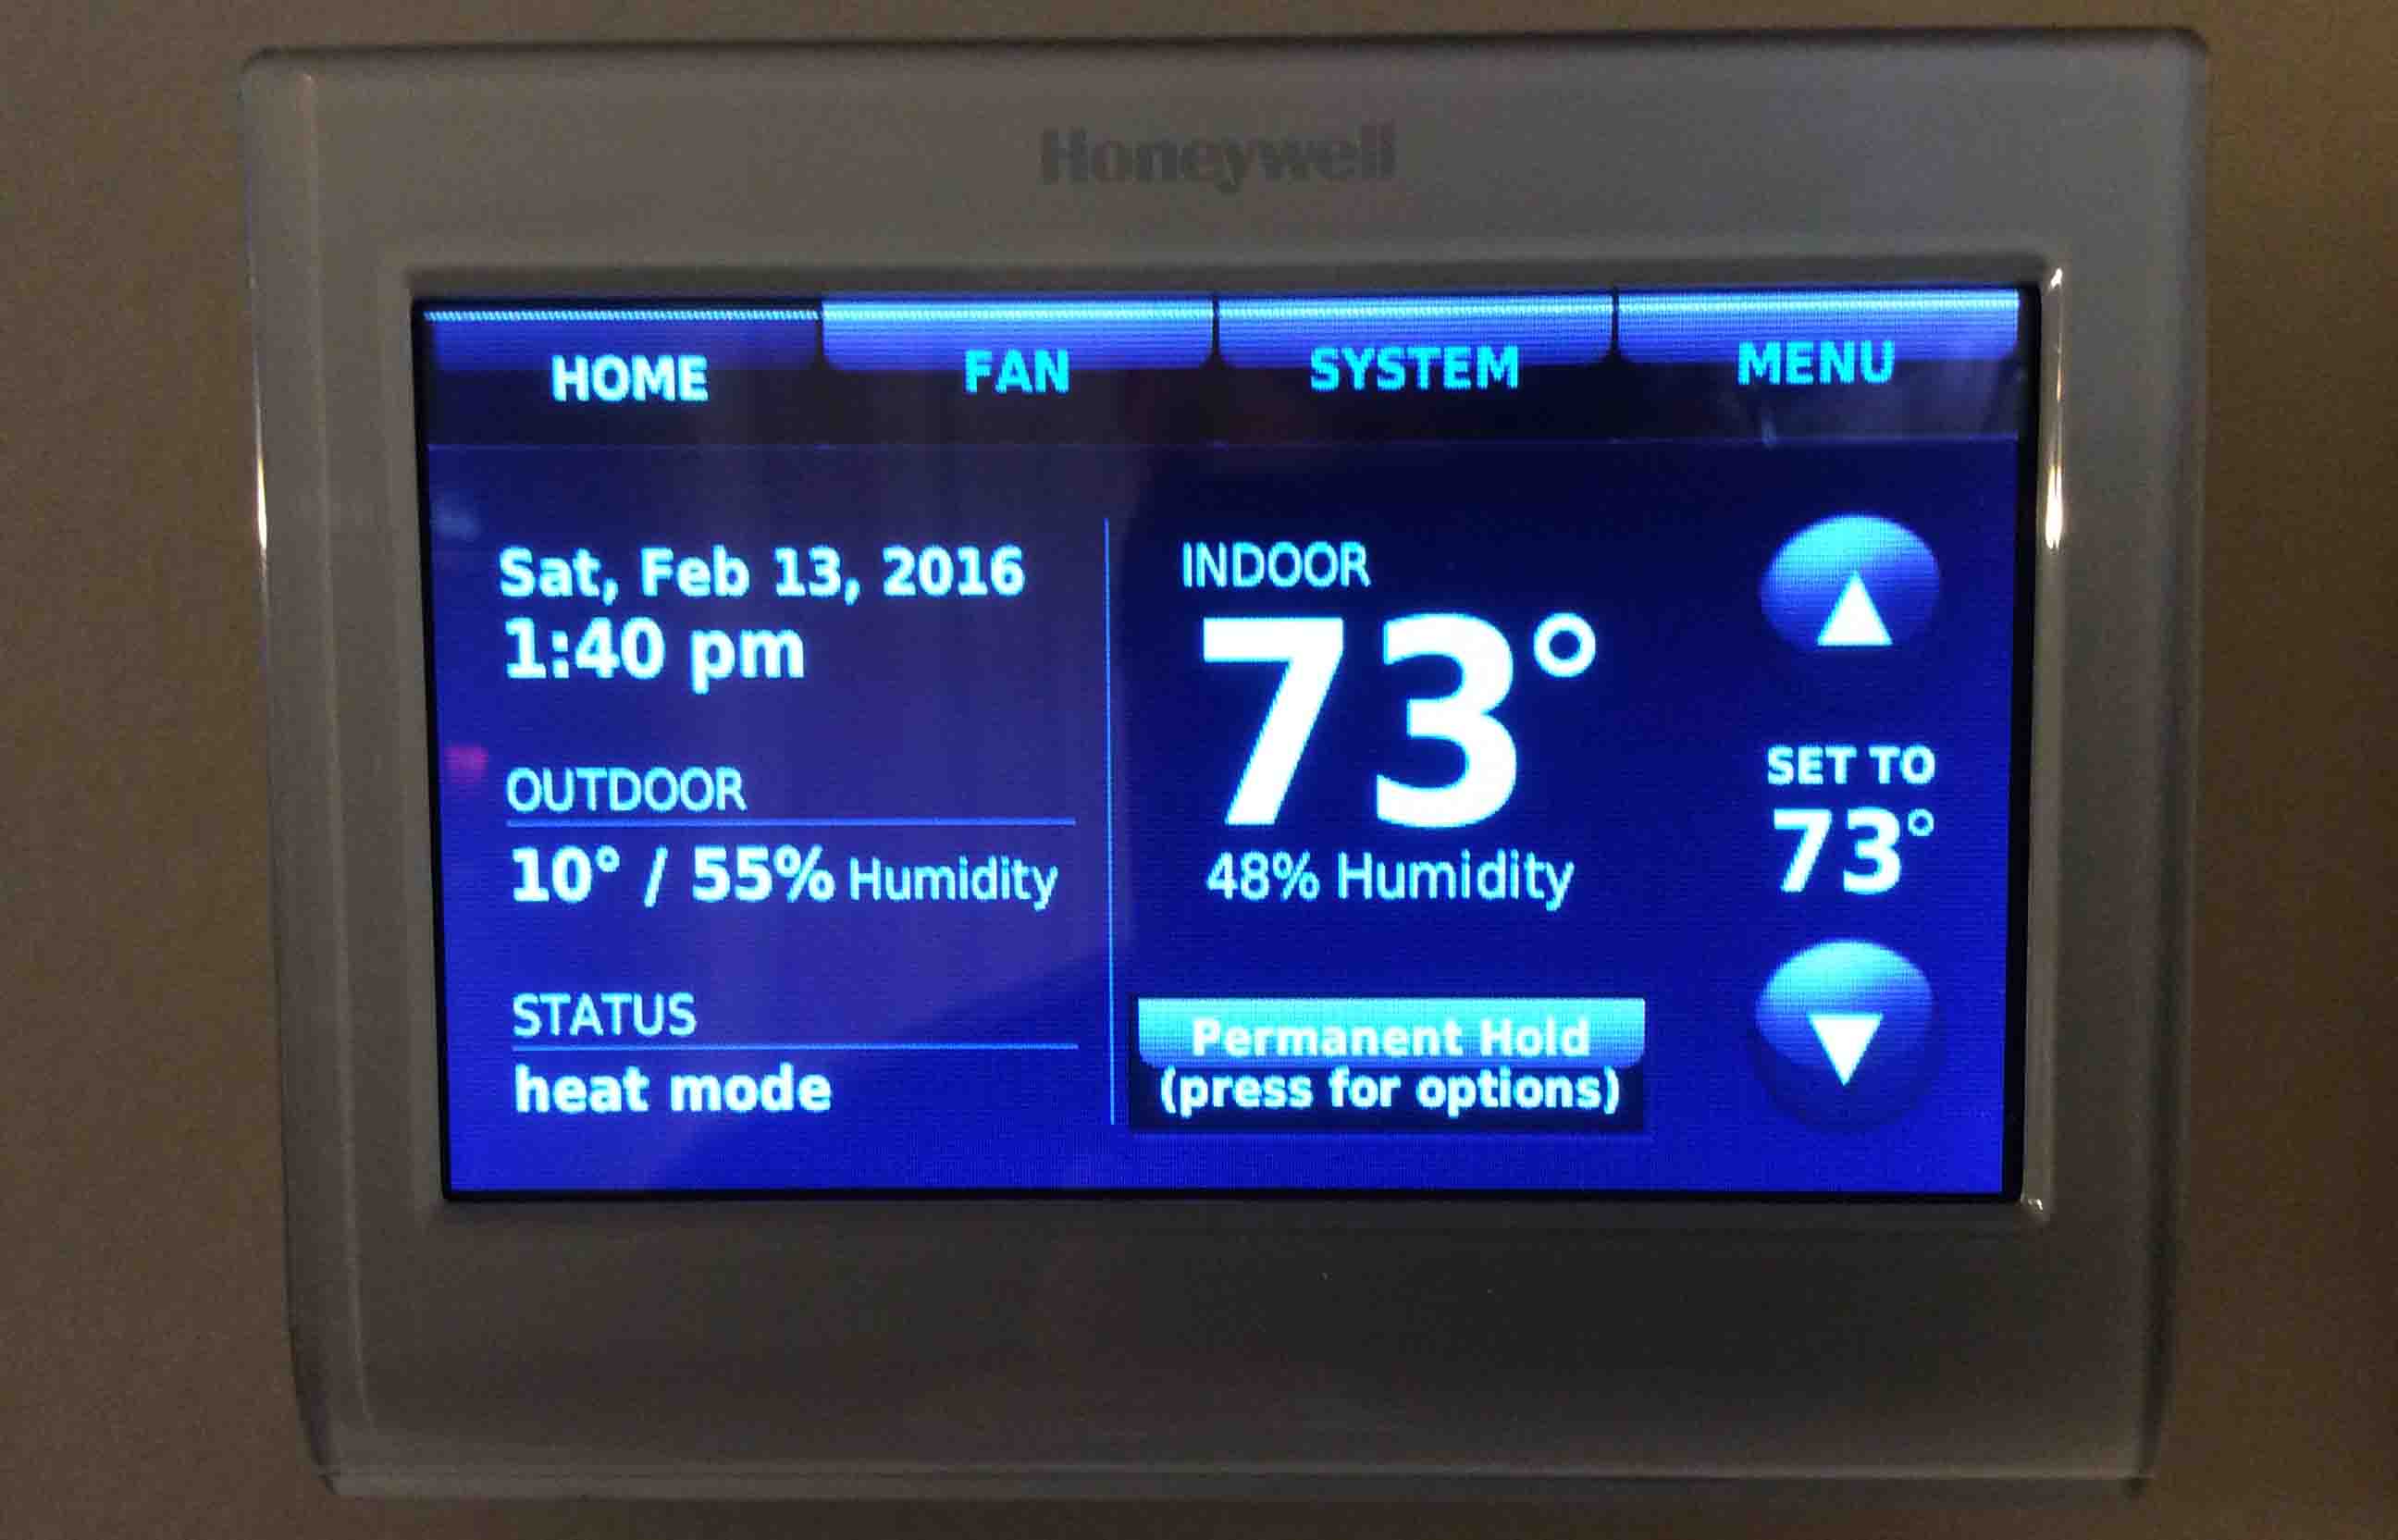
After answering these first prompts, the thermostat displays the Home screen. It looks something like the following.
10. Done with Honeywell Smart Thermostat Wiring Instructions !
Enjoy, and welcome to the world of the Internet of Things by the way. Indeed this home thermostat is a part of that digital age landscape. Why? Because not only can it save you money. But it adds convenience and more control to your home automation setup.
Related Posts to Honeywell Thermostat Wiring Instructions
- Honeywell Thermostat Wiring Color Code
- How to Wire a Honeywell Thermostat with 4 Wires
- Honeywell Thermostat 4 Wire Wiring Diagram
- 4 Wire Thermostat Wiring Color Code
Other Posts About Honeywell Thermostat
- How to Connect Honeywell Thermostat to Google Home
- Honeywell Thermostat Not Following Schedule, How to Fix
- How to Change Honeywell Thermostat Temperature Setting
- Honeywell Thermostat Says Wait, Fix, Repair, Solve
- How to Set Honeywell Thermostat Temperature Offset
References for Honeywell Thermostat Wiring Instructions
Revision History
- 2021-08-20: Shortened the tags and internal links lists.
- 2020-05-25: First published.