Knowing how to change WiFi networks on your iOS devices allows you to quickly connect to local wireless networks anywhere you go. So in this piece, we detail how to change WiFi network on iOS devices like the iPhone, iPad, iPod Touch, et al.
You may need to connect your iOS mobile device to different WiFi networks as you move about among offices, stores, friends’ houses, and coffee shops. Or, perhaps you have changed the name of your home WiFi network, or you want to connect your iPad to a different WiFi access point (WAP) in your home such as a 5 Ghz. network. We accomplish this by following the procedure below. It shows how add WiFi networks to the list of networks that your phone will connect with when in range. These instructions are valid for mobile devices running iOS 7 up through iOS 11.
How to Change WiFi Network on iOS Devices
1. Turn on your iOS device
iOS devices include iPhone, iPad, iPad Air, iPad Mini, and iPod Touch.
2. Press the Home Button
This wakes up the screen. If you have set up a PIN, you need to enter that in the next step. If not, then skip to Step 4.
3. Enter PIN if Prompted
Entering the device password brings up the first Home screen page as pictured next. You must start there because that’s where the Settings app is found. where we will visit in order to update the wireless network connections.
4. Find the Settings App Icon to Continue with How to Change WiFi Network on iOS
We’ve circled Settings in pink in the next pic.
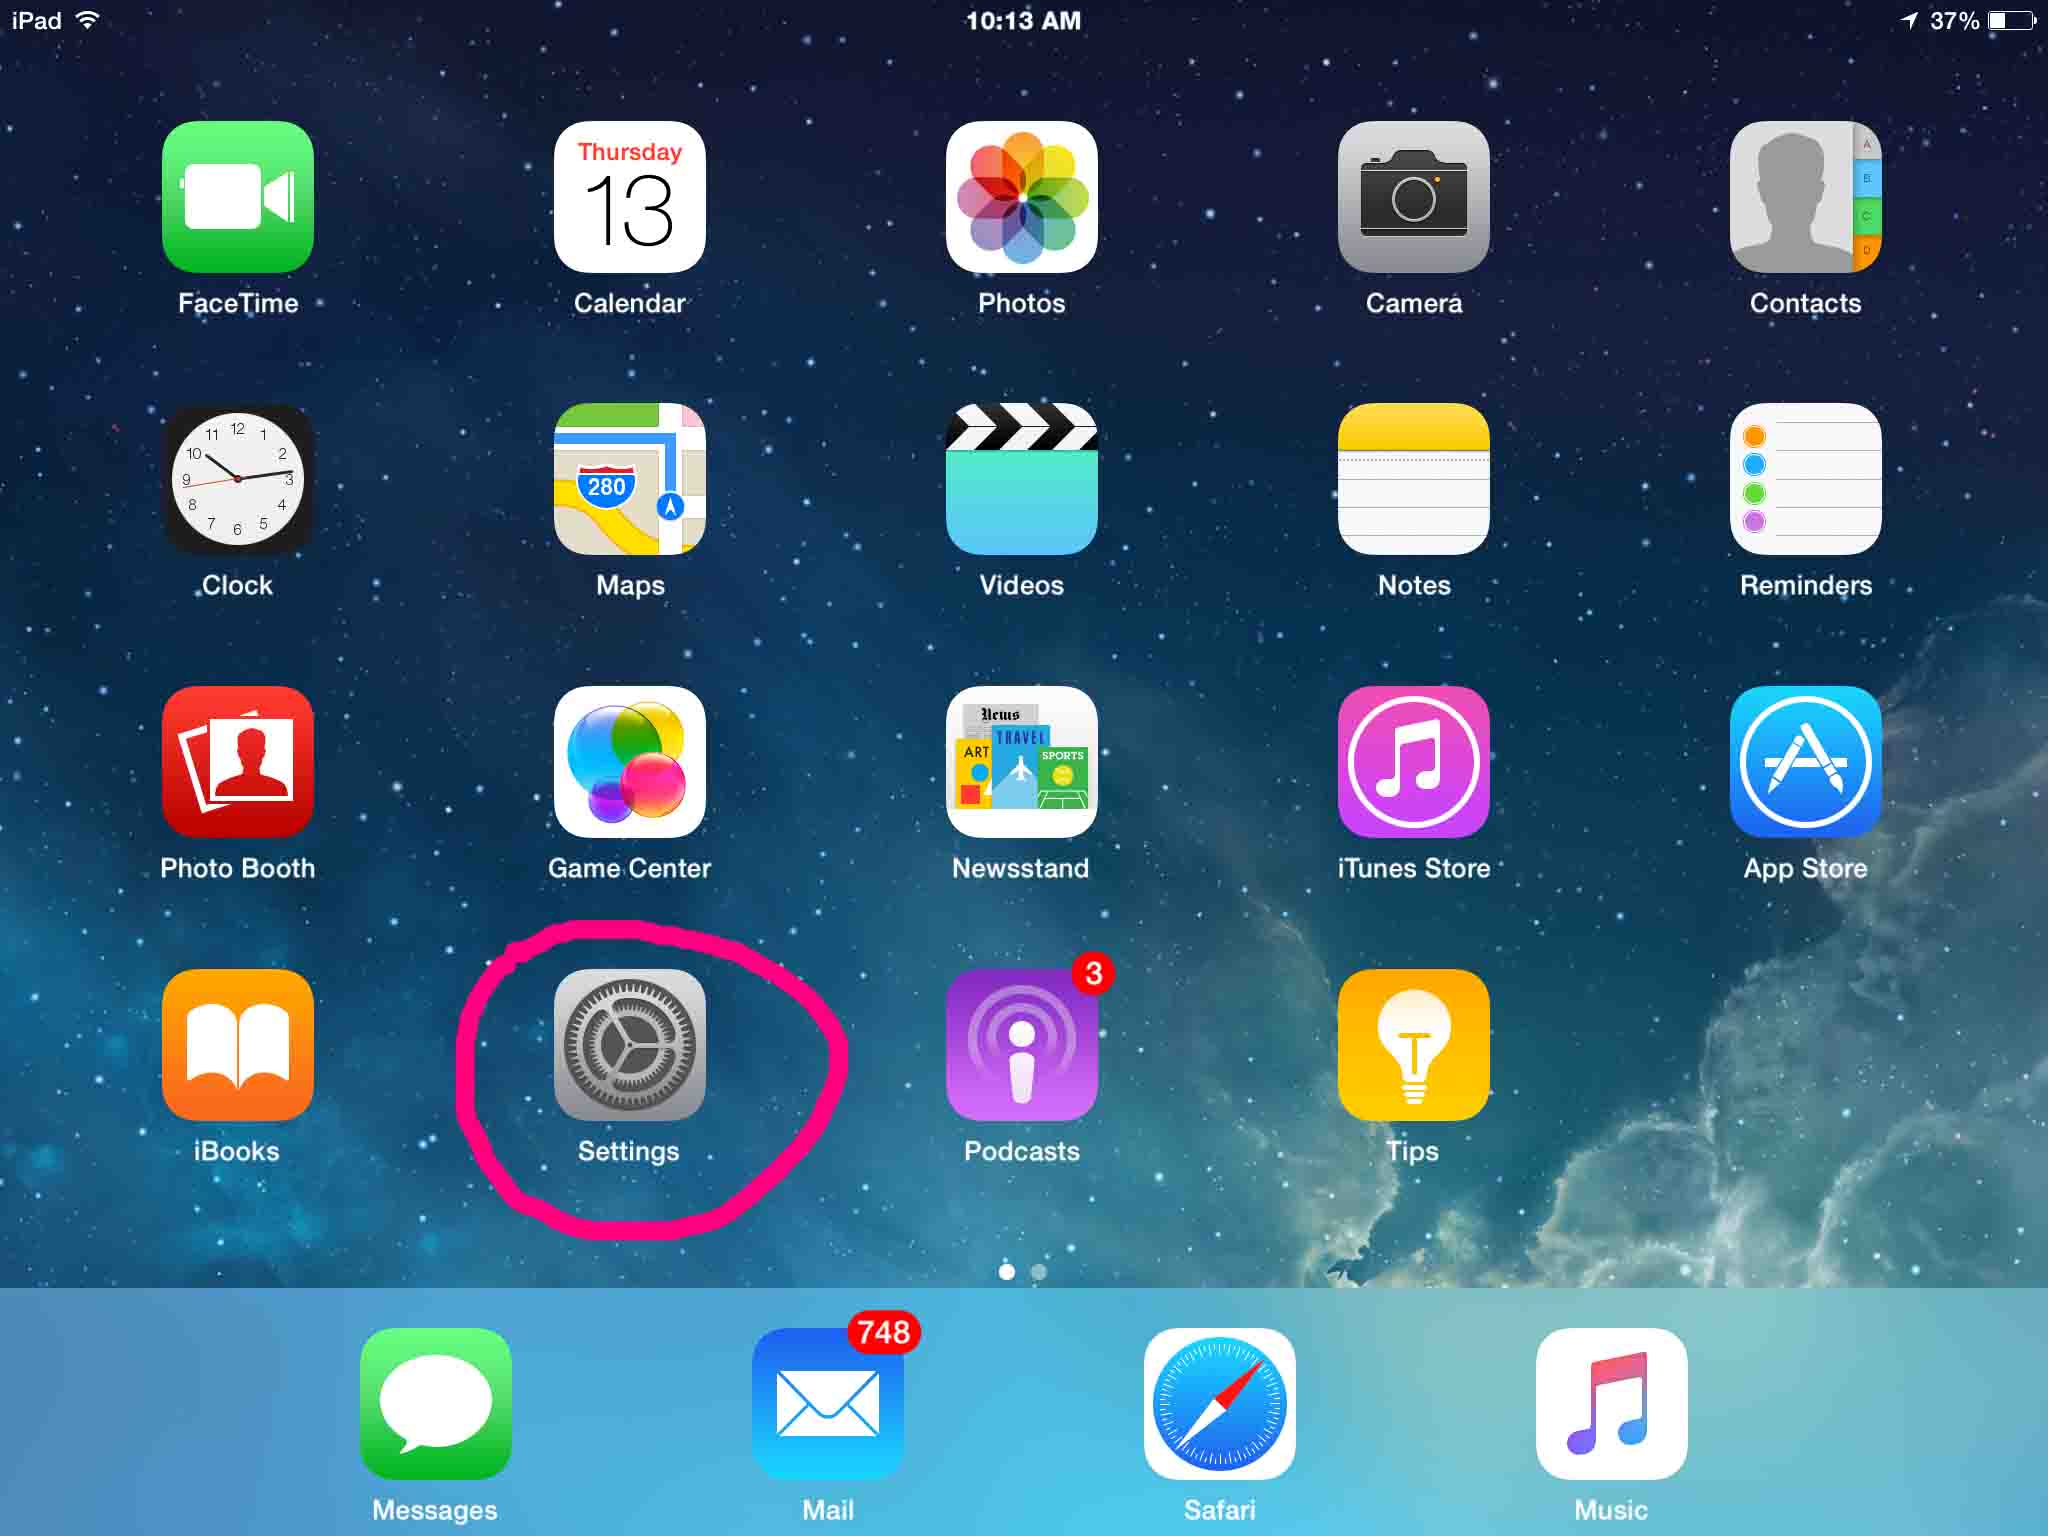
5. Tap the Settings App Icon
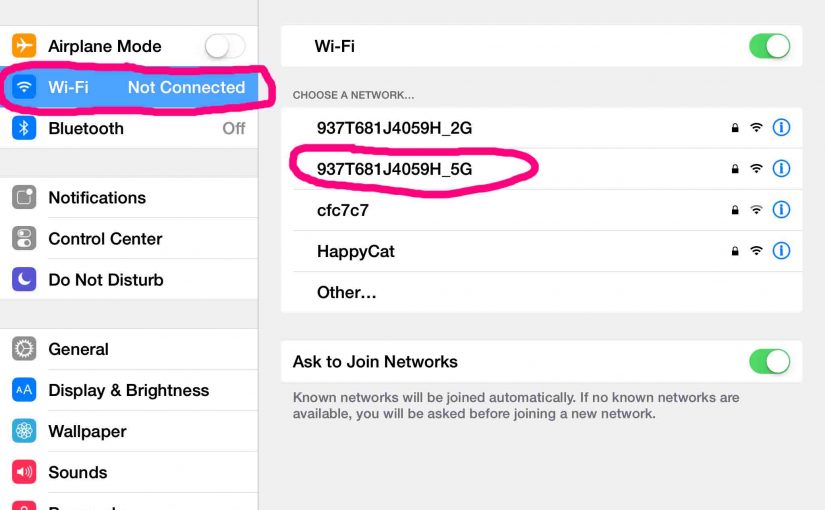
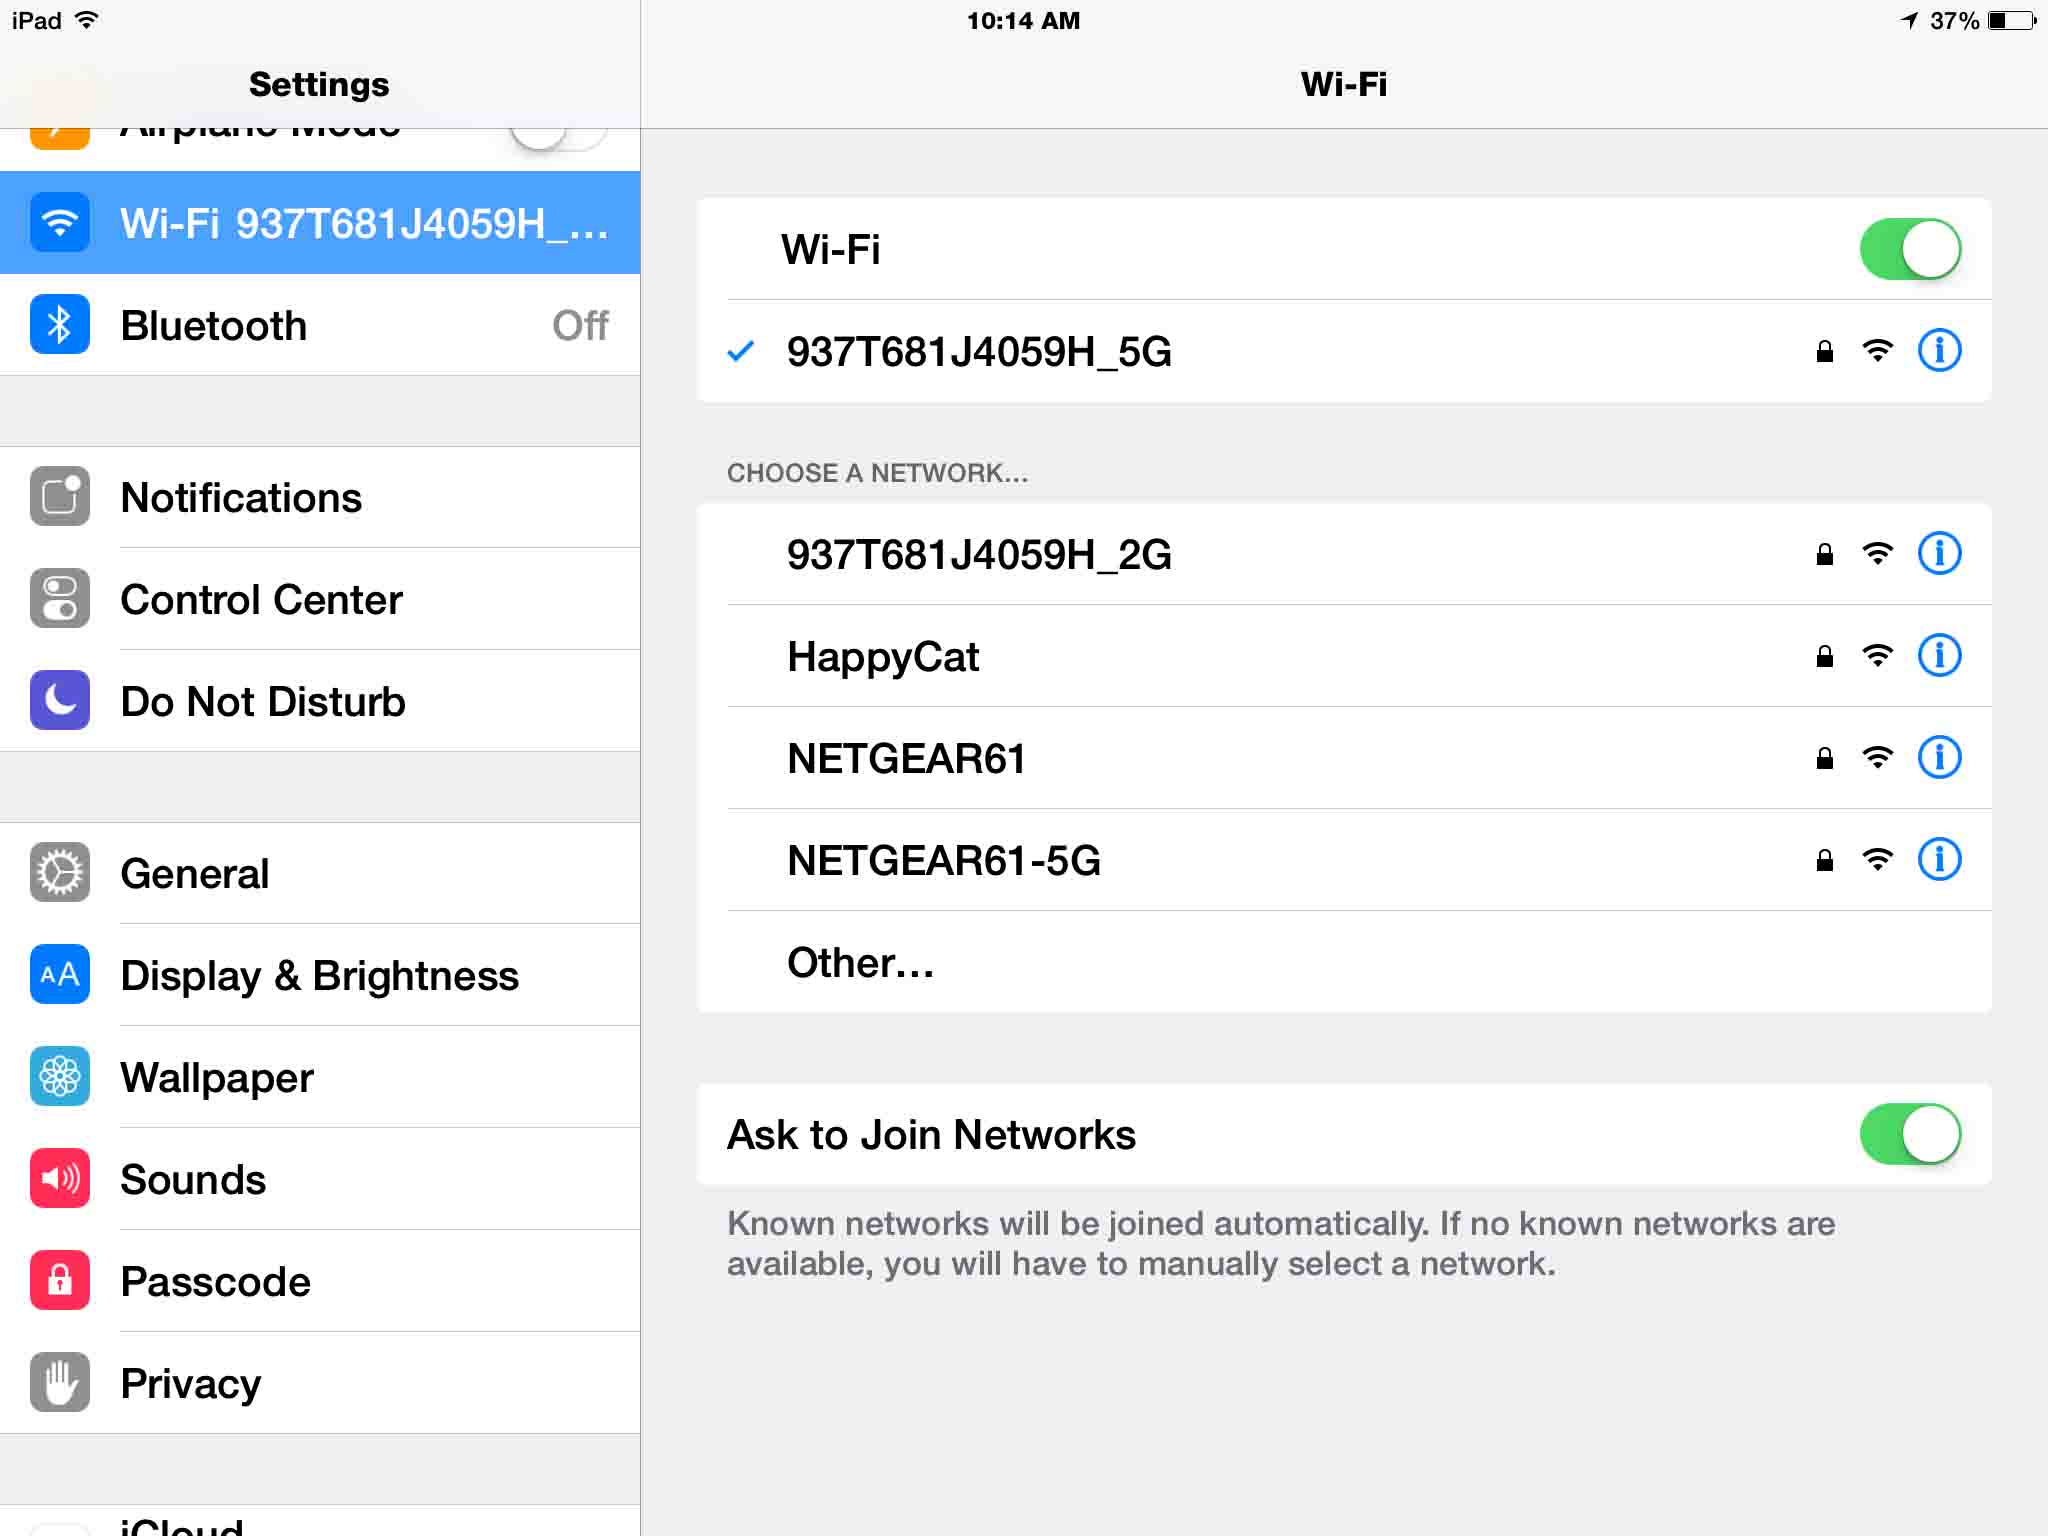
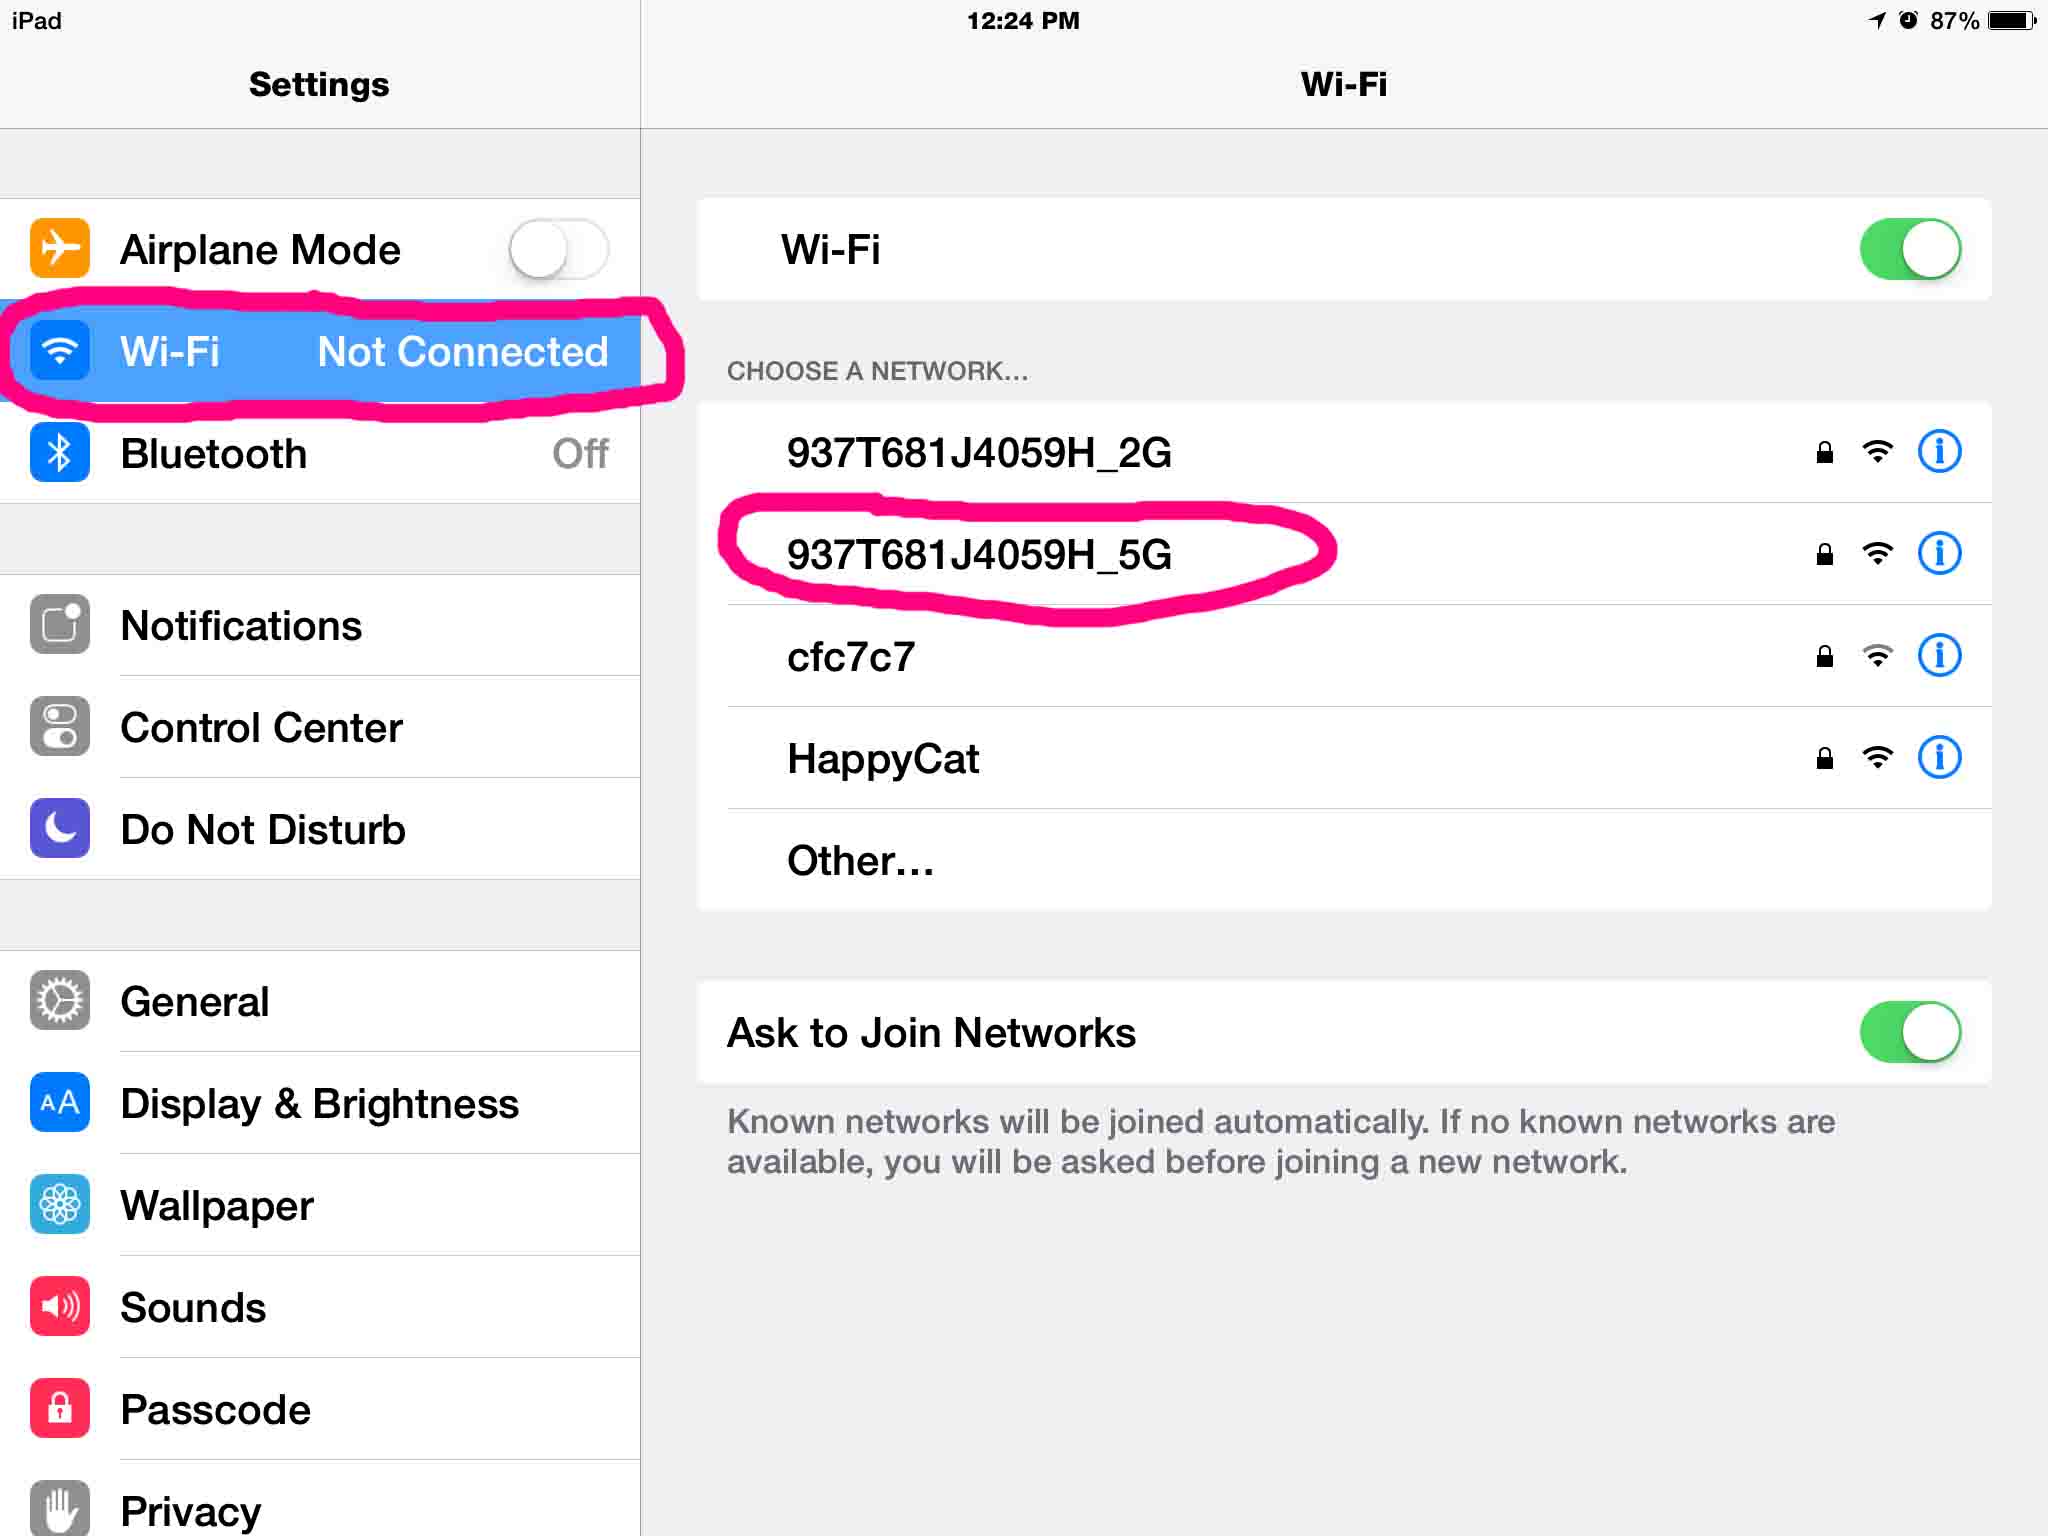
The Settings screen should immediately expand and fill the screen, as shown next. Since we previously chose the WiFi item in prior settings change sessions, it shows as selected here already. This screen displays a list of the in-range WiFi networks. In this case, we find the one we connected to at the top of the list. It has the blue check mark to its left. Note that we are currently connected to the 937T681J4059H_5G network.
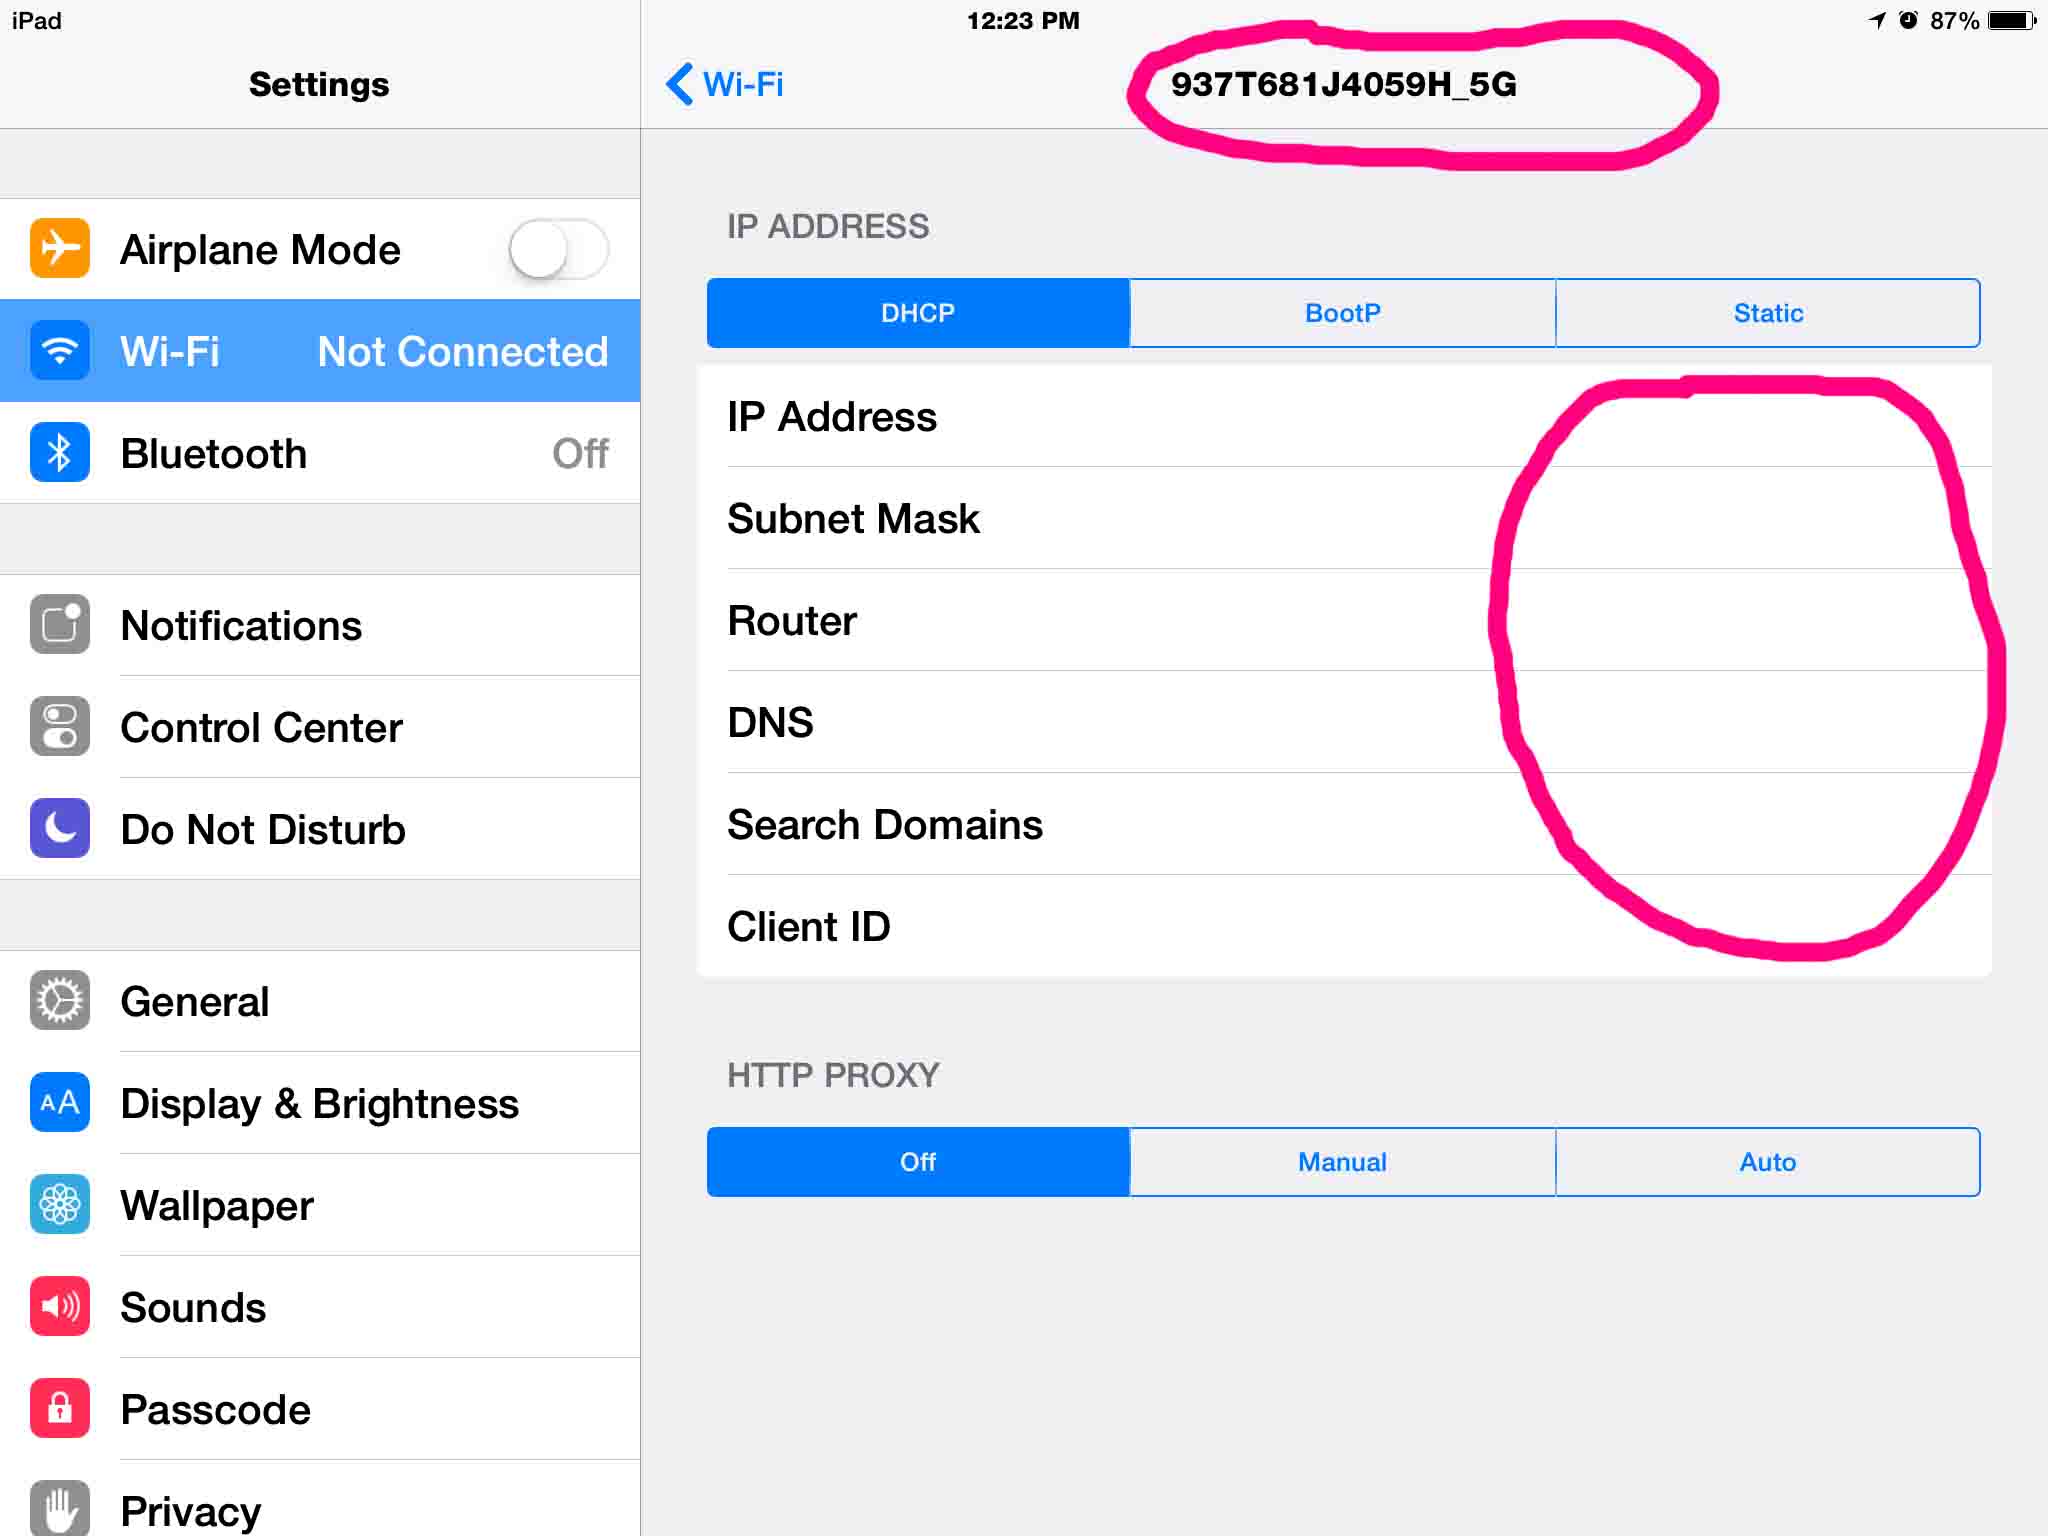
6. Next, Tap the Line for the Connected Network
The Network Information screen then appears, as shown below.
We’ve selected the WiFi network connections and settings item (far left, highlighted in blue and circled in pink).
In our scenario, as noted earlier, we already connected to the 937T681J4059H_5G wireless network. Below though, we will disconnect from this network, and connect to another. You may use flavors of this procedure to select in-range wireless networks for connection while roving among different locations.
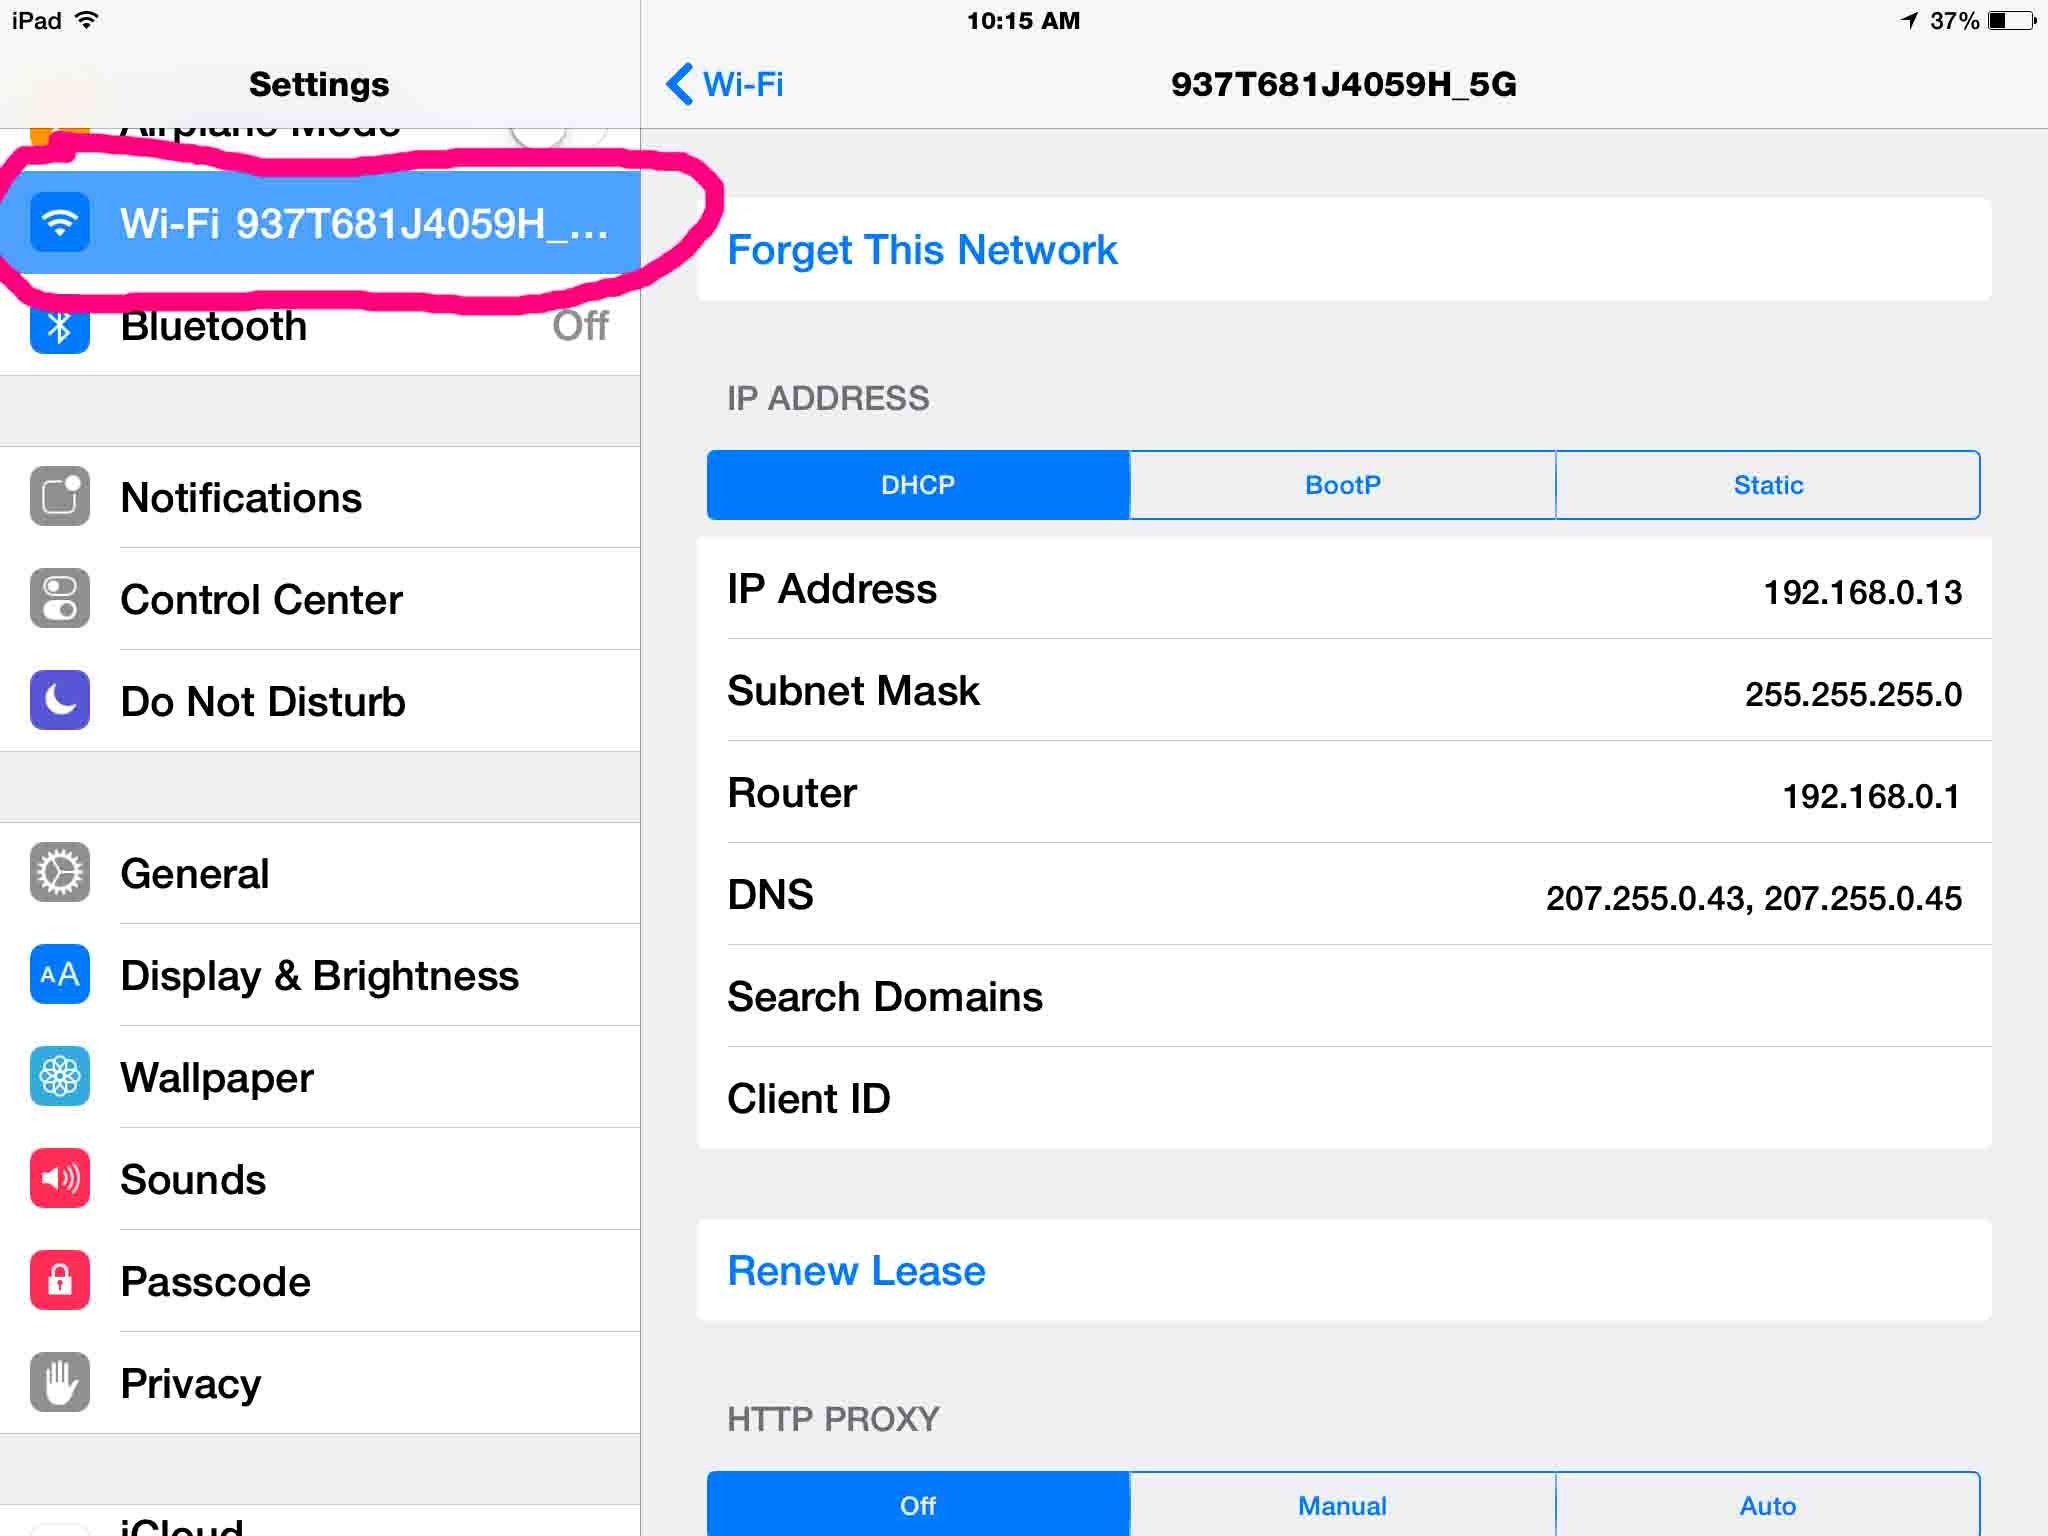
7. Then, Tap the Forget This Network Item to Continue with How to Change WiFi Network on iOS
See this pictured above, near the top and center of the page.
This forces disconnection from the current WiFi network. But before detachment actually occurs, the Forget Network Confirmation dialog box appears as pictured next.
Detail
We “Forget” the current wireless network due to potential errors that might occur when the iPad / iPod Touch / iPhone automatically connects to the stronger or more reliable of the two networks, and drops the weaker one.
Now the device may unexpectedly switch between multiple WiFi networks given the following conditions.
- When two or more WAPs come in range of a WiFi enabled iOS device.
- One or more sets of login credentials (SSIDs and passwords) for the networks exist in memory.
- We set the network entries to automatically connect when close enough to your device.
This can happen as you walk around your space with the device while streaming movies and radio shows to it.
The problem is that this “behind the scenes” WiFi network switching can impact video streaming from digital video recorders. It can result in stream interruption, buffering, errors, et al. Even if we wired both WAPs to the same home network, and both have direct access to the DVR or other streaming player, an unexpected WiFi switch can cause the video to freeze or generate an error message. Sometimes, to recover from this, you must perform a manual restart of the show stream.
We hope that future releases of router, DVR, and iOS firmware will improve streaming recovery when automatic WAP switching occurs. But in the meantime, you minimize these sorts of errors by configuring JUST ONE in-range WAP. Then, make sure that no others are “remembered” by your iOS device. To ensure that, we “forget” the currently-connected network information. We confirm our desire to forget in the next dialog box.

8. Tap the Forget Button to Continue with How to Change WiFi Network on iOS
Find the Forget button circled in pink in the previous picture.
The dialog box then disappears. Then the iOS devices relinquishes the current network connection (in this case, the 937T681J4059H_5G network).
This takes us back to the WiFi Settings page, as shown next.
Now we can see that our iPad Air has disconnected from the prior network. Check this by looking at the leftmost column. Inside the blue “Wi-Fi” settings bar, the connection status field says, Not Connected.
9. Tap the Blue Wi-Fi Link
Find this link at the top of the last picture.
This closes the Network Information screen, and takes you back to the Choose a Wi-Fi Network page, as shown in the next picture. We’ve circled the connection status at the left, showing Not Connected state. You can also see that the information about the WiFi network that we connected to before, in the right column, is now blank. No IP address or DNS info appears.
No networks listed near the top of this page, means that the iOS device does not remember connection information for any of the in-range WiFi access points (WAPs). Or at least, someone configured it NOT to automatically connect to any of them. This is what you want.
Also, on this screen, the iOS device automatically searches for and displays any in-range WAPs it discovers.
10. Tap the Desired In-Range WiFi Network
In this scenario, we’re logging into the 937T681J4059H_2G access point, the 2 Ghz. SSID on our dual band WAP. We tapped that and got the password prompt dialog box, as pictured next.
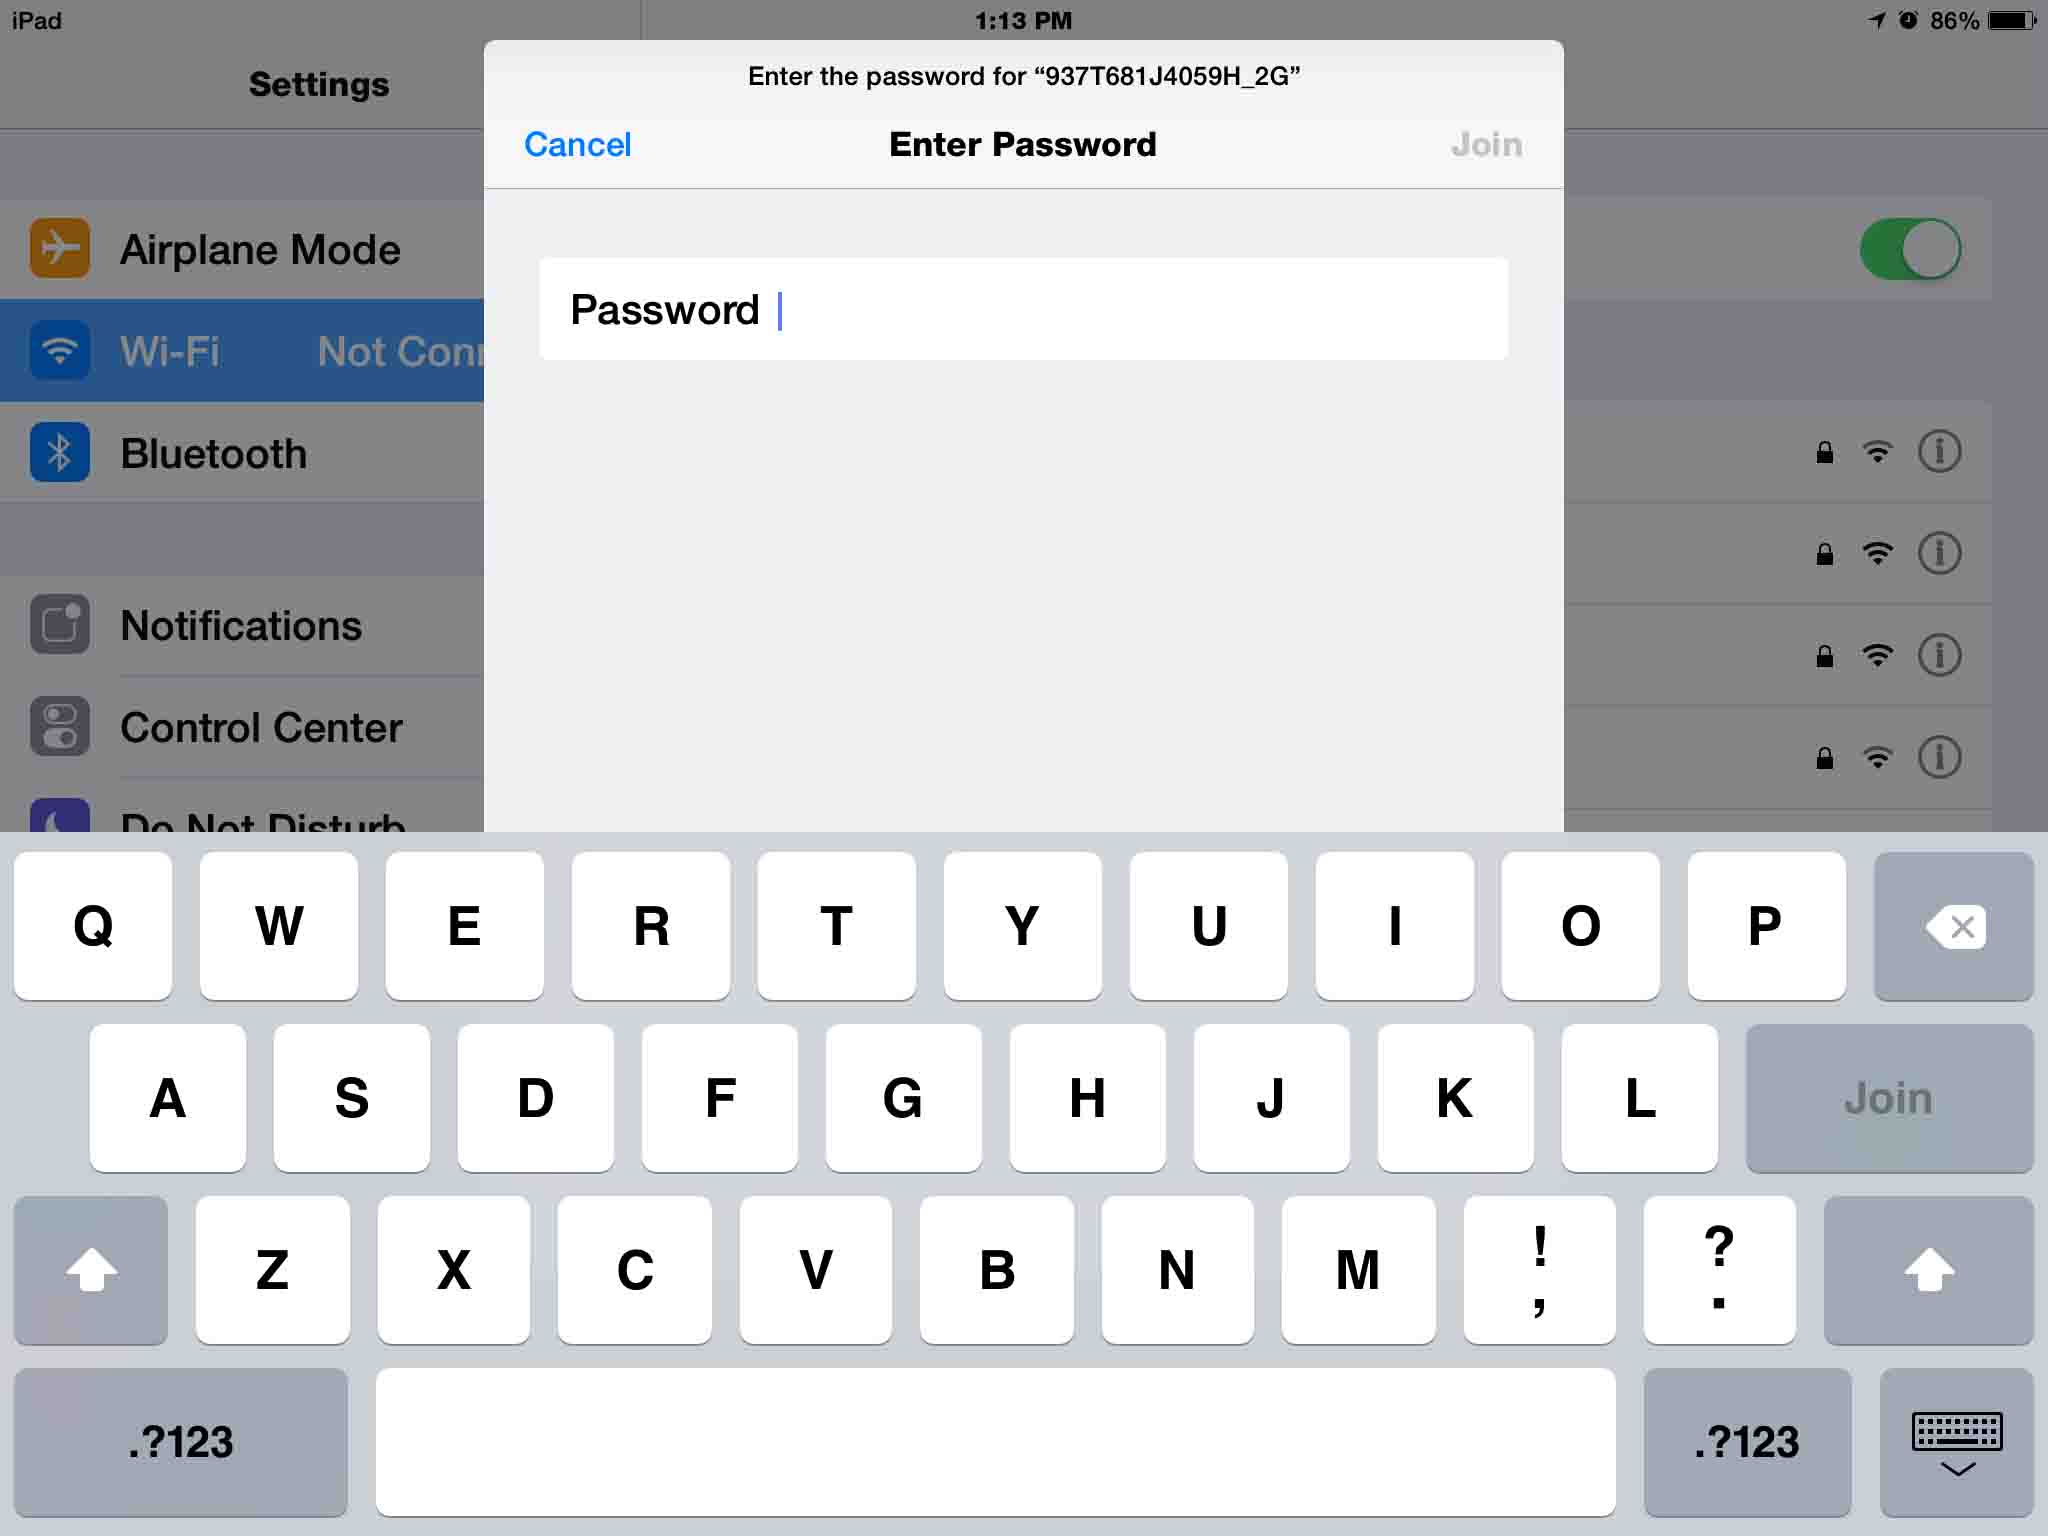
11. Enter the WiFi Network Password to Continue with How to Change WiFi Network on iOS iPhone, iPad, iPod Devices
via the virtual keyboard, pictured above, and then press the Join button.
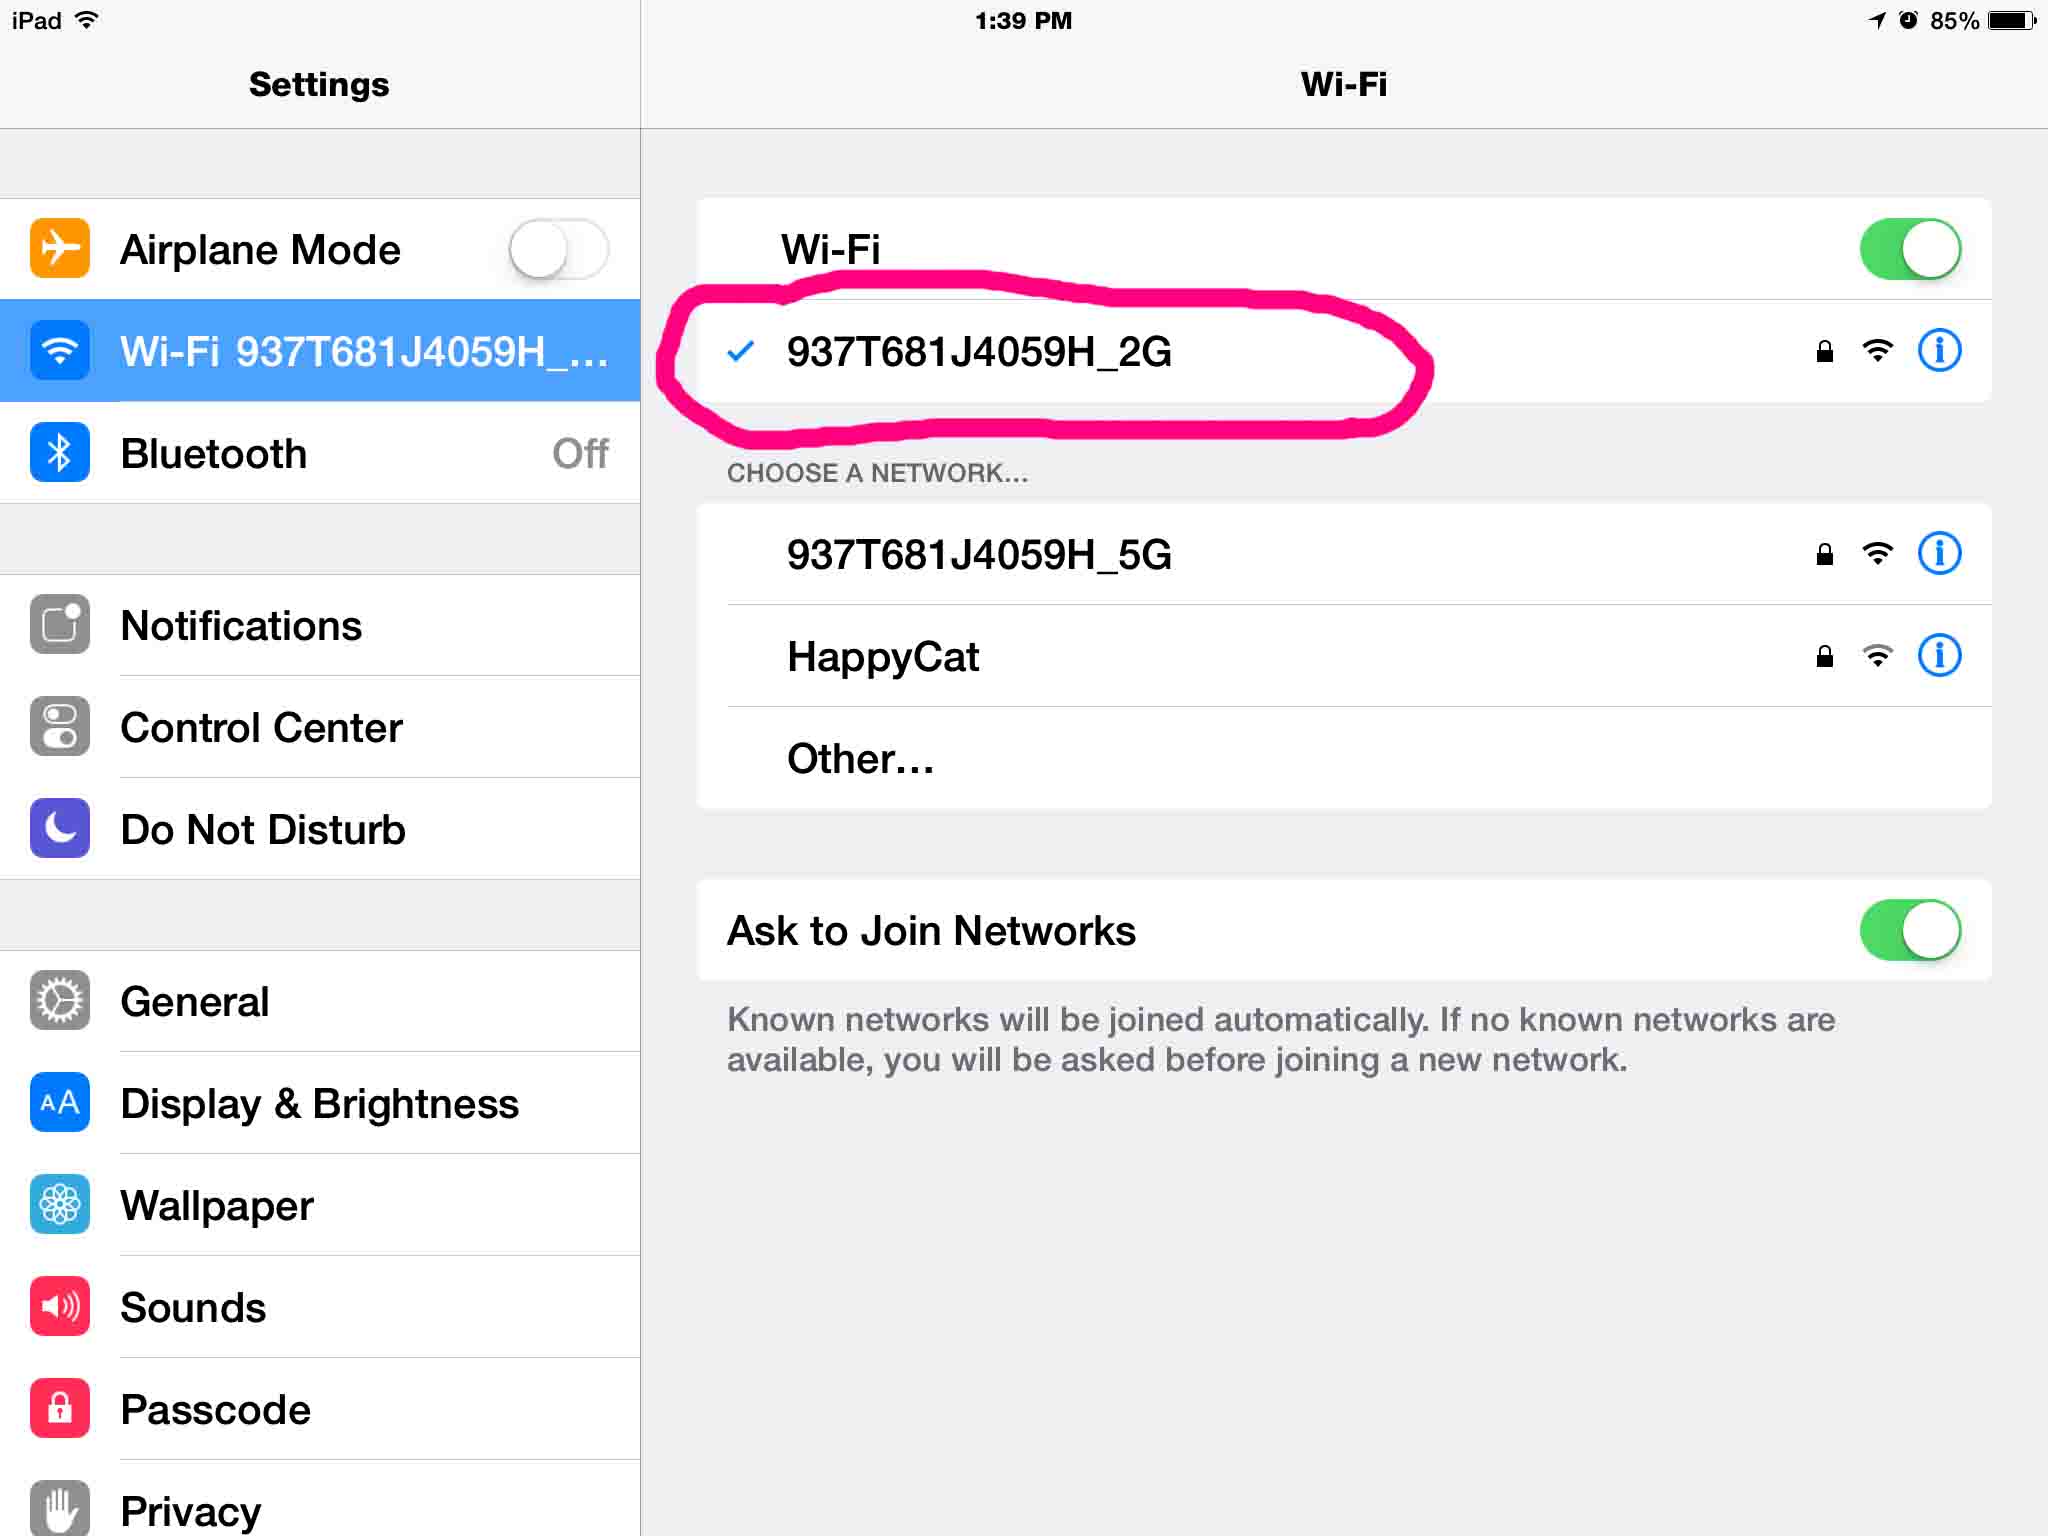
The system then takes you back to the Select Wi-Fi Network screen. But now, the new network to which we connected appears near the top, with the blue check mark, and circled in pink.
12. Done with How to Change WiFi Network on iOS Devices !
Your device connected to the new WiFi network successfully. Then it automatically connects to this network when it comes into range of the network.
Note that logging into “visible” networks as we’ve done above, allows your device to receive some information about the network from the WAP, prior to actually connecting. The WAP sends, among other tidbits, the SSID, type of authentication (WEP, WPA, WPA2), and encryption (TKIP, AES). Therefore you need neither enter, nor even know these details when connecting.
But, if you do connect to a hidden WiFi network, you must know in advance all of these details about it, and manually type them in. We do not address this procedure in this article though. Why not? Because we suggest connecting to visible networks, to avoid the extra hardships with hidden ones.
Related Posts to How to change WiFi Network on iOS
- Bookport Plus Change WiFi Instructions
- Change WiFi Network on Honeywell Smart Thermostat RTH9580WF
- How to Change WiFi Network on Amazon Echo Dot Gen 2 Smart Speaker
- Change WiFi Network on Logitech Squeezebox Boom Internet Radio, How To
- How to Change WiFi Network on Sharp Aquos Smart TVs
References for How to Change WiFi Network on iOS Devices
- Apple’s Instructions on Connecting to WiFi Networks
- Connect to WiFi on your iPhone, iPad, or iPod touch
- Potential Quick Fixes When Your iPad Won’t Connect to Your Wifi Network
Revision History
- 2019-02-20: Added subheadings, broke up very long paragraphs, added keyword targeting and more tags, and fixed some typos.
- 2018-02-22: Revised title and keyword targeting, and added a Related Posts section.
- 2015-09-19: Added mention of iOS versions 7, 8, and 9, to which the above described procedure applies.
- 2015-08-16: Originally published.