First, you can charge this mini wireless speaker conveniently via the hidden USB charge port. Here, we go over how to charge JBL Clip 3.
In short: Choose an adequate USB charging adapter. Why this? Because the 3 does not come with this as a standard accessory.
Next, connect a micro USB charge cable between the 3 and that adapter. Then, plug the adapter into a working wall outlet. Finally after a few hours, the speaker fully charges. Then you’ll be able to play it again for up to ten hours before needing to recharge it again.
How to Charge JBL Clip 3: Step by Step
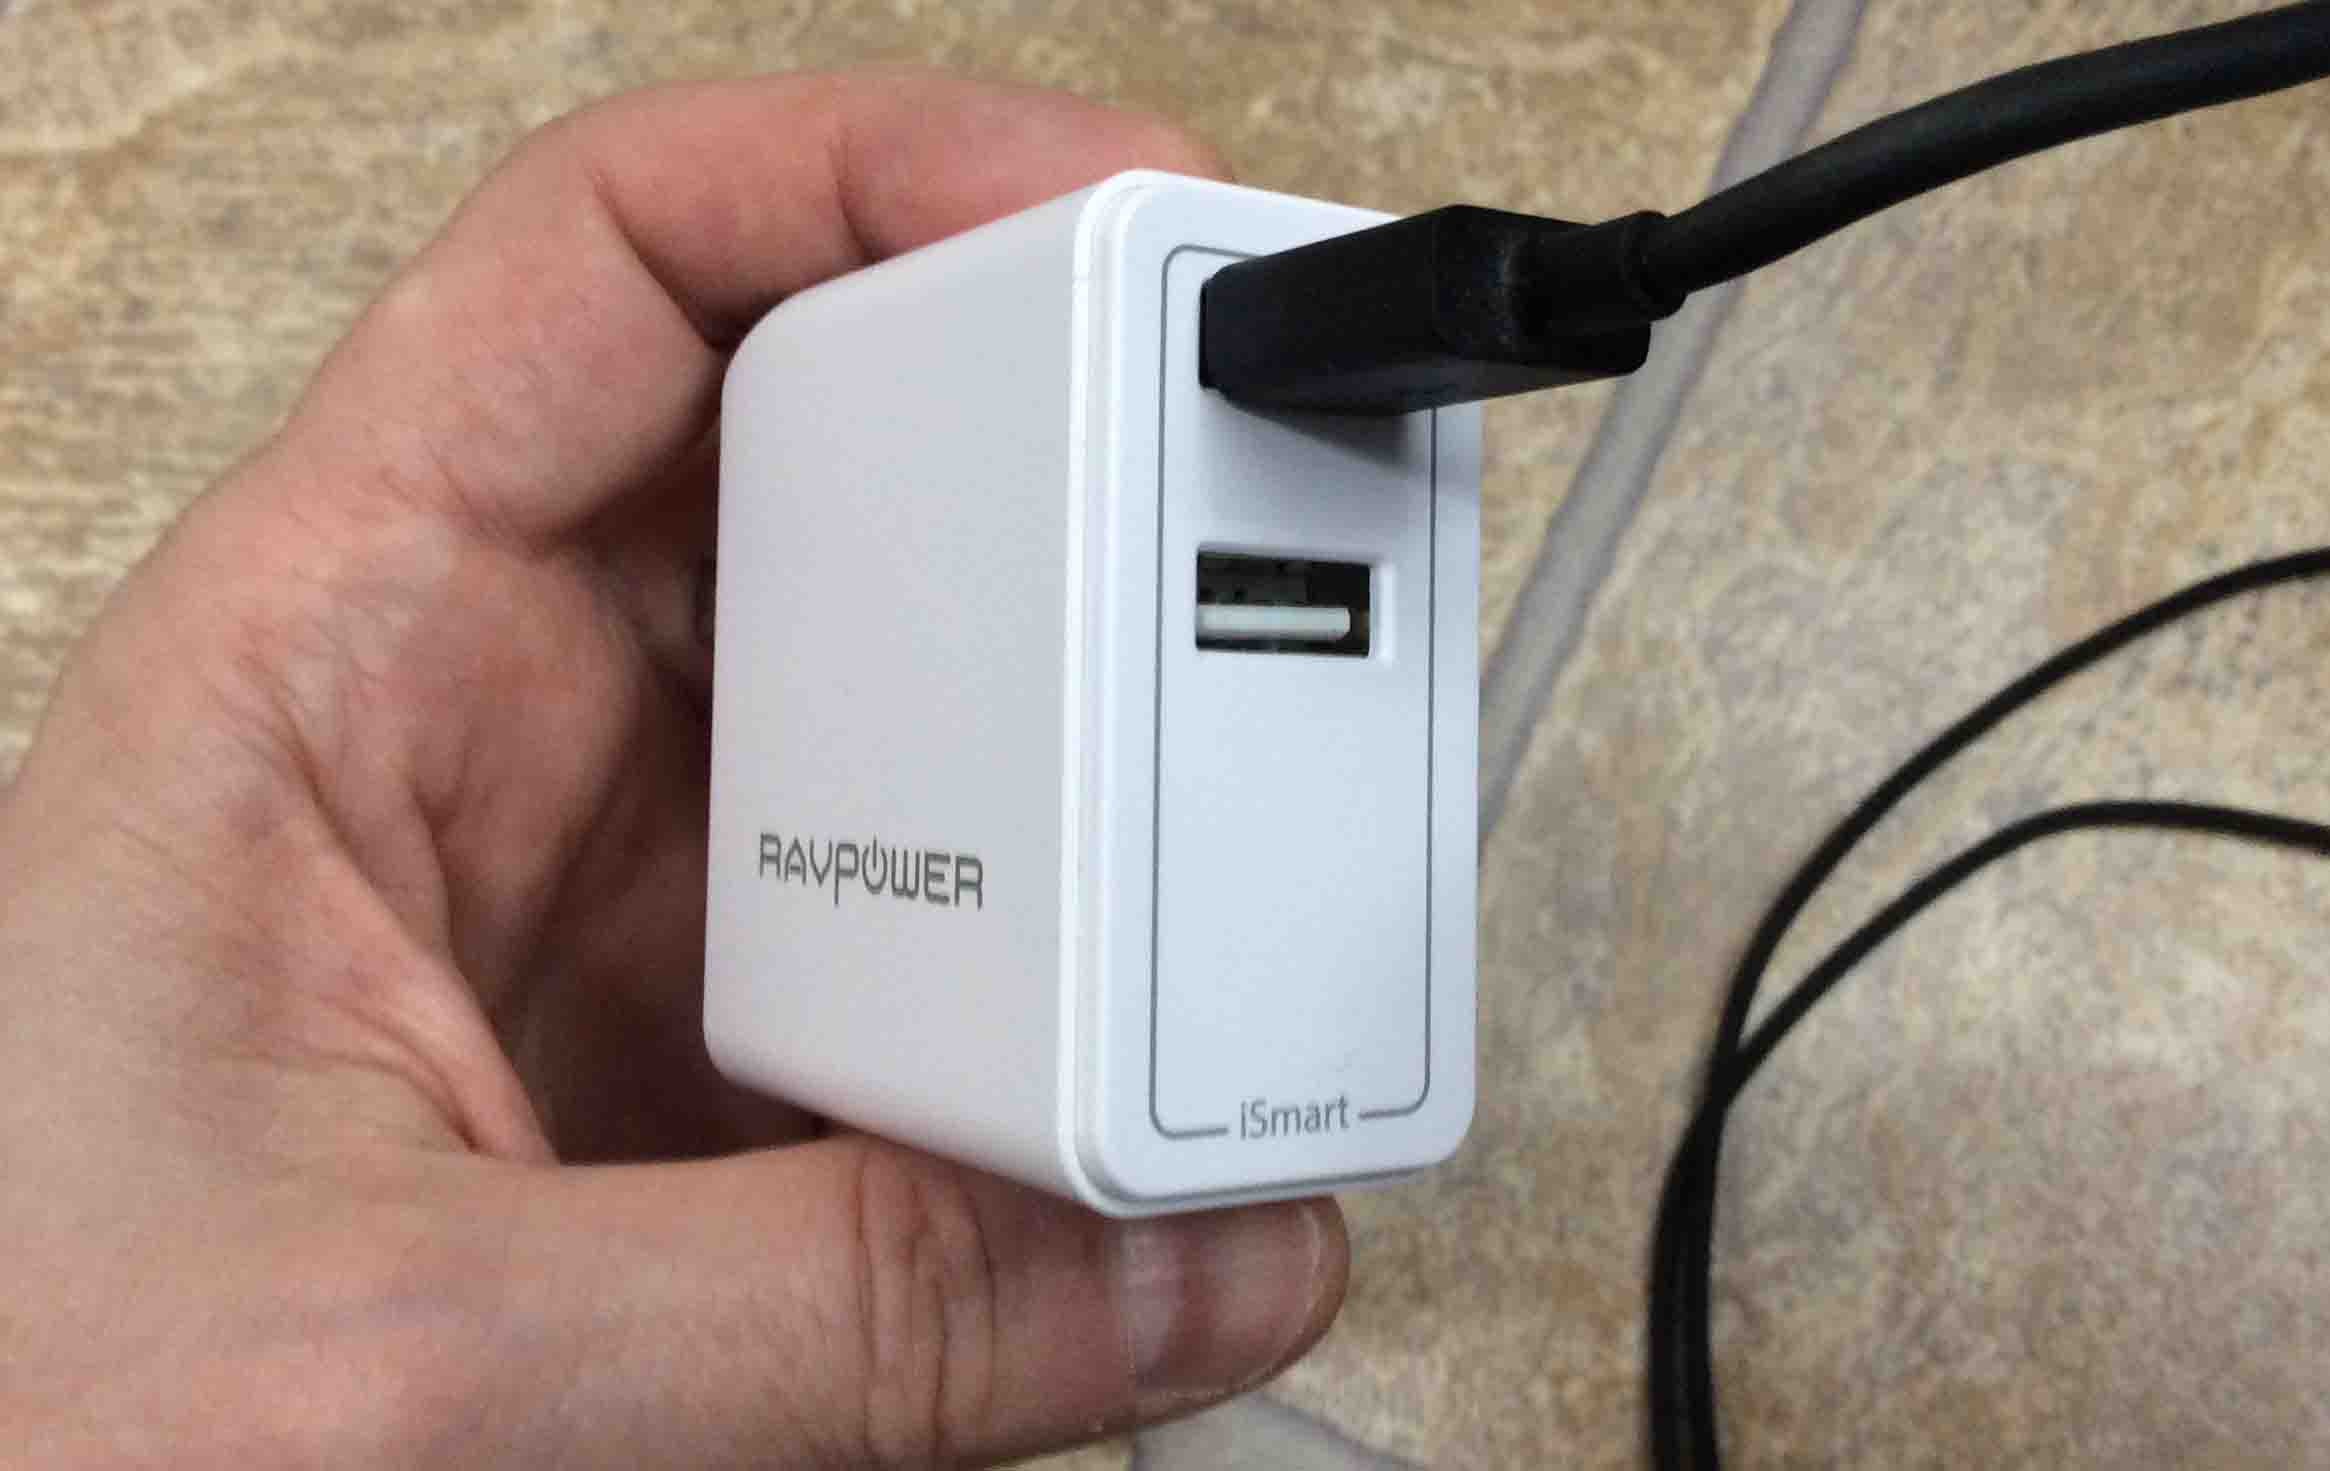
1. Choose Right Size Power Adapter
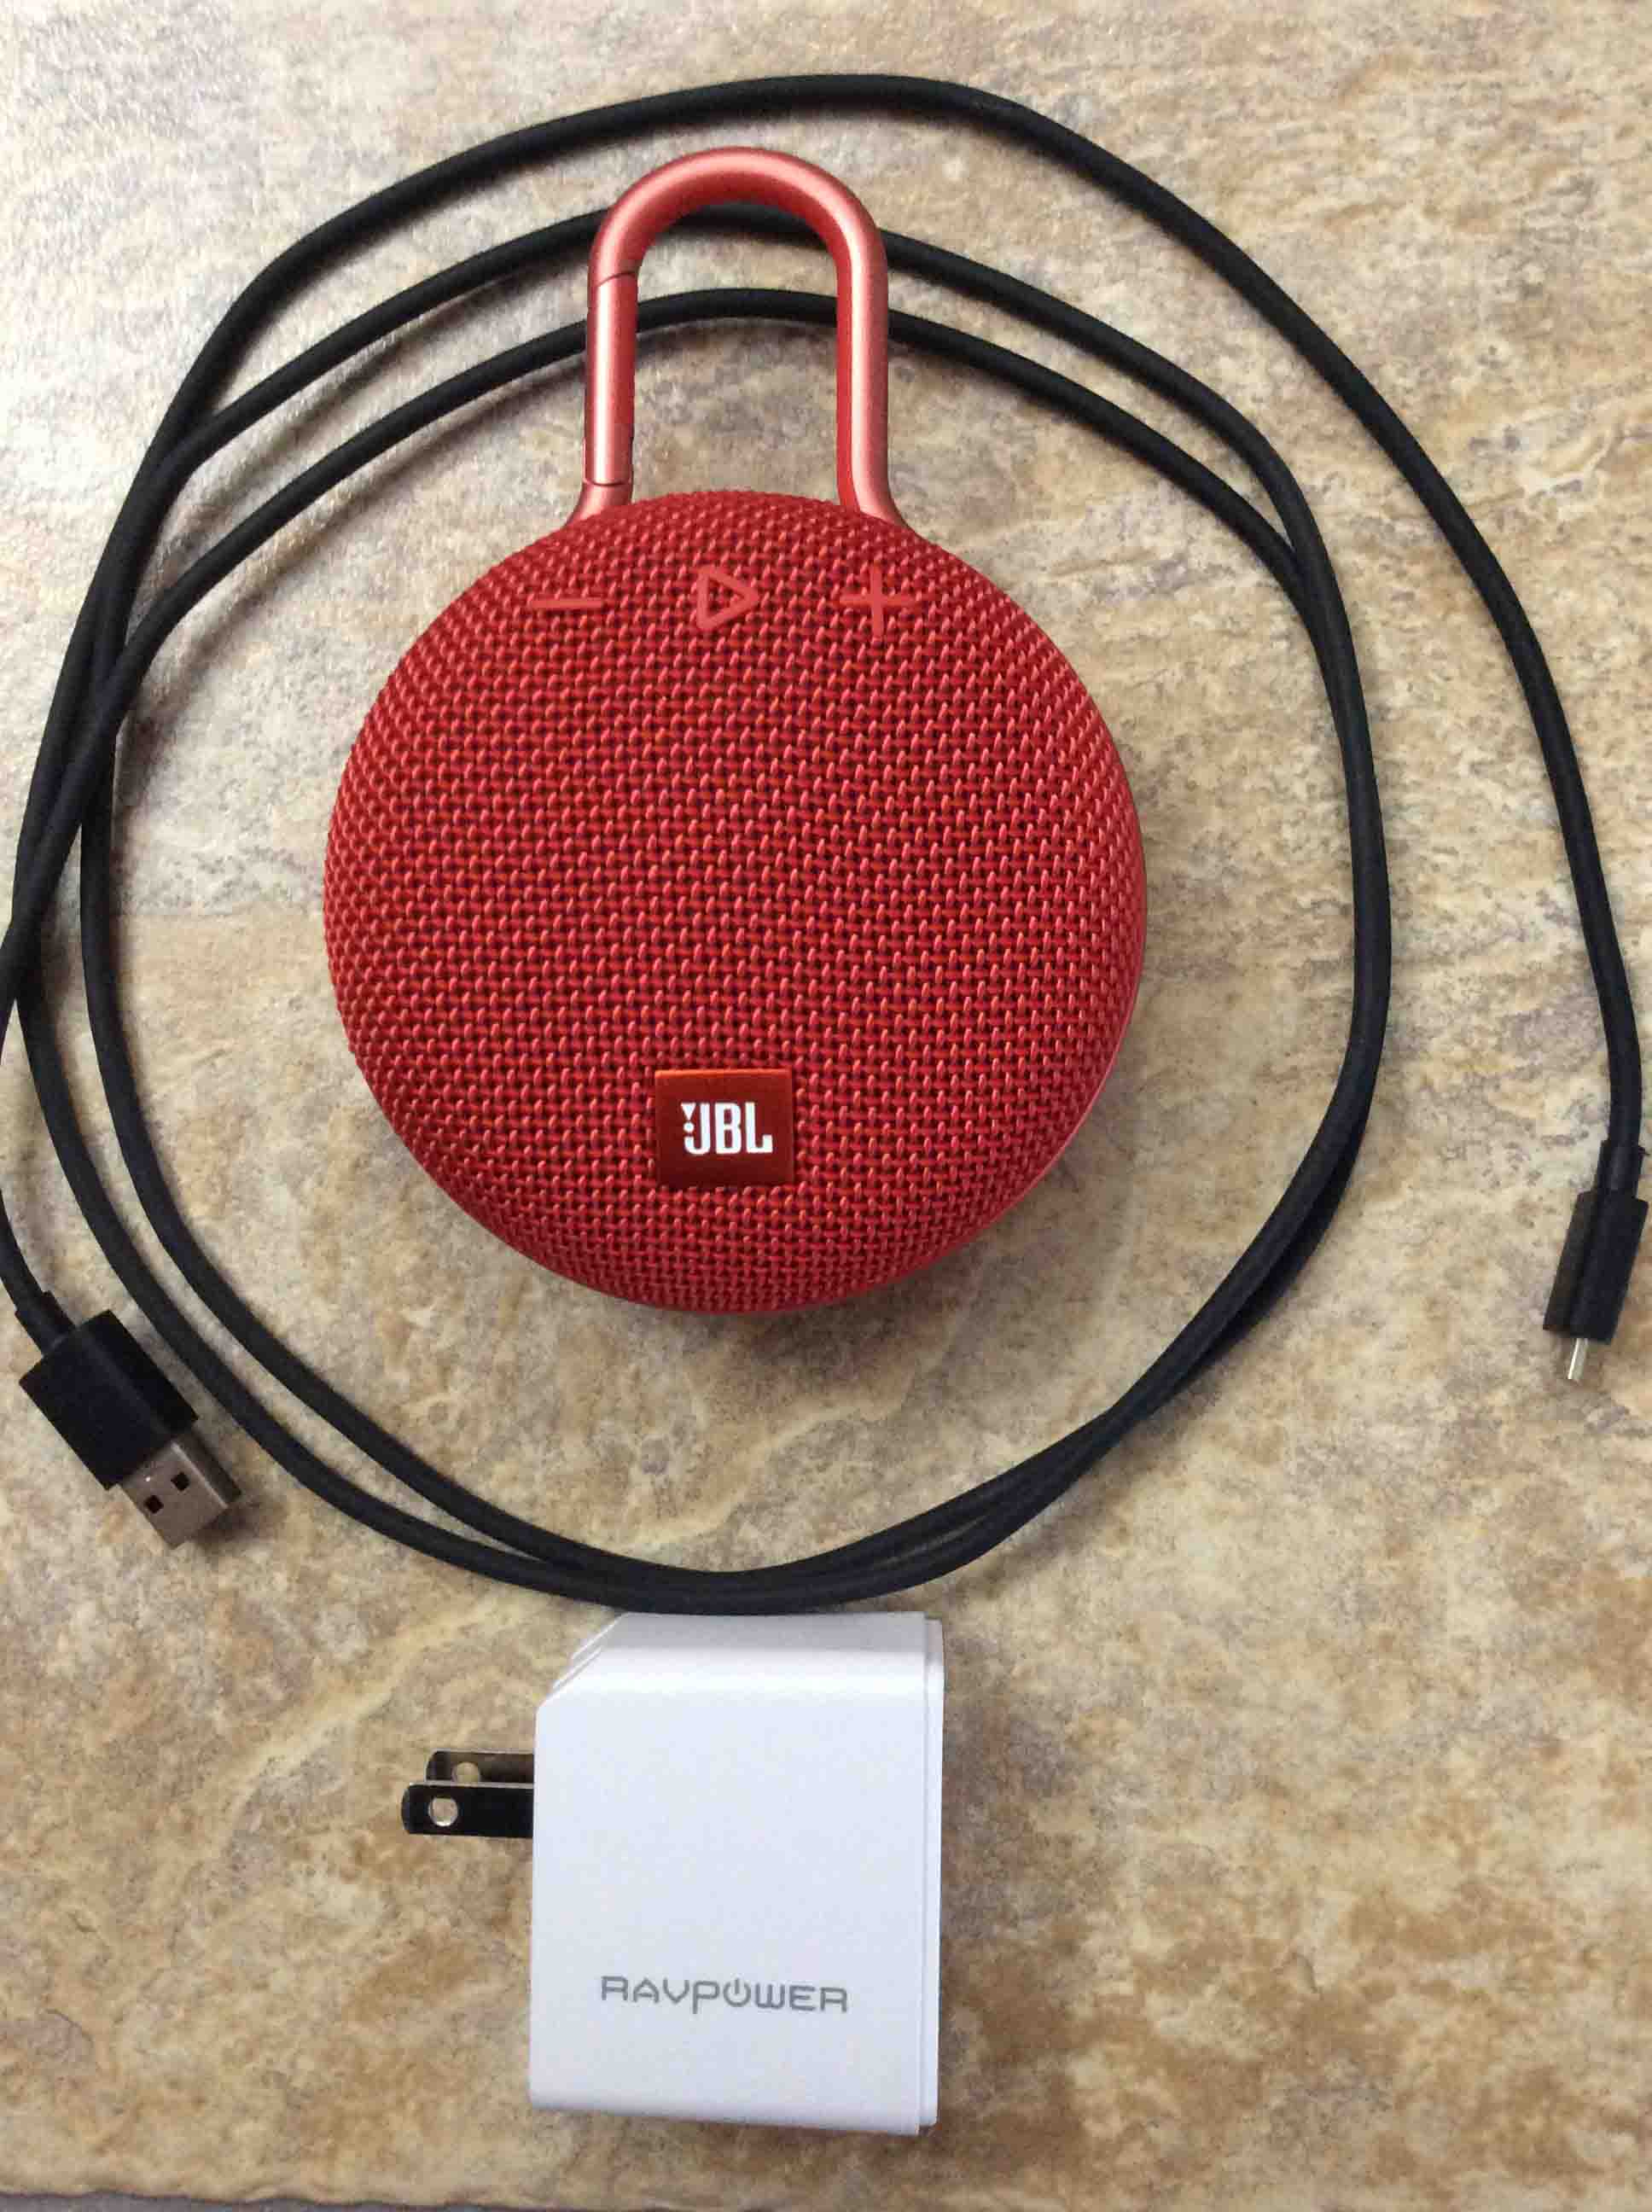
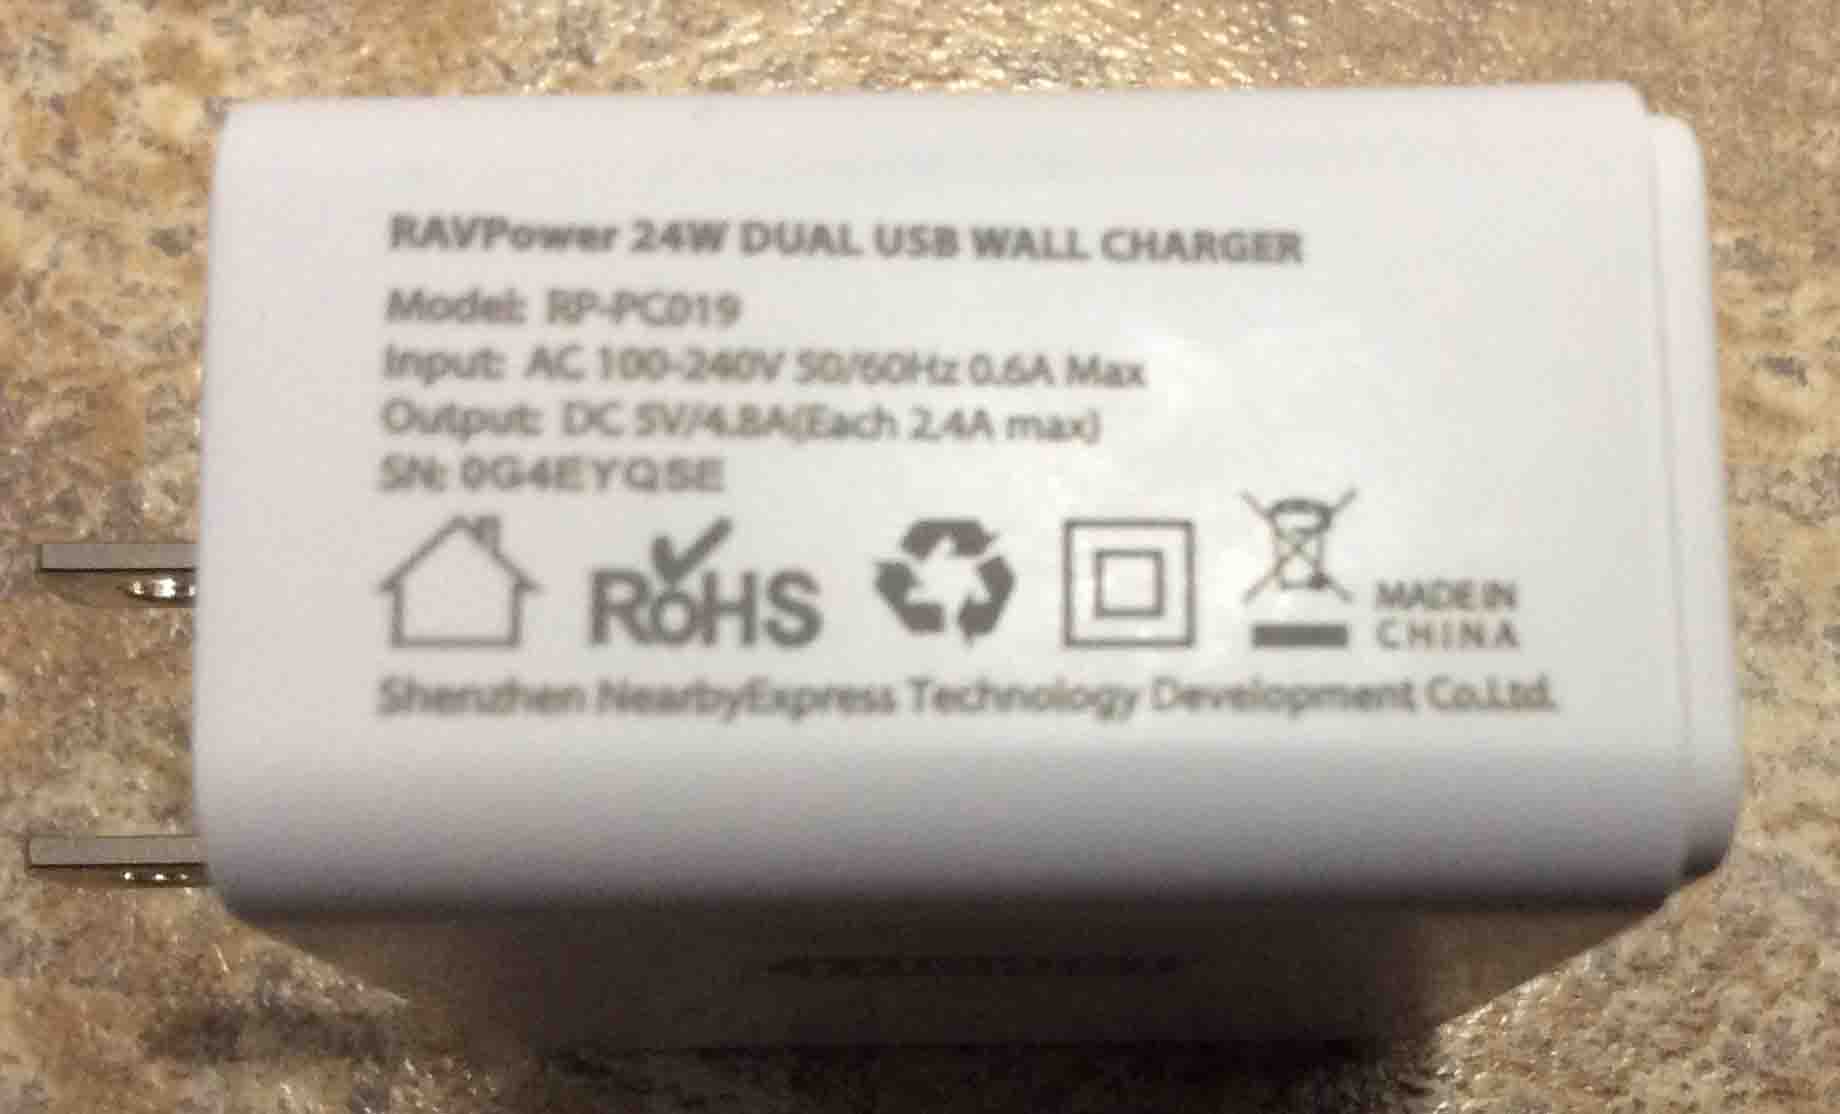
Now in this demo, we use the RavPower 24 watt dual port USB charger adapter, as we show next. Now this speaker requires 5 volts at 600 milliamps to charge fully. So this adapter is indeed beefy enough for the job.
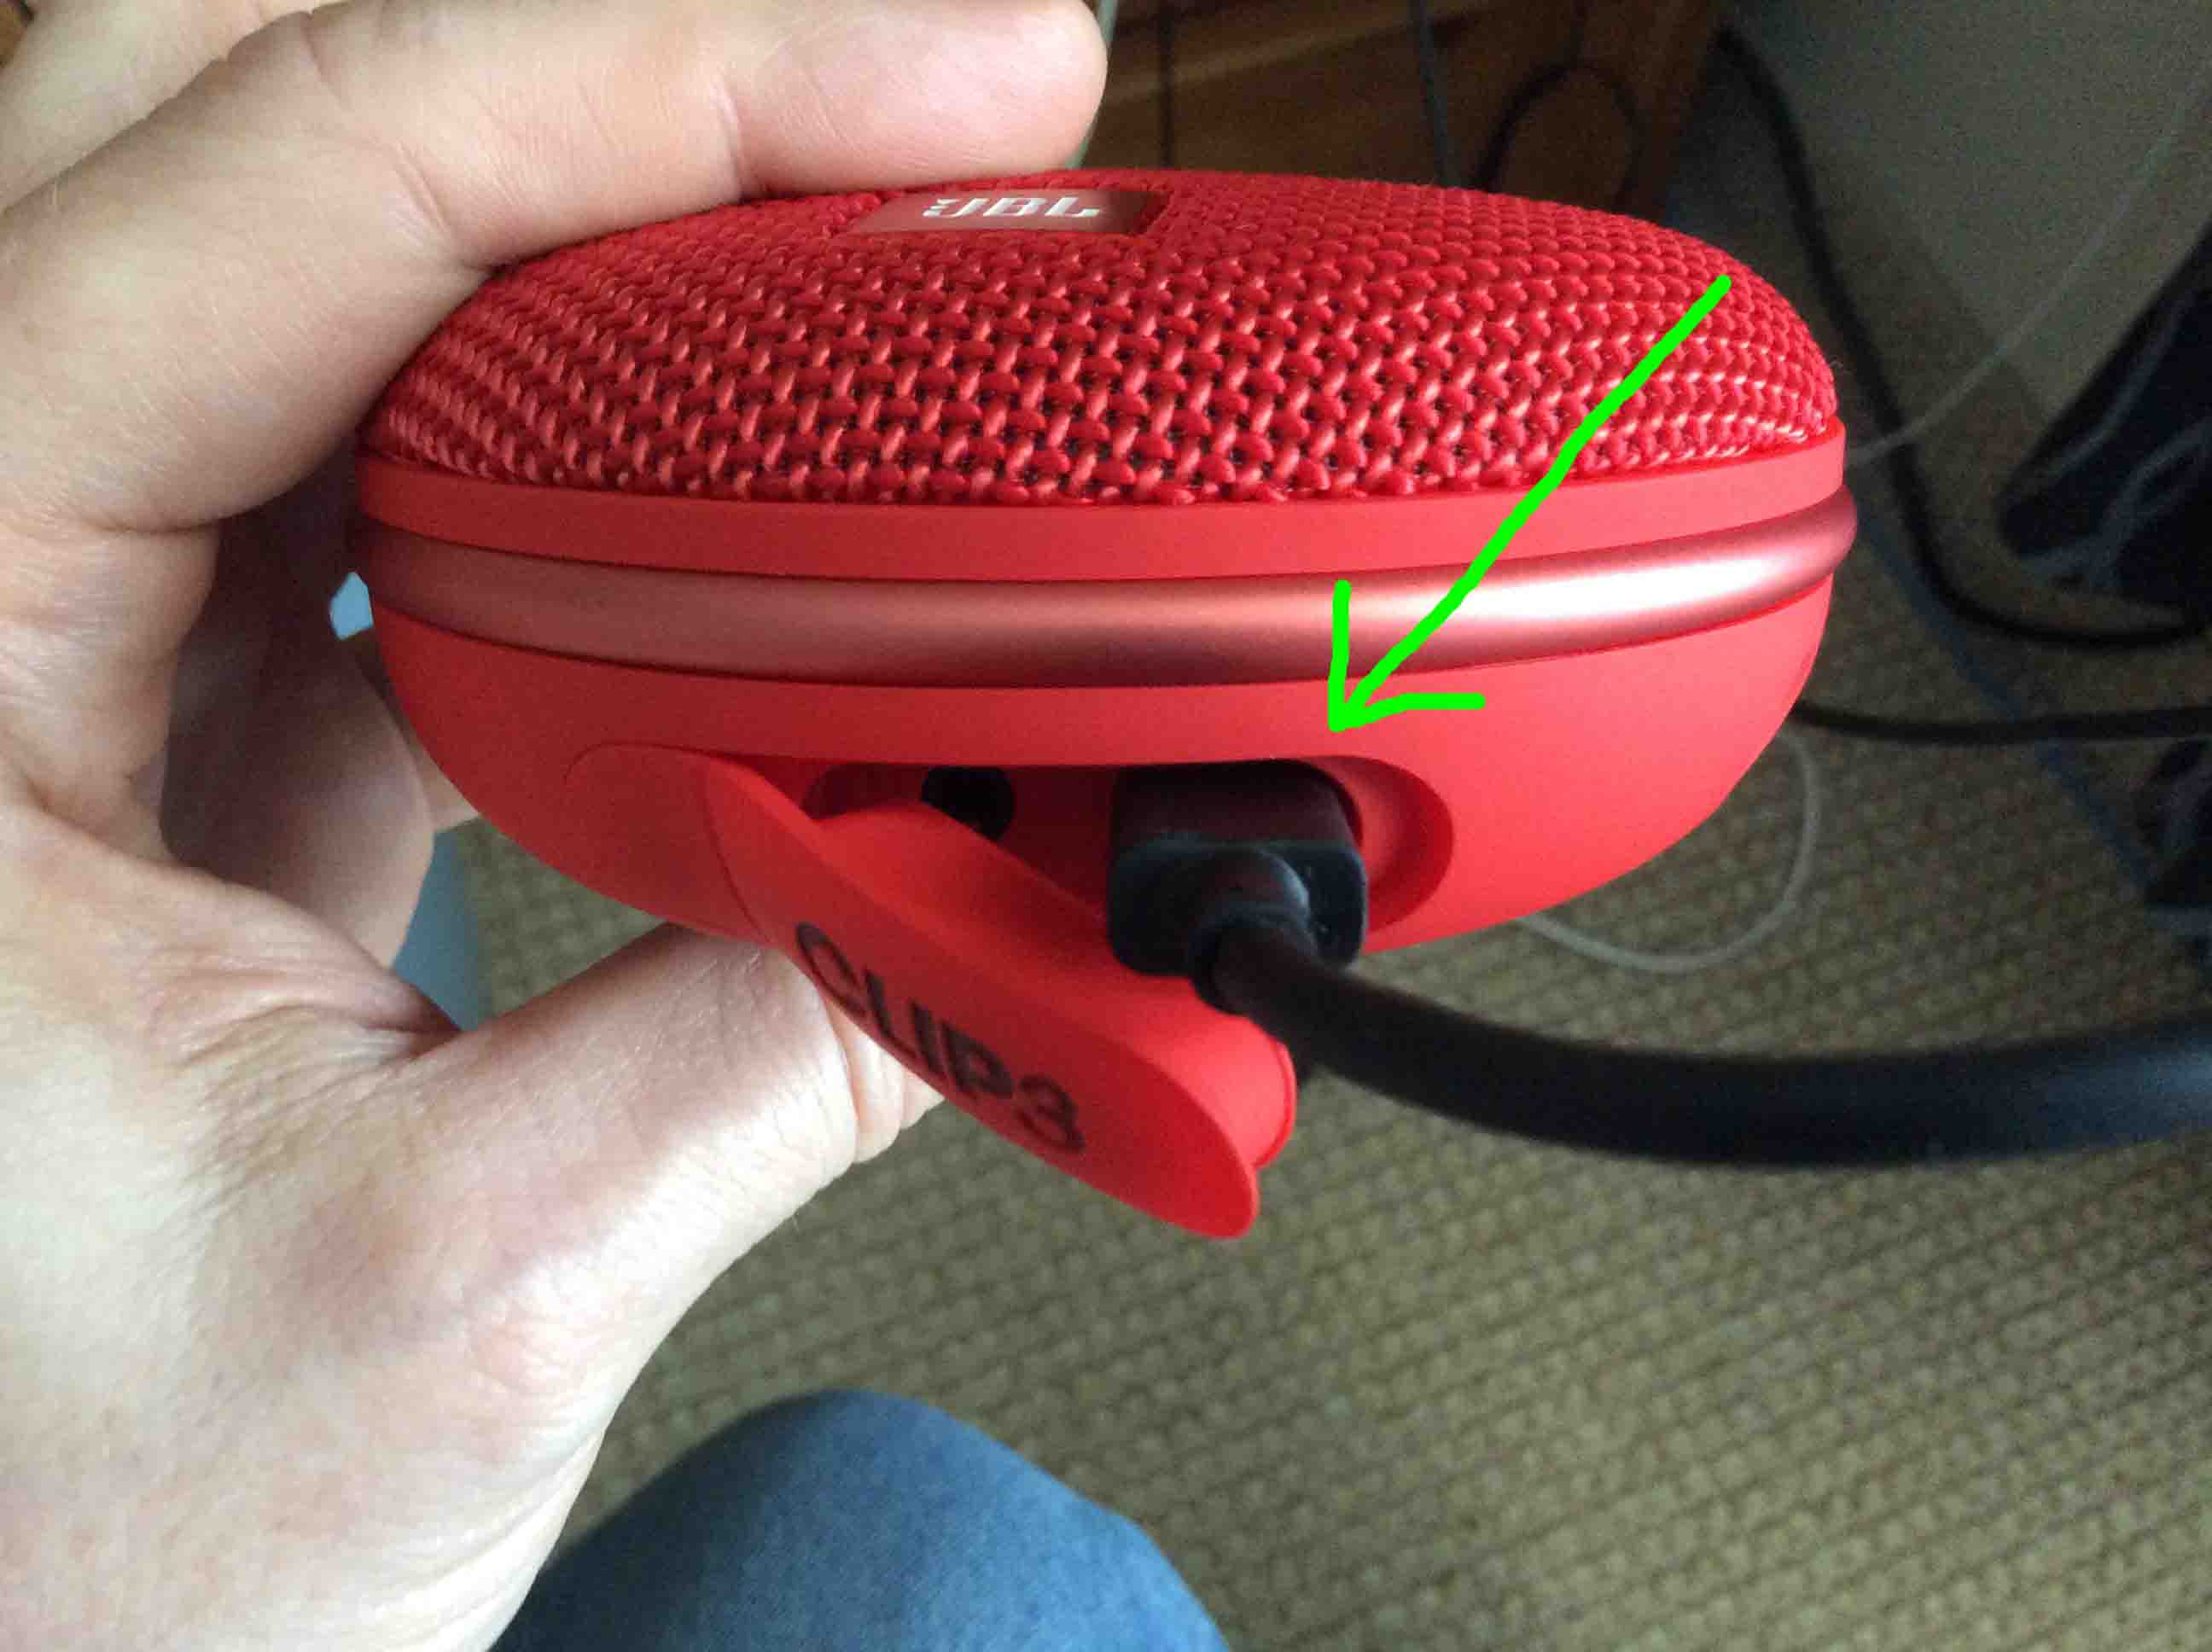
2. Open the Port Cover on the JBL Clip 3
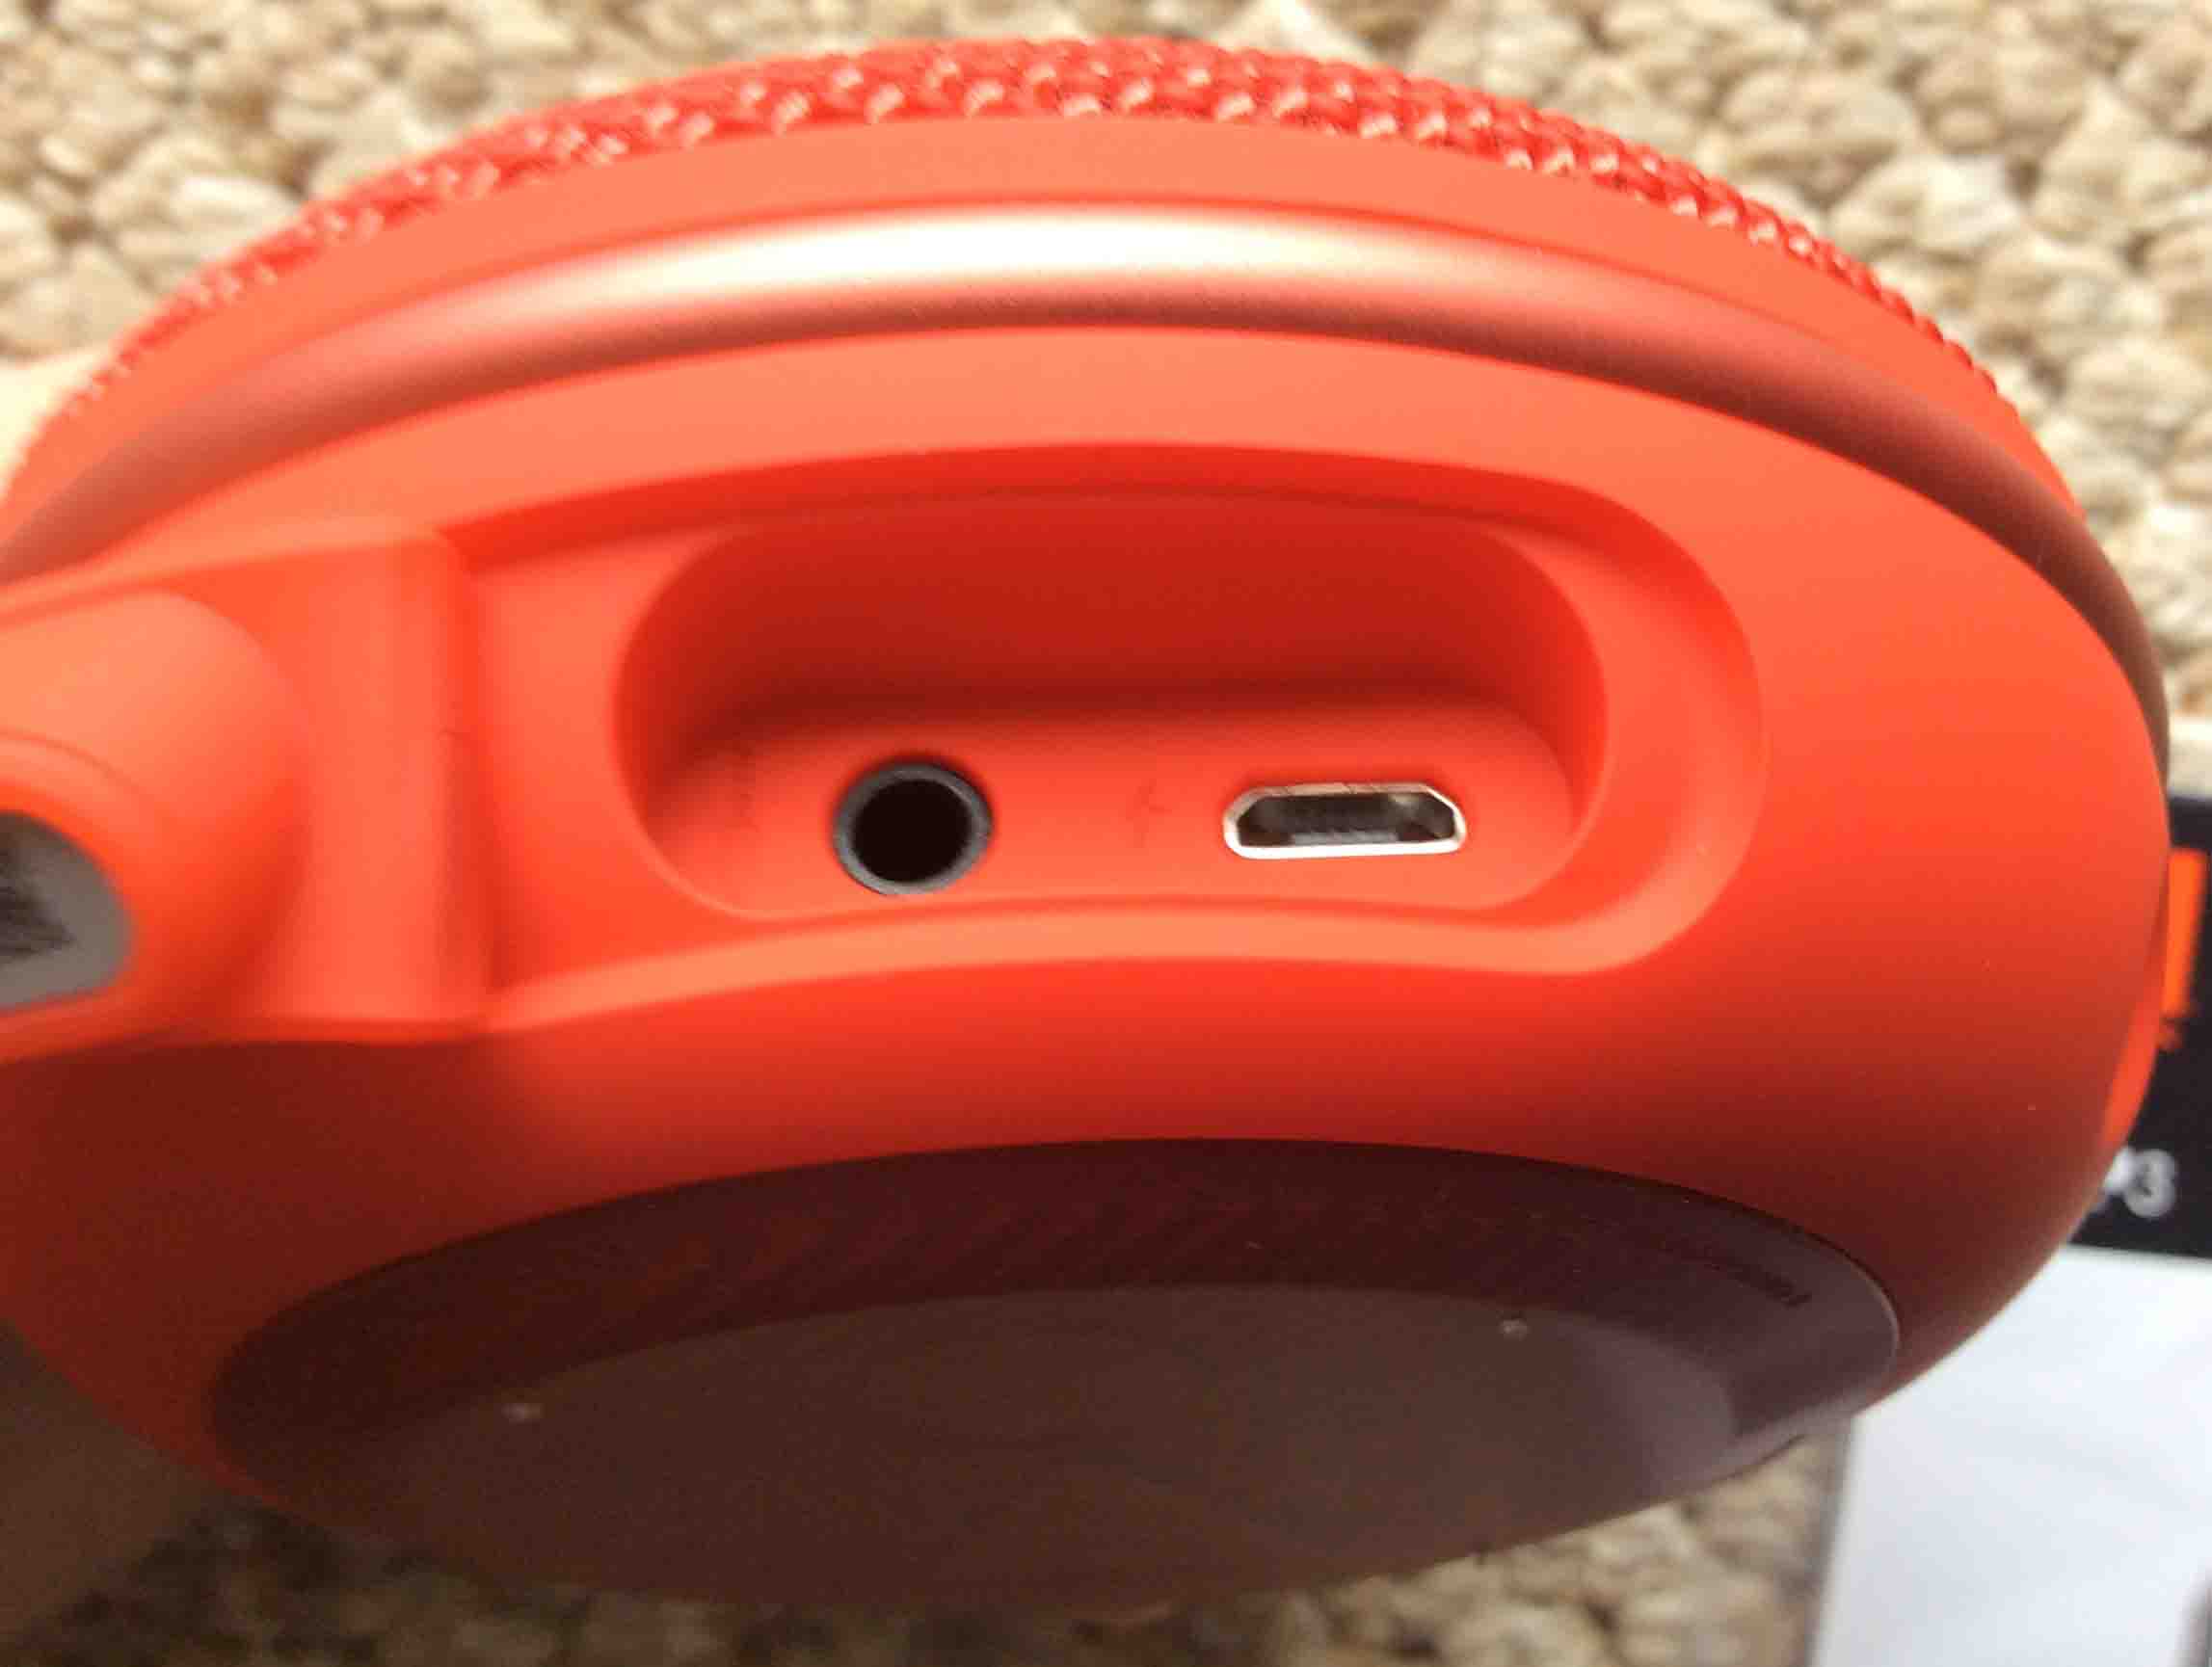
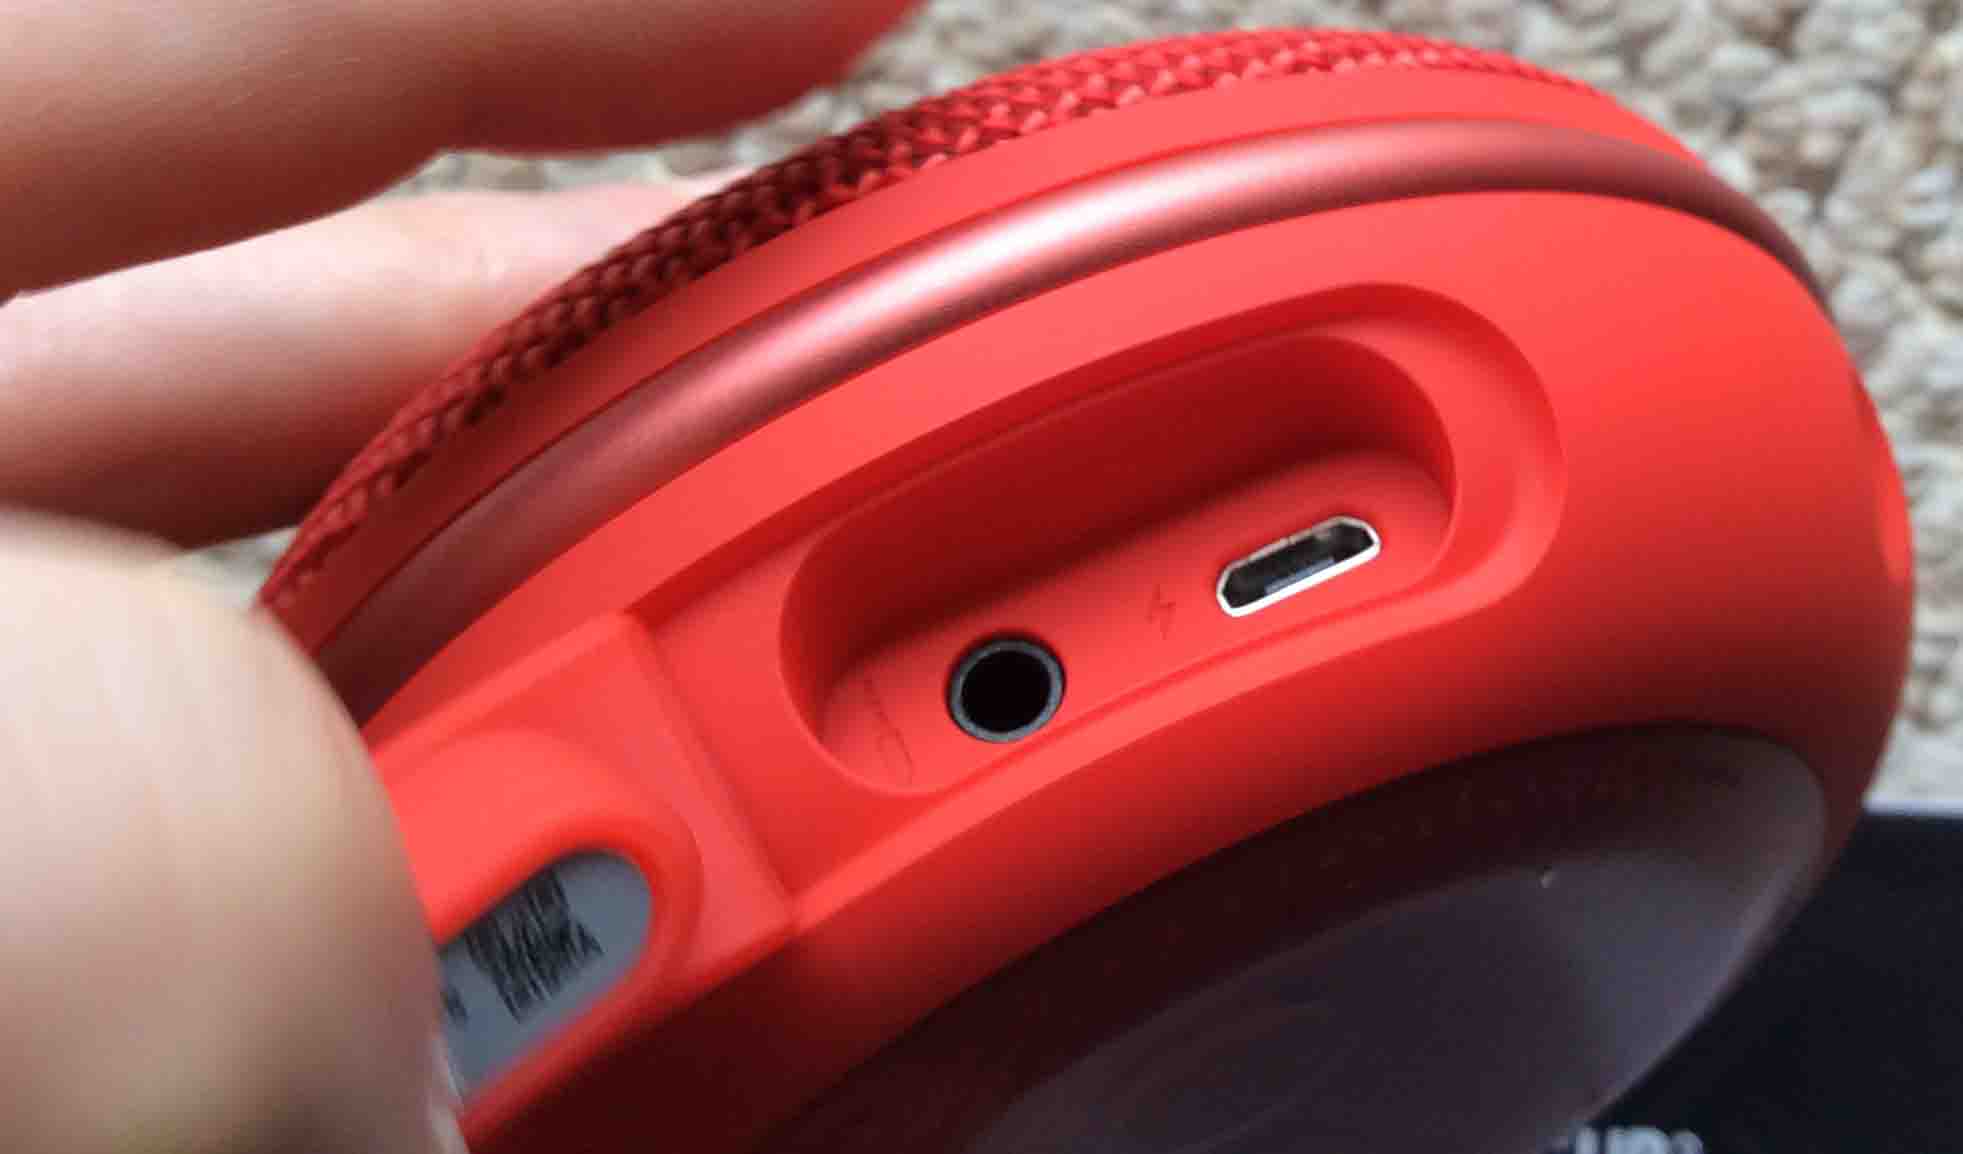
Then, use a penny or a dime to work open the waterproof seal port cover on the 3. This exposes the micro USB charging port inside.
3. Connect the Micro USB Cord to Continue with How to Charge JBL Clip 3
Then, plug the small end of your micro USB charge cable into the matching micro USB port.
4. Plug the Other End of the USB Cord into the Power Adapter
Then, connect the A end of the USB charge cable to the power adapter, as er illustrate next. In this demo, we use a RavPower 24 Watt adapter and an Amazon USB cable.
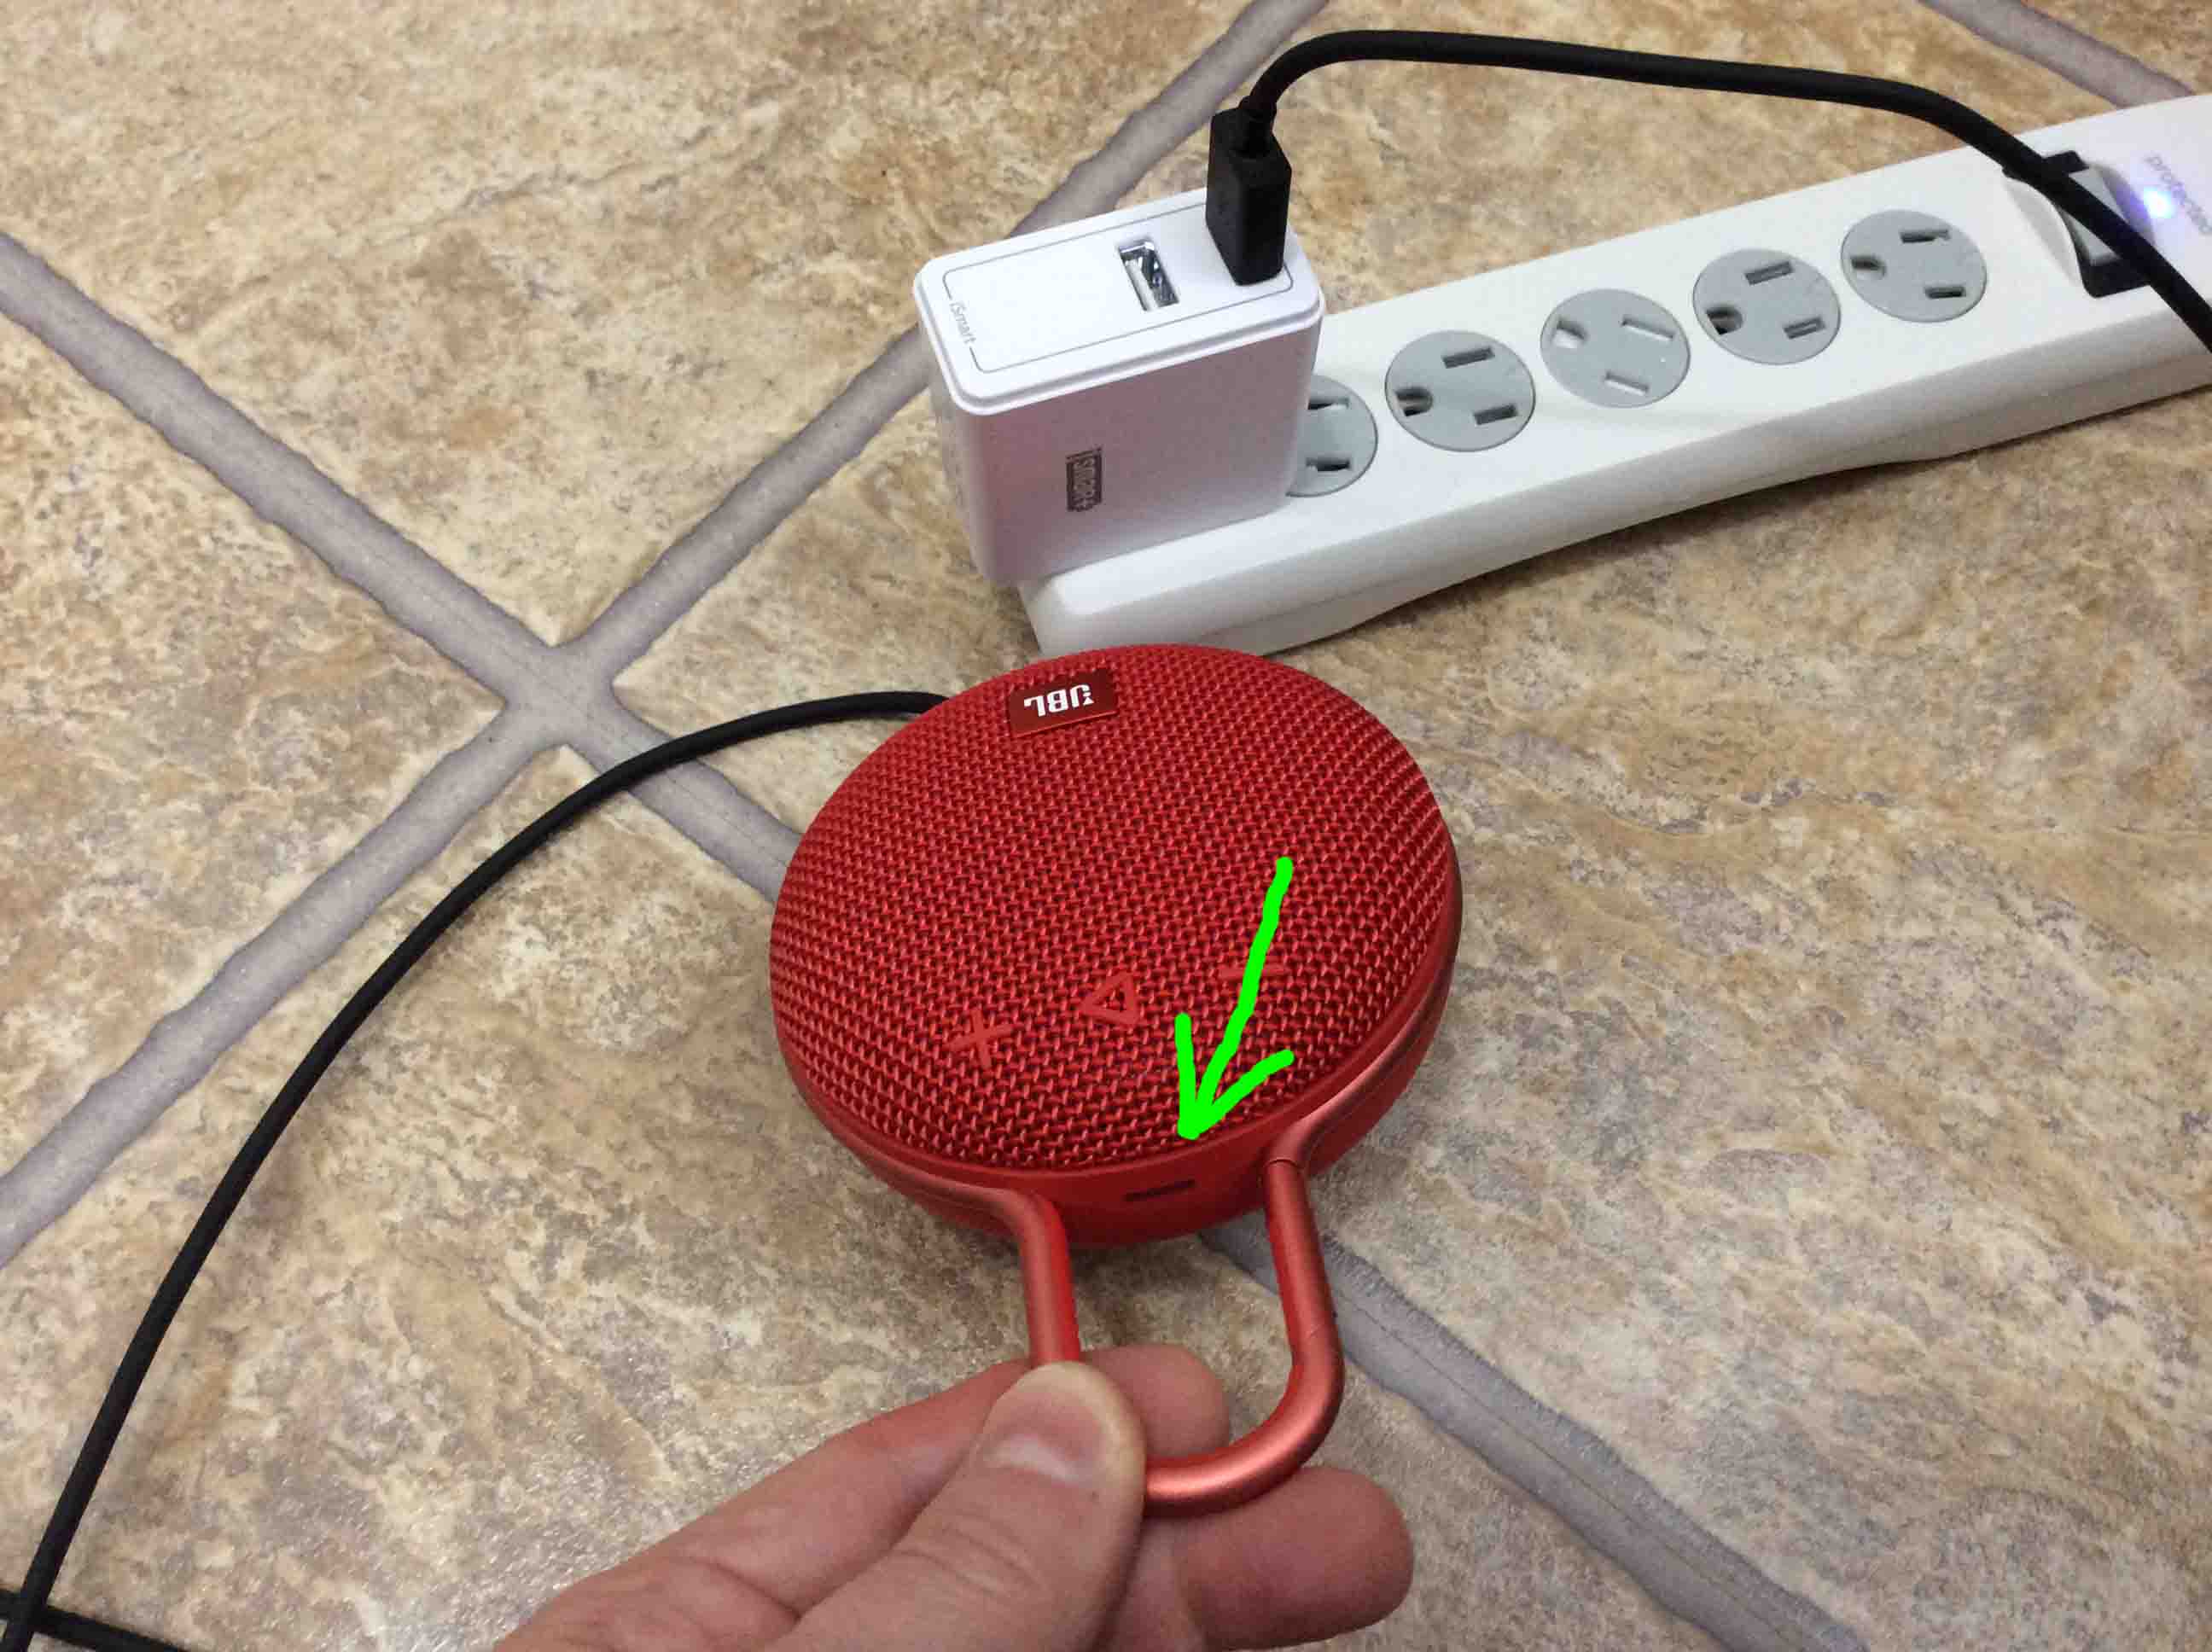
5. Plug the AC USB Power Adapter into a Working Wall Outlet
Plug the adapter into a working AC outlet. In this demo, we plug ours into a surge protector power strip.
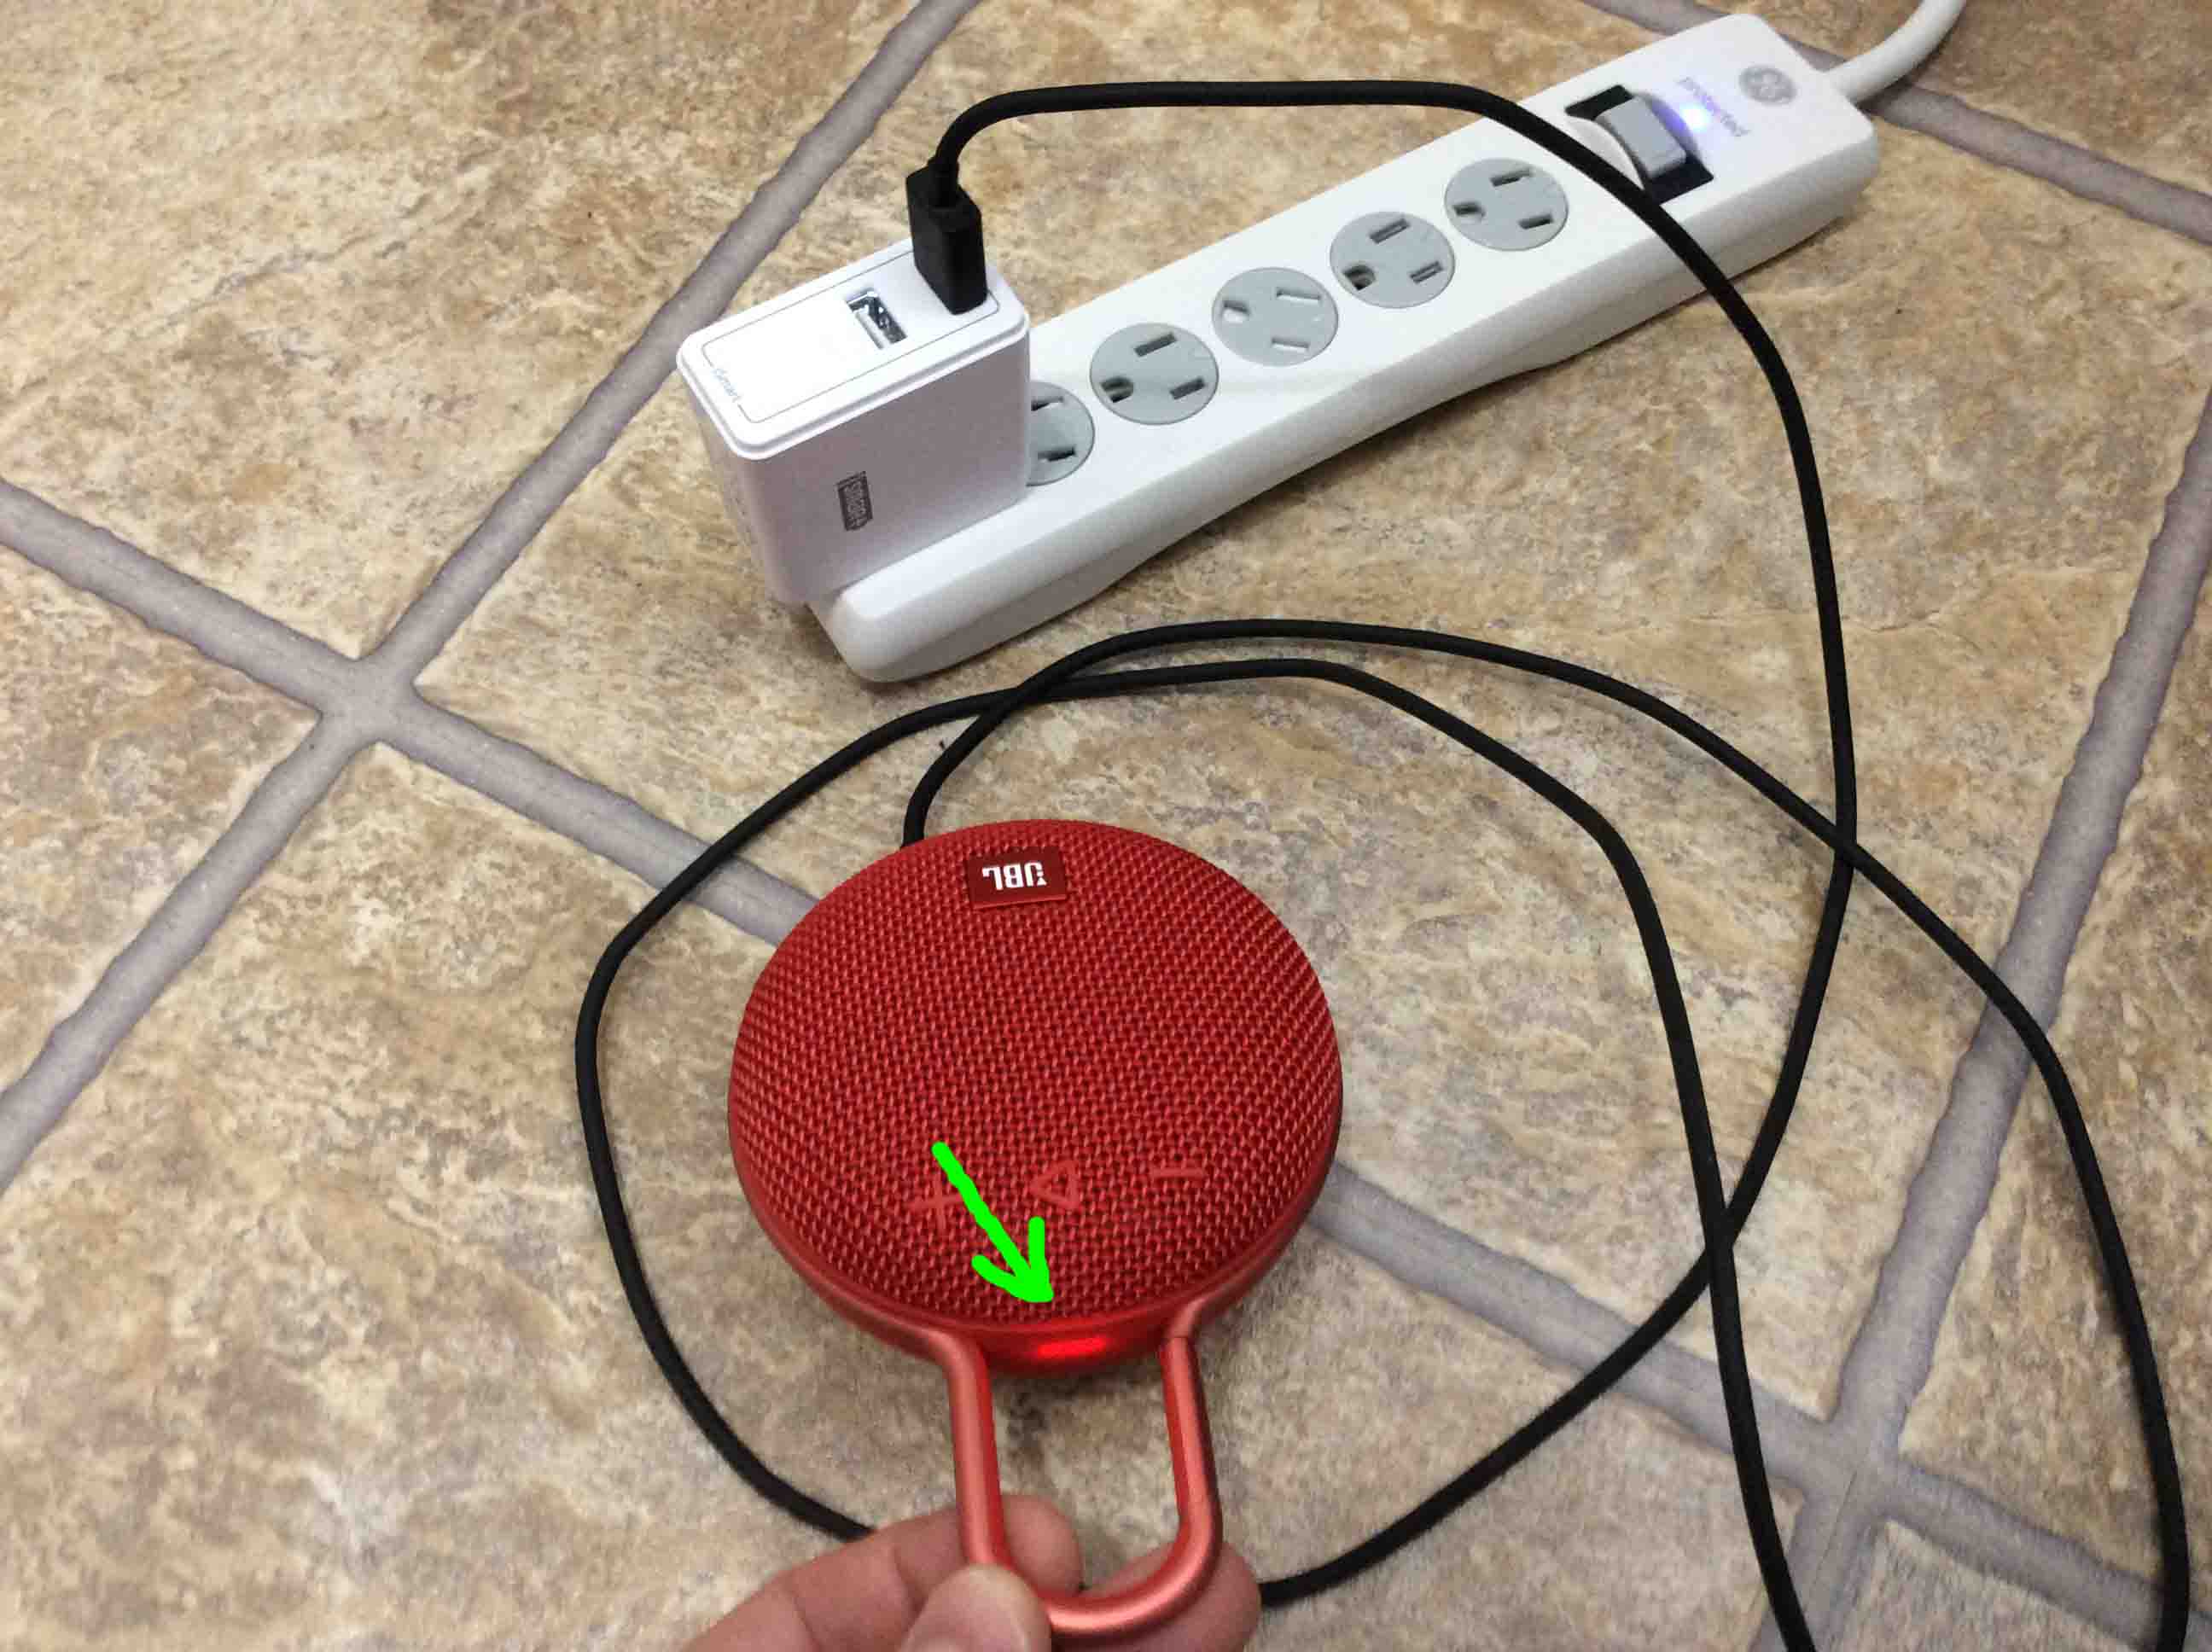
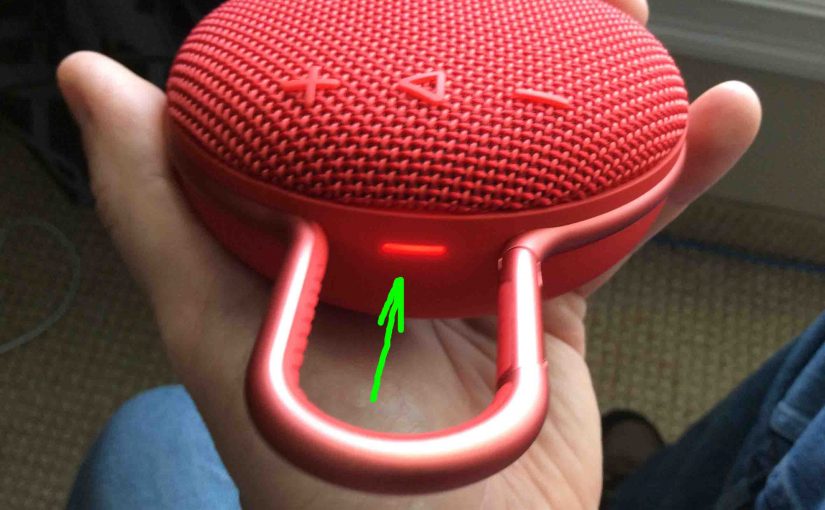
The status lamp lights up solid red on the 3 when you connect power. Now there is no battery status gauge however.
The red lamp means that charging is in progress, and it goes out when charging completes. However, there’s no way to tell how far along the charging is on this speaker model.
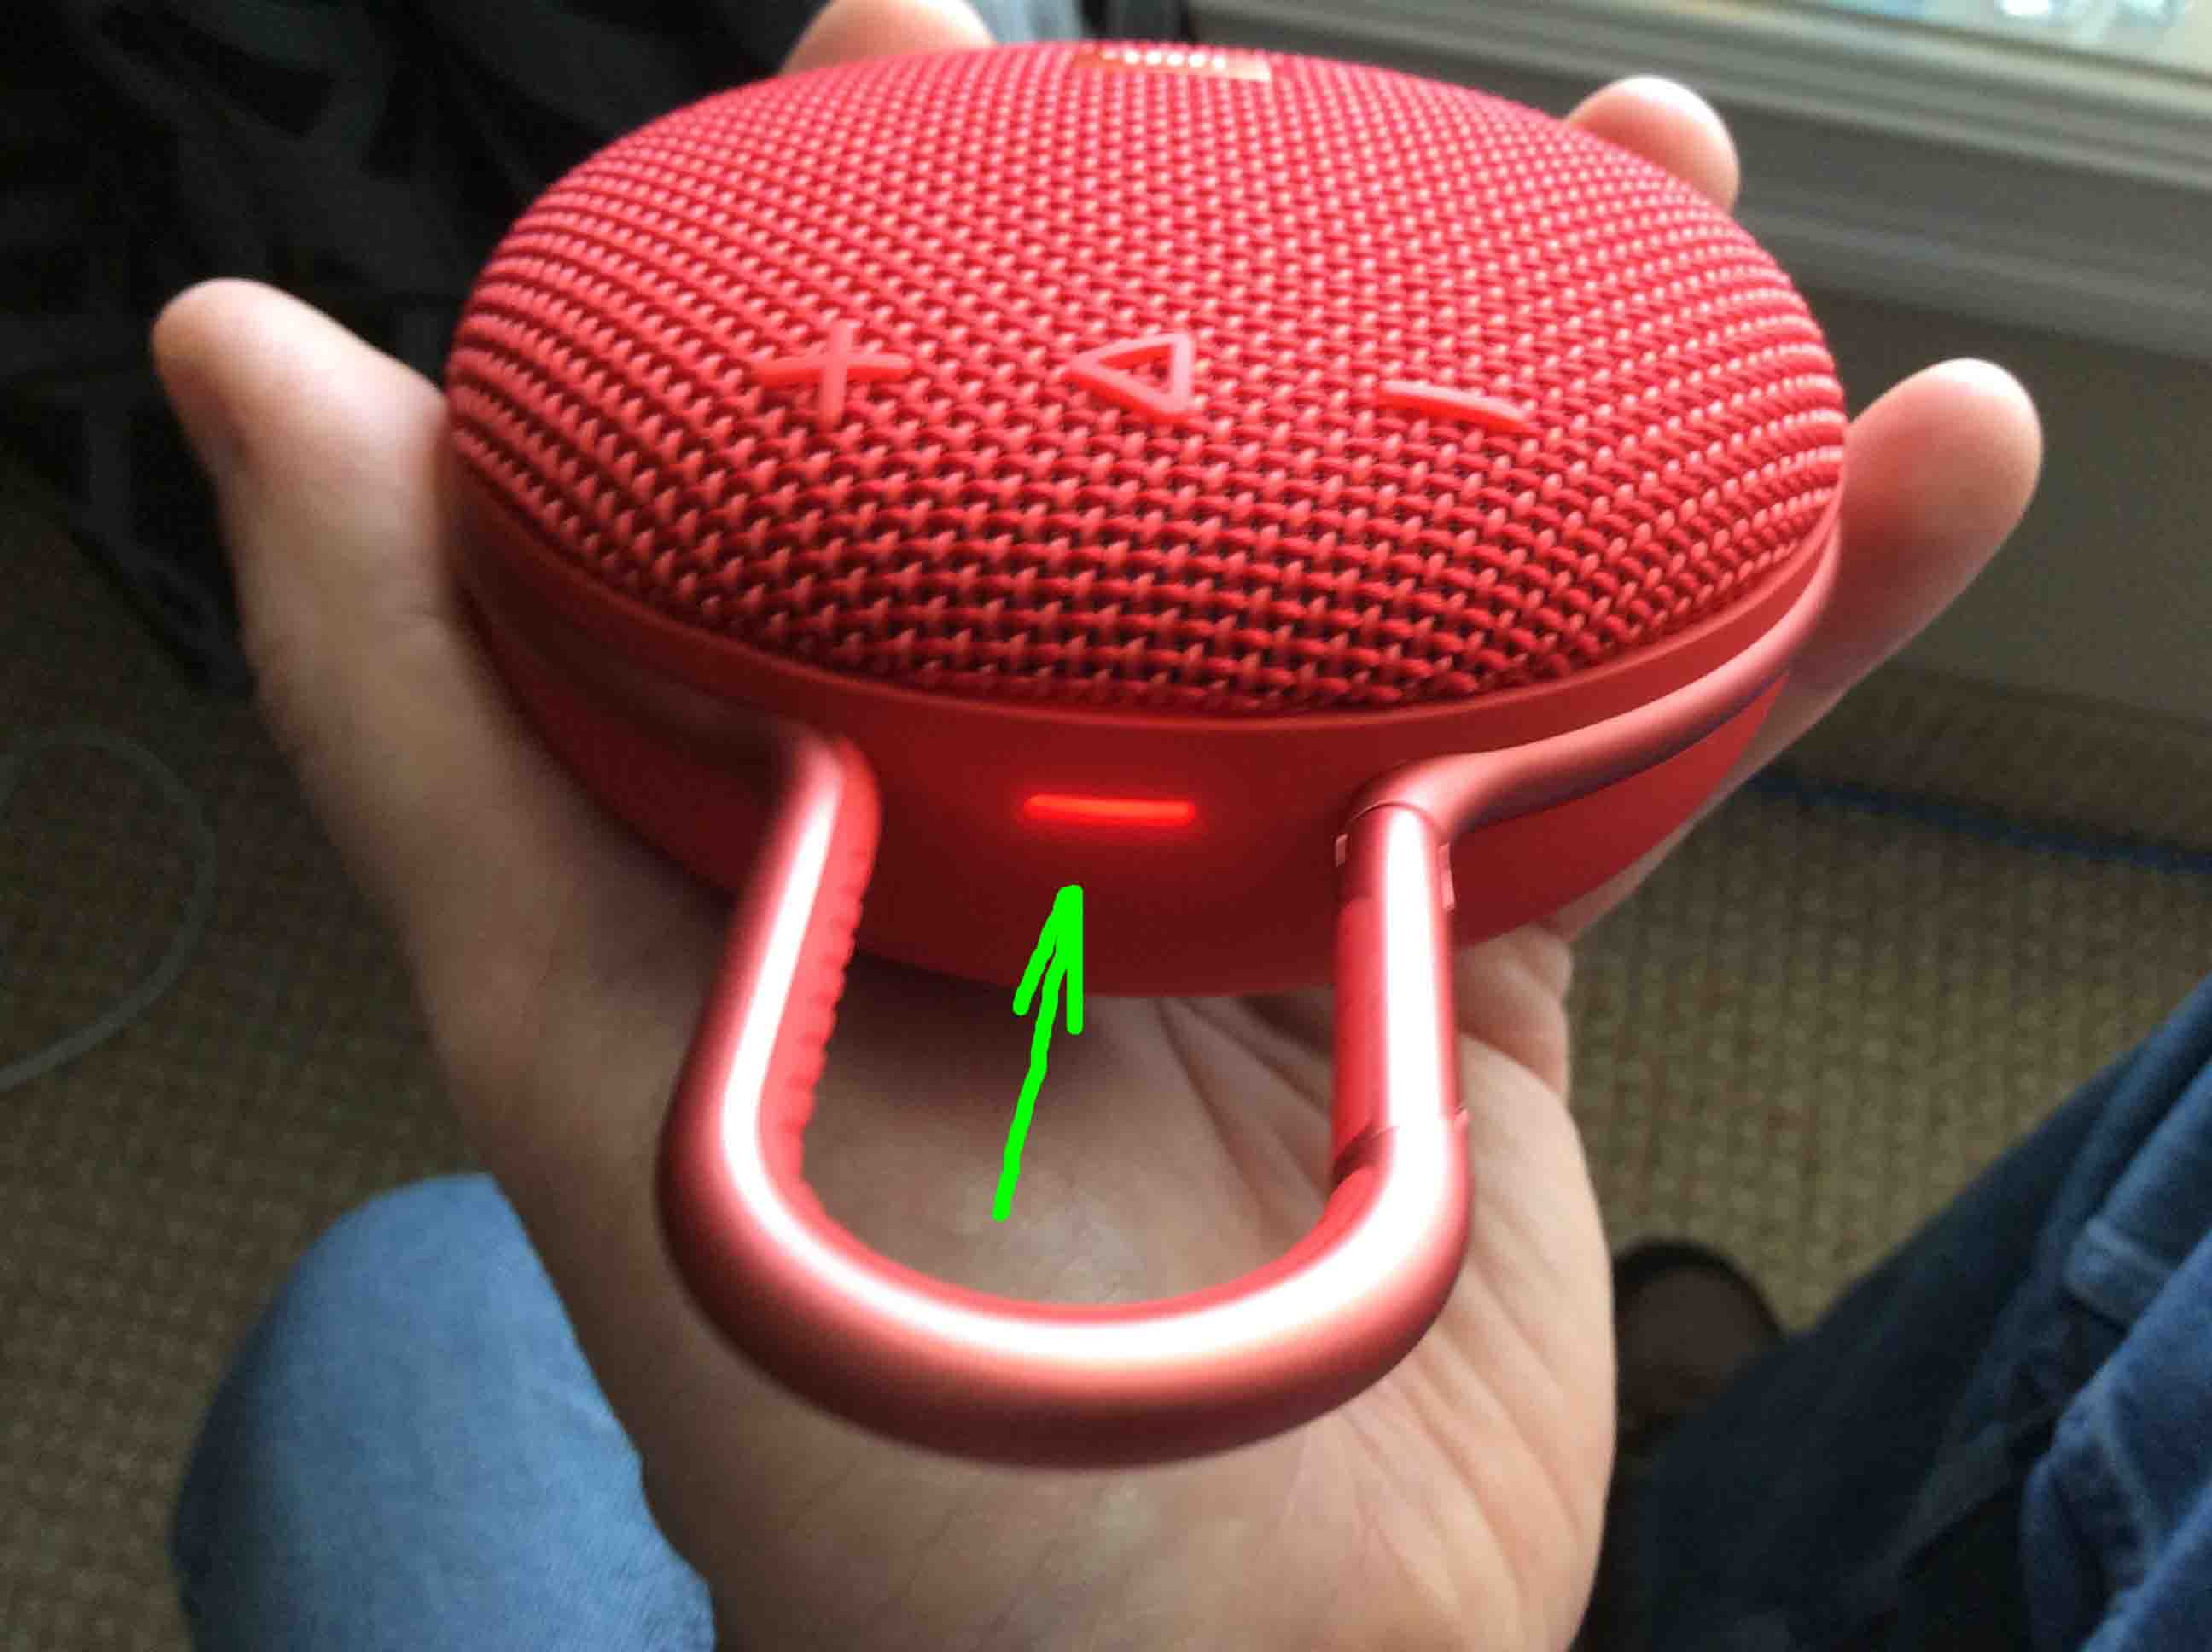
6. Let the JBL Clip 3 Charge Until the Red Light Go Out
Battery charging is complete when the solid red lamp goes dark.
7. Unplug the USB Cable
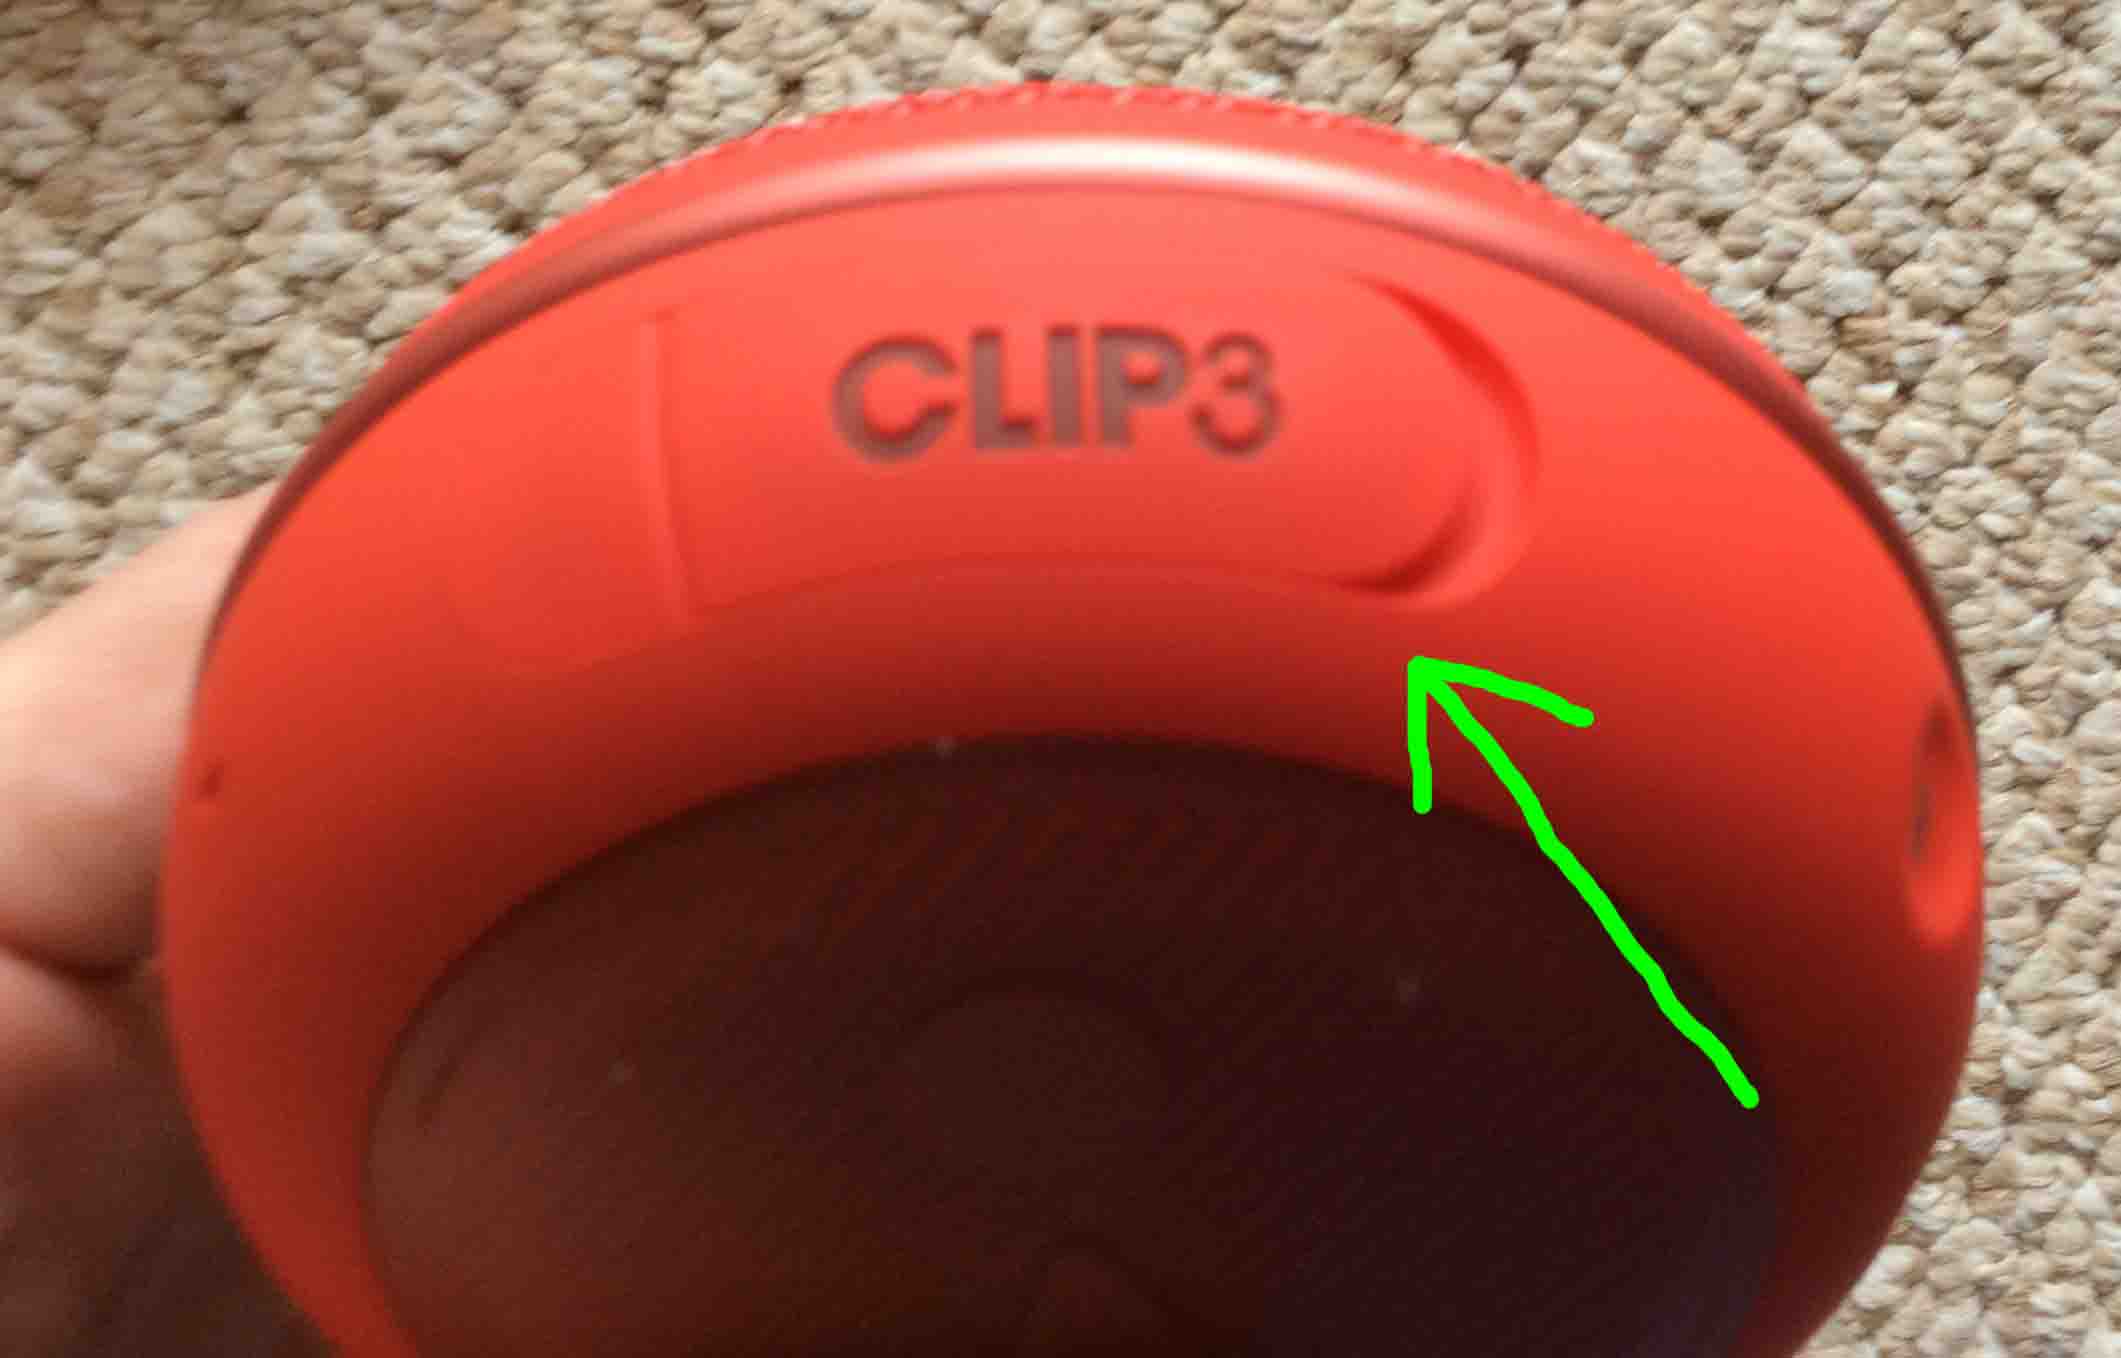
8. Fully Close the Waterproof Port Door
Note that unless you snap this flap securely, water could enter the port area. Then this could possibly damage the electronics inside. So, be sure to press the port door closed with enough force for best water resistance.
9. Done !
Finally, we have now fully charged the 3.
Repeat this process every ten to twelve hours of music play. Why? Because this helps keep its battery in top condition.