Picture of the JBL Flip 4 Bluetooth speaker with USB charge port highlighted.

How to Charge JBL Flip 4 Wireless Speakers

You can charge JBL Flip 4 wireless speakers conveniently via their hidden USB charge ports.  To summarize: First, select an adequate USB power adapter.  Why this?  Because the Flip 4 does not come with this as a standard accessory.

Plus, the Flip 4 needs a high power USB power source to charge fully in a reasonable amount of time.

Next, connect the orange micro USB cable between the Flip 4 and that adapter.  Then, plug the adapter into a working wall outlet.

Finally after a few to four hours, your JBL speaker fully charges, and you’ll be able to play it again for up to twelve hours before you must charge it again.
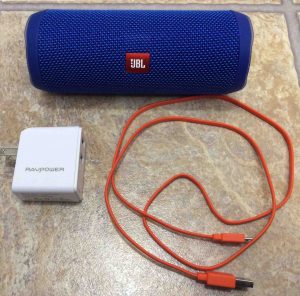
Picture of the JBL Flip 4 portable speaker with a RavPower USB charger and micro USB charge cable.
JBL Flip 4 portable speaker with a RavPower USB charger and micro USB charge cable.

How to Charge JBL Flip 4 Wireless Speakers

1. Choose Right Size Power Adapter

In this demo, we’re using the RavPower 24 watt dual port USB charger adapter, as shown next.

Picture of the RavPower 24W dual USB wall charger, showing its specs label side.
RavPower 24W dual USB wall charger, showing its specs label side.

2. Open the Port Cover on the JBL Flip 4

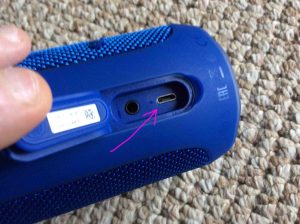
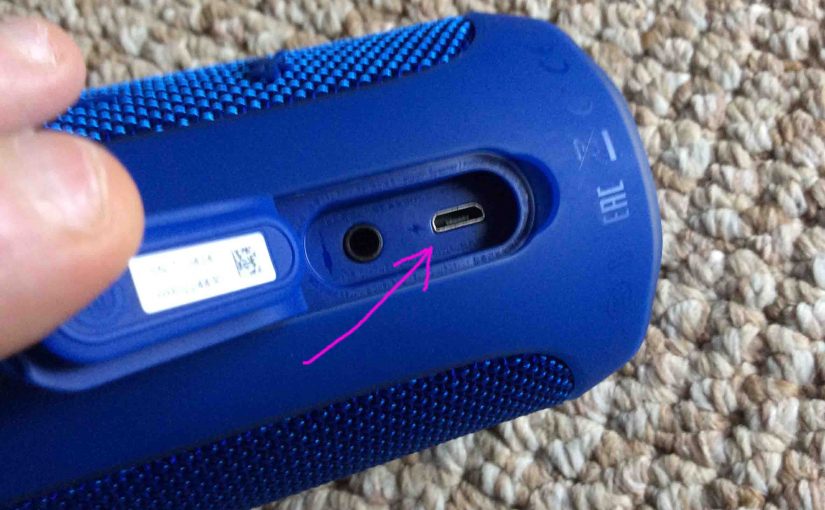
Use a penny or a dime to pry open the waterproof seal port cover on the Flip 4.  This exposes the micro USB charging port inside, as shown next.

Picture of the JBL Flip 4 Bluetooth speaker with USB charge port highlighted.
JBL Flip 4 Bluetooth speaker with USB charge port highlighted.

3. Plug in the Micro USB Cord to the Flip 4 to Continue with How to Charge JBL Flip 4

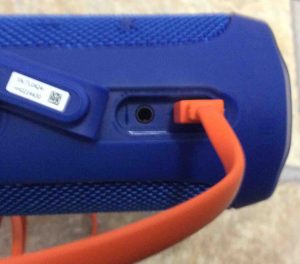
Then, plug the small end of the orange micro USB charge cord into the matching micro USB port in the speaker, as shown next.

Picture of the speaker with its orange micro USB charge cable inserted.
The speaker with its orange micro USB charge cable inserted.

4. Plug the Other End of the USB Cord into your USB Power Adapter

Next, connect the A end of the USB charge cable to the power adapter, as pictured next.

Picture of the RavPower portable USB charger with a micro USB cable plugged into one of its dual USB ports.
RavPower portable USB charger with a micro USB cable plugged into one of its dual USB ports.


5. Plug the AC USB Power Adapter into a Working Wall Outlet

Now that the Flip 4 and our RavPower adapter are connected, we plug the RavPower into a functioning AC outlet, as shown next.  In this demo, we’ve plugged ours into a surge protector power strip.

Picture of the speaker, charging from a RavPower USB AC charger.
The speaker, charging from a RavPower USB AC charger.

At least one of the battery status lamps lights up on the Flip 4 when you apply enough USB power.  There are five lamps that light in succession as the speaker battery charging progresses, as shown in the next picture.

Picture of the battery charge status gauge, showing the wireless speaker charging.
The battery charge status gauge, showing the wireless speaker charging.

6. Let the Flip 4 Charge Until All Battery Power Lights Go Out to Continue with How to Charge JBL Flip 4

Battery charging is complete when all but the last of the battery status lights light solid.  The last one continues to blink for several minutes.

This next picture shows the speaker just before completing a full charge cycle. Note that all the lamps in the battery status gage are glowing.  However, the last one continues to blink.
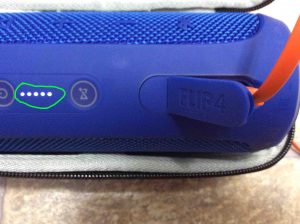
Picture of the battery charge status gauge, showing the wireless speaker fully charged.
The battery charge status gauge, showing the wireless speaker fully charged.

The battery recharge cycle finishes when all battery status gage lights go out, as shown next.

Showing charging done, with all lights out on battery status gauge.

7. Unplug the USB Charge Cable from the  JBL Flip 4 

Picture of the JBL Flip 4 Bluetooth speaker with USB charge port highlighted.
JBL Flip 4 Bluetooth speaker with USB charge port highlighted.

8. Fully Close the Waterproof Port Door

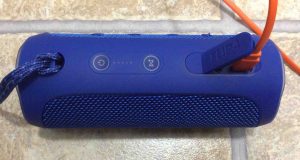
Note that unless this flap is snapped securely and completely in place, water could enter the port area, possibly damaging the Flip 4 electronics inside.  So, be sure to press the port door closed with enough force to properly seat it, for full water resistance.

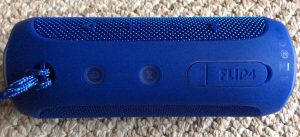
Top view of the speaker, showing the controls, with the port door fully closed.
Top view of the speaker, the controls, with the port door fully closed.

9. Done with How to Charge JBL Flip 4 !

We have now fully charged our JBL Flip 4 wireless Bluetooth speaker.  Note that the battery charge status gage just after turning on the Flip 4 after a full recharge.  All lamps are aglow, meaning that the speaker is current fully charged.

Repeat this process every ten to twelve hours of music play through the Flip 4, to keep its battery in top condition. We charge ours when the battery status gage lights show only one light glowing.
Picture of the JBL Flip 4 wireless speaker, showing all lamps lit on its battery status gauge, circled in yellow. The gauge shows that the battery is fully charged.
JBL Flip 4 wireless speaker, showing all lamps lit on its battery status gauge, circled in yellow. The gauge shows that the battery is fully charged.

Related Posts to How to Charge JBL Flip 4

  1. How to Charge JBL Go Bluetooth Speaker
  2. Flip 4 JBL Charging Indicator, How to Read to See How Full the Battery Is
  3. How to Charge Wonderboom Speaker

Other Posts About the JBL Flip 4 Bluetooth Speaker

  1. Hard Reset JBL Flip 4 Bluetooth Speaker Instructions
  2. Review of the JBL Flip 4 Portable Waterproof Speaker
  3. JBL Flip 4 Specs, Specifications for this Speaker
  4. How to Restart JBL Flip 4 Bluetooth Speaker
  5. Pairing Instructions for Flip 4 JBL Speaker

References for How to Charge JBL Flip 4

  1. JBL Flip 4 Portable Bluetooth Speaker, Black, at BestBuy.com

Revision History

  • 2020-05-05: Added more tags.
  • 2019-04-22: Added tags.  Fixed some subject targeting issues.
  • 2018-05-24: First published.