This piece shows how to connect the Echo Studio smart speaker to a WiFi network. Plus, this routine works for brand new Studios as well as used ones that you want to put on another network or account. Note though that in certain circumstances, your Studio may set itself up automatically if the following conditions are met:
- You have an Amazon account.
- You have at least one Alexa WiFi device set up on that account, such as a smart speaker.
- Your Echo Studio is in range of the WiFi network which serves that Alexa device.
After plugging the Echo Studio into AC power, give it a couple minutes, and if it announces that setup is complete, then you’re good to go. But if not, follow the instructions below to get it up and running.
Before you Start on How to Connect Echo Studio to WiFi
You need the following to connect your smart speaker to WiFi:
1. A Smart Mobile Device
You’ll need to run the Alexa app on a compatible mobile phone or tablet computer. For this demonstration, we’re using an iPad Air tablet.
2. A WiFi Connection
The Echo Studio does not come equipped with an RJ45 Ethernet port. So, you must connect it to the Alexa service through a WiFi network. Further, that network must have internet access, and it must be in range of the speaker when connecting.
3. The Alexa App
Get the Alexa app in the Google Play (Android) store, or the App Store (iOS). Download and install the right version for your device, and then log into it with your Amazon account credentials. If you just created an account, be sure to use those credentials.
4. An Amazon Account
If you do not already have an Amazon account for your Studio, then get one at https://amazon.com/ . Follow the prompts there to set one up.
Or, when you run the Alexa app in Step 2 under the Echo Studio Setup Instructions, Step-by-Step below, and you’ve never signed into the app with a valid account, Alexa will ask you to sign in, as shown next.
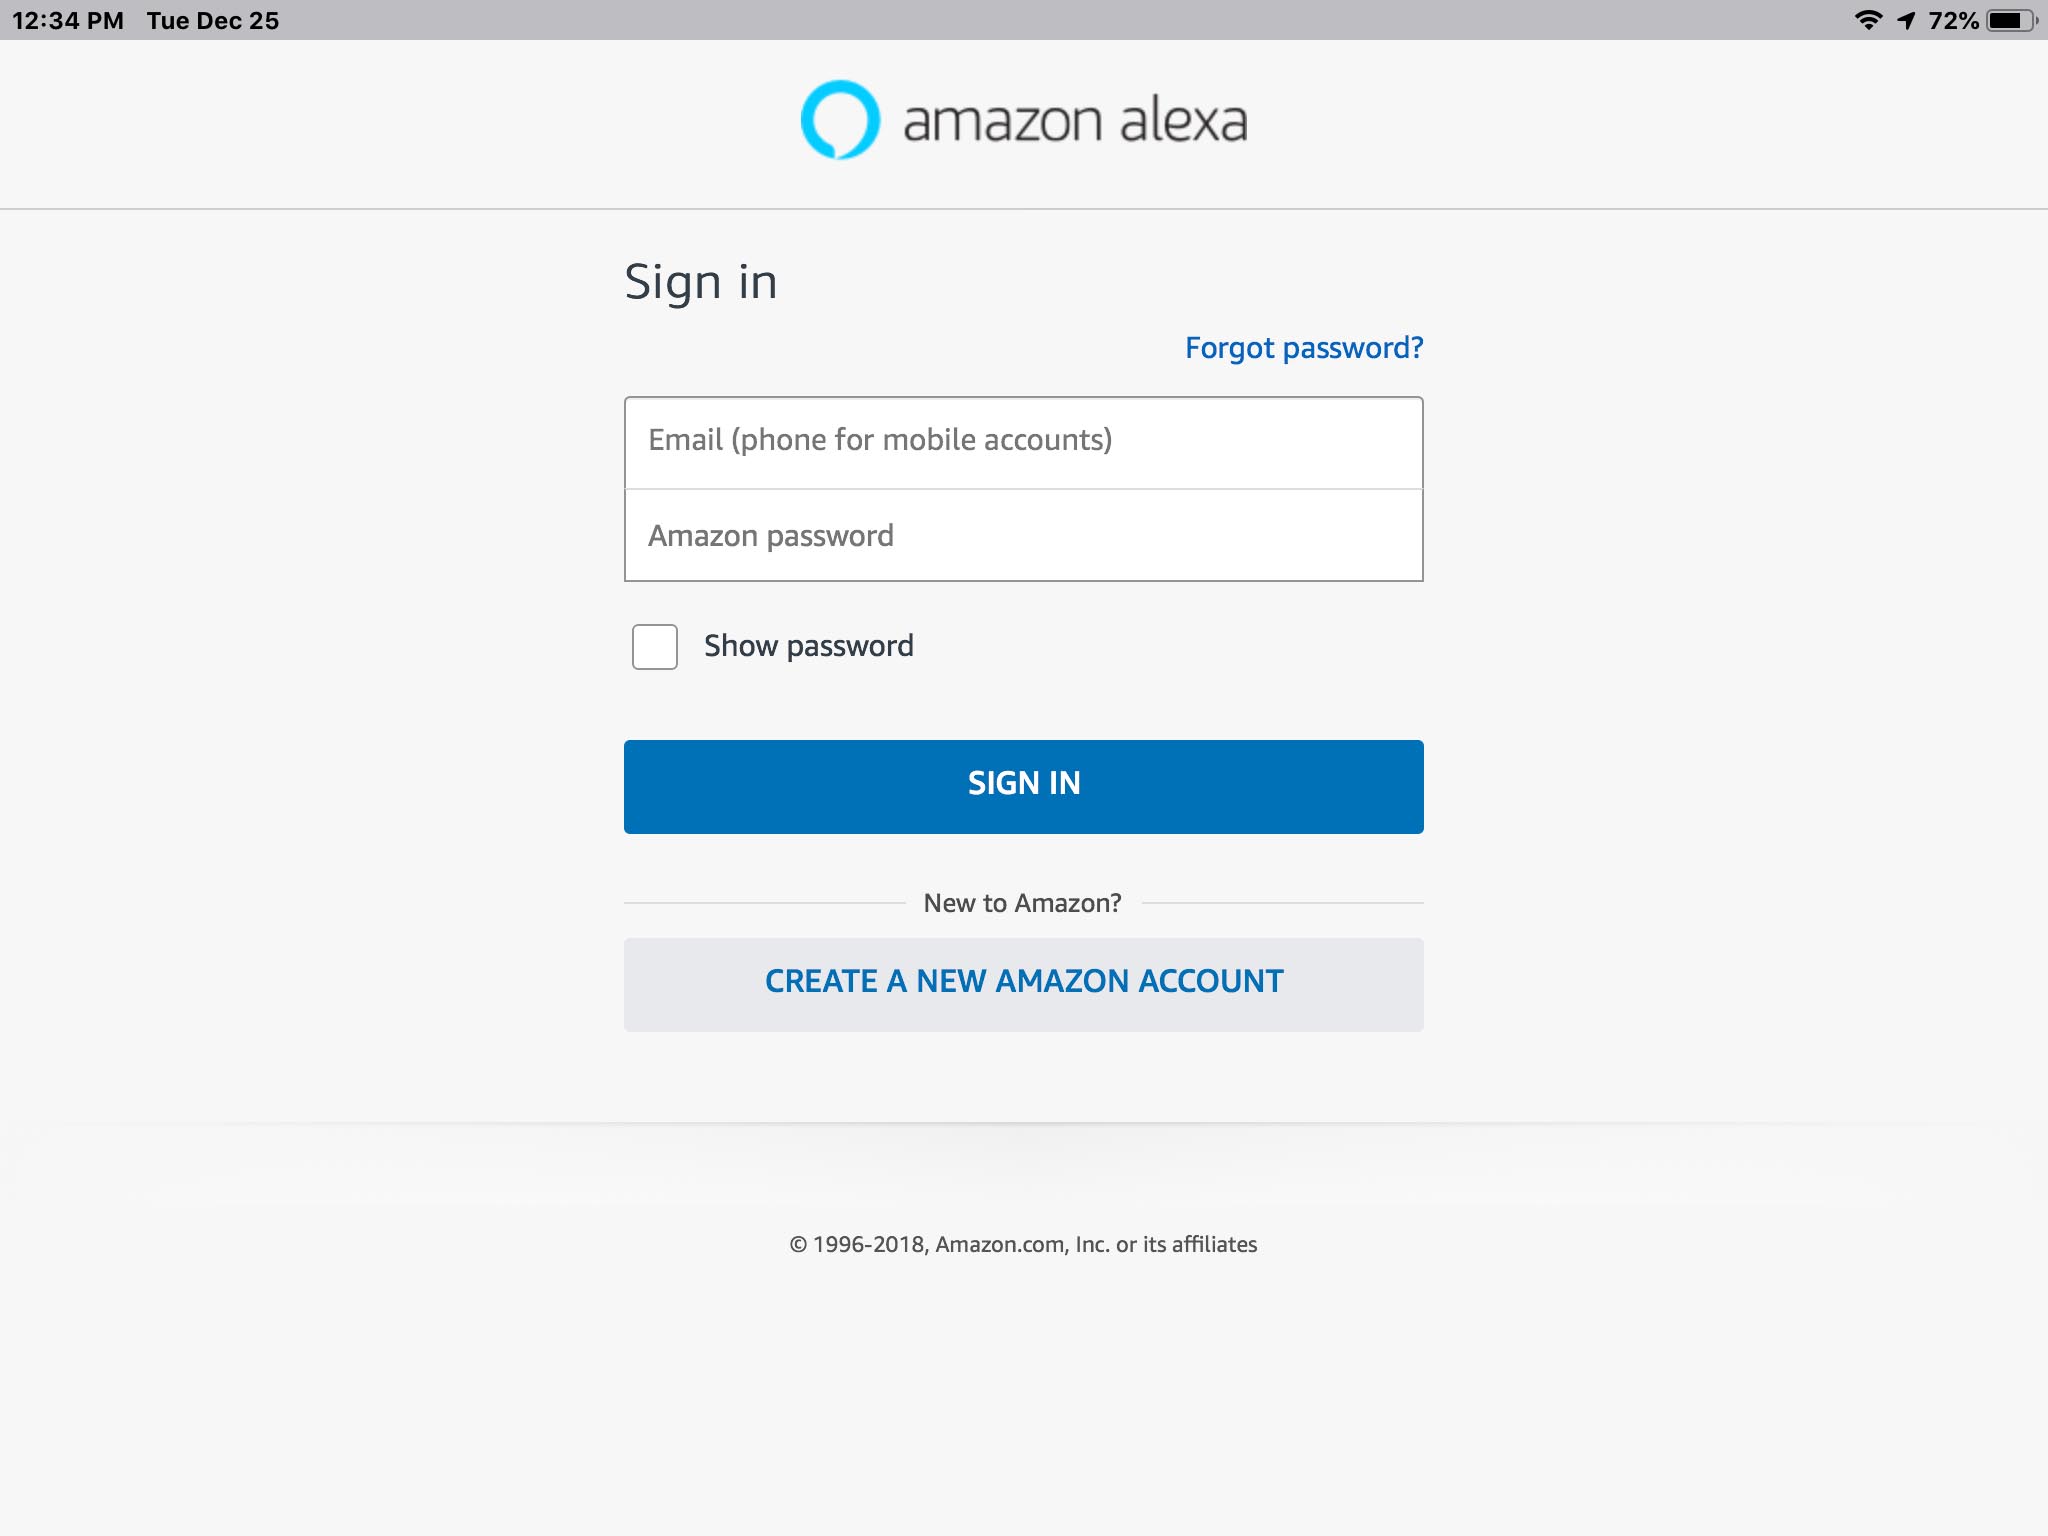
There, the app lets you create a new account if you don’t already have one. If you do not, then press the Create a New Amazon Account button in the lower center portion of the login screen. Then, the app walks you through that account setup routine. Note that you must have an account to run the following steps.
5. Bluetooth
Turn on Bluetooth on your mobile device. Why? Because the app uses Bluetooth to find nearby Amazon Echo devices in some situations.
How to Connect Echo Studio to WiFi Summary
- Connect the Echo Studio to household power.
- Next, put the smart speaker into Setup mode.
- Run the Alexa app.
- Then, enter Amazon account Id and Password if needed.
- If prompted to add a new device, skip ahead to step 12.
- If not prompted, then on the app’s home screen, tap the More menu item.
- Tap the Add a Device option.
- Next, tap the Amazon Echo device type.
- Touch the Echo Studio device item.
- Tap the Yes bar.
- Then, tap the listed Echo Studio to setup.
- Choose the WiFi network to connect your Echo Studio to.
- Next, Enter WiFi password if needed.
- Wait for your Echo Studio to Connect with your WiFi network.
- Tap the blue Continue bar.
- Next. tap the blue Continue bar.
- Pick the room where you will put your Echo Studio.
- Choose the street address where your Echo Studio will be located.
- Then, tap the blue Continue bar.
- Tap the blue Done bar.
- Finally, test out your Echo Studio.
How to Connect Echo Studio to WiFi, Step-by-Step Instructions
1. Plug your Echo Studio into AC Power
Plug the included AC cord into the device.
Plug the other end of that cable into an AC outlet, and plug the adapter into a working outlet. The speaker then boots up, as shown next.

2. Now Put your Alexa Echo Studio into Setup Mode
Now, your Studio is probably already displaying its orange light ring on the top of the unit, as shown next. If you see that orange lighted ring, then skip ahead to the next step. Or if not, then work through this step.
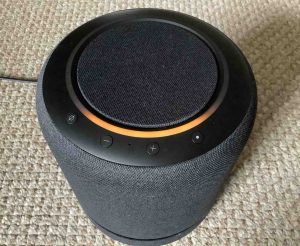
After connecting a new Echo Studio to AC power, the unit typically enters Setup mode automatically. You will also hear it announce this. and as mentioned, the ring will turn orange and display a spinning pattern.
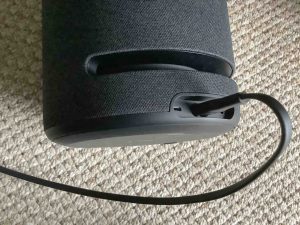
But if this is not a new Echo Studio, it may not right away go into Setup mode. So in that case, you must reset it. In summary, to reset, press and hold the Action button, as pointed out in the next picture, until the Studio starts resetting. After this factory reset, the unit then enters Setup mode.

At any rate, how ever you get it into Setup, once you have it there, move on to the next step.
3. Then, Run the Alexa App
Find the Alexa app on your mobile device, as we did on the iPad Air device, as shown in the next picture.
Tap the Alexa app icon to run it. If this is your first time starting the app, it will prompt you for your Amazon account and password. Again, if you just set up a new account above, log into the app with those account credentials.
Plus, if this is your first Echo device, the app will ask you to set up a new device.
4. Enter Account Id and Password to Continue with How to Connect Echo Studio to WiFi
Should the Alexa app prompt, enter your Amazon account details. Doing this will sign you in via the Alexa app. The app then remembers your account information the next time you run it, so that you won’t have to punch in this data every time.
5. If you are Prompted to Connect a New Echo Studio Device…
The later versions of the Alexa app are pretty good at detecting new devices nearby. So upon starting the app, you may very well see the following screen.
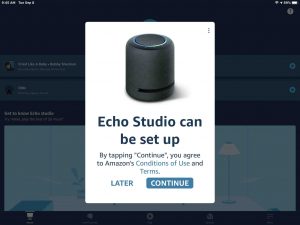
If so, tap the blue Continue button, and then skip ahead to step 12 below. As seen in that step, the system then prompts you to select the WiFi network.
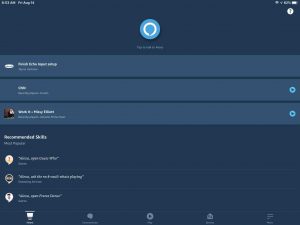
6. If you are Not Prompted to Connect a New Echo Studio Device…
If the app does not detect your new Echo Studio right away, it displays its Home screen. We got the Home page pretty quickly, since we have other devices on our Amazon account, as shown next.
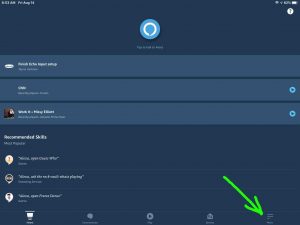
7. Tap the More (Hamburger) Button to Continue with How to Connect Echo Studio to WiFi
Find this called out by the green arrow in the last picture.
Hitting the More control brings up the Alexa app’s main menu, as shown next.
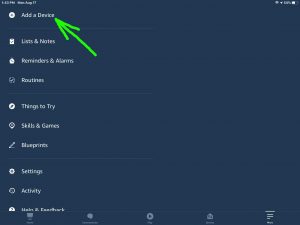
8. Tap the Add a Device Item
Visit the next page in the process by tapping the Add a Device menu item (left top of the screen), highlighted by the green arrow in the last picture.
This brings up the Setup->What type of device are you setting up? screen, as shown next.

9. Tap the Amazon Echo Device Type
Tapping the Amazon Echo item brings up the first Setup screen for Echo devices, as shown next, where you pick which model of the Echo you’re connecting. In this case, we want to connect an Echo Studio device. So, we’ve pointed out that option with a green arrow in the next picture. You may have to scroll down a bit to see this option on your mobile device.
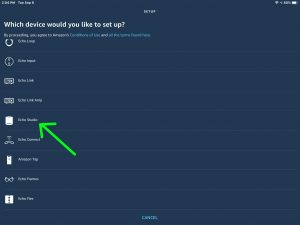
10. Tap the Echo Studio Device Item to Continue with How to Connect Echo Studio to WiFi
Touching the Echo Studio device brings up the Echo Studio Set Up screen, as shown next.
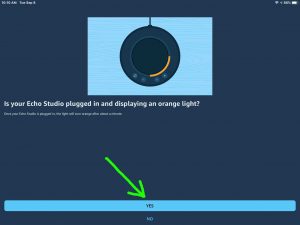
11. Tap the Yes Bar
Touch the blue Yes bar.
This starts the app scanning for new Amazon Echo devices to connect, as shown next.
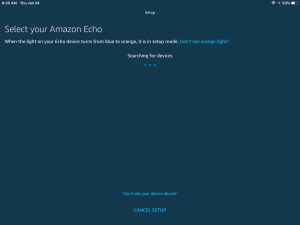
Now at this point, the app is waiting to hear from the device you’re connecting. It will hear it then, when you place that device in Setup mode.
If your Echo Studio is indeed in Setup, then after a brief pause, Alexa should find it, as ours did, and display it in a found-devices list, as shown next.
If Alexa does not find your Studio, make sure you have Bluetooth turned on in your mobile device that’s running the app. Turn that on, and then check again that your speaker displays the orange light ring.
Note that the Amazon Echo Studio only stays in Setup mode for several minutes, and times out after that. Should that happen, then just press the Action button until the orange light appears, or unplug the speaker from power for a few seconds and plug it back in. This should re establish Setup mode.
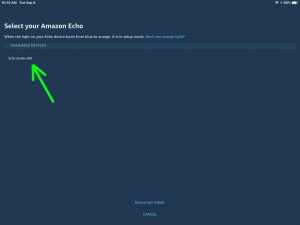
12. Tap the Listed Amazon Echo Studio to Connect
In this demo, we tap the Echo Studio-2RK device, pointed at by the green arrow in the last picture above.
This brings up the Select your Wi-Fi Network page, as shown next.
Just prior to the app showing this screen, it runs a WiFi scan from the device you chose, for in-range WiFi networks that said device sees. Then, it’s this list that the app displays for you.
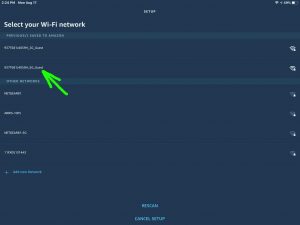
13. Choose the WiFi Network to Connect your Echo Studio With
Tap the WiFi network you want your speaker to sign into. In our case, we’re choosing the 937T681J4059H_5G_Guest network. That one is pointed out by the green arrow in the last picture.
14. Enter the Password for That WiFi Network
Tapping a WiFi network may ask you to enter the password for that network. If it does, type it in.
Skip down to the next step if you don’t see this prompt. Indeed, the app may not prompt you, if you’ve previously saved this network’s information to your Alexa account. This is true for us in this scenario. So Alexa did not ask us for the password.
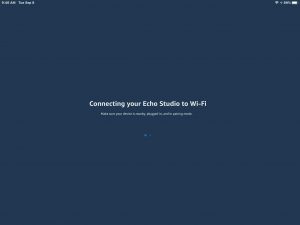
15. Wait for your Echo Studio to Connect to your WiFi Network
While your speaker tries to set itself up on the WiFi network you picked above, the app shows the Connecting your Echo to Wi-Fi screen, as pictured next.
After some seconds, and if all goes well, you see the following screen. This shows that the Echo Studio successfully connected to your WiFi network.
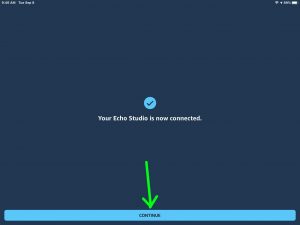
Also, the Echo Studio then makes a chime sound, and announces that it’s ready for use.
But if it does not connect and you get errors, follow any instructions that the app displays. If you entered the wrong WiFi password, the app prompts you to re-enter it.
Now if the problem connecting is network related, you may have to troubleshoot that issue on your router. In that case, once you’ve fixed the problem, try rerunning this routine again. We recommend that you close the Alexa app and start it anew first. Then, again, be sure that your Alexa Studio is in Setup mode before doing the setup routine again.
16. Tap the Blue Continue Bar to Continue with How to Connect Echo Studio to WiFi
Touching Continue brings up the Choosing a Location for your Echo Studio page, as pictured next.

17. Tap the Blue Continue Bar
Touching Continue then brings up the Which room is your Echo Studio In prompt, as shown next.
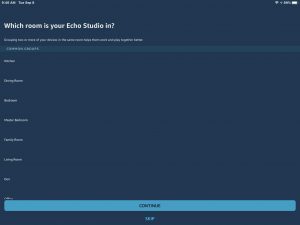
18. Choose the Room Where you will Place the Echo Studio
In this demo, we tapped the Bedroom choice, as shown in the next picture. Note that a check mark appears to the right of the choice you make once you touch that selection.
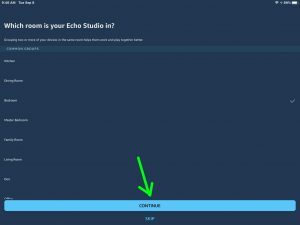
19. Tap the Blue Continue Bar to Continue with How to Connect Echo Studio to WiFi
Touching the Continue bar then brings up the Where is your Echo Studio page, as shown next. The system is prompting you for the street address where you’ll be using your speaker, as shown in the next screenshot.
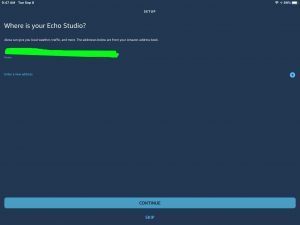
20. Tap the Street Address where your Echo Studio is Now Connected
The default address, which is filled in, and which we covered up in our demo, is shown above. This is the street address listed on your Alexa account.
Review this address, and if it’s the one you want, tap it. A check mark should then appear to the right of it, as shown in the next picture.
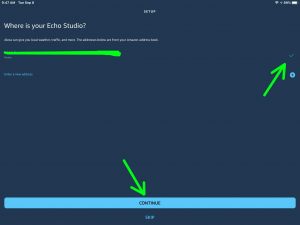
If the listed street address is not not the one you want, then tap the Enter a new address link on this screen, and follow the directions to type in the street address you want.
Once done, the system returns you to this screen, except that now, the correct street address for your speaker should be listed. Tap that, and then move on to the next step.
21. Tap the Blue Continue Bar
Once you bump the Continue strip, your Echo Studio speaker is now setup, and ready to answer voice commands. The system confirms this by displaying the following screen.
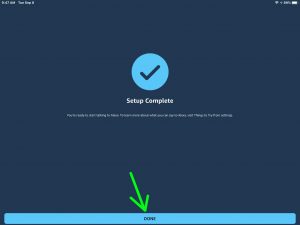
22. Tap the Blue Done Bar to Continue with How to Connect Echo Studio to WiFi
Then, the Alexa app takes you back to its Home screen, as shown next.
You may now close the Alexa app if you wish.
23. Test Out your Echo Studio
Your Amazon Echo Studio is now ready to accept and perform voice commands and answer questions once the lighted orange ring darkens after setup. Try asking it some questions like:
- What’s the weather?
- What time is it?
- Give me my flash briefing.
- How are you today?
- Sing happy birthday.
- Tell me a joke.
… and so on. Of course, be sure to precede each question with your Echo wake word. The default is Alexa. Or it could be Computer, Amazon, or Echo if you changed it.
24. Done with How to Connect Echo Studio to WiFi !
Enjoy this Alexa device. It’s a truly hi-fi sounding stereo streamer by itself, or when you pair it with another Echo Studio to form a stereo pair.
Other Posts About the Echo Studio Device
- Alexa Echo Studio Setup Instructions
- How to Reset Alexa Echo Studio, Hard Factory Reset
- Echo Studio Buttons Guide, Meanings Functions Codes
Related Posts to How to Connect Echo Studio to WiFi
- How to Connect Amazon Alexa to WiFi
- How to Connect Sony SRS XB12 to Alexa Echo Devices
- Connecting JBL Xtreme 2 to Alexa Echo
- How to Connect Echo Dot 2nd Generation to WiFi
- How to Connect Two Wonderbooms, Pair Together
References for How to Connect Echo Studio to WiFi
Revision History
- 2020-09-08: First published.