Sharp Aquos Smart TV, displaying the Network Setup screen.
Here we show how to connect a Sharp Aquos TV to WiFi. This allows it to run apps, as a tablet or smart phone does. Many of these need access to the internet via either an Ethernet cable or a WiFi connection. In this demo, we cover the WiFi connect option.
Now since we’re not using Ethernet here, we must connect the Aquos to WiFi for internet services. Or, you may have to connect if you update your router or add more security to your network. So the info for logging into your WiFi may change. Then after such an update, the Aquos can no longer connect. Then it loses its internet access until you connect it again to WiFi. So in this piece, we demo how to connect the Sharp Aquos TV to WiFi, to restore its full function.
Aquos high definition televisions typically get that access for their built-in streaming apps via a WiFi wireless network. This means that when you first set up this TV, you must program the WiFi details into it. Then, the TV stores this data, and uses it to log into the network later.
A Sharp Aquos HD TV does not let you know right away about failed WiFi connections. Instead, you find about them when you run an internet based app like Netflix or Hulu. So, you may not see for some time that it has lost its WiFi link. This could happen if you spend most of your time watching regular or HD channels, as shown above.
But when you do access internet-enabled apps, you’ll notice a problem. In the Netflix case for example, the system may tell you that the network connection is currently down. Then it prompt you to try logging into Netflix again. Or, it may just throw up the Netflix splash screen, and then seem to just hang or lock up. Exiting the app and restarting does not clear this up without a working WiFi connection in place. So when an app repeatedly fails to run, this likely means that something is wrong with the television’s WiFi connection. Thus, we cover below how to set up that connection anew.
Follow the routine below to deduce the problem and to connect the Sharp Aquos TV to working WiFi.
Each app may act differently to a lost WiFi connection. Plus, these symptoms often appear for other reasons as well. So to check that your television has indeed lost WiFi, bring up the network status screen as follows.
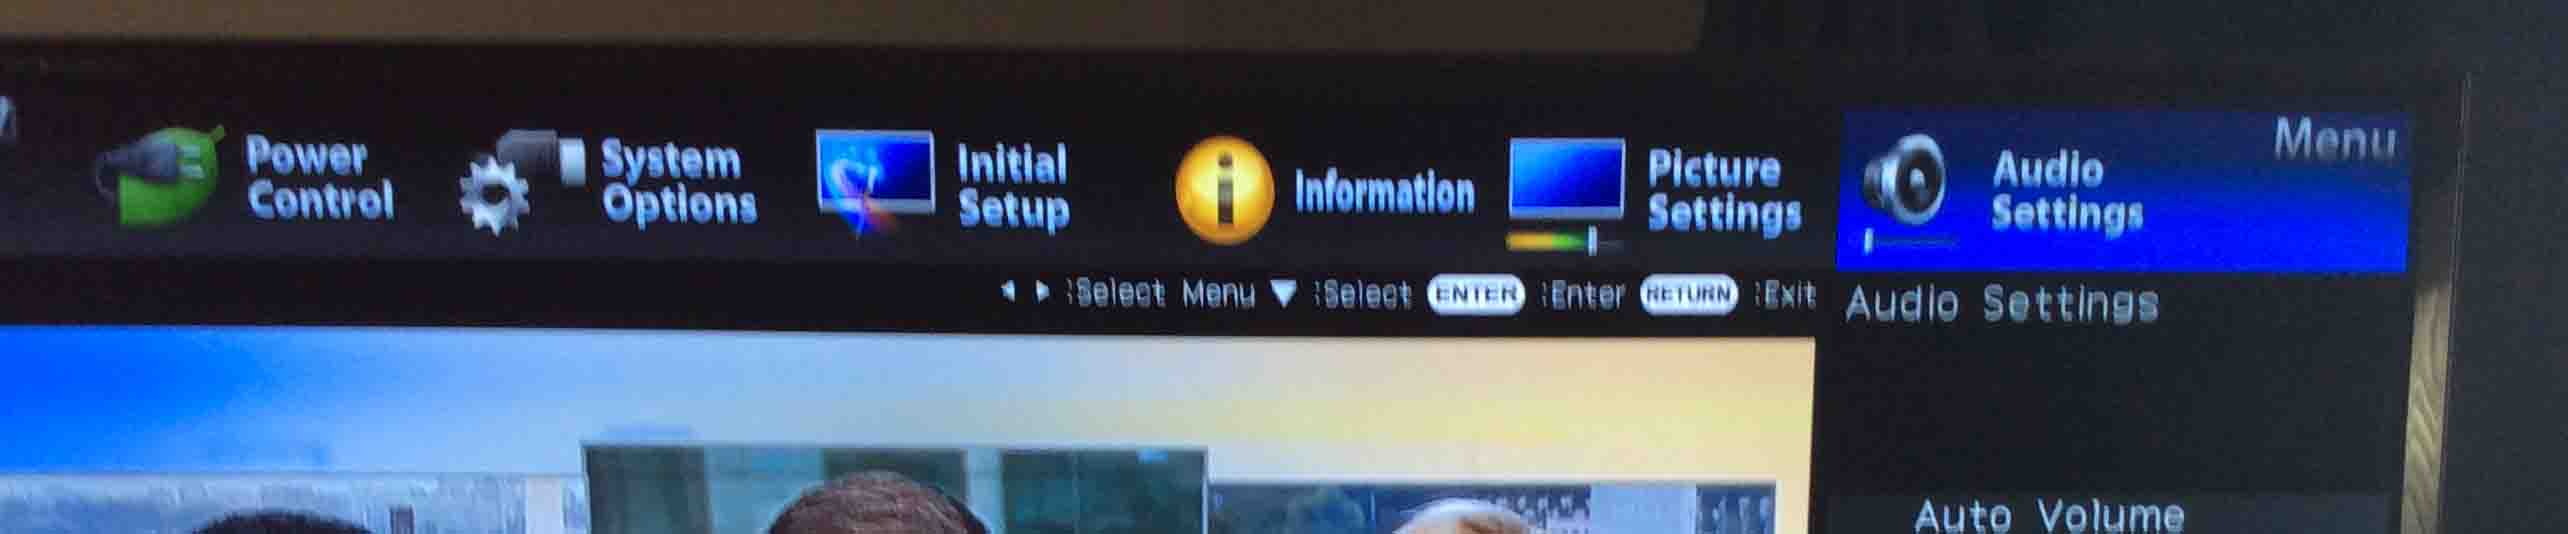
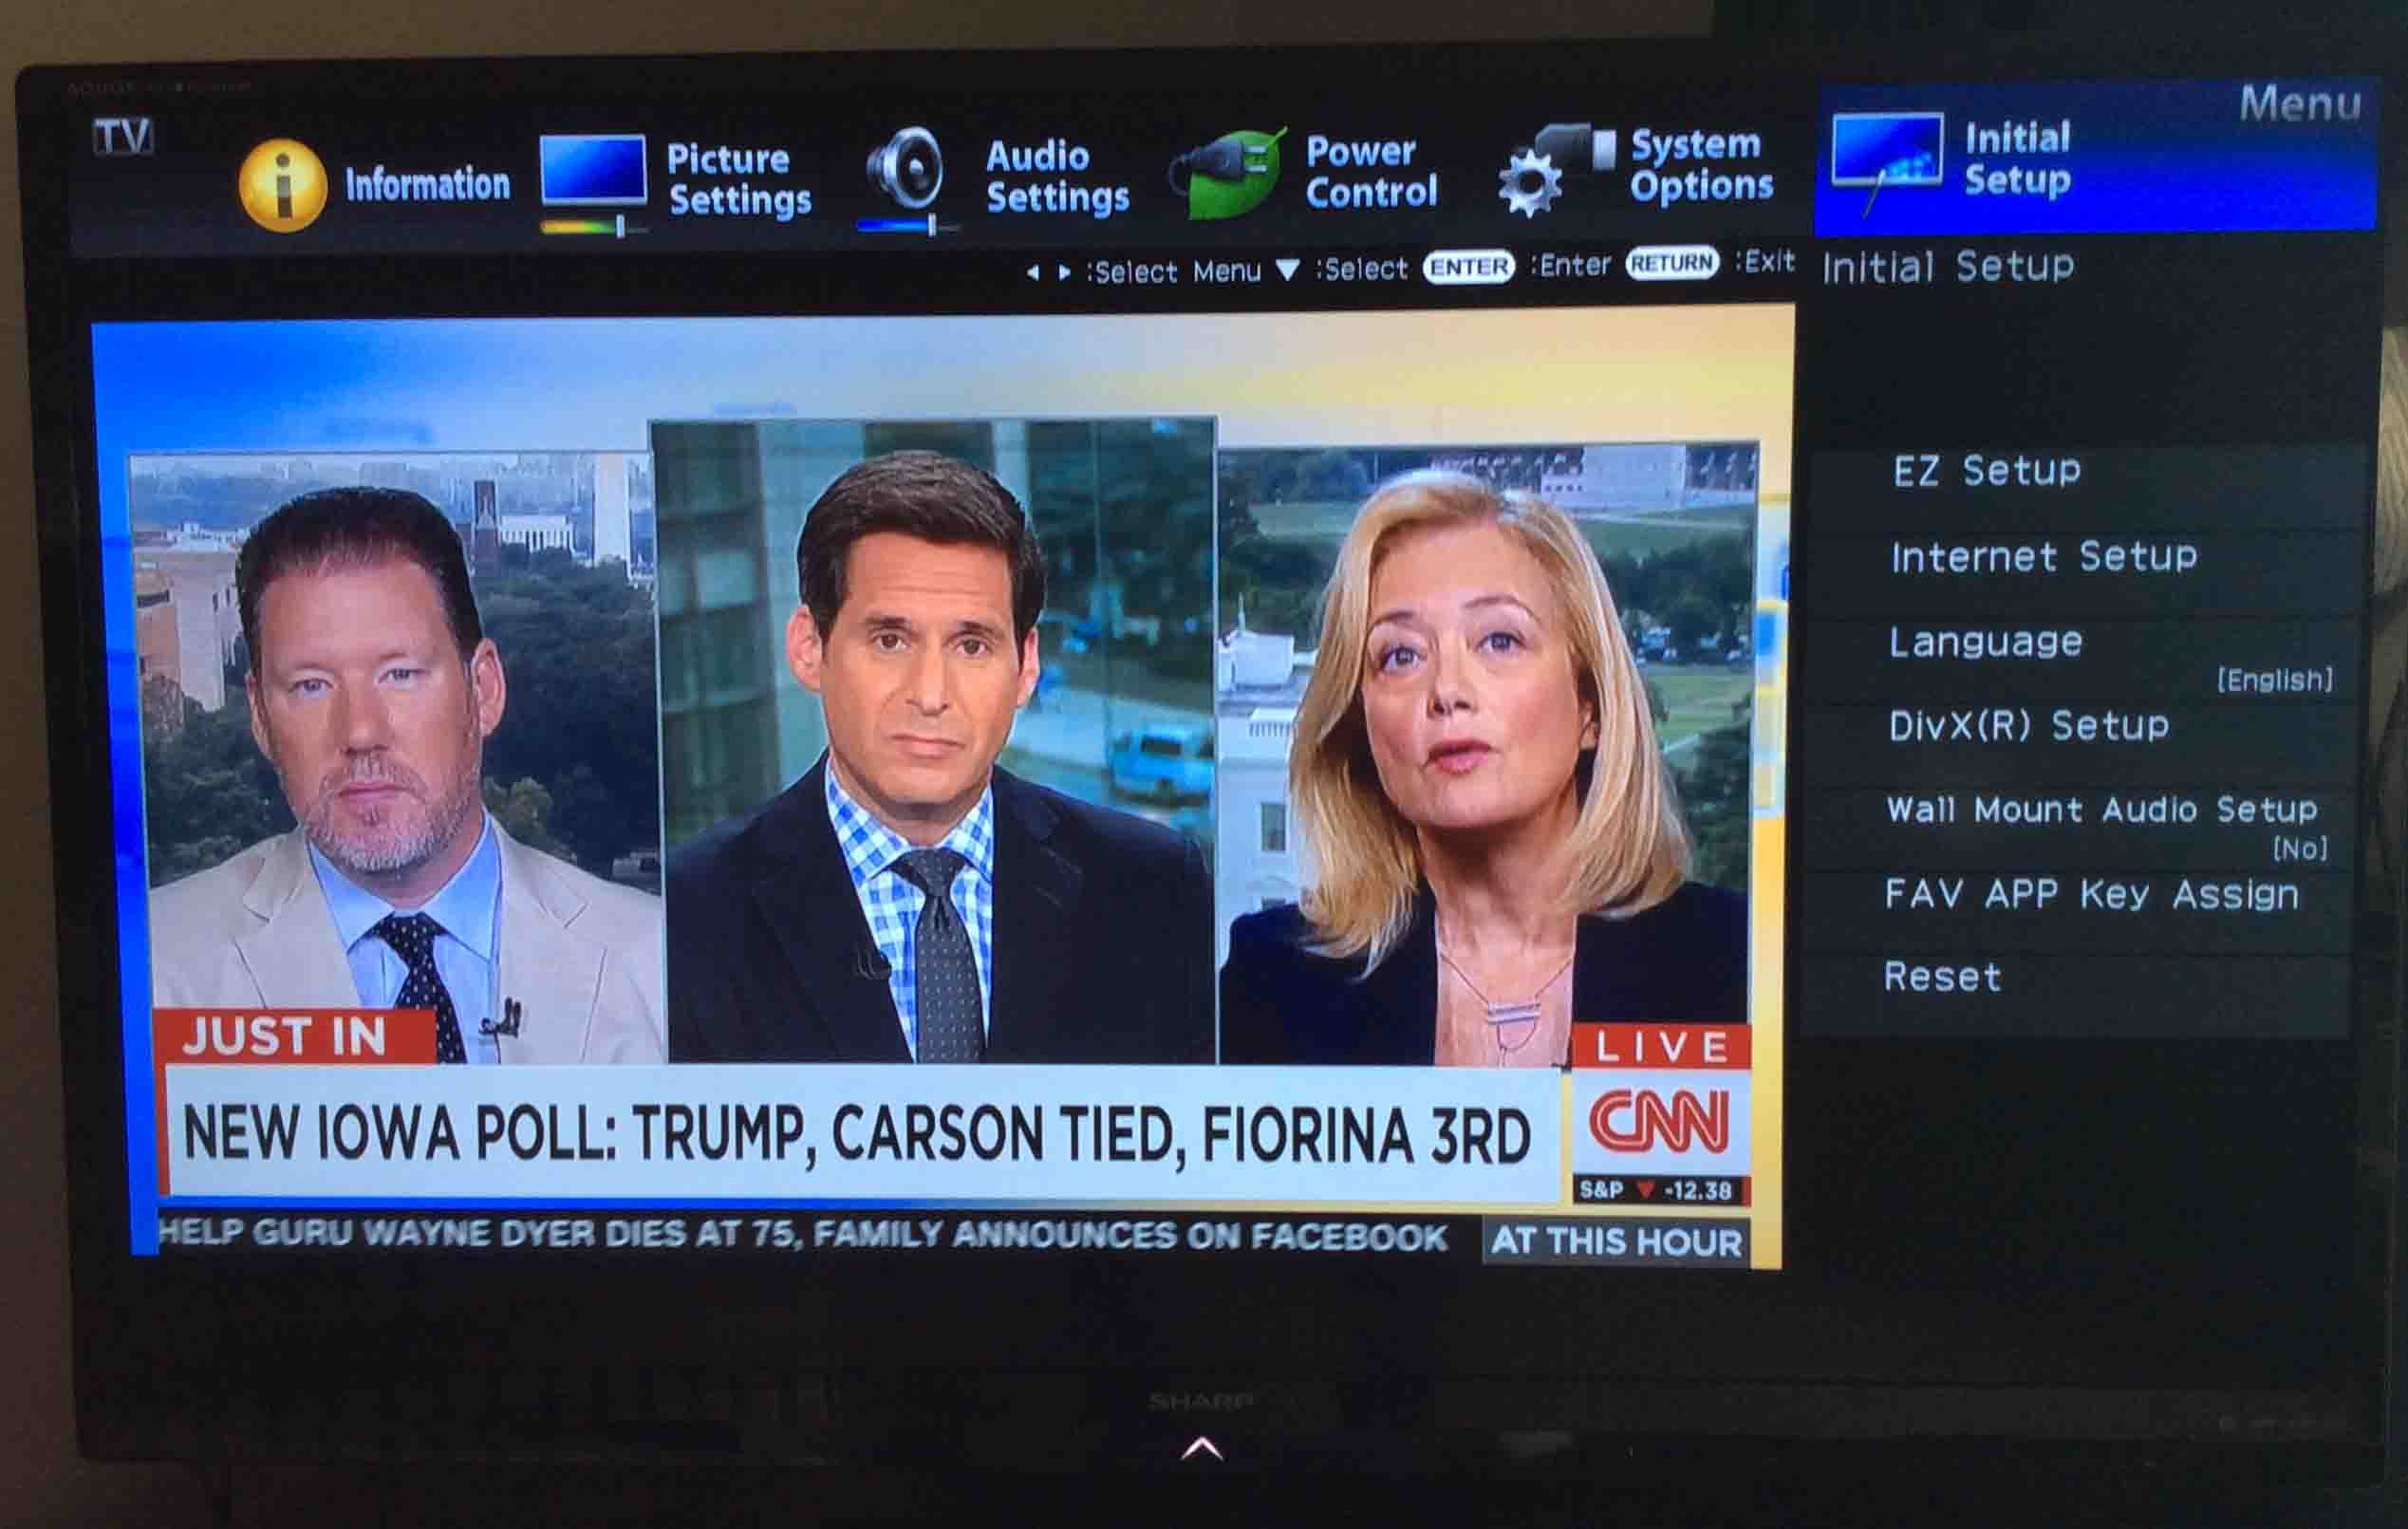
Access the set’s main menu by pressing the MENU button on its remote control. The menu appears across the top of the screen, as shown next.
Then, highlight the Initial Setup menu item. For that, press the remote control’s left and right arrow keys some times. Stop when that app image turns blue, as shown next.
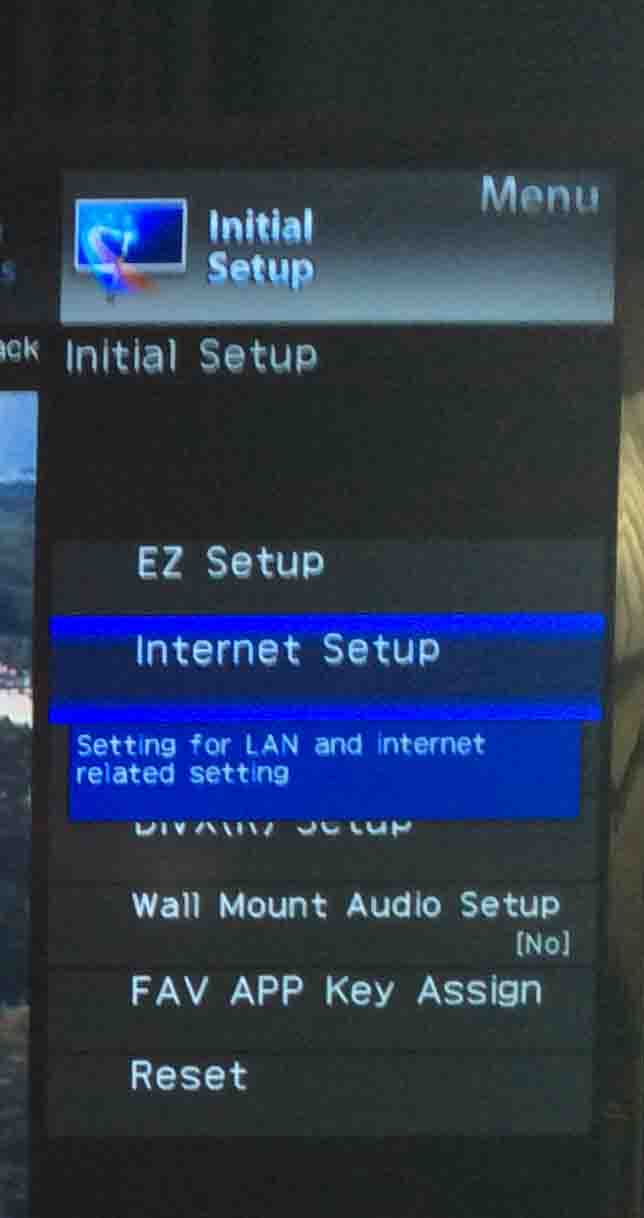
Then move into that menu with the remote’s DOWN arrow key. Stop on the Internet Setup option, as shown next.
Next. press and release the ENTER button on the remote.
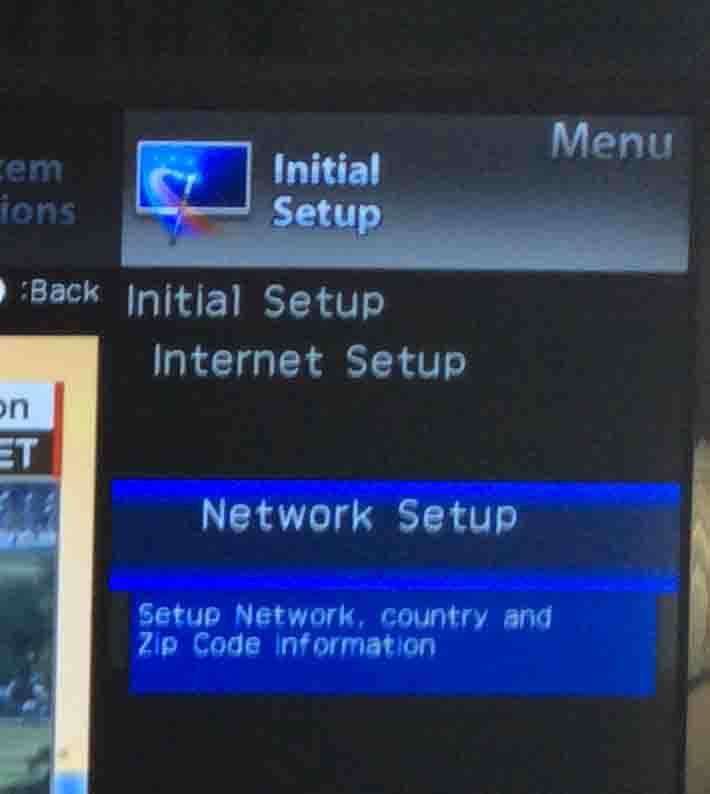
This takes you to the Internet Setup menu, as shown next.
Next, press the ENTER button on the remote.
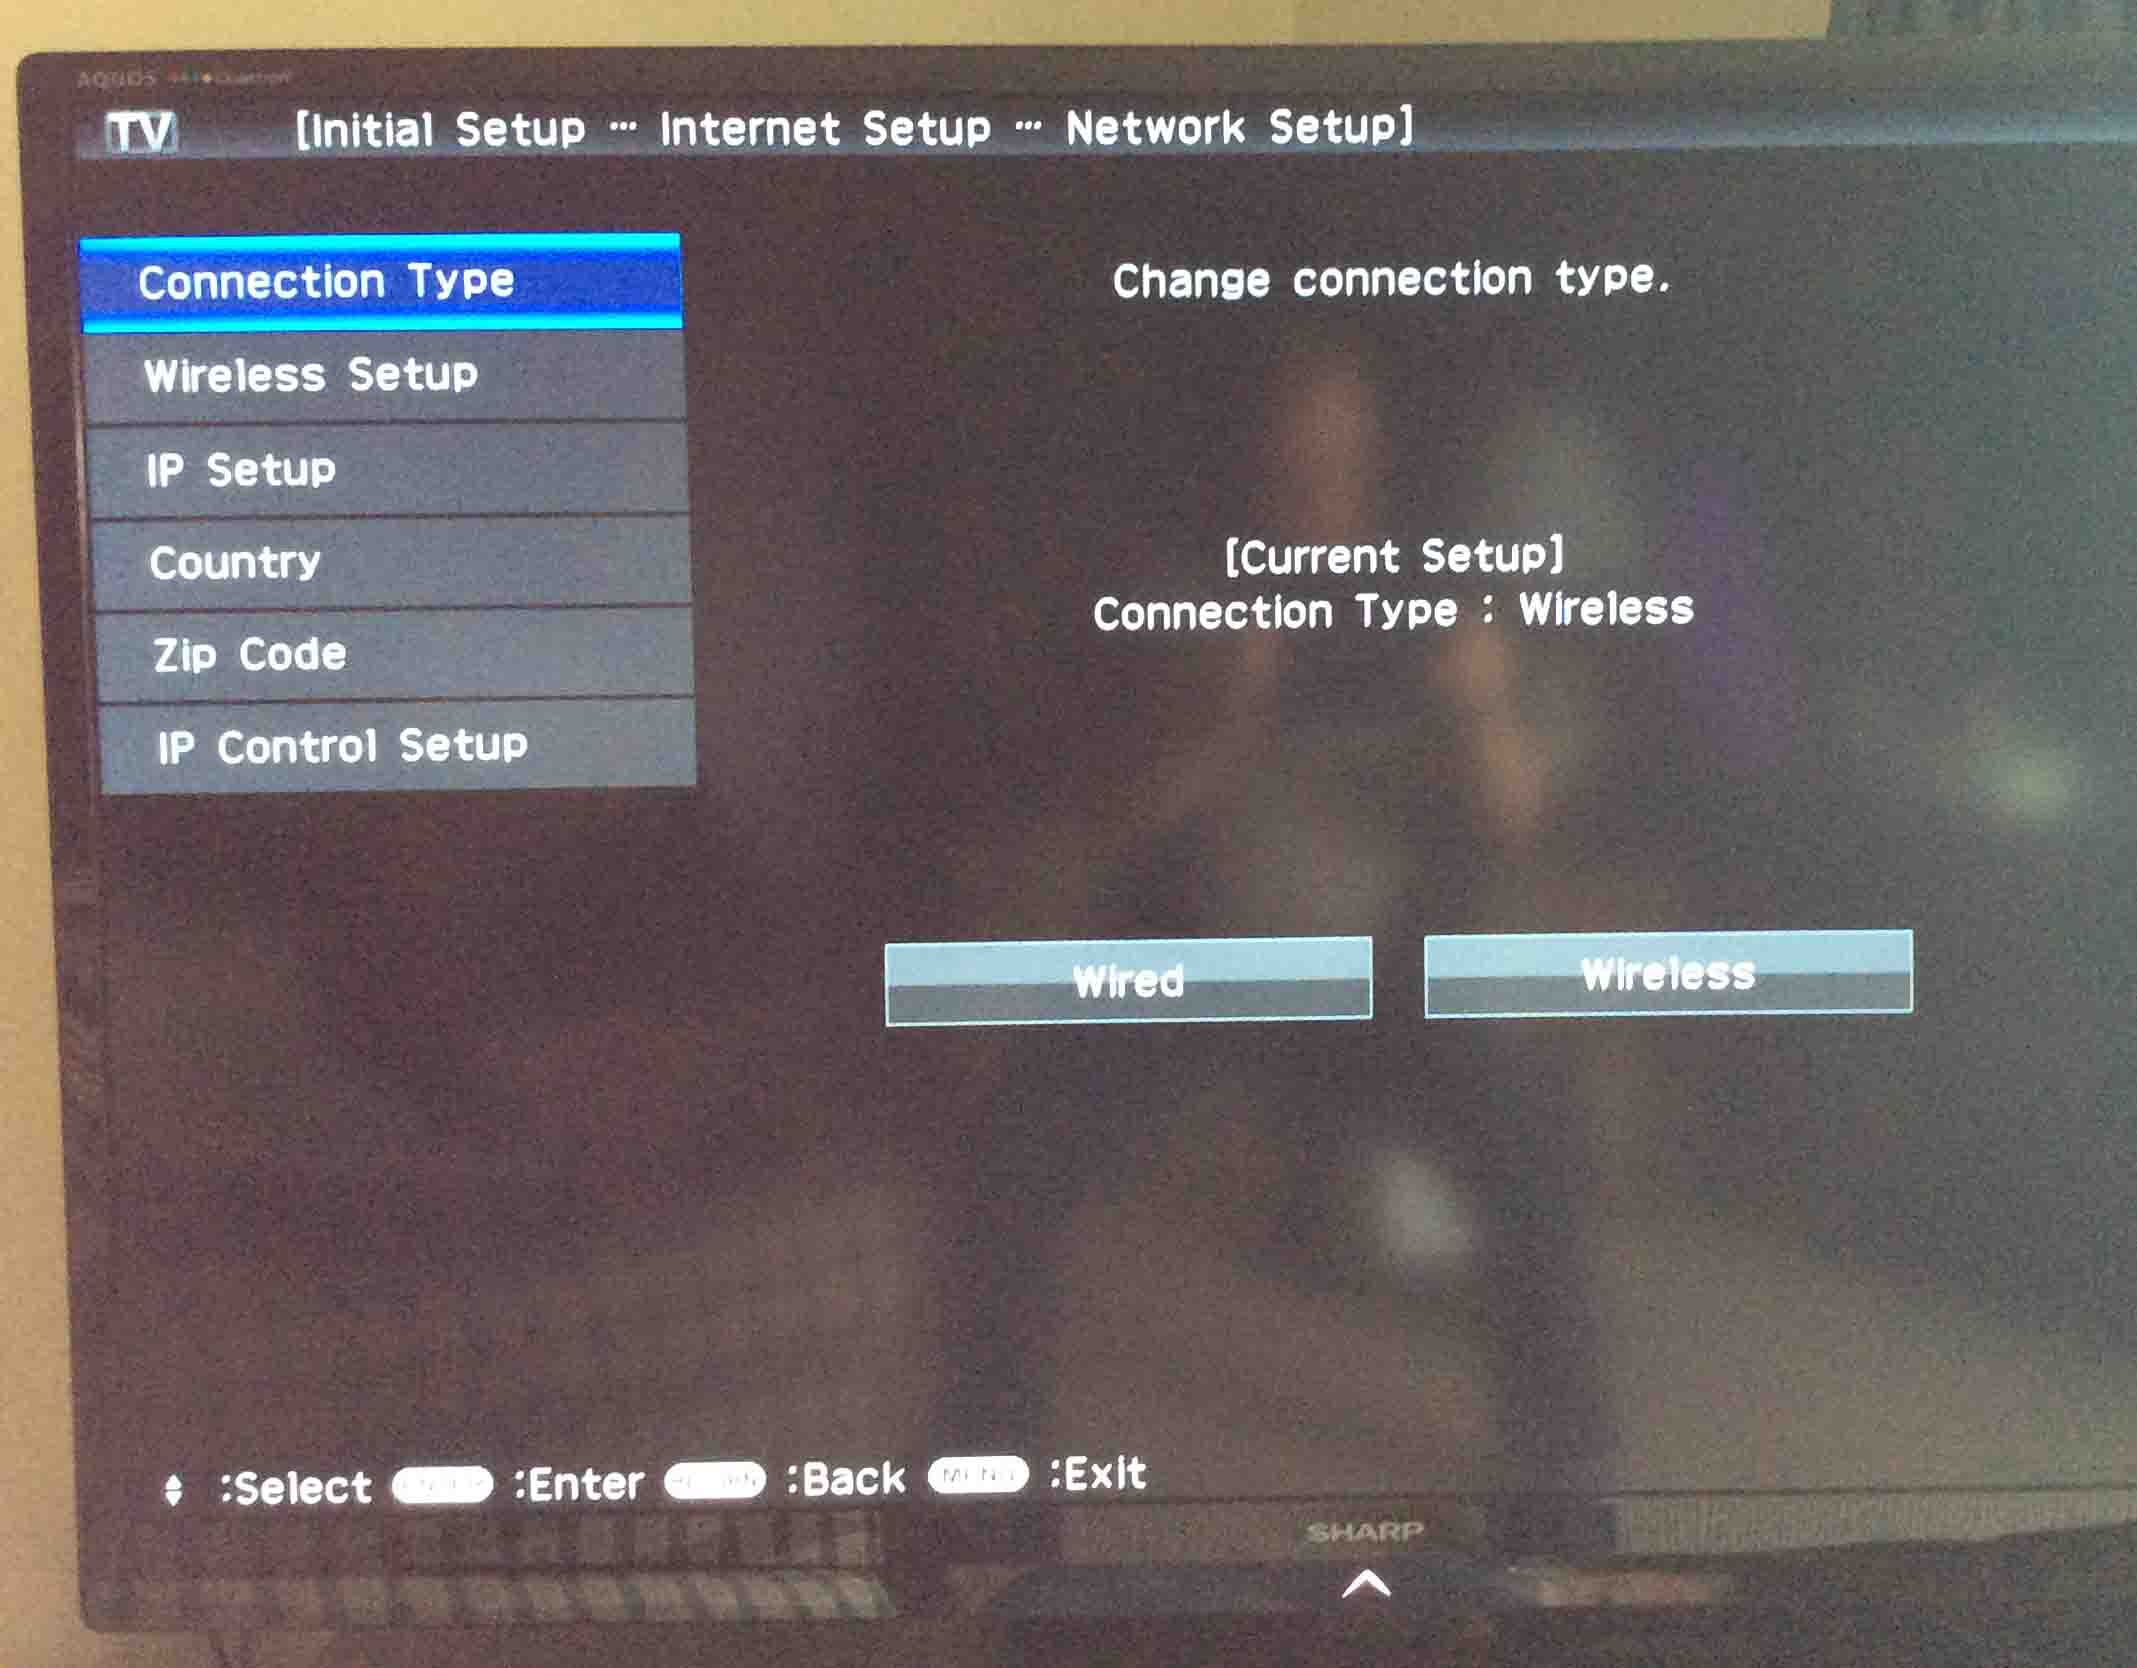
The TV then displays the Network Setup screen, as shown next.
Then, press the DOWN arrow key on the remote once. This selects the Wireless Setup menu item, shown next.
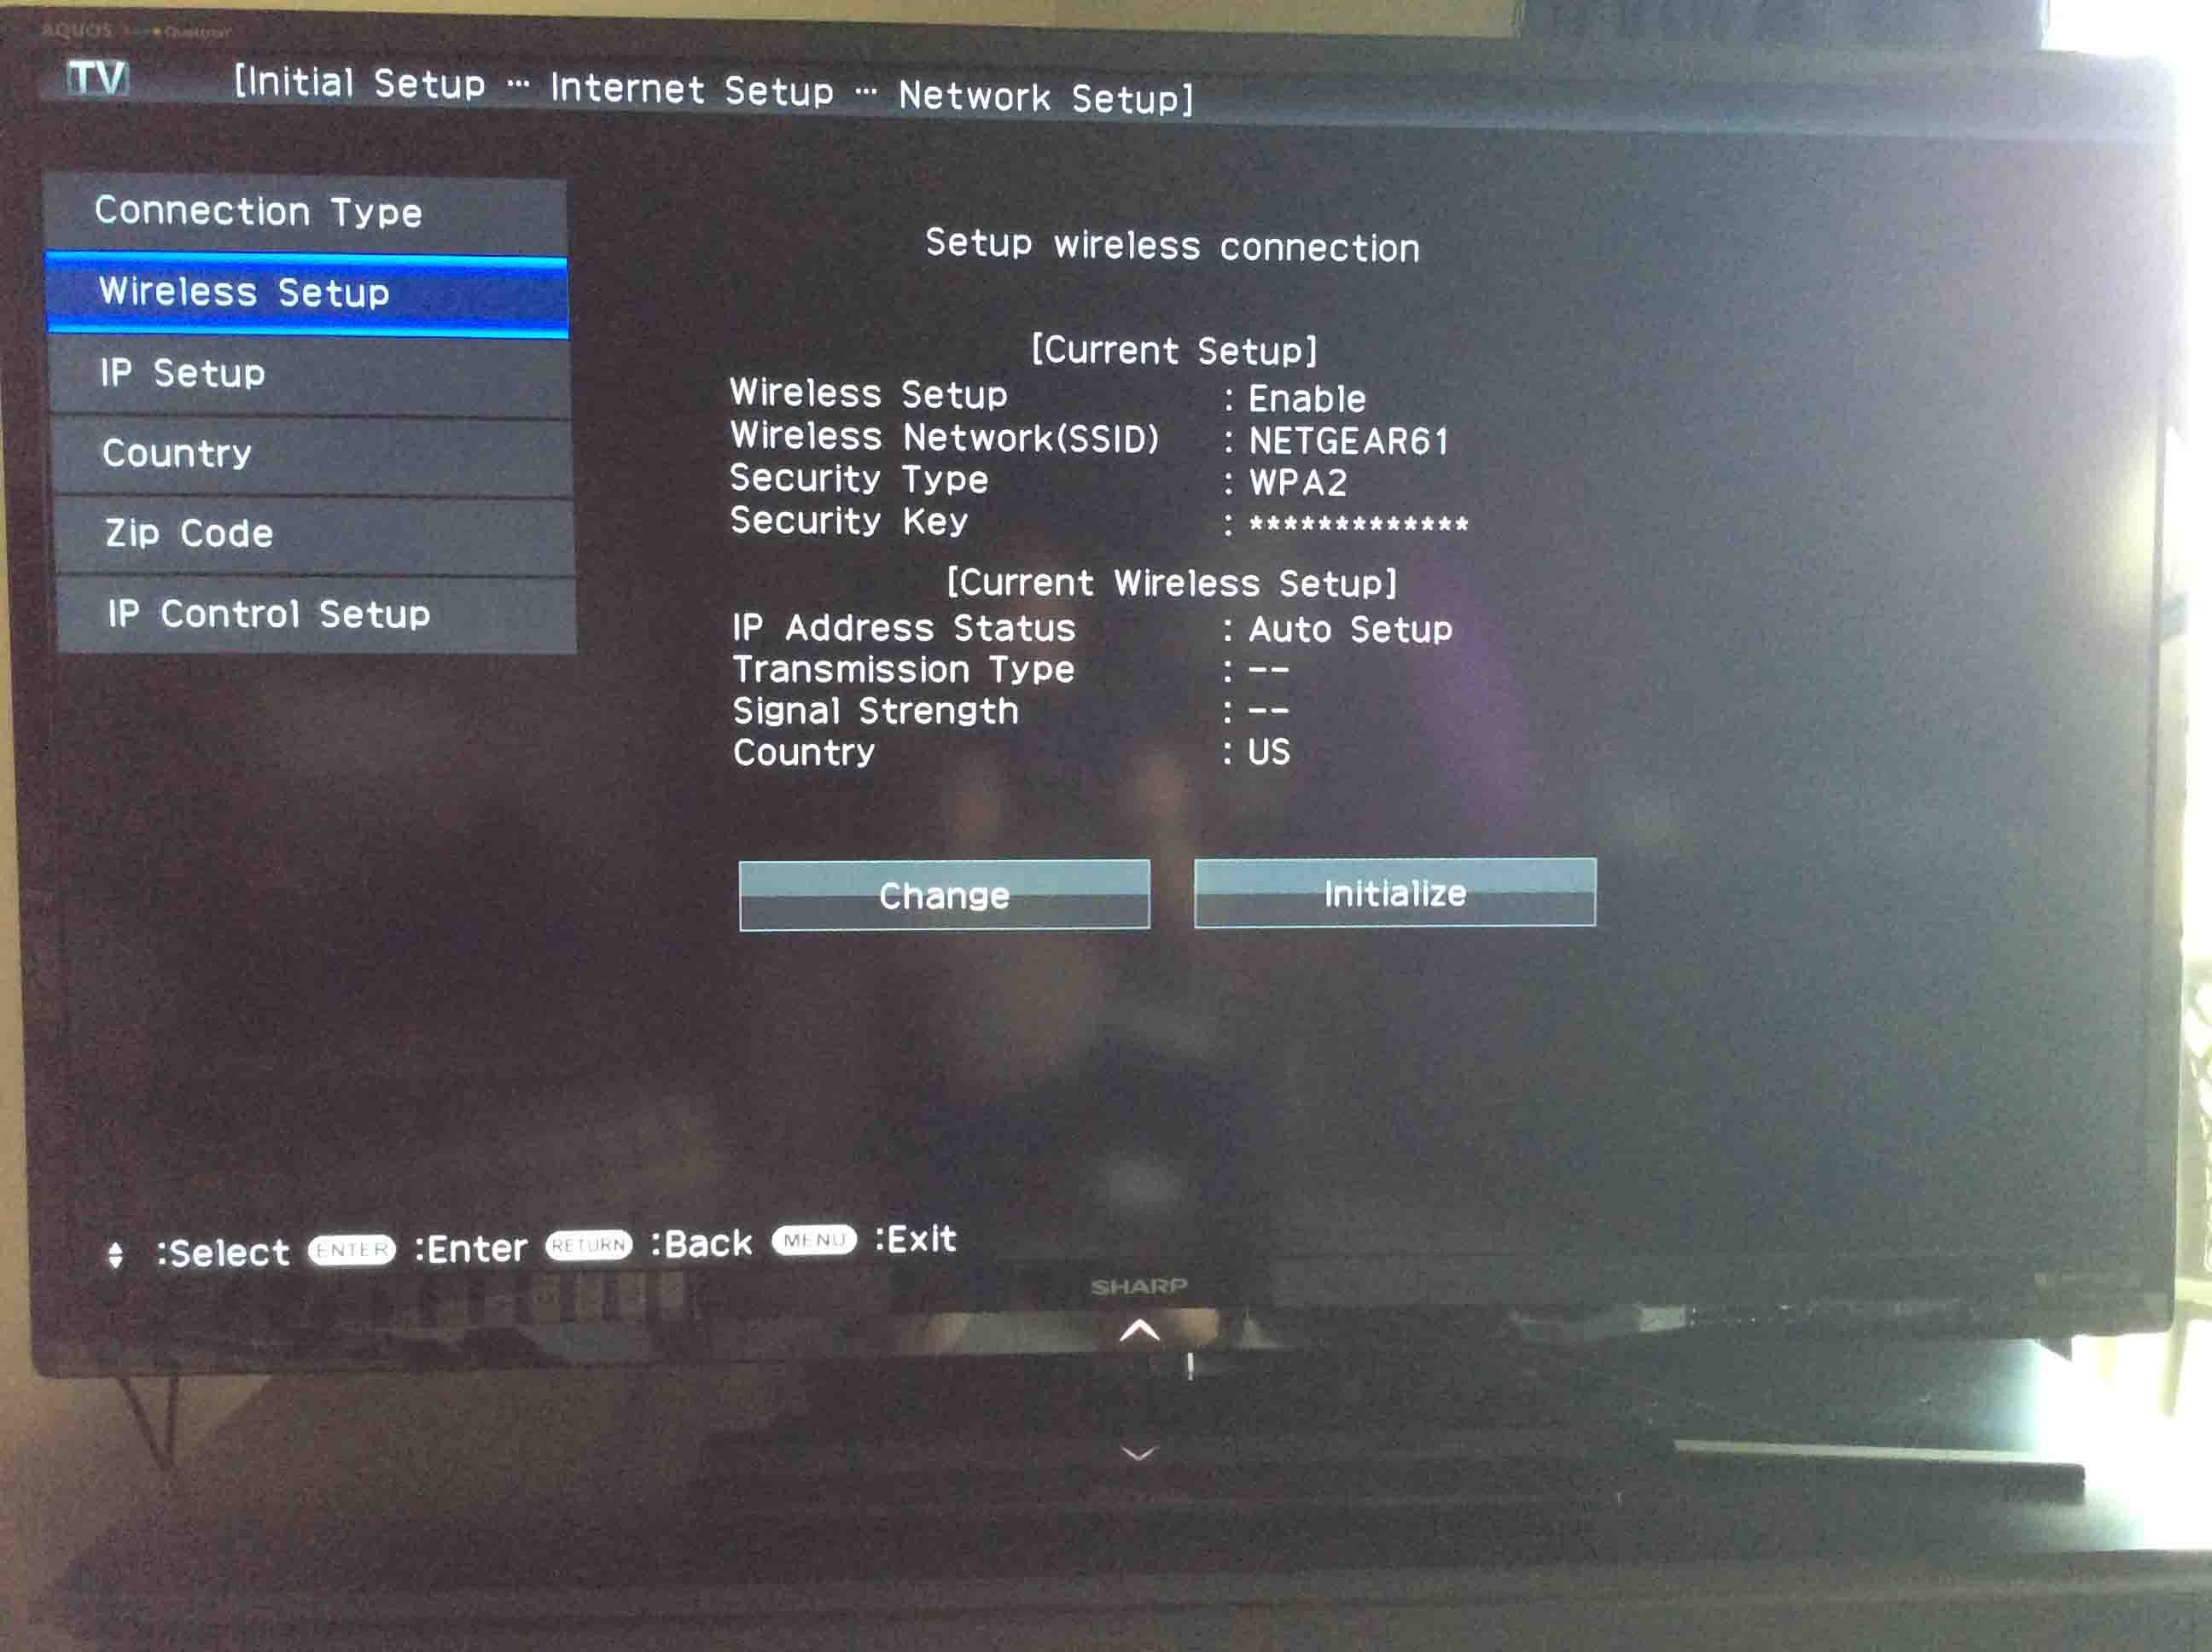
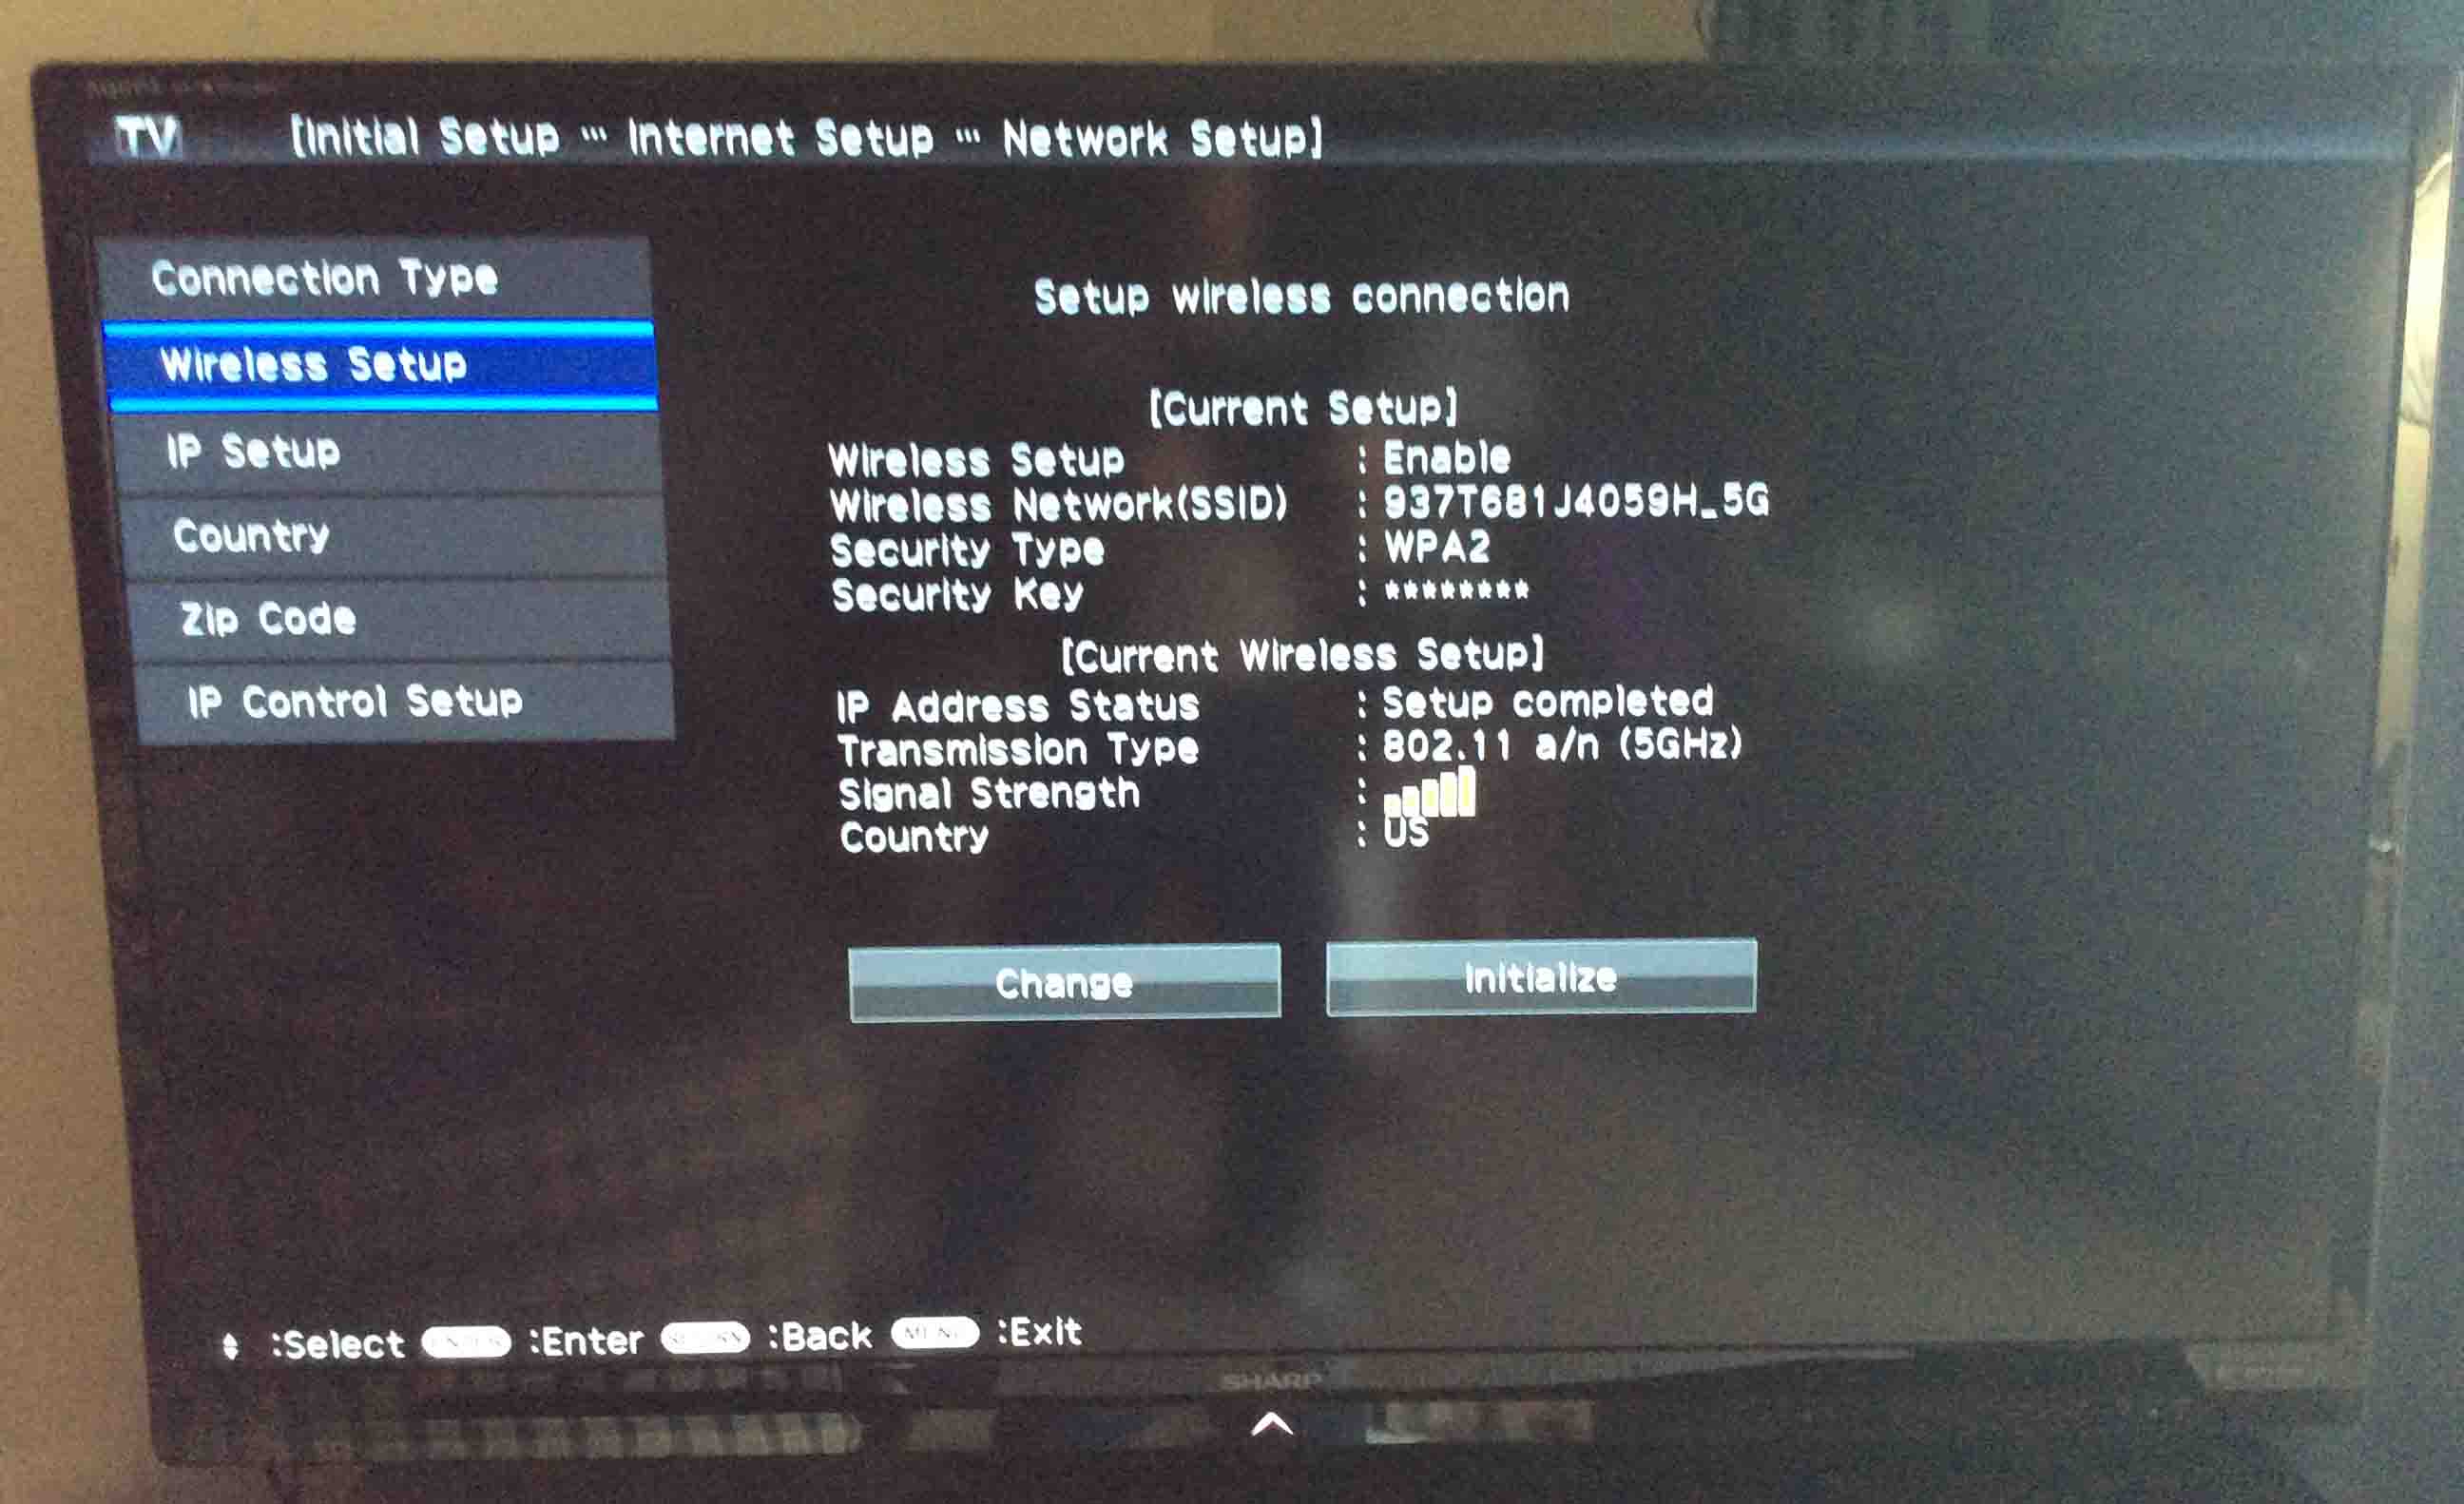
The TV then fills in the right two-thirds of the screen with the currently-saved network info. It also shows the connection status.
Note in the next picture that the TV is NOT connected to the WiFi network NETGEAR61. How do we know this? Because the Transmission Type and Signal Strength fields are blank (showing dashes). This is proof that the Sharp Aquos TV no longer connects to the saved wireless network. So to get it online again, you must update the WiFi details on it. Look at step 7 below to see a version of this screen that shows a properly-working WiFi connection.
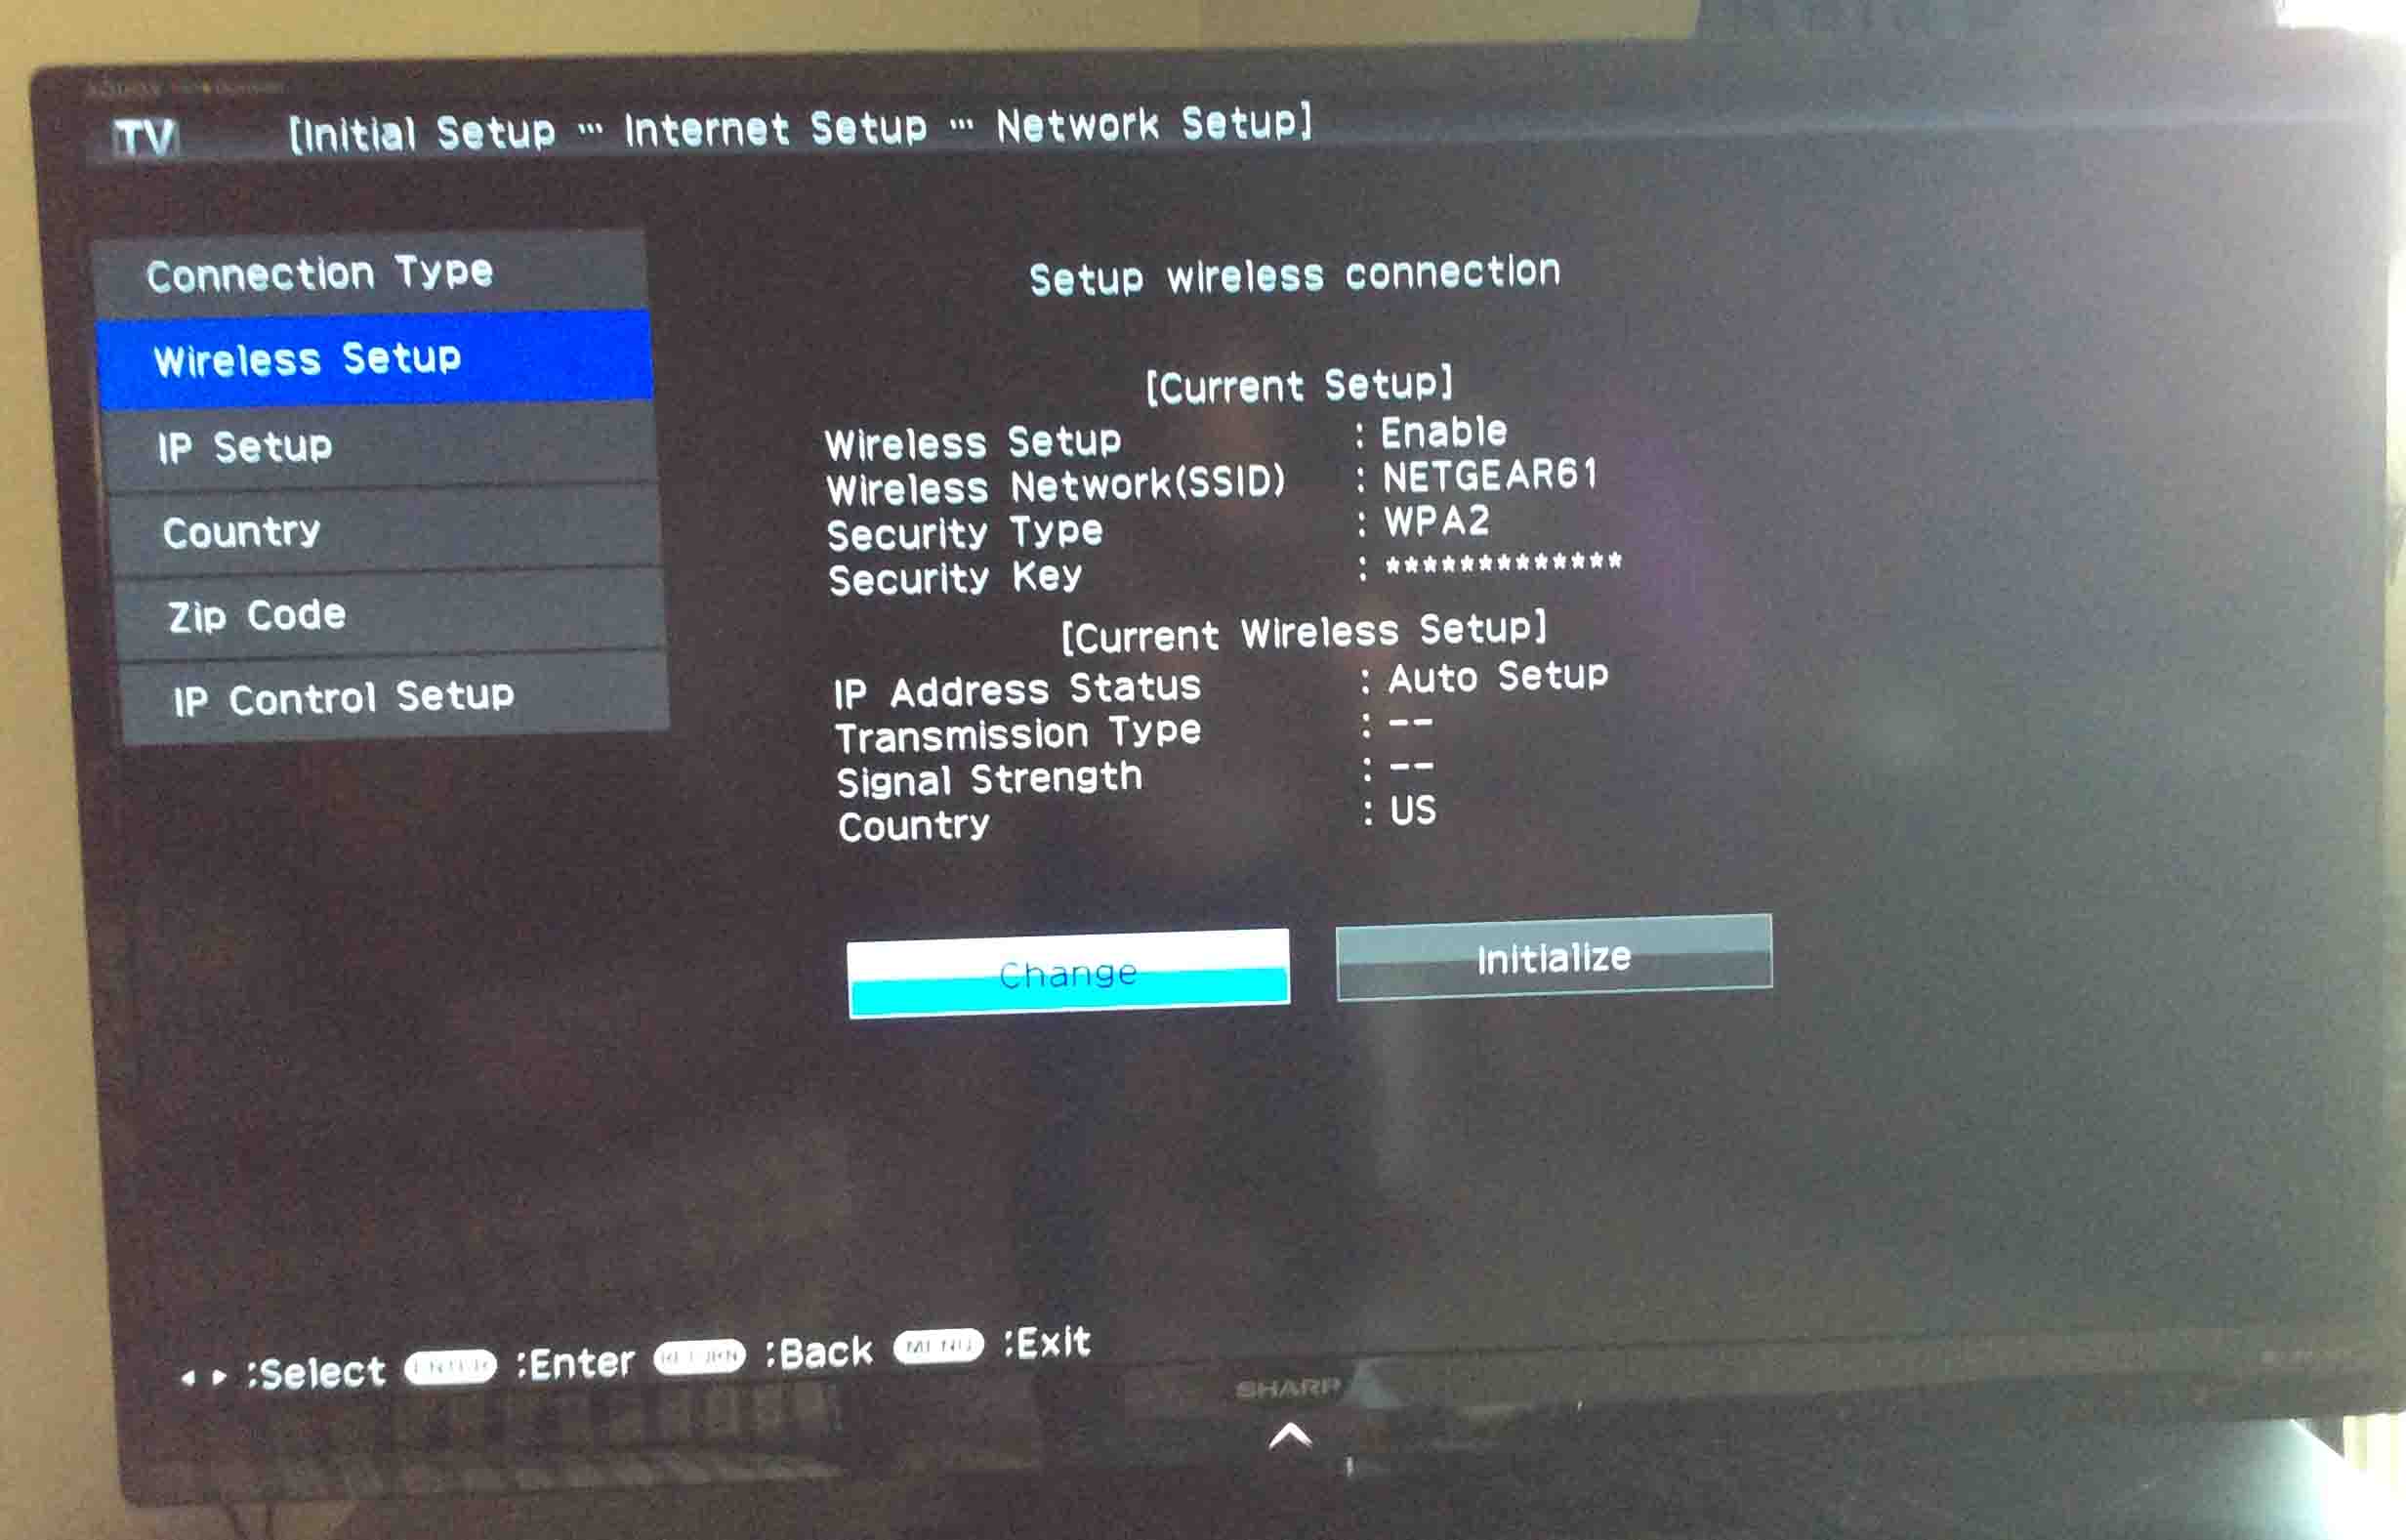
Then, with the Wireless Setup menu item highlighted, press the ENTER key on the remote. This highlights the Change button, as shown in the next picture.
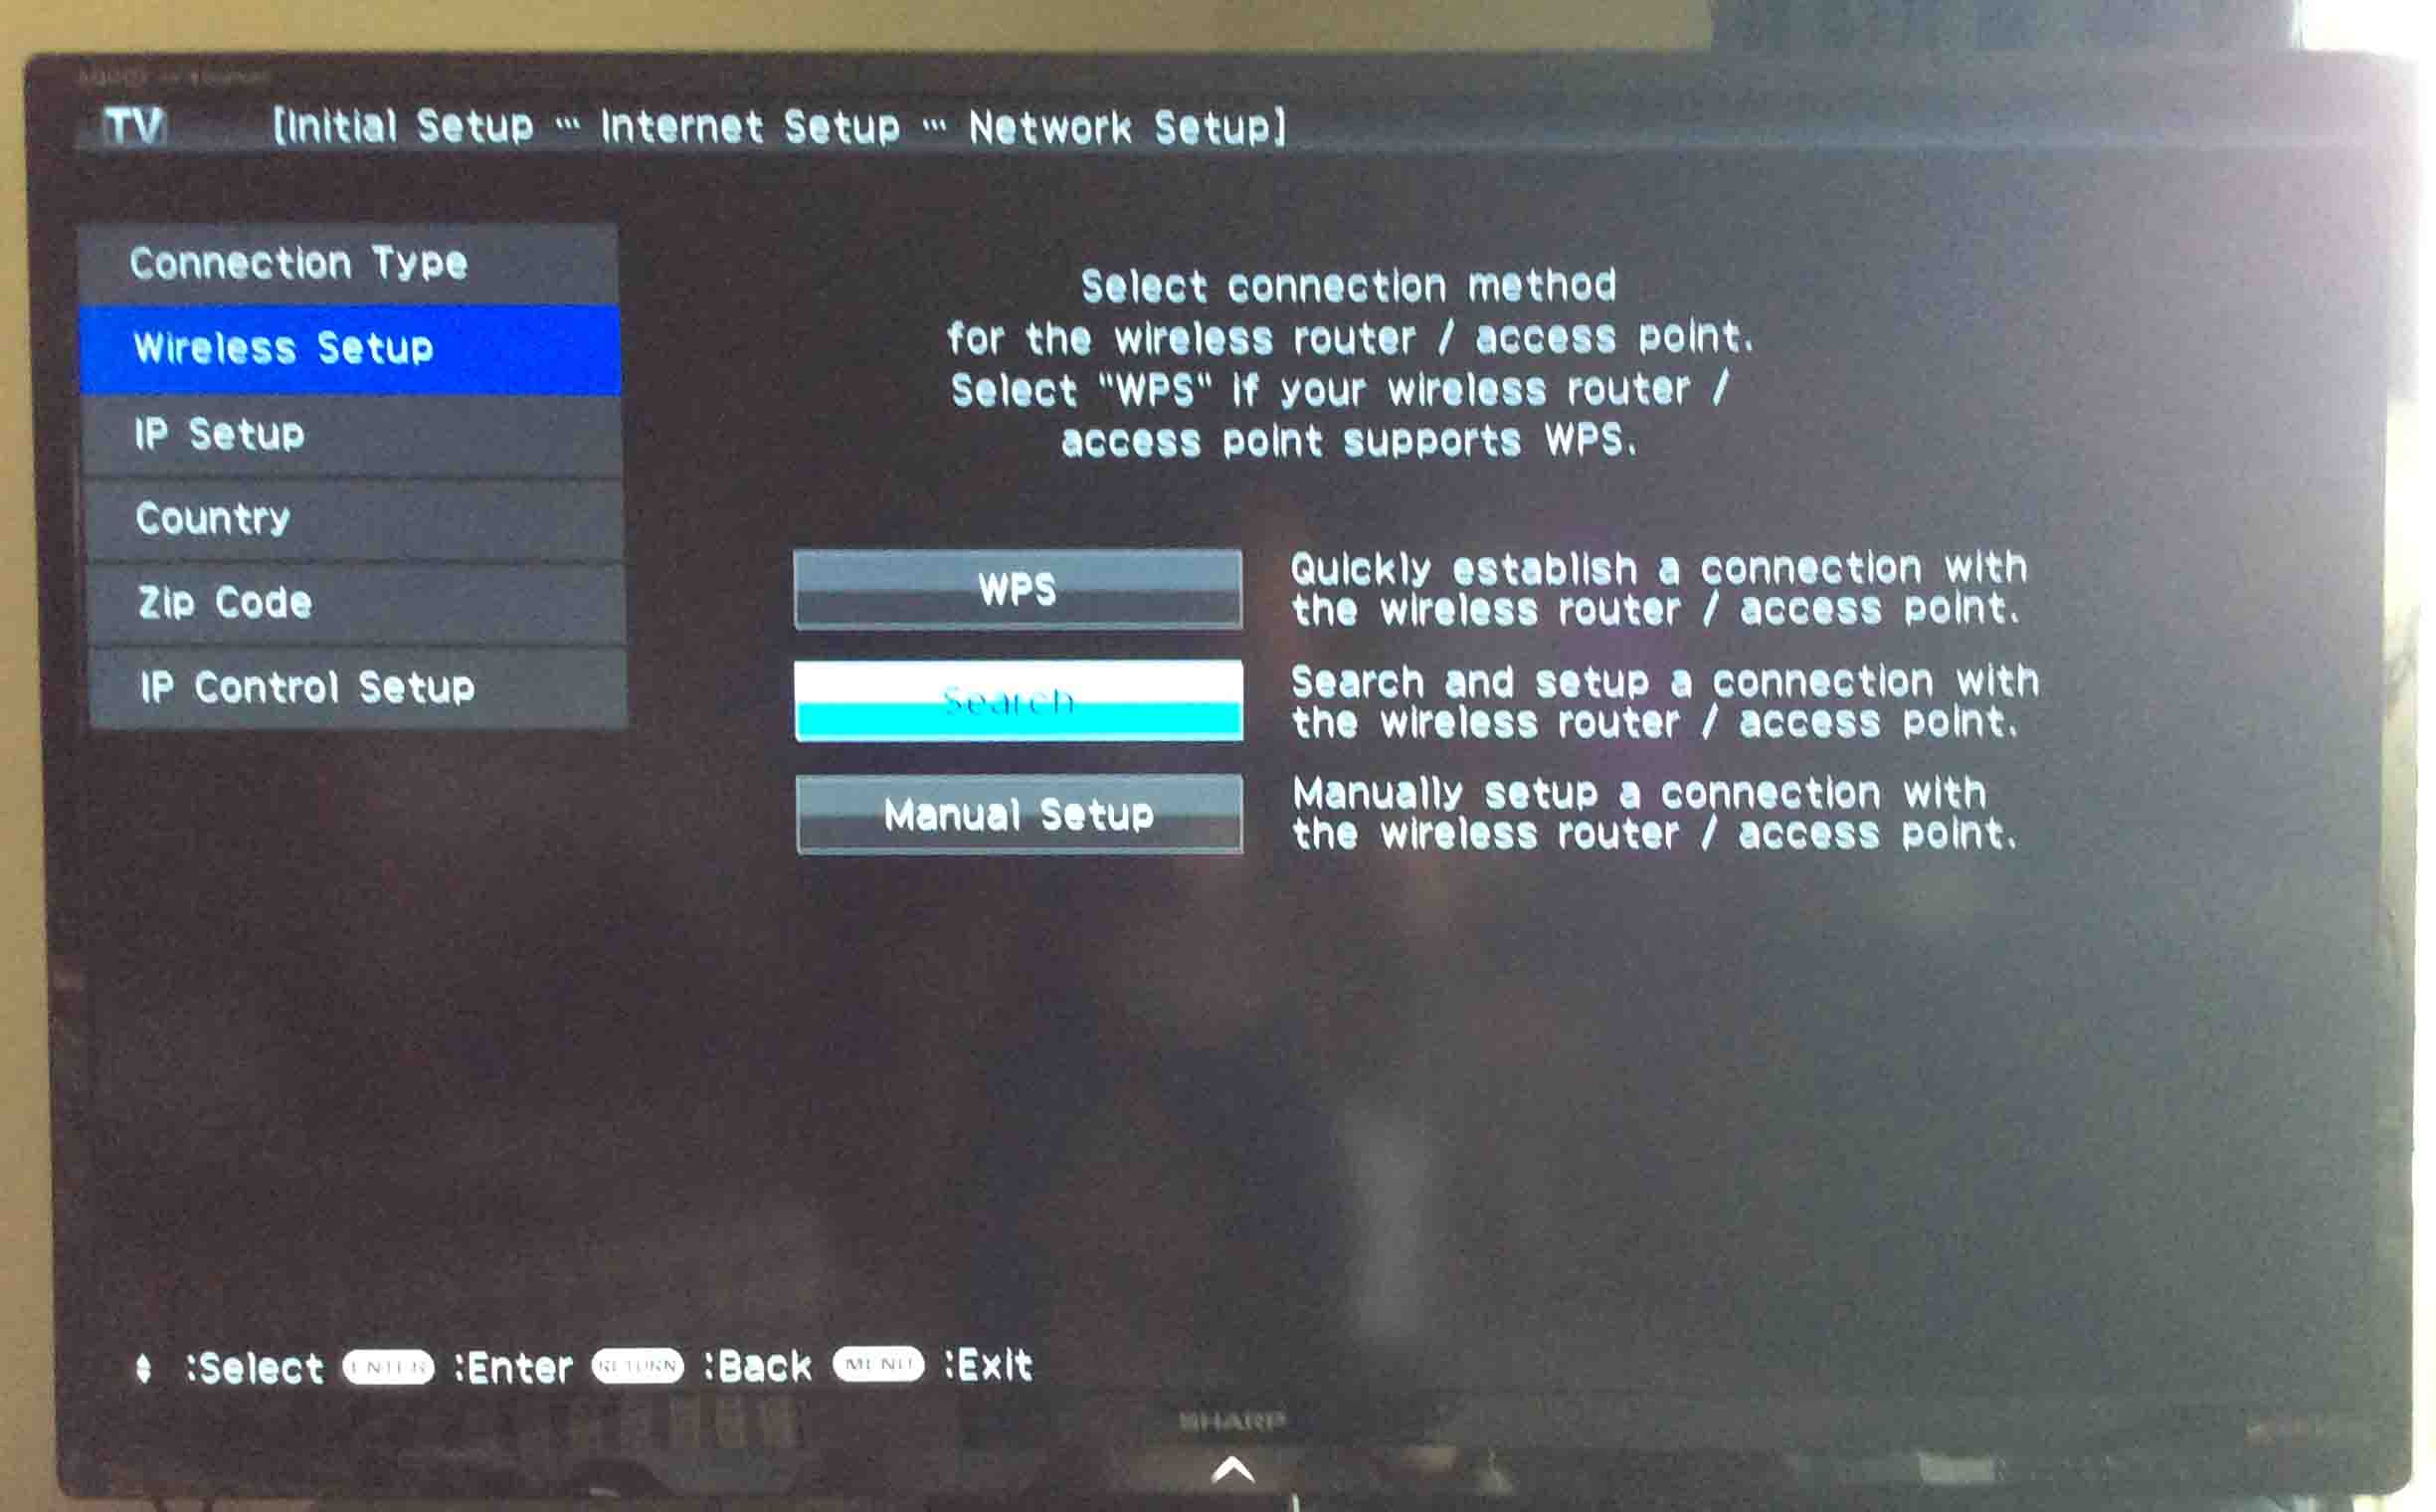
Next, press and quickly release the ENTER key on the remote. This brings up the Select Connection Method screen.
Once this screen appeared, we used the remote’s arrow keys to select the Search item, as shown next. We could have also used the WPS or Manual Setup options. But instead, we chose to use the Search method in this demo.
If you select WPS, follow the instructions that appear on the screen. When your network connection is made, skip down to step 7 below.
Or, you could manually enter the new network’s SSID, security type, and password without scanning for it. Do this by picking the Manual Setup option. Setting up connections in this way is beyond the scope of this piece. But the prompts are pretty straight forward. If you go that route, then you’ll see a lot of the same screens as are shown in this routine.
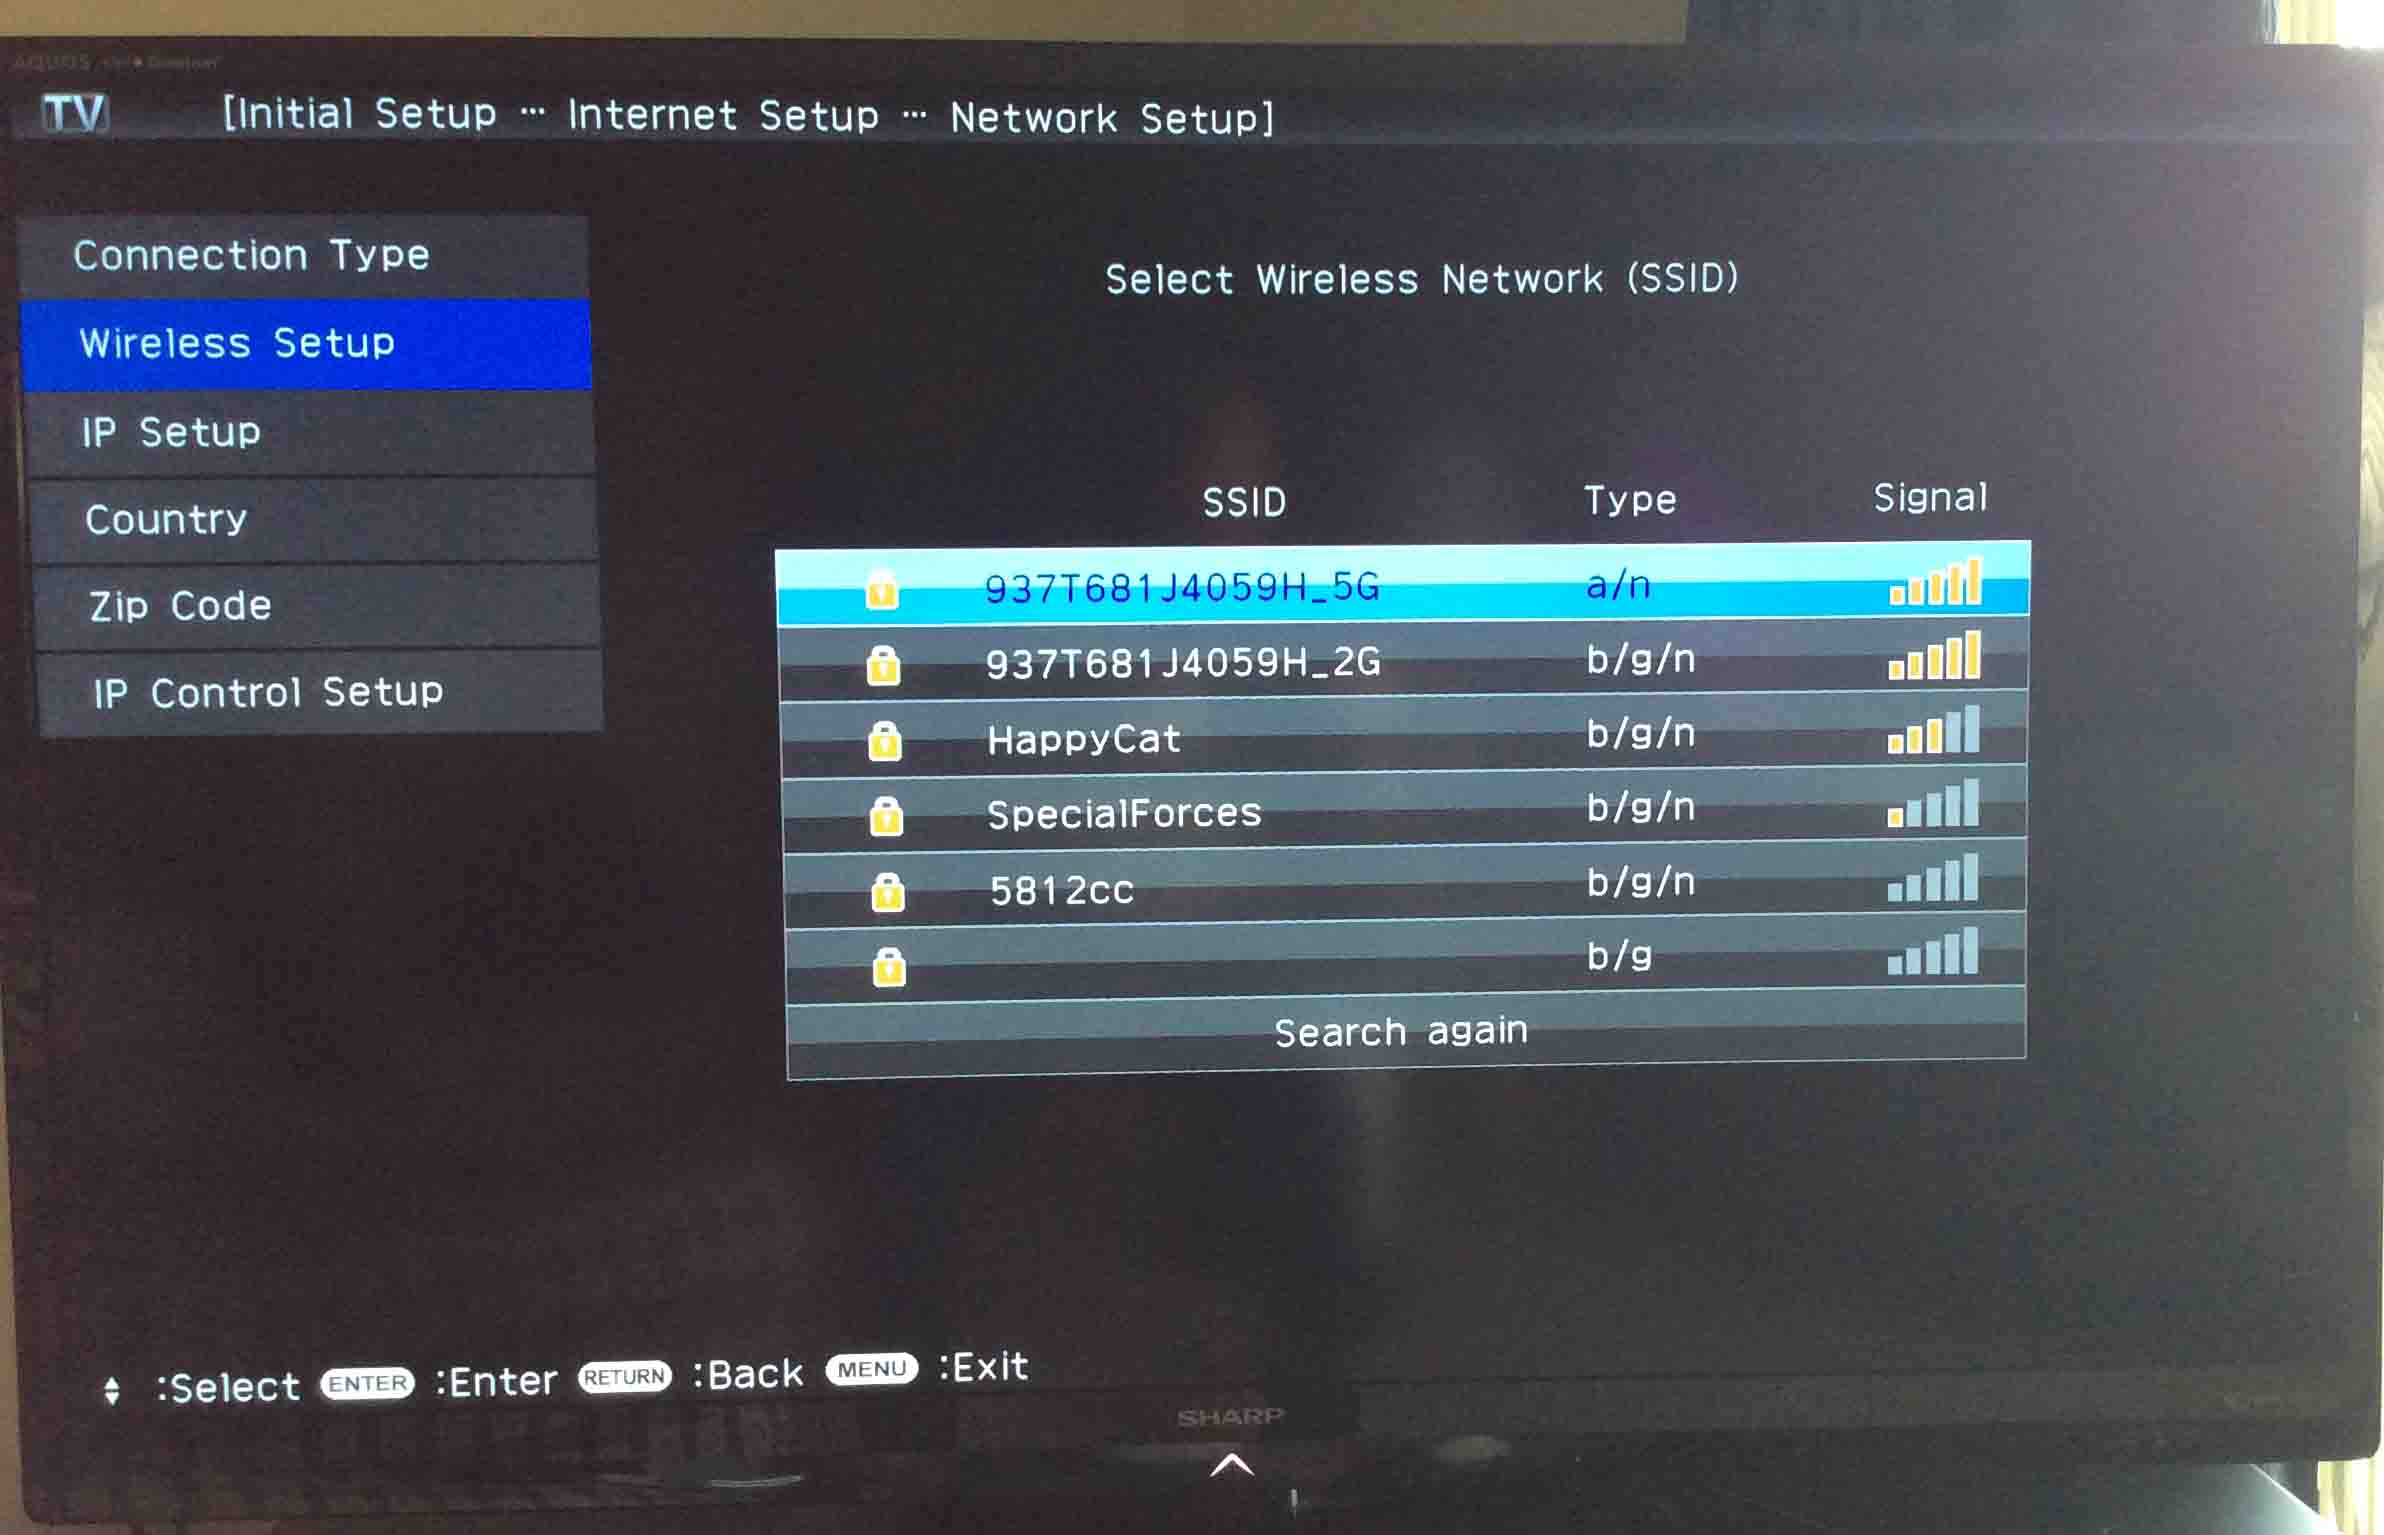
Then, press ENTER on the remote. This starts a scan of both the 2.4 and 5 Ghz. bands for in-range wireless networks. This television can connect to either Wireless G or N networks. Thus, WiFi networks of all eligible types appear in the resulting list on the Select Wireless Network (SSID) screen. This page appears when the network scan is complete. This is shown next.
Use the remote’s UP and DOWN arrow keys to highlight the network to connect the TV with. In our case, we want the 937T681J4059H_5G network. So we chose it as shown above.
When you choose a network, press and quickly release the remote’s ENTER key.
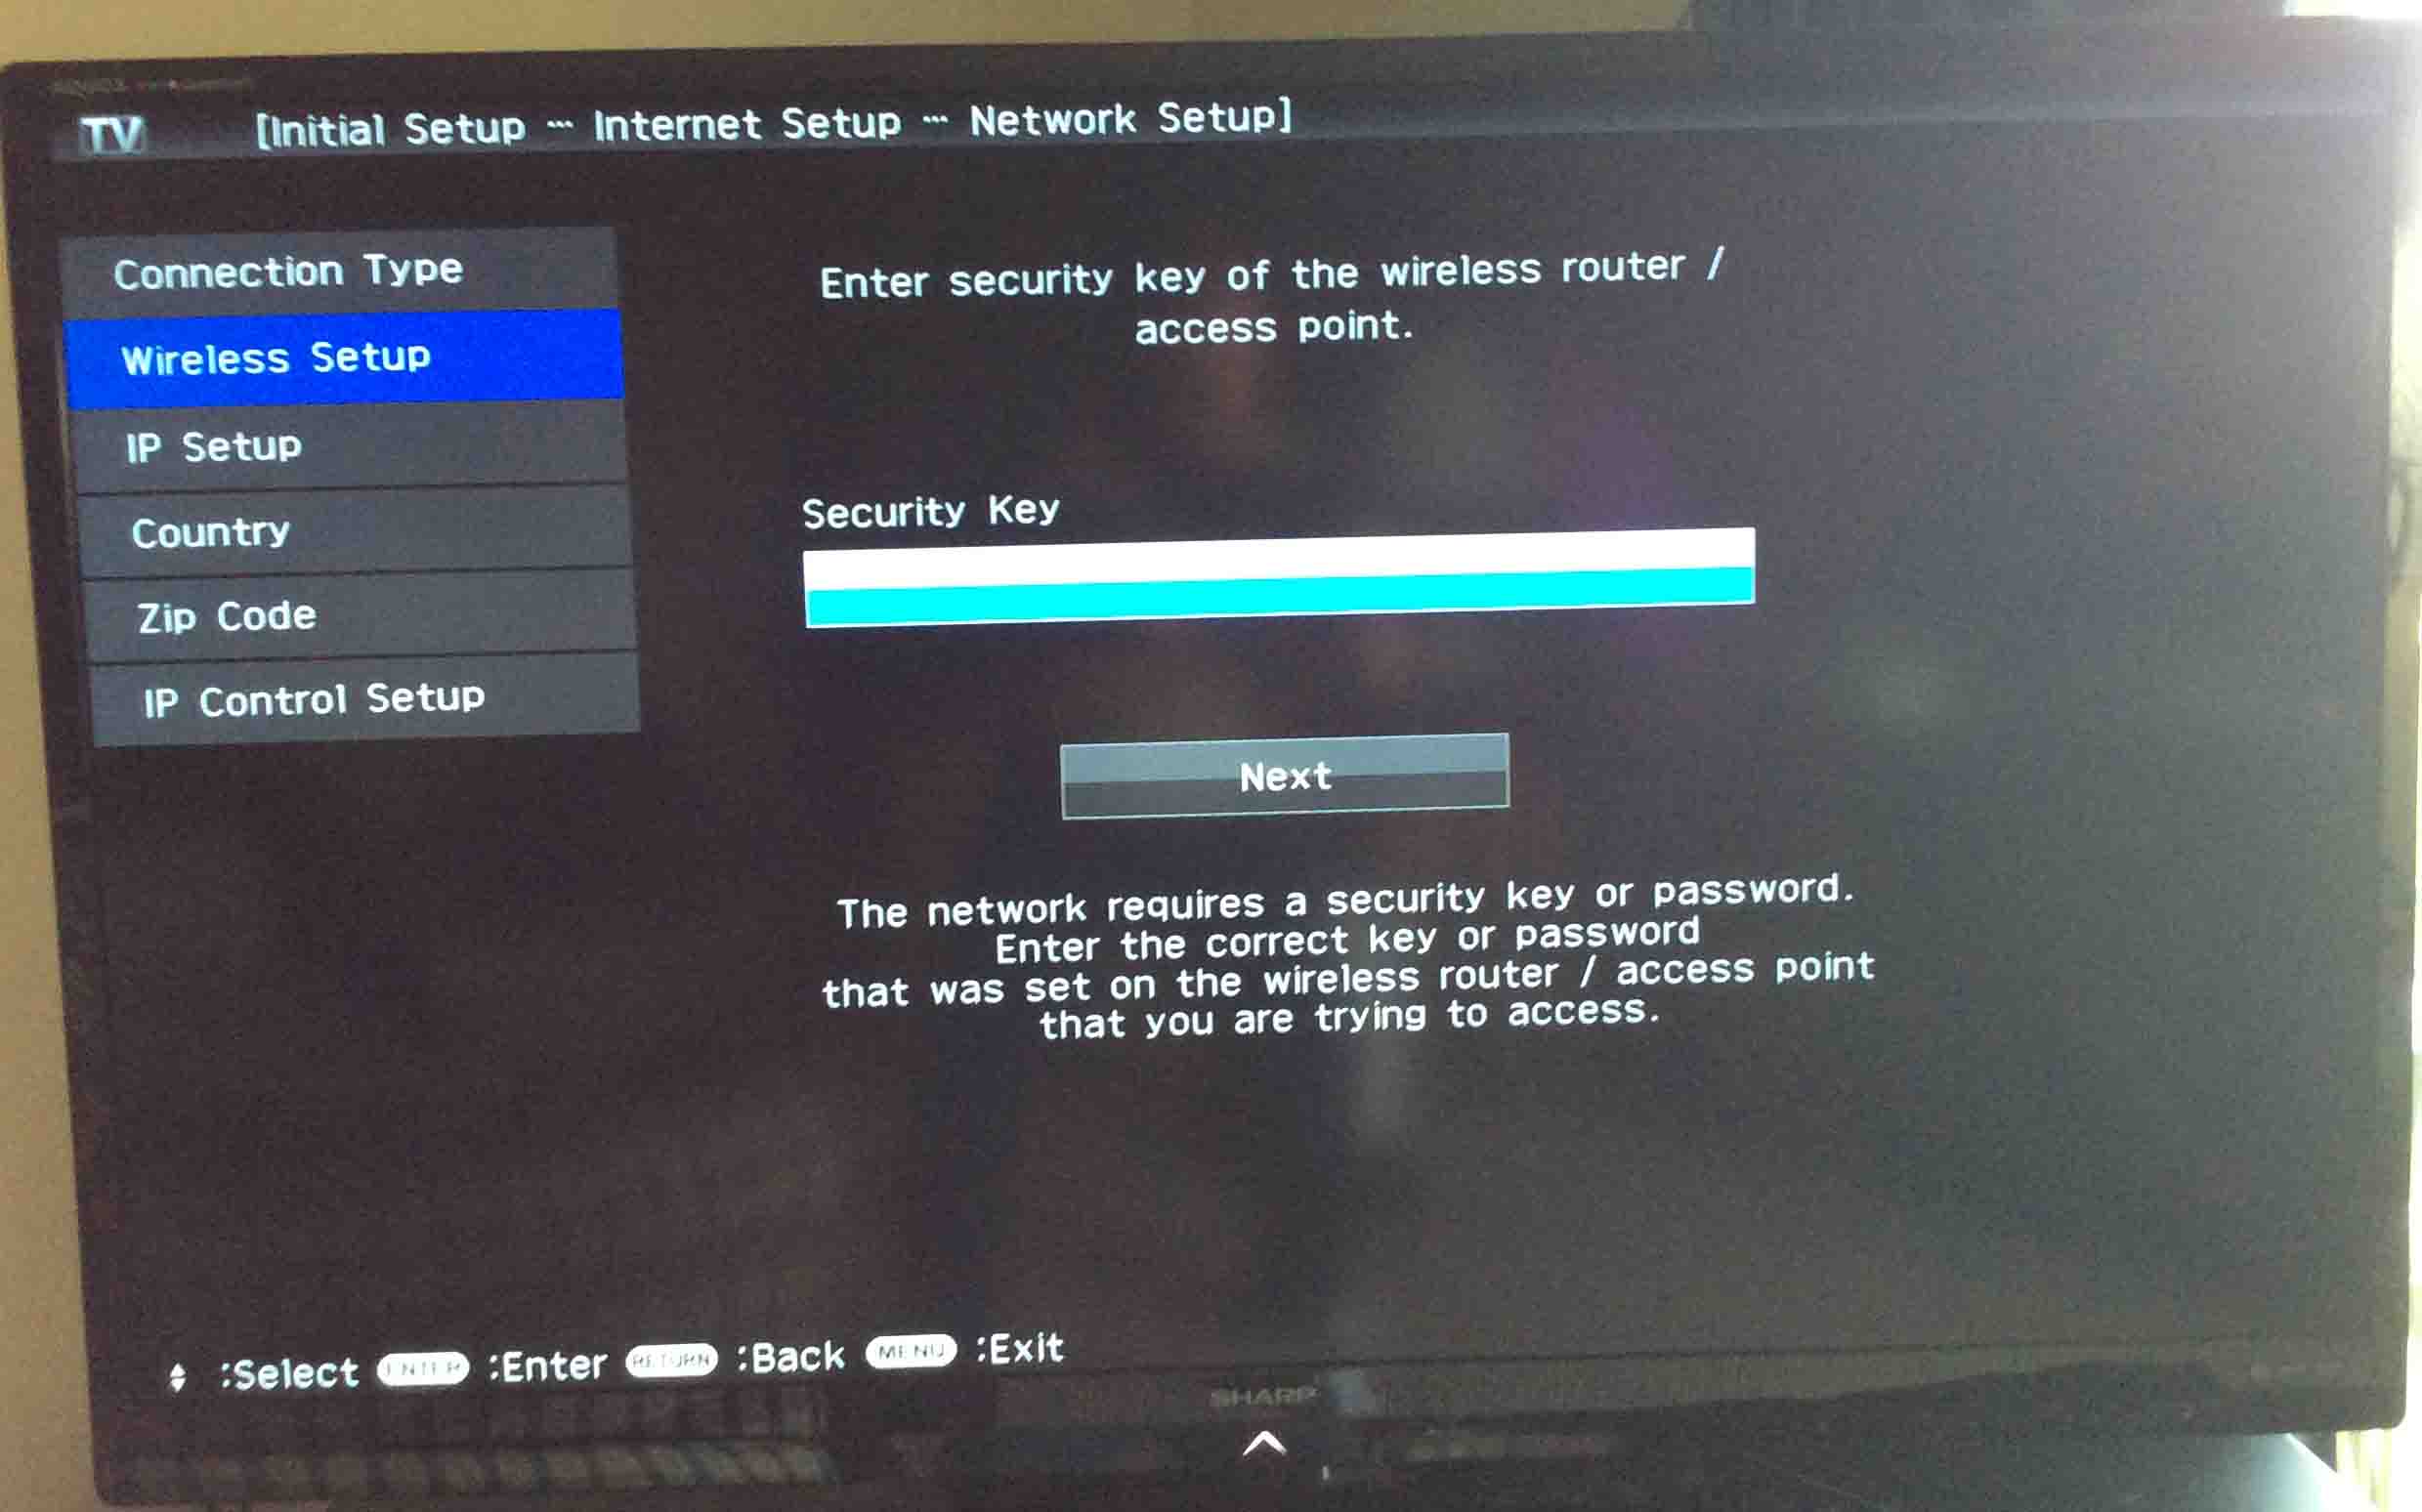
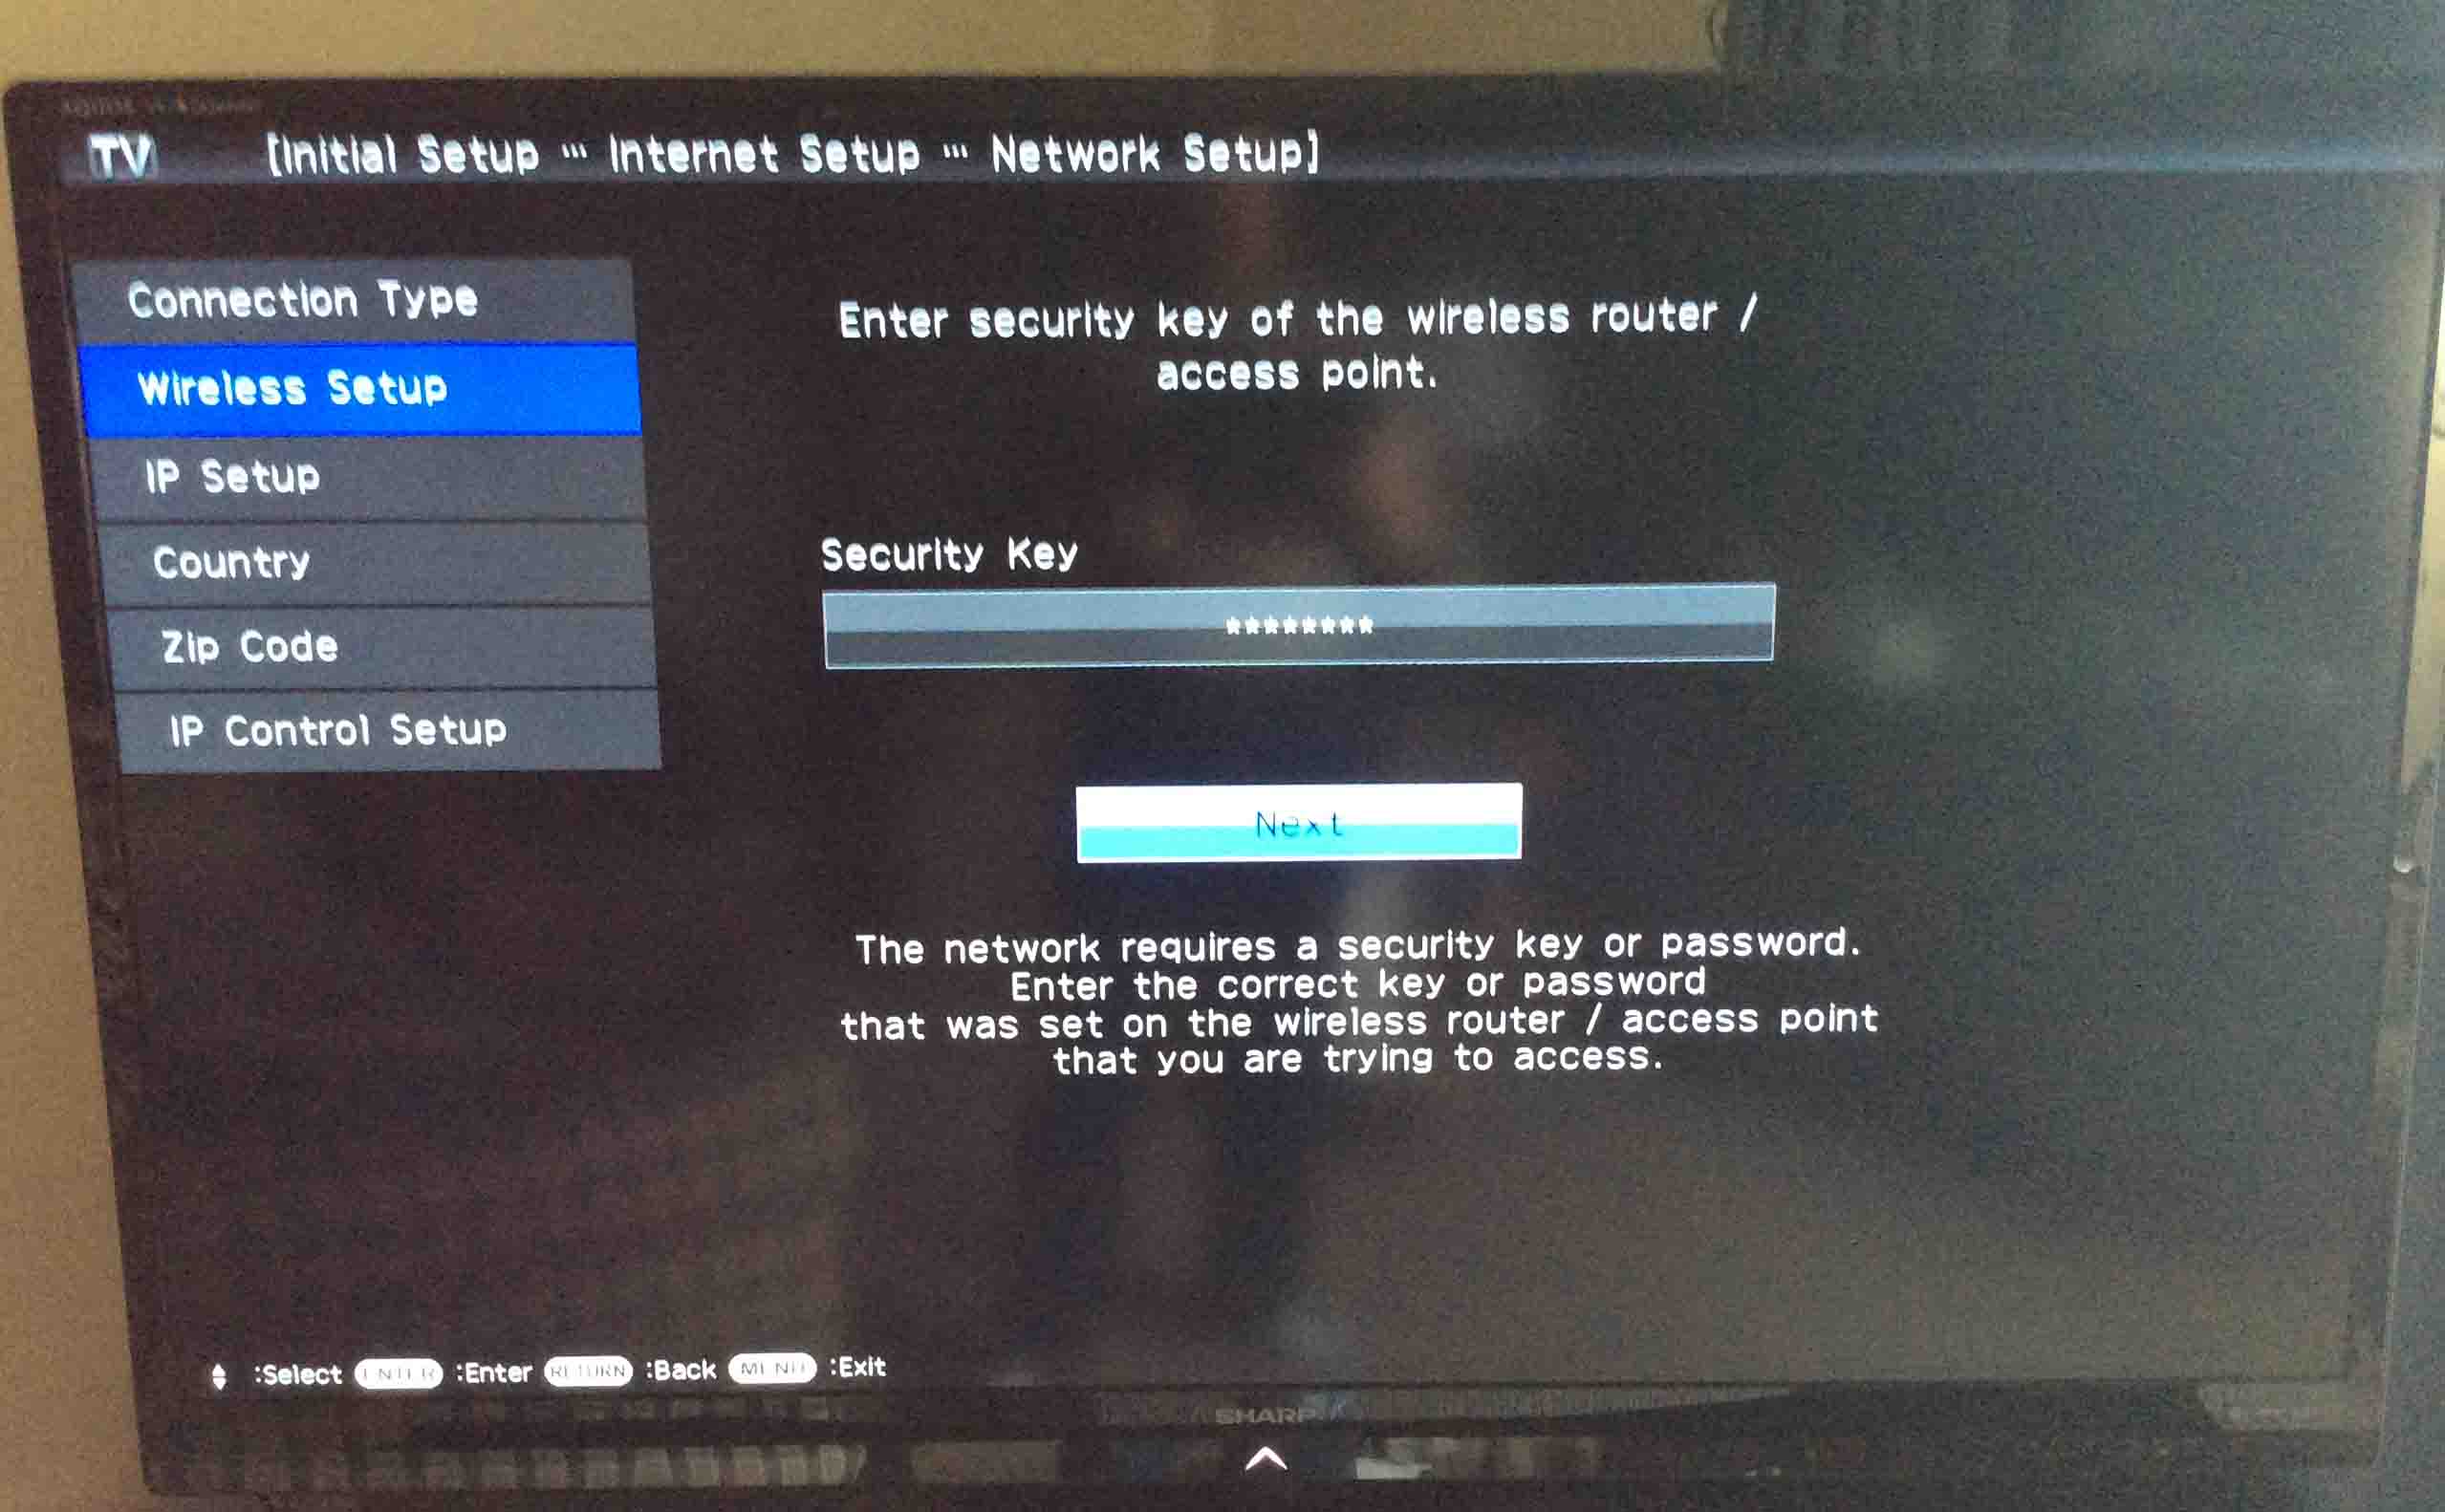
This brings up the Enter security key for the wireless router screen, as shown next.
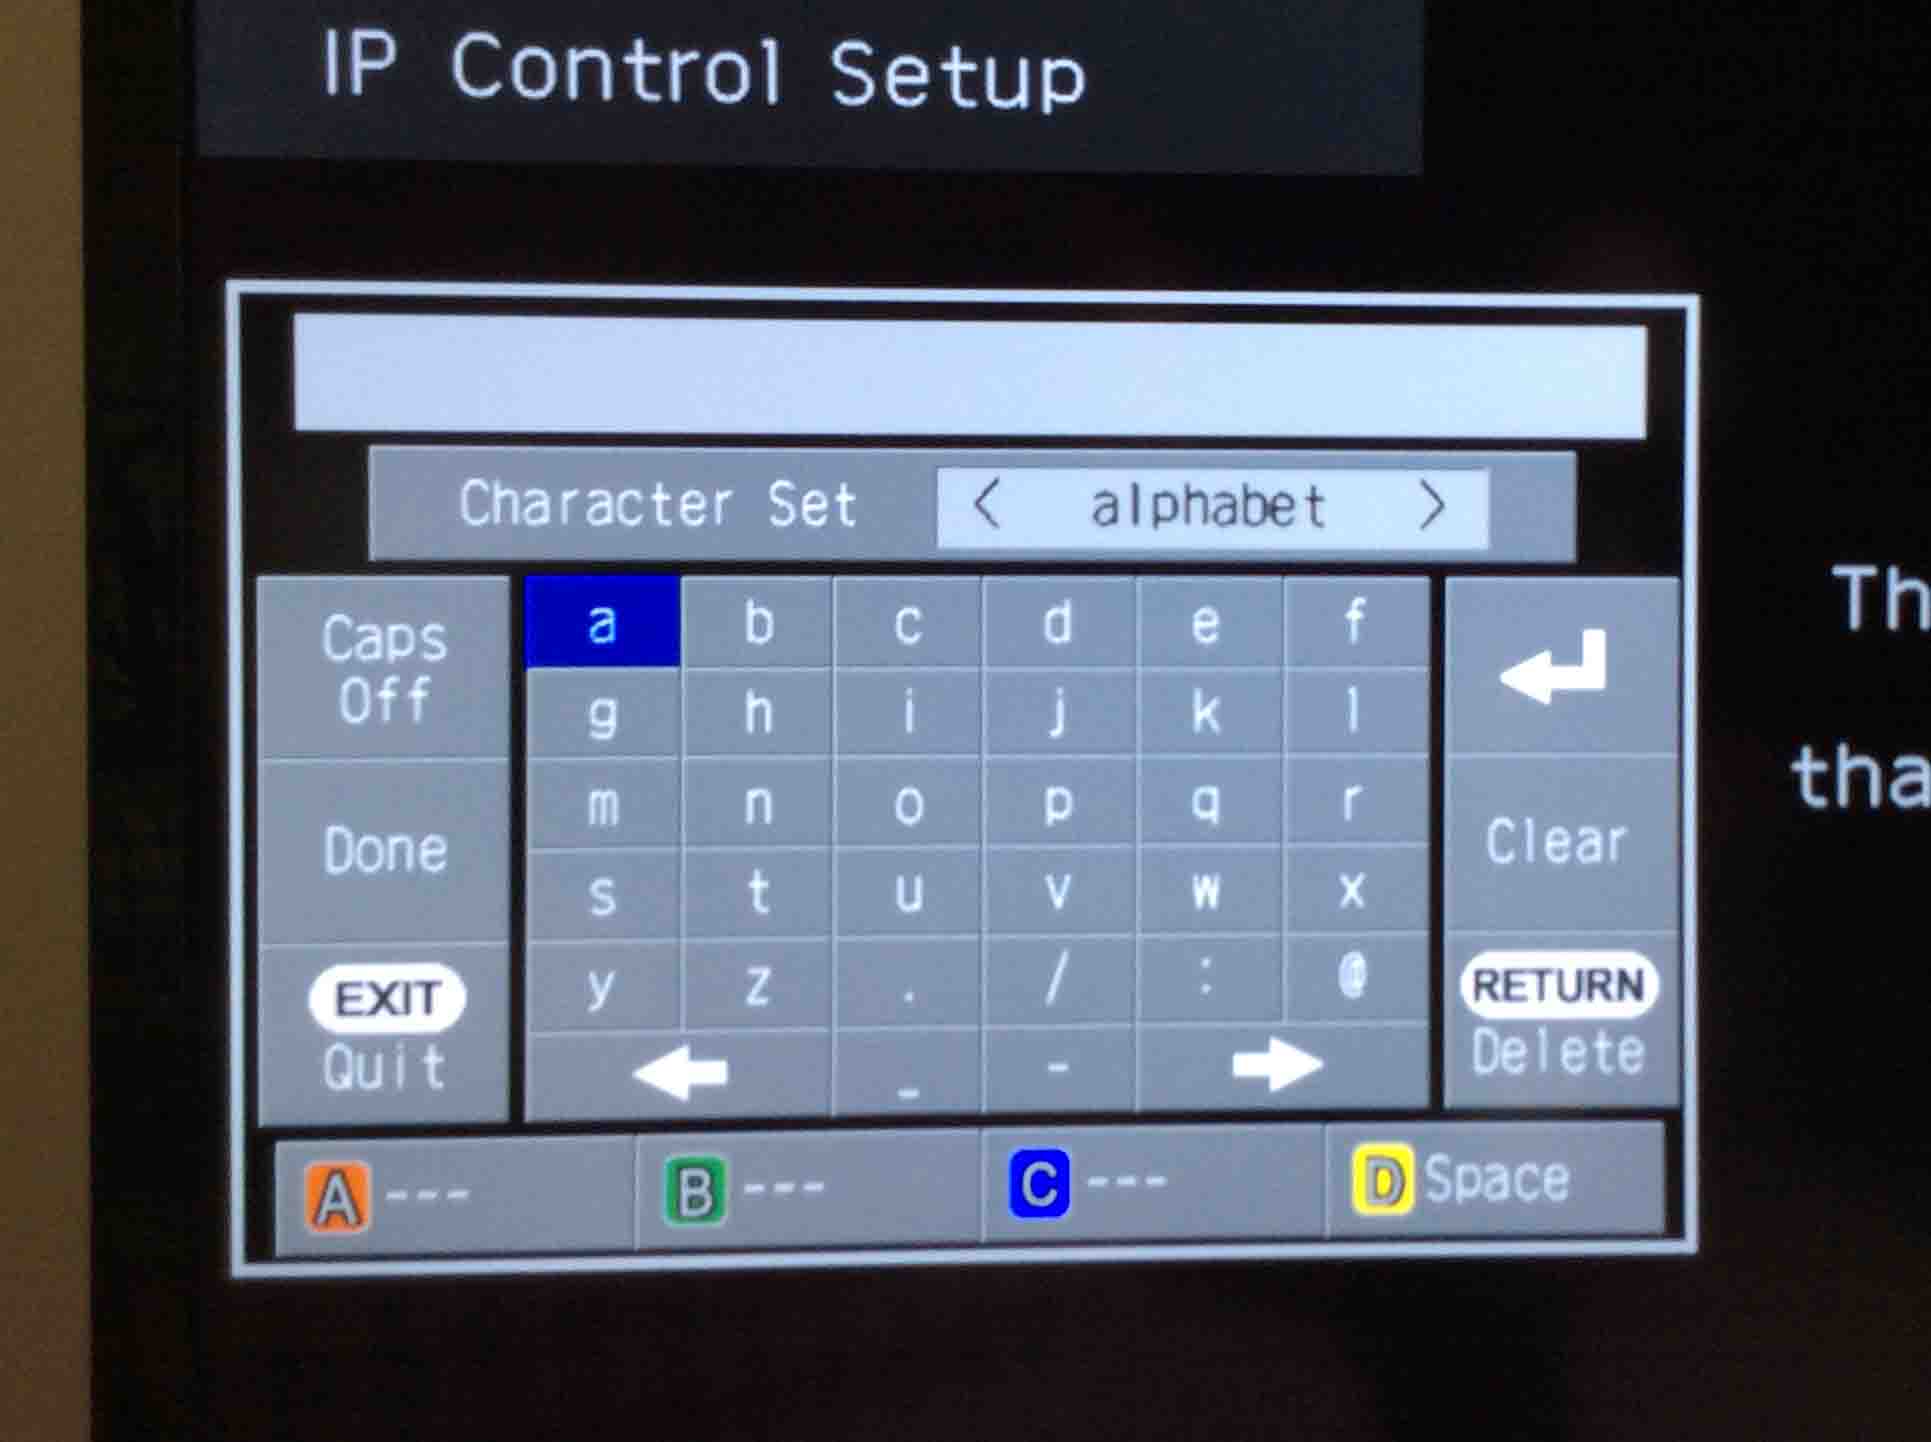
Press the ENTER key again, to bring up the on-screen Sharp Aquos alphanumeric keyboard, as shown next.
Move around the onscreen keyboard with the remote’s arrow keys to find each character. When you highlight a character you want, press the ENTER key on the remote. This adds it to the password buffer, which appears across the top of the keyboard.
Highlight and click the CAPS (ON, OFF, LOCK) key to switch between lowercase, single uppercase, and all uppercase letters.
To enter letters, navigate to the Character Set menu, and select the “Alphabet” character set. For numbers, again move to the Character Set pull down menu, and select the “Numbers” character set. When typing in symbols and punctuation, choose the Sign character set.
To erase characters, navigate to the Return, Delete key and press the ENTER key. This erases the character beneath the cursor. Then it moves all characters to the right of the cursor, one spot to the left. They then fill in the space where the deleted symbol was. Press the Clear key to erase all the characters typed so far, and start over.
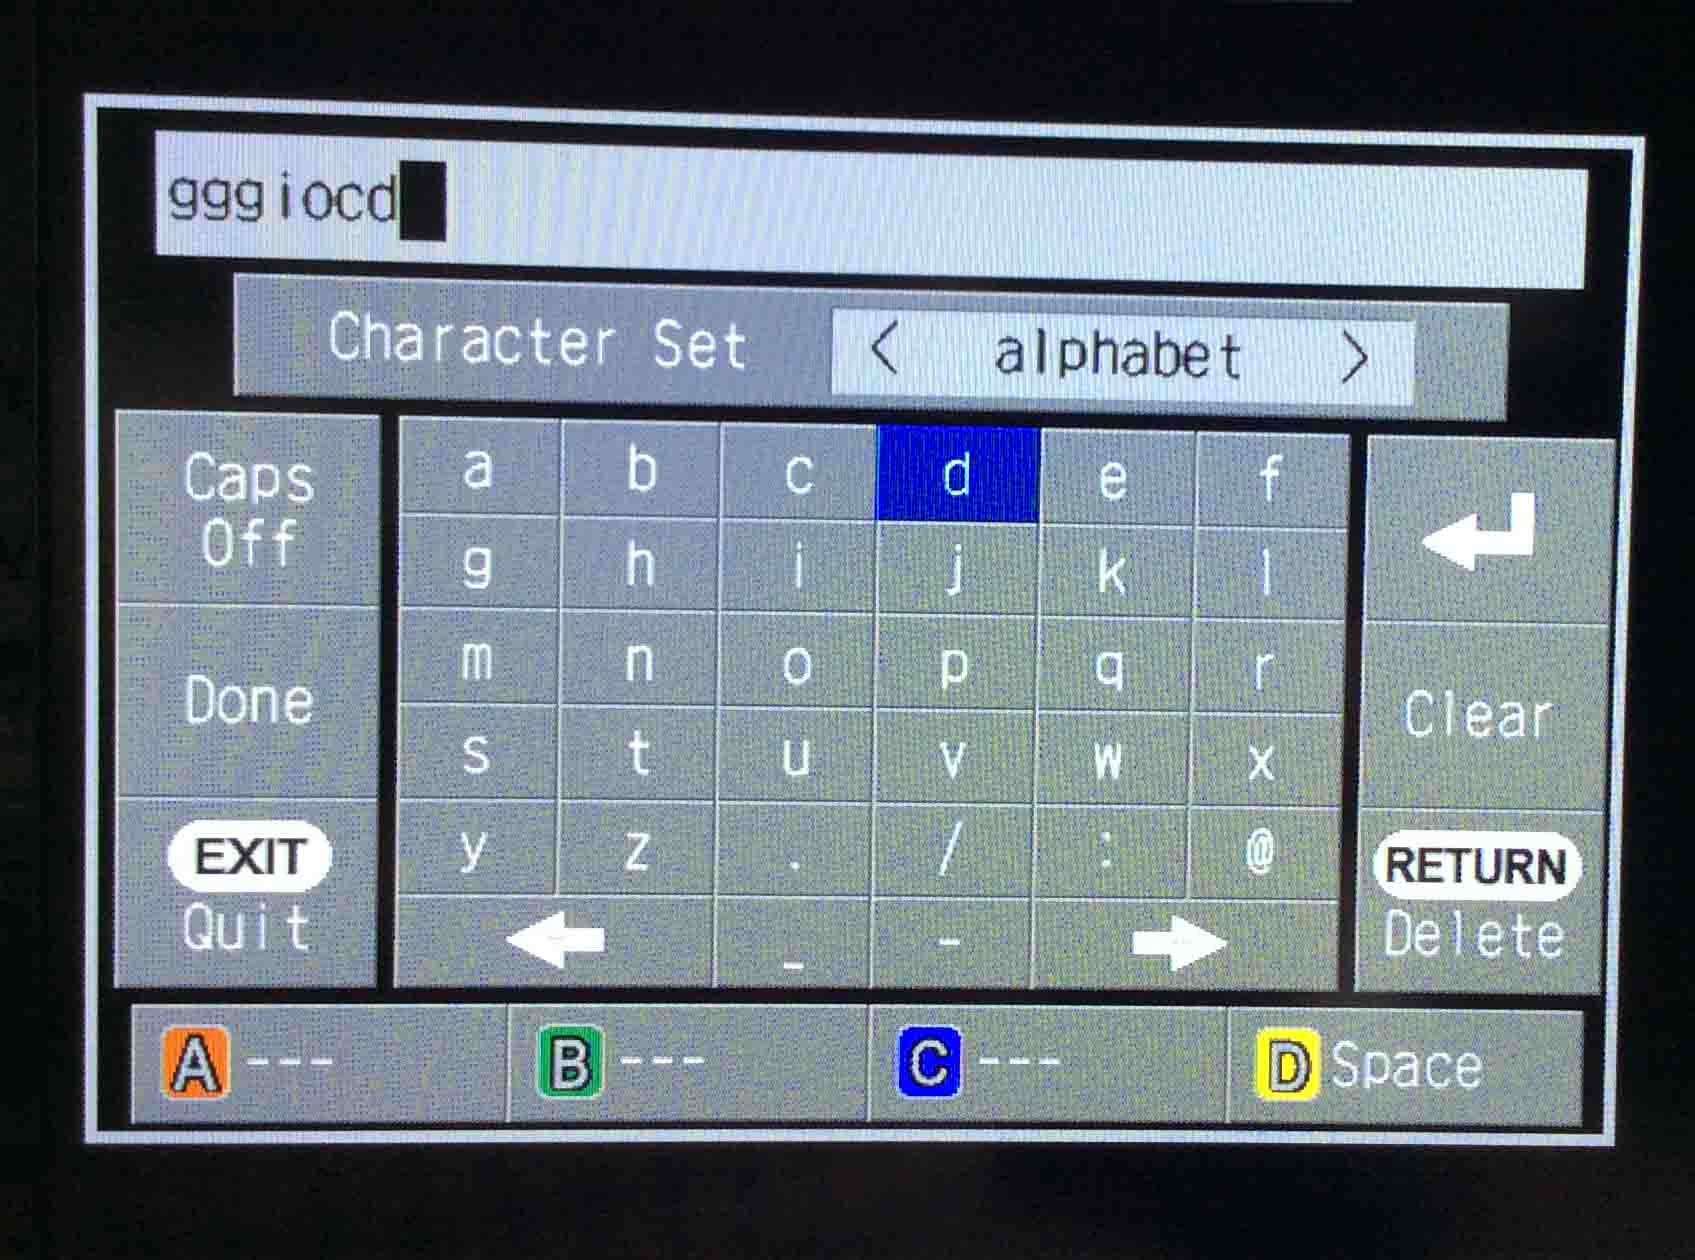
An example of this keyboard with a partially-entered password is shown in the next picture. Notice the so-far entered characters in the edit field across the top of the keyboard.
Once you punch in the password, move to the Done key. Then quickly press and release the ENTER key on the remote. The onscreen keyboard then closes, revealing once again the Enter Security Key screen. But now, it has the password field there now filled in with stars, as we see next.
You have now entered the WiFi password.
Start a connection attempt to the network by highlighting the Next button on the screen in the last picture. Then quickly press and release the ENTER key on the Aquos remote.
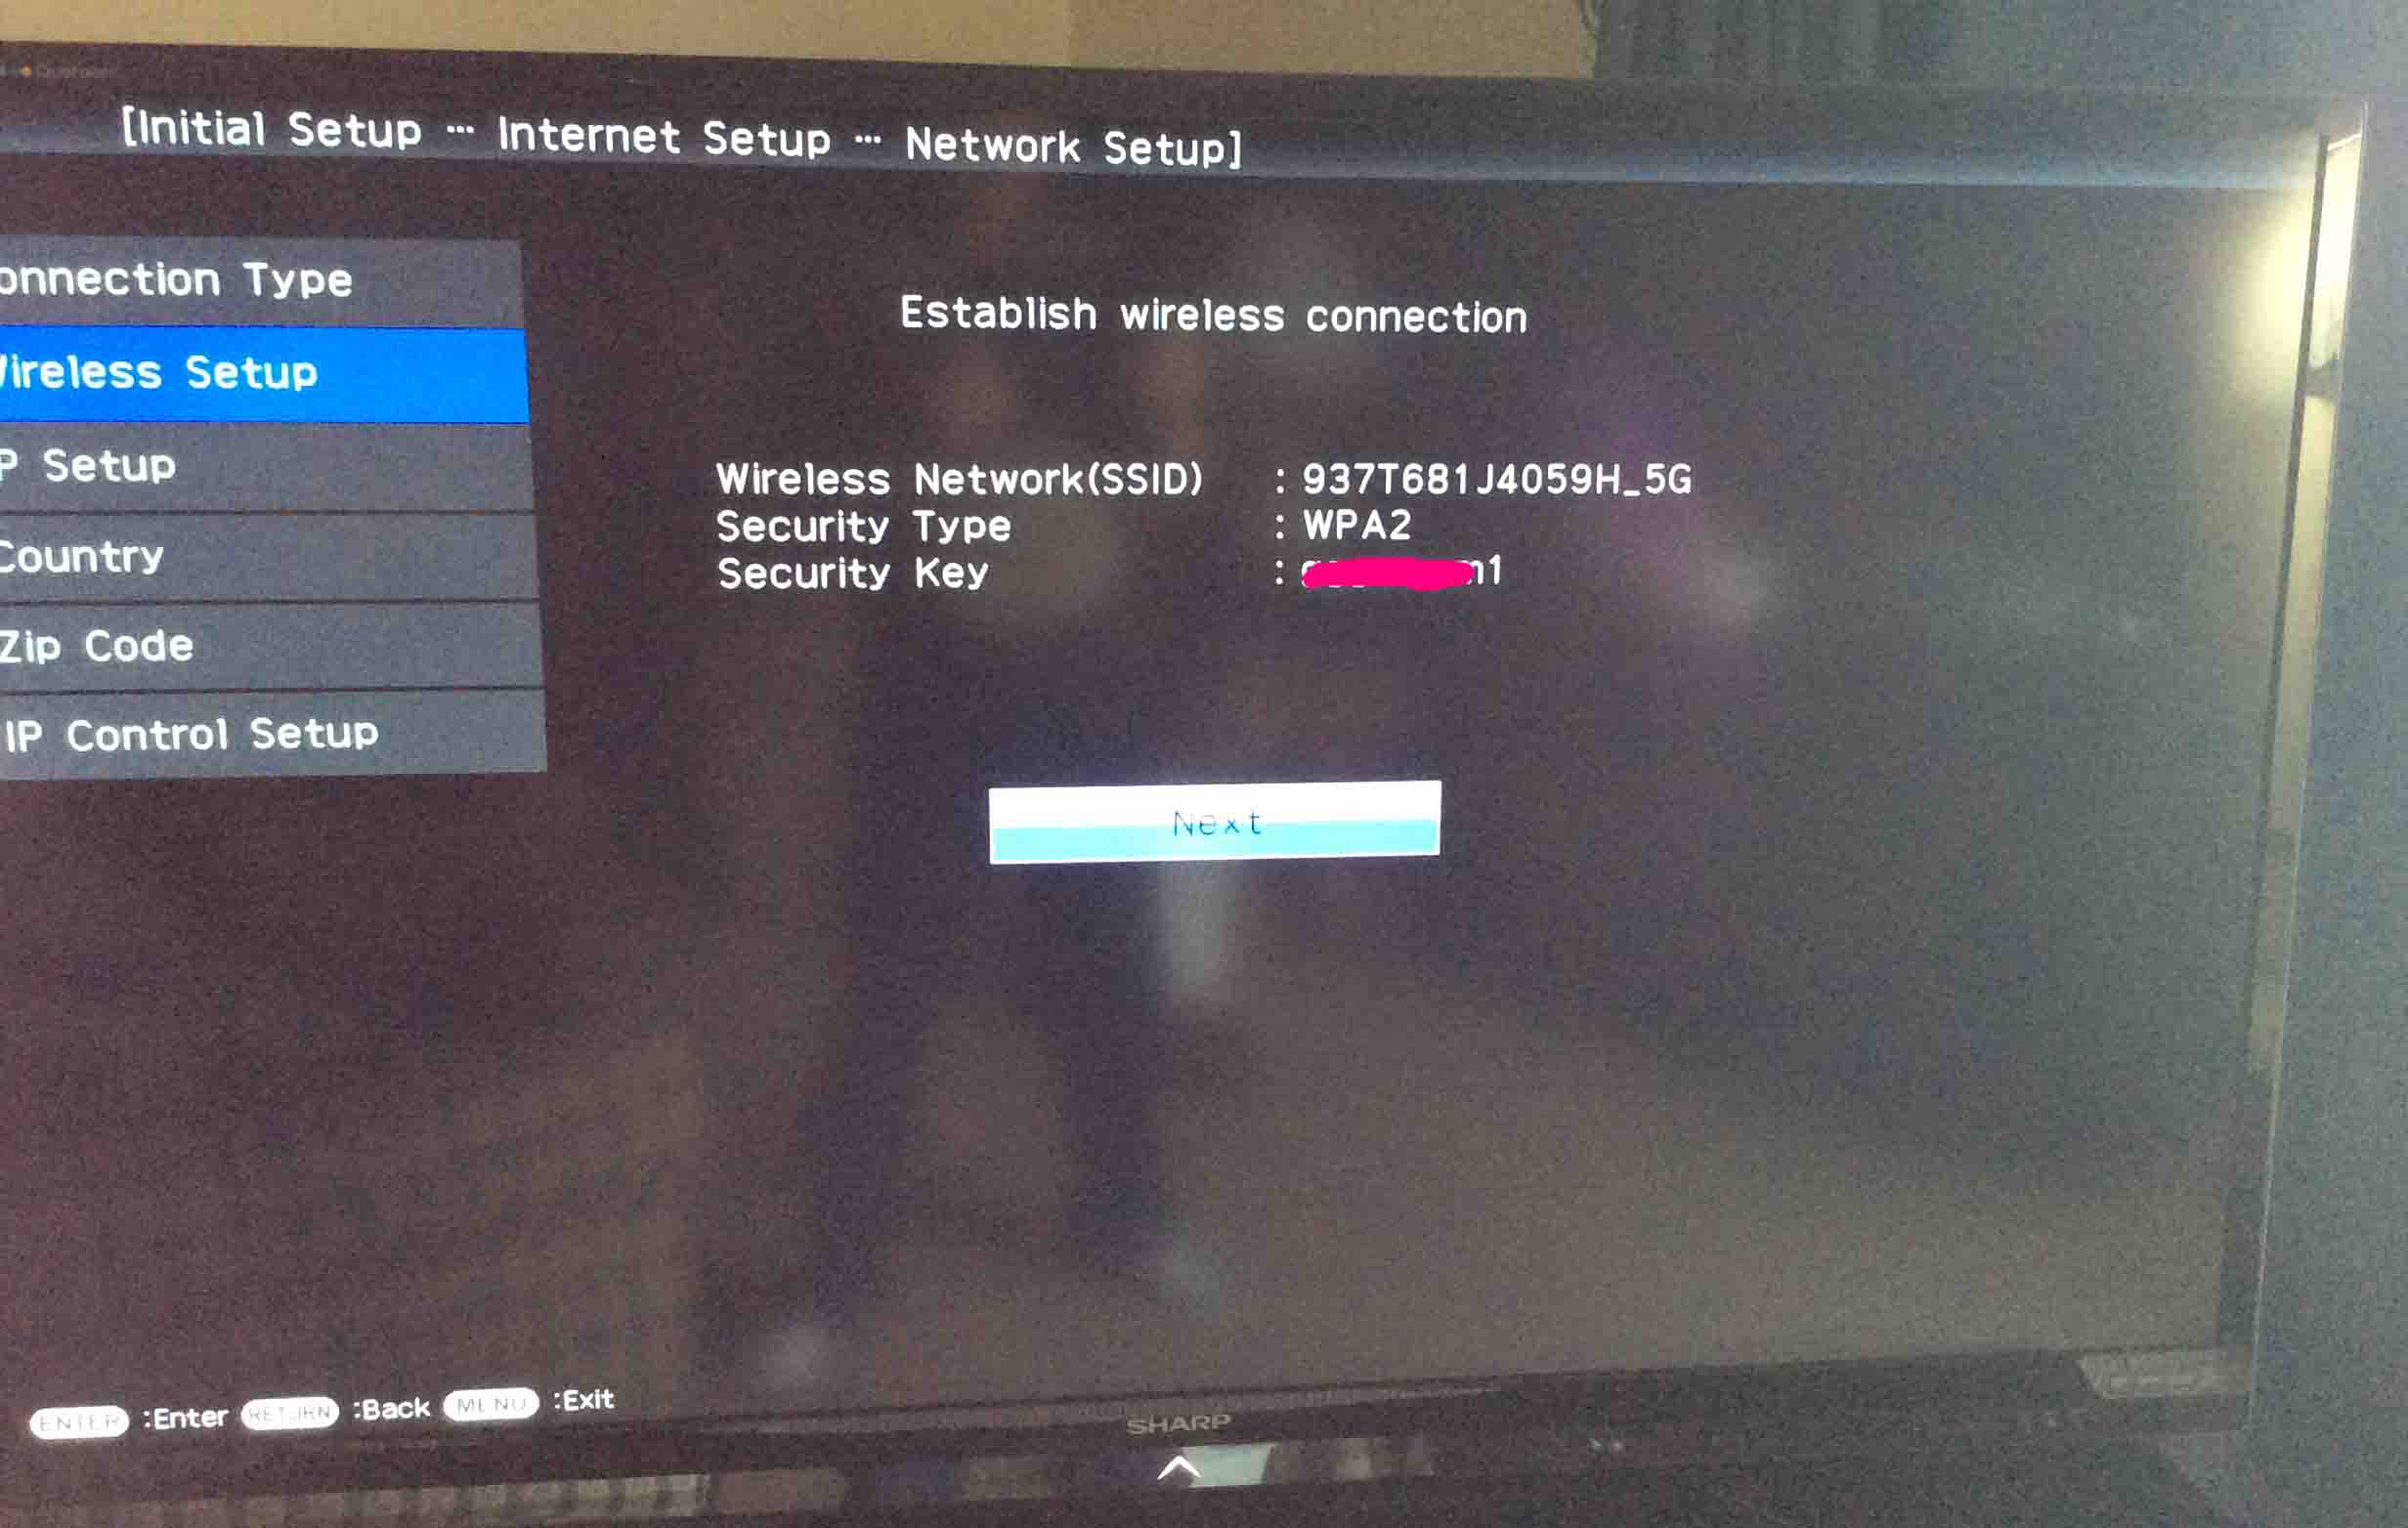
The onscreen keyboard now closes. Then the Establish wireless connection screen appears. Here, you see the chosen network SSID, security type, and key that you typed in, as shown next.
Note that we blanked out the password with “pink paint,” as the password is visible on this screen.
Verify that the key, as displayed here, is correct. If it is not, you may press the RETURN key. This starts a new scan for in-range wireless networks. Then it takes you back to the list of WiFi networks this scan found. See this list displayed in step 3 above. Pick up from there, to re-enter the security key (password).
But if the password looks right, quickly press and release the ENTER key on the remote.
The TV then tries to connect with the new network. You may see Connecting… messages for three or five seconds while the Sharp Aquos TV contacts the WAP.
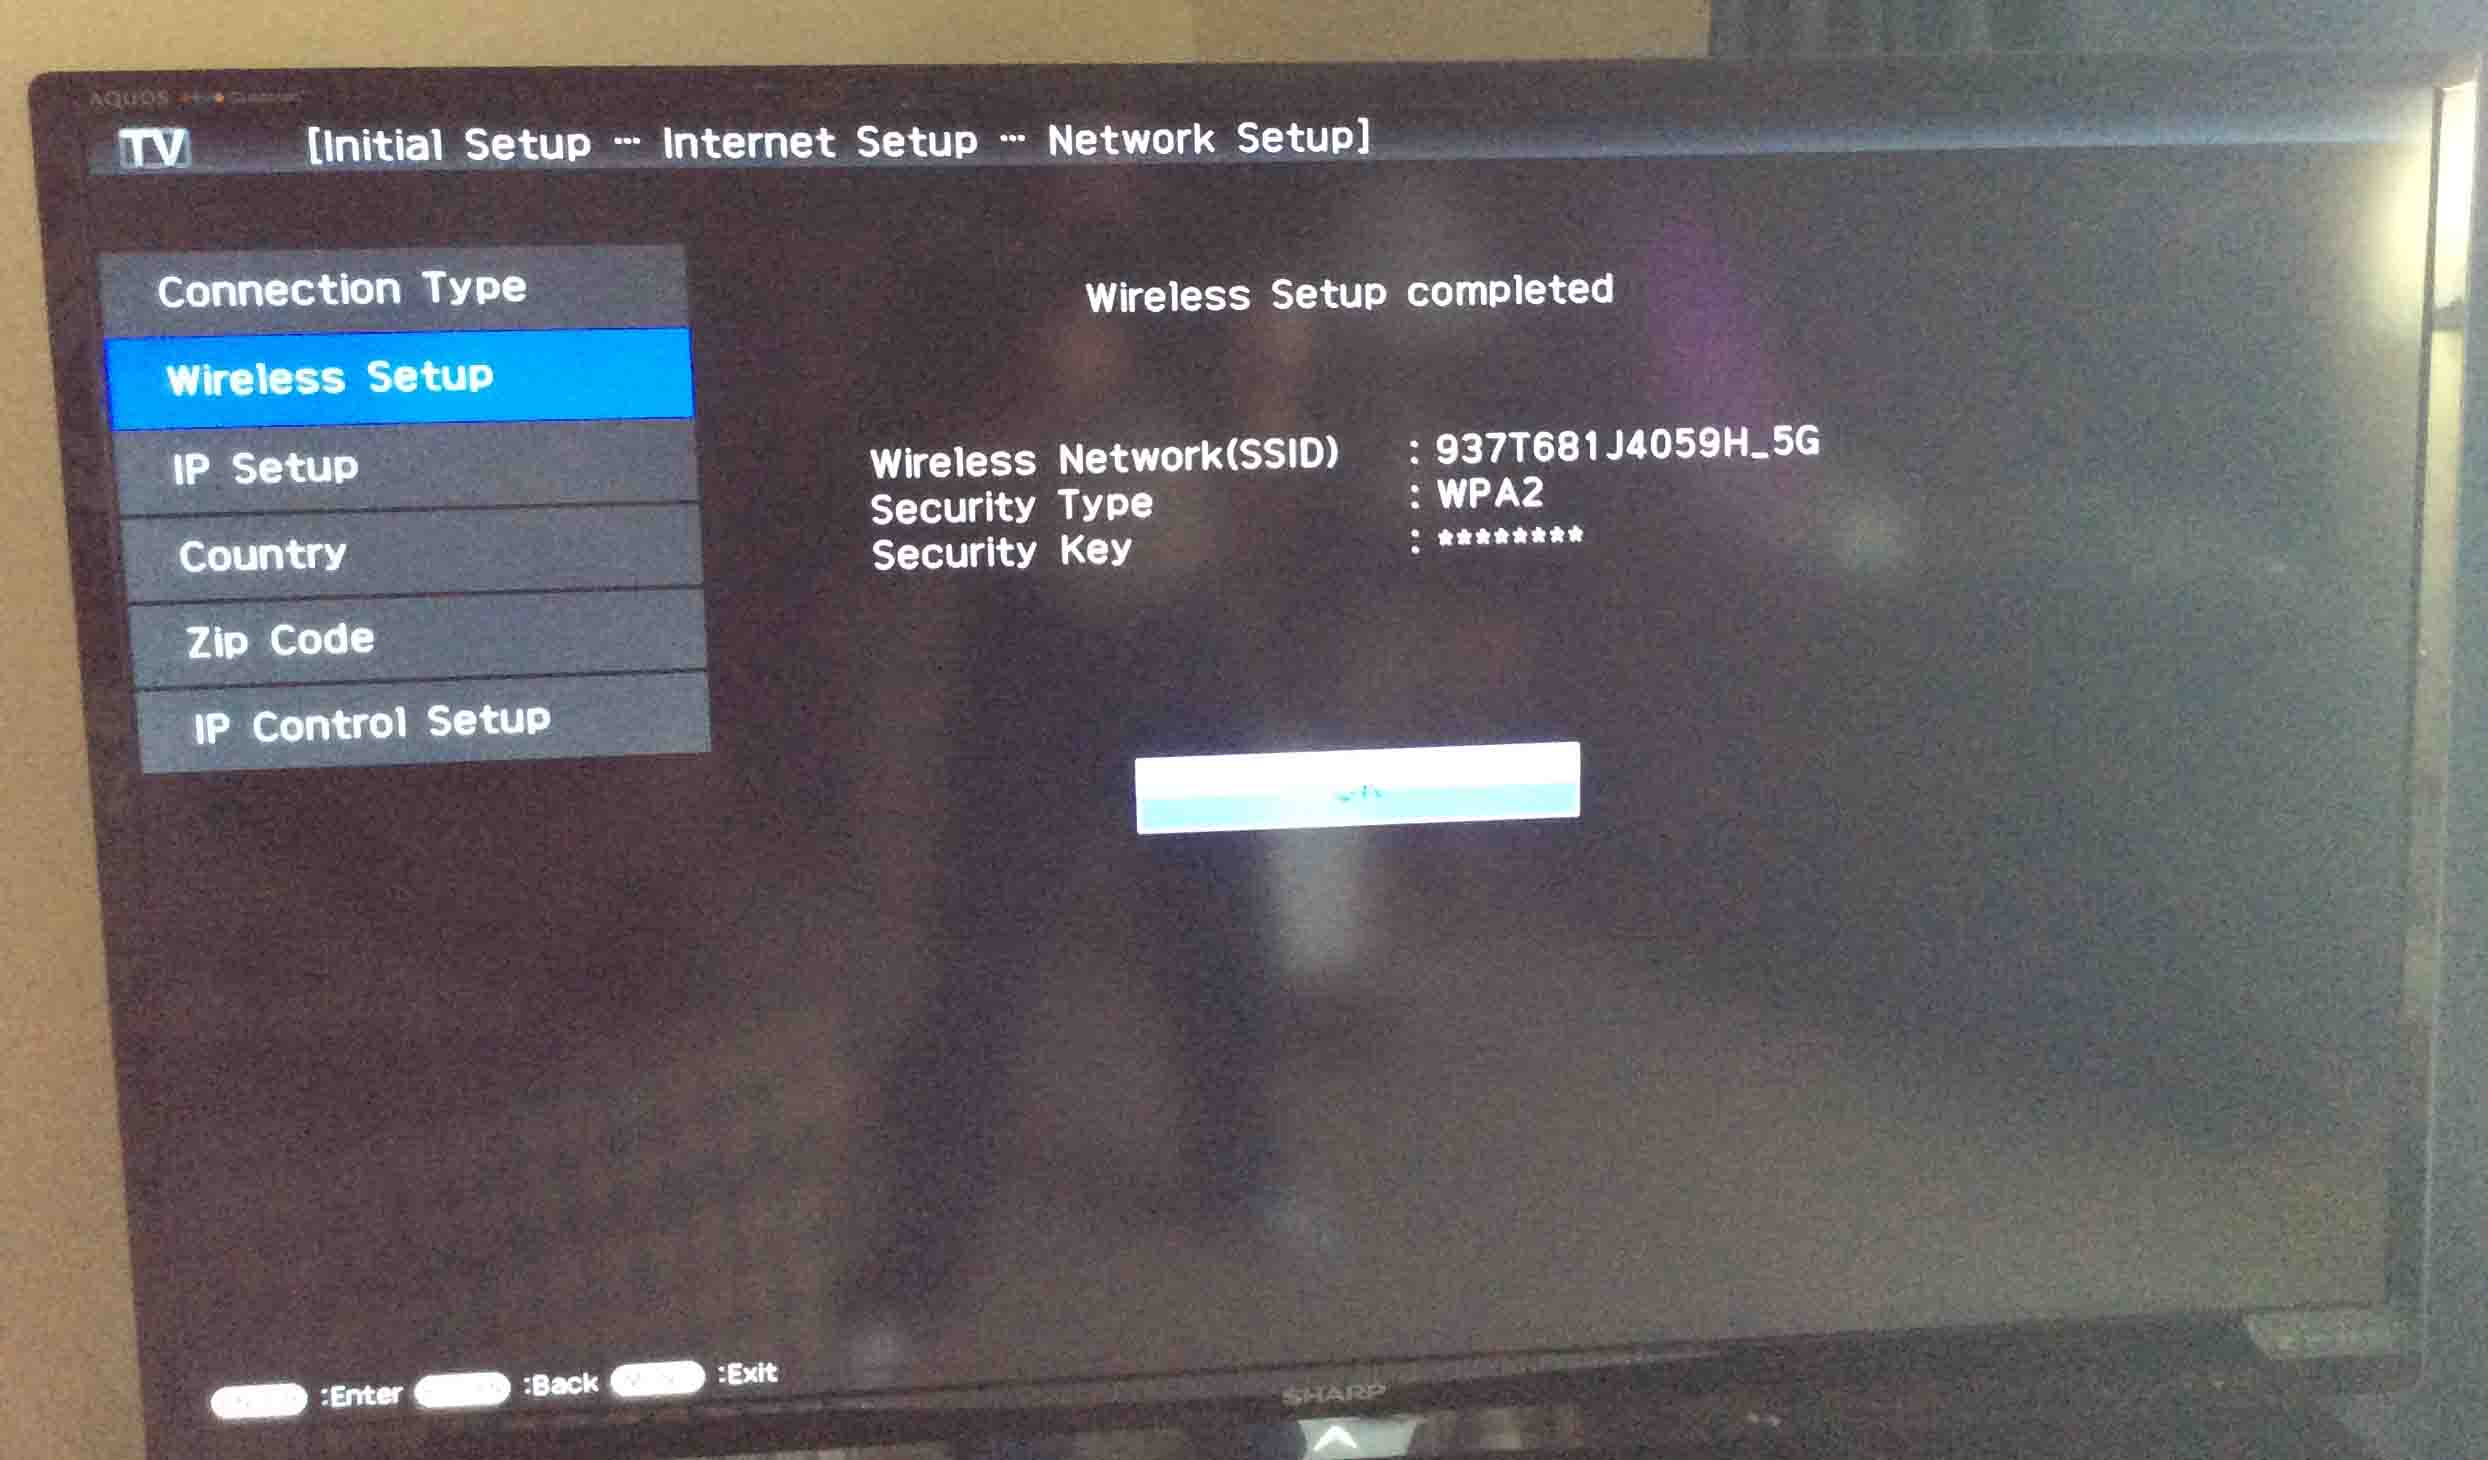
But if all goes well, the Wireless setup completed screen displays, as shown next.
Press the ENTER key on the remote, which again displays the Setup wireless connection screen. But this time, a successful connection is present. Check this by looking at the Transmission Type and Signal Strength fields. These fields now, unlike the same screen in step 1 above, should have info in them.
You have now successfully configured your Sharp Aquos TV to connect with a working WiFi network.
So, press the EXIT key to leave the screen above, and return to regular TV viewing.
You’re done. Enjoy your TV viewing!
The JBL Go 2 speaker by Harman Kardon is a low power, hand-held style unit…
Shows how to fix Honeywell wireless thermostat connection failure issues. You might see these on…
Shows how to connect HP DeskJet 3630 series to WiFi. Note that doing this will…
Here, we show how to reset the Wonderboom speaker version 2. which returns it to…
We give here the JBL Clip reset directions, that return it to its default settings…
The JBL Boom Box JBL by Harman Kardon is a moderate to higher power, boom…