When you scan for in-range Bluetooth speakers on a phone, desktop computer, or tablet, your JBL Charge 3 speaker shows up as “JBL Charge 3” by default. That is, its default Bluetooth name is, “JBL Charge 3”. But you can change this name using the JBL Connect+ app along with an iOS or Android based mobile device. In the post, we outline the JBL Charge 3 change name routine, step by step. Here’s how to do it.
Getting your Devices Ready for JBL Charge 3 Change Name Operation
-
- First, install the JBL Connect app on your Android or iOS mobile device.
- Then, turn on your Charge 3 and pair your mobile device with it.
- Then, once you do all that, follow the routine below to change the speaker’s Bluetooth name.
JBL Charge 3 Change Name, Step by Step
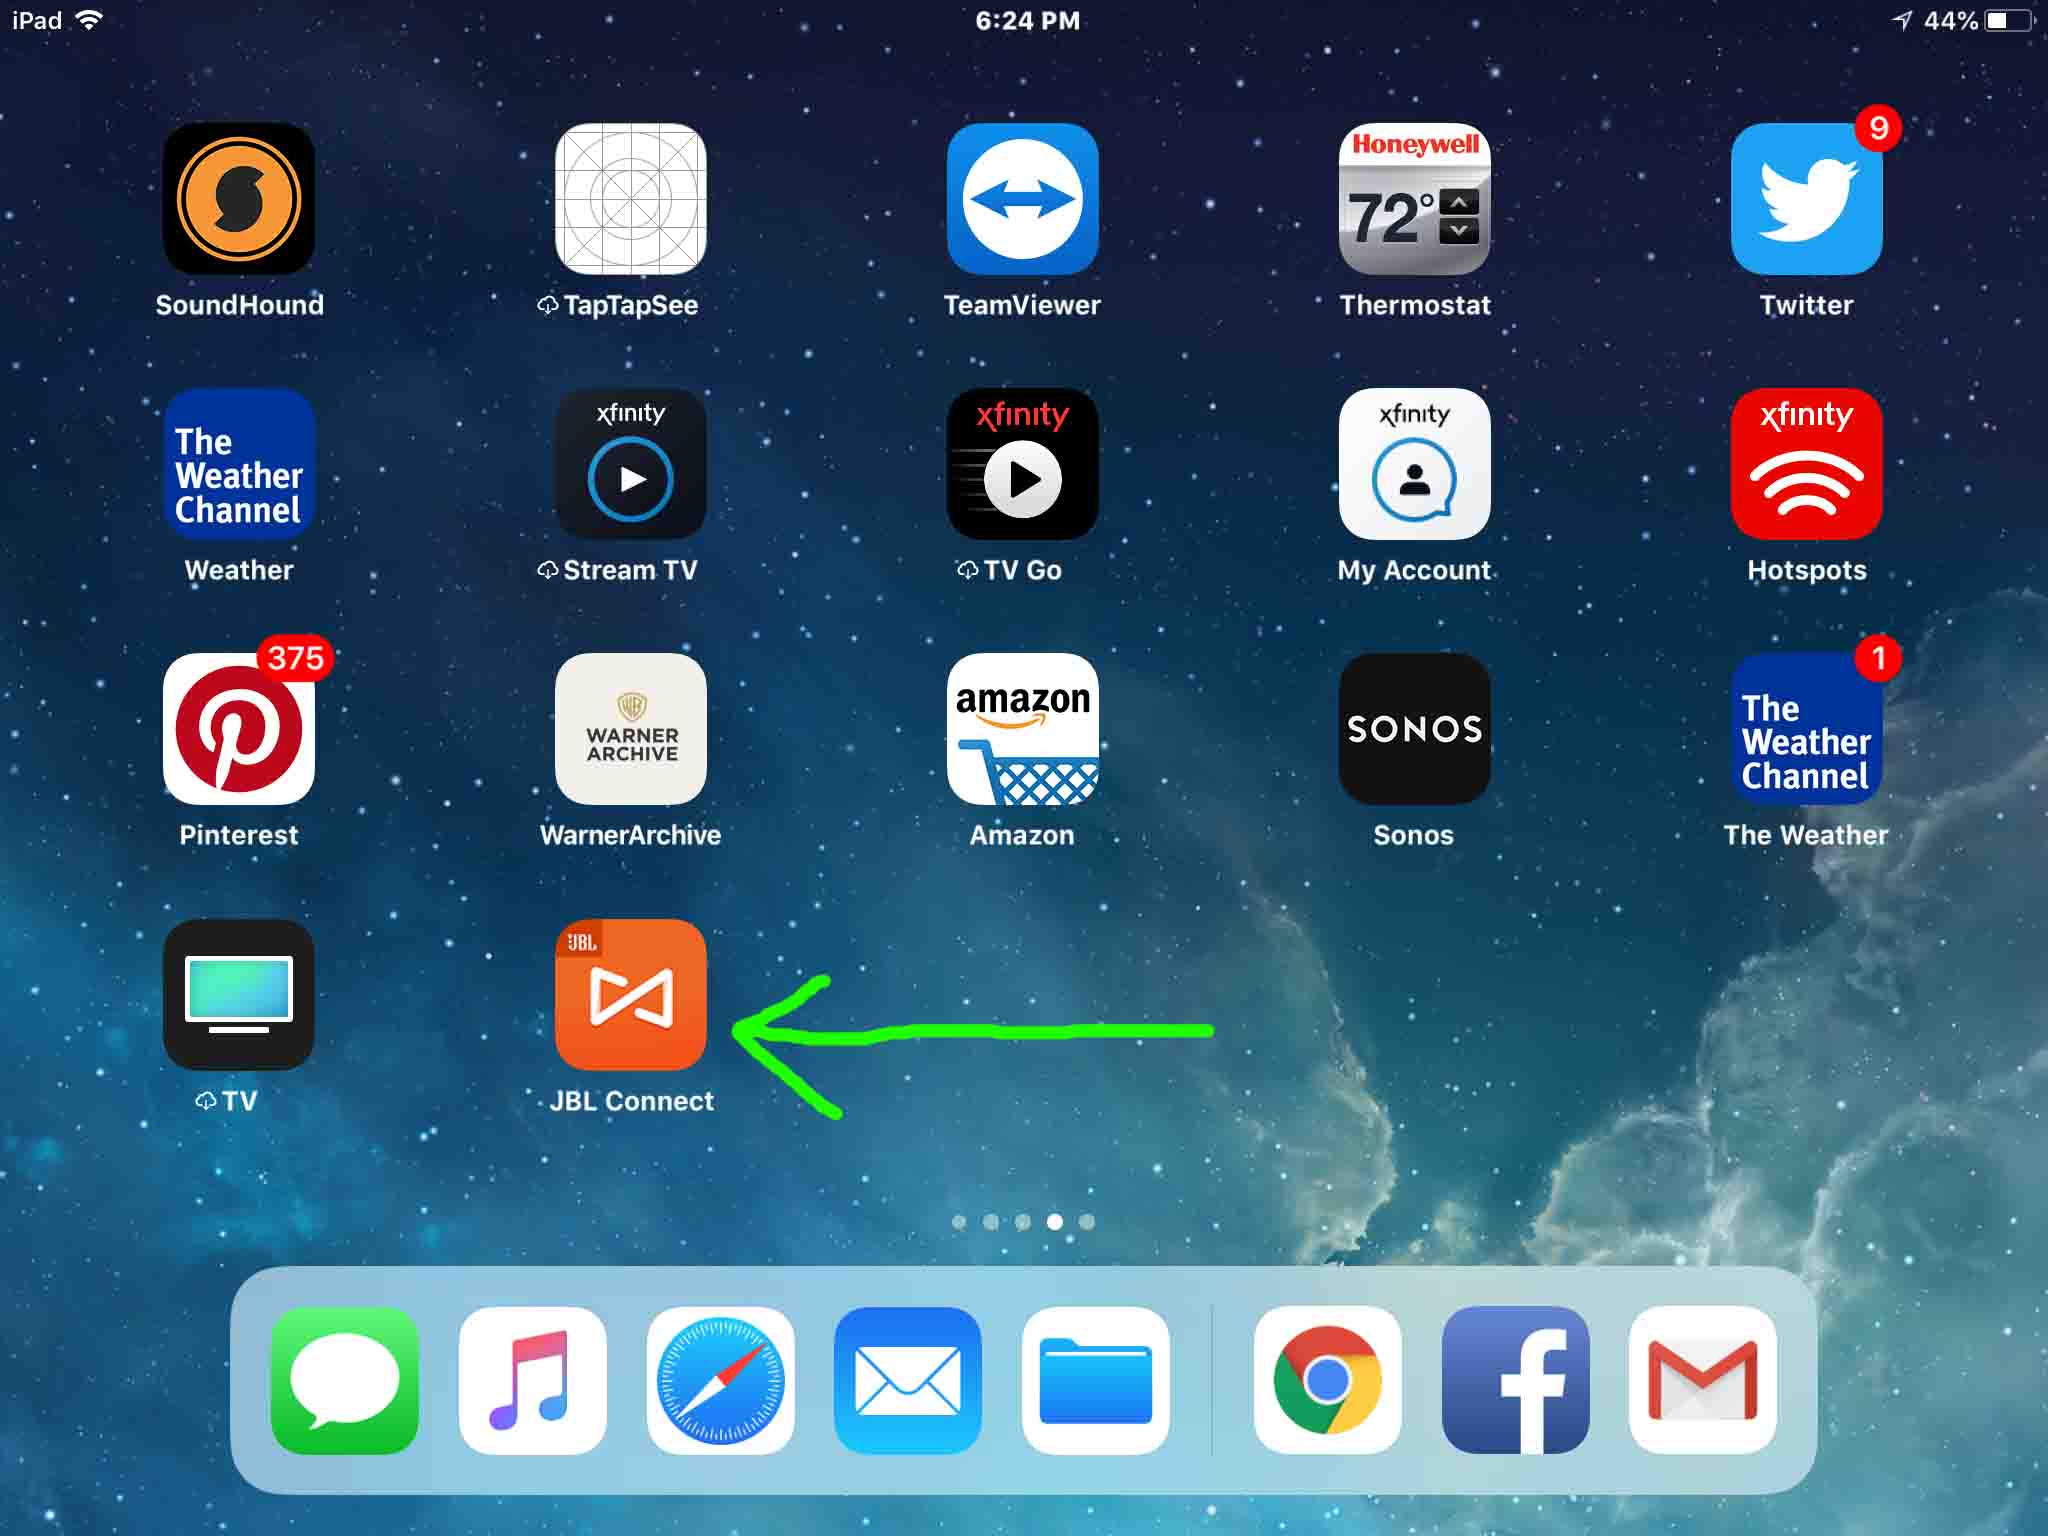
1. Find the JBL Connect App on your Mobile Device
Our copy installed on home screen four, as shown next. We pointed a green arrow at the JBL Connect app.
2. Run the JBL Connect App
Tap the JBL Connect app icon, as shown in the last picture.
Then, you should see the following screen.

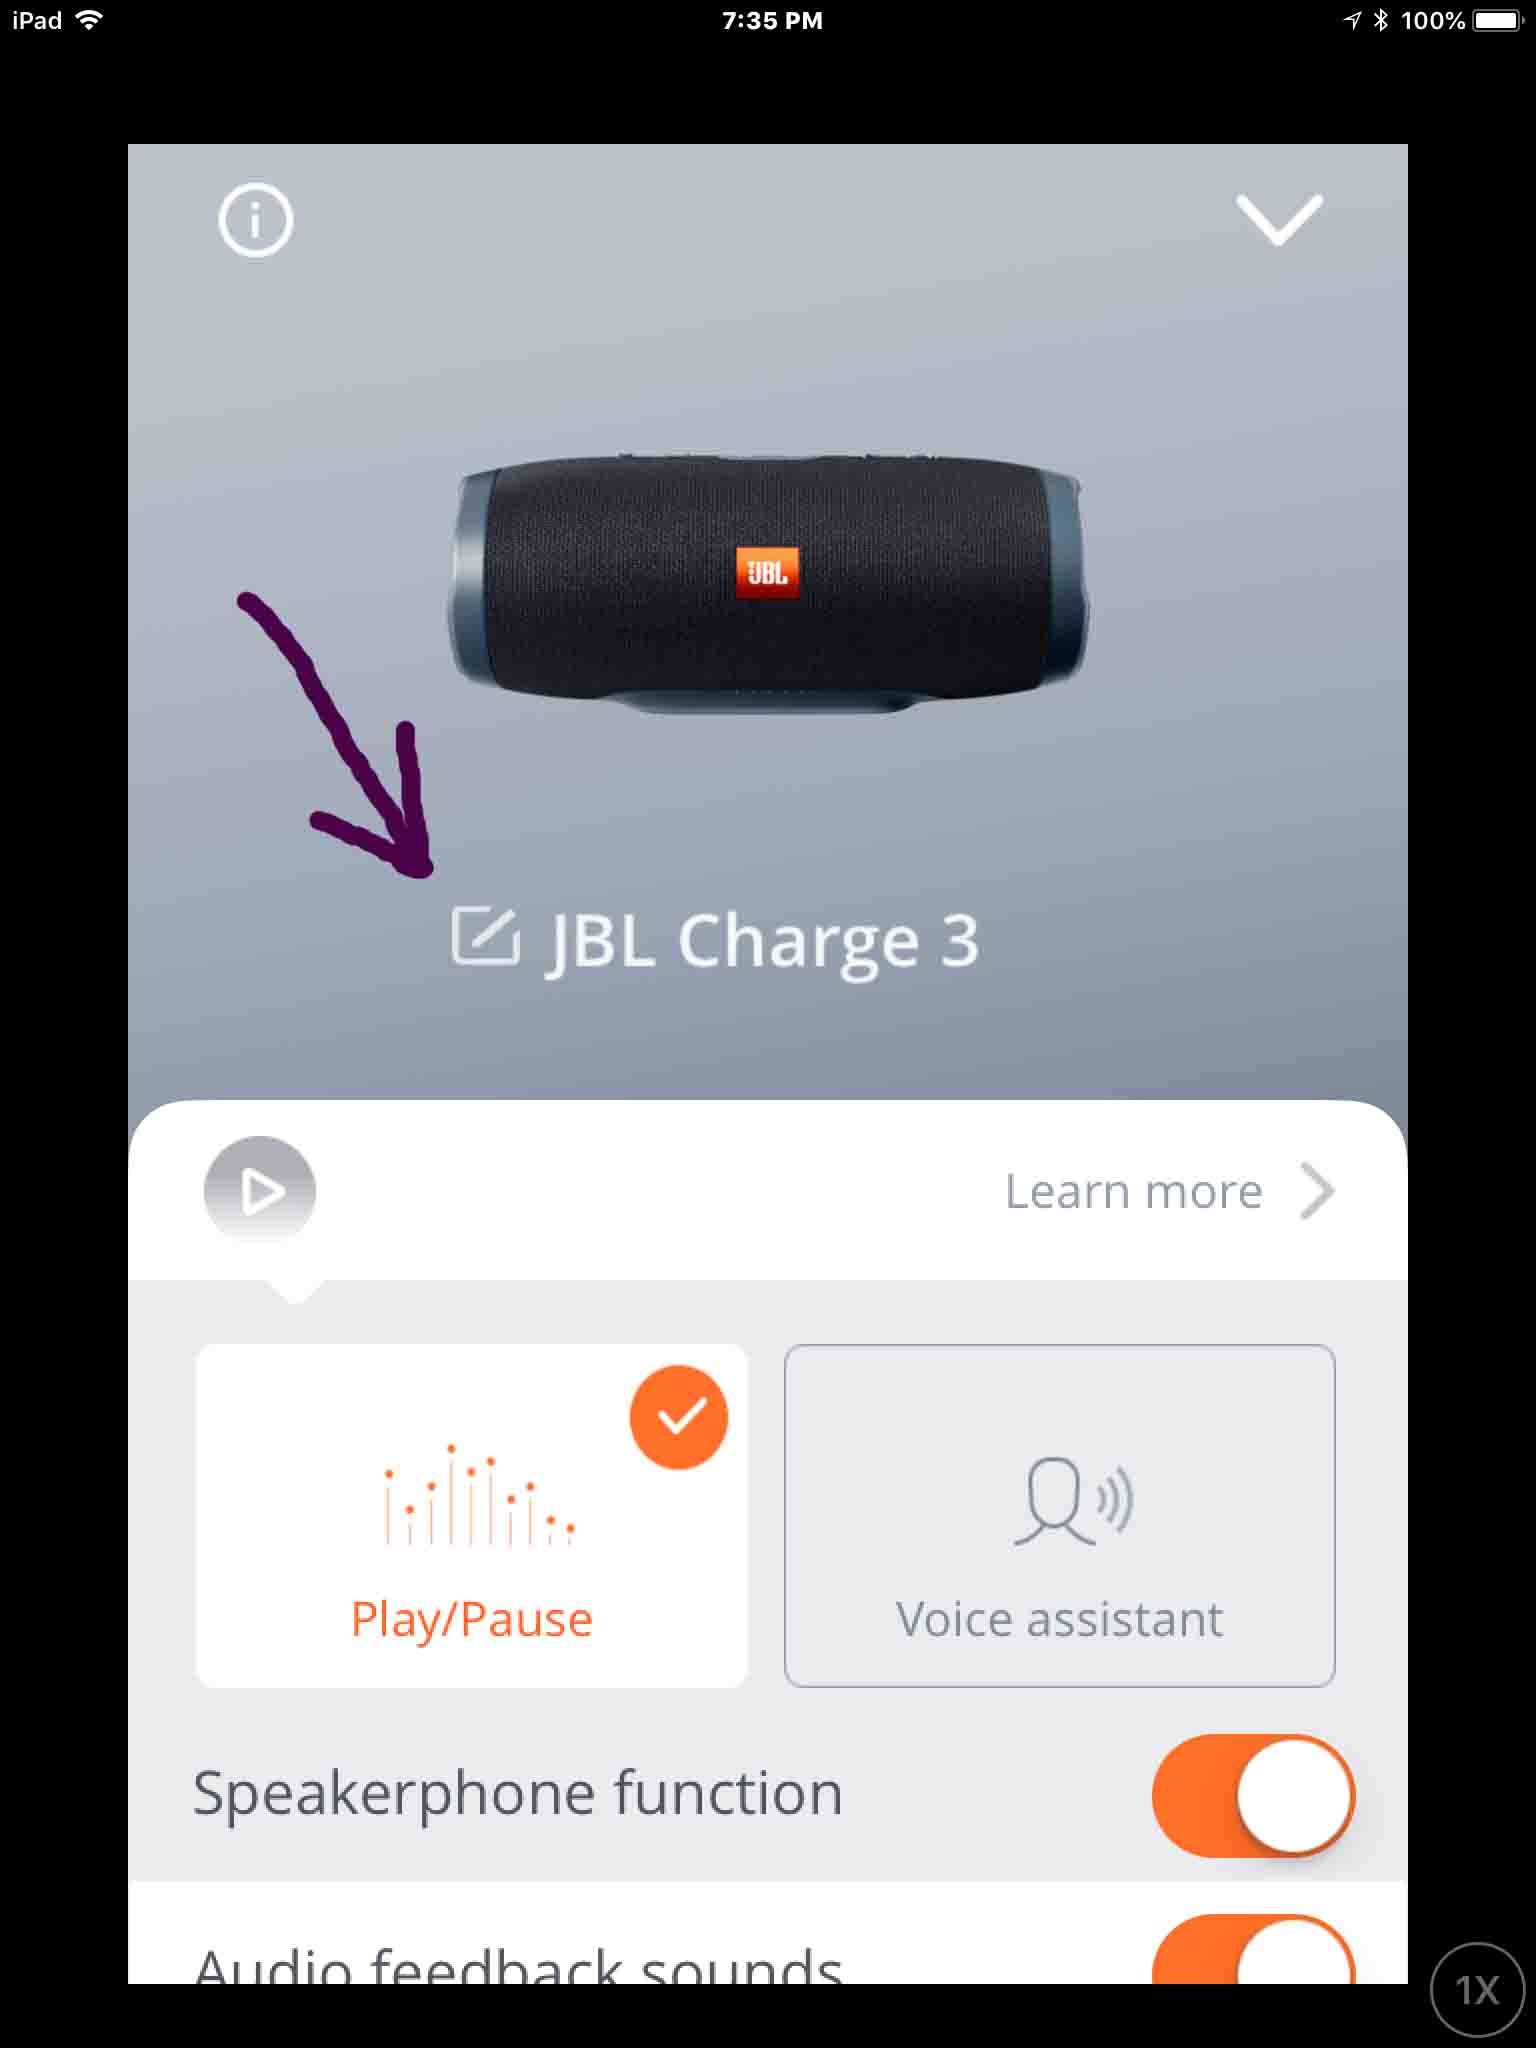
3. Get to the Settings Screen
Tap the gear Settings button, as pointed at in the last picture by the dark purple arrow.
You should then see the Settings screen for the paired Charge 3 speaker, as shown in the next screenshot.
4. Edit the Settings for the Paired JBL Charge 3
Tap the pencil icon next to the speaker, as highlighted by the purple arrow in the last screenshot.
Then, you should see the speaker name change screen, as we show next.
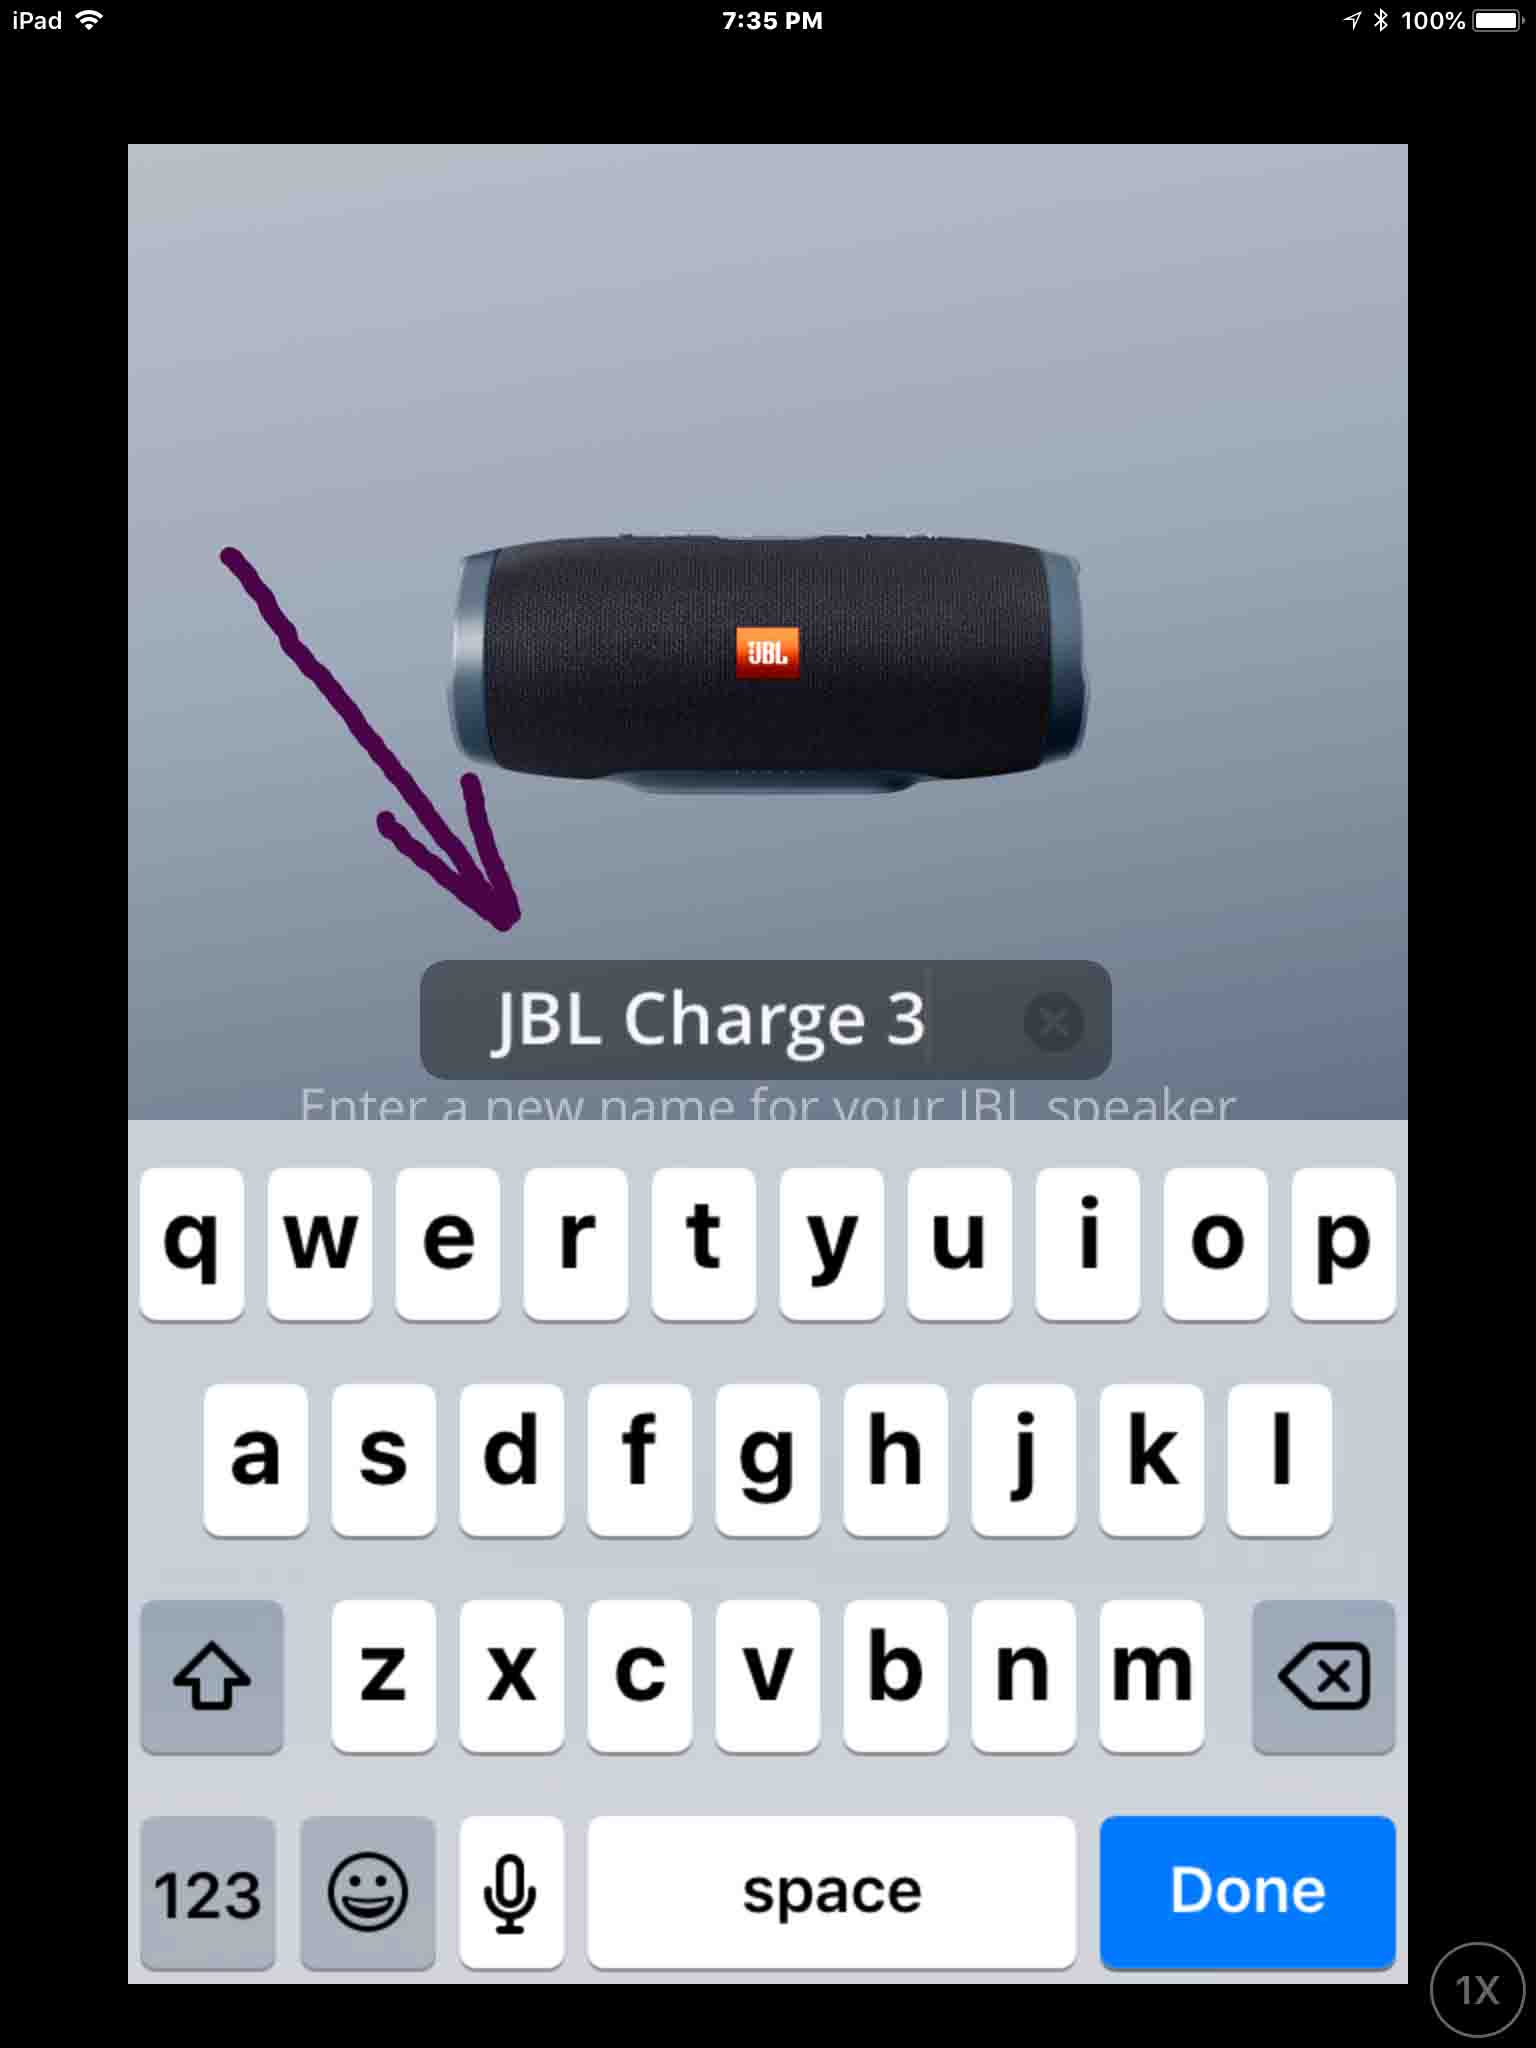
5. Edit the Speaker Name Field
Use the displayed virtual keyboard to change the name of the JBL Bluetooth speaker to the name you wish it to assume.
In the next screenshots, we change ours from “JBL Charge 3” to “Tom’s Charge 3”.
First, we backspaced over the default name (“JBL Charge 3”), as shown in the next picture.
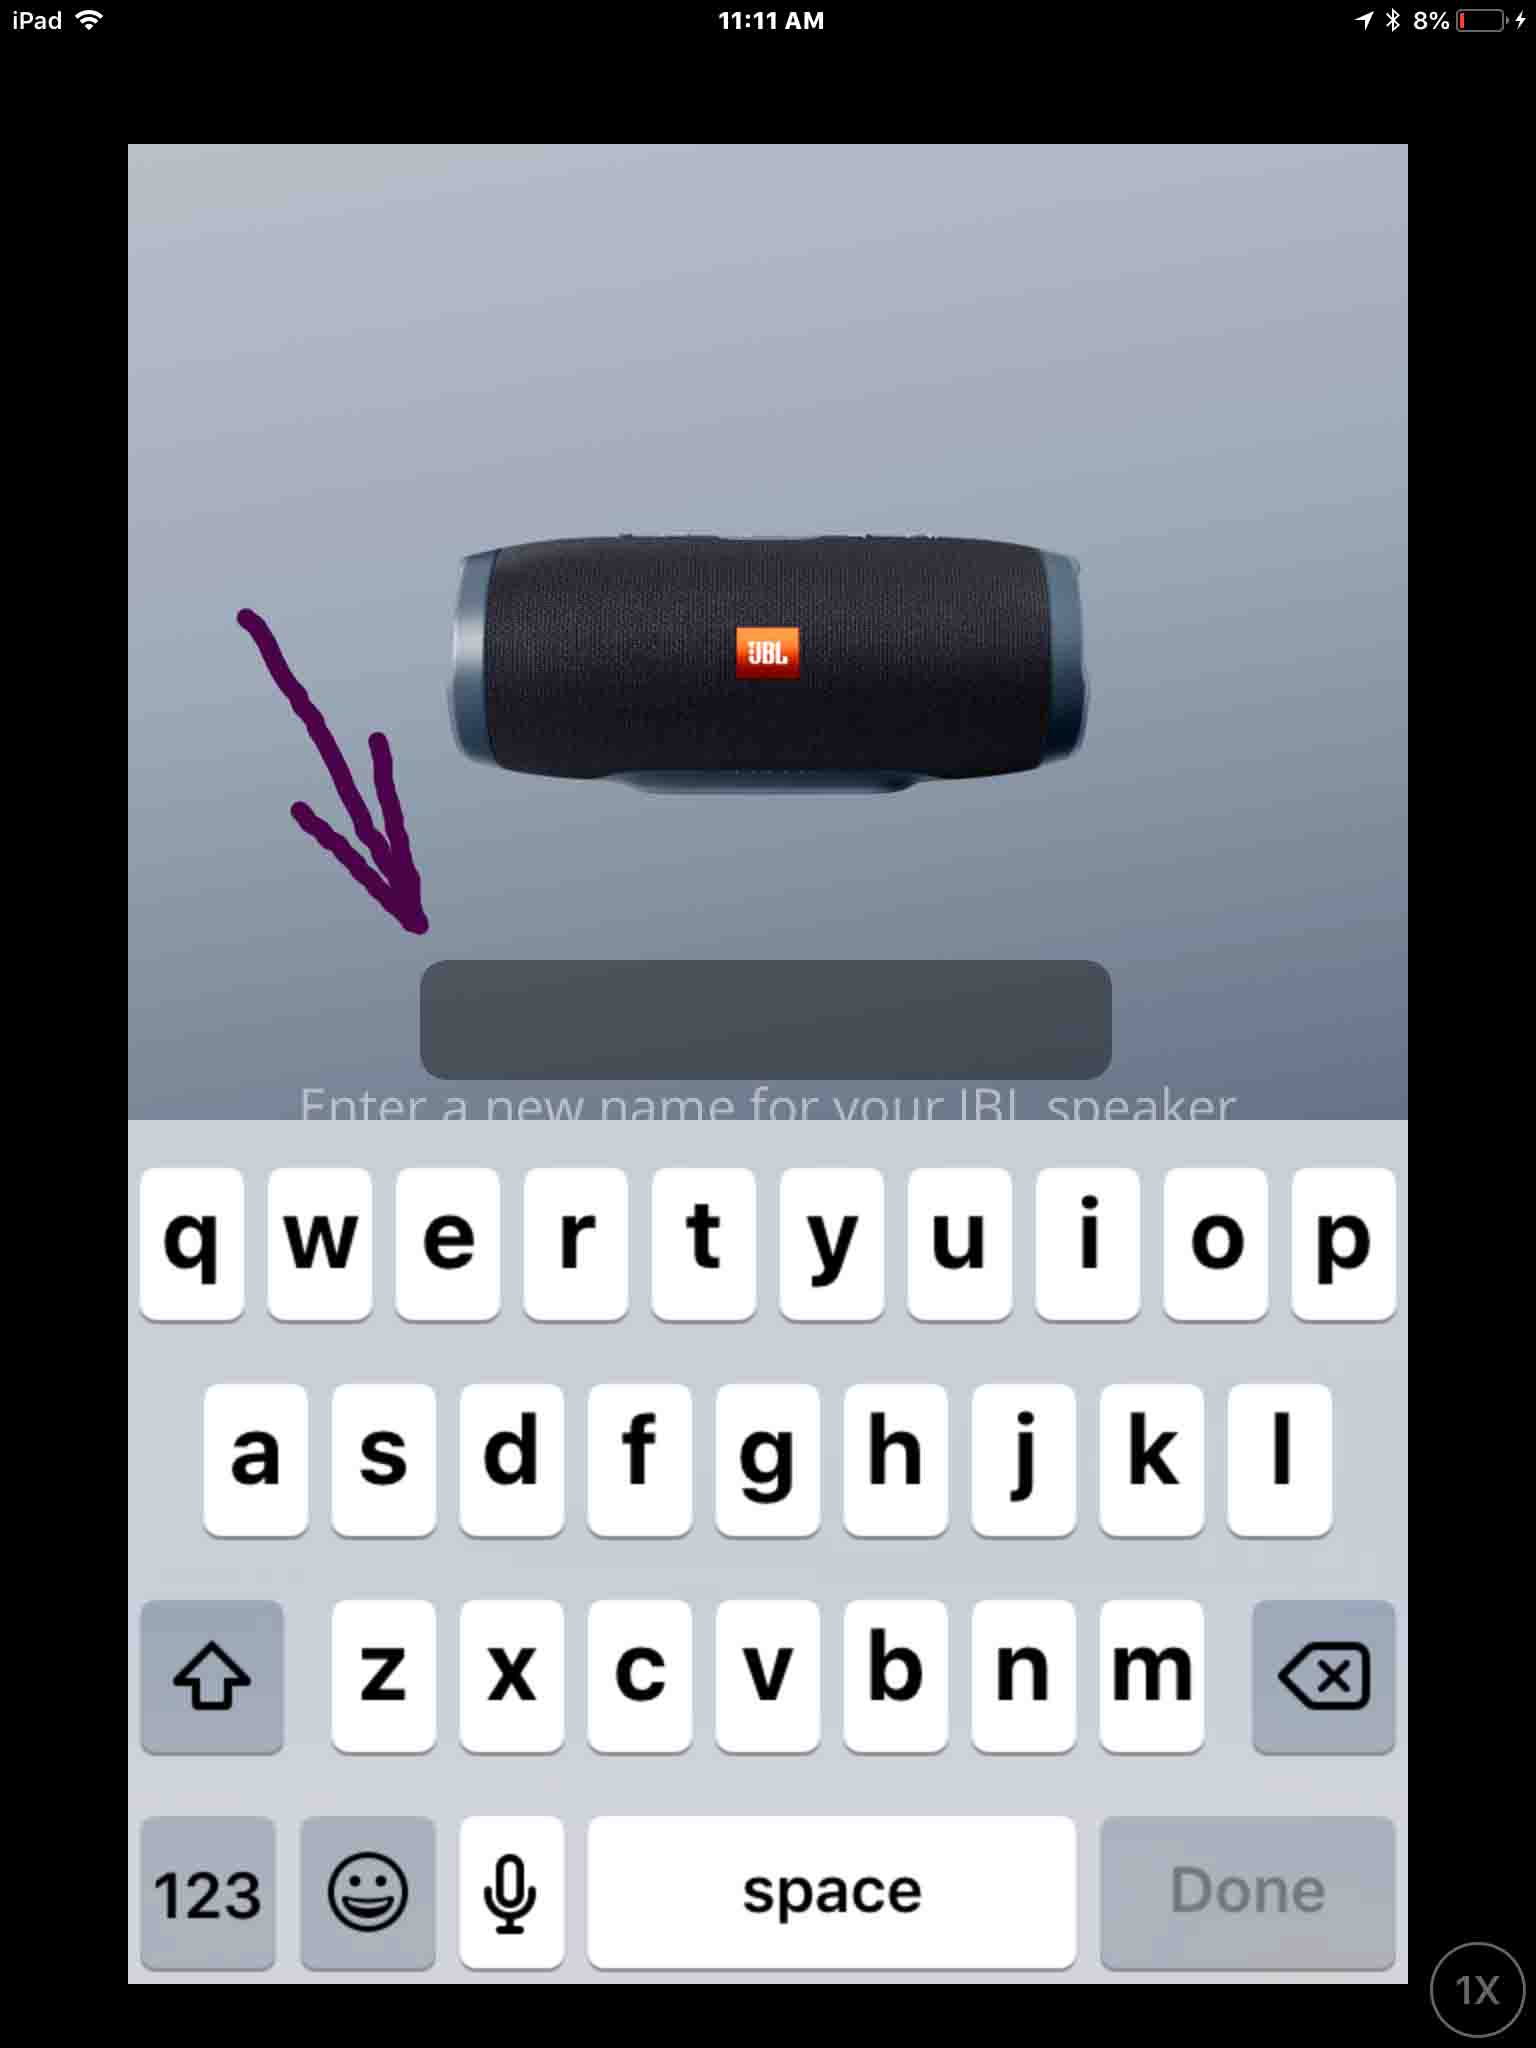
Then, we typed in the new speaker name, “Tom’s Charge 3”, as we show next.

6. Tap the Blue Done Key when Finished Editing
Once you’ve edited the speaker name what you want it to be, tap the blue Done key on the virtual keyboard.
You then receive instructions on how to pair your speaker again with its new name, as shown in the next screenshot.
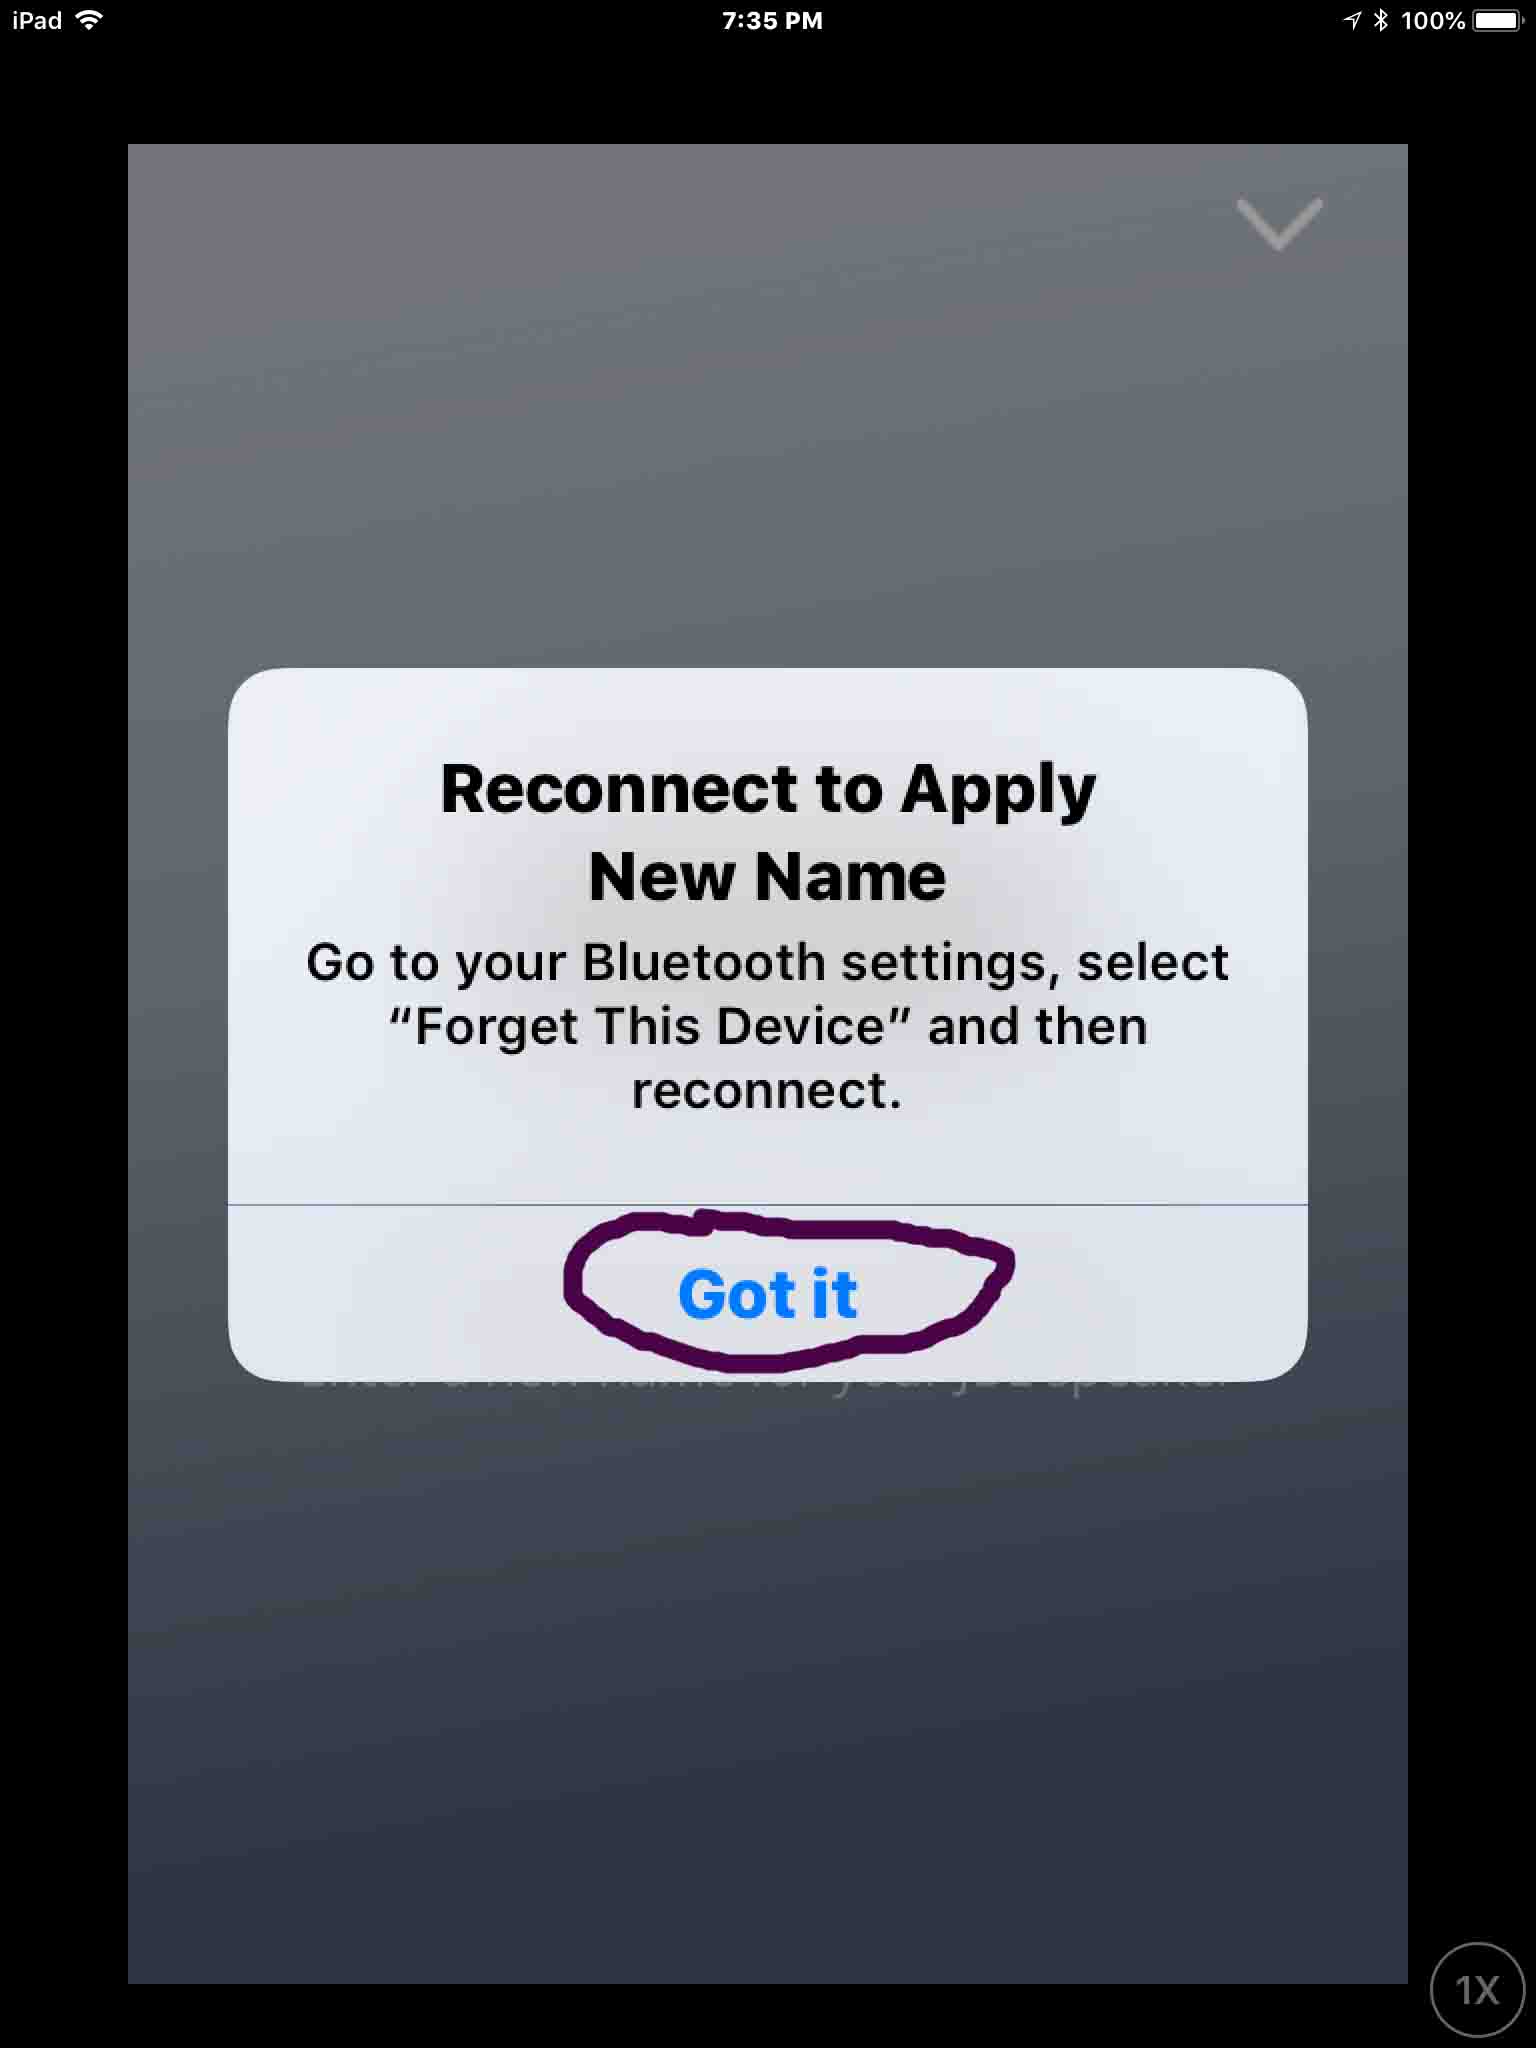
7. Tap the Blue Got It Link
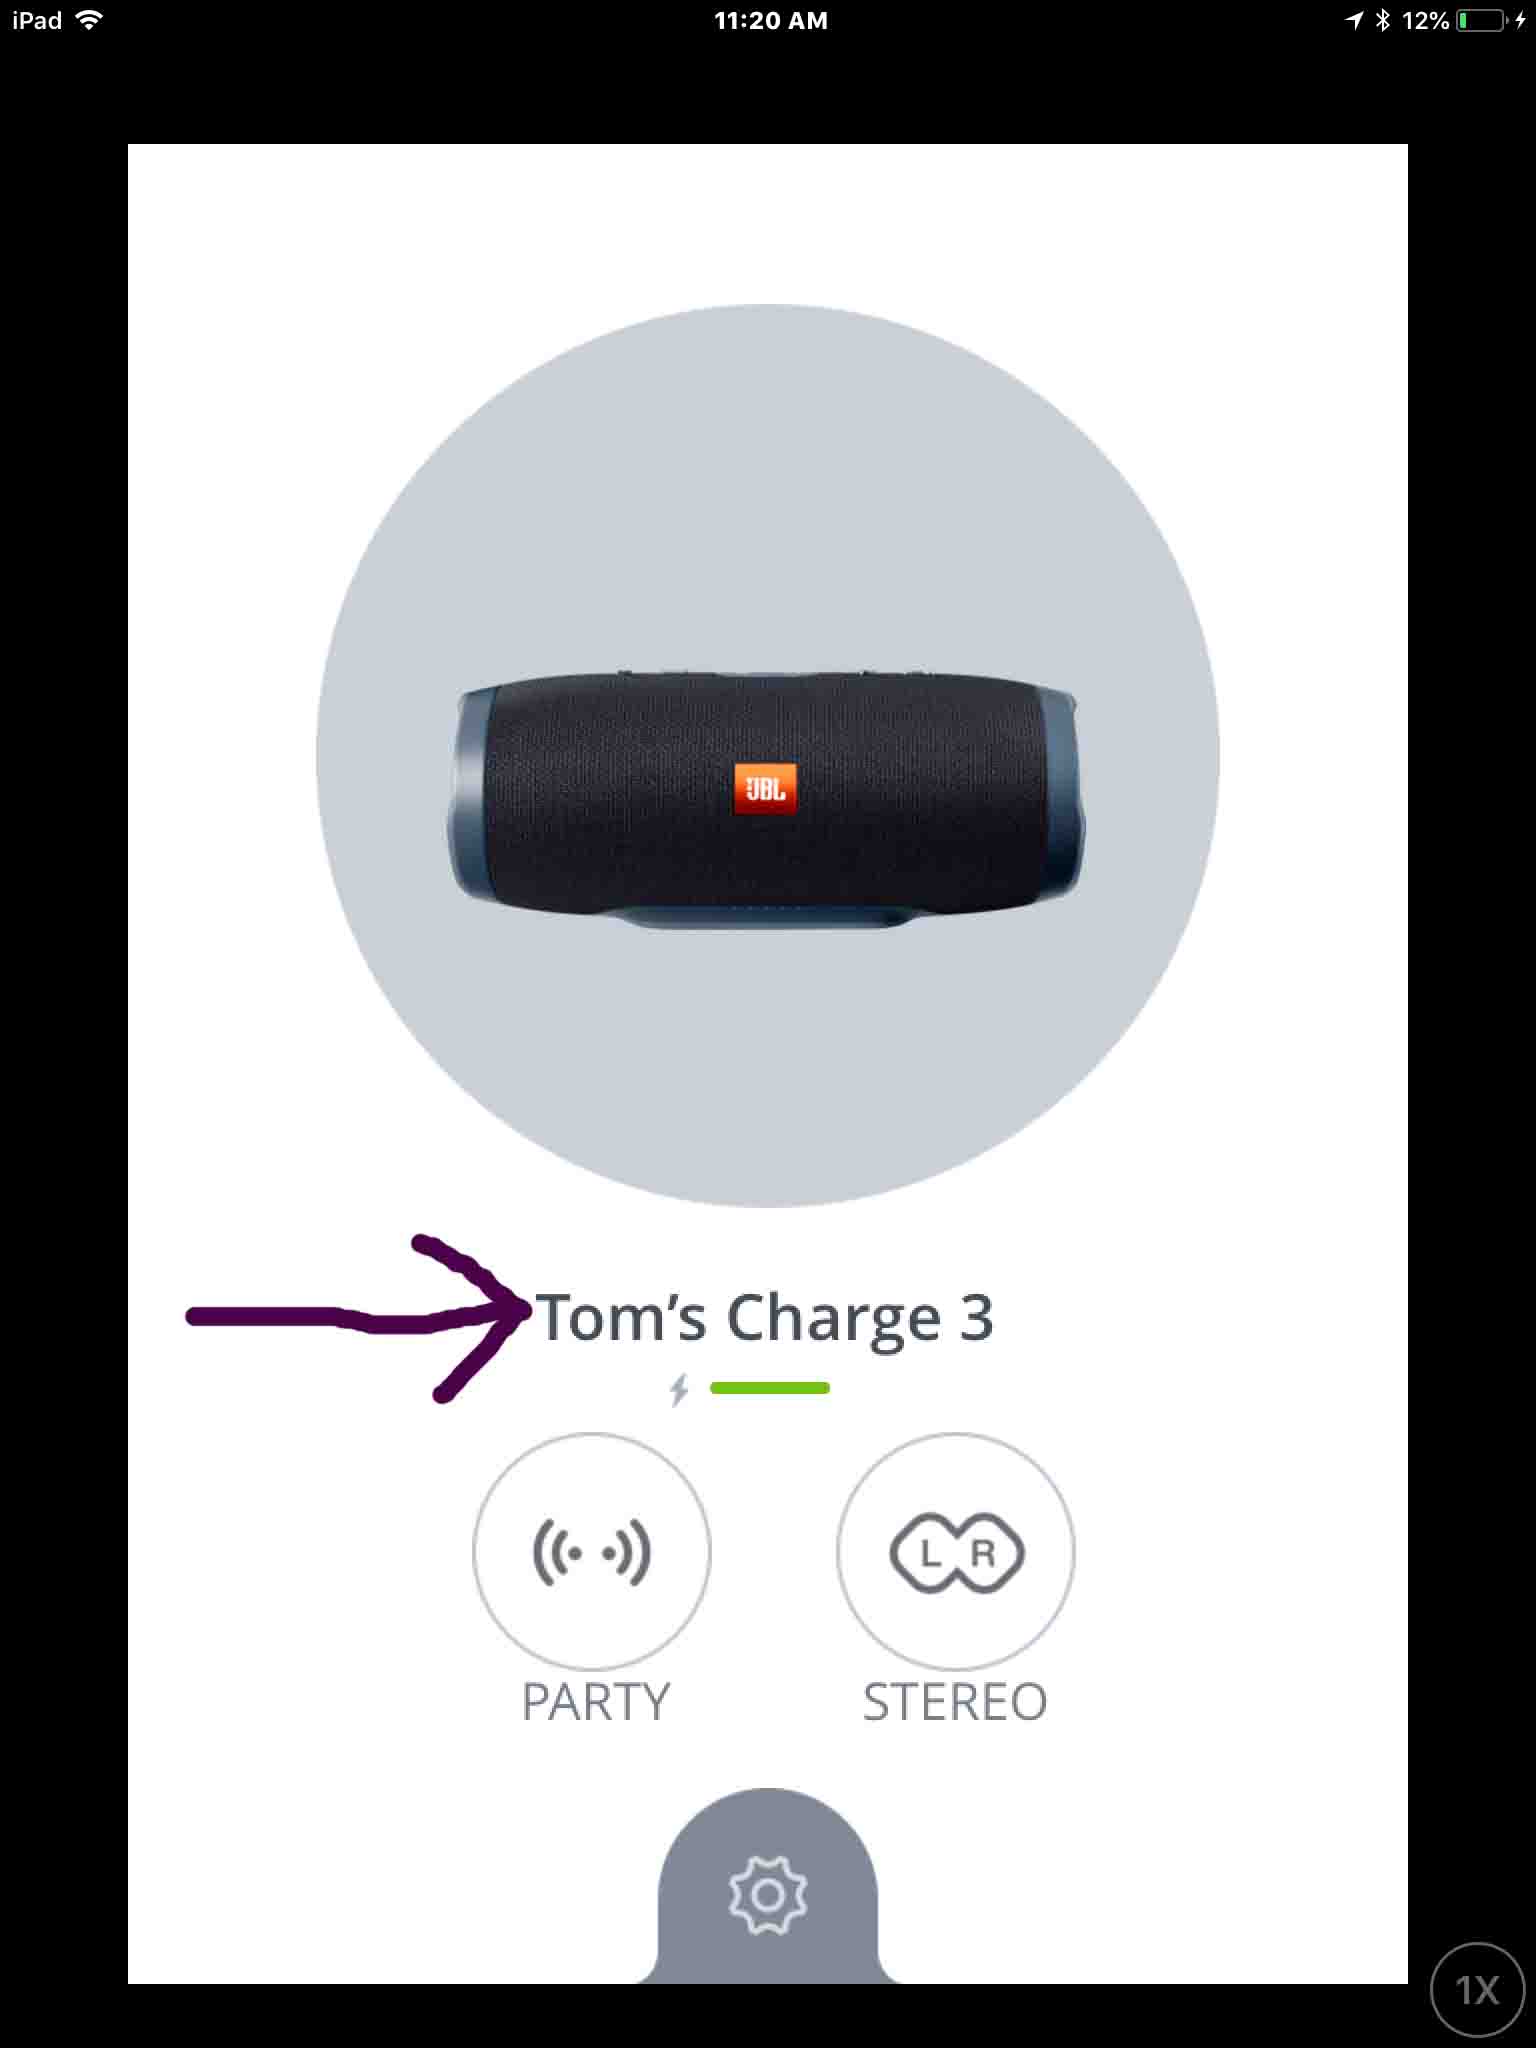
Tapping the Got It link here takes you back to the Settings screen for the speaker. But now, the JBL Charge 3 appears with its new name assigned. See this in the next screenshot.
How to Pair the JBL Charge 3 Using its New Name
With your JBL Charge 3 still paired under its old speaker name, run through this routine to unpair it, forget it in your mobile device, and finally, re pair it under its new name.
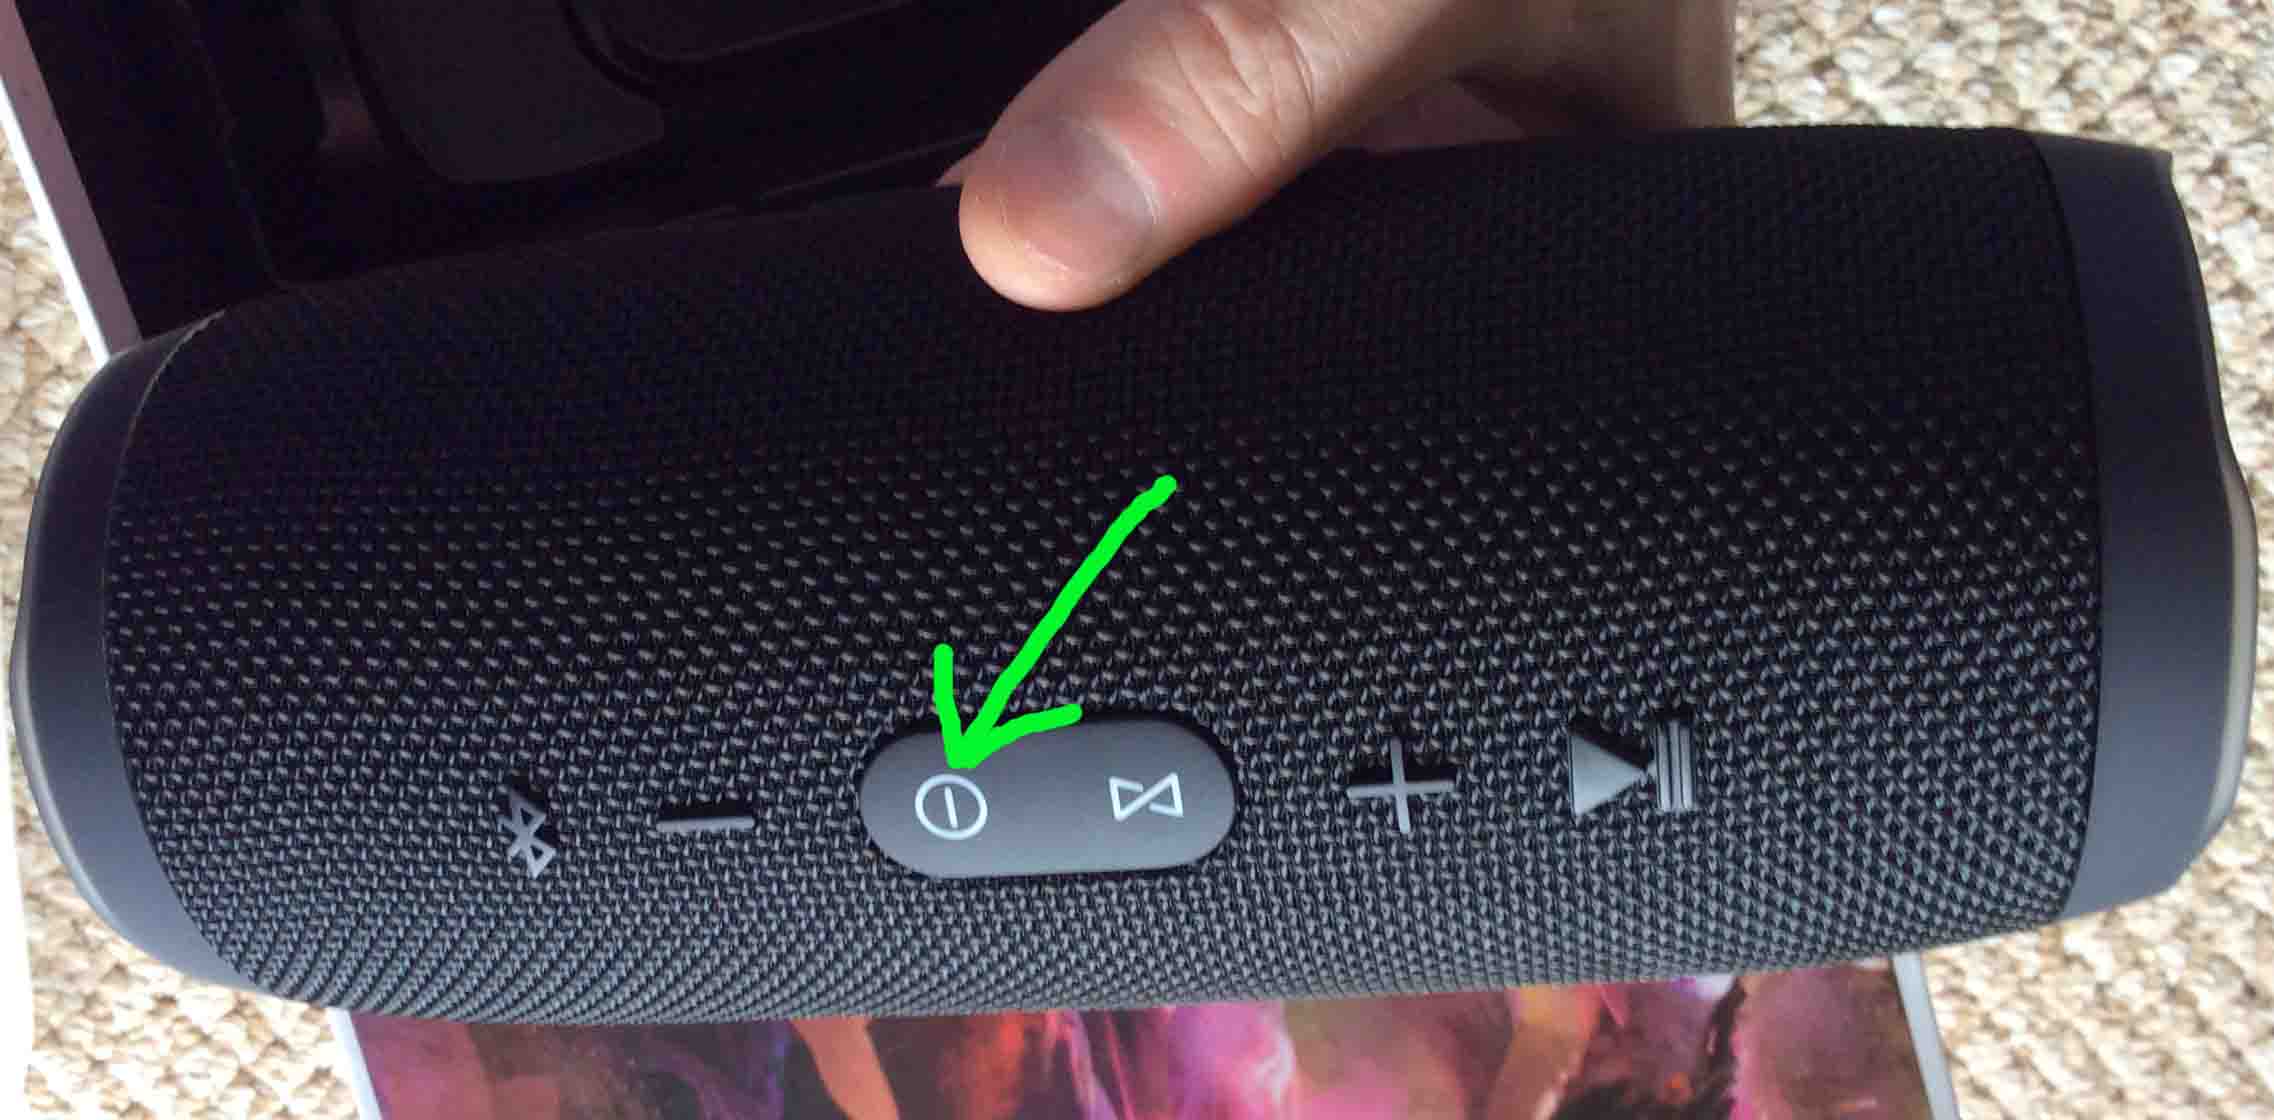
1. Power Down the JBL Charge 3
To turn off the speaker, press and release the Power button, as shown next.
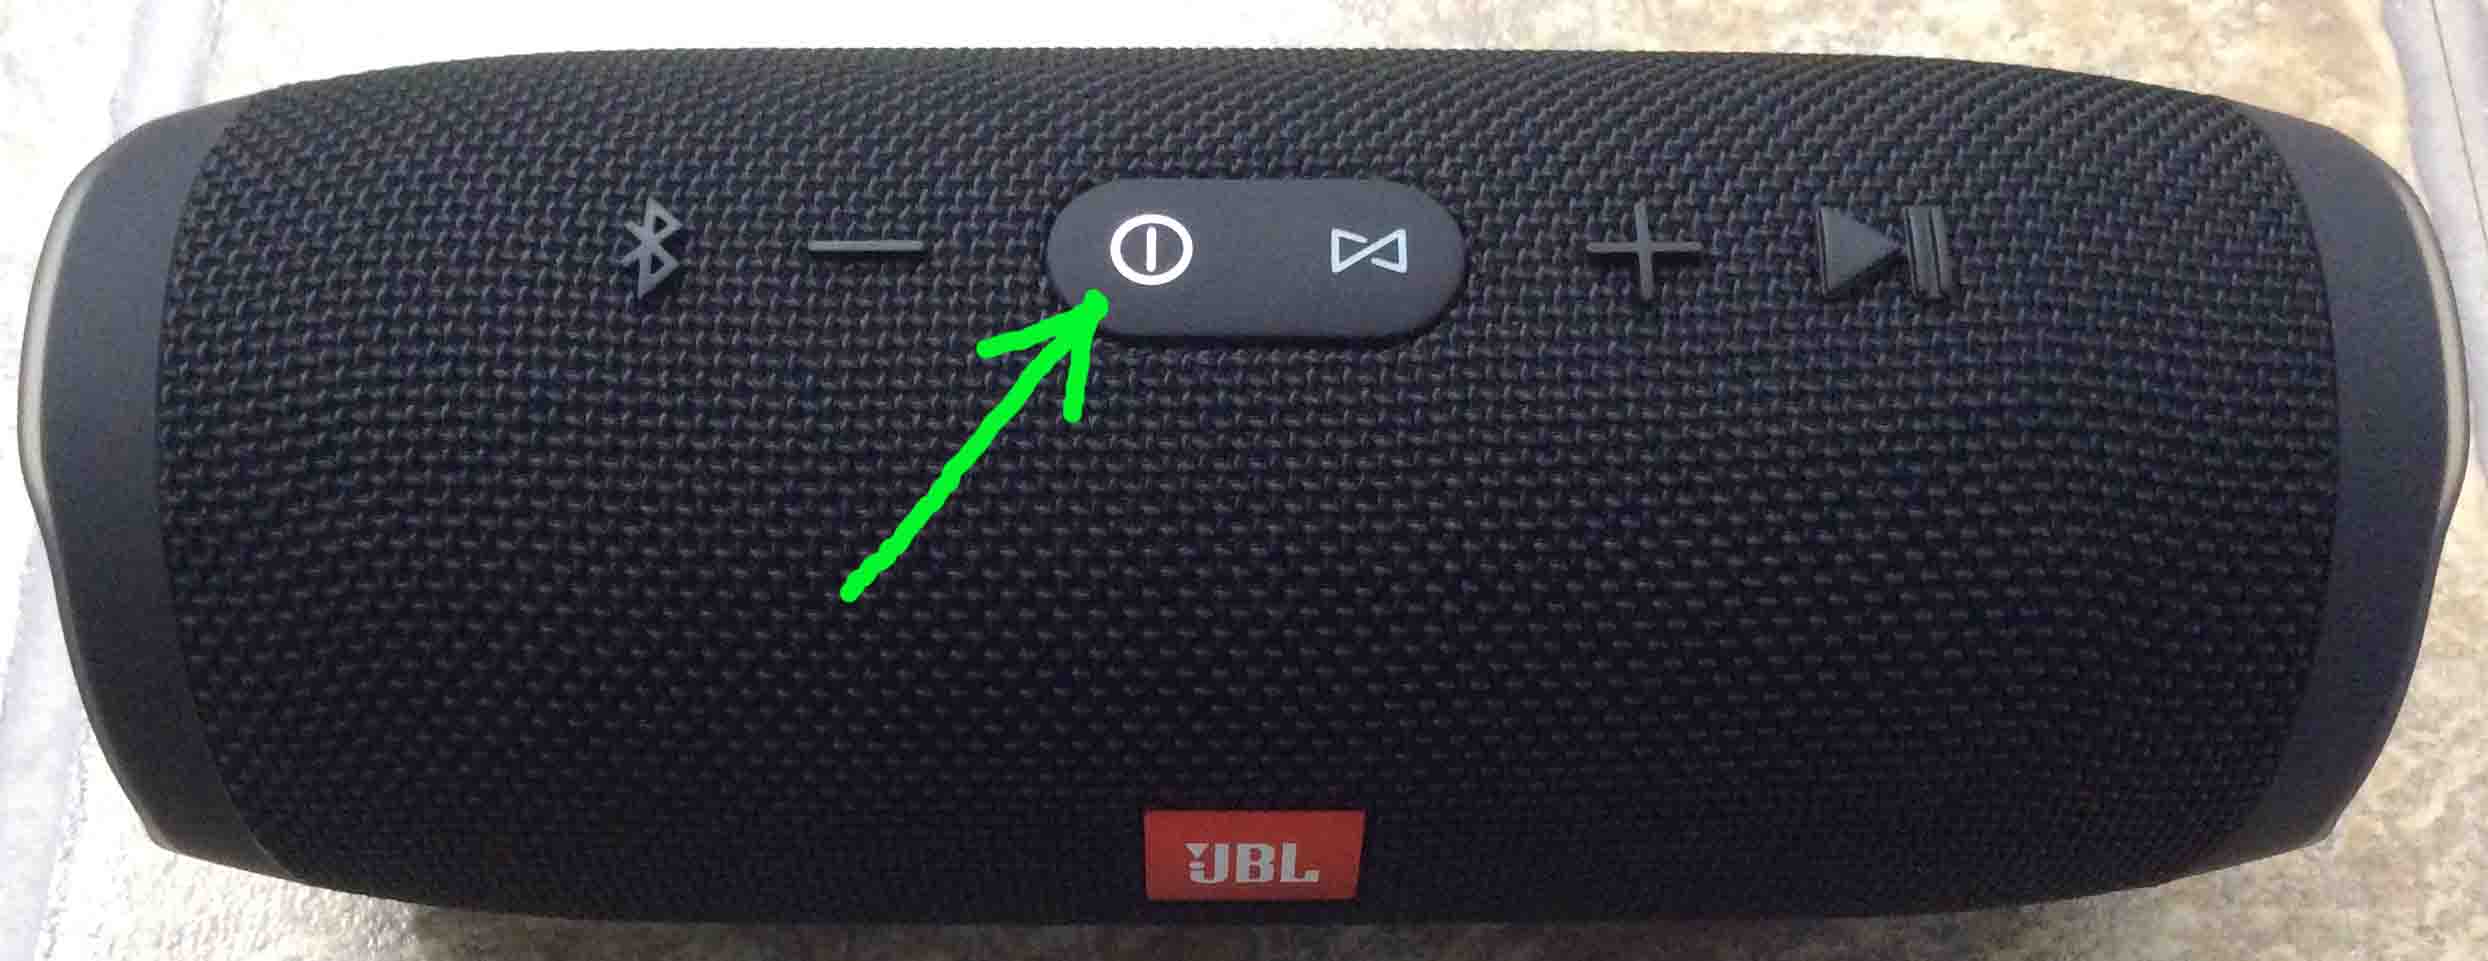
Powering down the JBL Charge 3 unpairs it from your mobile device.
2. Return your Mobile Device to its Home Screen
Press the Home button on your phone, tablet, or desktop computer, to close the JBL Connect app, and reveal the mobile device’s Home screen.
3. Find the Settings App
We found ours on the second page of the iOS home screen on our iPad Air, as we see next.
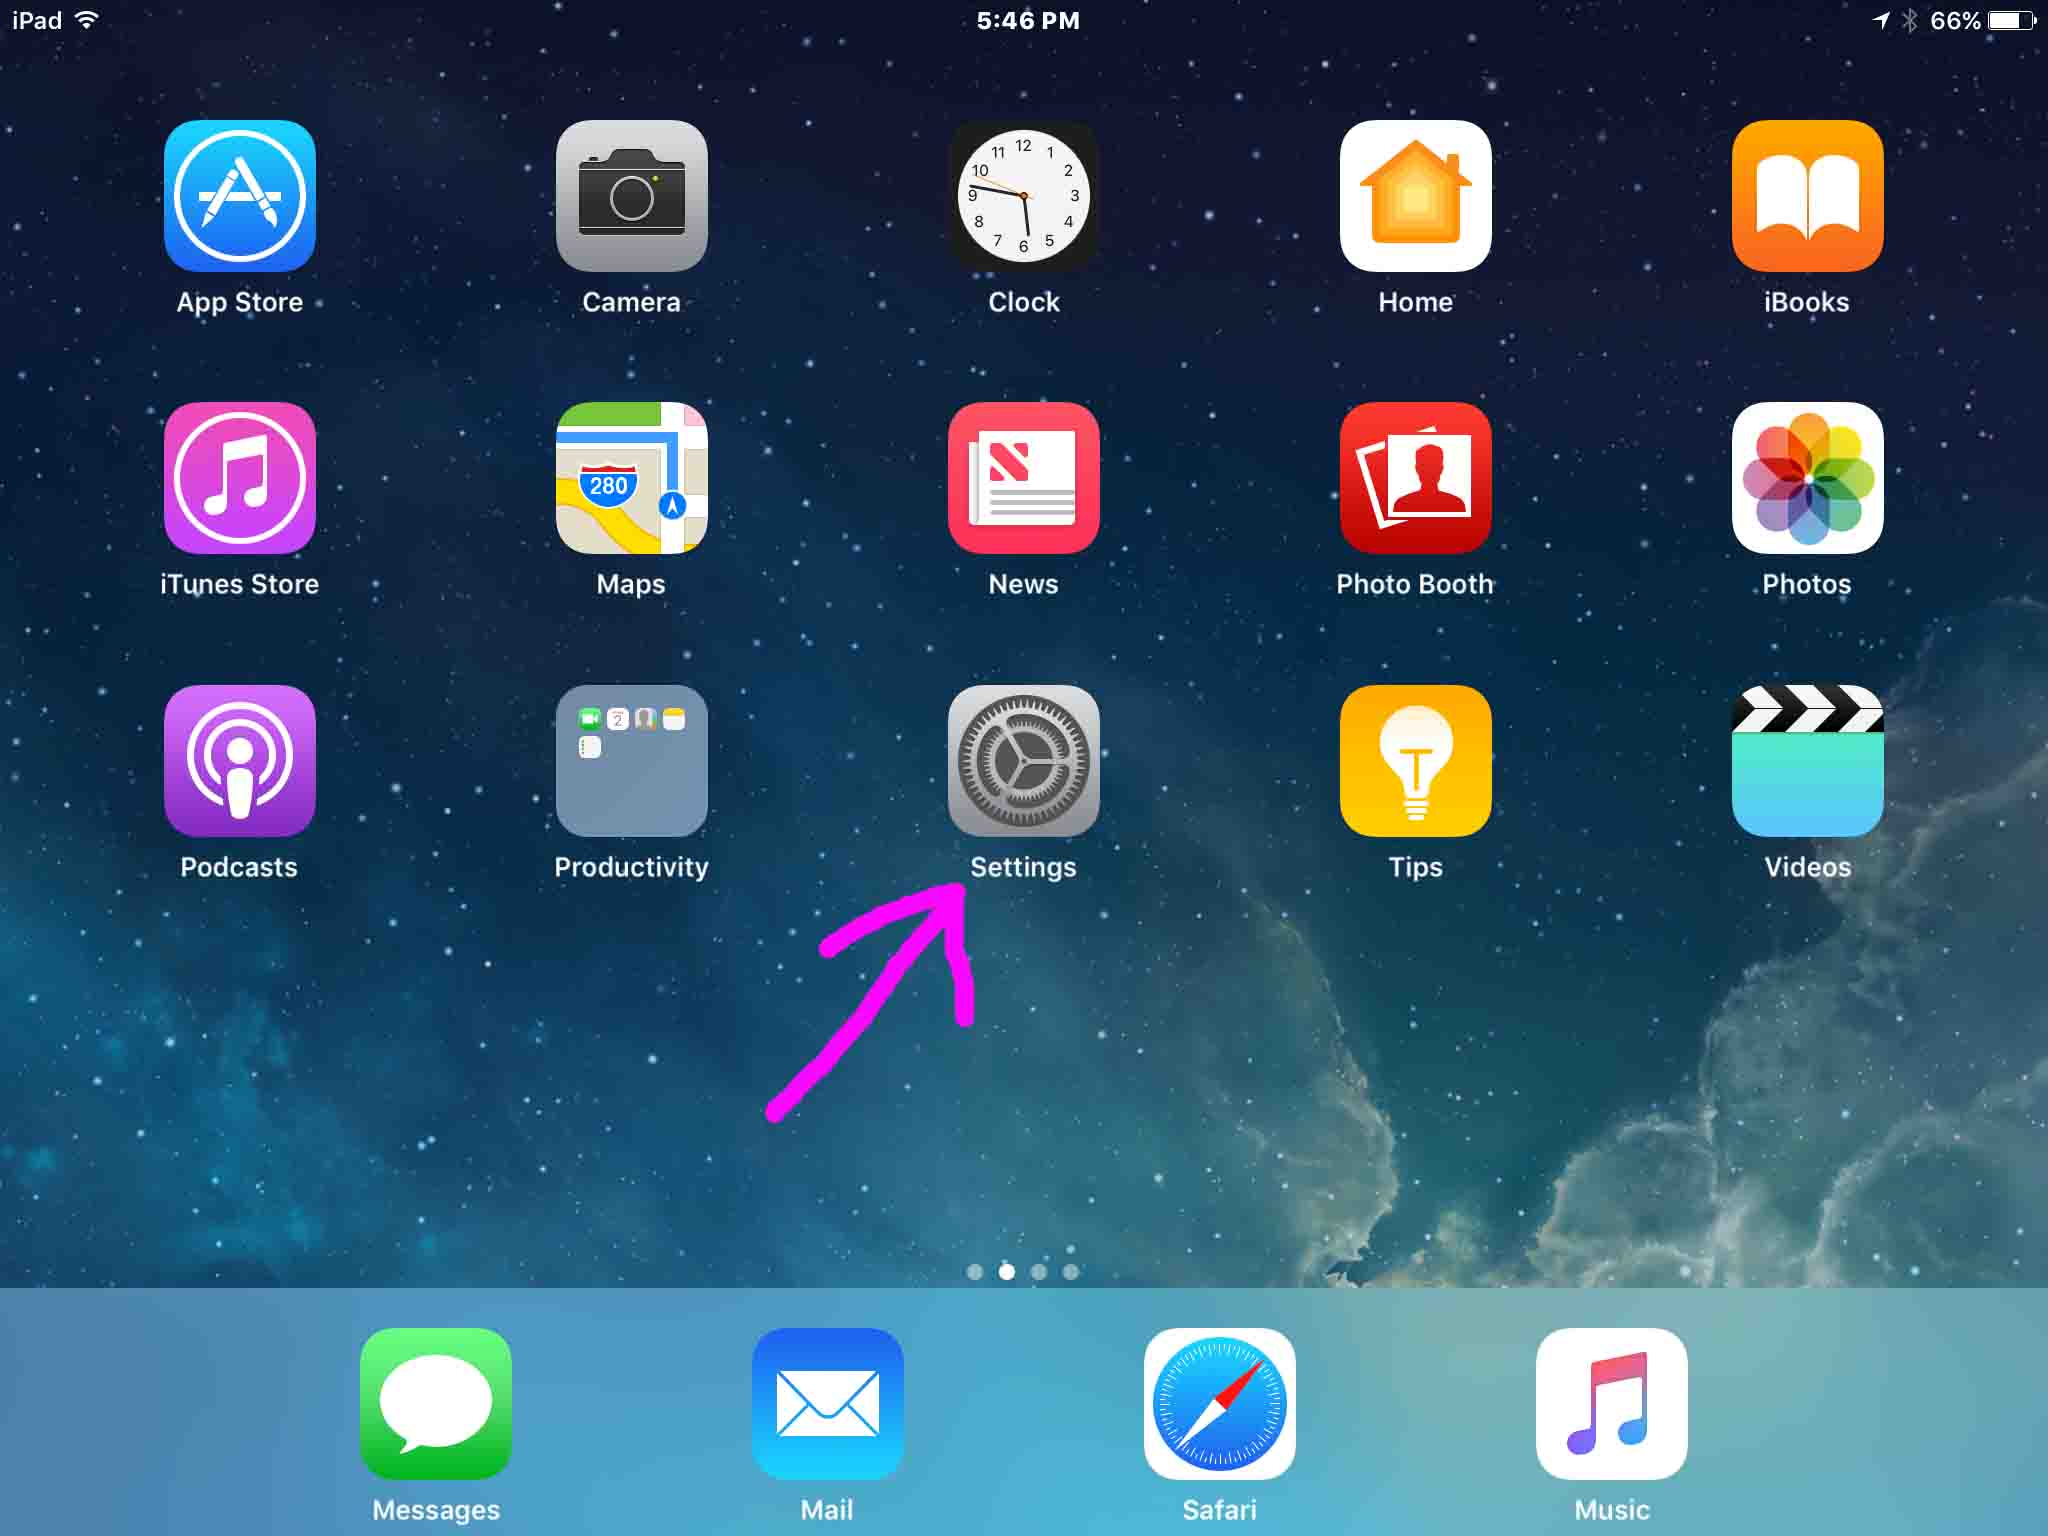
4. Bring up the Settings App
Tap the Settings app icon.
The mobile device then displays the first page of its settings.
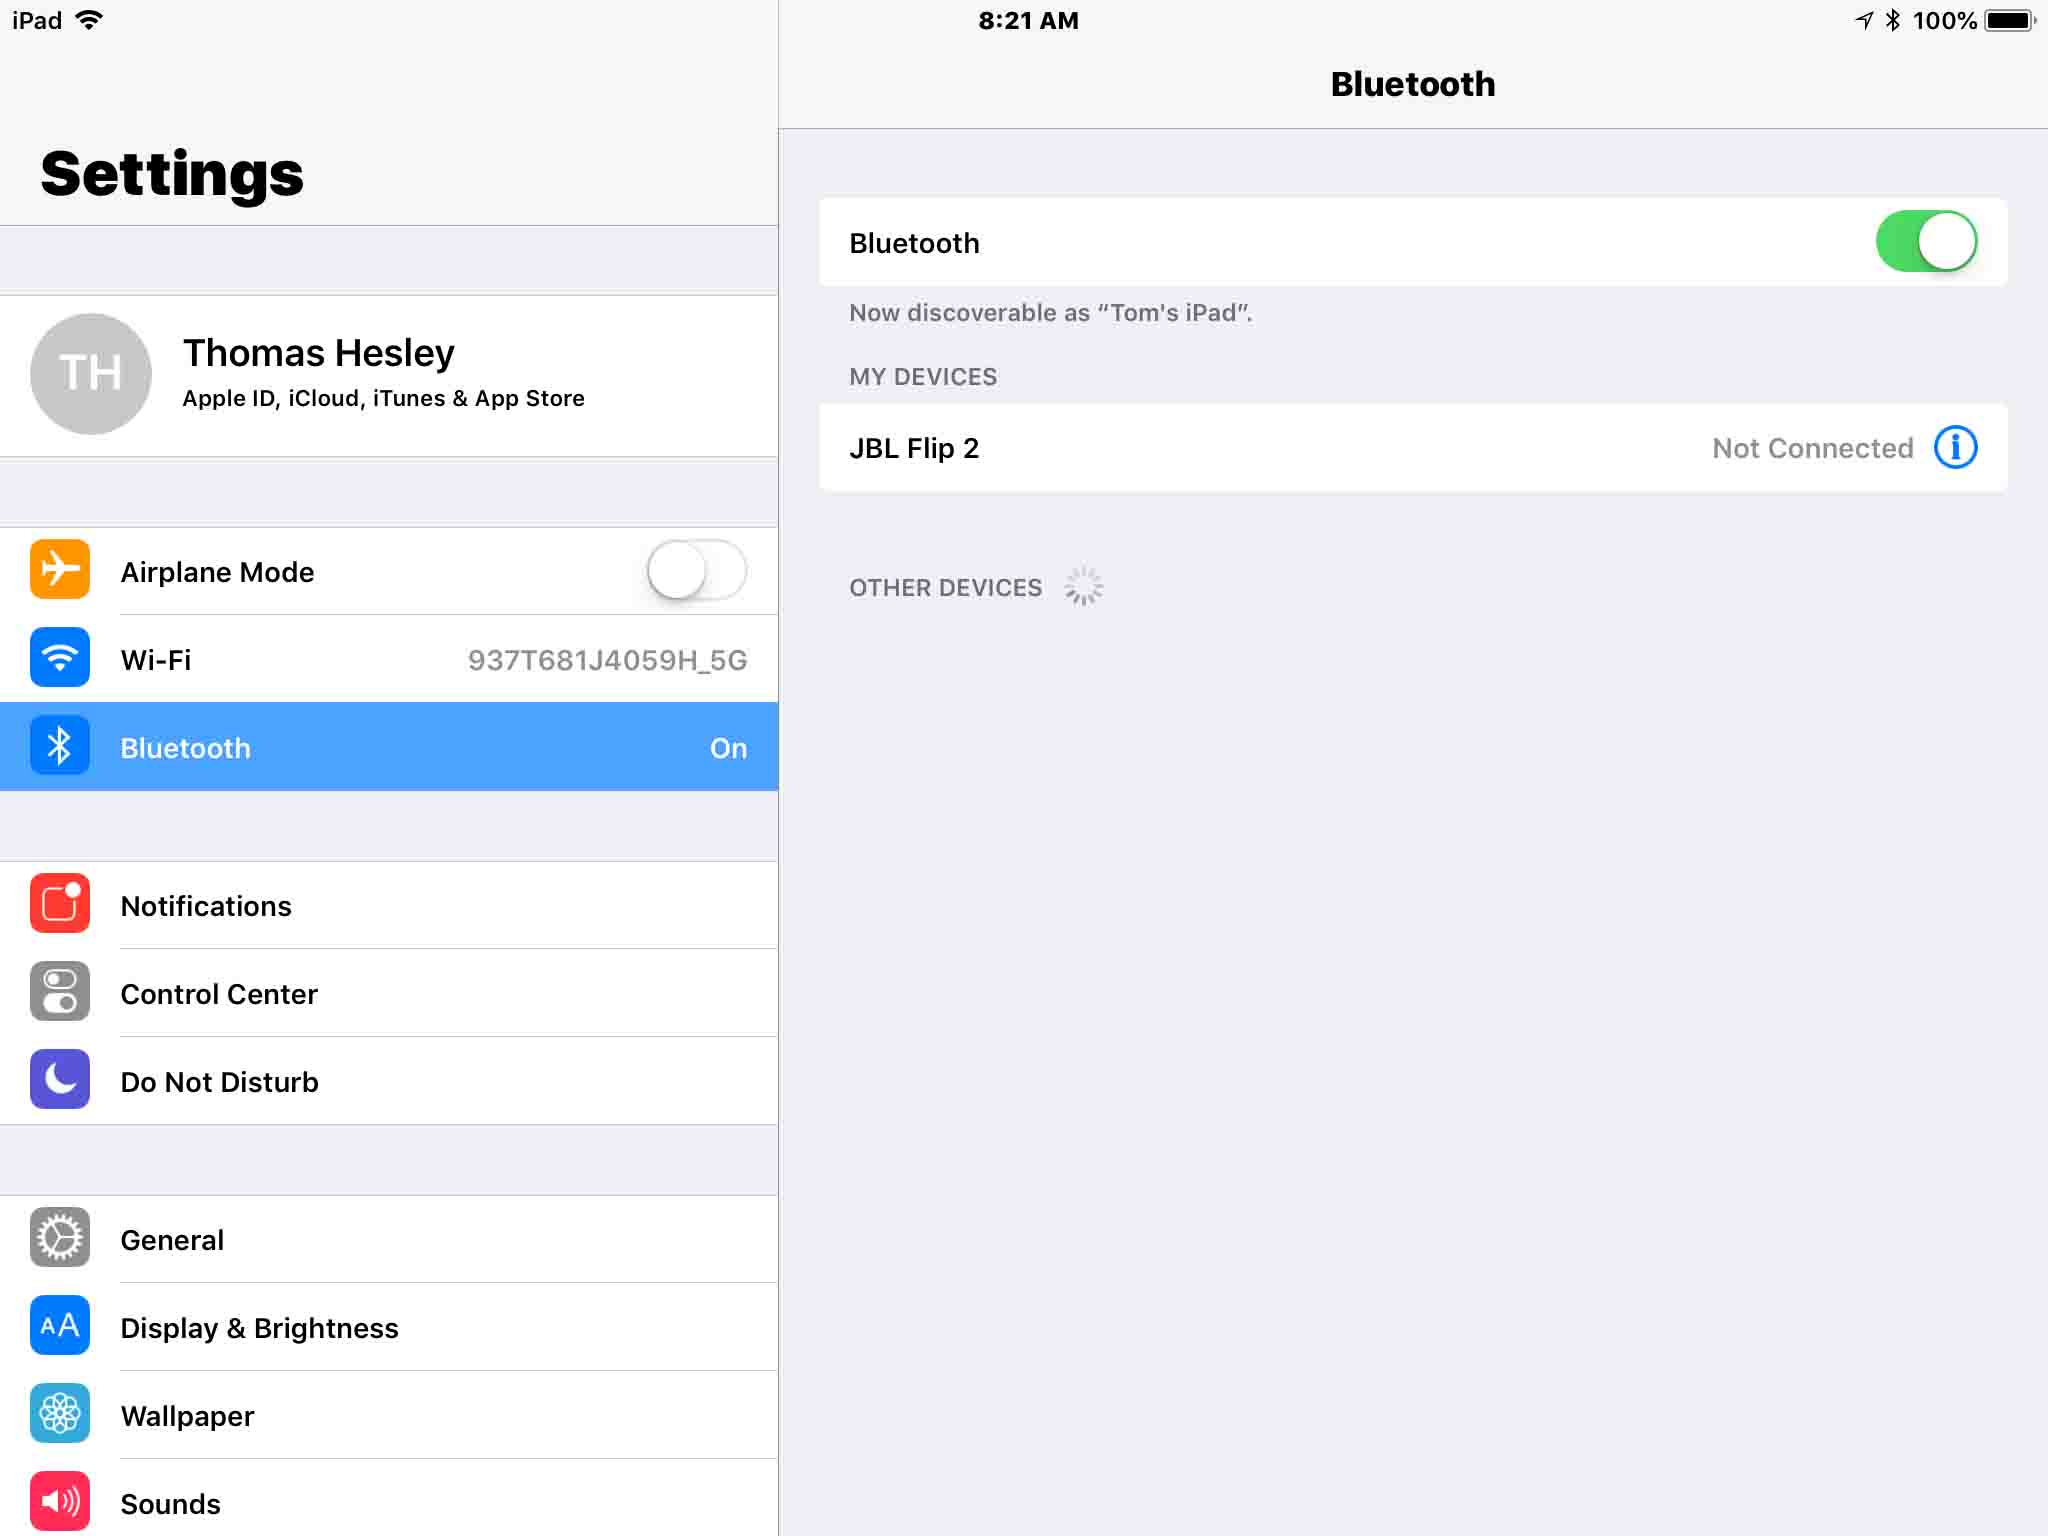
5. Go to Bluetooth Settings
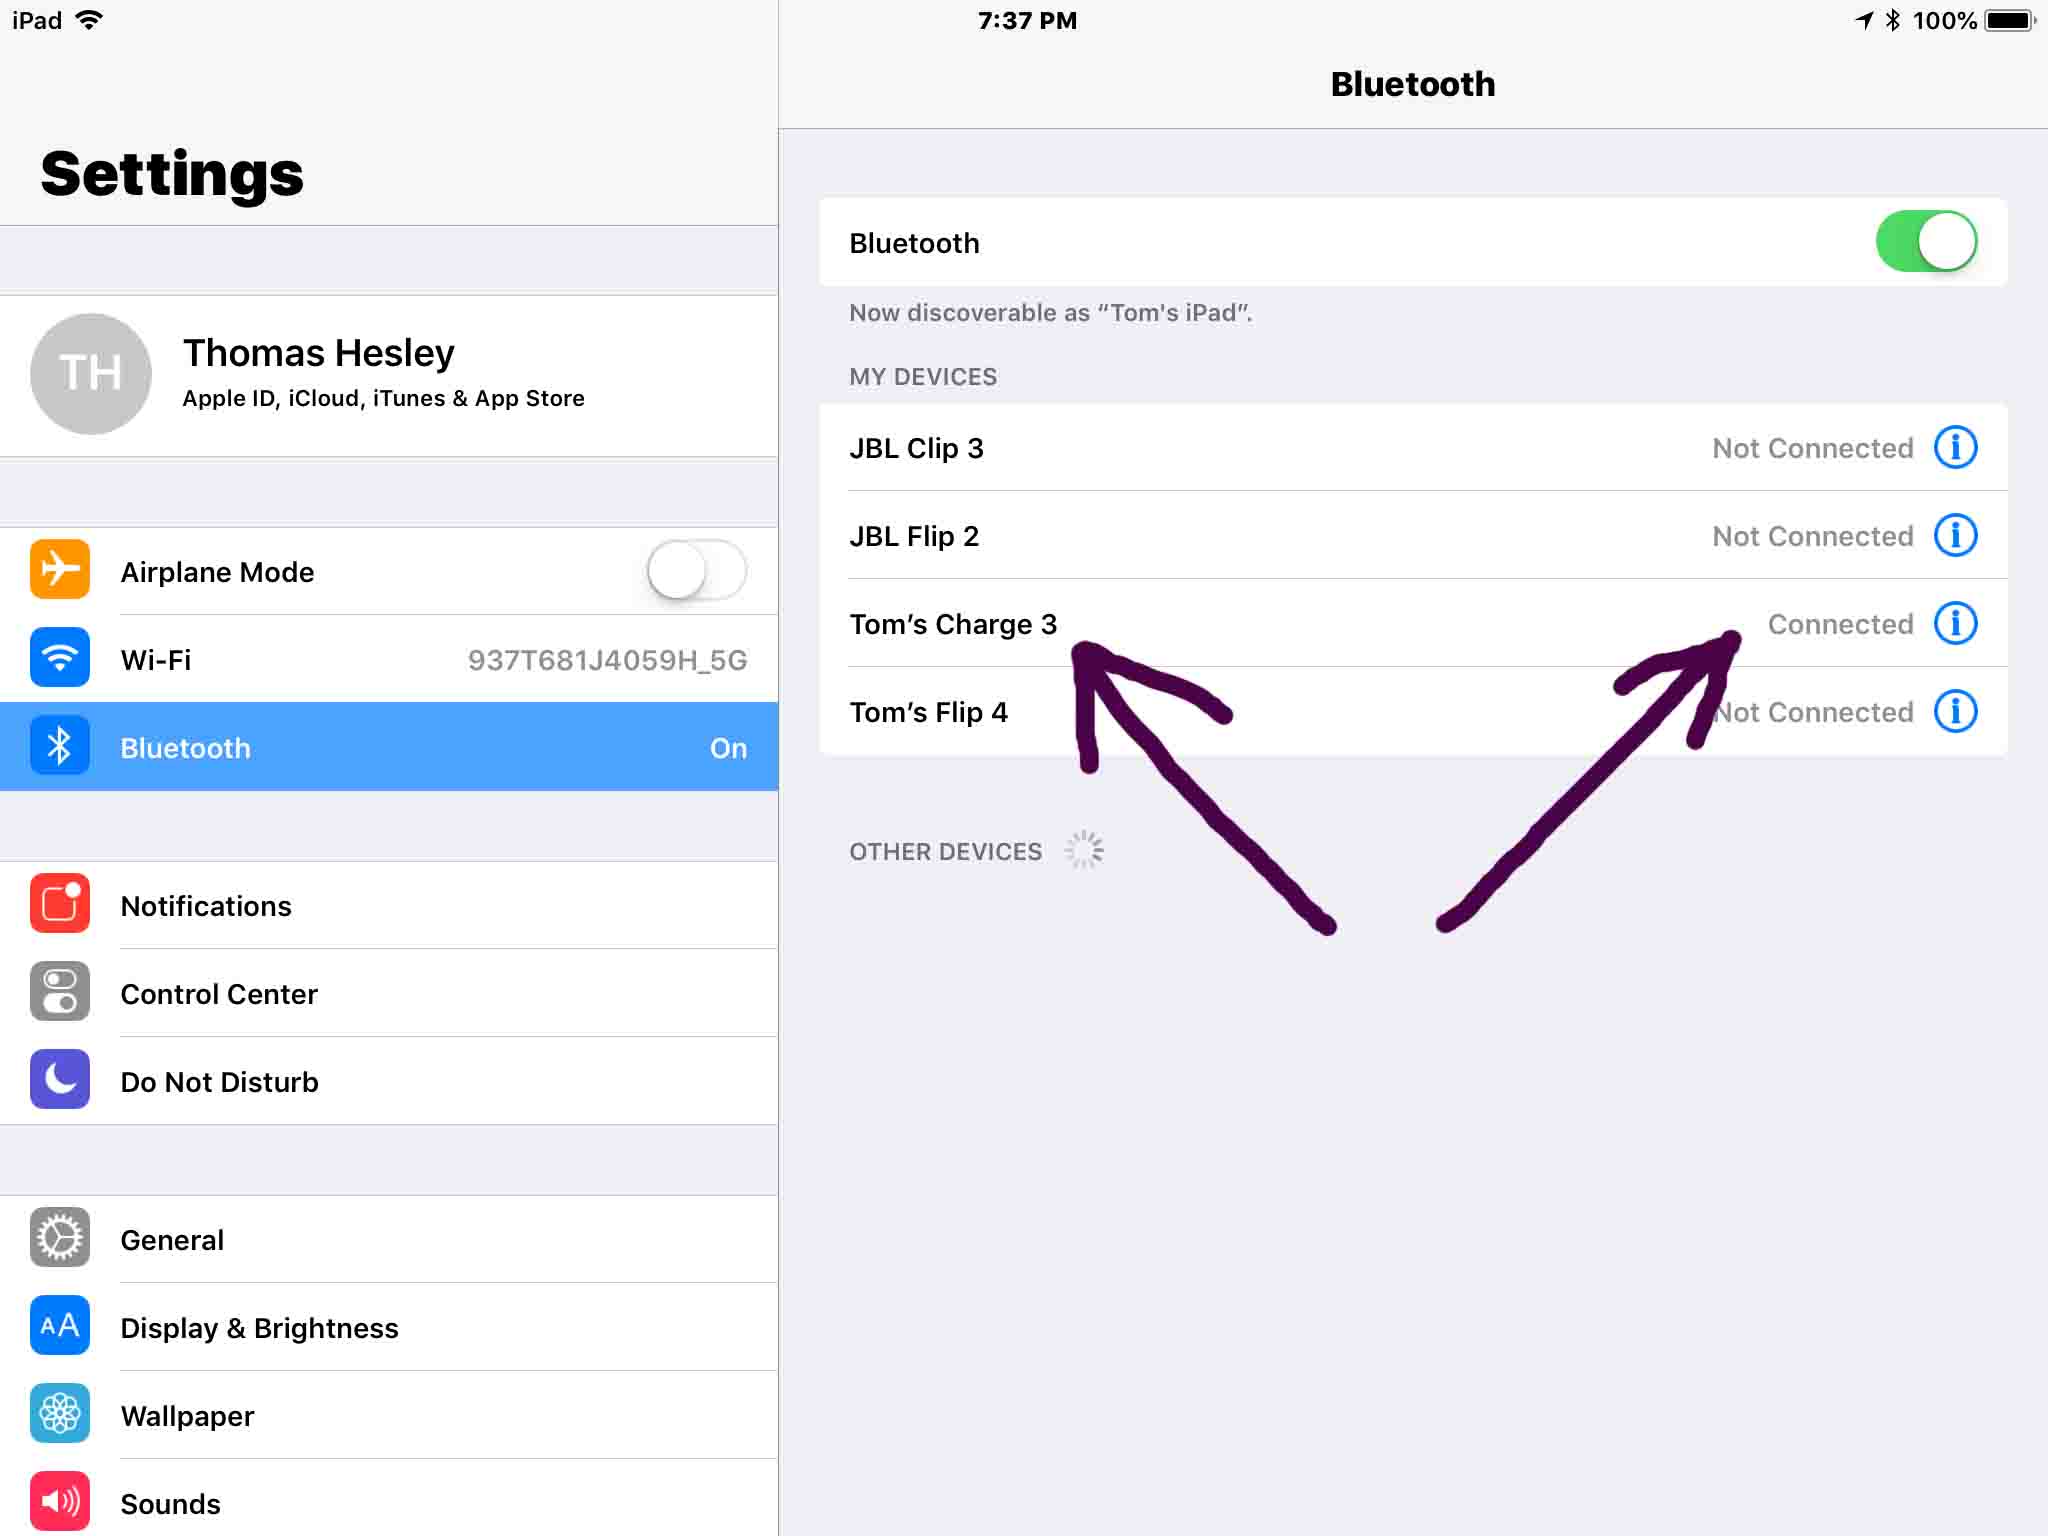
Our Bluetooth settings screen displays as follows on our iPad Air tablet. Note that our Bluetooth is enabled here. But since we turned off our JBL Charge 3 speaker, it shows as not connected. See this as shown in this list of previously paired Bluetooth devices, shown next.
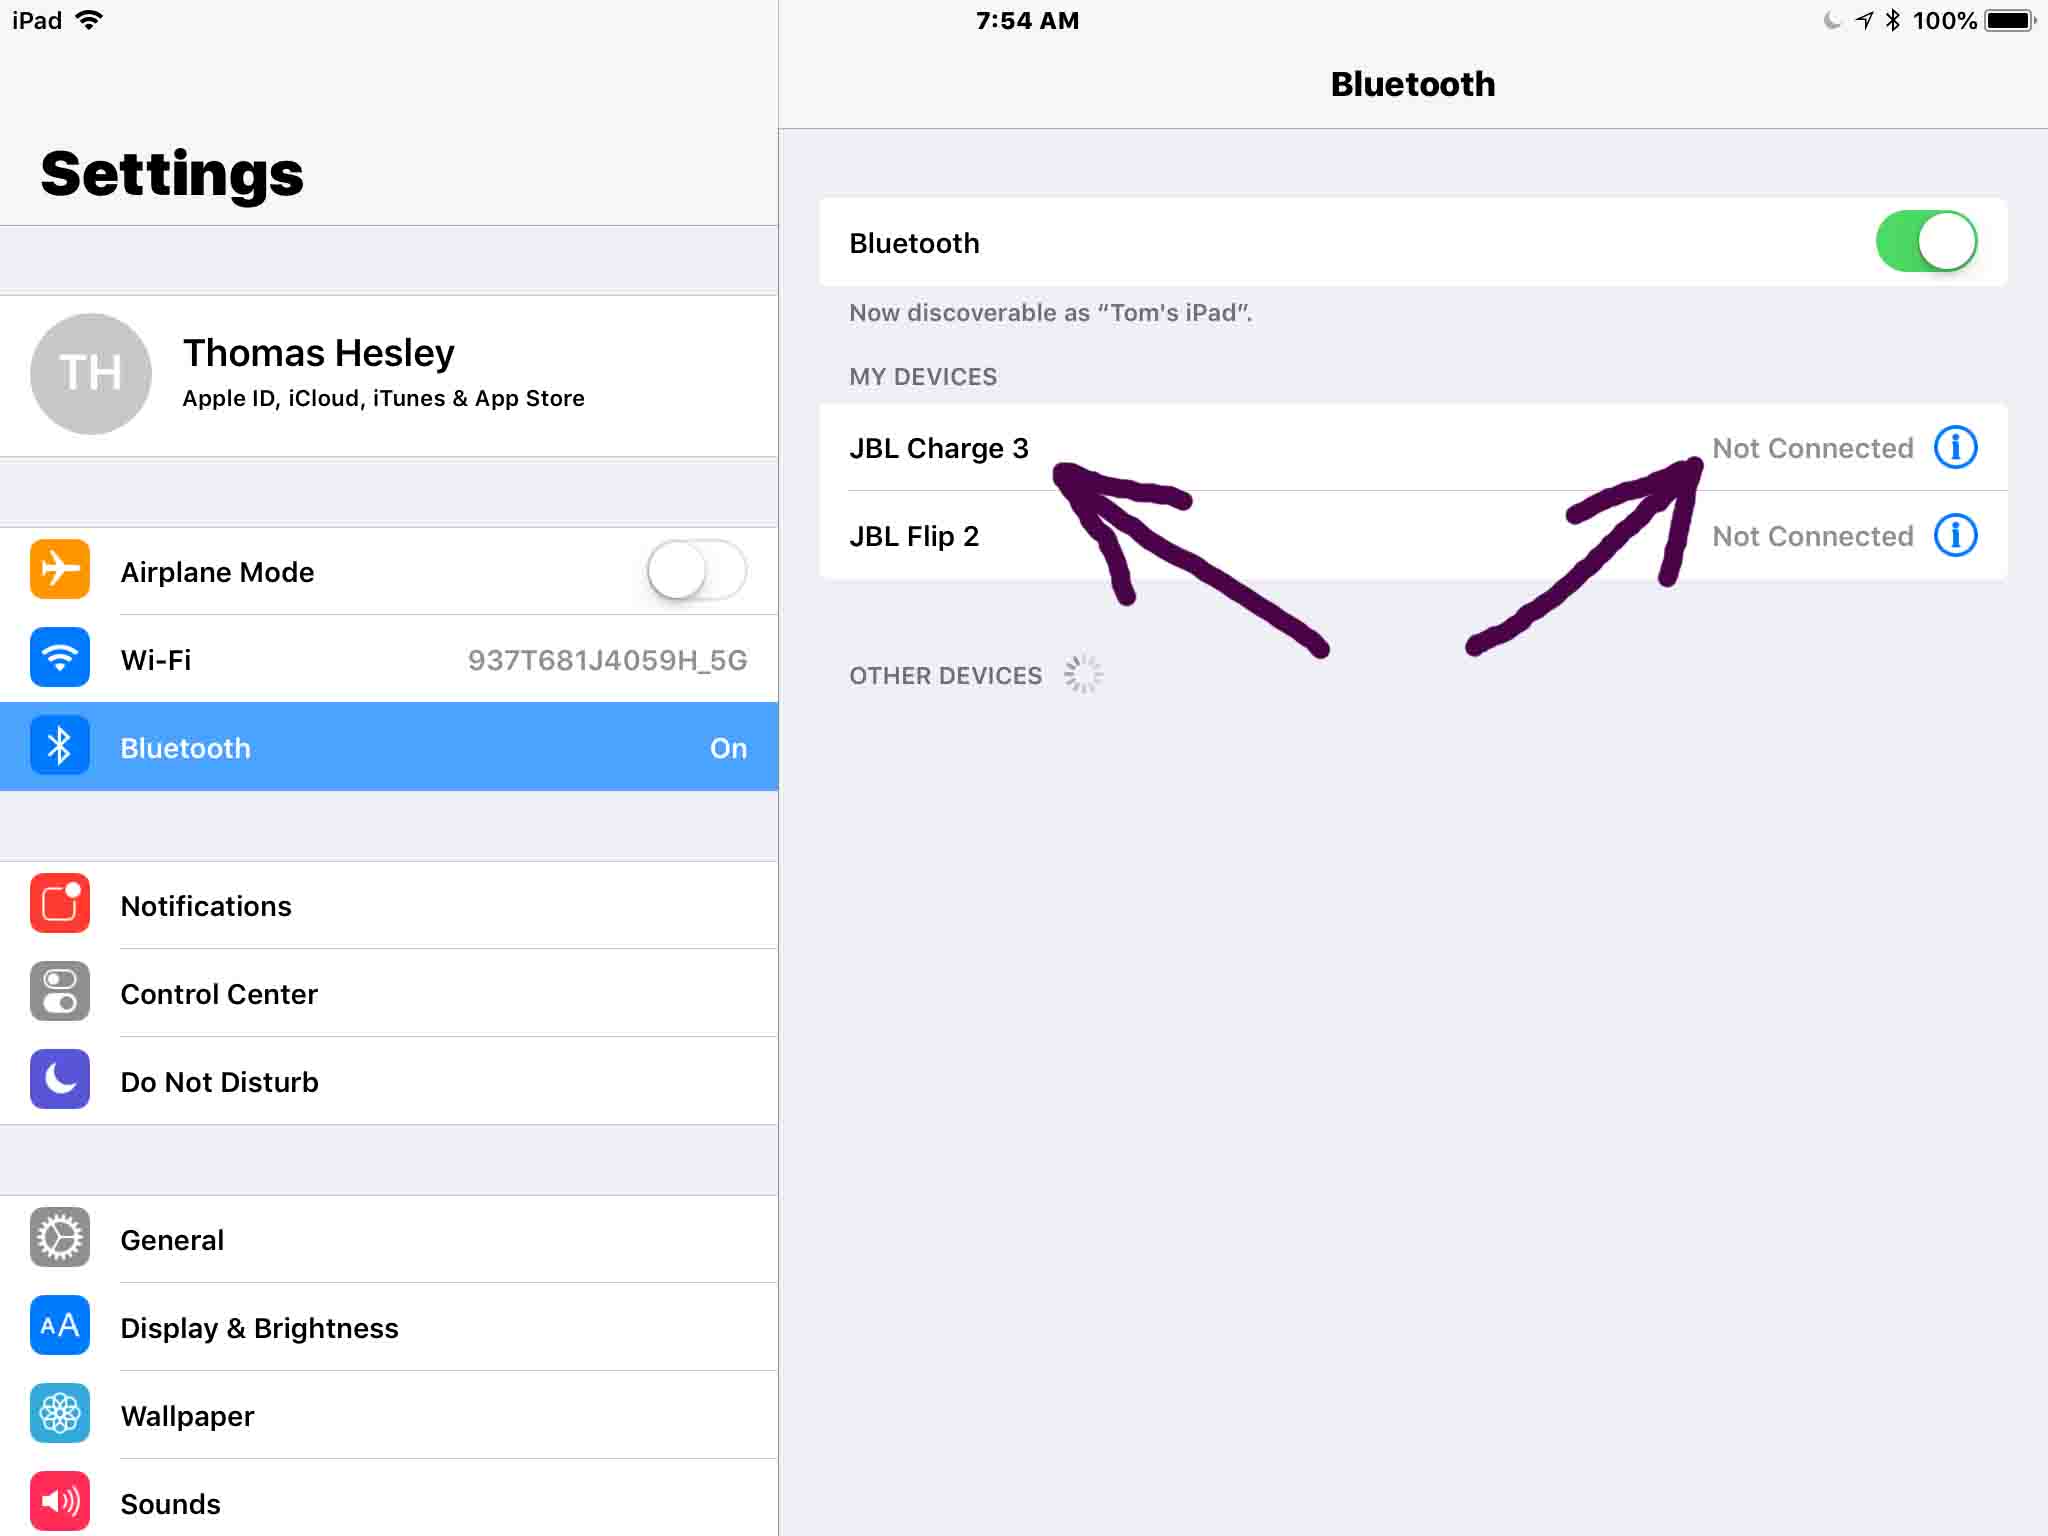
6. Tap the JBL Charge 3 Entry in the My Devices List
The JBL Charge 3 entry is the last item on the list shown in the last screenshot.
Then, the JBL Charge 3 device screen shows, as seen next.
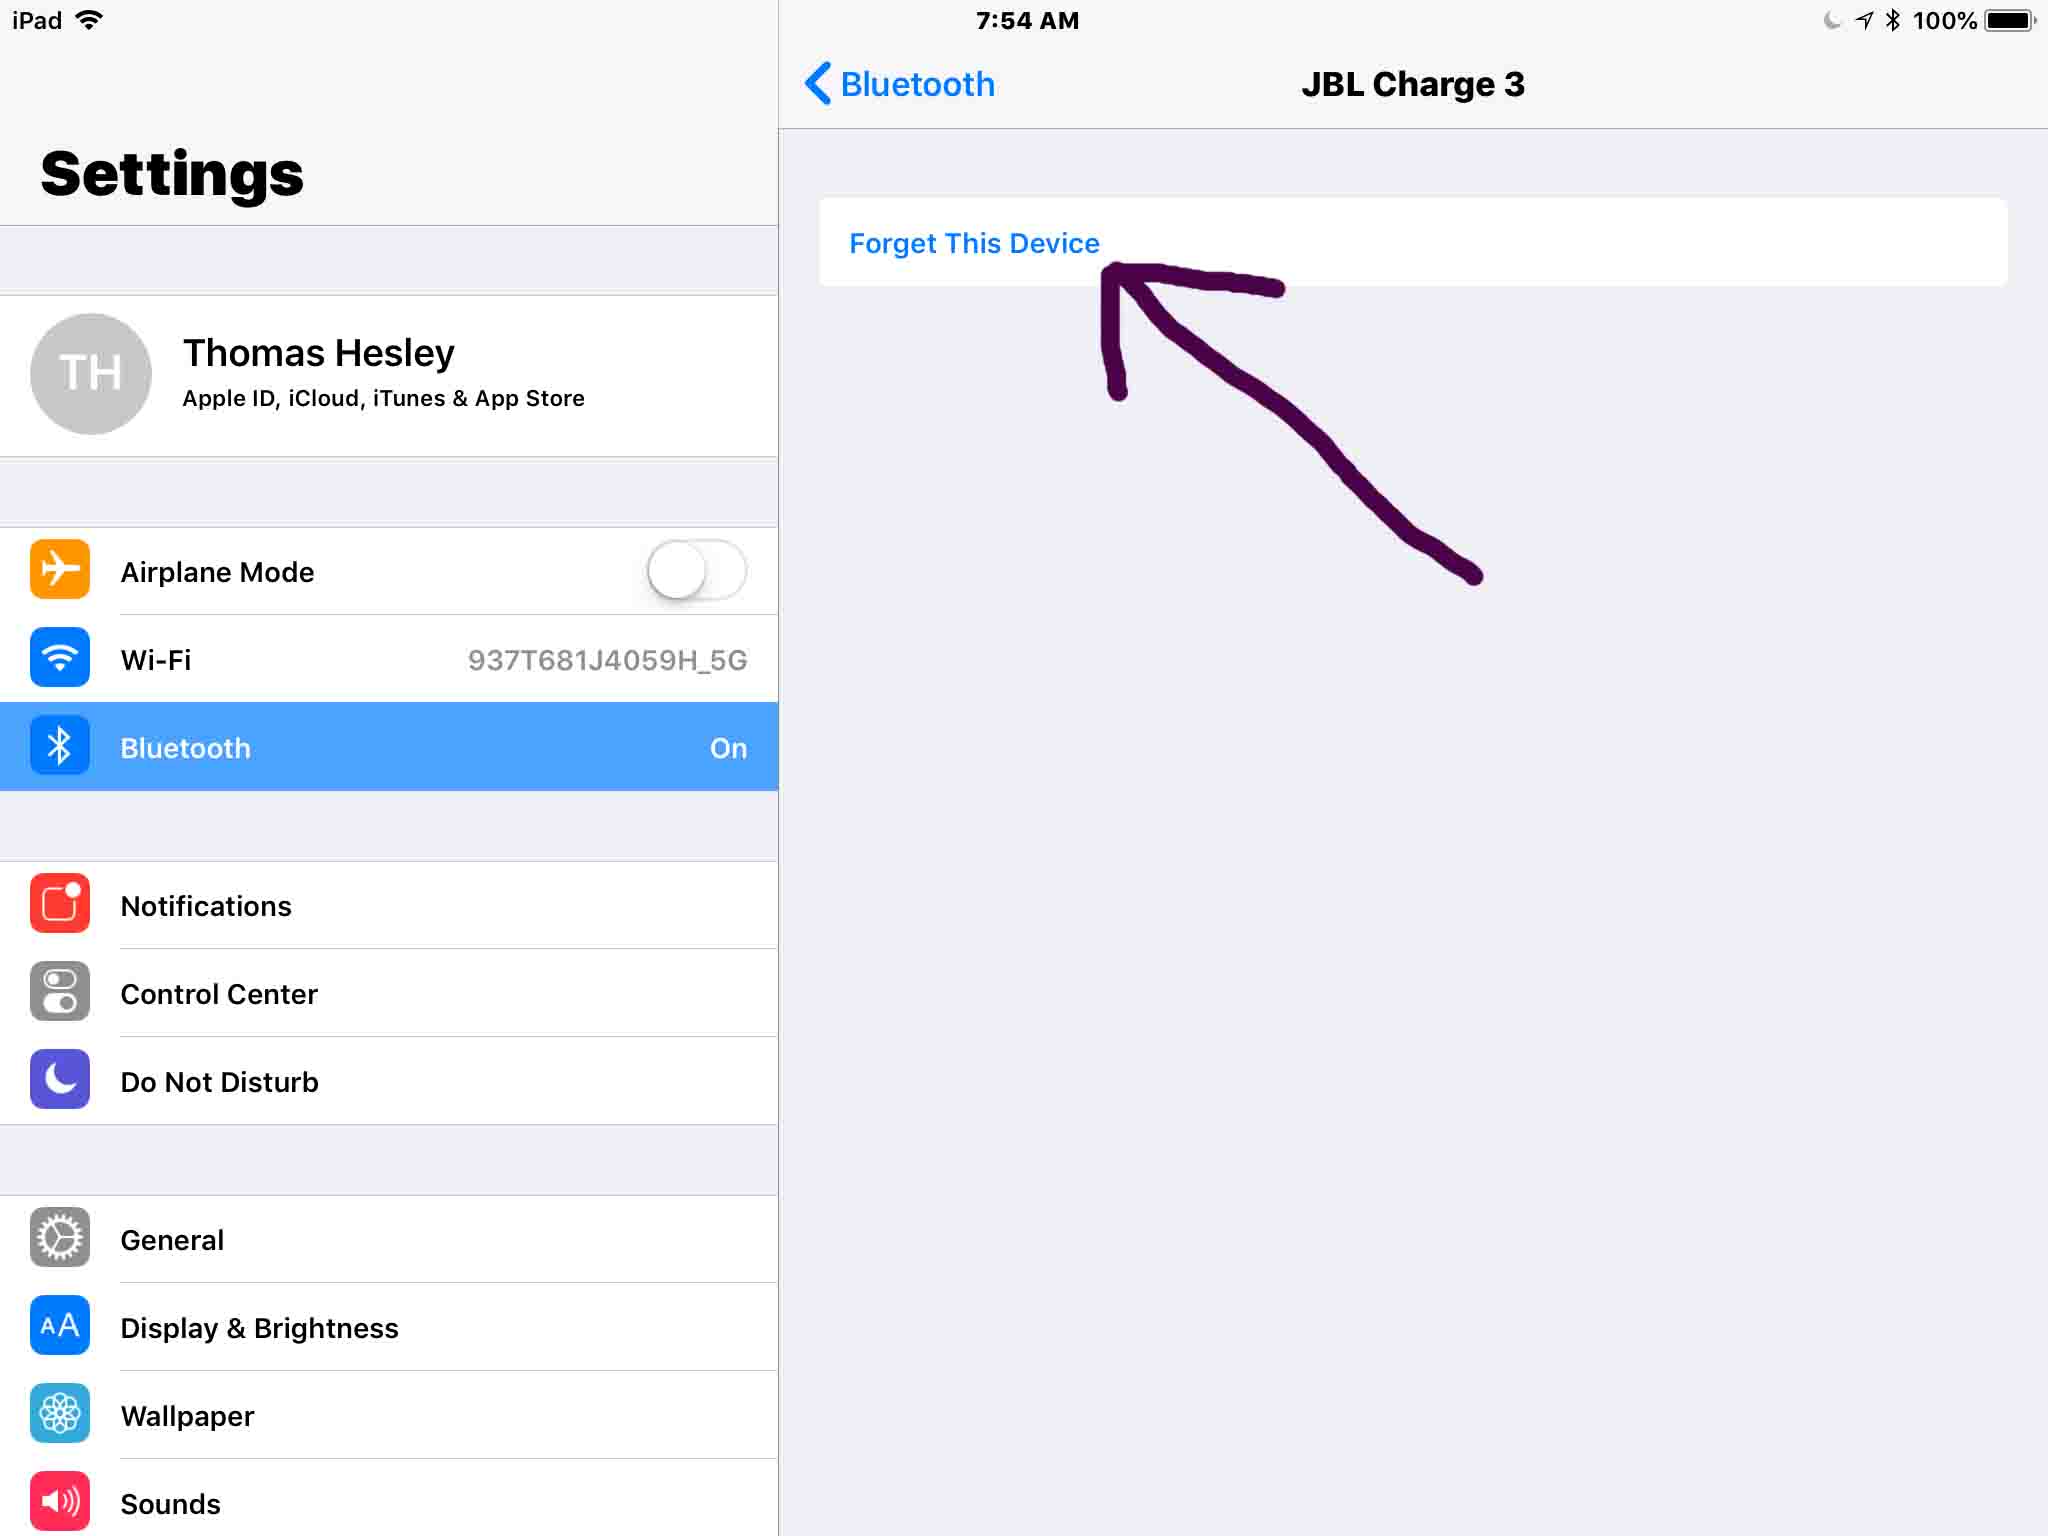
7. Tap the Forget This Device Option
When you tap the Forget This Device link, you then get the Forget “JBL Charge 3” prompt, as shown next.
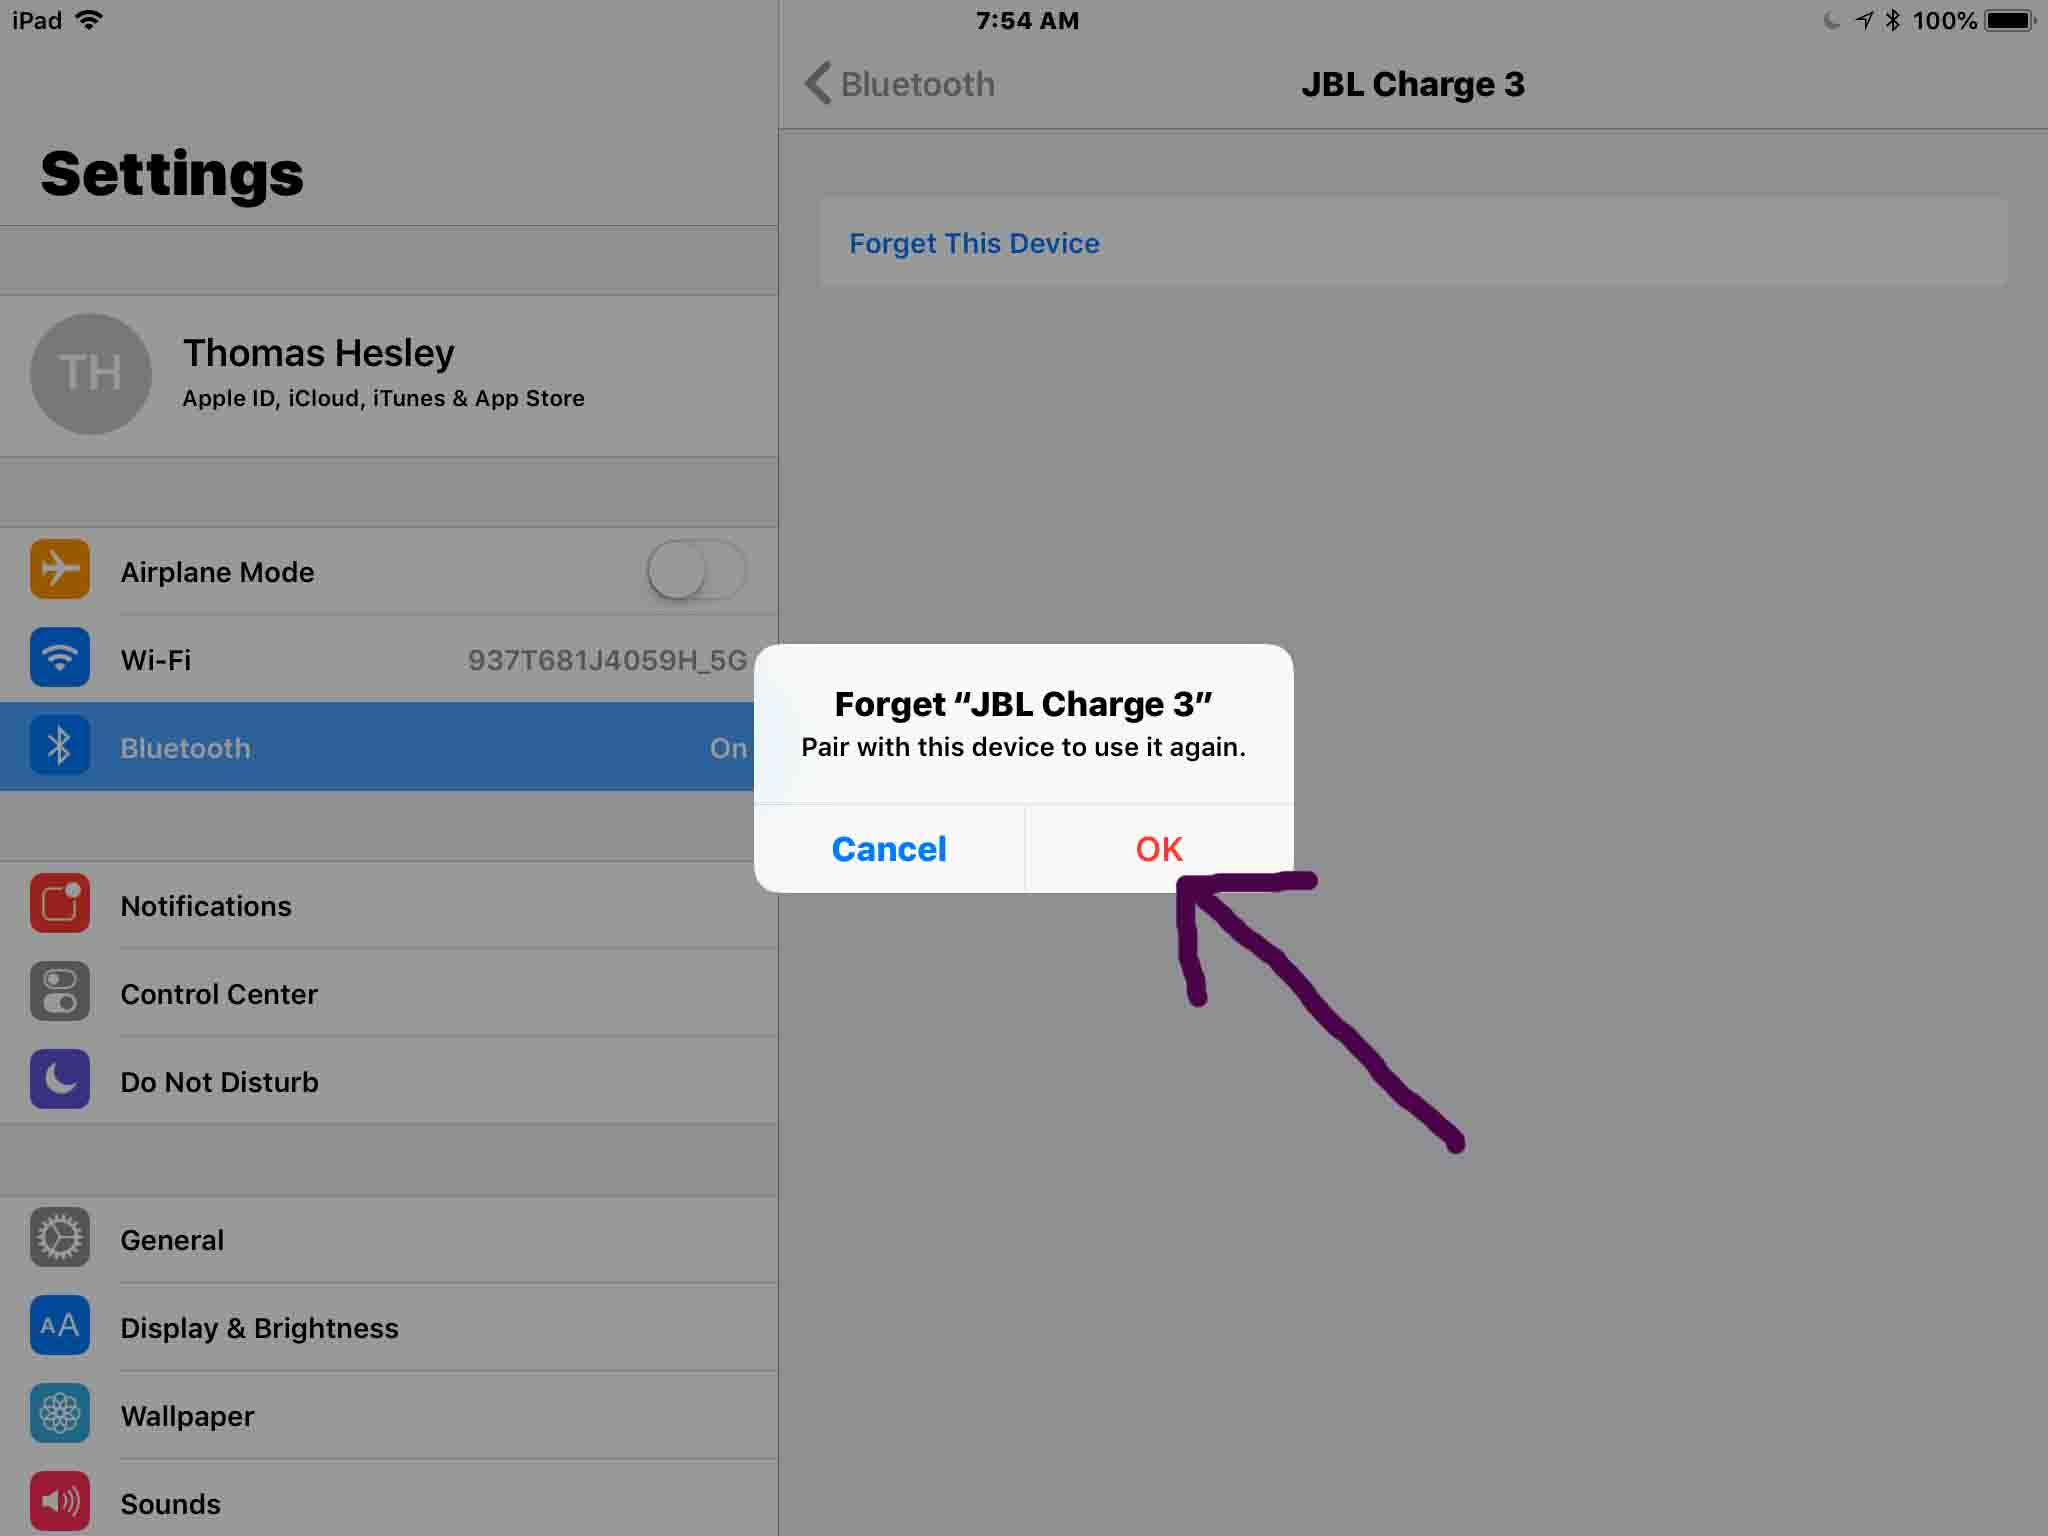
8. Tap the Red OK Button
Tapping OK removes the JBL Charge 3 data from the mobile device. This stops that device from looking for the speaker with that name, the next time you turn its Bluetooth on.
At any rate, after you hit OK, the Forget JBL Charge 3 window closes, and the system takes you back to the previously paired Bluetooth devices list. That screen looks similar to the following screenshot. Note that the JBL Charge 3 entry no longer appears in this list.
9. Turn On your JBL Charge 3
Turn on the speaker by quickly pressing its Power button. See this button pointed at by the green arrow, in the next picture.
The speaker then powers up.
But since it now has a new Bluetooth name that presumably no other nearby Bluetooth devices are aware of, it will not pair with anything. The light that comes on in the power switch denotes this not-paired state by glowing solid white, as shown next.
10. Put your JBL Charge 3 into Pairing Mode
Now, to see your newly named speaker on your mobile device, place into Bluetooth pairing mode. Do this by pressing and releasing the Bluetooth button, as we point out in the next picture.
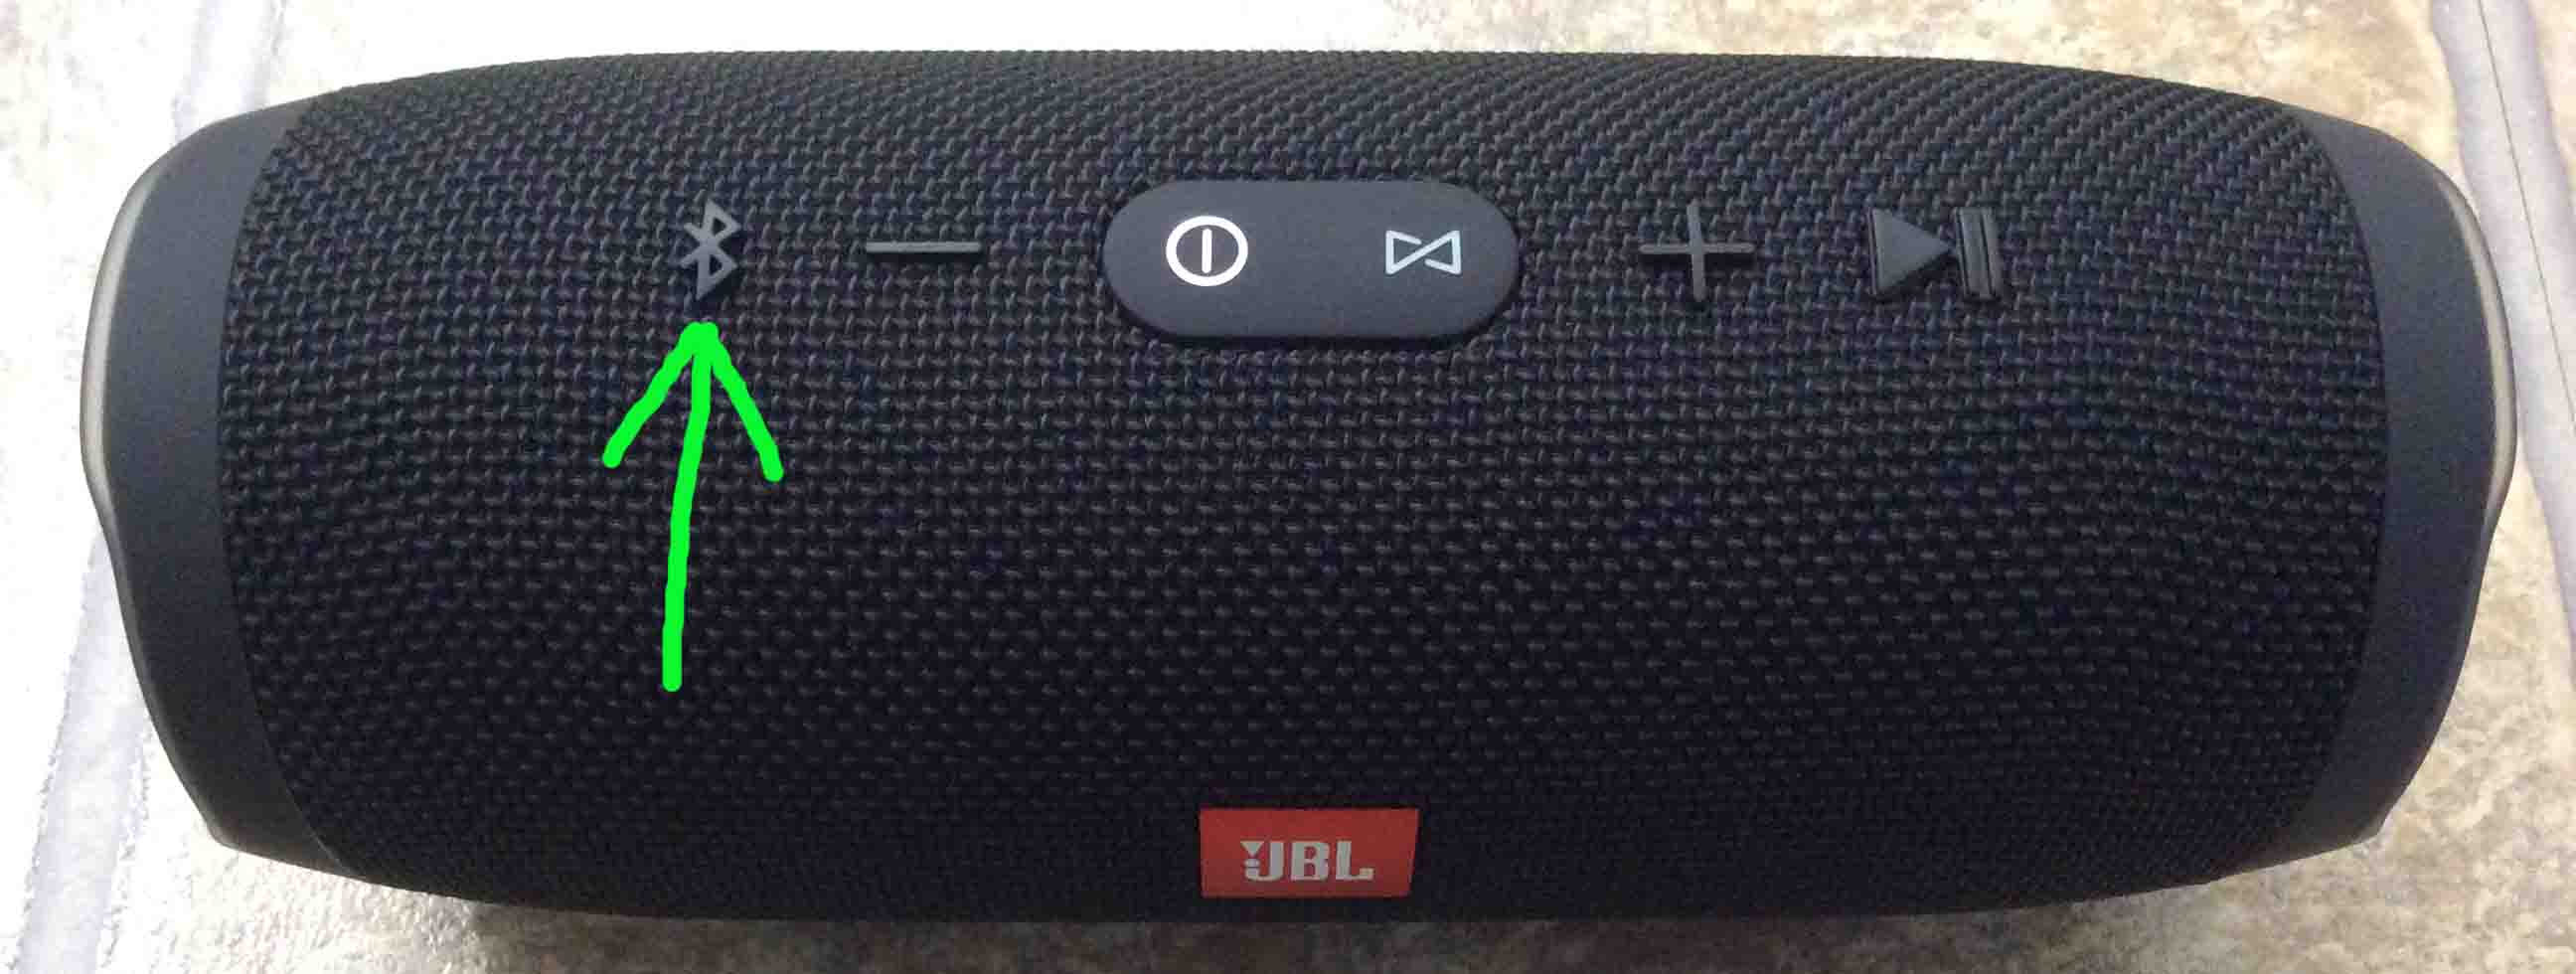
When you press this button, the JBL Charge 3 makes a repeating single pluck guitar note sound several times. Also, the power button changes from a solid white glow to flashing blue. See this next.

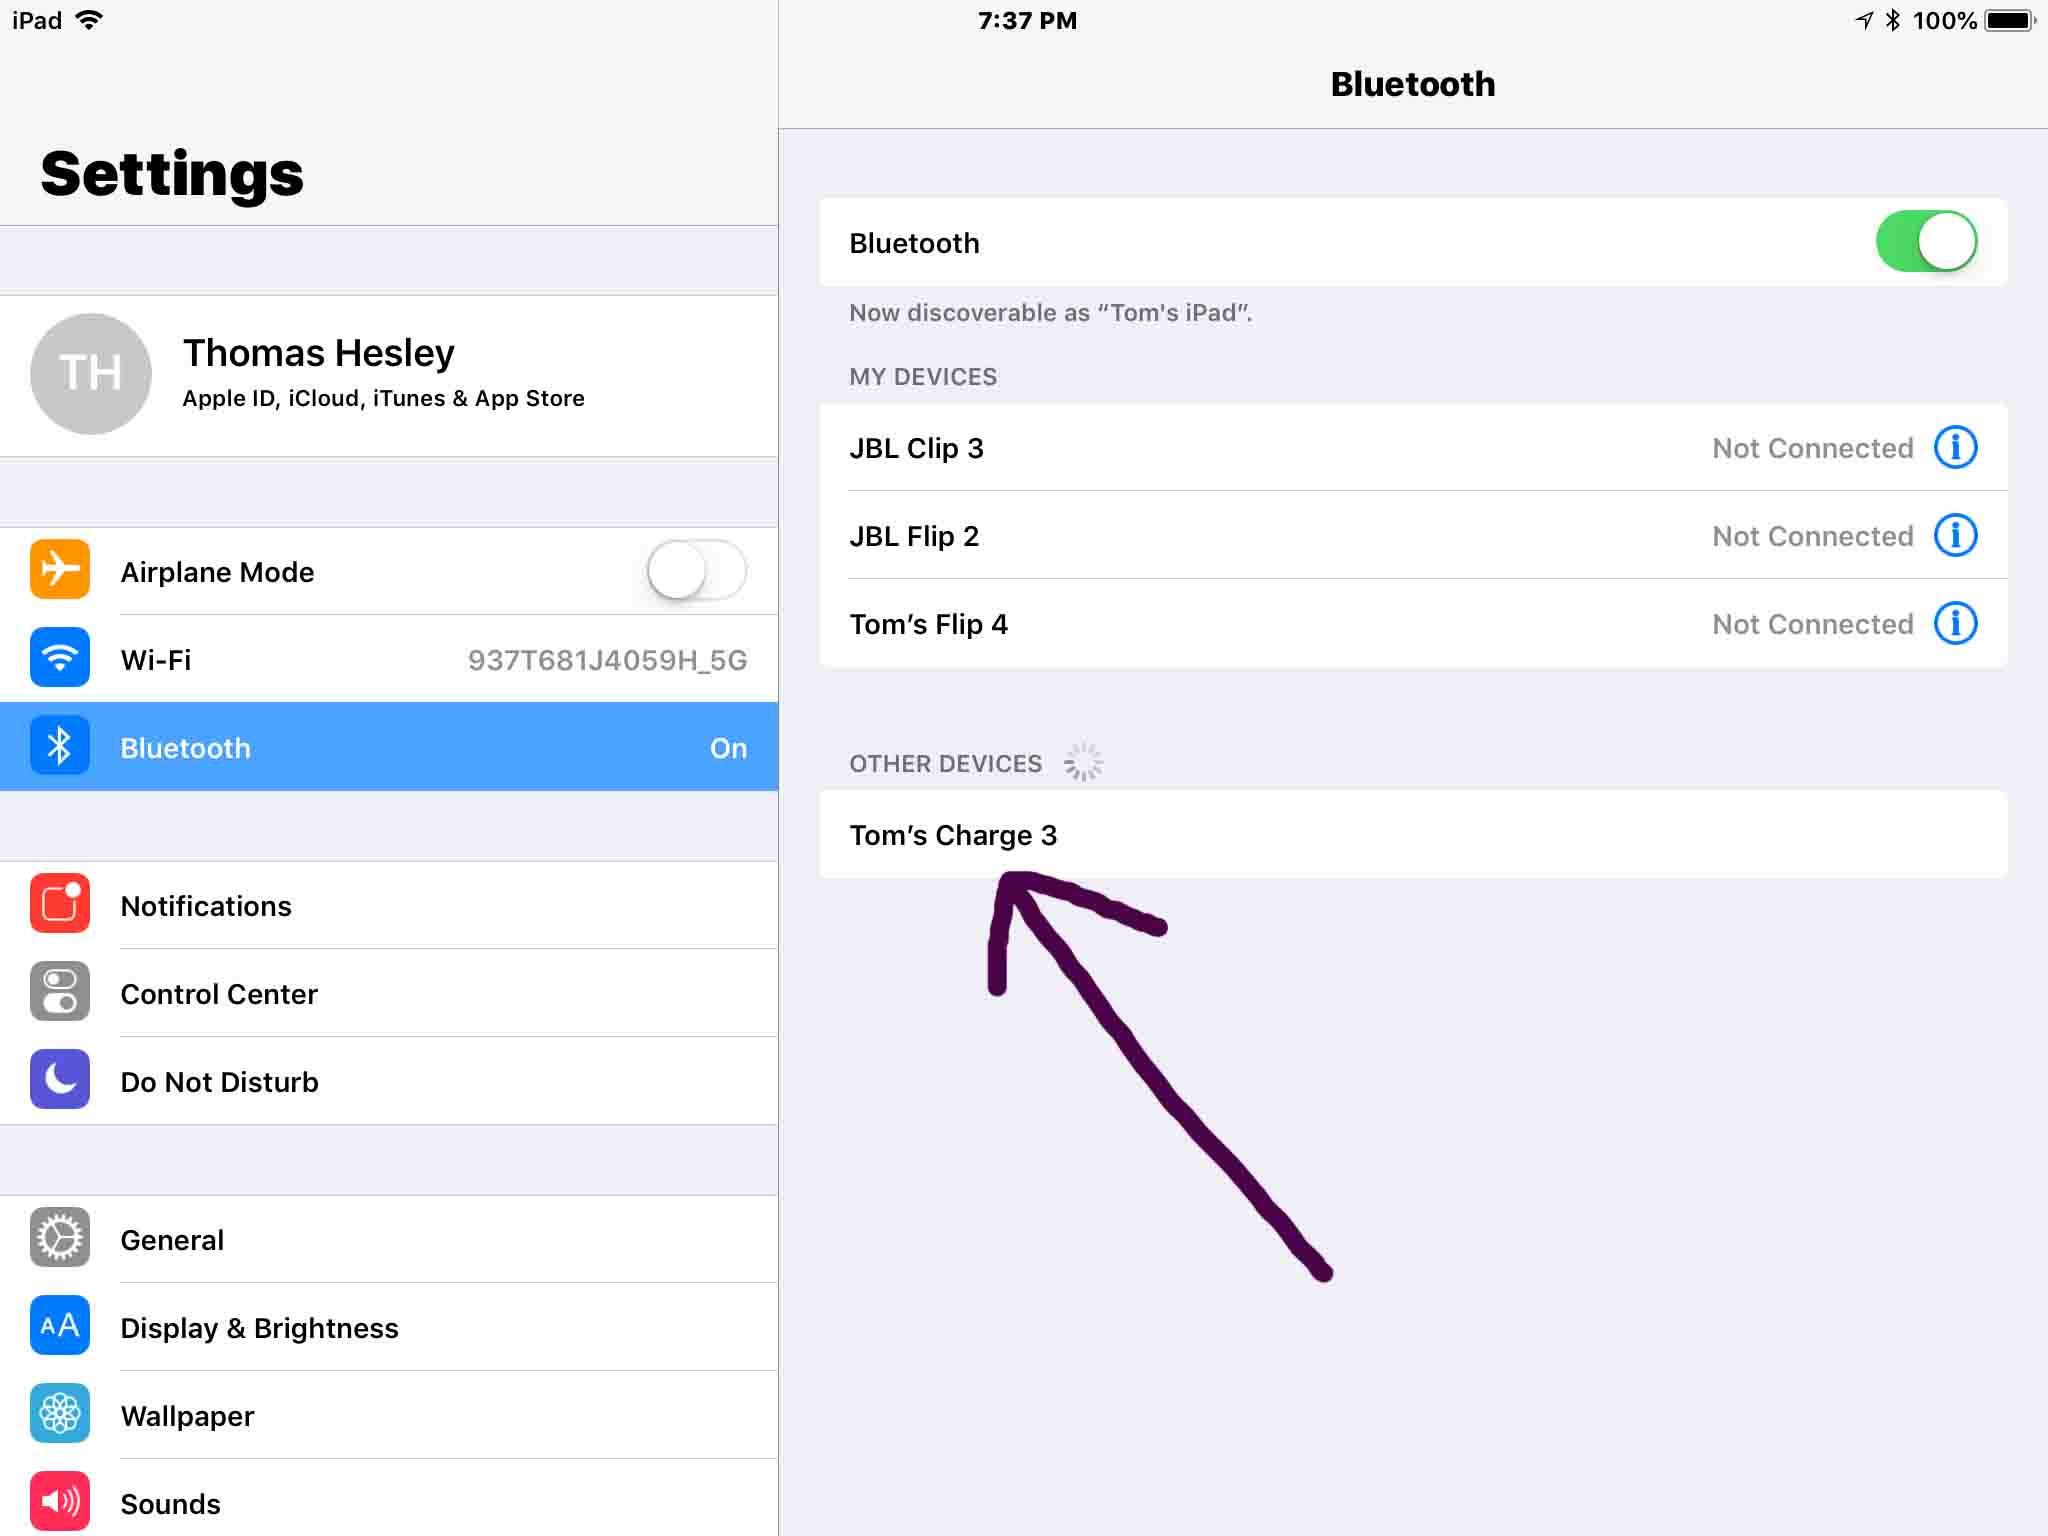
11. Find your JBL Charge 3 with its New Name on your Mobile Device
See the screen shot next. We found our speaker. Note that it appears here with its new Bluetooth device name, as pointed at by the purple arrow.
12. Pair with your Newly Named JBL Charge 3
Tap the listed speaker in the Other Devices portion of the Bluetooth devices list.
Your mobile device then pairs with the JBL Charge 3 using its newly assigned name (“Tom’s Charge 3” in this demo). It’s Bluetooth Settings screen then changes to look something like the following.
13. Done!
We have now successfully renamed / changed the Bluetooth device name of our JBL Charge 3. We’ve also successfully paired it with a mobile device using this new name.
Restoring Default JBL Charge 3 Name
Note that you can restore the original default speaker name by resetting the JBL Charge 3.
Or, you can rename the speaker back to the “JBL Charge 3” by changing the name back to its default, by using the above given routine.
Related Posts to JBL Charge 3 Change Name
Other Posts About the JBL Charge 3
References
Revision History
-
- 2022-12-02: Updated links.
- 2020-04-21: Added more tags.
- 2019-04-02: Tweaked key phrase targeting.
- 2018-07-27: First published.