llow these instructions that show how JBL Charge 3 charging via its hidden DC input charging micro USB port works. Discussed below.
JBL Charge 3 Charging: First Remarks
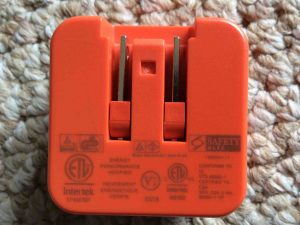
First, we recommend recharging the JBL Charge 3 with the included JBL USB charger. Why? Because this power adapter meets the speaker’s amperage needs, and is provided by JBL besides. Presumably, JBL thinks that this is a well-matched AC charger. So, we won’t buck any systems here. Yet in a pinch, you could fully charge it with other non JBL adapters. But exploring those options is beyond the scope of this post.
JBL Charge 3 Charging: Step-by-Step Routine
1. For Best Results, Use the Included USB Power Adapter
As stated earlier, we’re using the JBL USB wall charger AC adapter included with this speaker, as shown next.
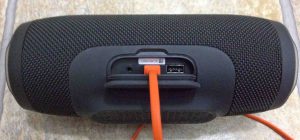
2. Open the Port Door
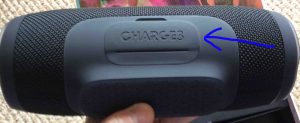
Pry open the port door flap on the lower back of the speaker. Then pull it toward you to open all the way. This exposes the USB power out and micro USB charging input ports.

3. Plug in the DC Power Cord to the Charge 3
Then plug the USB connector end of the charge cord into the matching micro USB input port.
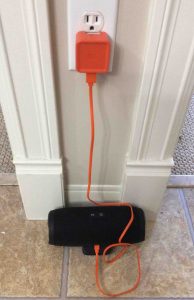
4. Plug the AC Power Adapter into a Working Wall Outlet, to Continue with JBL Charge 3 Charging
Then connect the charger into a working AC outlet.
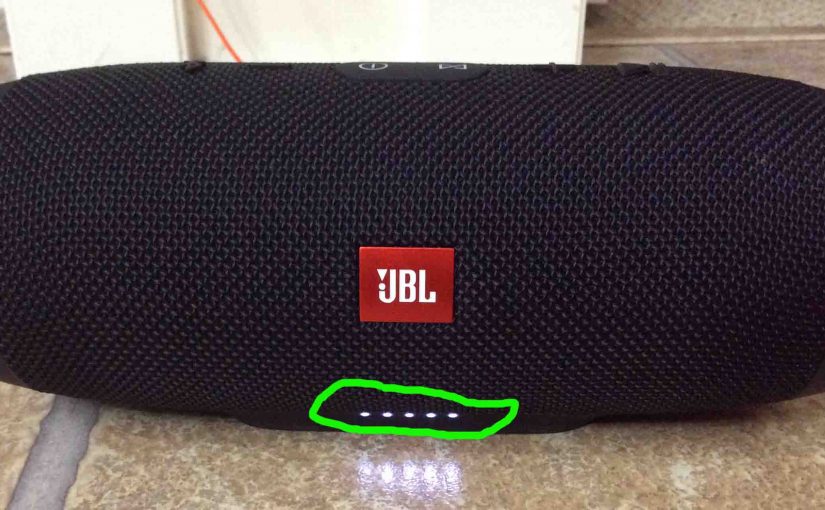
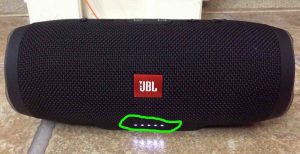
At least one of the battery status lamps lights up on the Charge Three when you apply charging power. There are five lamps on the Charge 3 that come on in succession as battery recharging progresses.
5. Allow the JBL Charge 3 to Recharge Until All Battery Power Lights Go Off
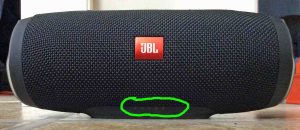
Battery charging is almost complete when all but the last of the battery status lights light solid. The last one continues to blink for several minutes more to top off the charge, as shown next.
The battery recharge cycle finishes when all battery status gauge lights go out, as shown next.
6. Unplug the USB Charging Cable
The next picture shows the USB charging port after we removed the charge cord.
7. Fully Push Closed the Water Resistant Port Door to Continue with JBL Charge 3 Charging
Then close this power port seal completely. If you do not, then water could get into the unit. Then it might damage the Charge 3’s electronics inside. So, take great care to correctly close the port door. This way, you get the full water resistance protection.
See how this port door looks when fully closed and sealed in the next picture.
8. JBL Charge 3 Charging Done !
We have now fully charged our JBL Charge 3. Note that the battery status gauge just after turning on the speaker following a full recharge. All lamps glow. This means that the speaker is indeed at full charge.
At last, repeat this recharging every twenty hours of play to keep the battery power bank in ready condition. We charge ours when the battery status gauge lights show just one lamp glowing. Keeping this speaker charged is important if you charge your phones / tablets from it.