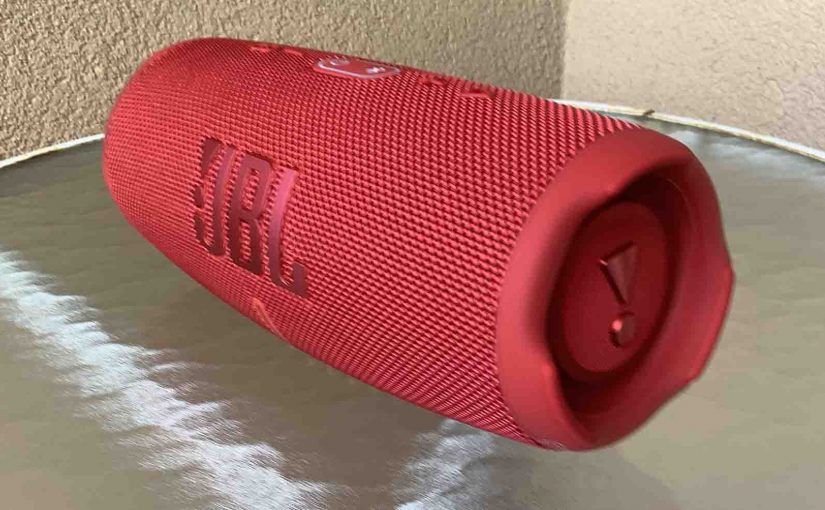
You can recharge the JBL Charge 5 portable speaker through the USB-C charging port at the rear of the speaker. To summarize these JBL Charge 5 charging directions: First, choose a right sized USB power adapter, which we detail below.
Next, connect the Black USB-C cable included with the speaker between the Charge 5 and the power adapter you’re using. Then plug the adapter into a working wall outlet. Finally after four to five hours, your speaker will fully recharge. Then, you can play it again for up to twenty hours roughly, before you must recharge it again.

JBL Charge 5 Charging, Step by Step
1. Choose Right Size Charger
The power supply you use for charging this speaker should be able deliver 15 watts (5 volts at 3 amps) to get the quickest recharging times. Plus, to avoid having to get a different cord, pick a charger with a female USB-A output port so that the included cable with this speaker will fit it.
For this demo though, we use the adapter that came with our Charge 5 JBL speaker, and though it doesn’t output quite the max current, the speaker still charges in about the same time.
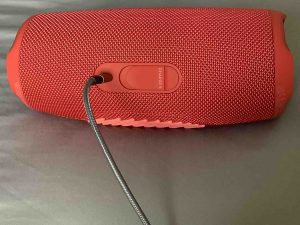
2. Plug in the USB-C Cord to Continue with JBL Charge 5 Charging
Insert the small end of the black USB-C charging cable into the matching port in the speaker, as shown above.
3. Plug the Other End of the Cord into the Power Adapter
Next, connect the A end of the USB charge cable to your USB power supply of choice.
4. Plug that Power Adapter into a Working Outlet
Now that the speaker and the AC adapter are connected, we plug the charger into a working AC outlet.
At least part of the battery status gauge bar lights up on the speaker when you apply enough USB power. As charging progresses, as shown in the next picture, more of this bar lights up, starting with the bottom.
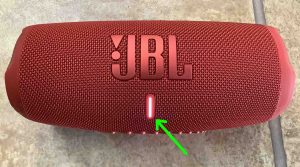
5. Allow Charging to Continue Until the Battery Meter Bar Goes Dark
Recharging is almost done when all but the top of the battery gauge glows solid. The topmost part keeps flashing though, for a few minutes more while the system tops off the charging.
After that, the battery charge cycle finishes when this gauge goes out.
6. Unplug the USB-C Charge Cable
7. Done with JBL Charge 5 Charging !
We have now fully charged our speaker. To further confirm this, check out the battery meter just after turning on the speaker afterwards. The entire meter bar should now glow, meaning that the speaker is fully charged.
Repeat this charging every twenty hours of music play, to keep its battery in top working condition. In fact, we charge ours when the battery gauge shows only one light glowing.
Other Posts About the JBL Charge 5
Related Posts
References
Revision History
-
- 2022-11-01: First published.