Here, we offer our JBL Flip 2 Charging Instructions for this popular Bluetooth speaker. Indeed, you can charge these JBL Flip 2 wireless speakers easily through the exposed USB charge port. To summarize: First, select an strong enough USB car or wall adapter. Why this? Because the Flip 2 does not come with this standard so far as we know.
Plus, the Flip 2 needs a medium power USB power source to charge fully in the shortest time.
Next then, connect a micro USB cable between the JBL Flip 2 and that adapter. Then, plug the power supply into a working wall outlet.
Finally after a few to four hours, your JBL speaker will fully recharge. Then, you’ll be able to play it again for up to four hours at mid volume levels, before you must charge it again.
JBL Flip 2 Charging Instructions
1. Choose Right Size Charger
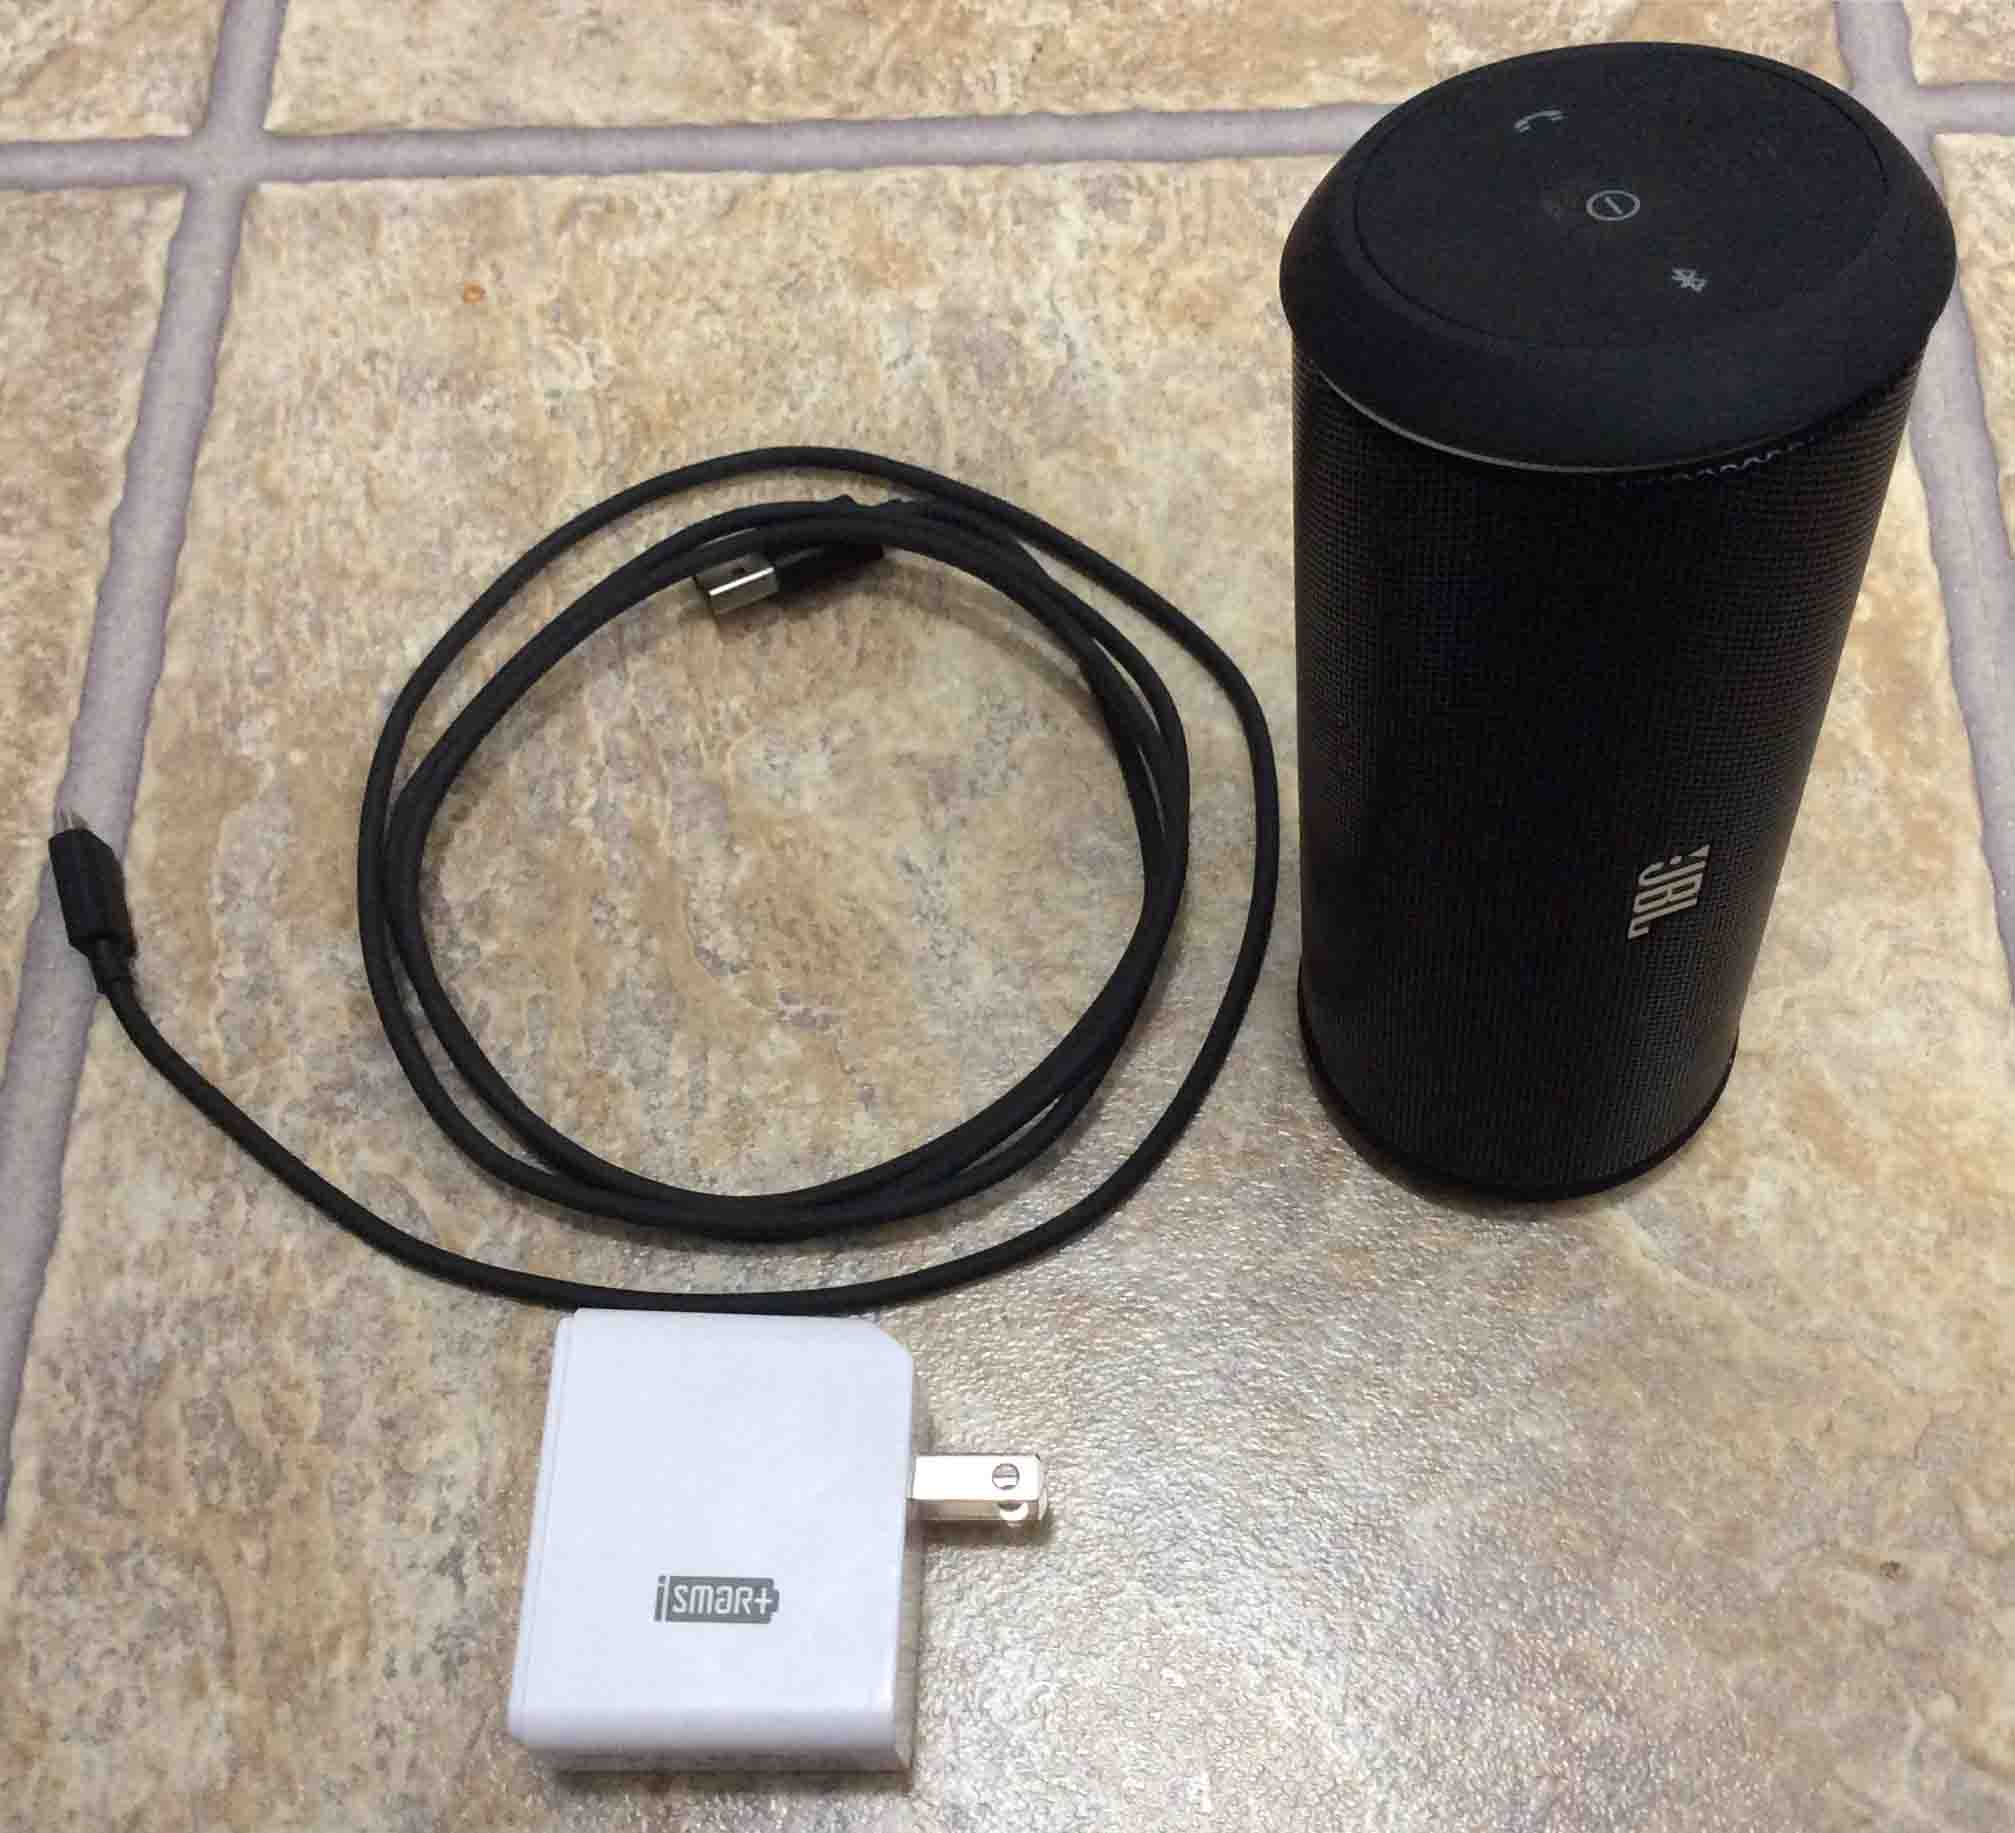
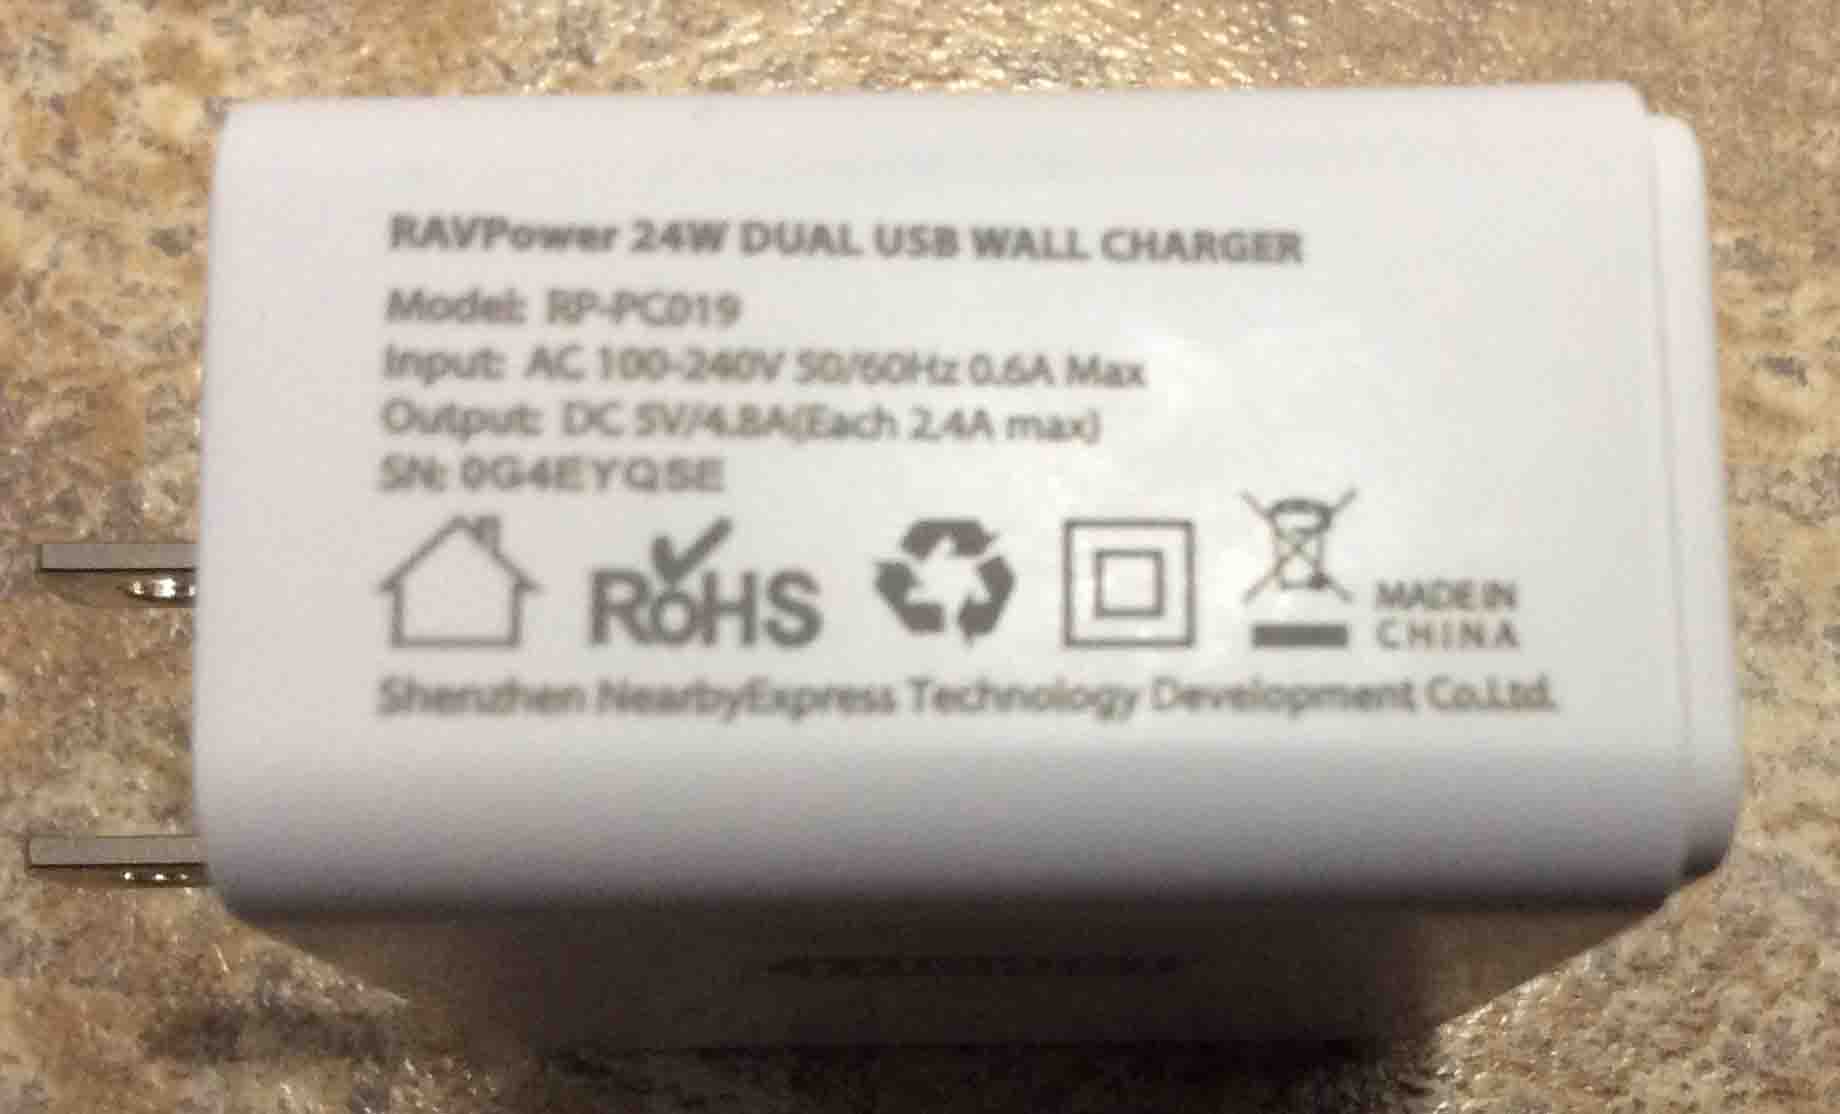
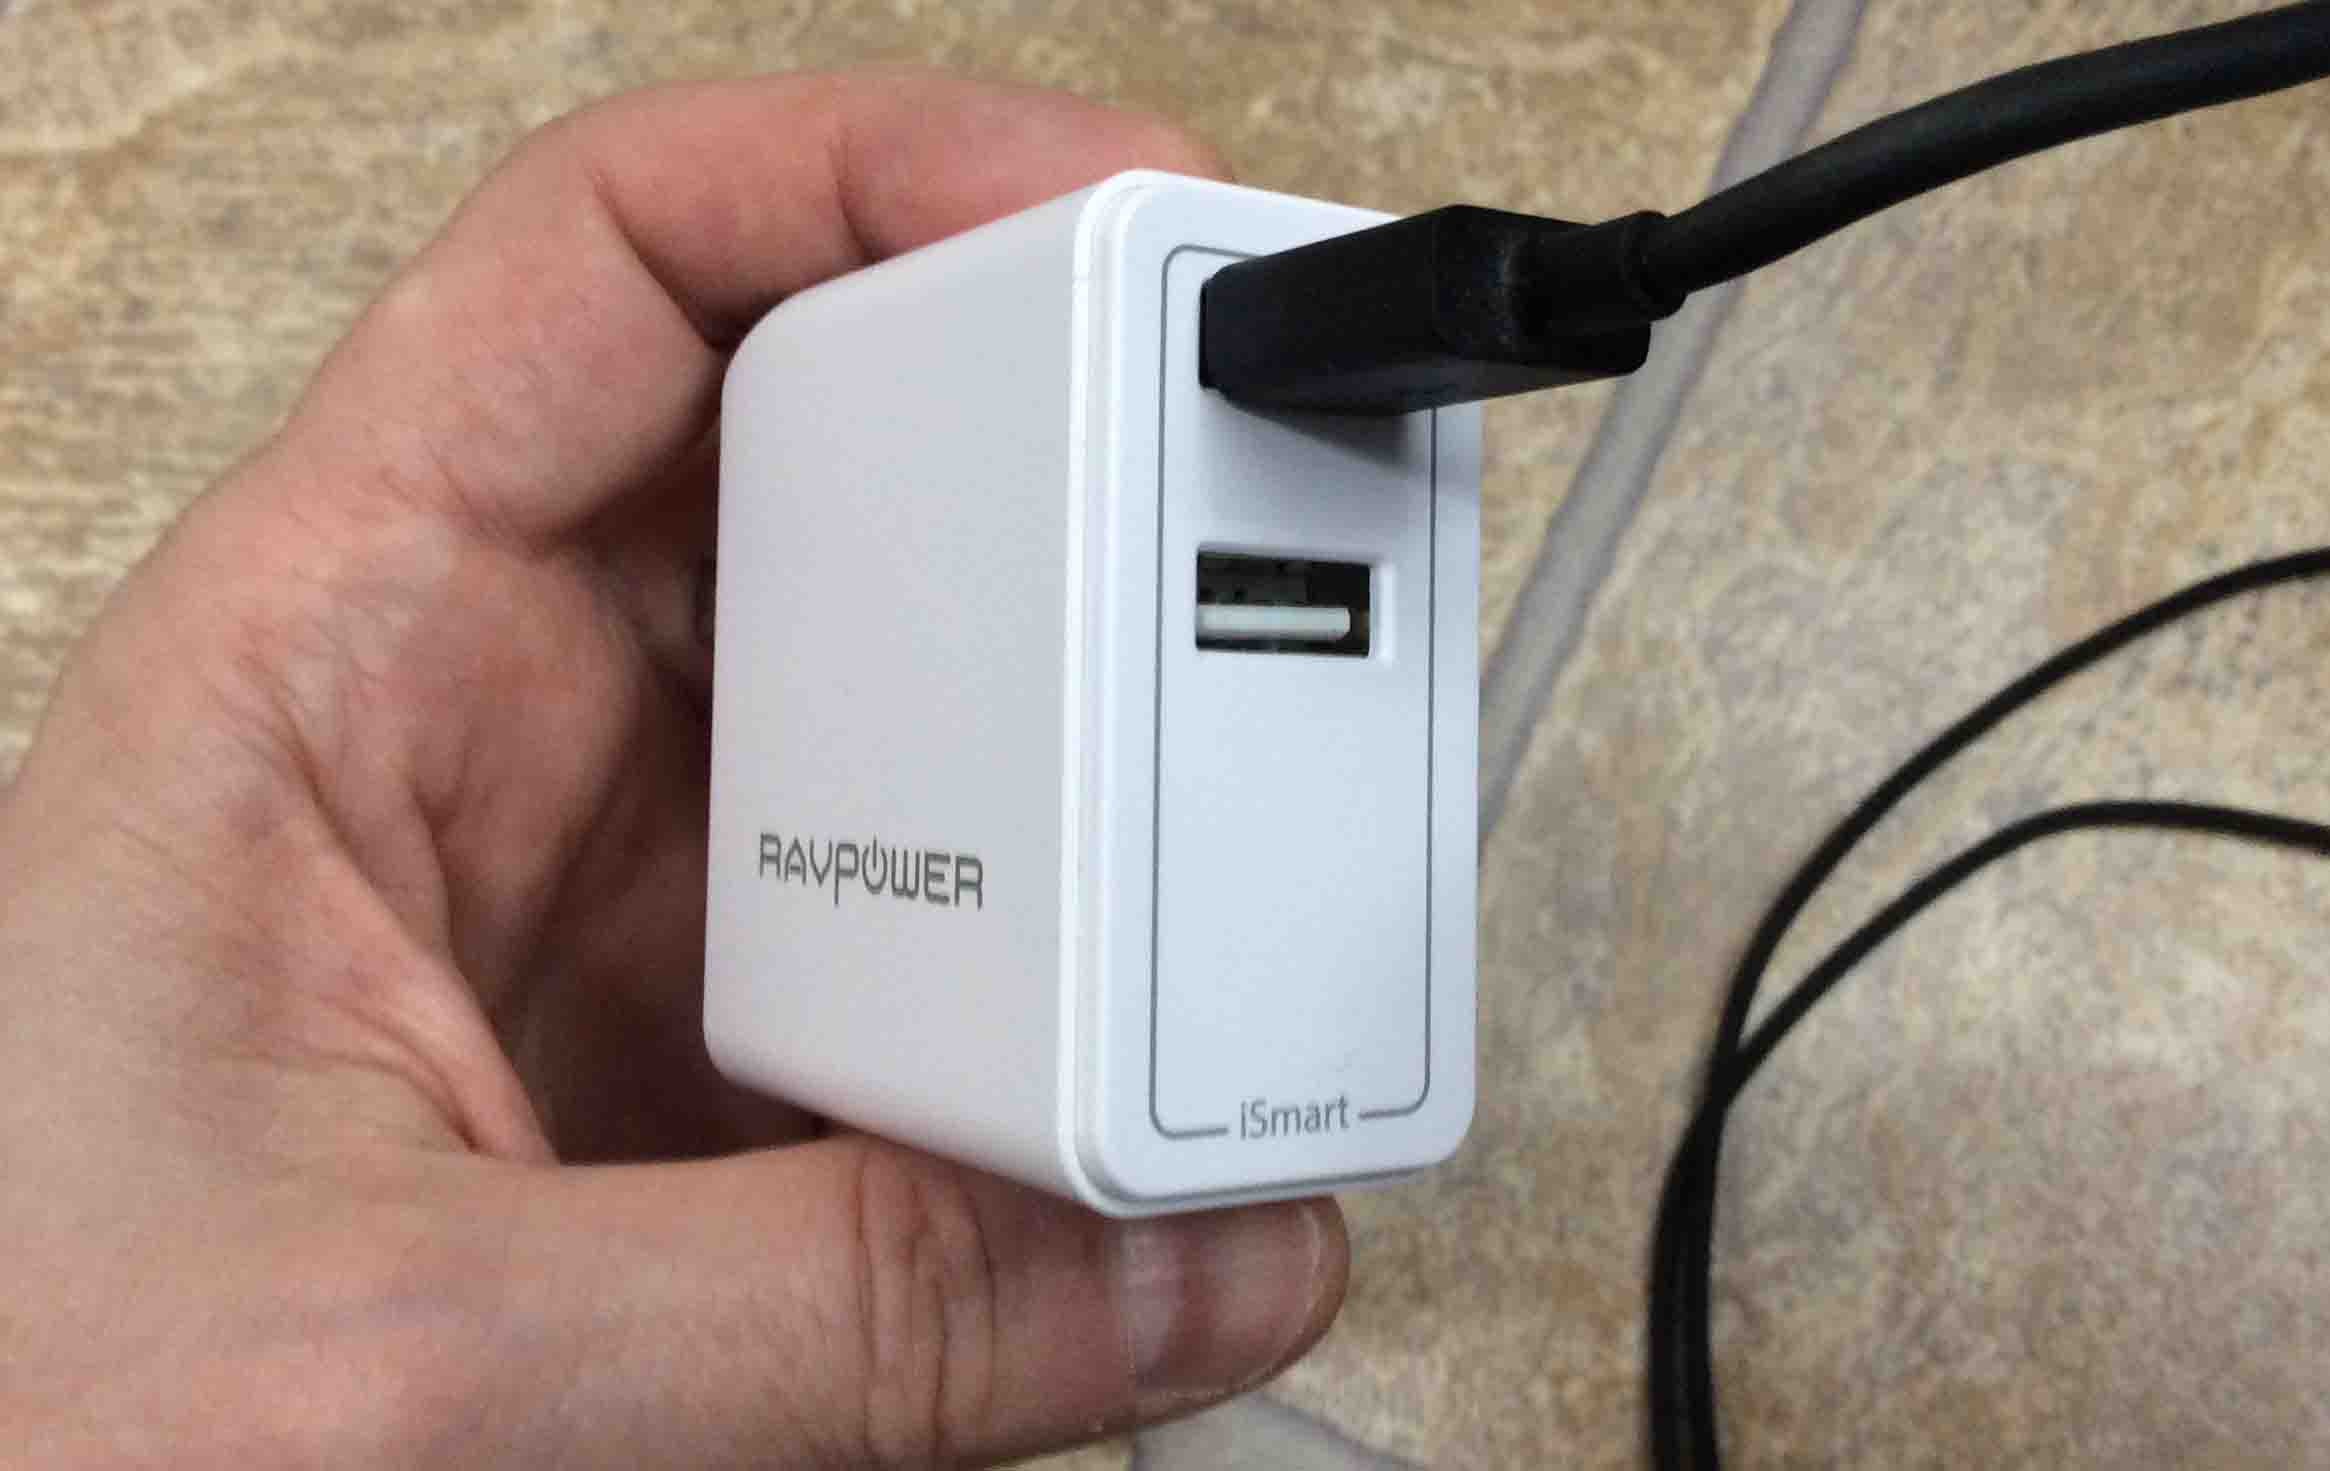
In this JBL Flip 2 charging instructions demo, we’re using the RavPower 24 watt dual port USB charger adapter, as shown next.
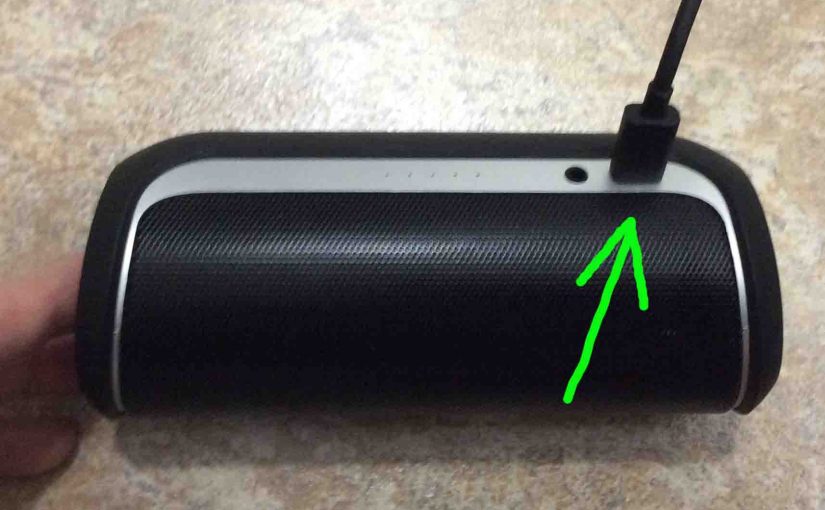
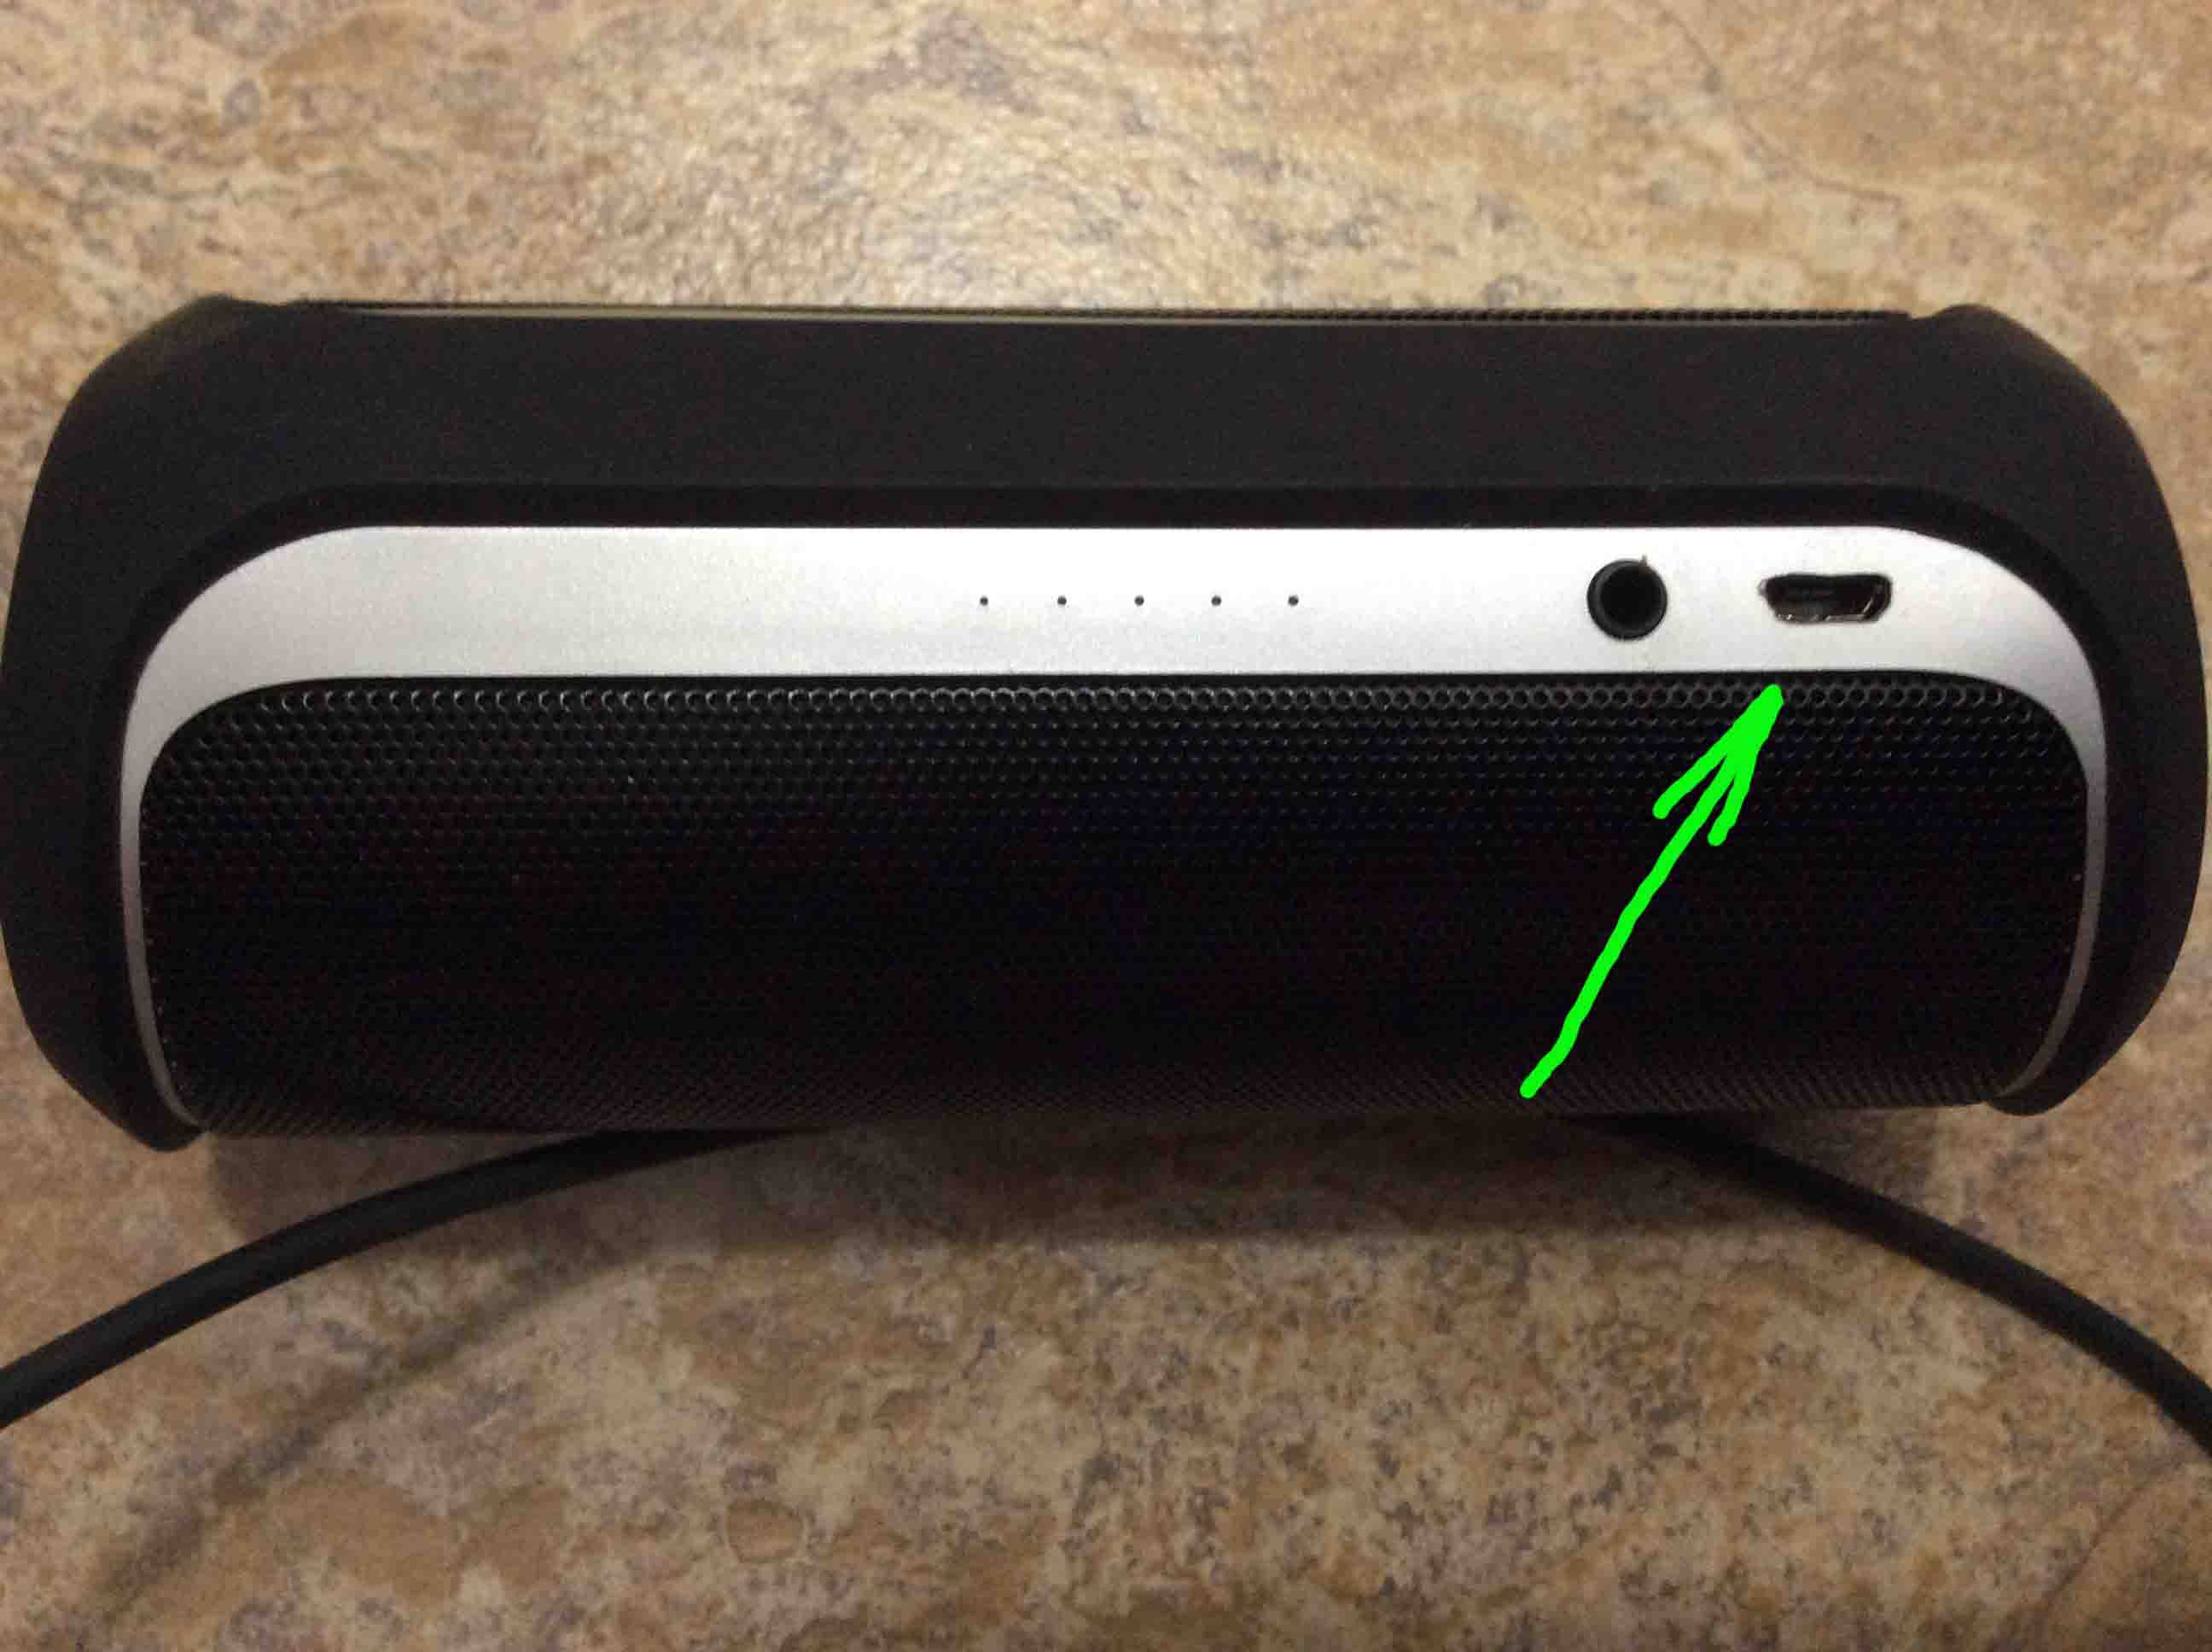
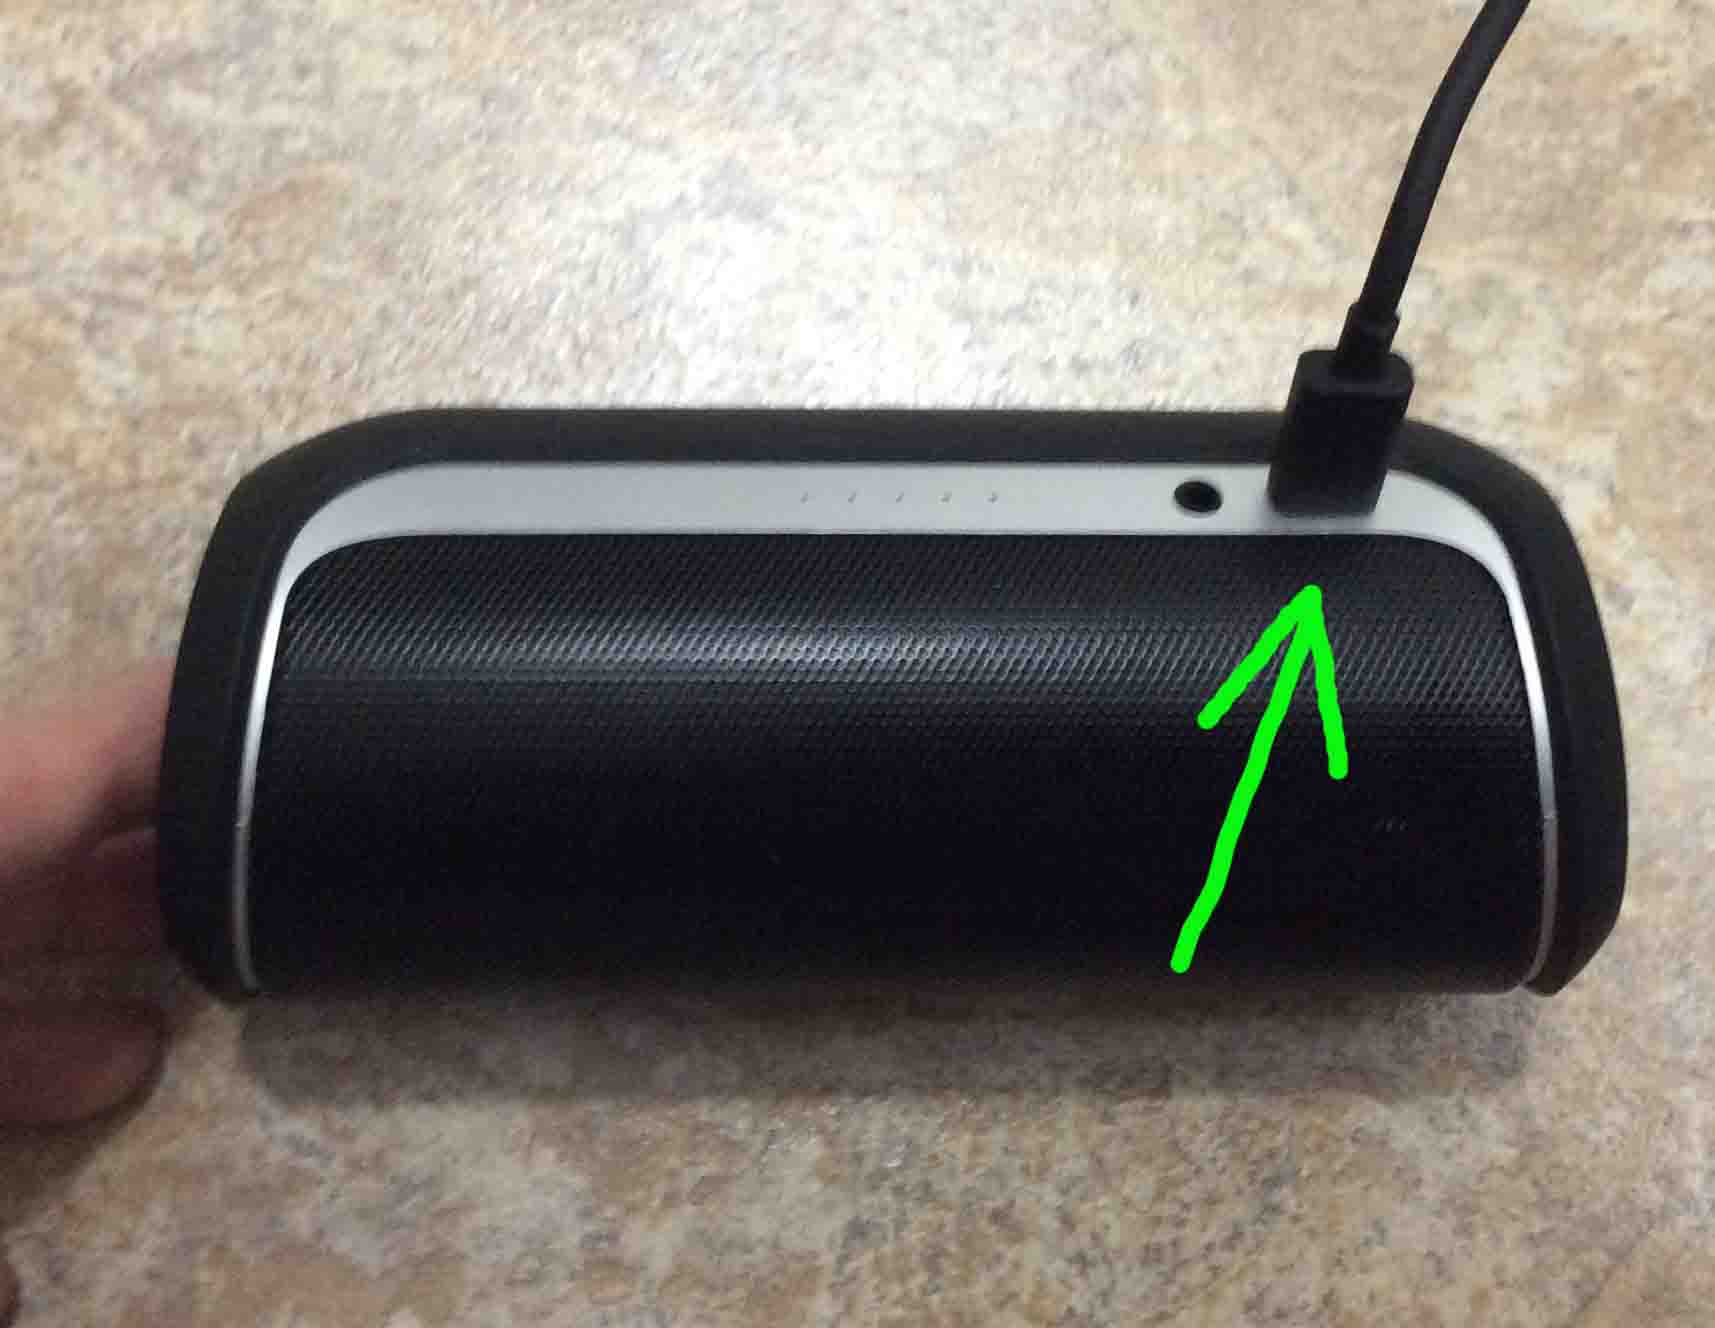
2. Find the Flip 2 USB Charge Port
Locate the micro USB charging port on the port side of the speaker, as shown next. Unlike the later models of the JBL Flip speaker line, the USB charge port on the JBL Flip 2 is exposed. Not hidden behind any waterproofing hatch. So, needless to say, the Flip 2 is neither waterproof nor splashproof.
3. Plug in the Micro USB Cord to the Flip 2
Then, plug the small end of your micro USB charge cord into the matching micro USB female port in the Flip Two, as shown next.
4. Plug the Other End of the USB Cord into your USB Power Adapter
Next, connect the A end of the USB charge cable to the power adapter, as shown next.
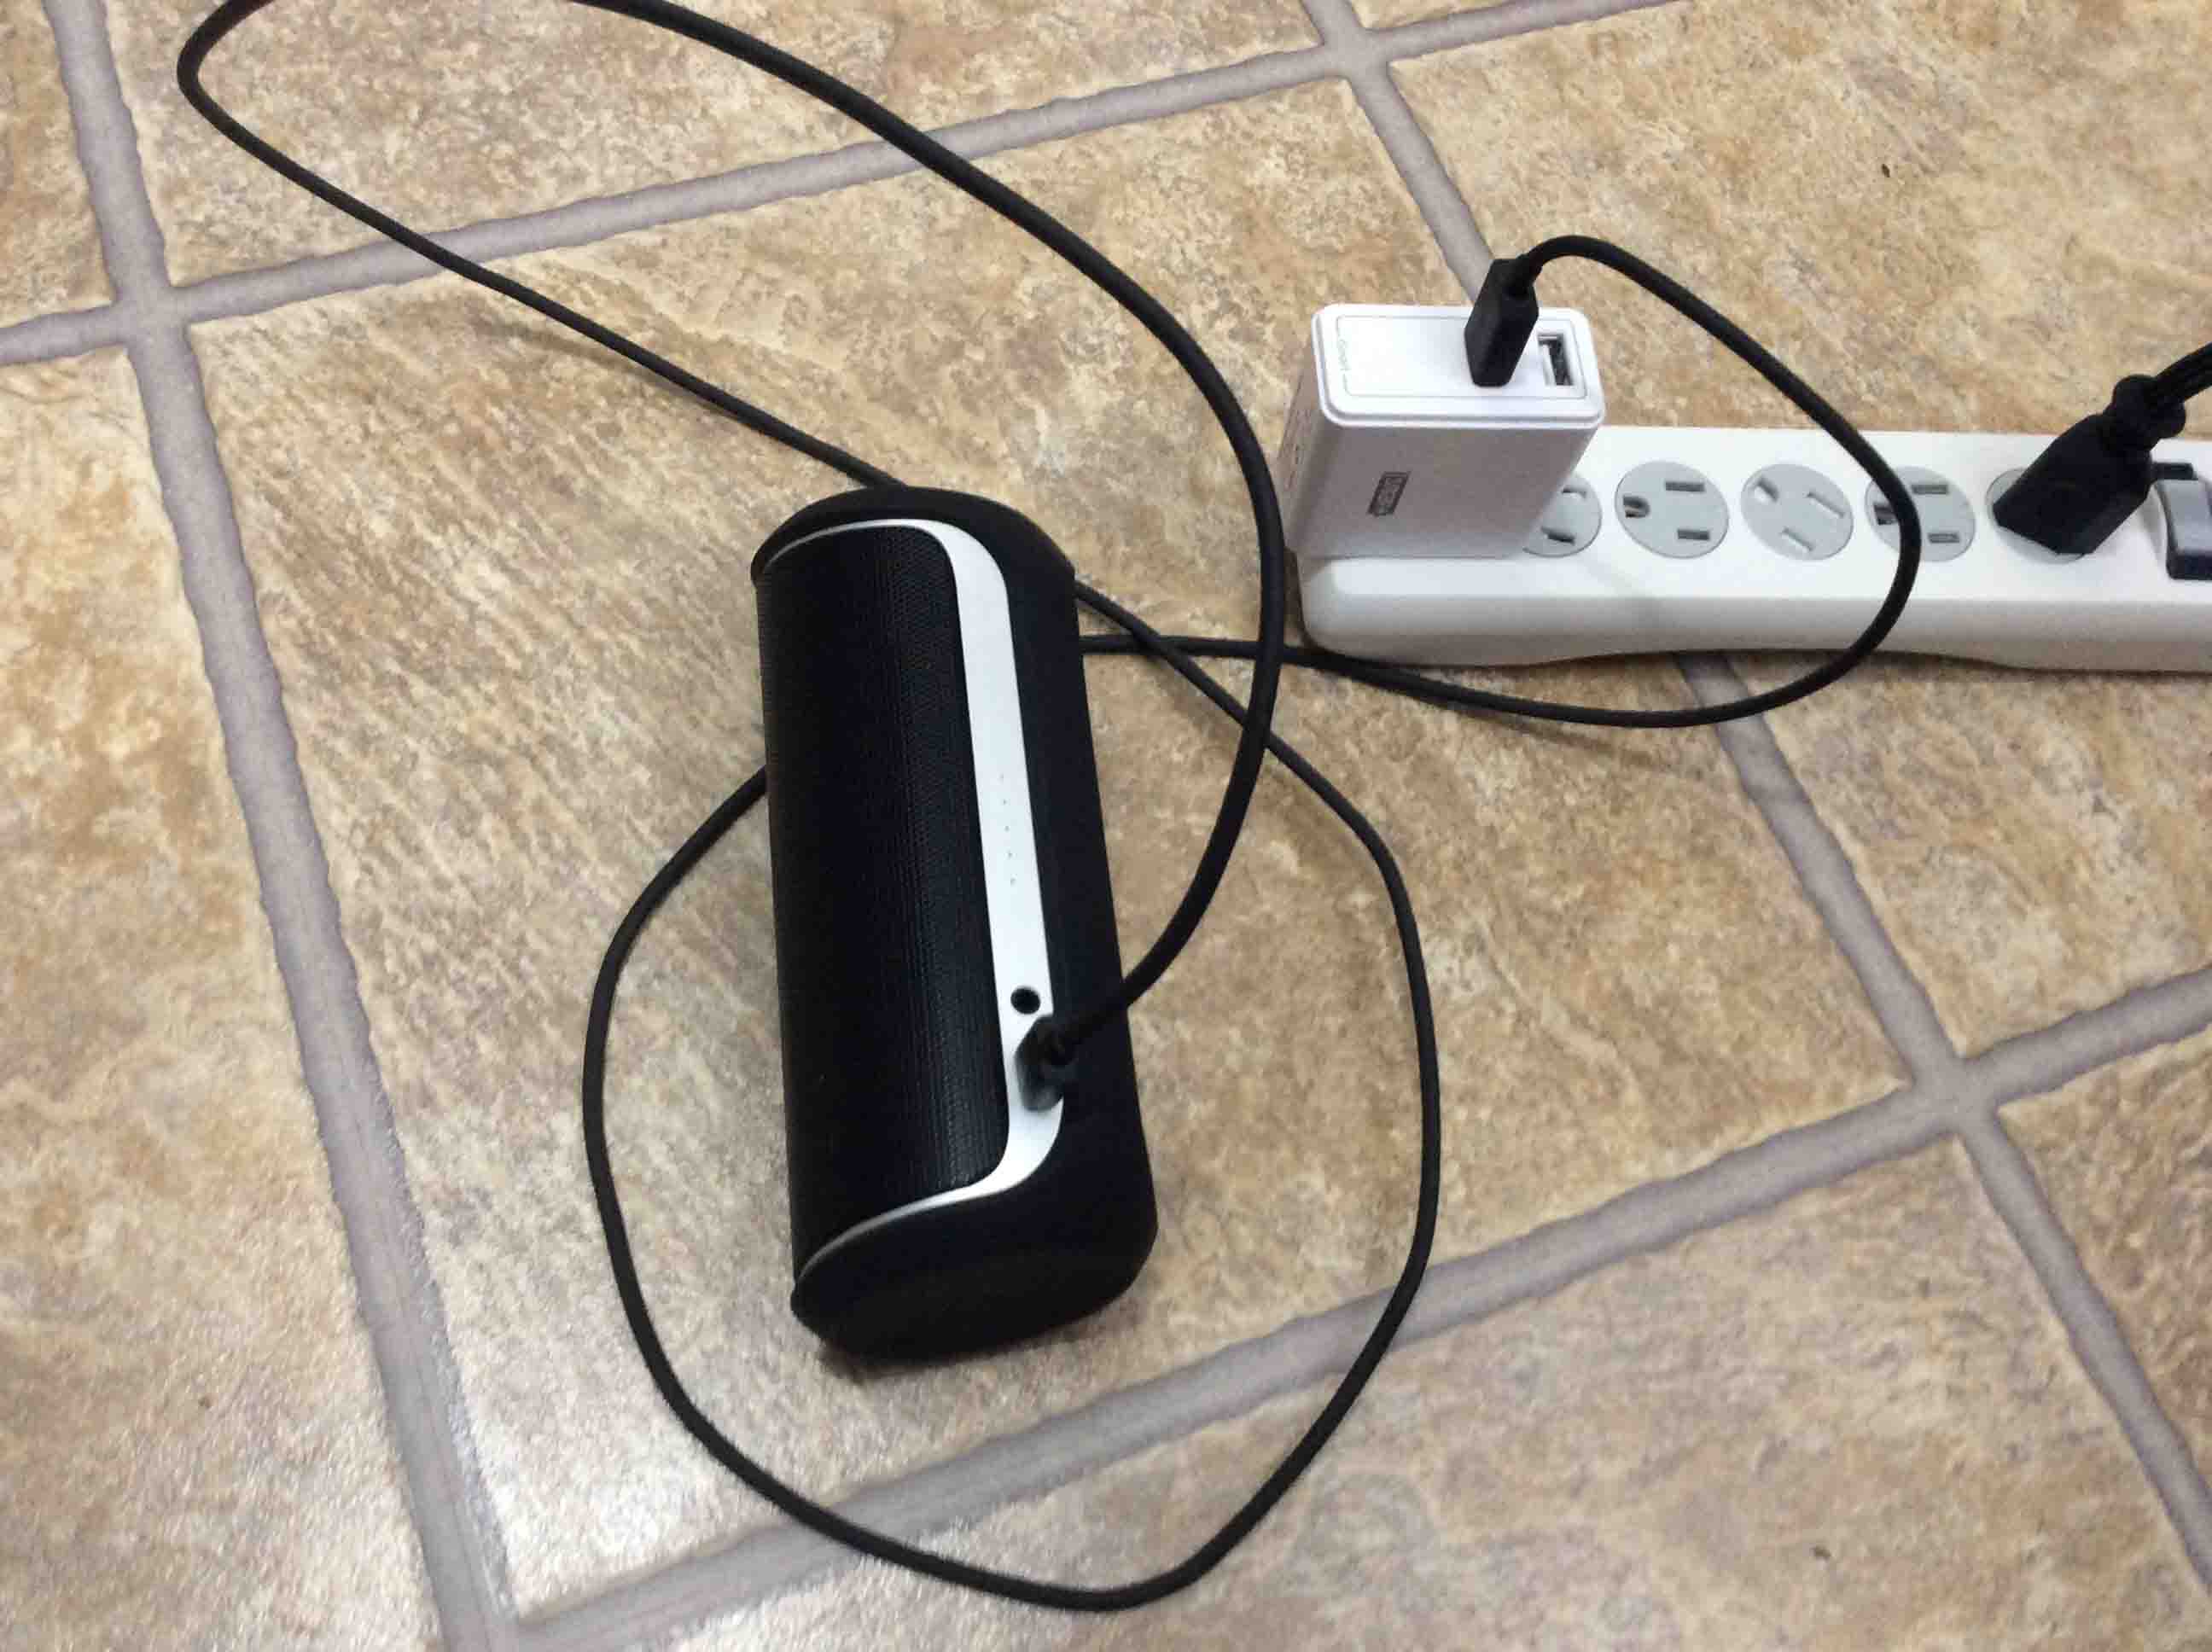
5. Plug the USB Power Adapter into a Working Outlet
Now that the Flip 2 and our RavPower adapter are connected together, we plug the RavPower into a working AC outlet, as shown next. In this demo, we’ve plugged ours into a surge protector power strip. Plus, we ran our speaker completely dead before this demo.
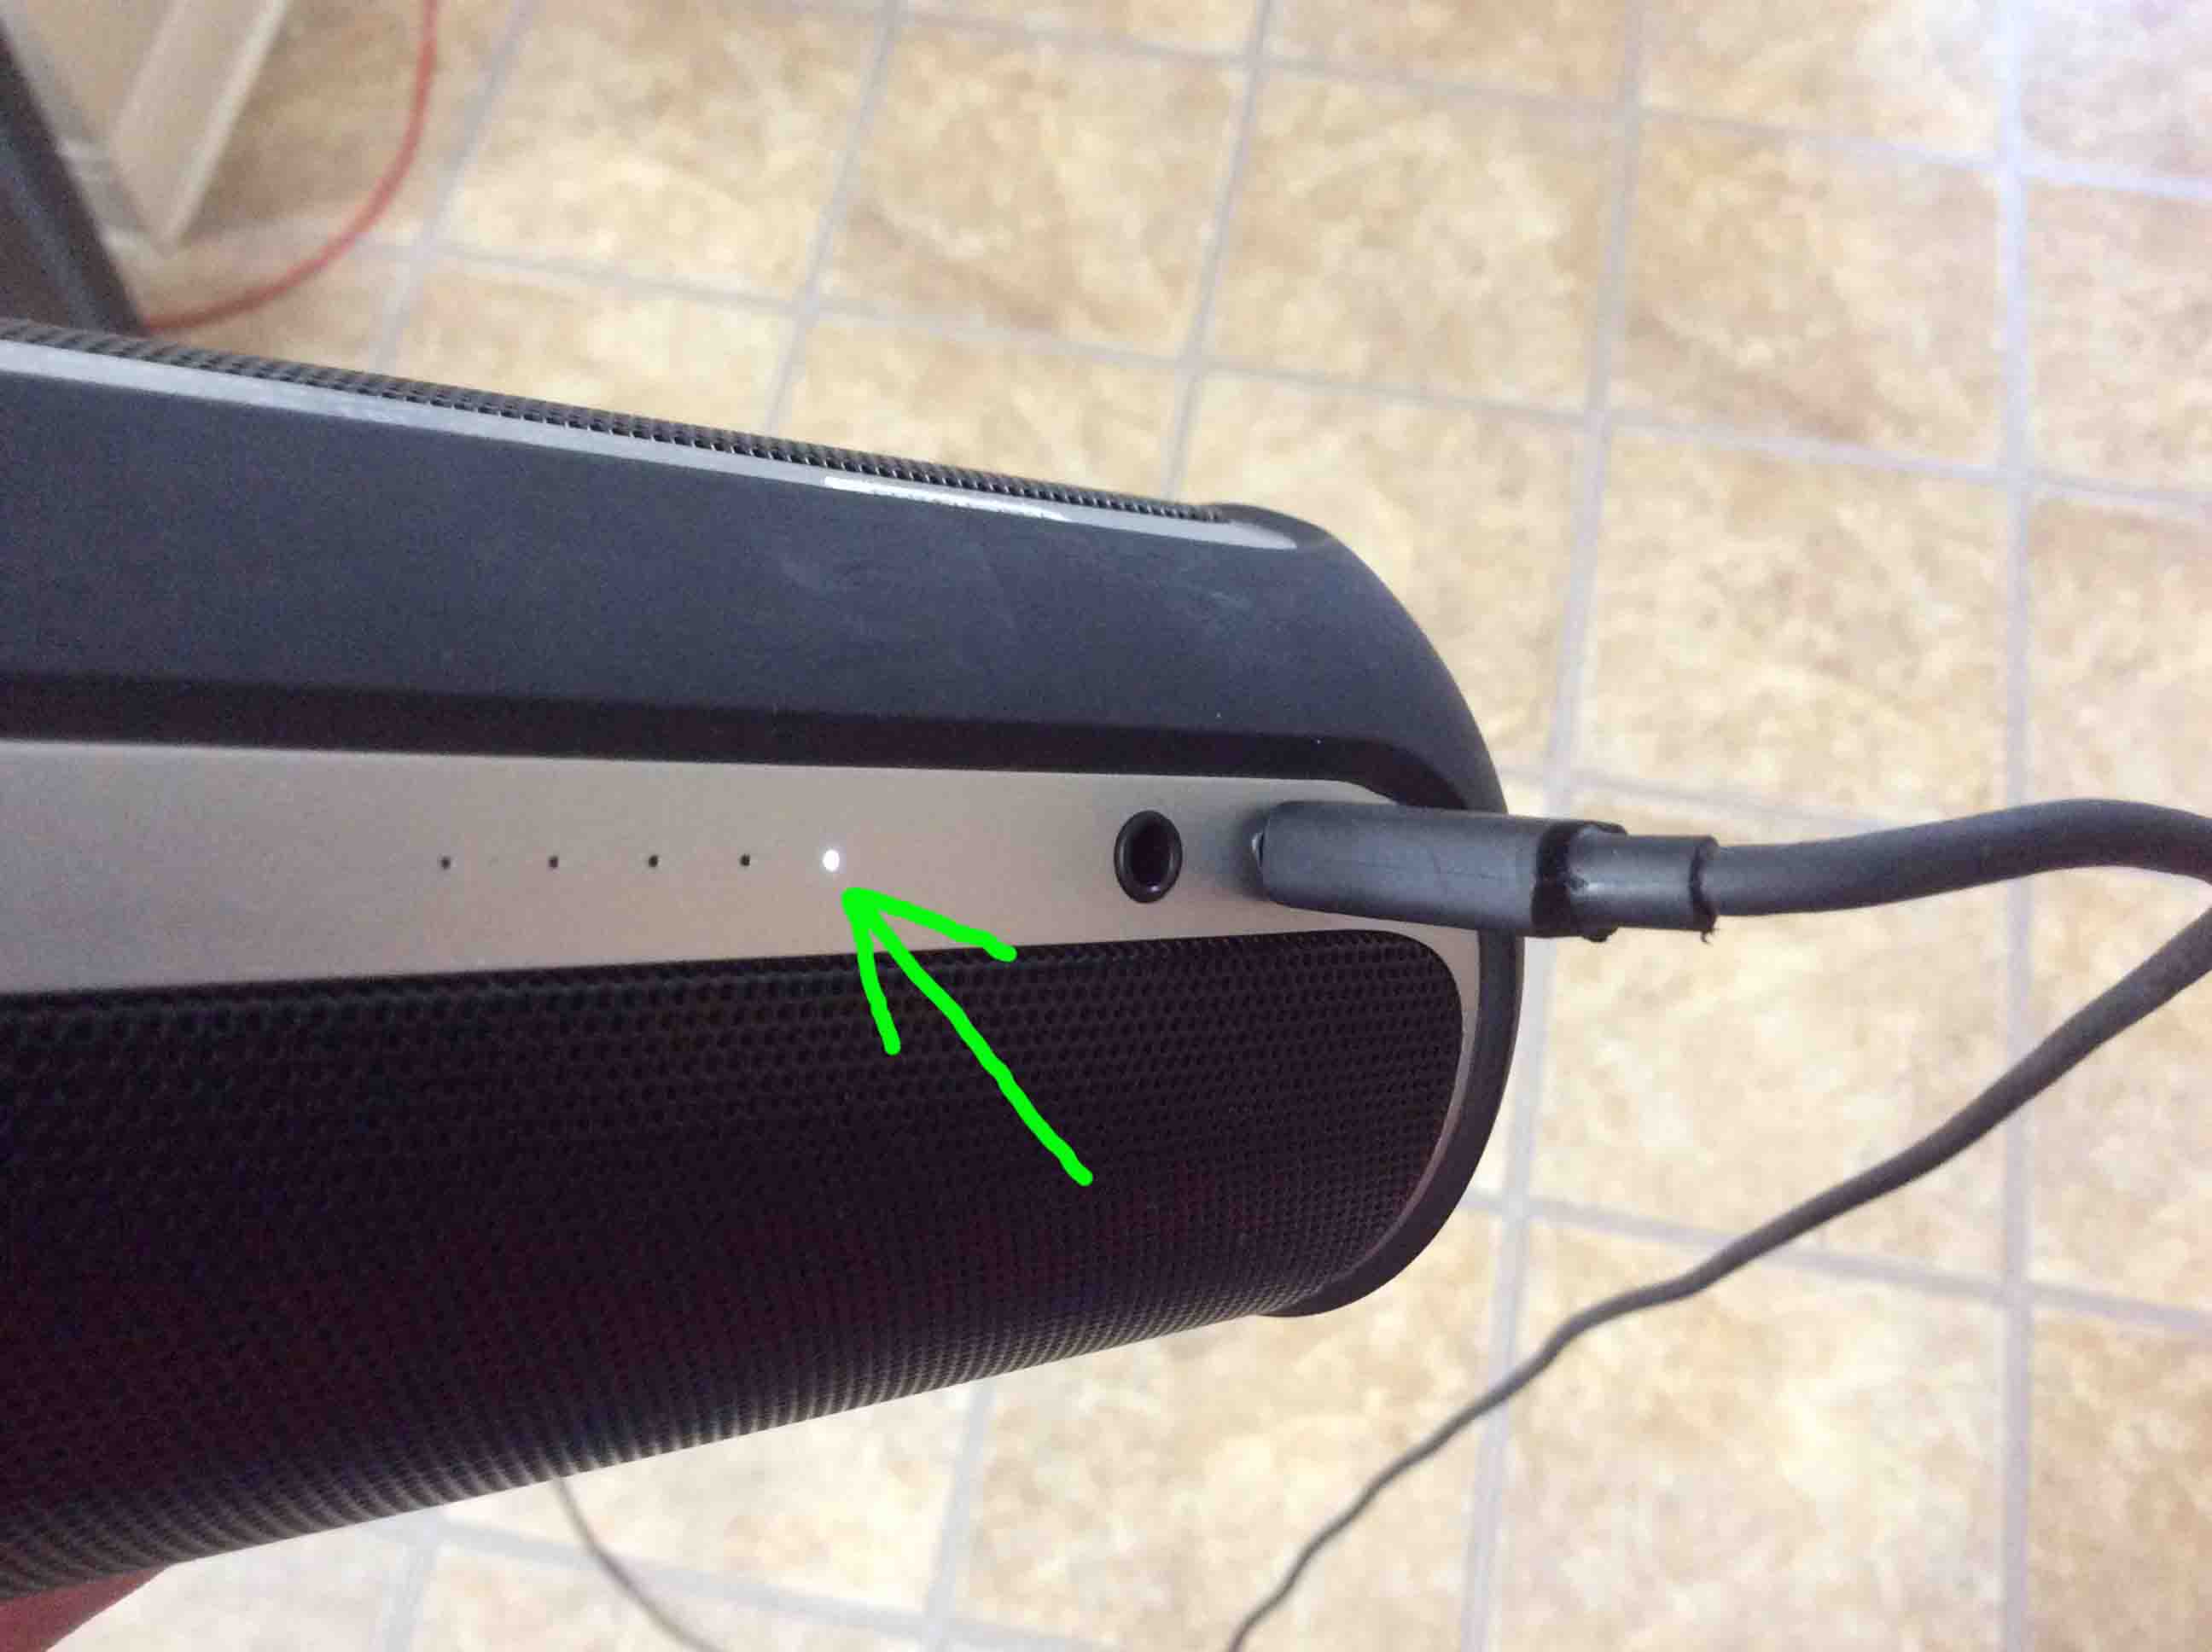
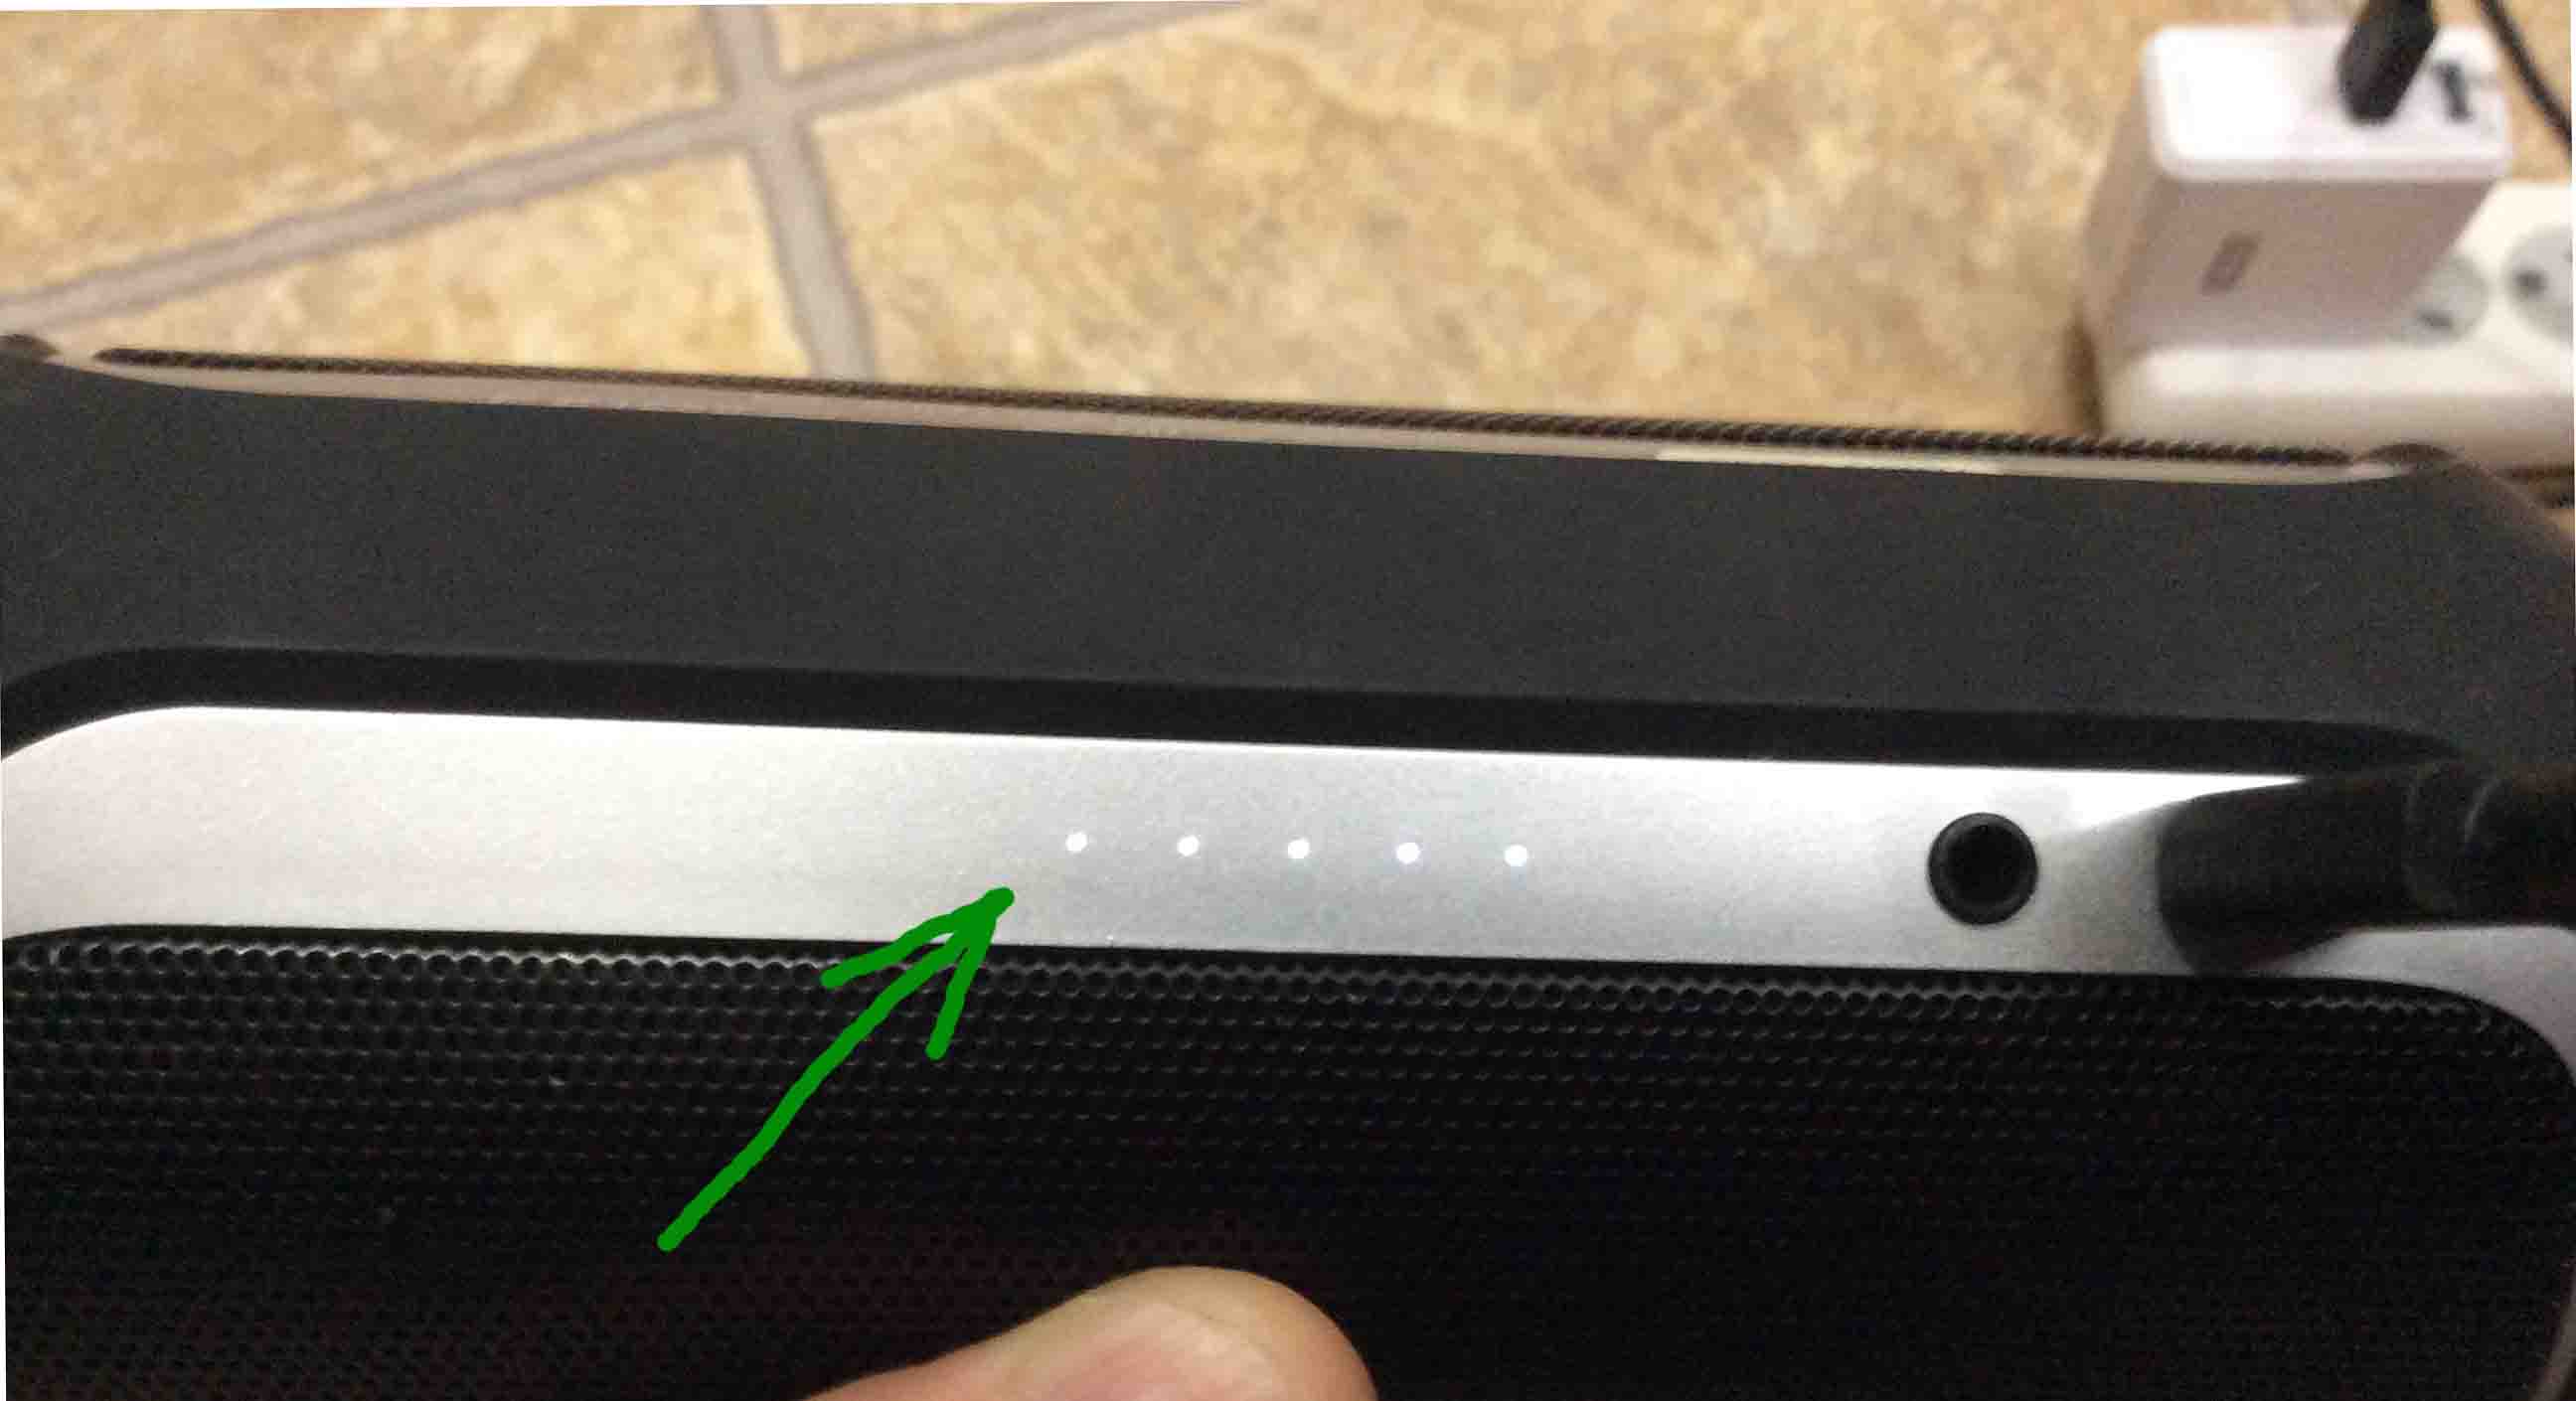
At least one of the battery status lamps lights up and blinks on the Flip 2 when you apply enough USB charging power, and its battery has discharged completely.
Further, there are five lamps that light in succession as the speaker battery charging progresses, as shown in the next picture.
6. Let the Flip 2 JBL Speaker Charge Until All Battery Power Lights Go Out
JBL Flip 2 Battery charging is done when all of the battery gauge lights glow solid. None flashing.
7. Unplug the USB Charge Cable from the JBL Flip 2
As soon as you can, disconnect the charge cable from the speaker after charging completes. We suggest against leaving the speaker connected to power for very long, as this helps preserve battery recharging ability.
We have now fully charged our JBL Flip 2 portable Bluetooth speaker. Note that the battery charge status gauge just after turning on the Flip 2 after a full recharge. All lamps glow as shown in the step 6 pictures above, meaning that the speaker battery is now fully charged.
8. Repeat Battery Recharging as Needed
Repeat this charging process every three to five hours of music play through the Flip 2, to keep its battery in top condition. We charge ours when the battery status meter lights show only one light glowing, as shown next.

9. Done with JBL Flip 2 Charging !
Related Posts to JBL Flip 2 Charging
- JBL Flip 3 Charging Instructions for Longest Battery Life
- UE Roll 1 Charging Instructions, How to Charge Speaker
- JBL Charge 3 Charging Instructions, How to Recharge
- Ultimate Ears Wonderboom Charging Instructions
- Clip 2 JBL Speaker Charging Instructions
Other Posts About the JBL Flip 2 NFC Speaker
- Flip 2 Buttons Guide for this JBL Flip Bluetooth Speaker, Each Control Explored
- JBL Flip 2 Charger Replacement Adapter Suggestions
- How to Adjust Volume on JBL Flip 2 Wireless Bluetooth Speaker, Turn Volume Up and Down
- JBL Flip 2 Charger Replacement Adapter Suggestions
- Pairing JBL Flip 2 with Google Home Original, Mini, Max Smart Speakers
References for JBL Flip 2 Charging Instructions
Revision History
- 2020-04-20: Added more tags.
- 2019-04-15: Shortened post URL.
- 2019-01-12: First published.