Charge the earlier JBL Go models (including the Go 1 and Go 2) through their charge ports. Here, we detail the JBL Go Bluetooth speaker charging instructions for these little poolside ready portable wireless speakers.
In sum: First, select an powerful enough USB charging adapter. Why? Because JBL does not provide a USB charger with the Go speaker standard.
Next, connect a micro USB charge cable between the the Go or Go 2 models, and that adapter. Then, plug the charger into a functioning wall outlet. At last, after a few hours, your JBL Go speaker fully recharges. Then, it can play once again for up to four hours before needing another charge.
JBL Go Bluetooth Speaker Charging Instructions, Step by Step
1. Choose Correctly Sized AC or Car Adapter
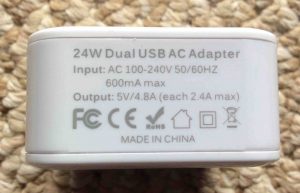
Here, we charge our JBL Go with the iClever IC-TC02 24 watt dual port USB AC charger adapter. See our iClever Dual USB Wall Charger IC-TC02 Review post for more details on this excellent USB AC charger. Now the Go speakers need 5 volts at roughly 0.6 amps to recharge fully in the shortest time. So this iClever USB adapter outputs plenty enough current to charge these speakers quickly.
2. Open the Port Cover on the JBL Go Bluetooth Speaker
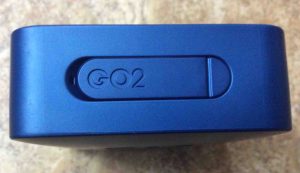
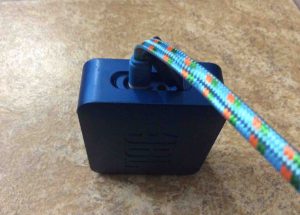
Use a fingernail, dime, penny, or small screwdriver to work open the waterproof seal port cover on the JBL Go. See the closed power port door in the next picture. Be careful not to mar the delicate seal around the inside edge of the door.
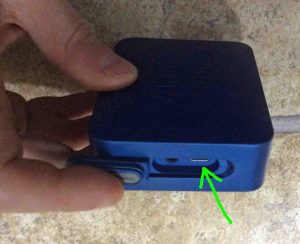
Prying open this door exposes the micro USB charging port inside, as shown next, pointed at by the green arrow.
3. Power Off the Unit to Continue with JBL Go Bluetooth Speaker Charging Instructions
Note that the Go still charges the the adapter present. But depending on how much extra capacity your charger delivers, the Go might charge somewhat faster when OFF.
4. Plug in the Micro USB Cord to the JBL Go Bluetooth Speaker
Then, plug the small end of your cable into the micro USB port.
5. Plug the Other End of the USB Cable into your Charger Adapter
Next, connect the A end of the USB power cable to the power adapter. In this demo, as said earlier, we have an iClever 24 Watt USB AC adapter. There’s also very long USB cable.
6. Plug the USB Adapter into a Functioning Wall Receptacle to Continue with JBL Go Bluetooth Speaker Charging Instructions
We then plug the RavPower into a working AC outlet.

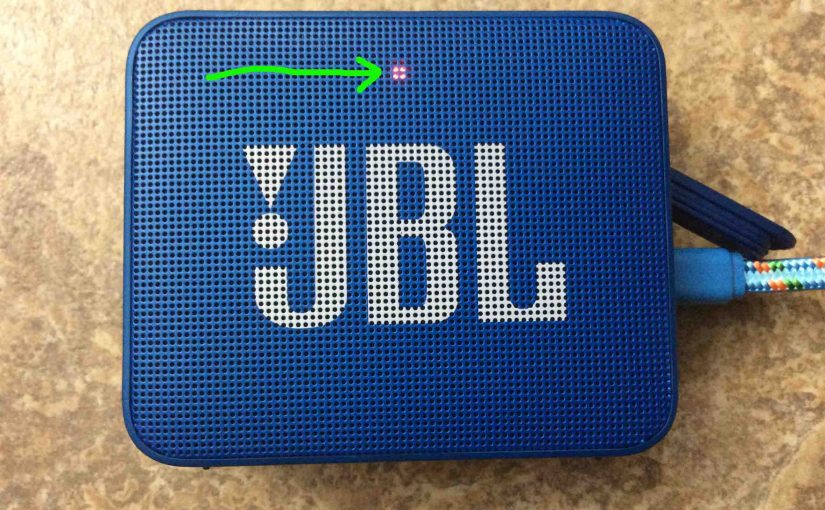
The status lamp lights up solid red on JBL Go speakers. And while no battery status gauge shows percentage of charge, the red lamp means that charging is occurring.
7. Let the JBL Go Charge Until the Red Light Goes Out
Full battery charging is complete when the status lamp turns off.
8. Unplug the USB Charge Cable from the JBL Go Speaker
9. Fully Close the Waterproof USB Port Door to Continue with JBL Go Bluetooth Speaker Charging Instructions
Note that unless you snap the Go port flap securely, water may soak its USB port. Now water and electronics generally do not mix. So getting the USB charging port wet might damage the electronics inside. So, it’s important to seal the port door with strong enough force to seat it.
10. Done with JBL Go Bluetooth Speaker Charging Instructions !
Finally we have now fully charged our JBL Go portable Bluetooth speaker.
Repeat this charging every three to four hours of play. This keeps the battery in top working condition for years to come.