Here, we offer JBL Xtreme 3 update directions for this revised version of the Xtreme series power bank Bluetooth speaker. This update can take up to fifteen minutes depending on the speed of your internet connection. Plus, you cannot easily back it out. That is, you won’t be able to downgrade to the earlier firmware version once you complete this upgrade. So, be sure that you truly wish the upgrade, and that you’ve considering all its potential gotchas before going ahead with it.
JBL Xtreme 3 Update: Disclaimers
We were unable to update our JBL Xtreme 3 firmware when we received this speaker at the time of this writing. Why? Because the speaker already had the current version. So, we borrowed some pictures below from the updates we did on our JBL Charge 3 speaker. We used pictures of the JBL Xtreme 3 speaker where we could though. Indeed the update processes are similar for both speakers. Finally, if or when we receive an actual update notification for our JBL Xtreme 3, we’ll update these photos to show the actual update in progress.
Prepare for JBL Xtreme 3 Update
Connect to the Internet
You’ll need and internet connection, a Bluetooth enabled mobile or desktop computer device, and the JBL Portable app, as well as the JBL Xtreme 3 speaker itself.
Install the JBL Portable App
So, log your mobile device into the internet and install the Portable app if you haven’t already.
Plug your JBL Xtreme 3 into AC Power
Connect your speaker to AC power. Why? Because we don’t want its battery going dead during the update. This accident could leave corrupted software in the speaker’s memory with no way to refresh it, and thus, render the speaker useless and not repairable.
Pair your Speaker with your Mobile Device
Then, pair your phone or tablet with the speaker.
You are now ready to begin the firmware updating process on that JBL Bluetooth speaker.
JBL Xtreme 3 Update: Step by Step
1. Find the JBL Portable App on your Mobile Device
We found ours on the fourth home page in our Apple iPad Air, as shown next.
2. Run the JBL Portable App
The app takes a few seconds to show you some nifty animations when you first start it. But then it finds your paired JBL Xtreme 3 speaker and shows you its status screen, as shown next.
Note the explanation point inside the orange circle in the top right corner of the speaker’s picture, as pointed at by the dark green arrow. This means that there are important messages about this speaker pending for your to read and act upon.
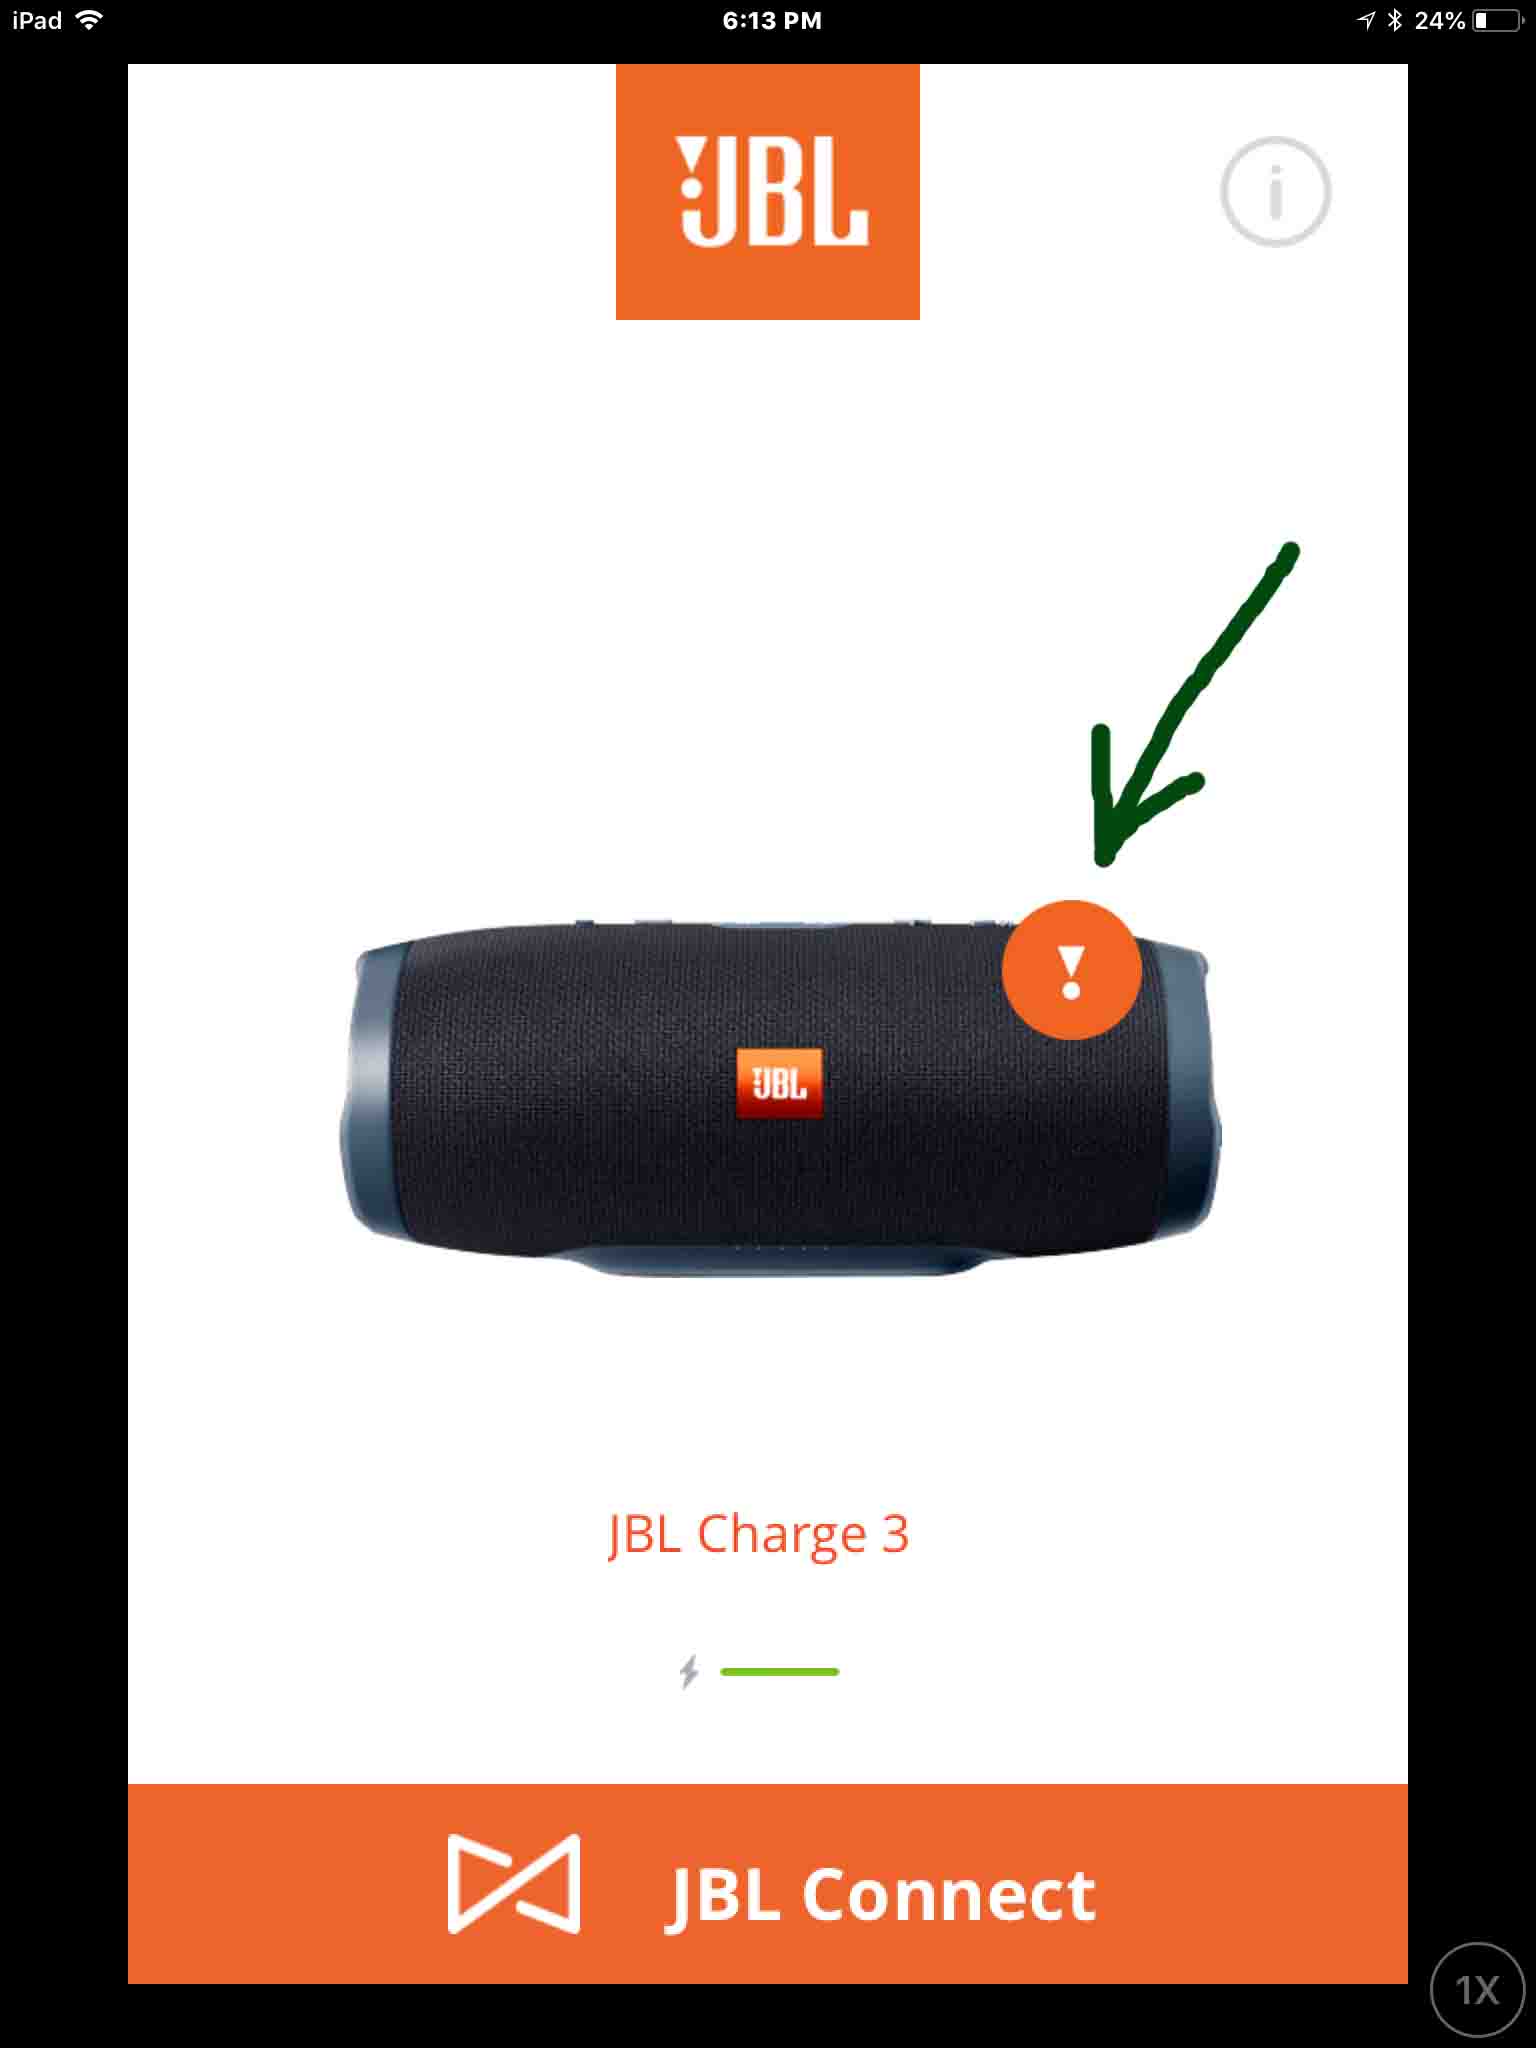
Note that if there are no current messages or updates available for this particular wireless speaker, then you will see no explanation point. Also note that the above picture, while it applies to the Charge 3 speaker, is similar to what you’d see with the JBL Xtreme 3.
3. Tap the Orange Circled Explanation Point (!)
Tapping the Important Messages (!) circle brings up the first IMPORTANT NOTICE screen about the available firmware upgrade, as shown next.
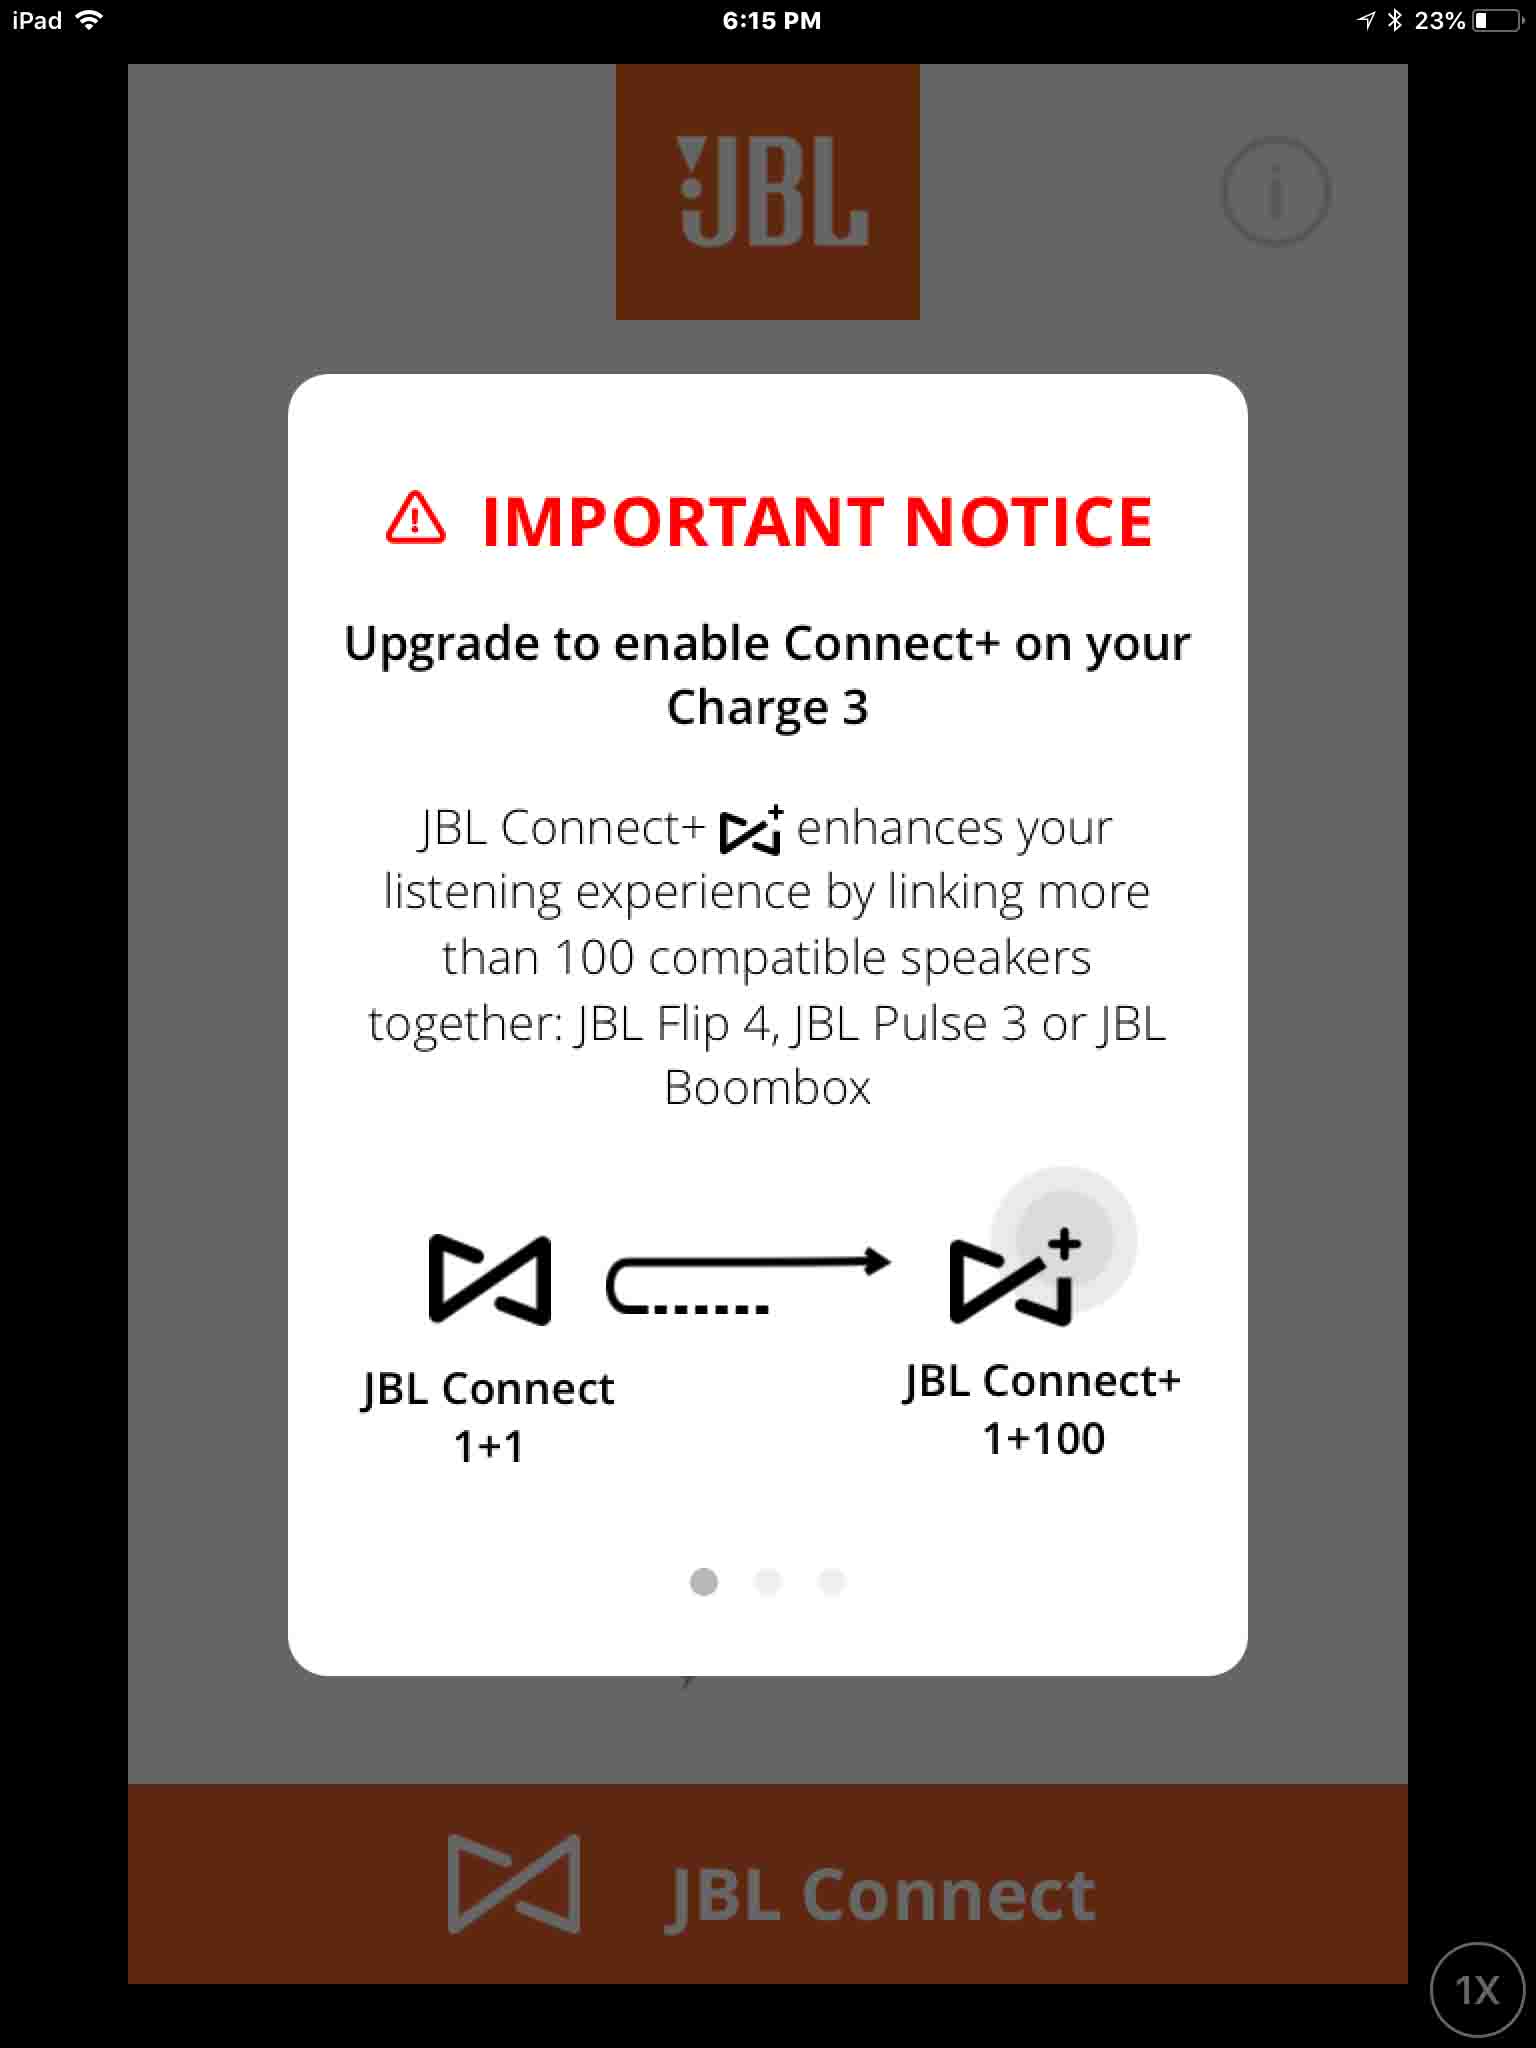
This screen gives details about the available firmware update.
4. Flick to the Left to See the Next IMPORTANT NOTICE Page to Continue with JBL Xtreme 3 Update
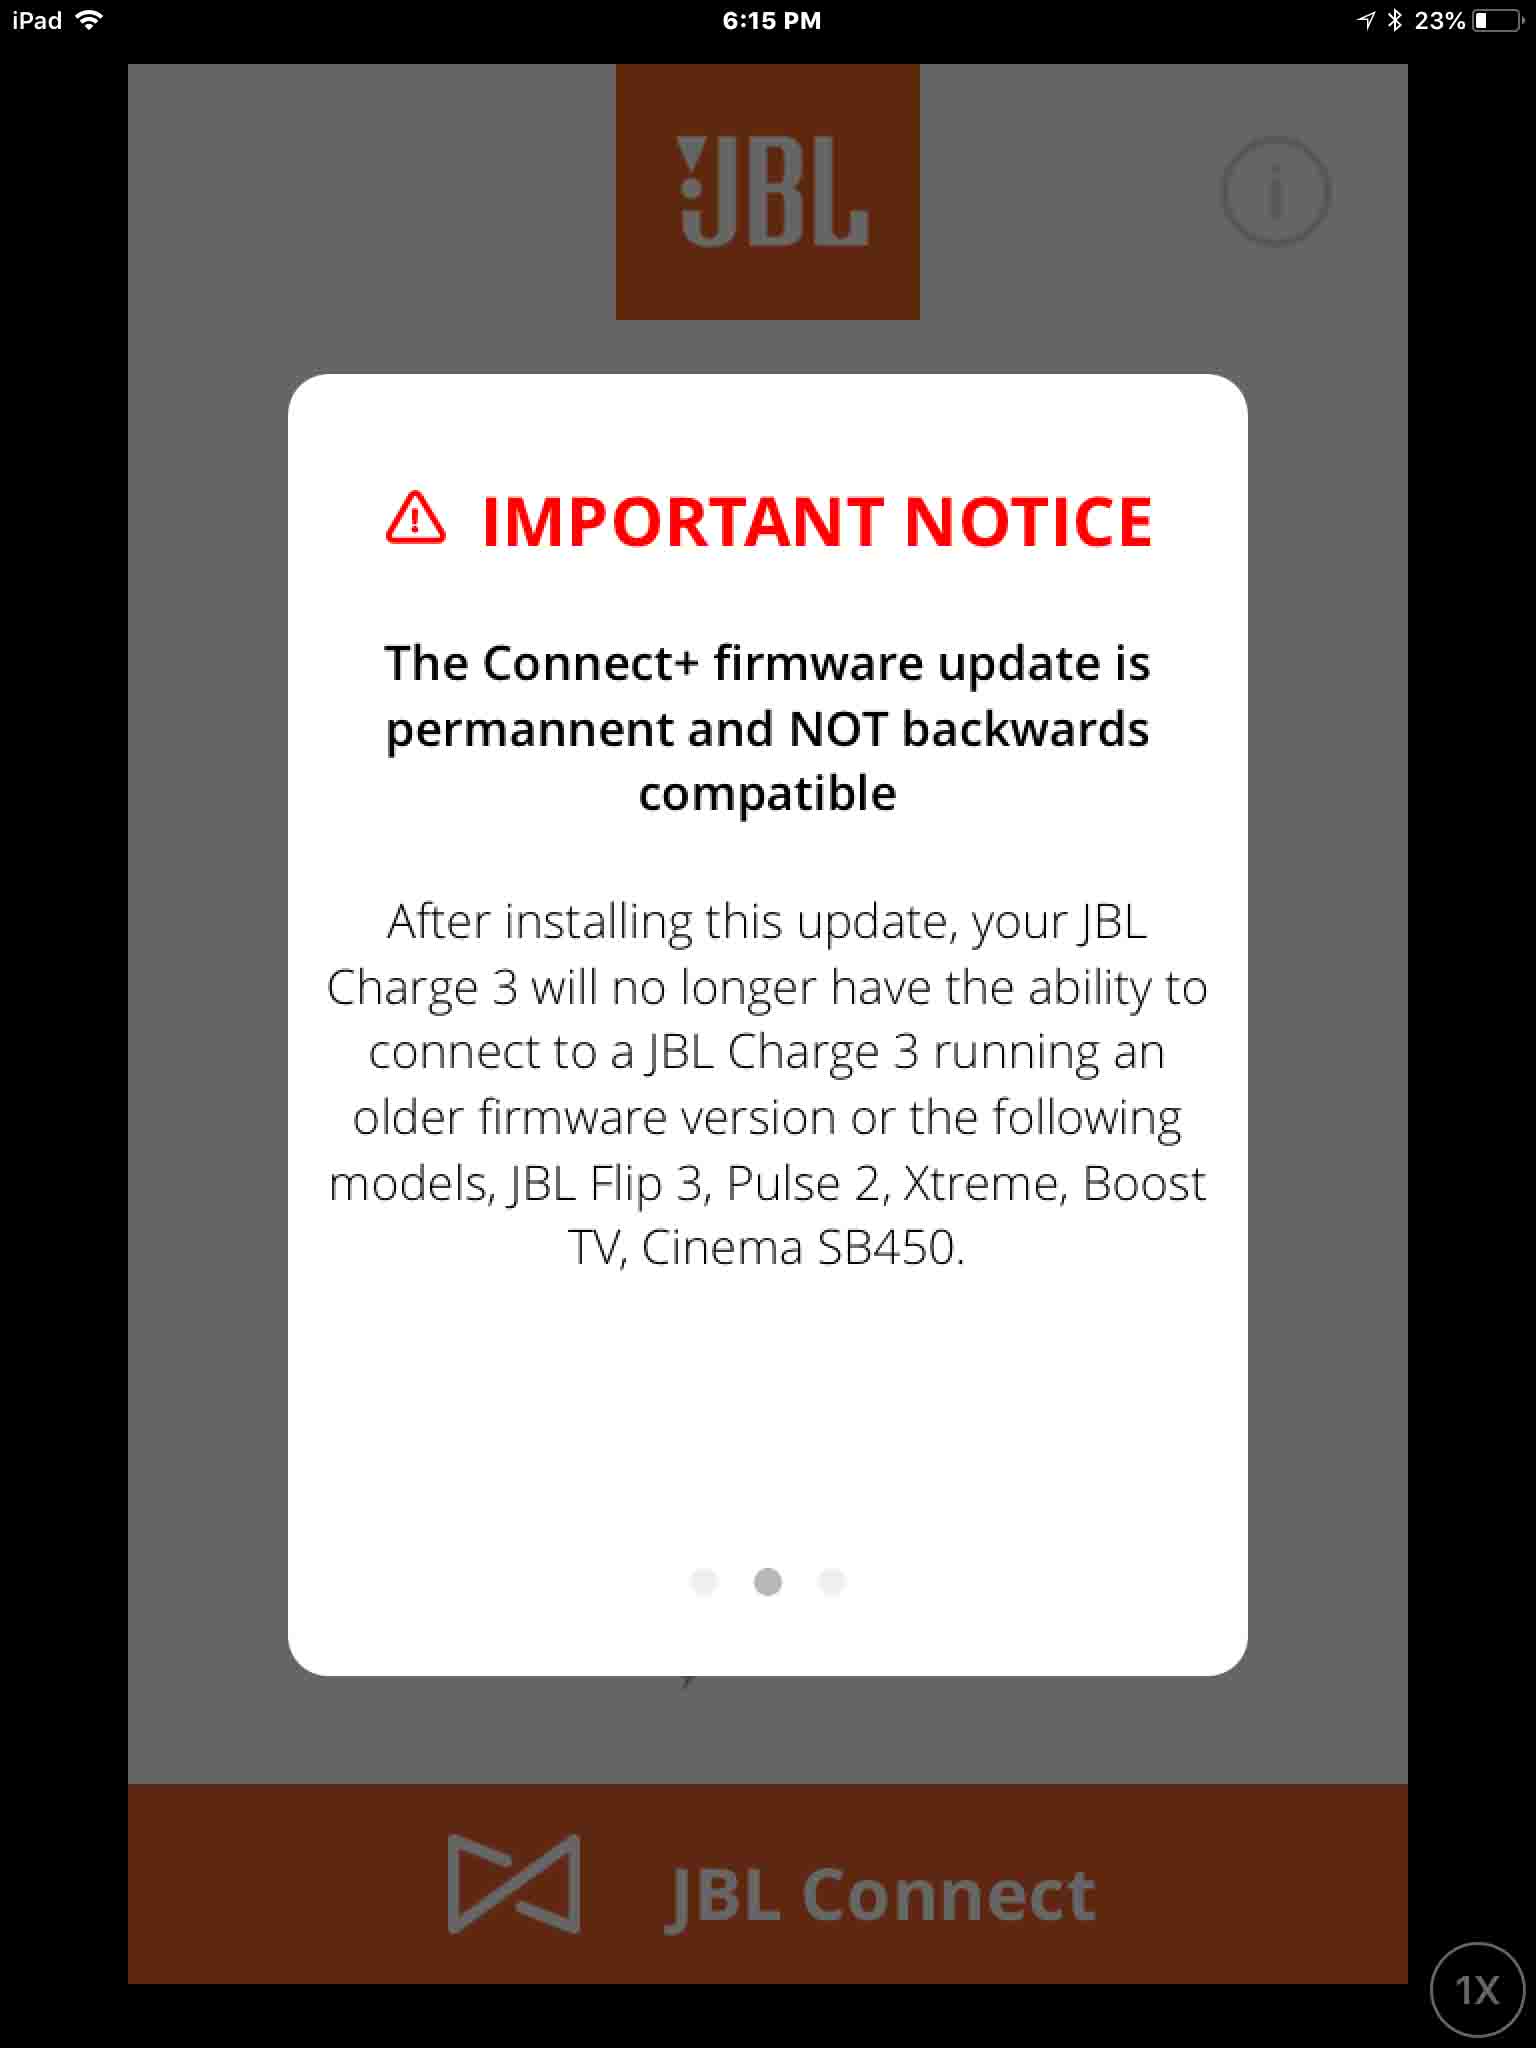
This page warns us that this particular speaker firmware cannot be undone, and that once done, this upgrade is permanent in the JBL Xtreme 3.
5. Flick Once More to the Left to See the Next IMPORTANT NOTICE Page
Another left flick brings up the JBL Xtreme 3 upgrade confirmation prompt screen, as shown next.
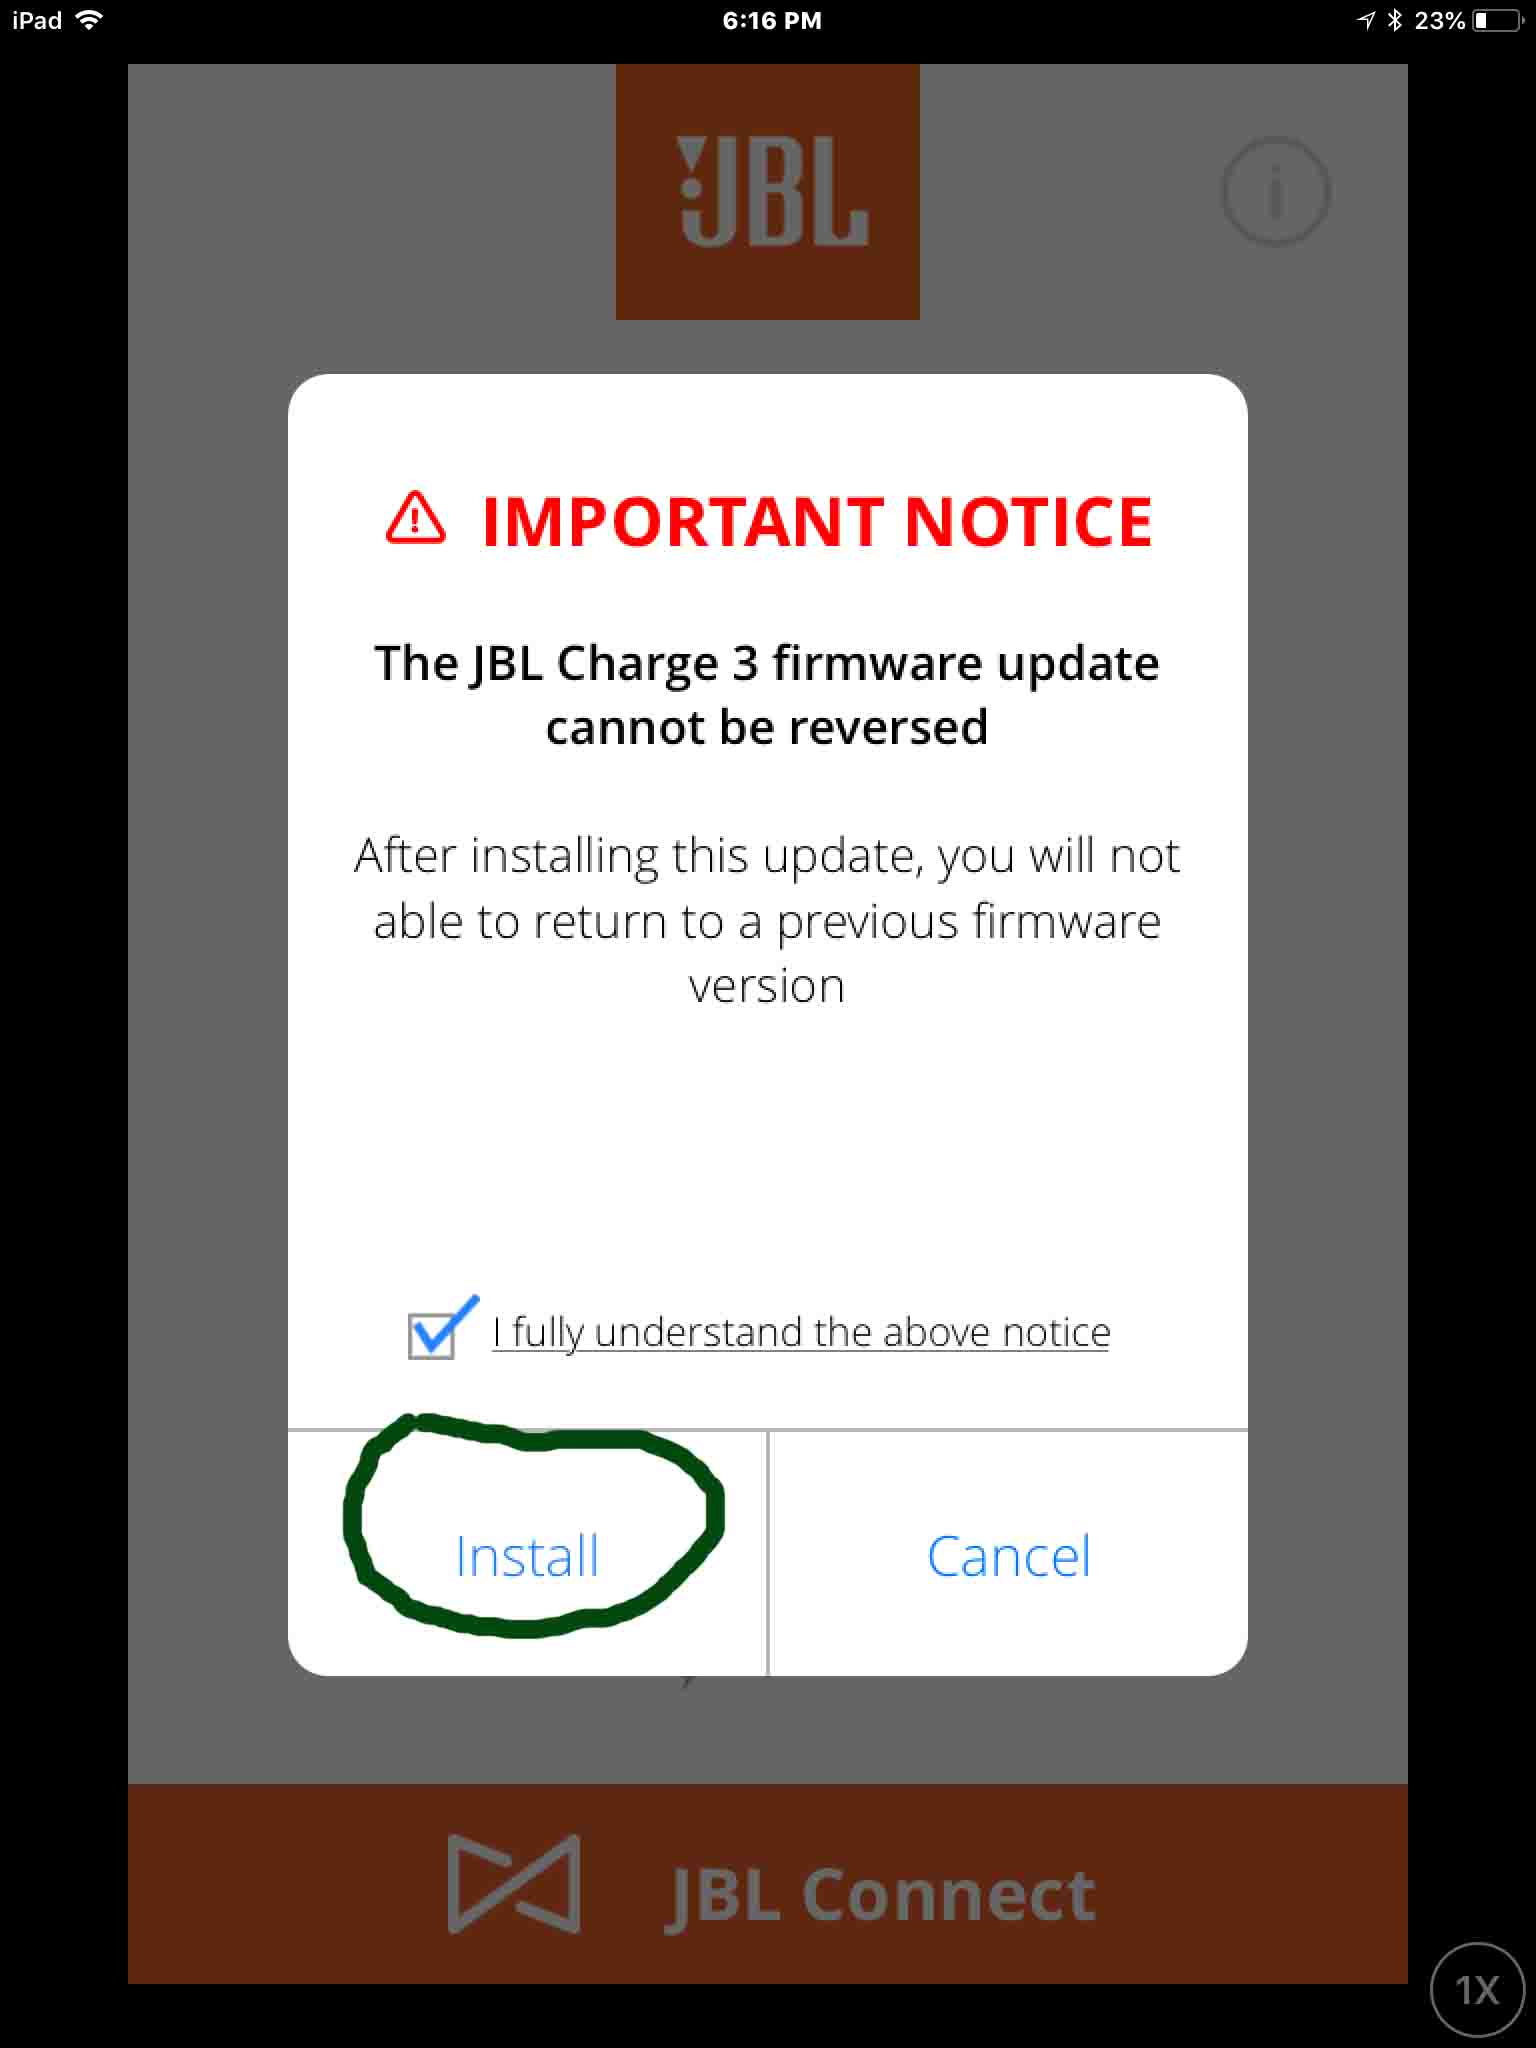
This prompt again warns us that we won’t be able to fall back to the old firmware version once this upgrade finishes. It then asks us to decide whether to install the new update or to cancel the operation. We’re going ahead, in the next step.
6. Tap the INSTALL Button
Touching the INSTALL button brings up the Upgrade Speaker screen as shown next.
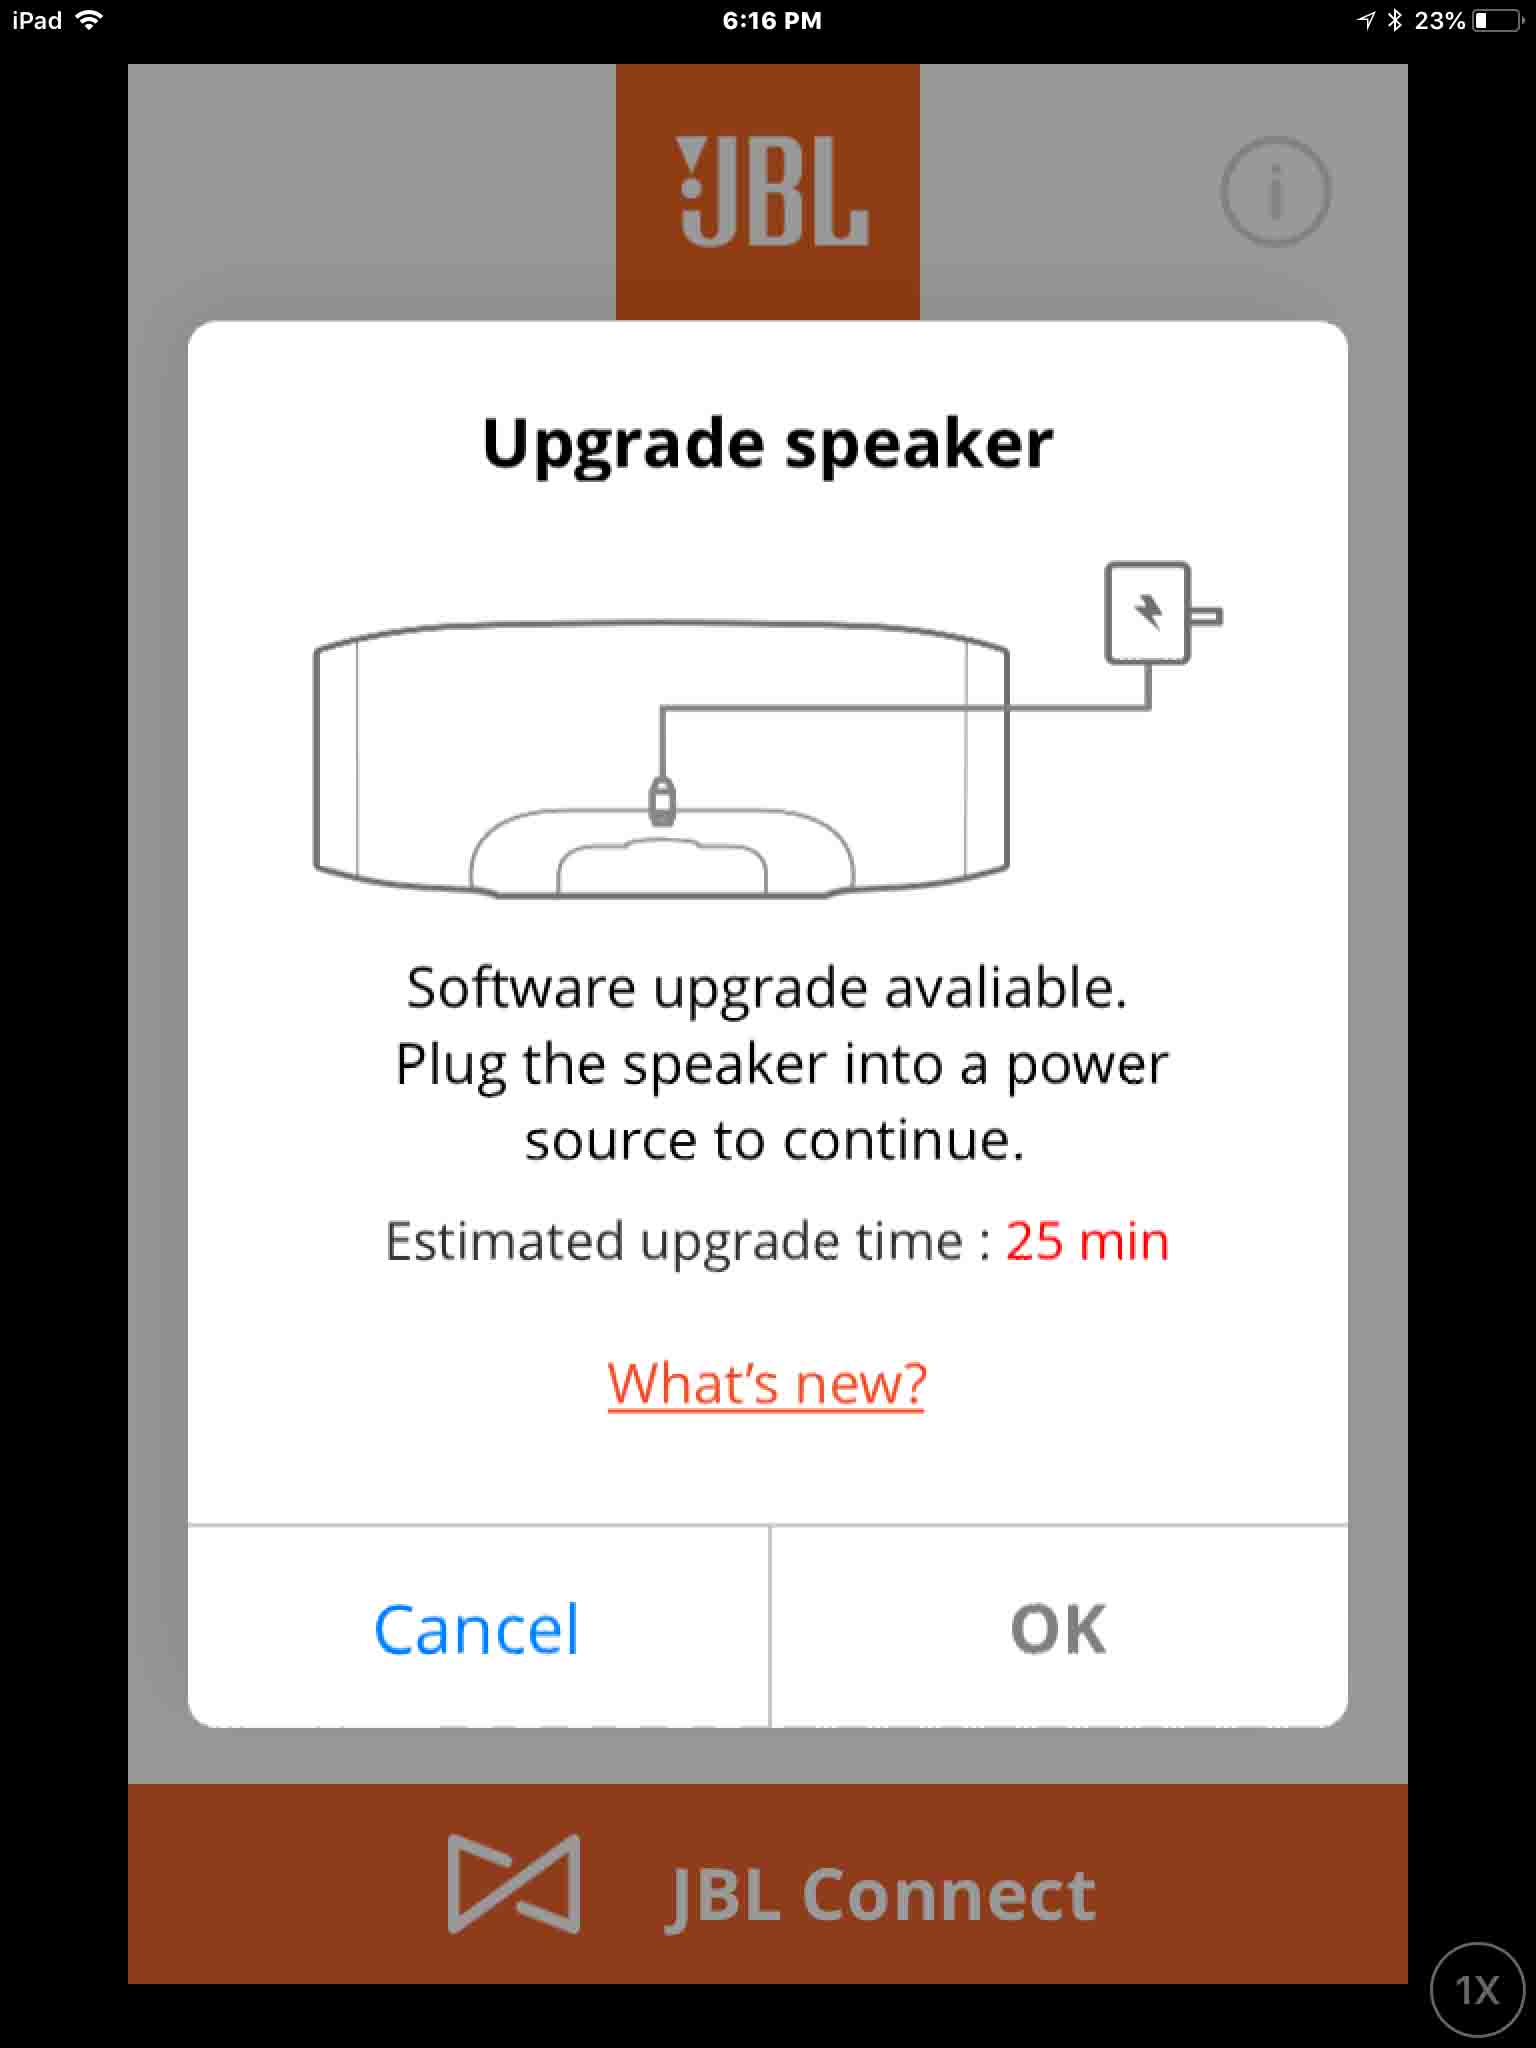
This page tells us to connect our speaker to AC power if we’ve not done so already (You would have already done this if you were following the instructions in the preliminaries section above).
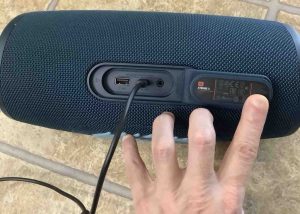
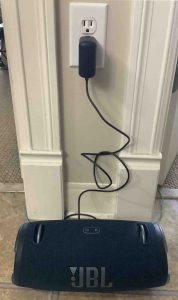
7. Connect the Speaker to AC Power if Not Done Already to Continue with JBL Xtreme 3 Update
We connected our JBL to an AC outlet in the preliminary update steps above, as shown in the next pictures.
8. Tap the OK Button on the Upgrade Speaker Screen
Next, go back to the JBL Plus app running on your mobile device, and tap the OK button. See this button in the last screenshot picture above.
The JBL Xtreme 3 update then begins, with the download of the software upgrade file from the internet, through your mobile device, to the speaker via the Bluetooth connection, as shown in the next screenshots.
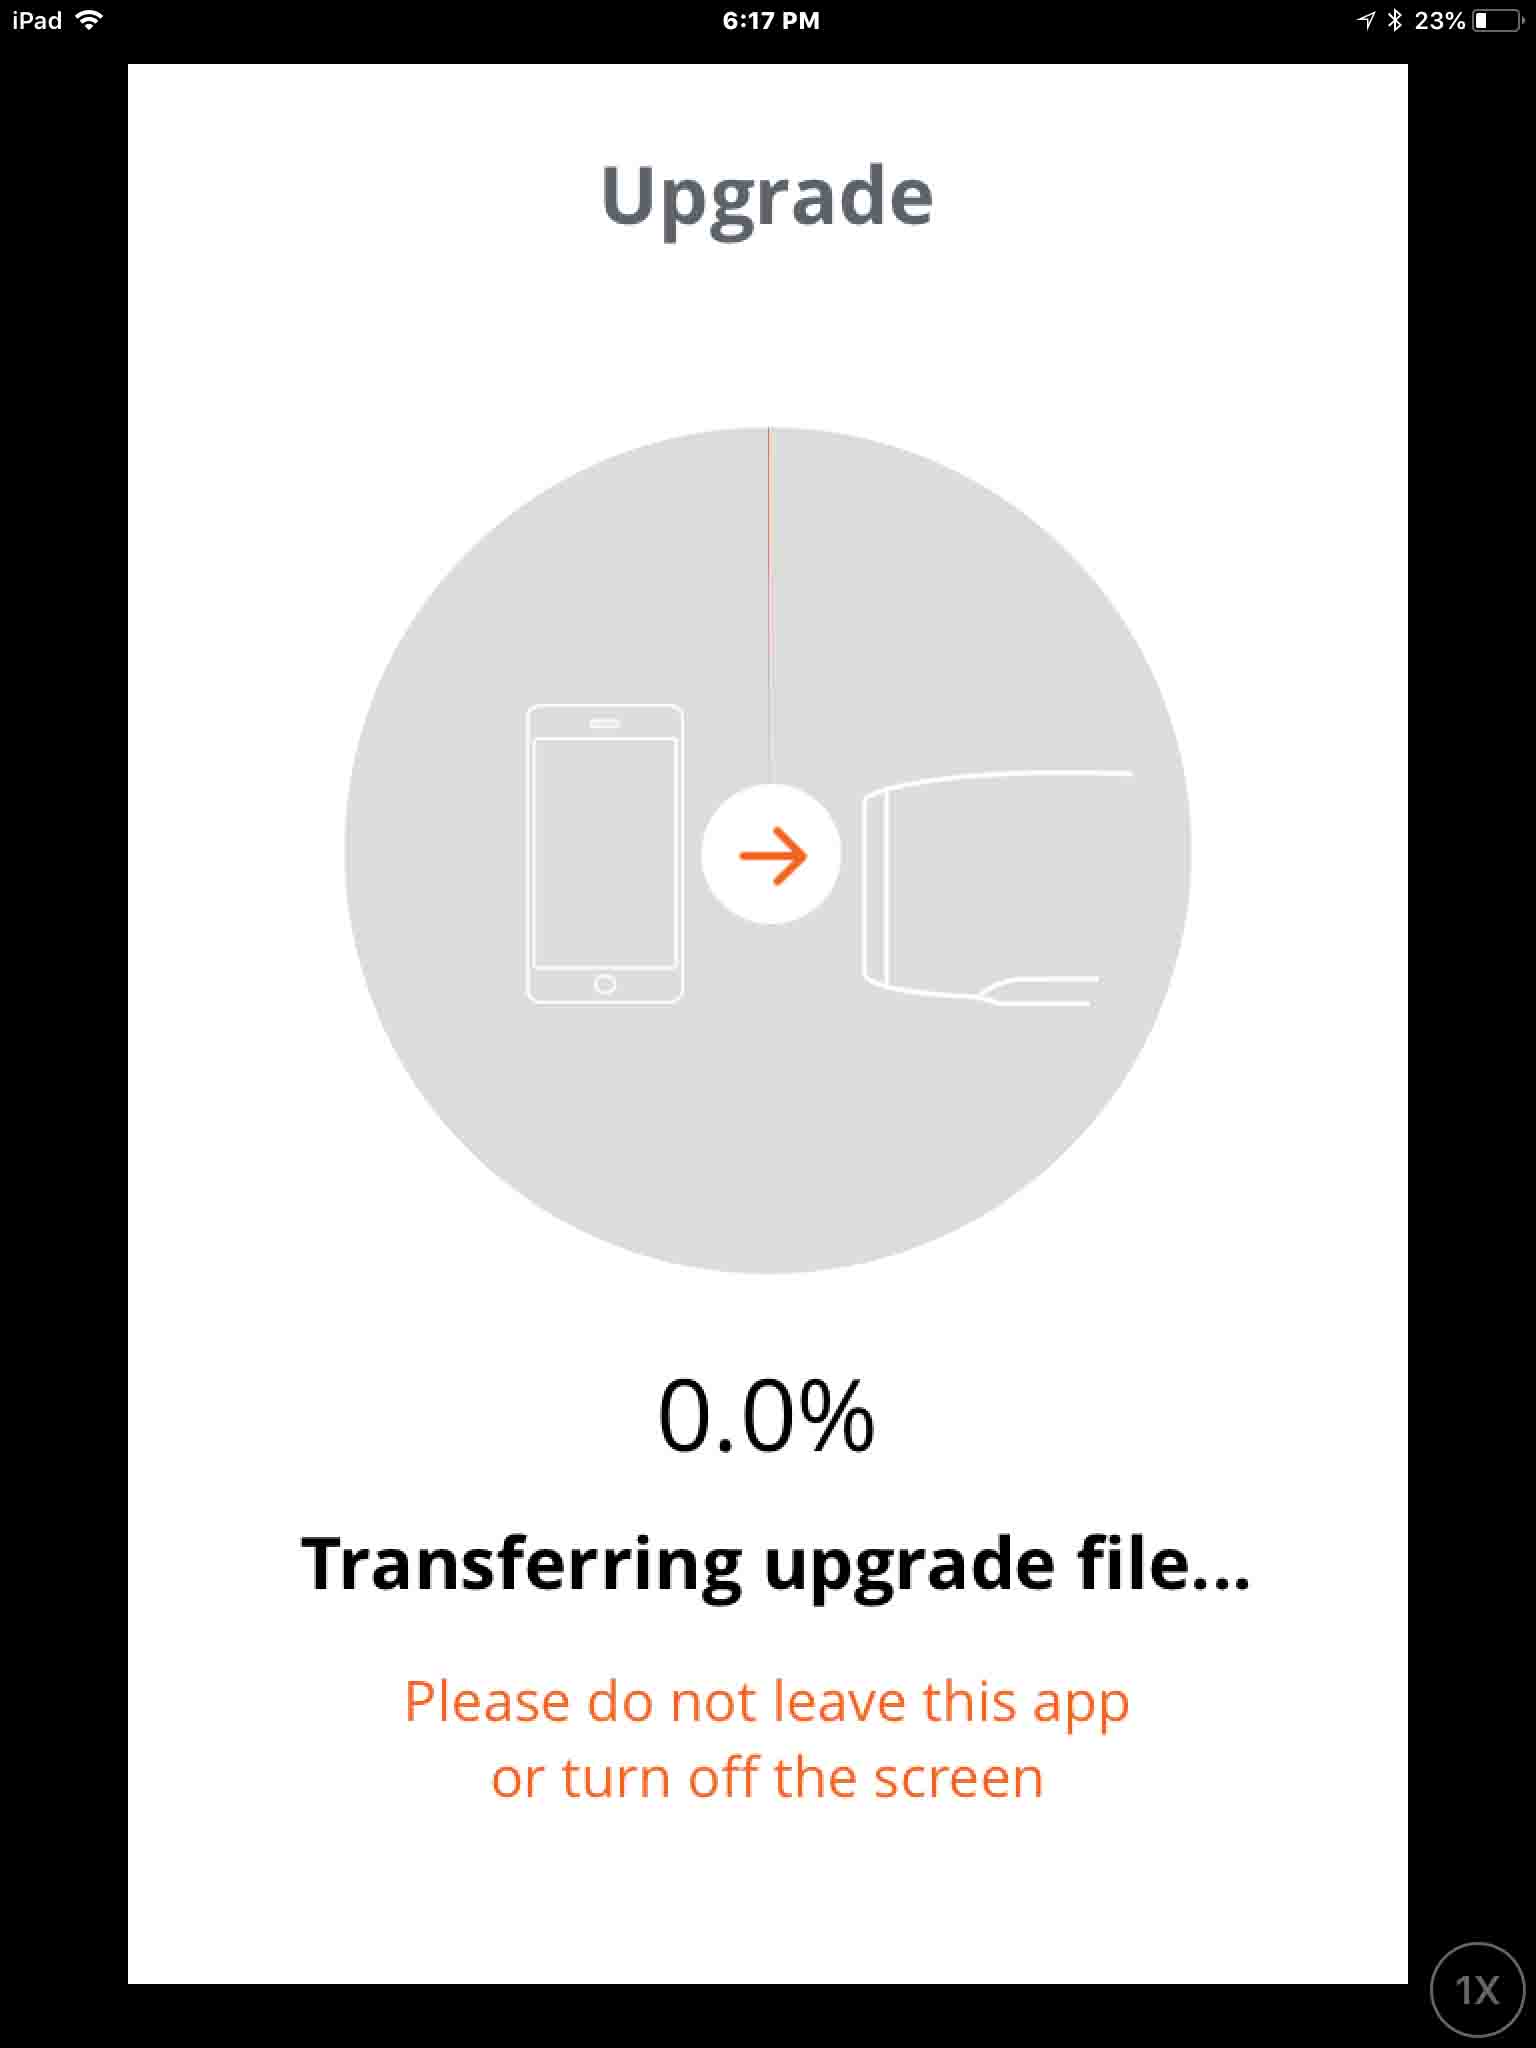
8a. The JBL Xtreme 3 Update Process Begins
Copying the file from the internet to the speaker is the slowest part of the upgrade process. But as shown in these screenshots, the JBL Portable app shows you a progress pie-chart picture, that gradually becomes more orange as the firmware file transfer proceeds.
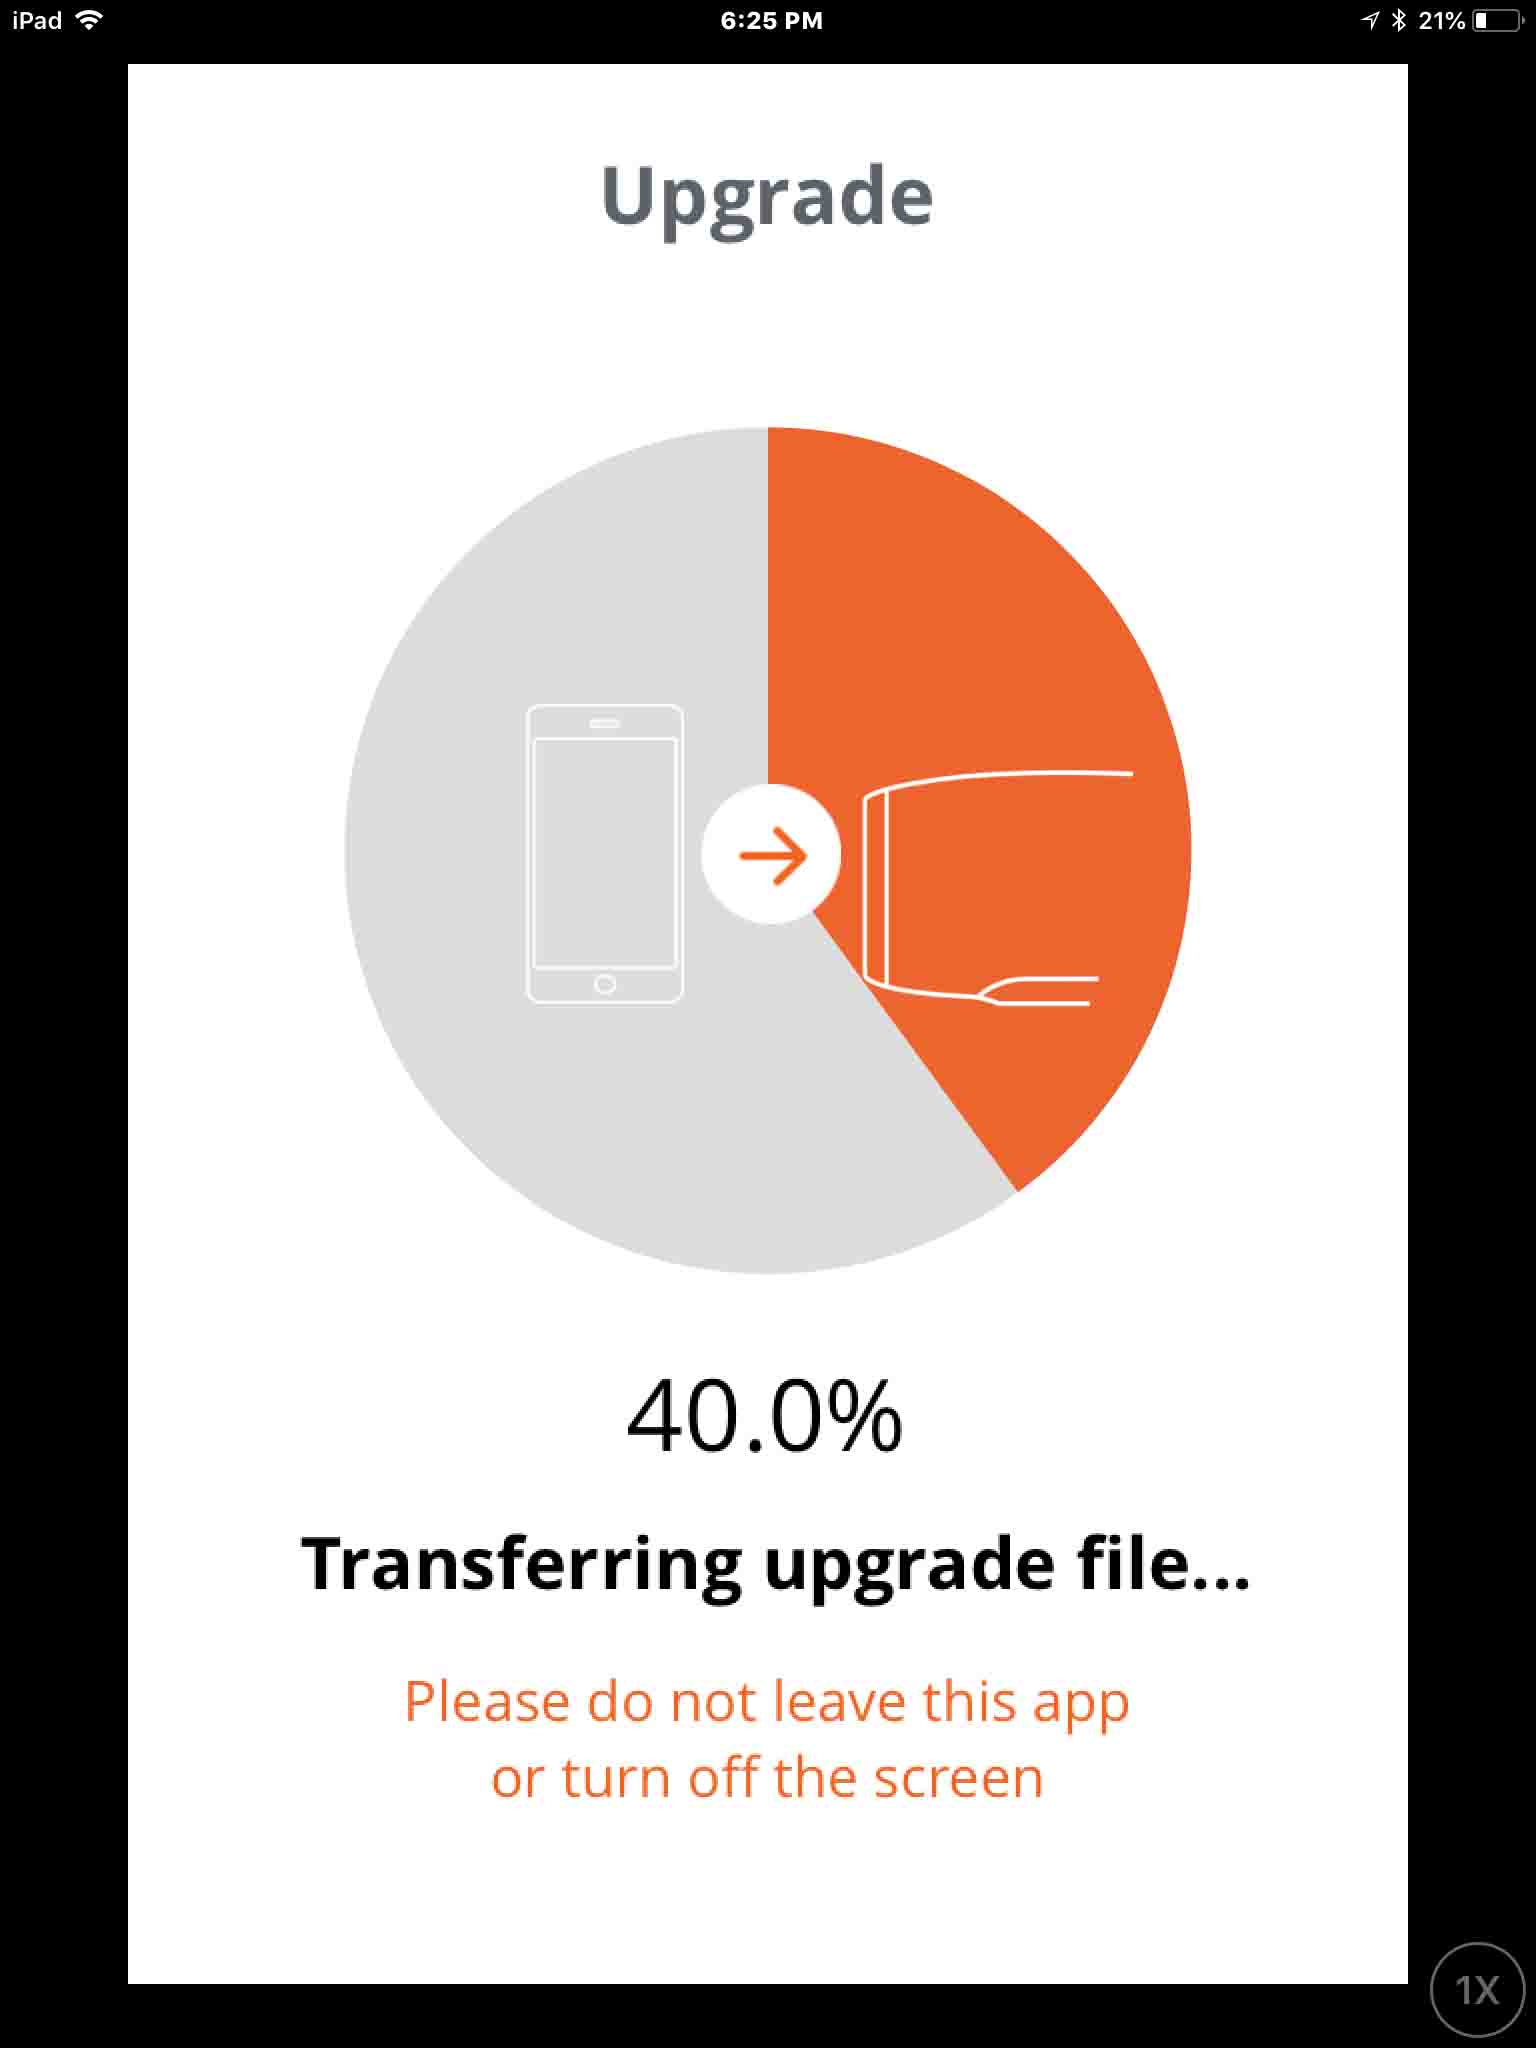
8b. JBL Xtreme 3 Update at Forty Percent Complete
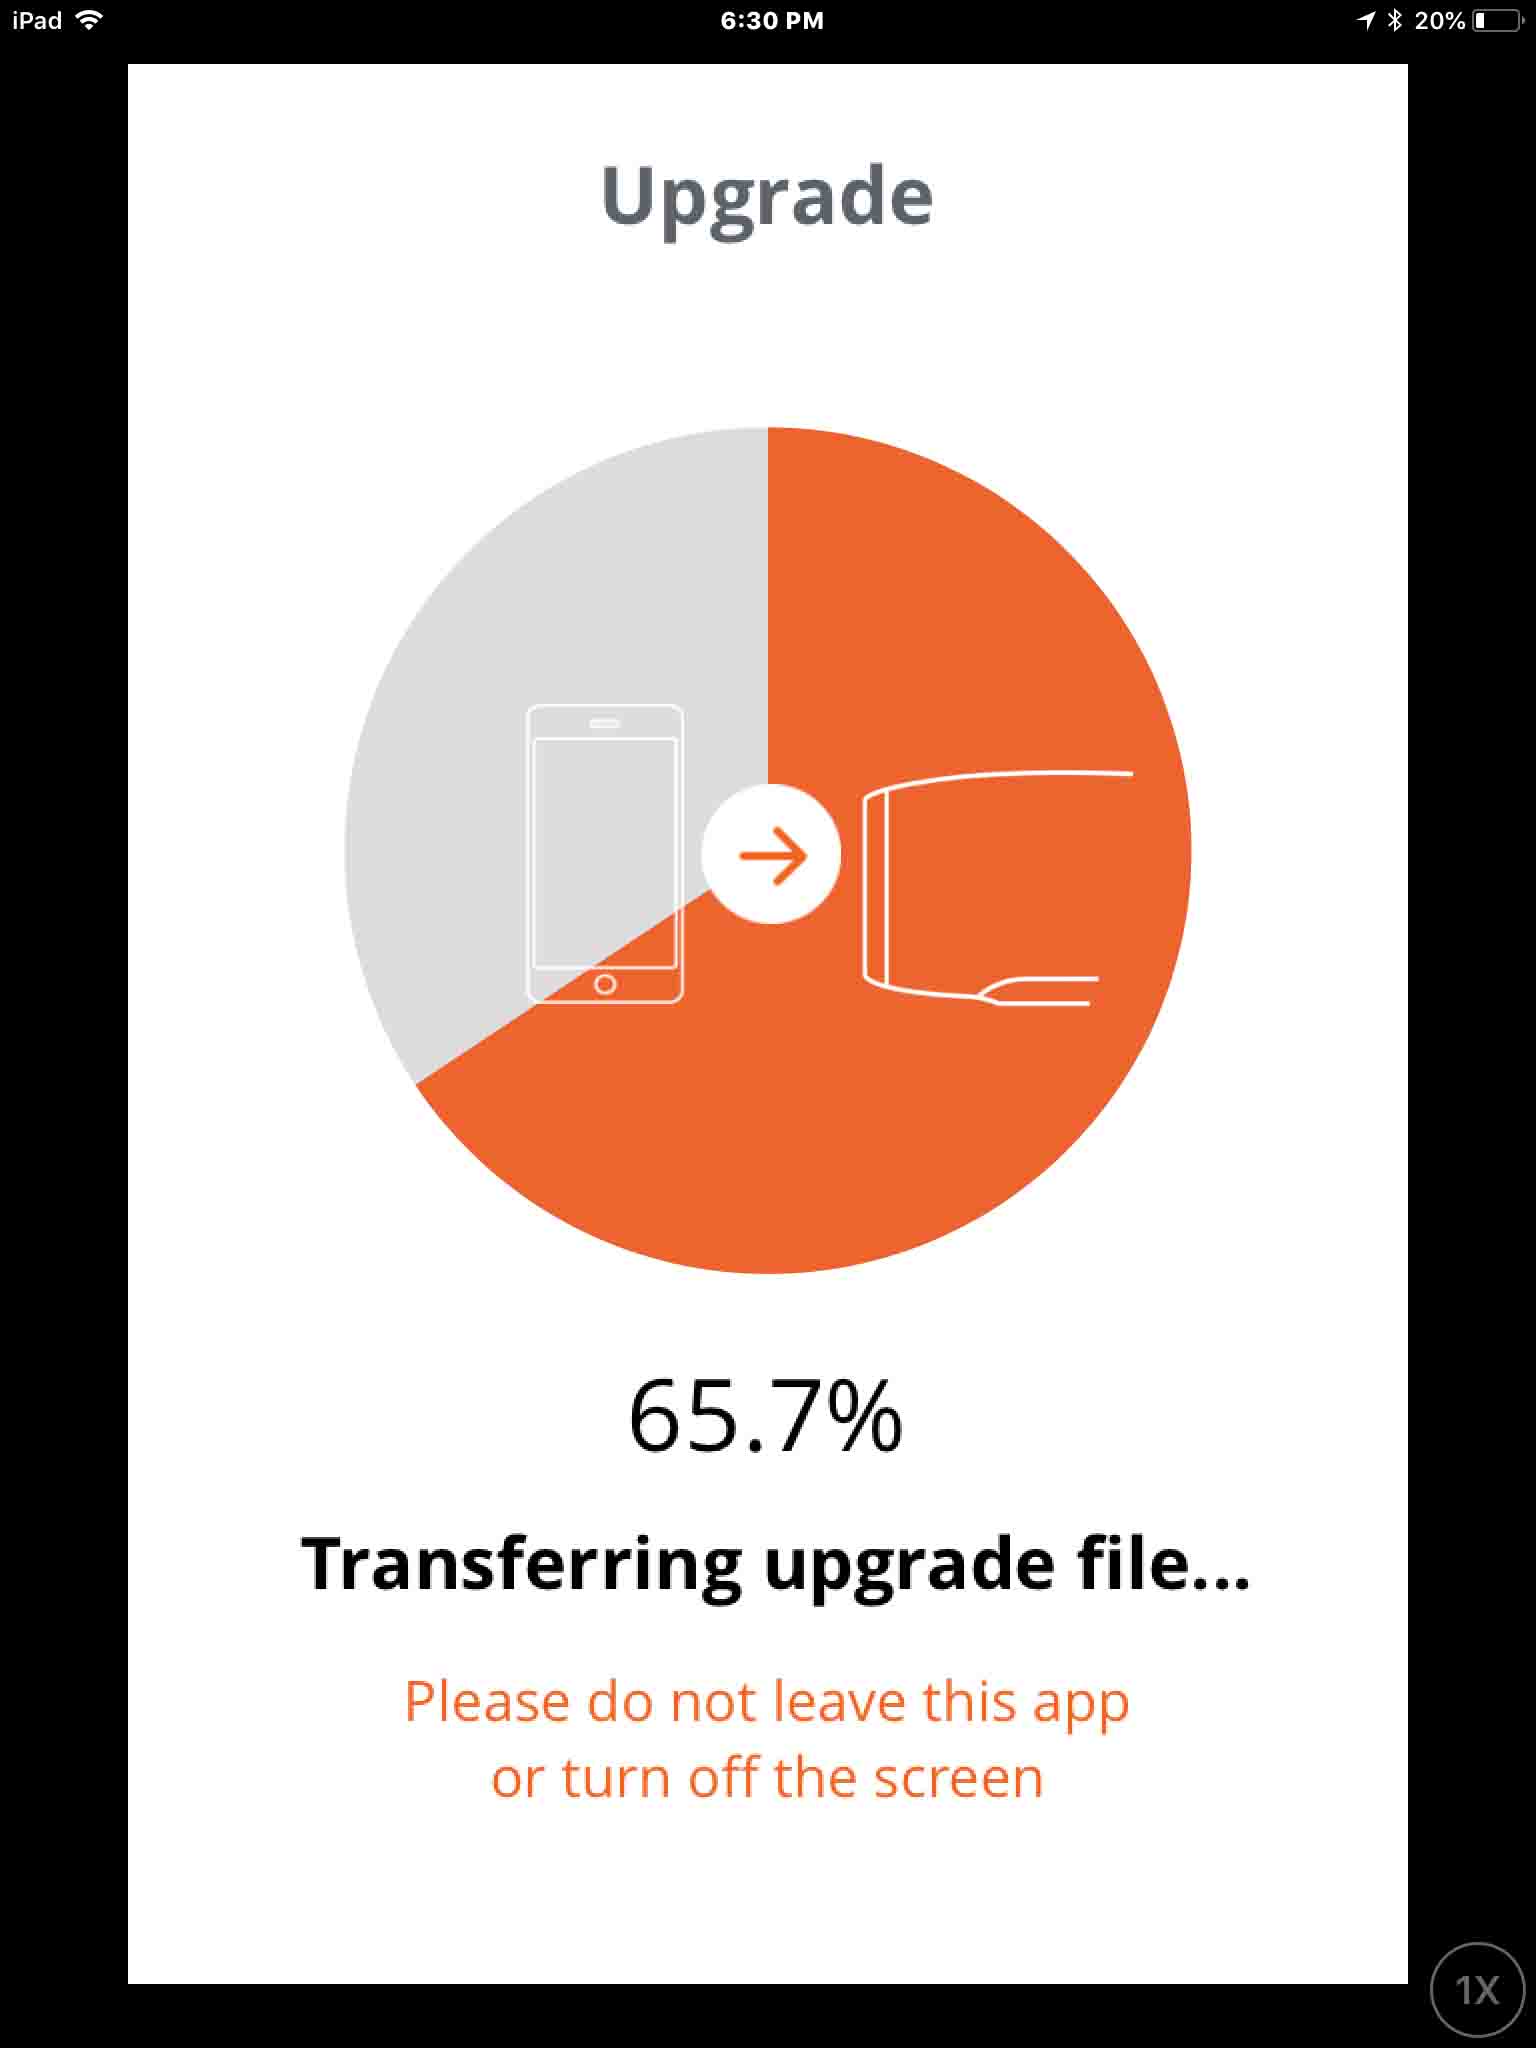
8c. JBL Xtreme 3 Update at 65.7 Percent Done
The next screenshot shows the upgrade file transfer at 65.7 percent complete.
8d. Update File Transfer 100 Percent Complete
The next screen shows that the firmware file transfer to the speaker has finished (100 percent done). The pie chart is completely orange now.

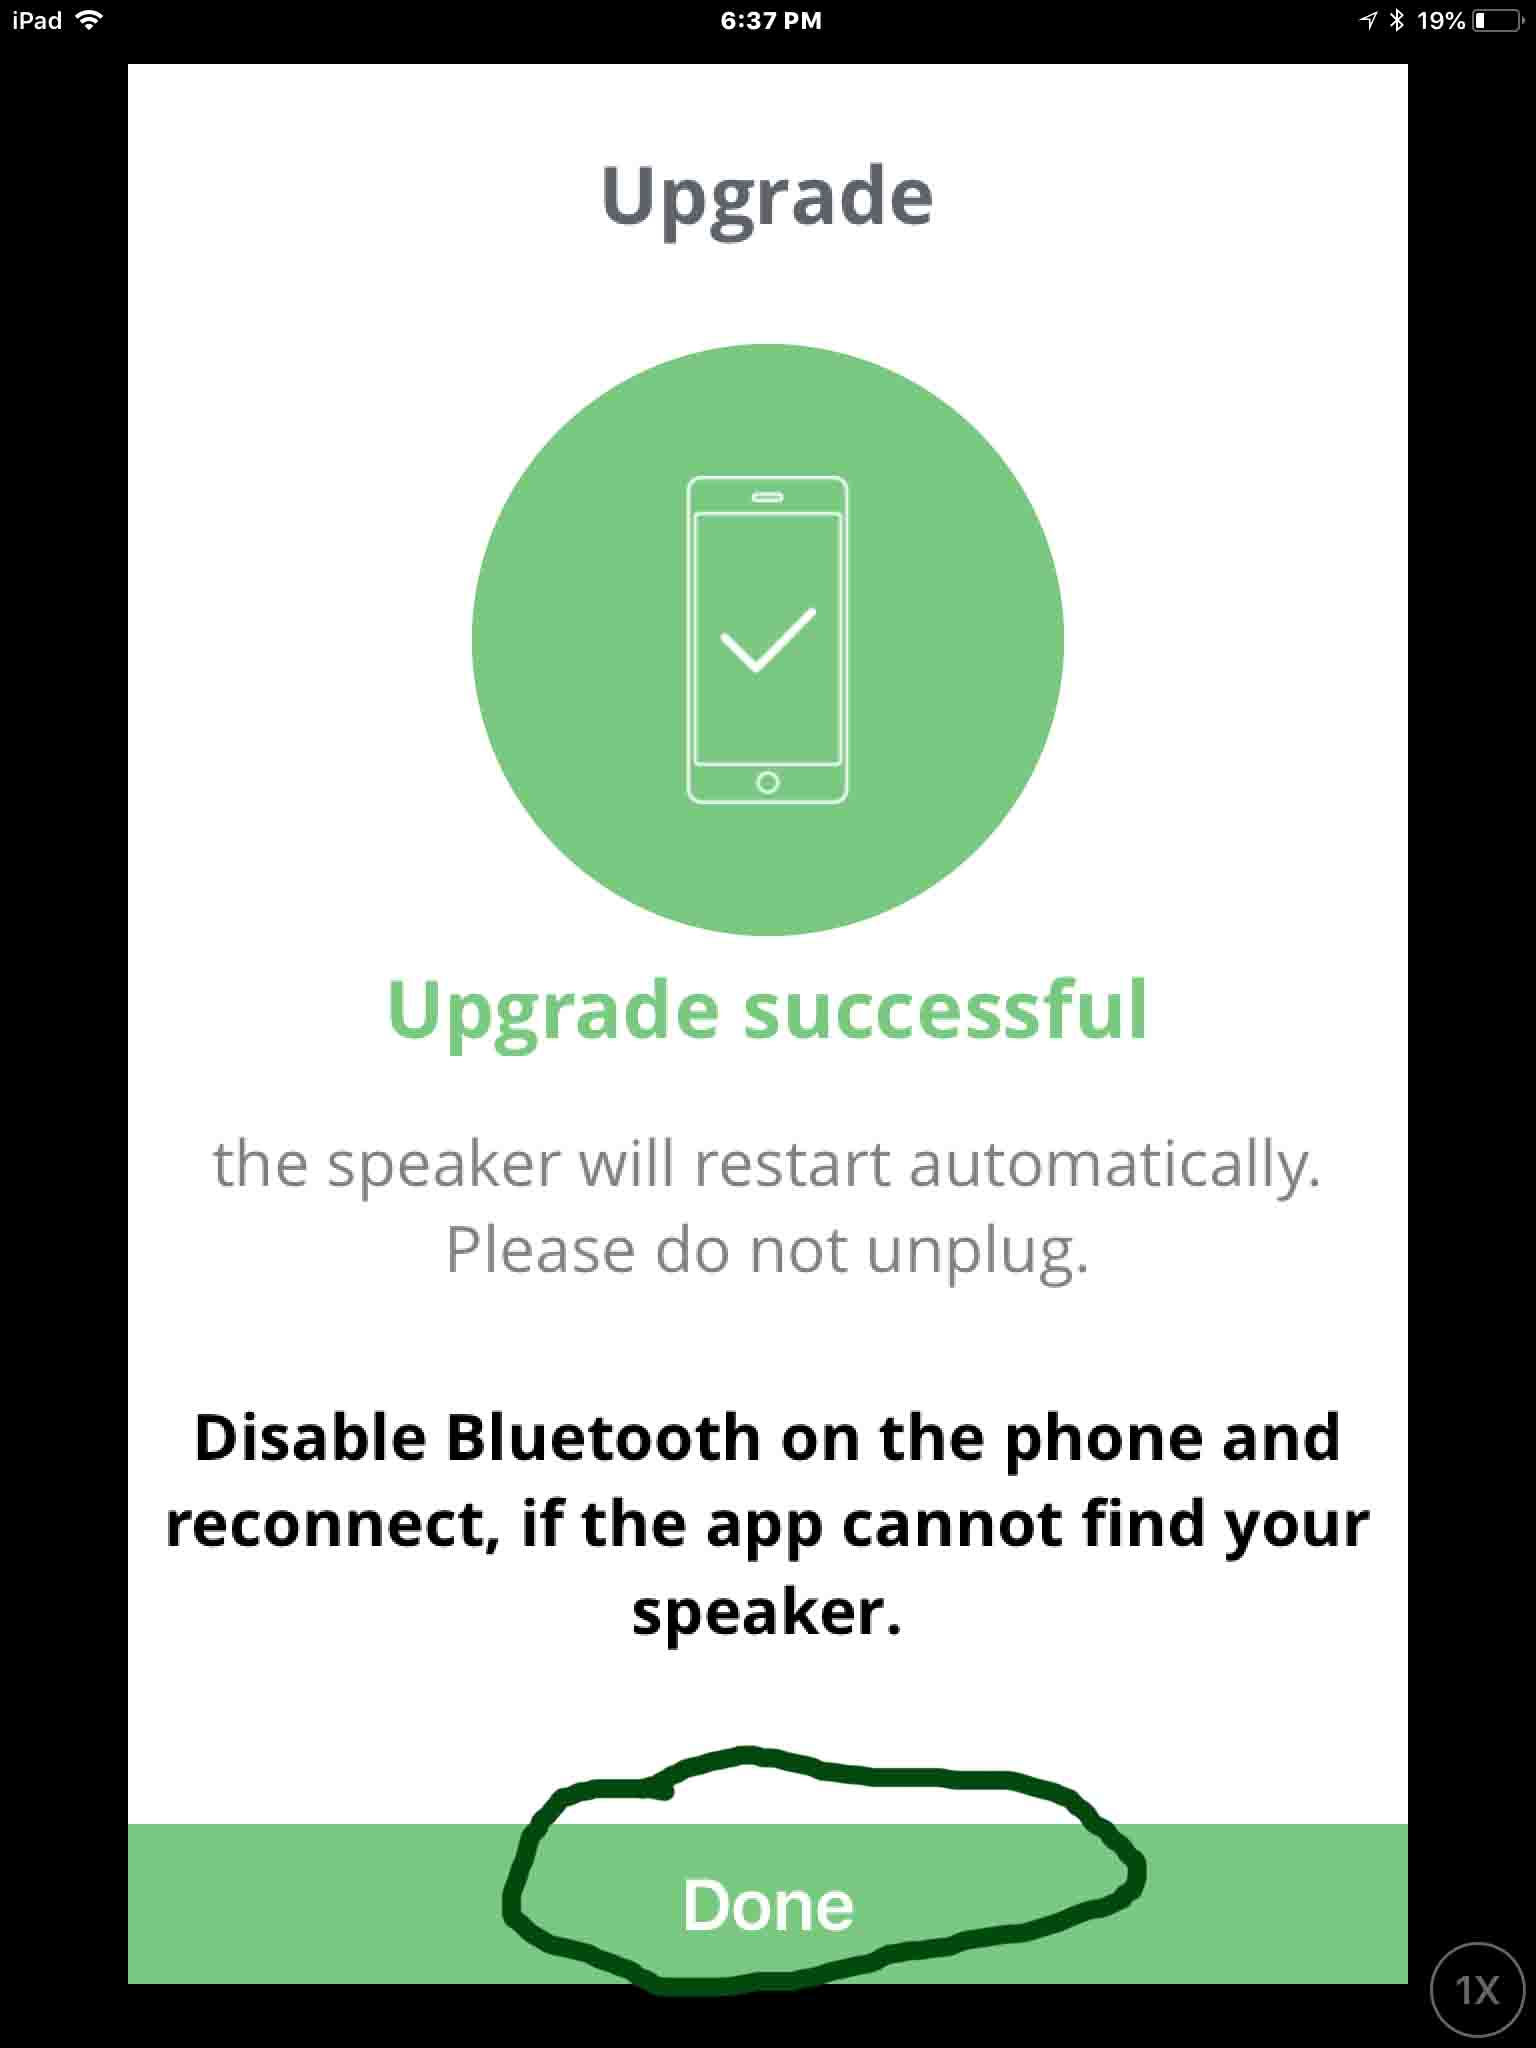
8e. The Upgrade Successful Screen Appears
Once the app copies the upgrade file to the JBL Xtreme 3 speaker, you get the Upgrade Successful screen, as shown next.
9. Wait for the Speaker to Shut Off to Continue with JBL Xtreme 3 Update
Watch the power light on the speaker, as shown next.
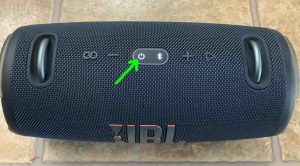
Eventually it will go dark, as we show next, pointed at by the green arrow.

The JBL Xtreme 3 may or may not turn itself back on again after the upgrade. Ours did not. So if, like ours, yours did not come back up, then go ahead with the next step (Step 10). But if yours did come back online though, then skip Step 10 and pick up with Step 11.
10. Power On the JBL Xtreme 3
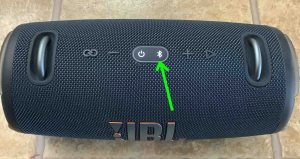
Press the dark Power button to turn the speaker on again. Then it should again pair with your mobile device where you’re running the JBL Portable app. The Bluetooth button turns solid white when your speaker successfully pairs again with your tablet or phone, as we see next.
11. Press the Done Button in the App
With your JBL Xtreme 3 successfully paired to the JBL Portable app again, press the green Done button, as shown above.
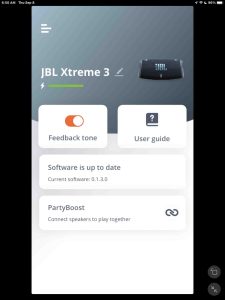
The app then displays the JBL Xtreme 3 speaker status screen once again. However, this time, note that there’s not any upgrade button, as shown next. This means that the update succeeded and that the speaker is now running the current software version.
12. Done with JBL Xtreme 3 Update !
You’re now successfully updated the speaker to the current software version in your JBL Xtreme 3 Bluetooth speaker. Enjoy the new multi speaker connectivity features.
Other Posts About the JBL Xtreme 3
References for JBL Xtreme 3 Update
Revision History
-
- 2022-09-08: First published.