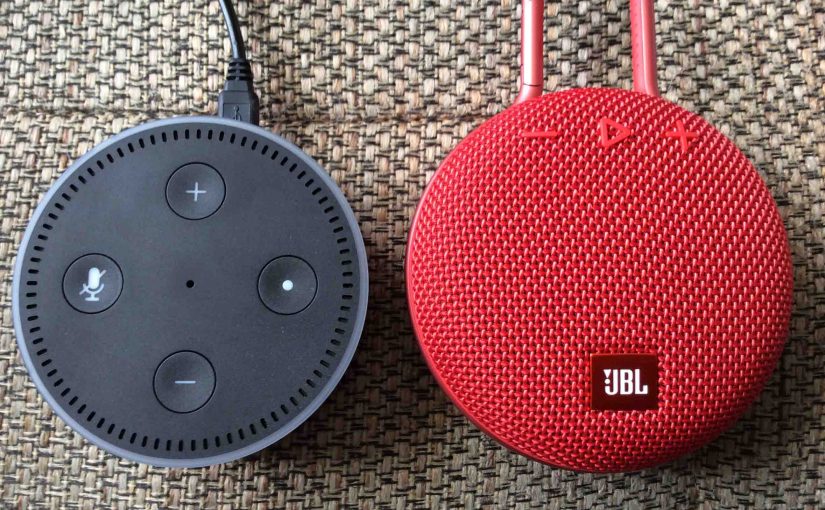
Shows how pairing the JBL Clip 3 with an Echo Dot works. Echo Dot speakers include generations 1 through 5. So this pairing happens between the Clip 3 and the Echo Dot devices. Thus you need not turn Bluetooth on in the mobile device you’re using to set up this pairing.
Pairing JBL Clip 3 with Echo Dot: Step by Step
Start with your JBL Clip 3 powered off (status lamp under the carabiner is dark). Then run through this routine to pair it to your Echo Dot. We’re using an iPad Air tablet to create this pairing.
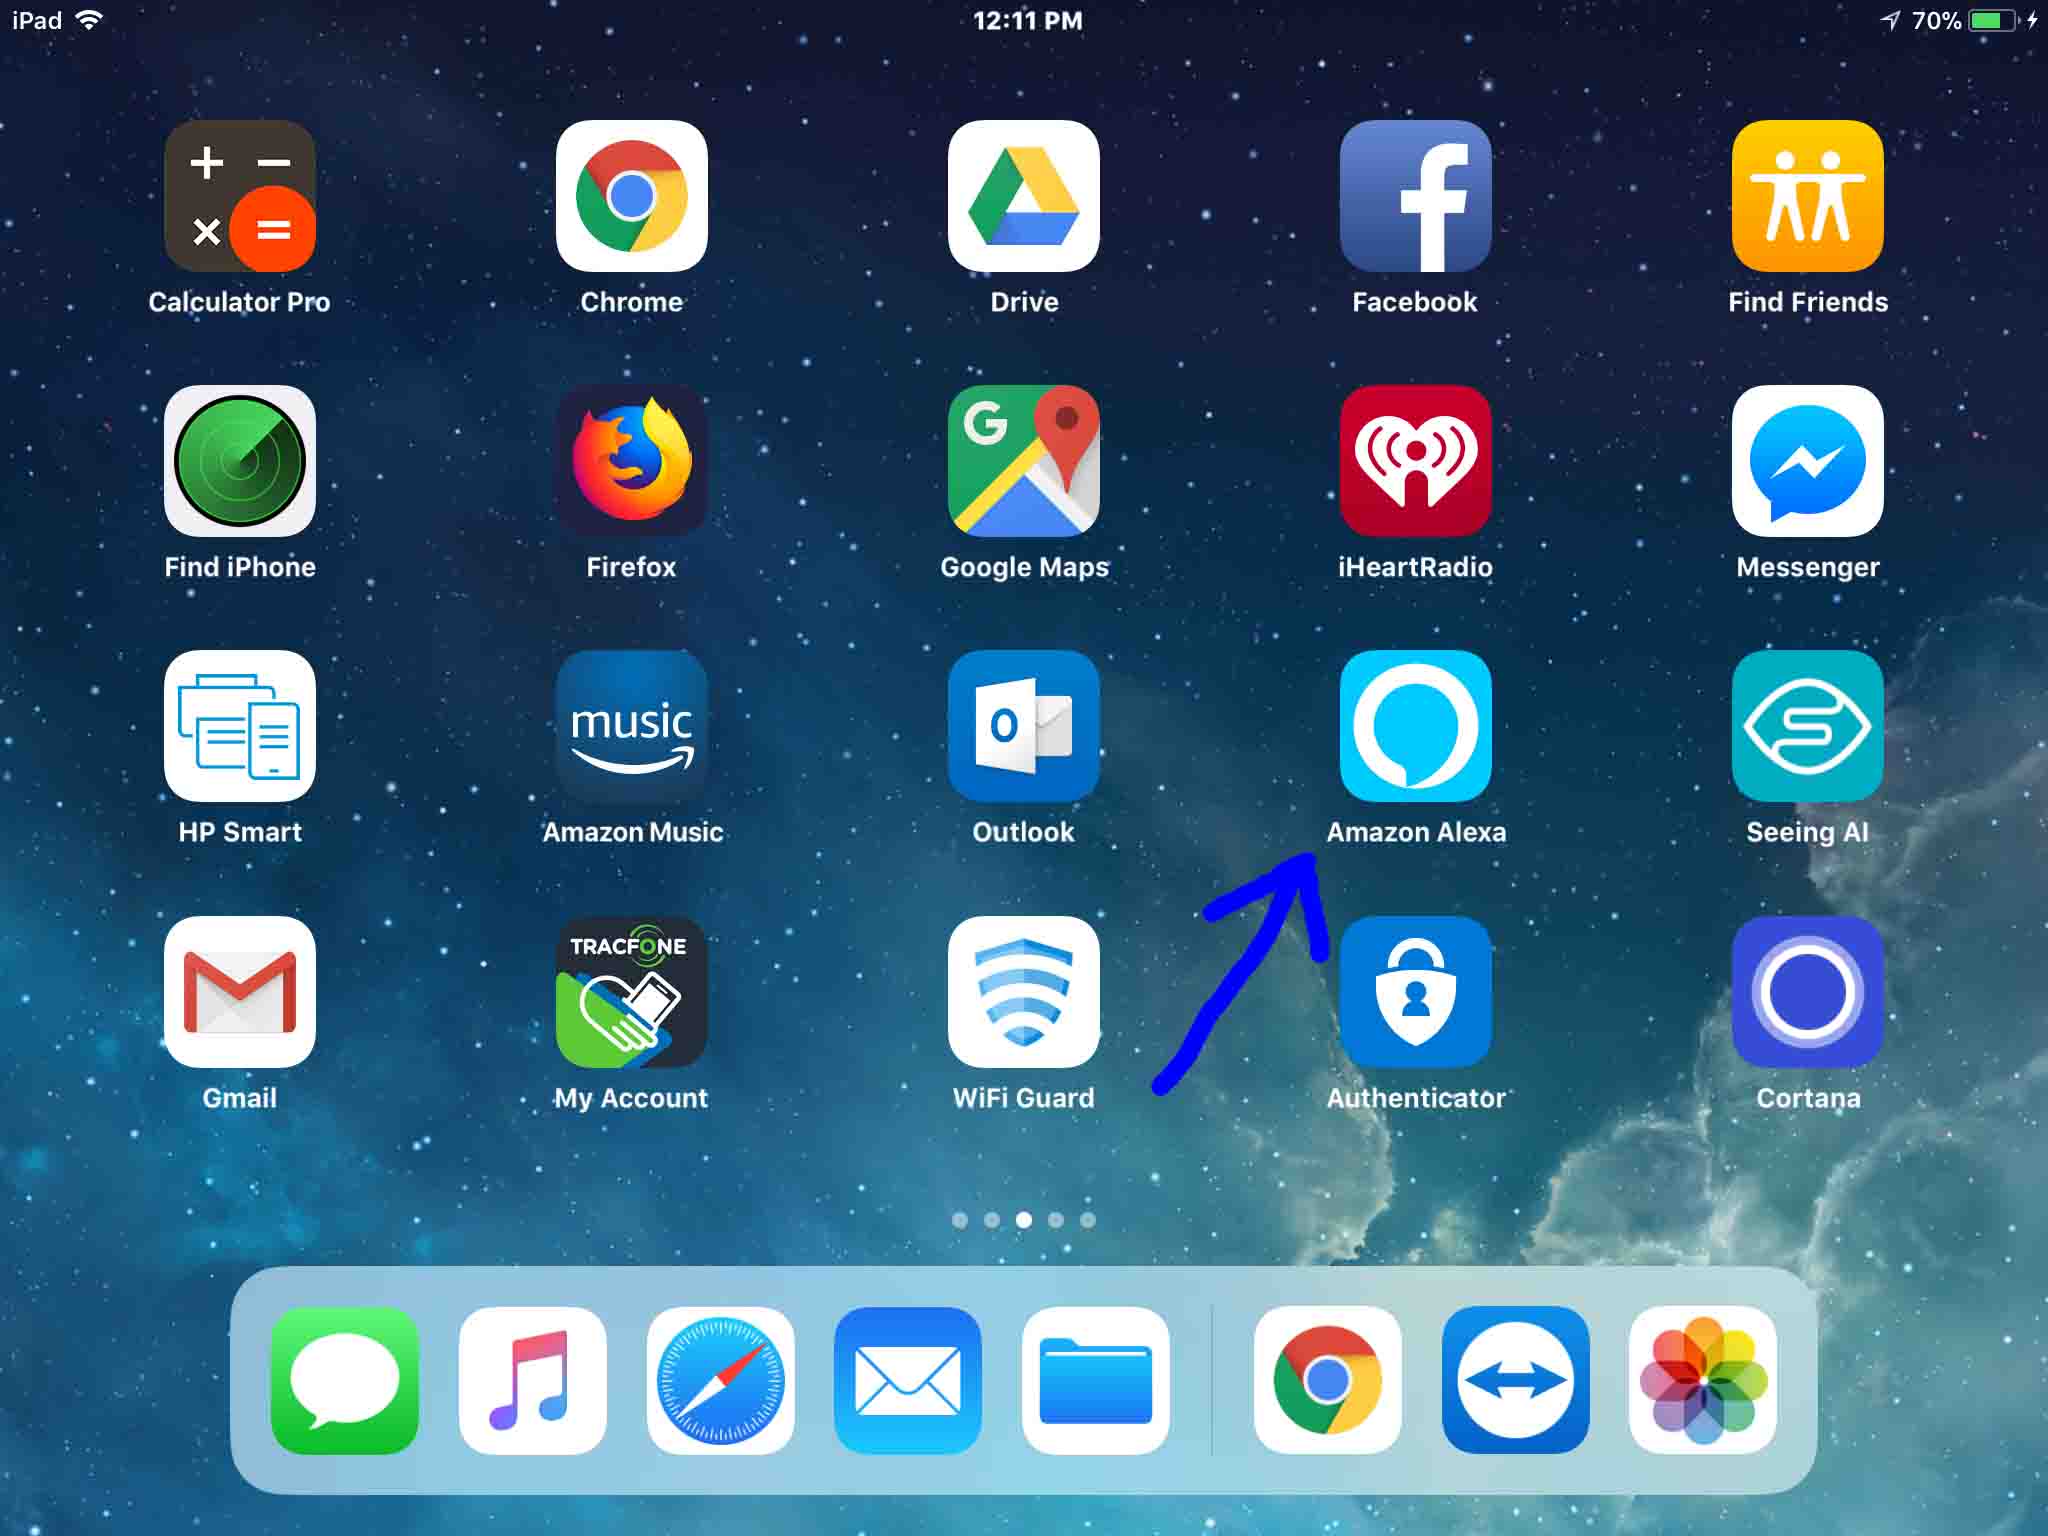
1. Find the Alexa App on your Mobile Device
Firstly, we find the Alexa app on our iOS iPad Air. In our case, the app is on the third Home screen page.
2. Run the Alexa App
Then, the app displays its Home page.
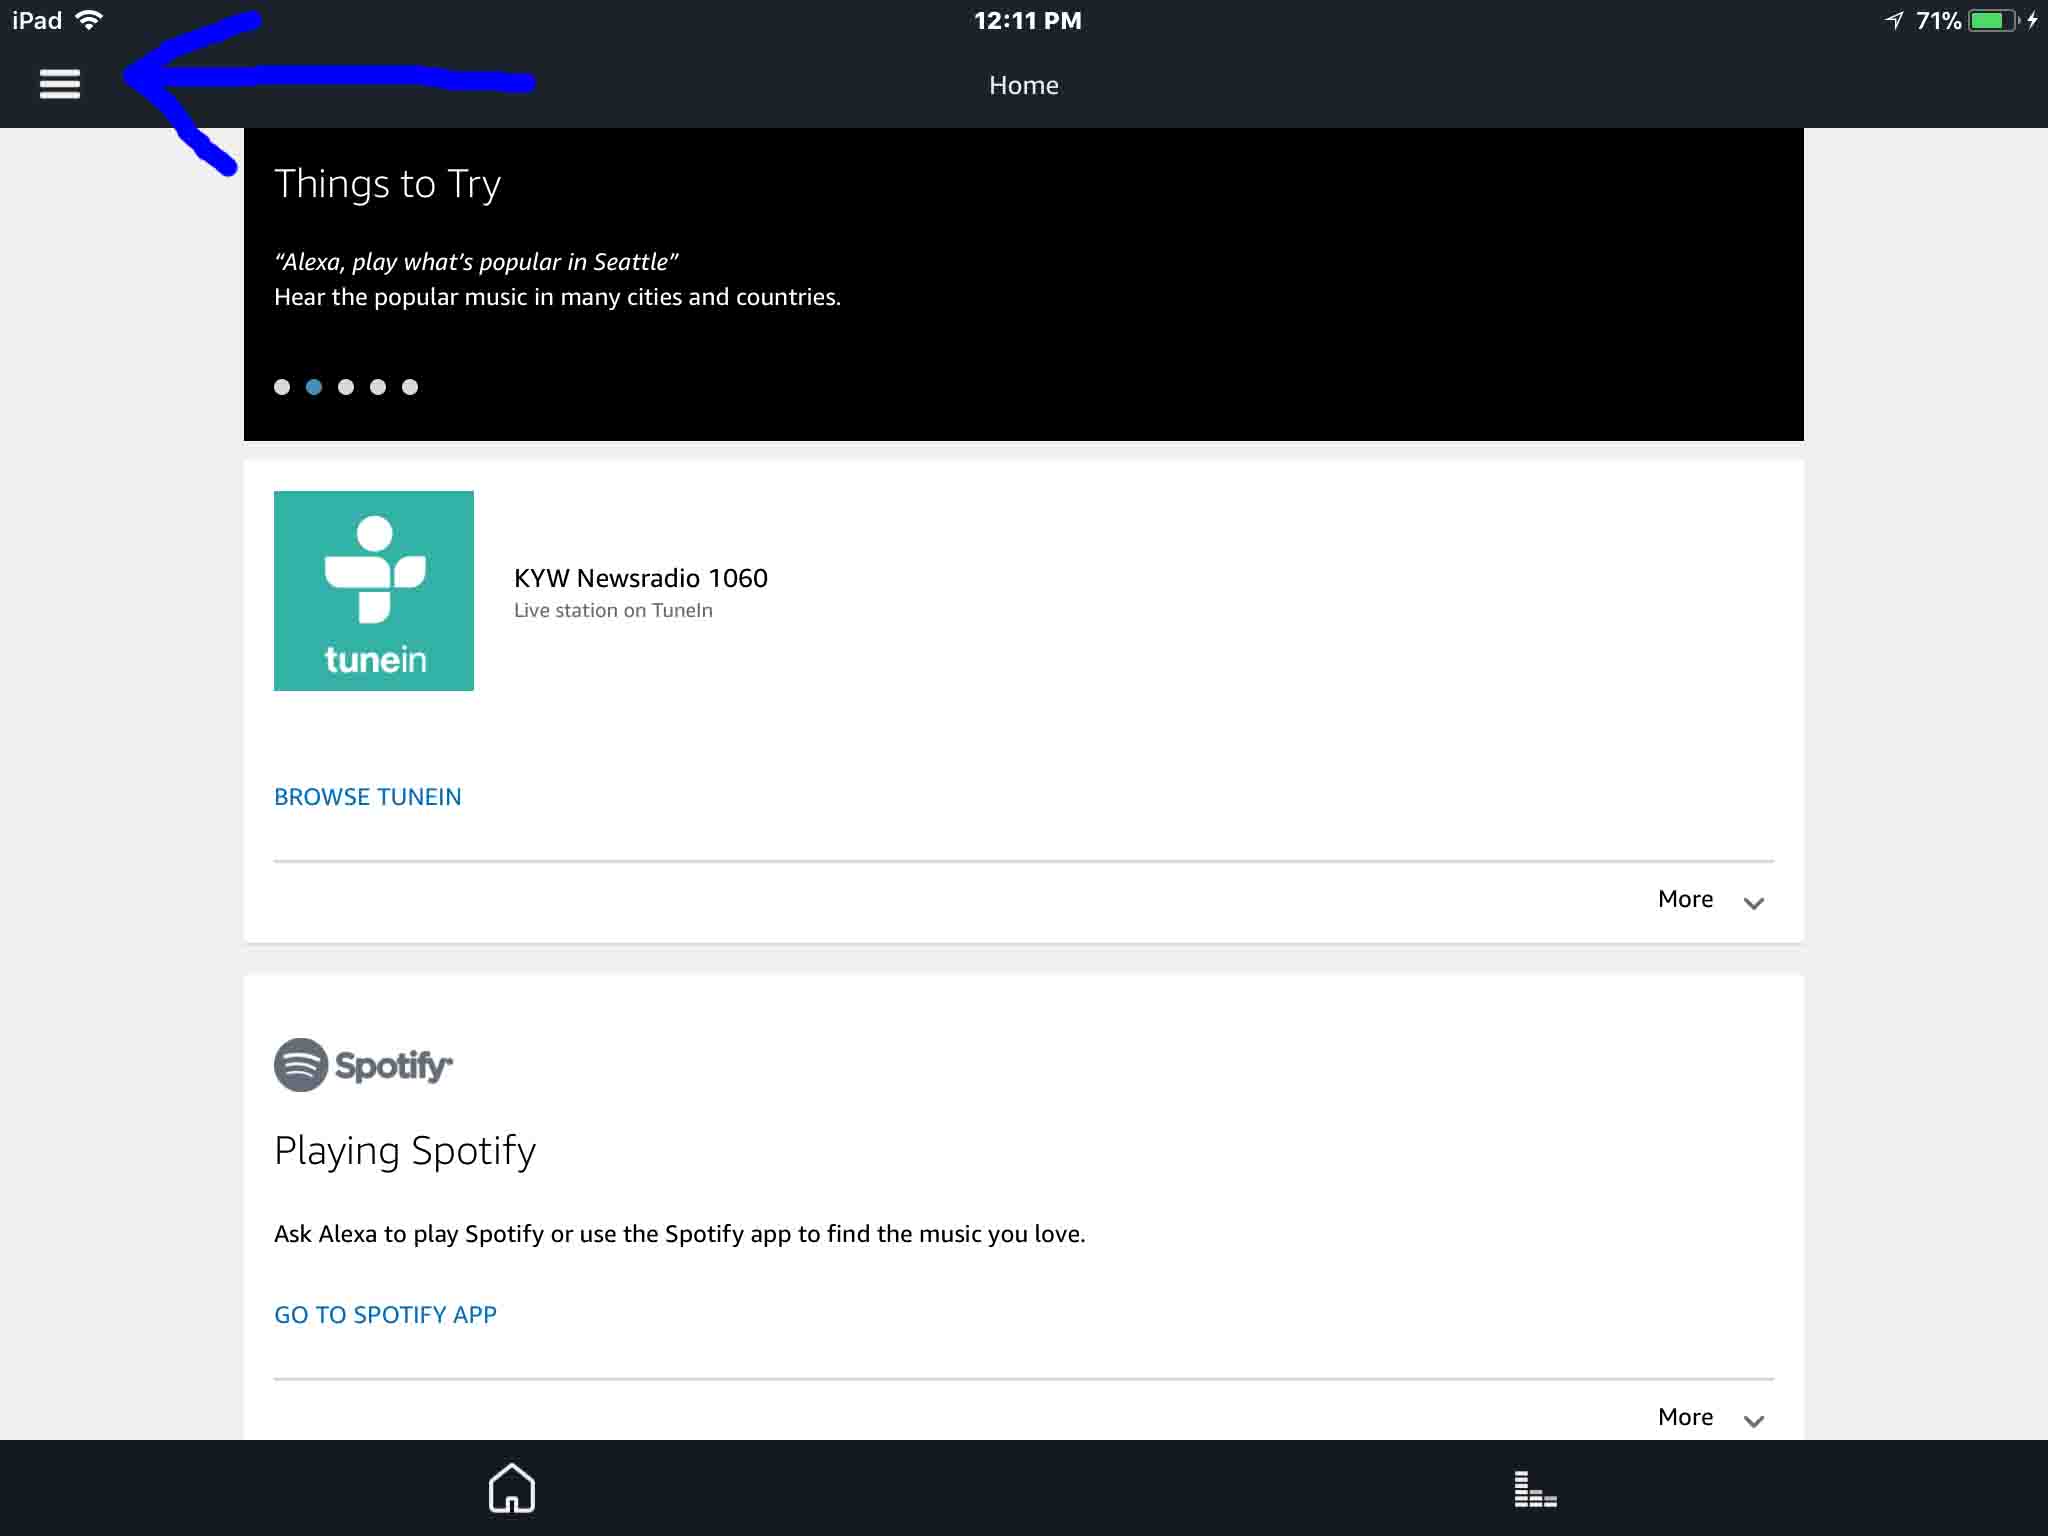
3. Tap the Hamburger Control
Next, find the hamburger item in the top left corner of the screen.
This then brings up the Alexa app’s main menu.
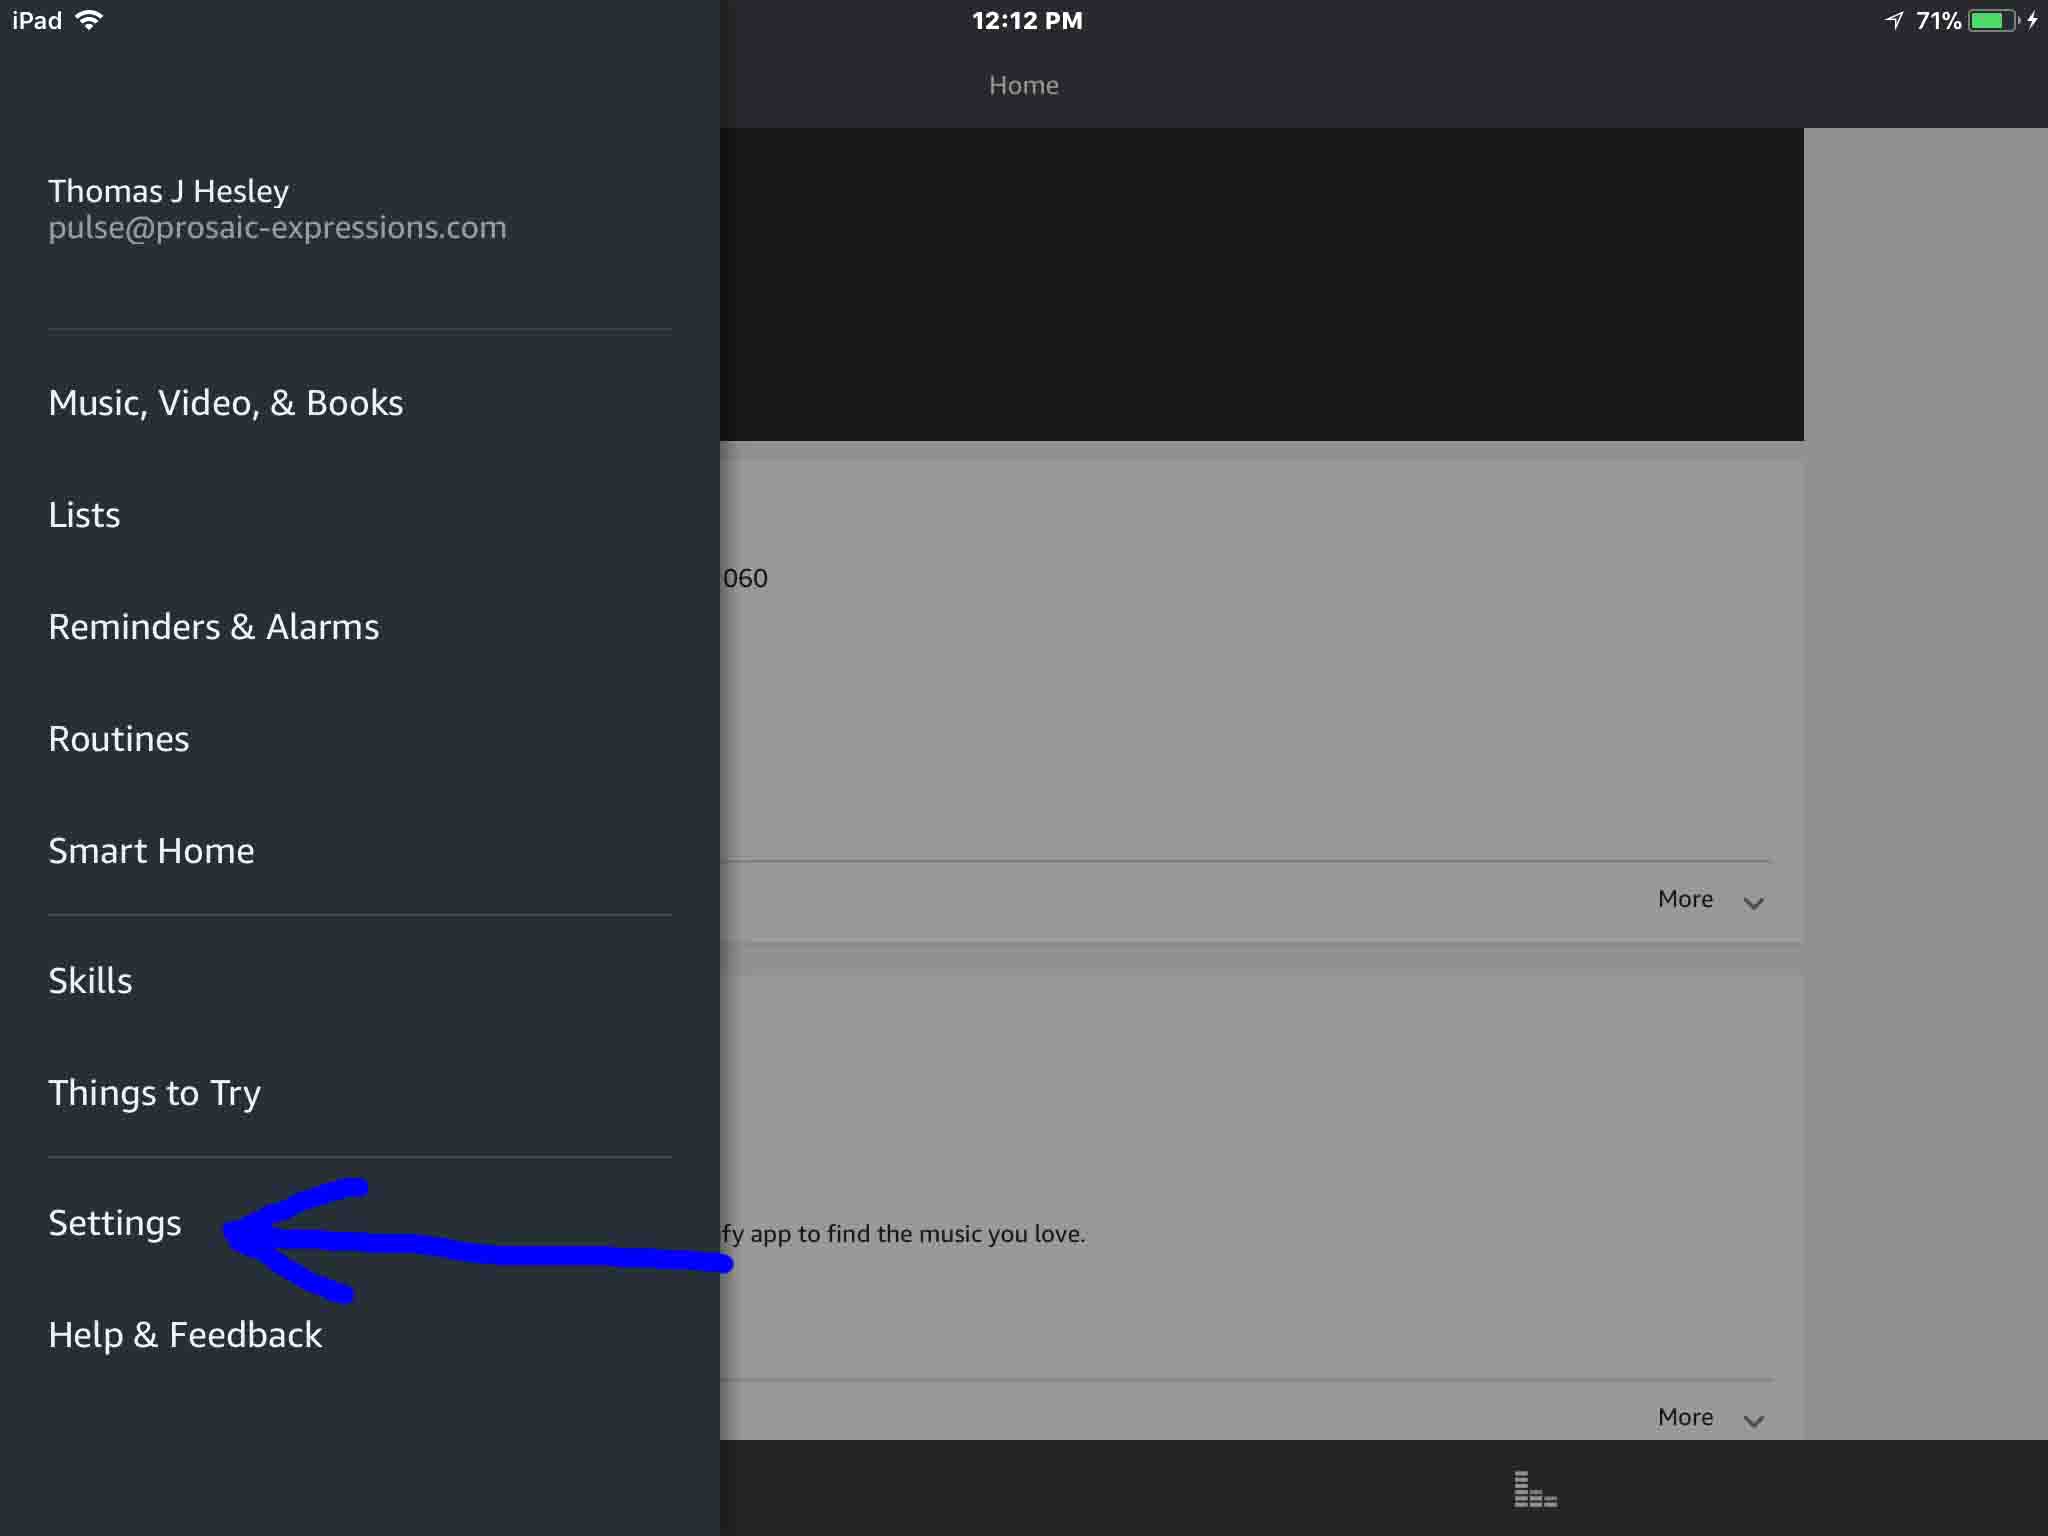
4. Tap the Settings Option on the Main Menu to Continue with Pairing JBL Clip 3 with Echo Dot
This then brings up the Settings screen. From here, choose which Echo device you wish to pair with your Clip 3.
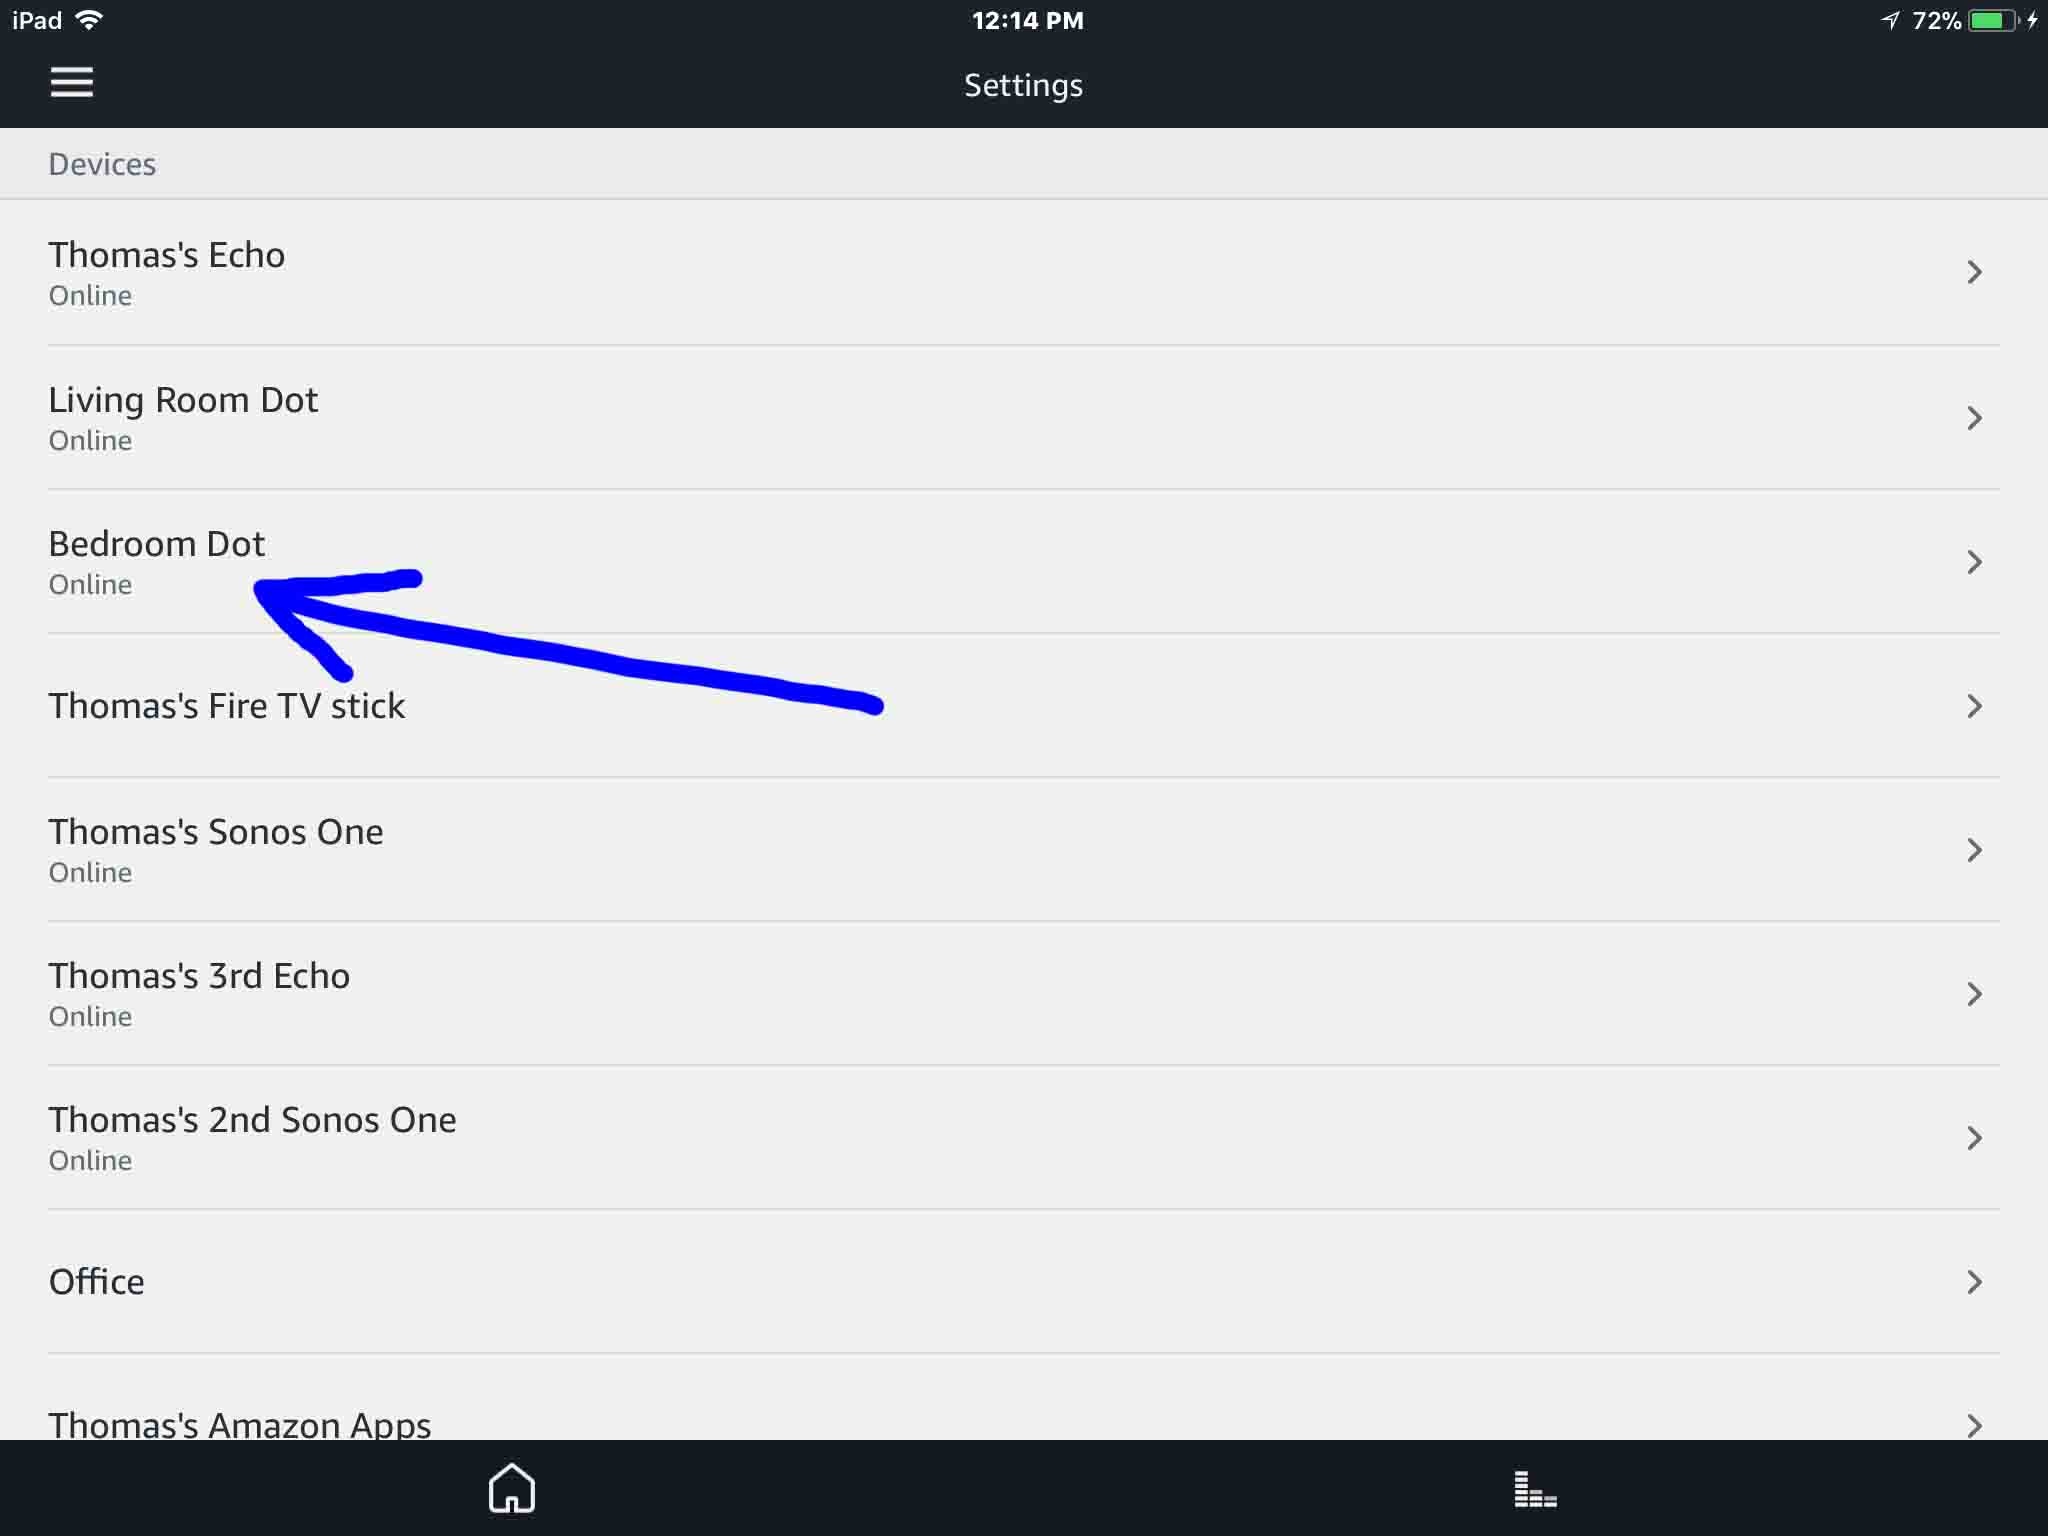
5. Tap the Echo Dot to Pair to the JBL Clip 3
This takes you to the device-specific settings screen for the Dot you chose.
In this demo, we’re pairing from our Bedroom Dot Echo Dot to our Clip 3.
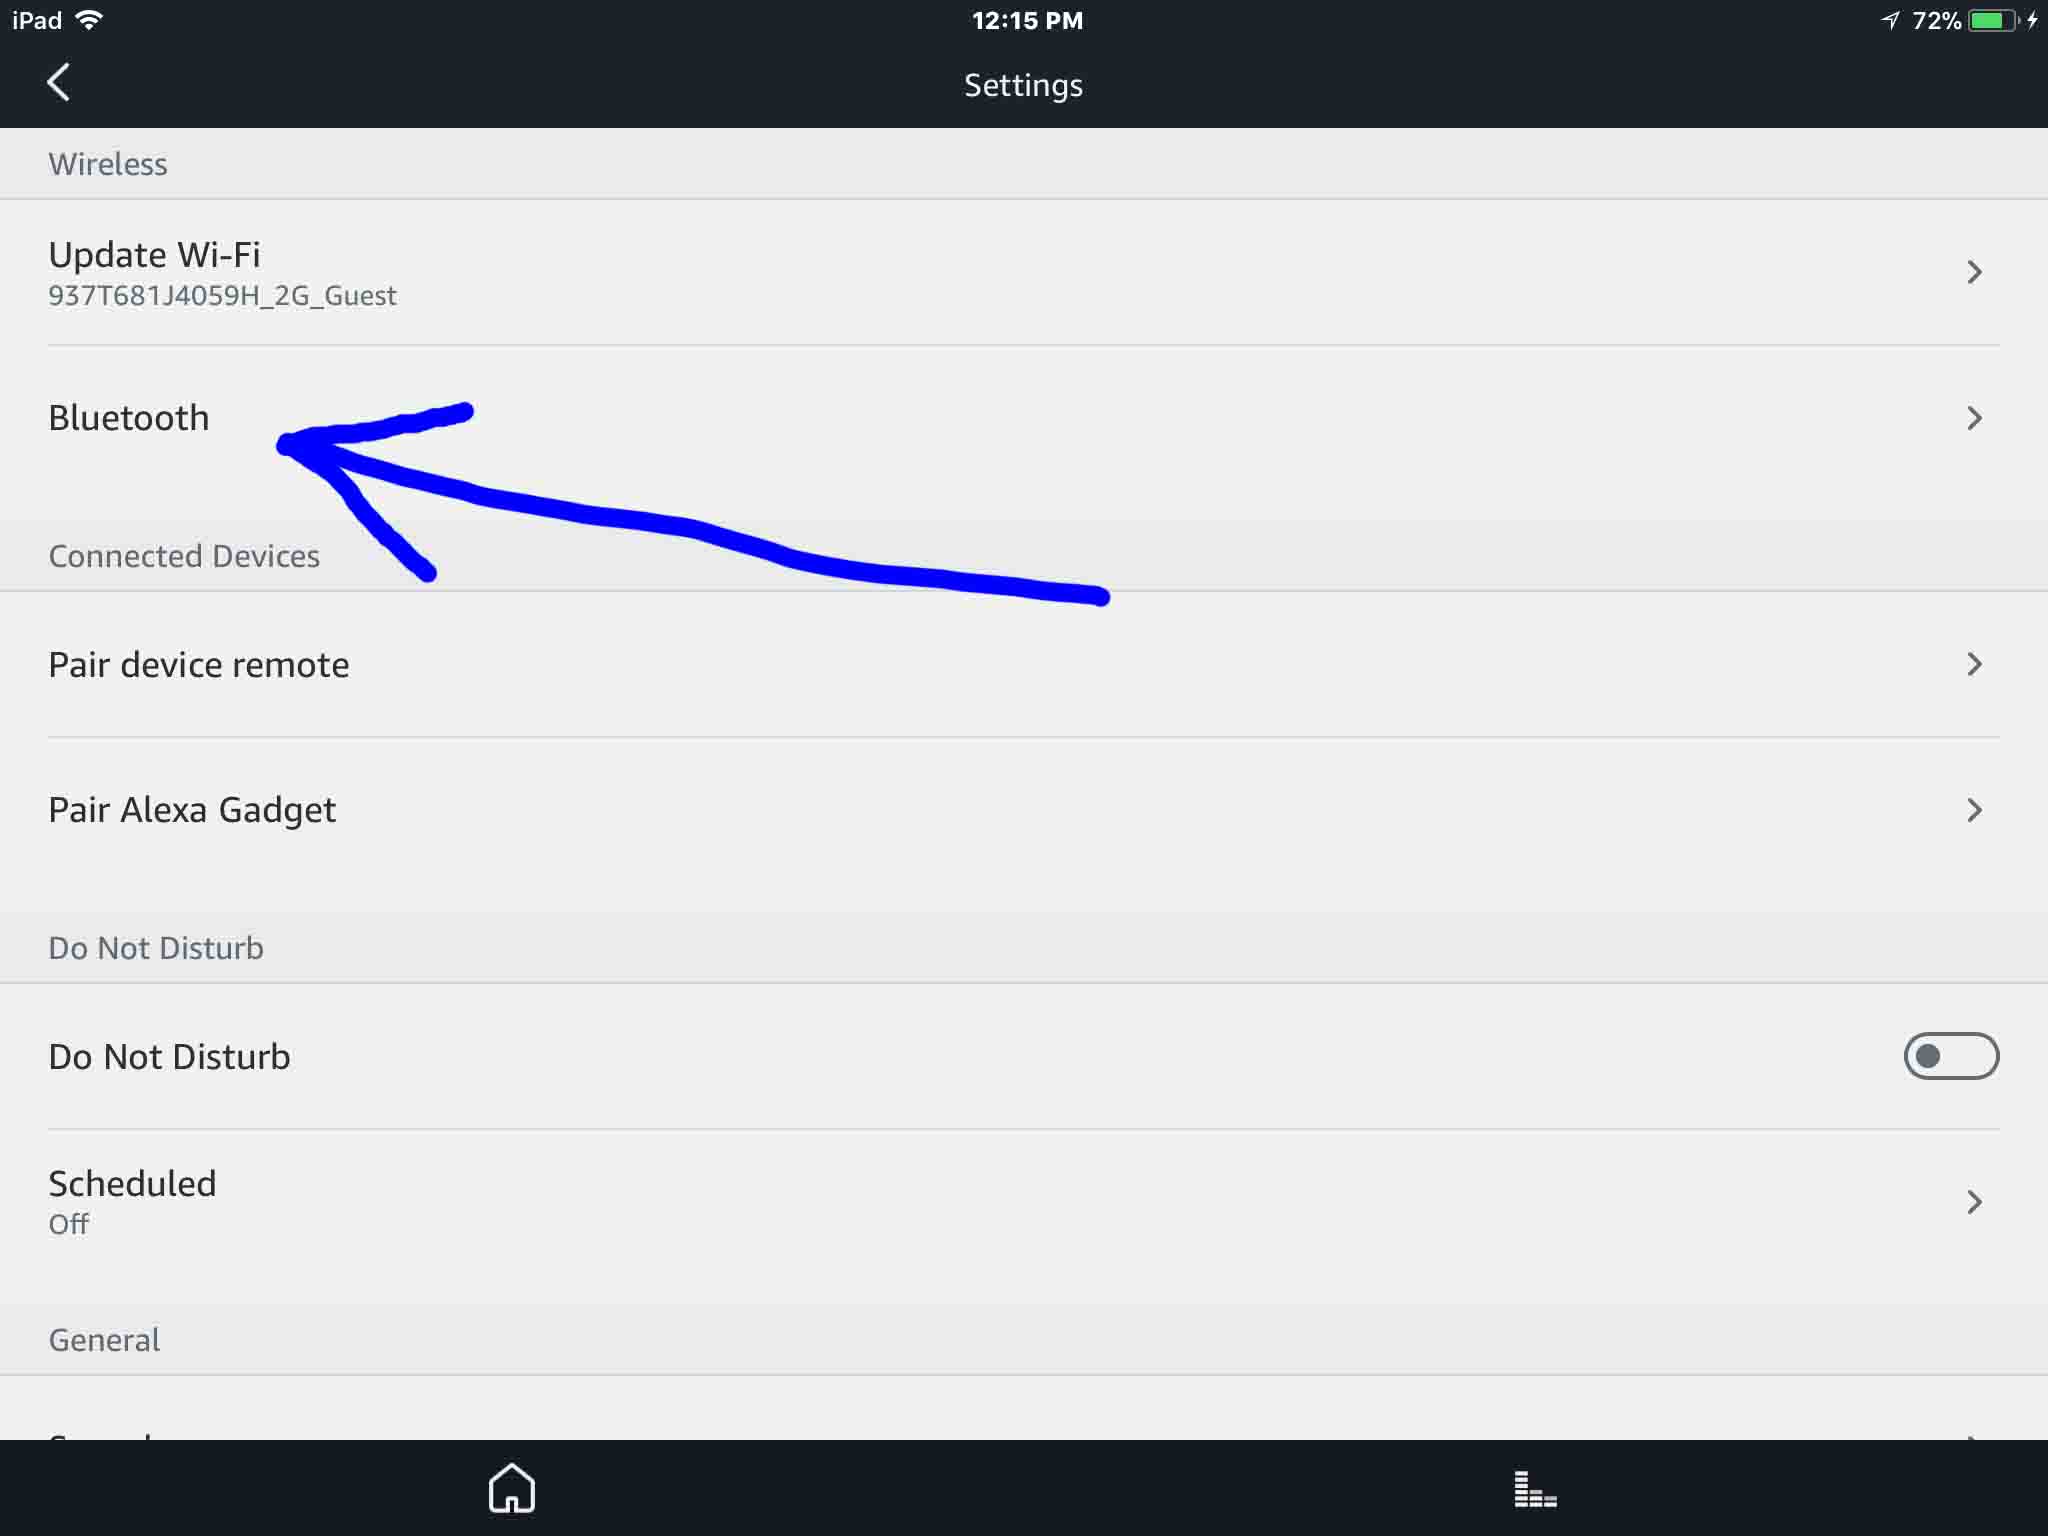
6. Tap the Bluetooth Item
Then, find and tap the Bluetooth option.
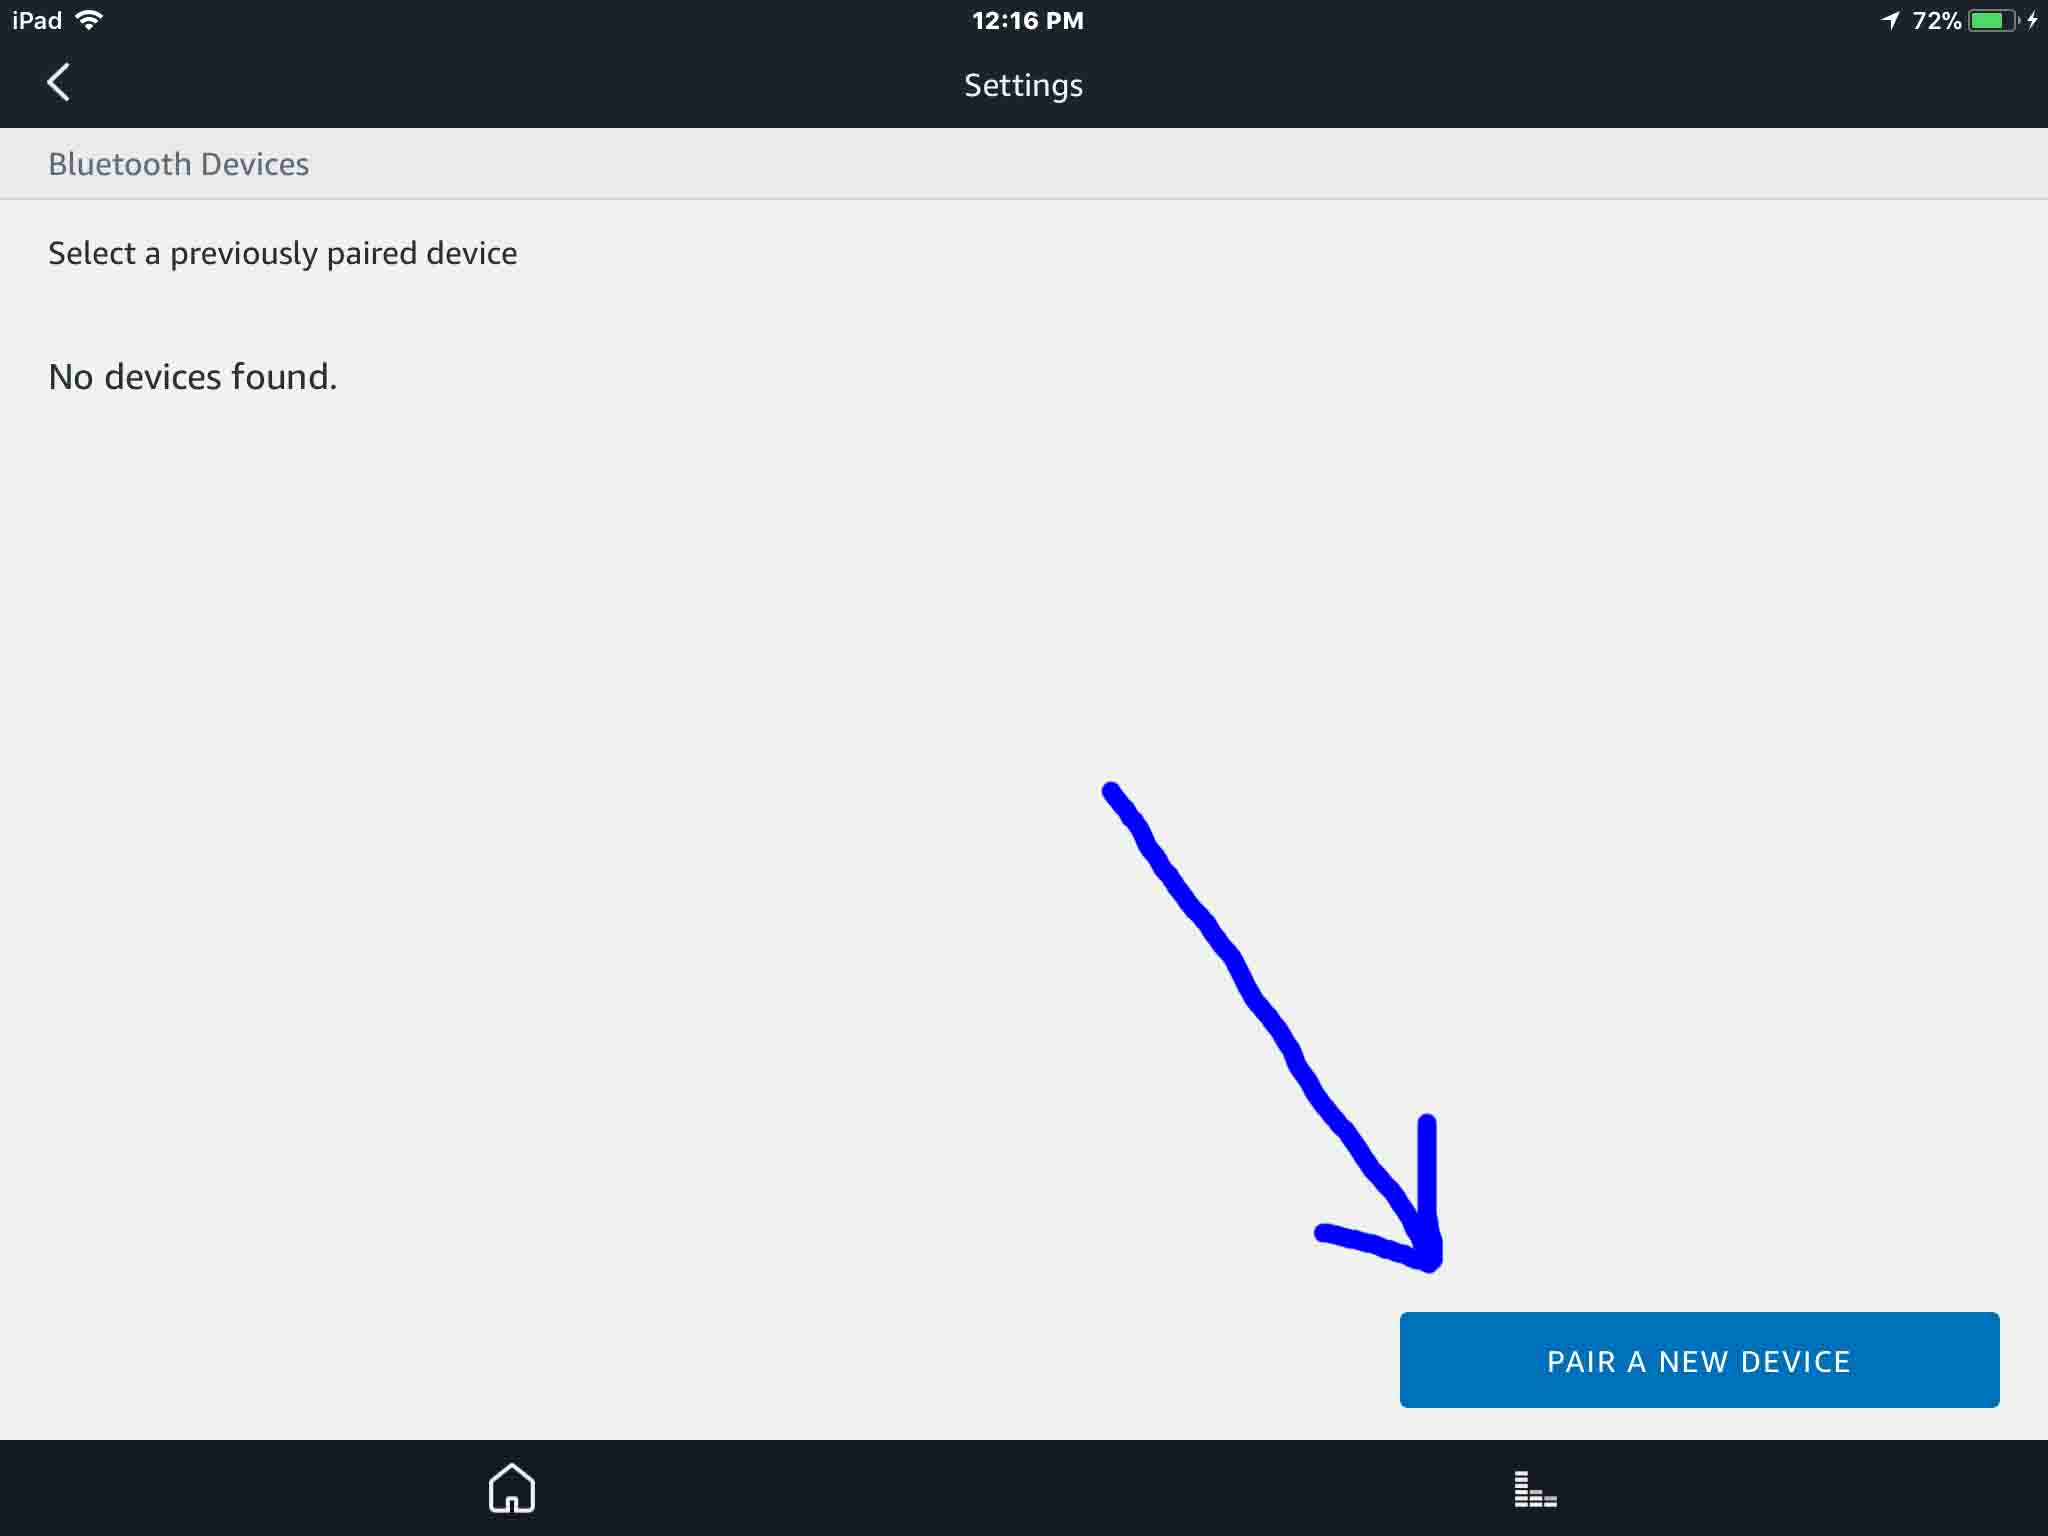
This brings up the Bluetooth Devices screen.
So you’re now ready to start a Bluetooth scan by your Echo Dot. So the Dot you chose is what scans for devices to pair.
But don’t press the Pair a New Device button just yet. We must first power up the JBL Clip 3 and put it into discovery mode.
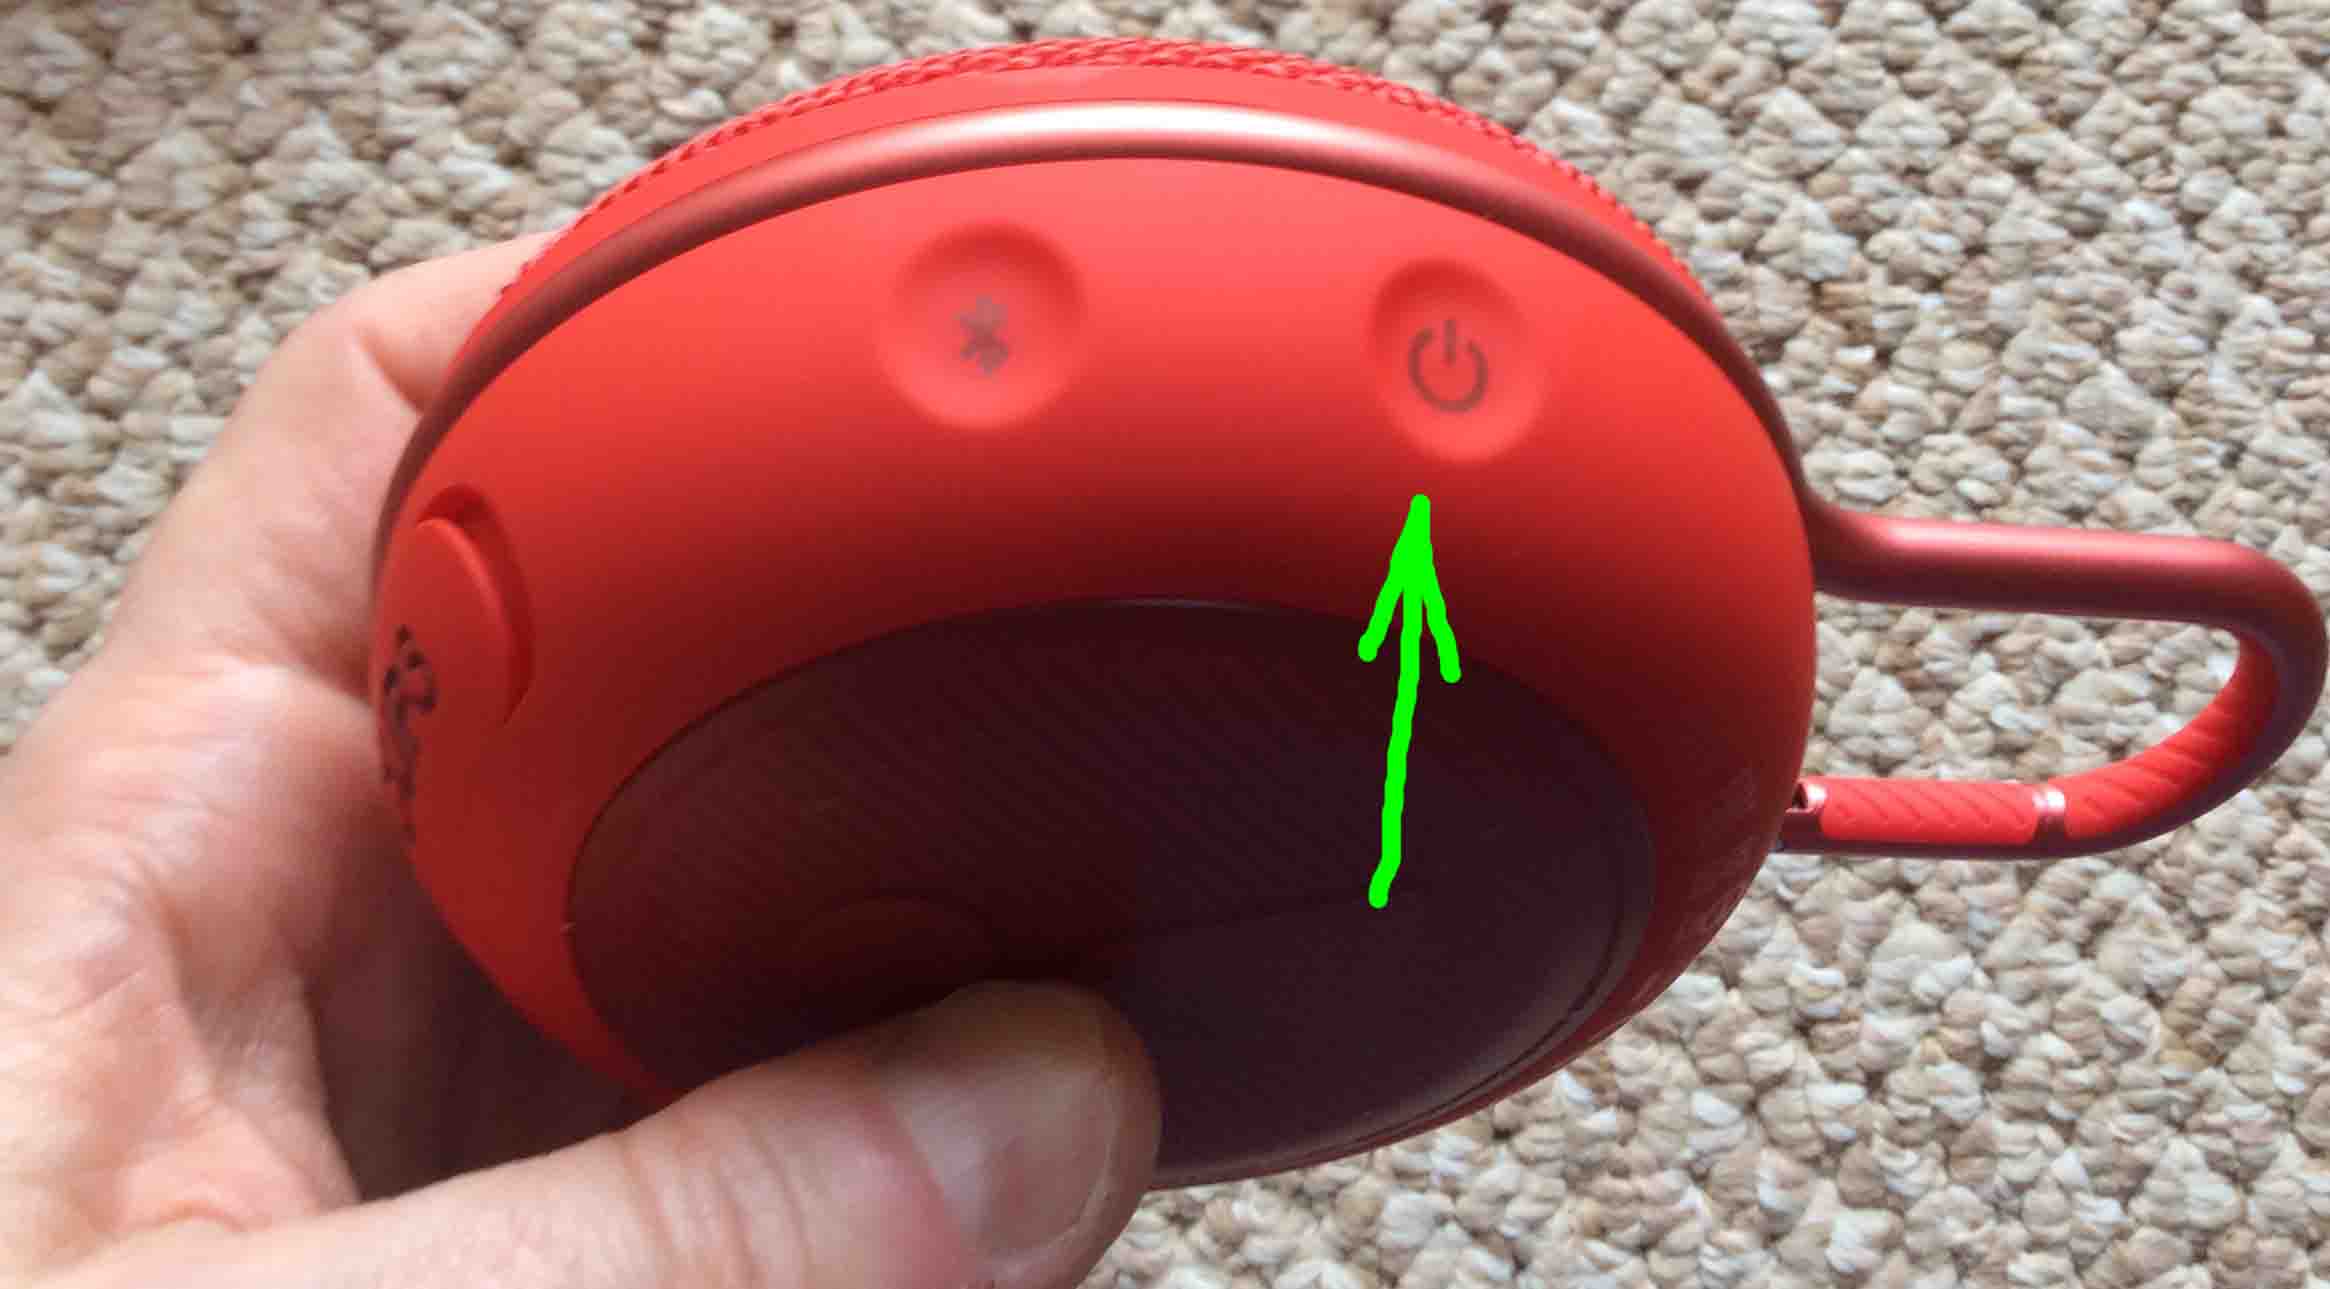
7. Turn On your JBL Clip 3
Put down your mobile device for a bit. Then turn on the Clip 3 by quickly pressing its Power button.
The Clip 3 then powers up.
But our Echo Dot does not know about this speaker. So the Clip 3 will not pair with it without your help the first time. Thus, the status lamp on the Clip 3 signals this not-paired state by slowly flashing white.

8. Put the Clip 3 into Bluetooth Discovery Mode
Then to allow the Echo Dot to find your JBL Clip 3, place the Clip into Bluetooth discovery mode. So for that, press and release the Bluetooth button.
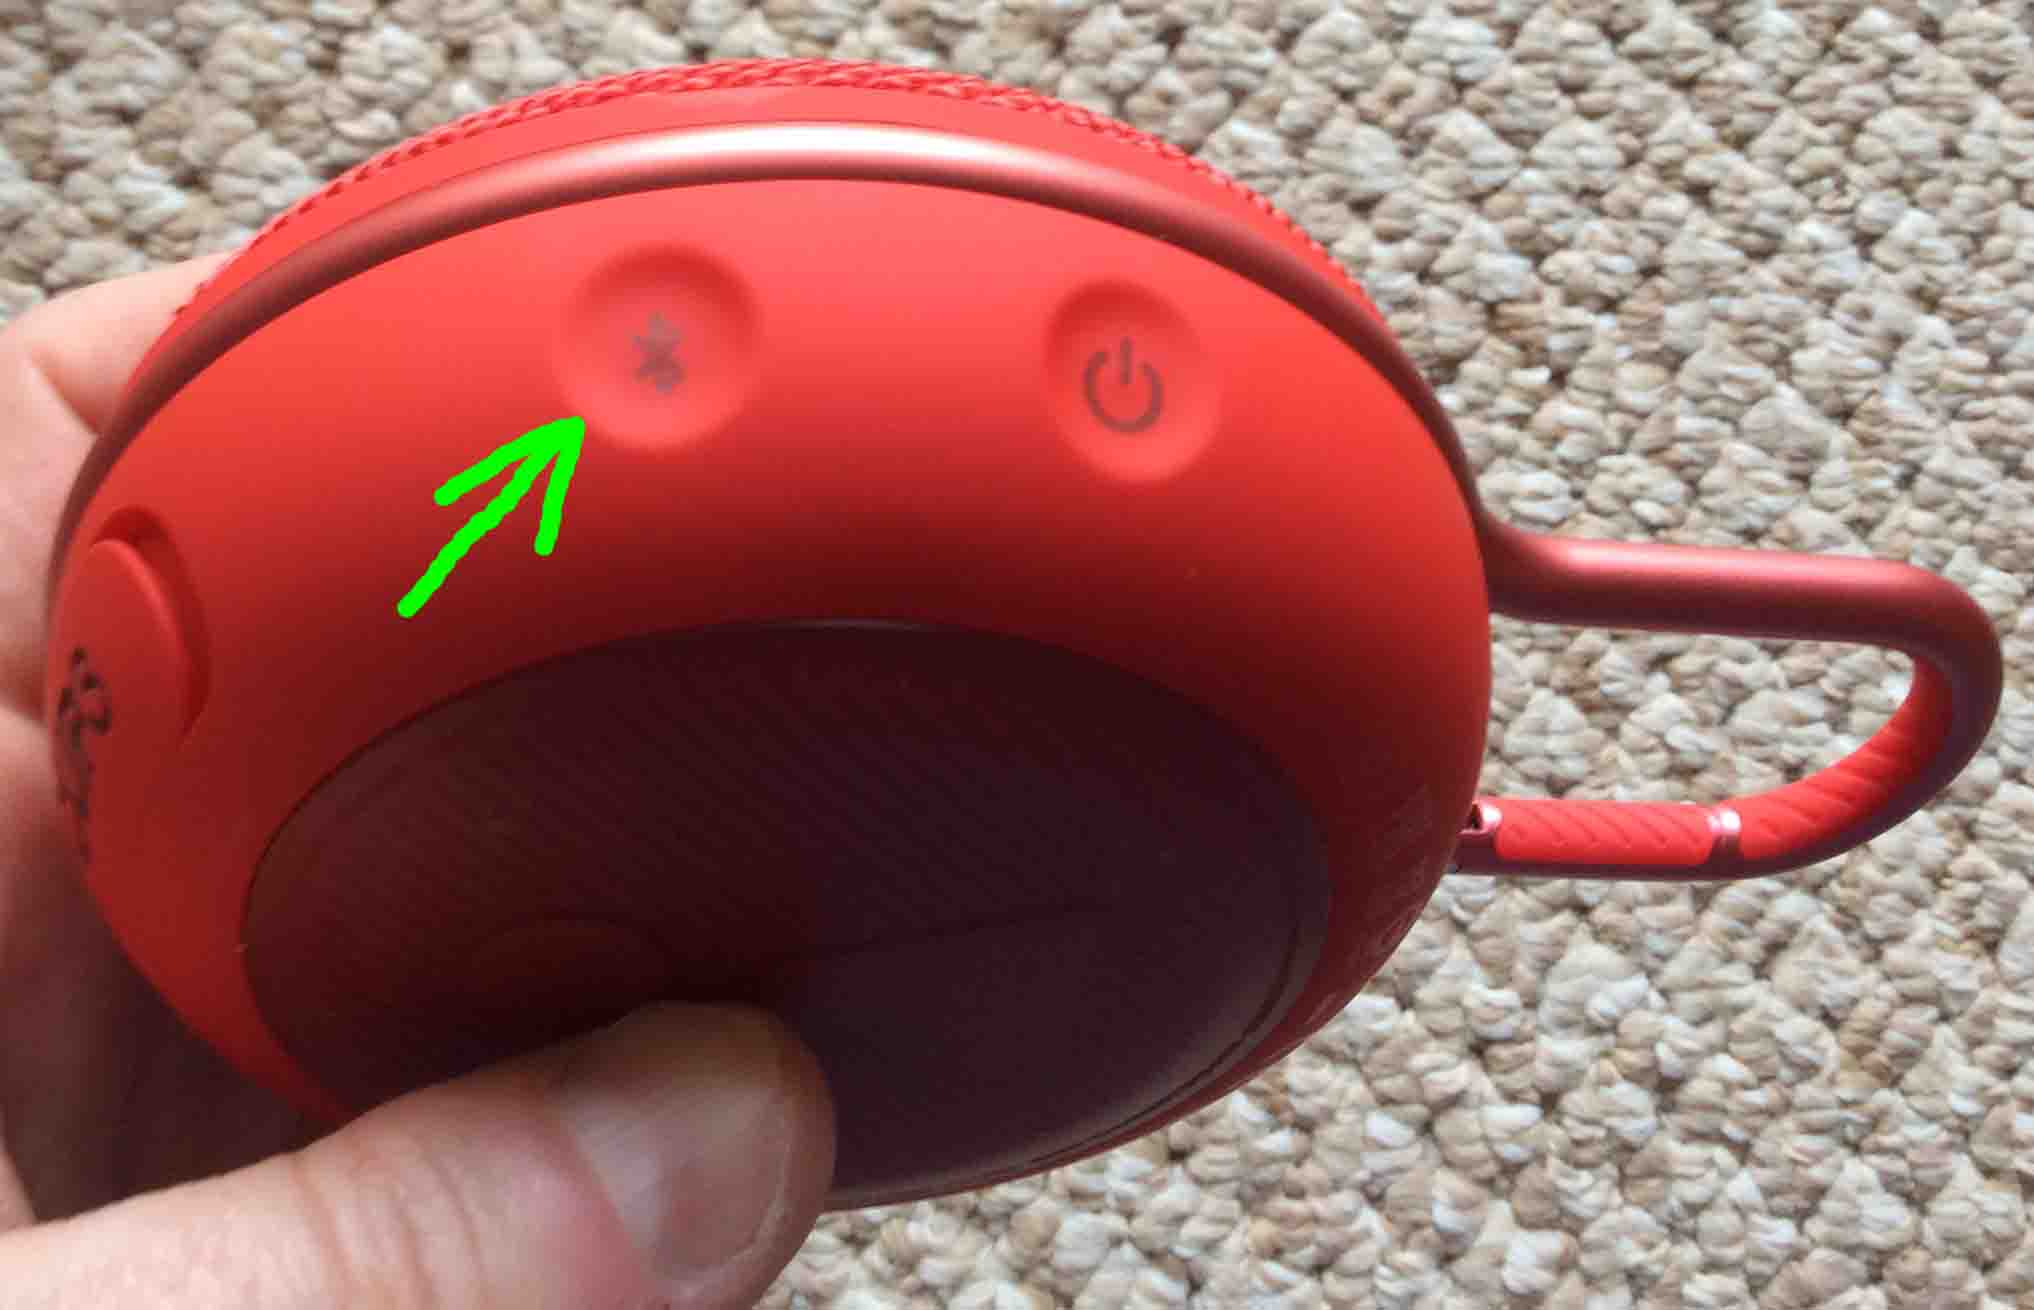
When you press the Bluetooth Discovery Mode button, the speaker makes a repeating single pluck guitar note sound several times. Also, the status lamp changes from a slow flashing white glow to rapid flashing white.

9. Go Back to your Mobile Device to Continue with Pairing JBL Clip 3 with Echo Dot
Next, the screen with the blue Pair a New Device button should still be showing.
10. Tap the Pair a New Device Button
Then this starts your Echo Dot scanning for any nearby Bluetooth devices that are themselves in Bluetooth discovery mode. In fact, your Clip 3 is now in Bluetooth discovery mode. So your Dot should now find it.
Thus after a short pause, you should see something like the screen we got here.
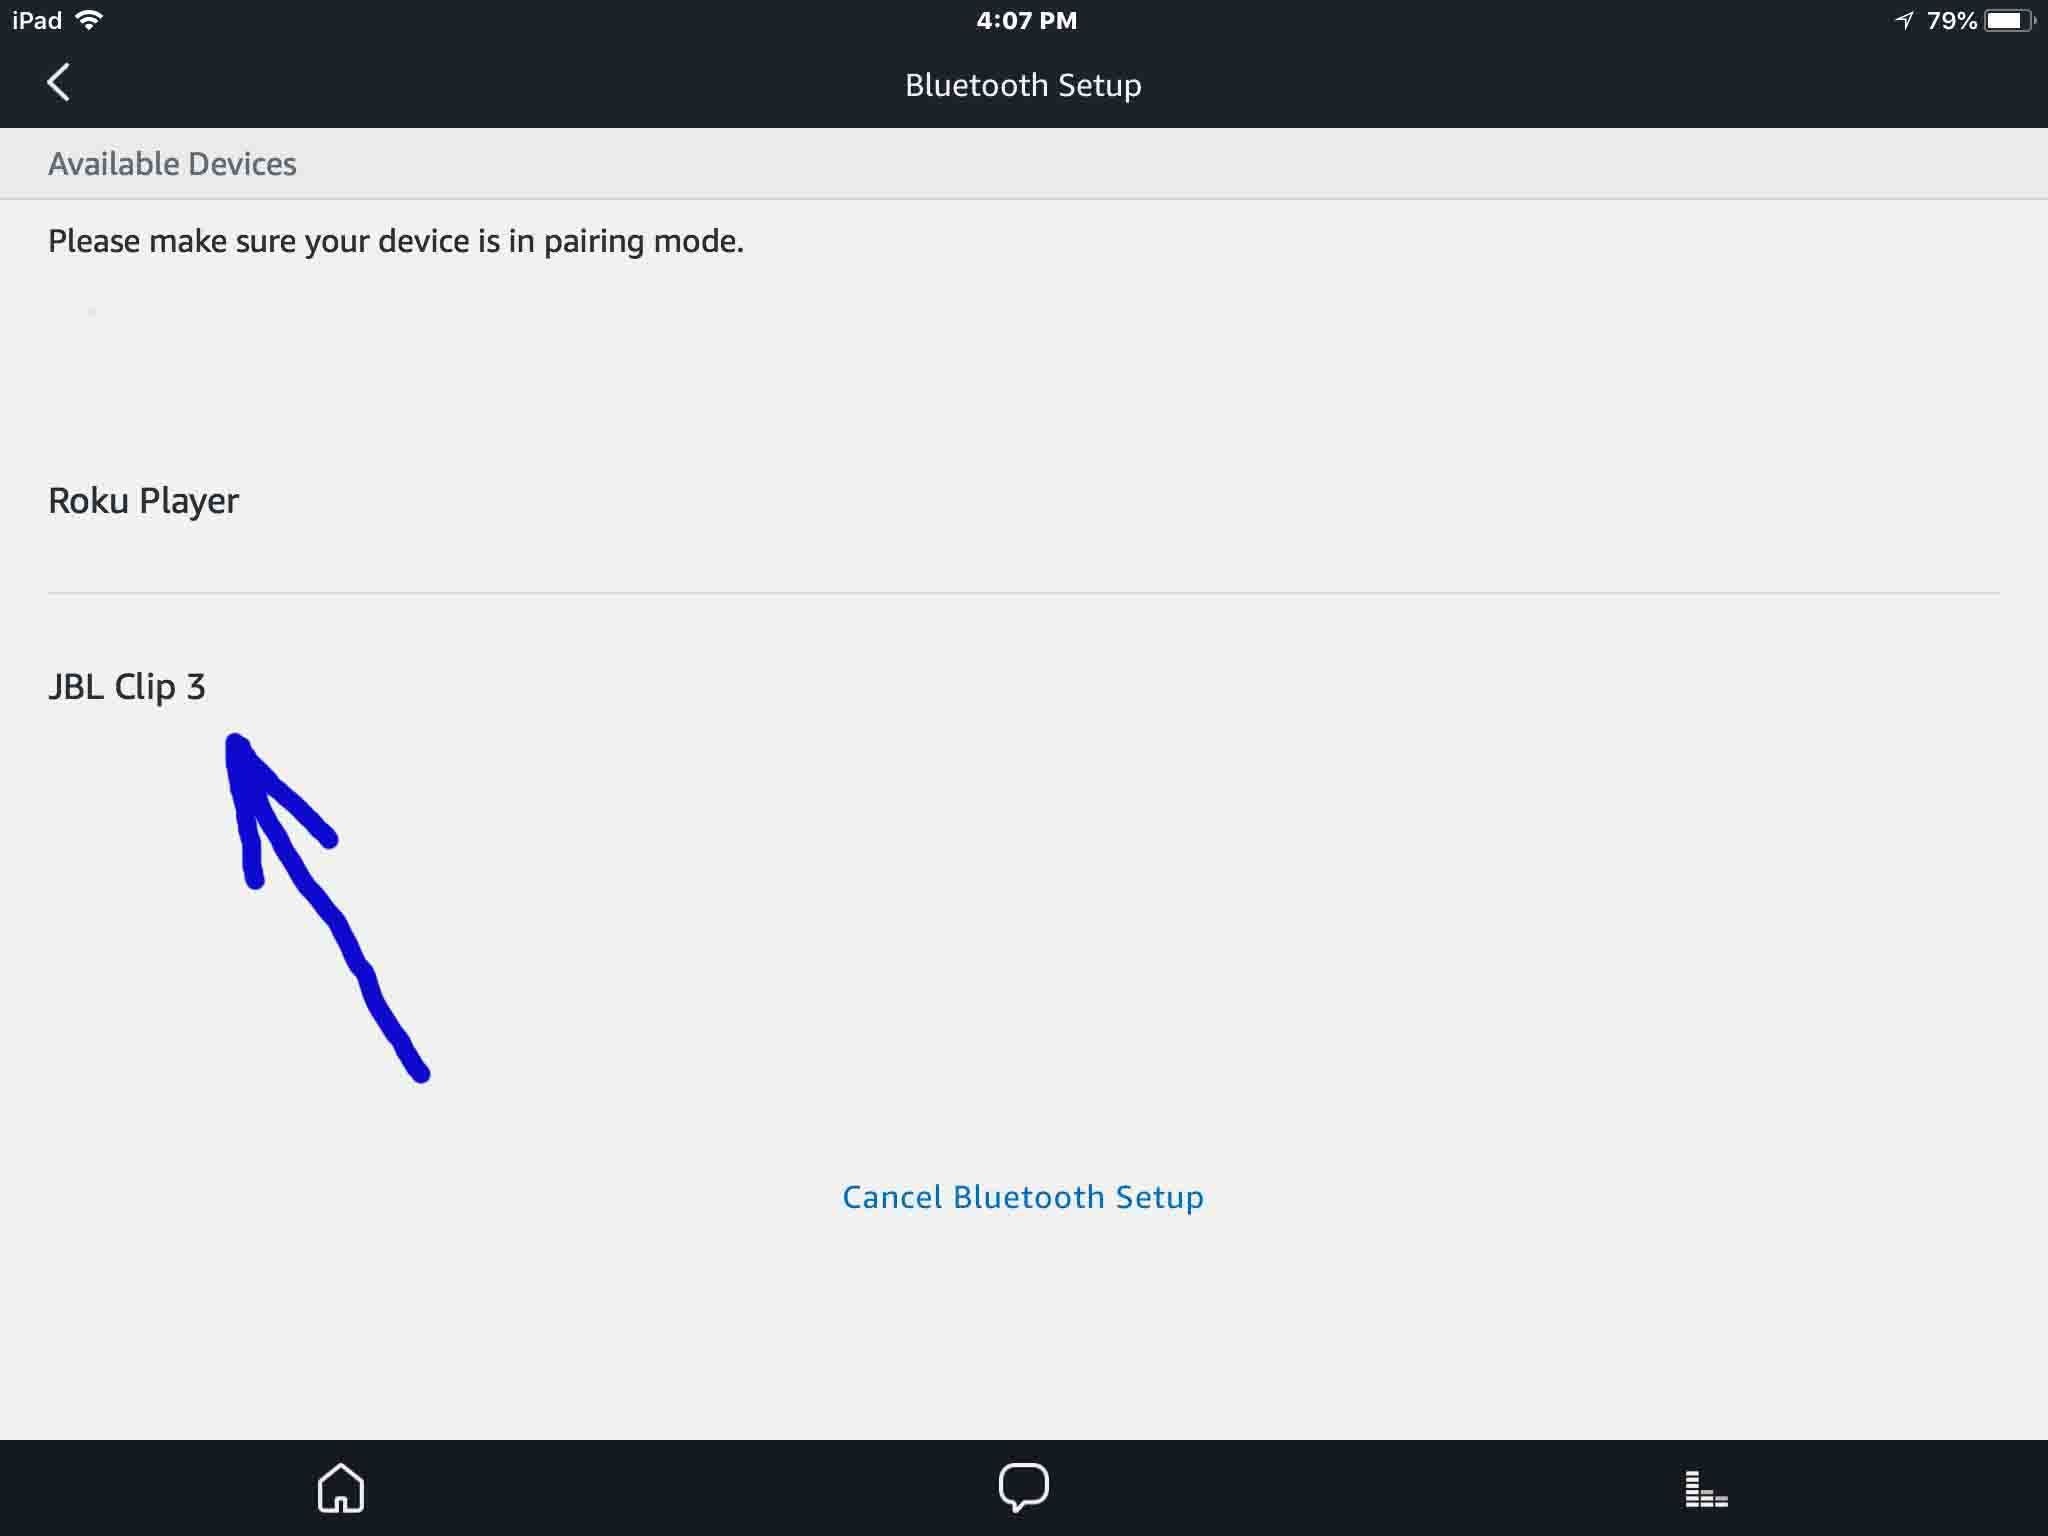
In our demo, the Alexa app found our JBL Clip 3 speaker, named JBL Clip 3.
11. Find your JBL Clip 3 on the Discovered Devices List
Our scan found two devices. It found the JBL Clip 3 as well as our Roku player. So, we located our Clip 3 speaker in the list.
12. Finally, Pair your Echo Dot with your JBL Clip 3
Then pair to the JBL Clip 3 by tapping it on the Bluetooth Setup screen.
The Echo Dot then pairs with the Clip 3. Then the Alexa App’s Bluetooth Settings screen changes as follows.
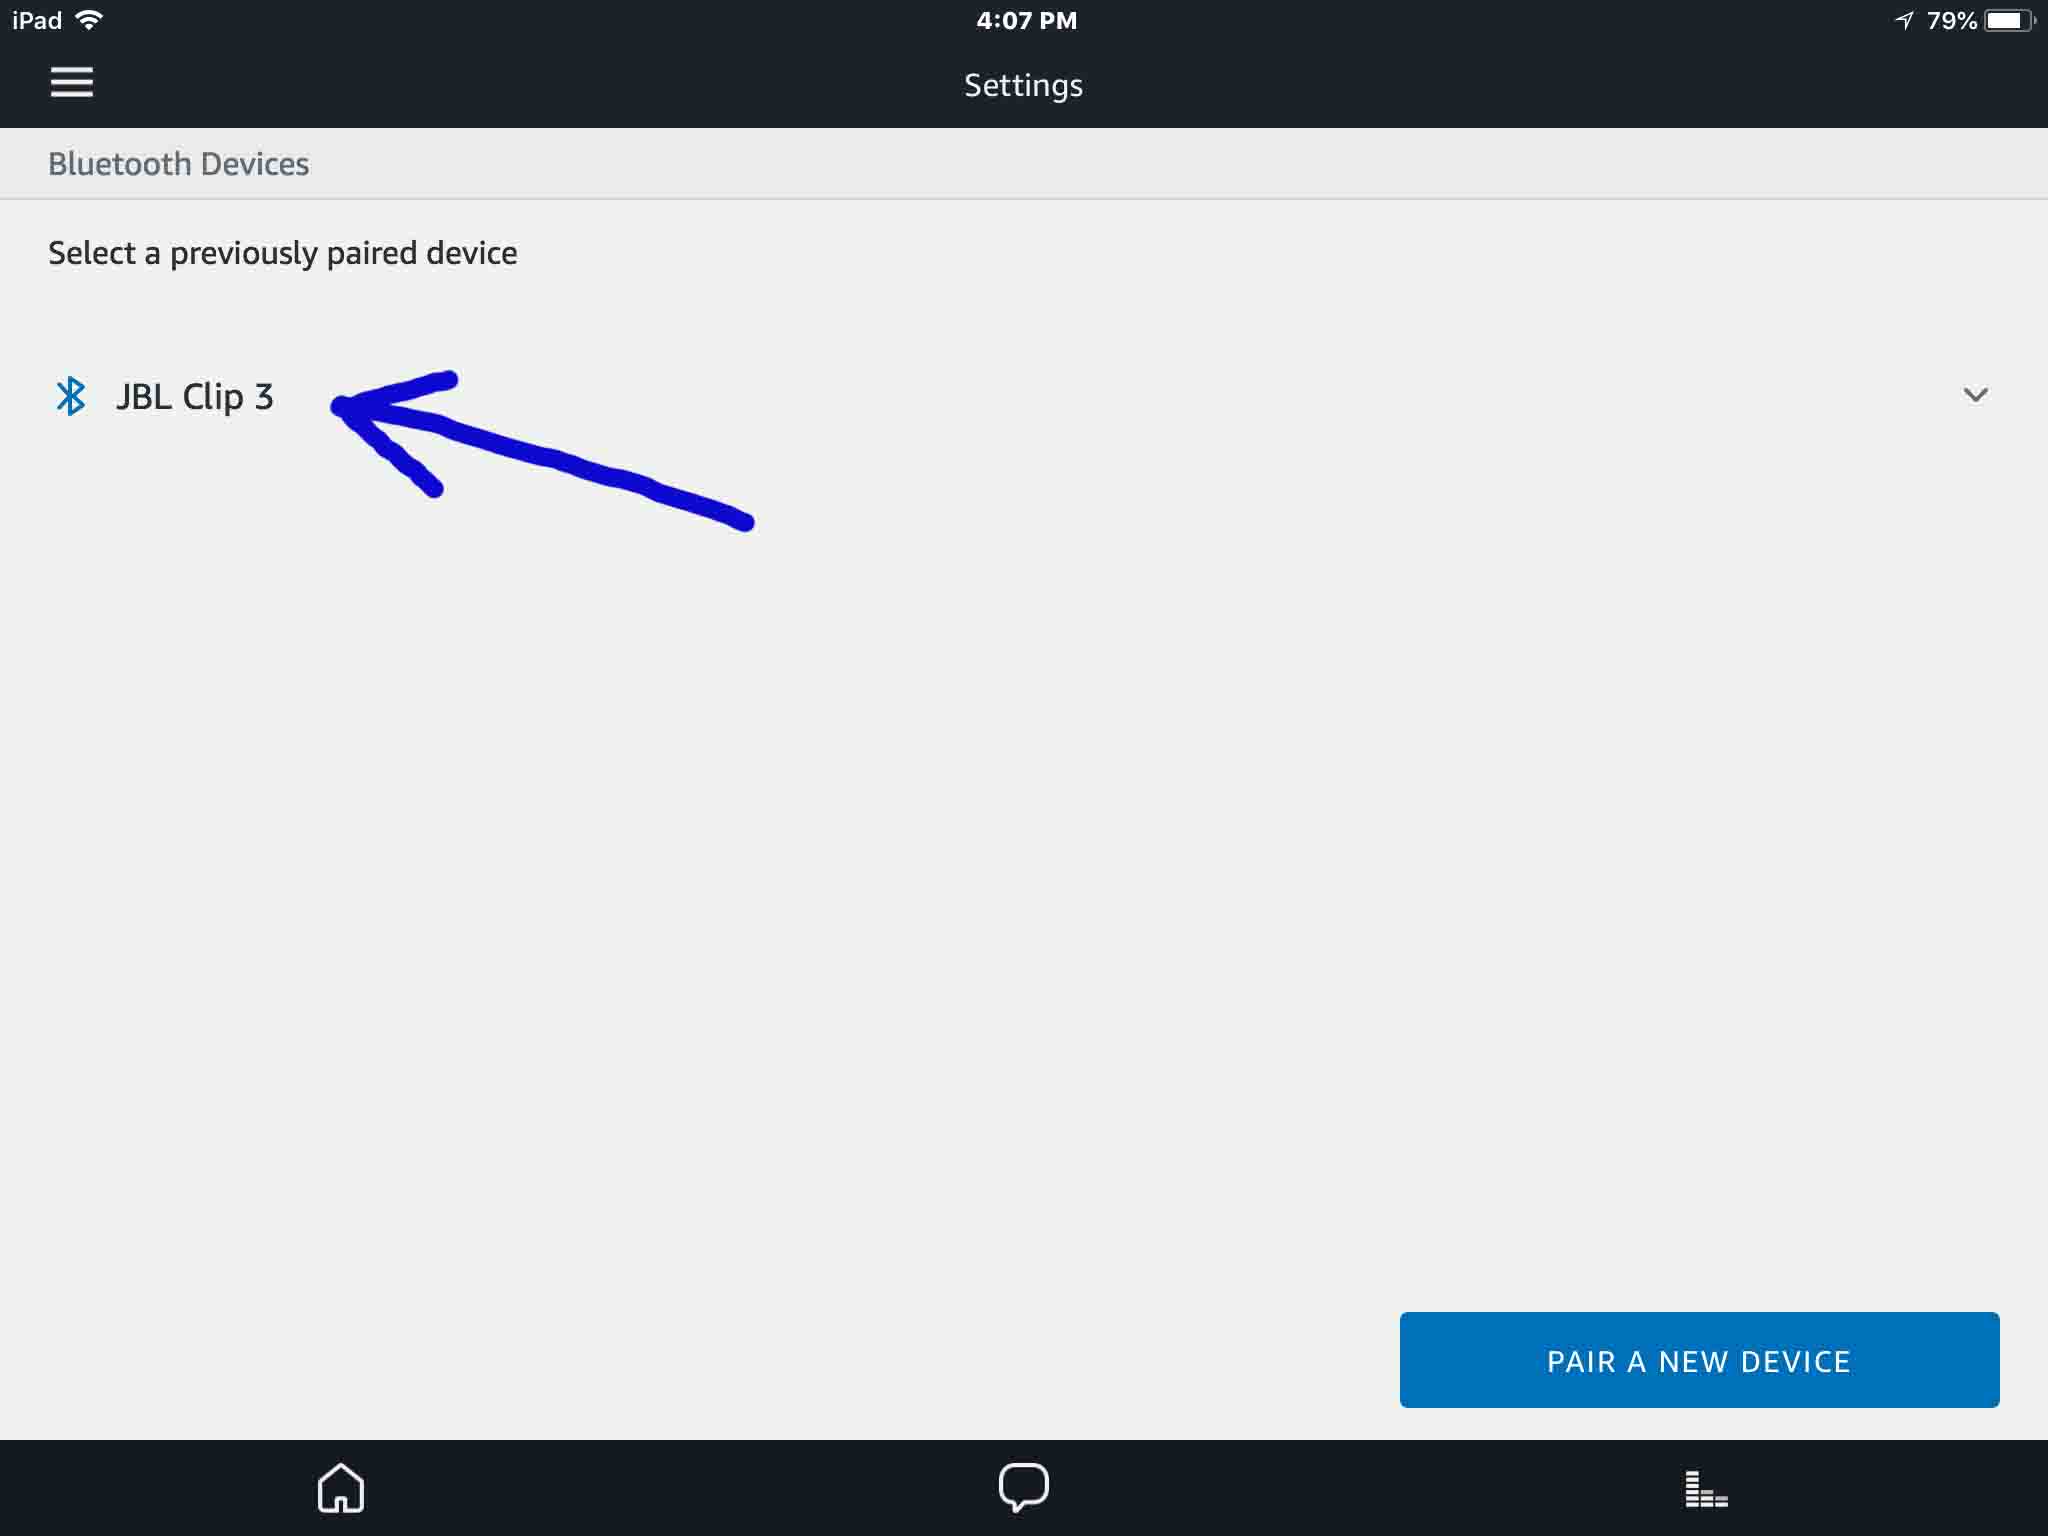
Also, the JBL Clip 3 makes the Speaker Paired sound (the three ascending guitar notes). Note that the Bluetooth symbol to the left of the listed speaker item turns blue in the last screenshot.
The speaker now has pairing with your Echo Dot. So its status light glows solid white. This means that pairing is in effect thus.
13. Done Pairing JBL Clip 3 with Echo Dot !
Finally we have now paired our JBL Clip 3 with our Echo Dot. Thus we can now ask Alexa to play music on this Dot. Then those tunes will play on the Clip. Just be sure to speak to the Dot though when issuing commands and not the Clip 3. Why? Because the Dot is still the device that receives voice commands through its far field mics. But not the JBL Clip 3.