
Not difficult packaging for the Google Home voice activated speaker. Here we show how simple unboxing the Google Home is. We also show how to power up, and get it ready for setup.
What’s On the Box
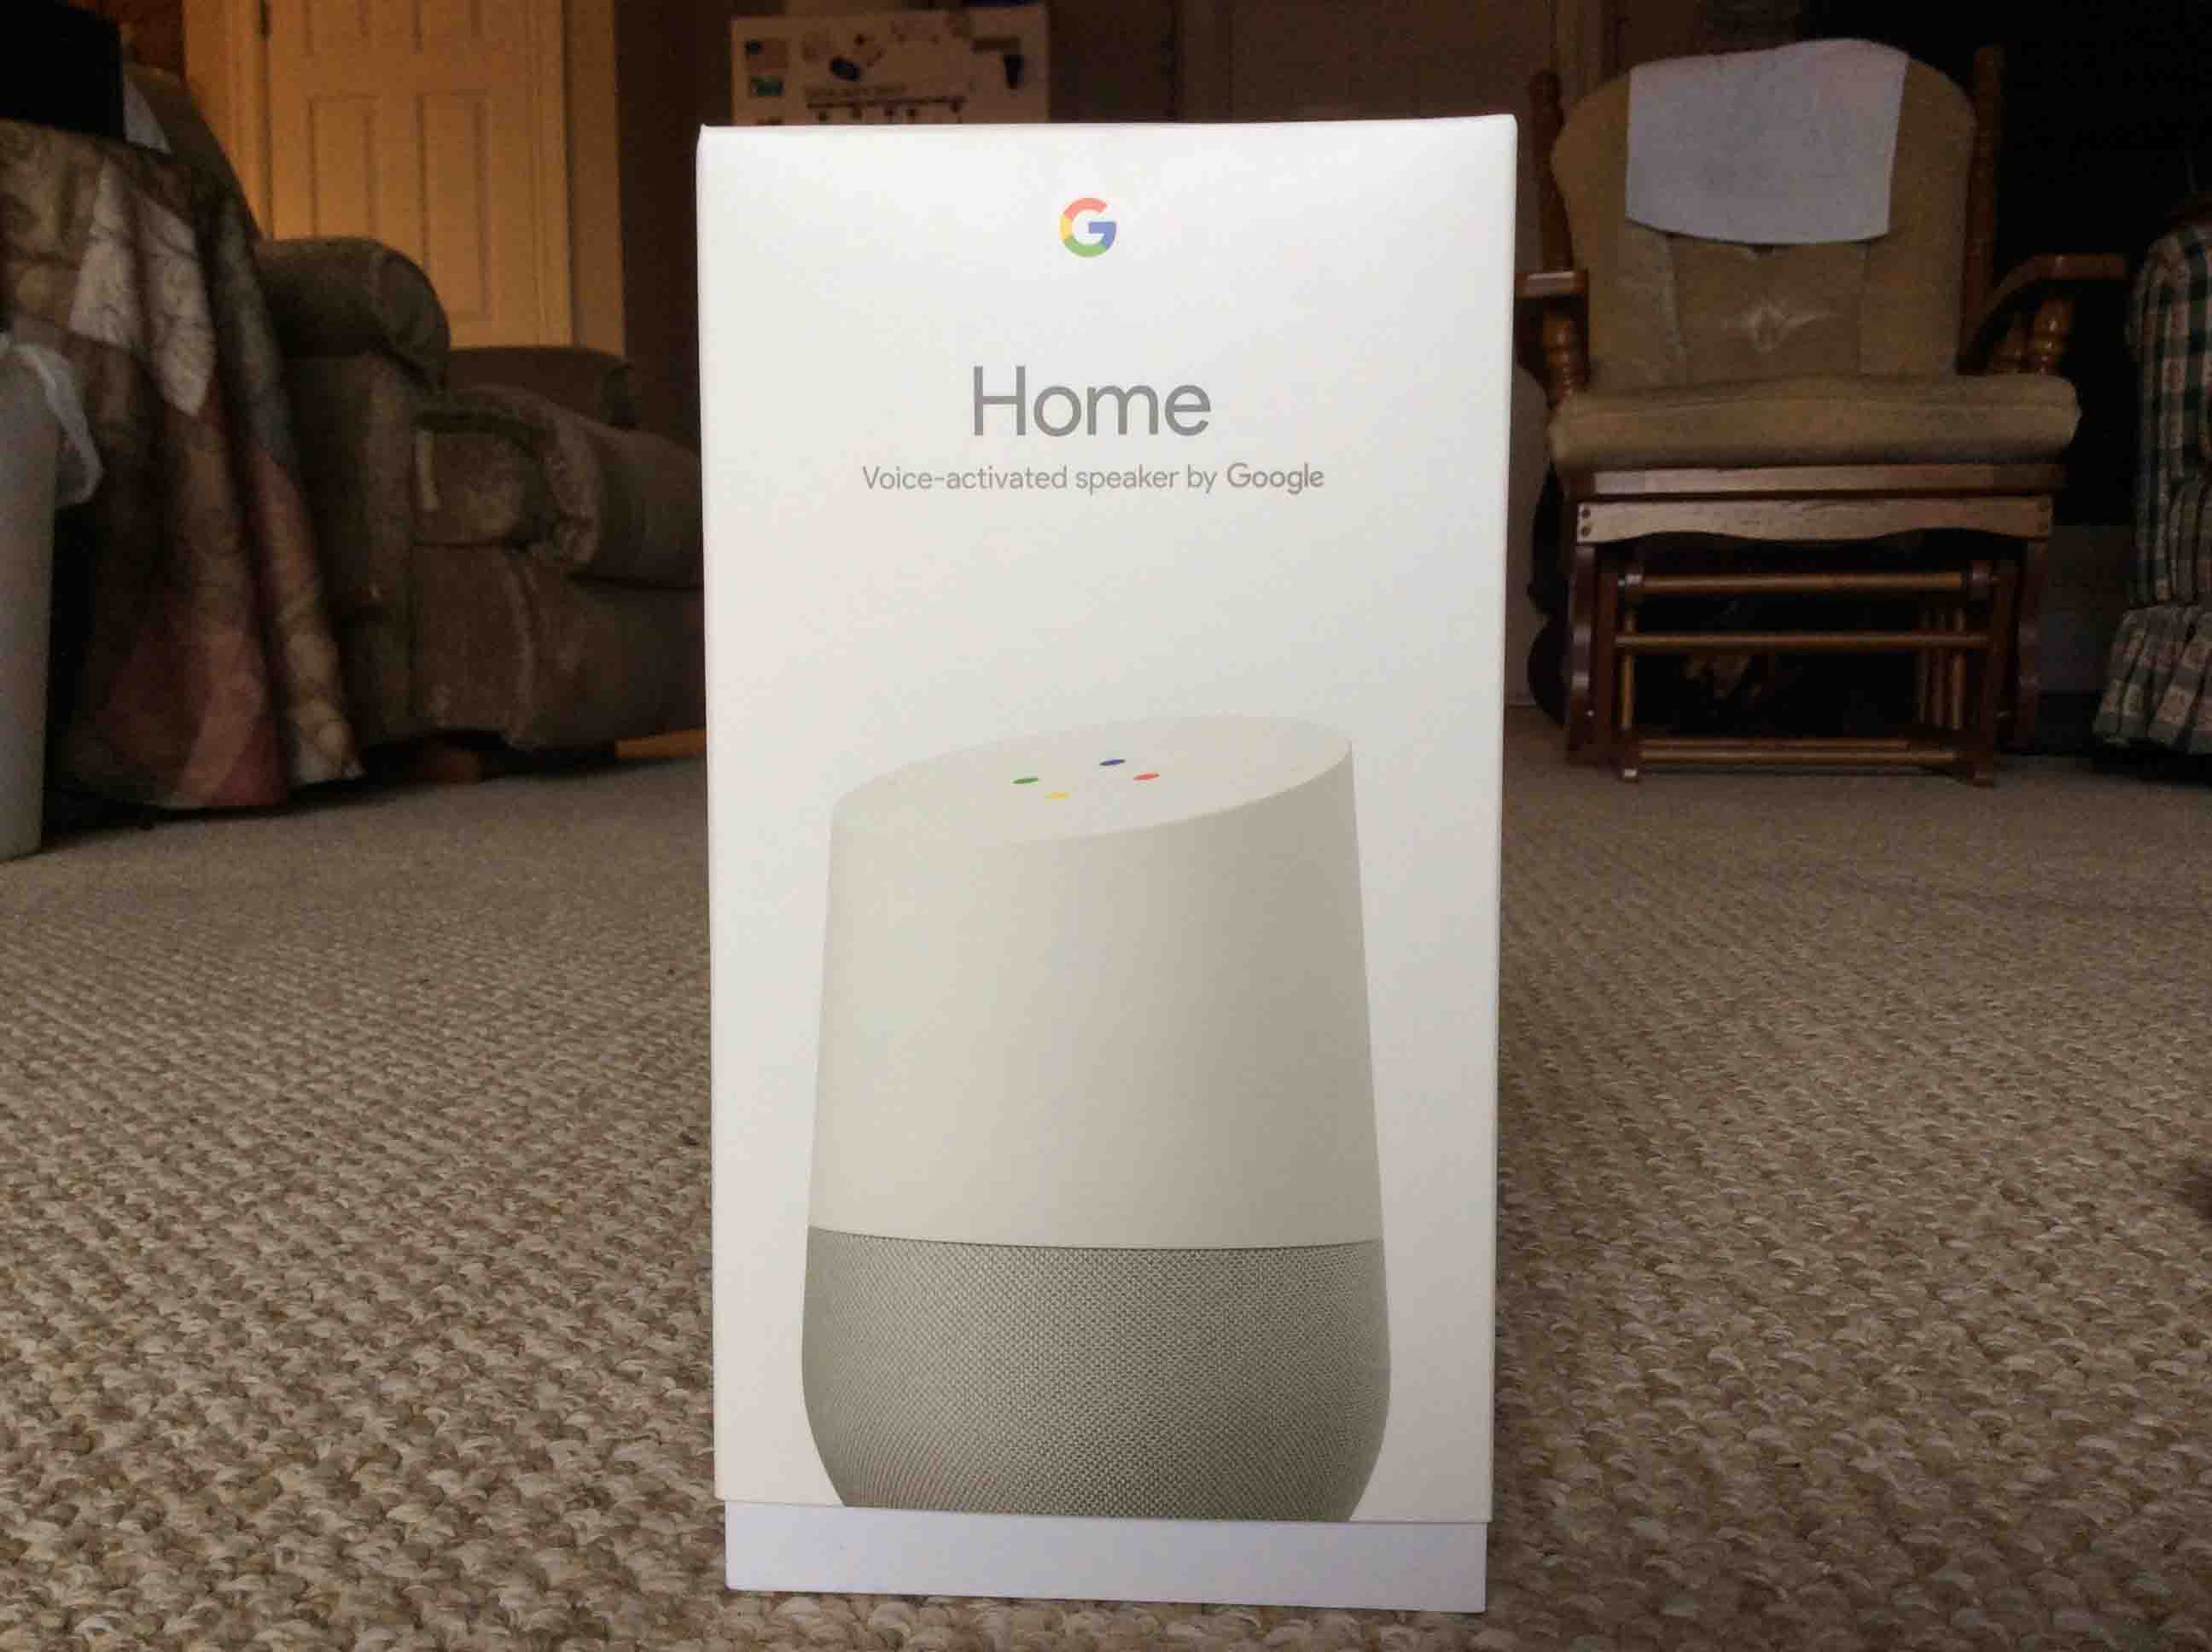
Firstly, for our vision impaired and blind readers, the Google Home smart speaker comes in a solid, heavy box that slides apart into two pieces, with a picture of the unit on the front, as pictured next. Moreover, the front and sides are white in color, while the back has a medium gray hue.
Now once you remove the tape that secures the top and bottom of the box together, you can slide the top piece away from the bottom. This grants access to the speaker, power adapter, and user guide pamphlets inside.
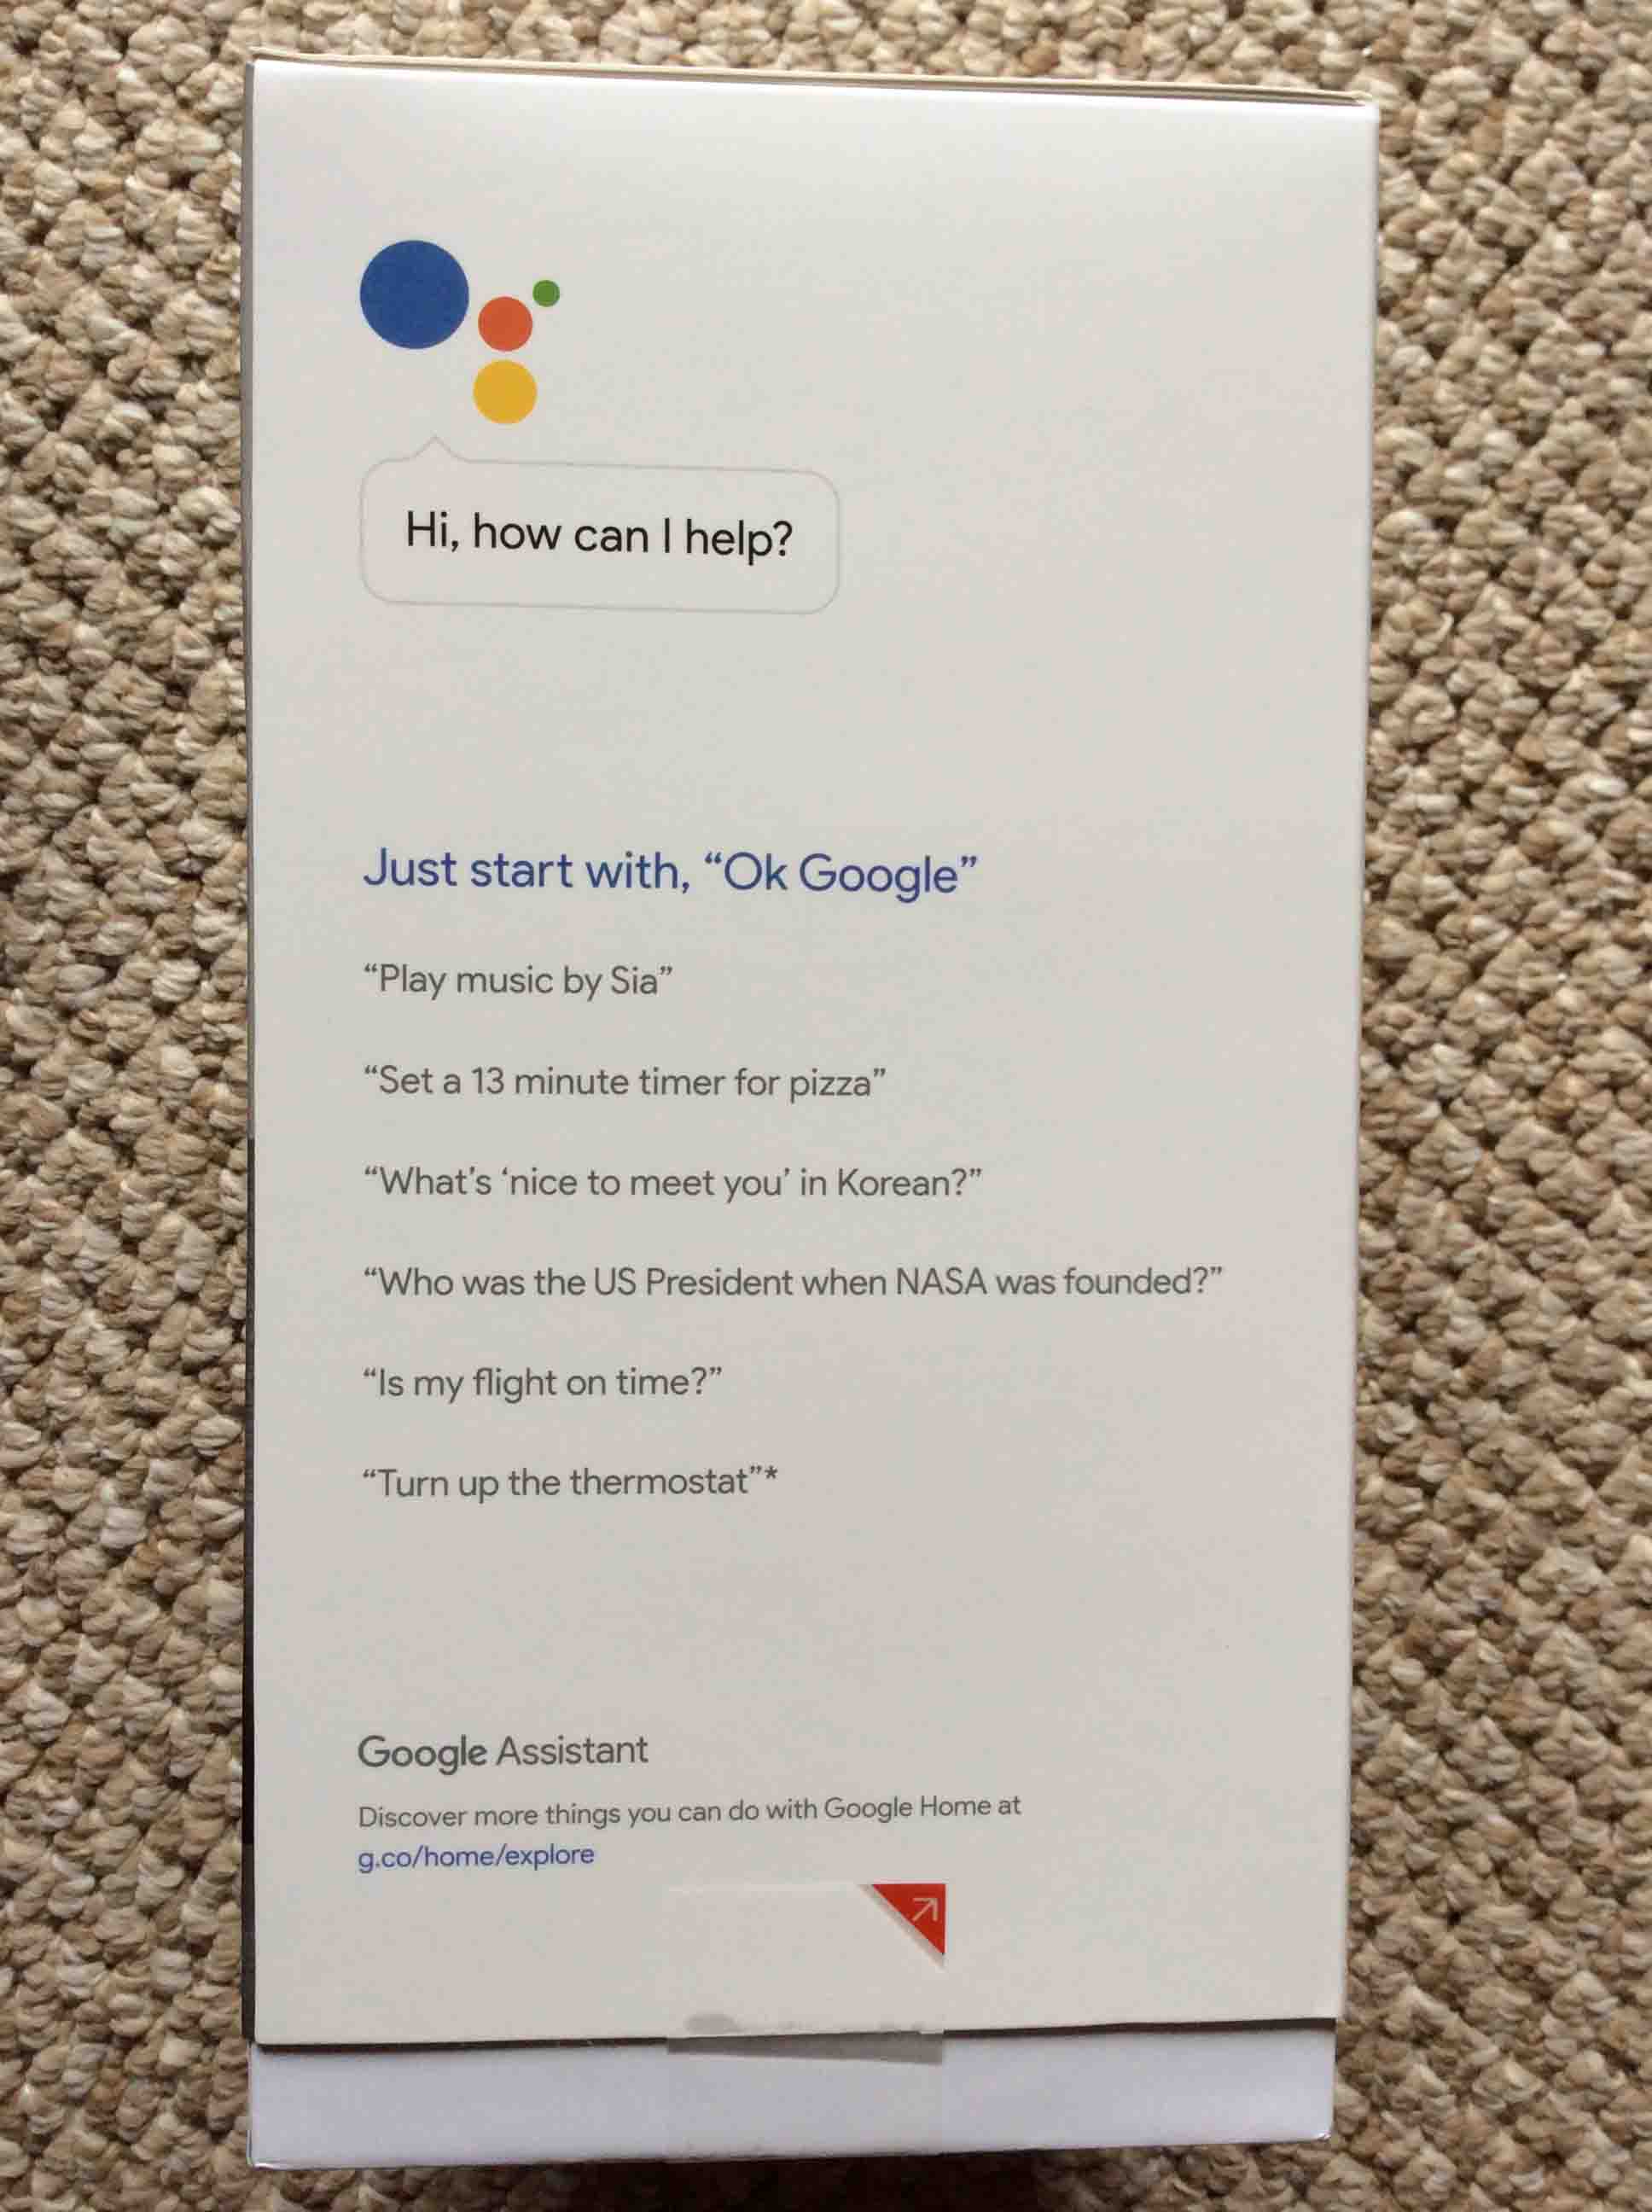
Sample Google Home Commands
Plus, on the left side of the box, there’s a list of seven example questions and commands that you can ask the Google Home Assistant once you’ve set it up, E.g. These include: “Okay Google, play music by Sia,” “Hey Google, set a 13 minute timer for pizza,” “Hey Google, who was the US President when NASA was founded?” and “Okay Google, is my flight on time?” See the next picture for more questions.
Partial List of Features and Services
Next, on the right side of the original packaging, they’ve listed several of the features, capabilities, and services offered by this Google Home assistant. It includes the following.
-
- Far field voice recognition for hands free use and accurate understanding of what you ask.
- Dual band Wi-Fi is supported (on both the 2.4 and 5 Ghz. bands).
- Rich, full bass and treble for hi fidelity, monophonic sound.
- Chromecast built in for casting of audio from Chromecast compliant audio applications. Chromecast also allows syncing of multiple Google Home speakers for multi-room playback of the same music.
- This speaker can also play music sources such as YouTube Music, Pandora, Google Play Music, and TuneIn Radio.
The box also details some of the services that the Google Home virtual assistant can control, such as the following.
-
- Google Chromecast.
- Nest thermostats.
- Hue light bulbs.
- SmartThings IoT devices.
See the next picture for more devices and services that you can access via Google Home.

What you can Do with Google Home
Finally, on the back of the box as pictured next, we find a picture of the gray version of the Google Home speaker. It’s sitting on a table, along with a brief layman’s overview of the sorts of tasks and activities this virtual assistant can perform for you. It does things like the following…
-
- DJing a party.
- Finding answers quickly to common (as well as not-so-common questions).
- Turning your home into a smart home.
We suggest that you keep the original packaging after unboxing. Why? Because it shows a valuable overview of Google Home, as documented here.

Unboxing the Original Google Home Speaker, Step by Step
1. Gently Peel Two Pieces of Tape Away from Box Bottom
They’ve marked the right, upper corners of this tape with red arrows, as shown in the pictures of the left and right sides of the box above. We removed this tape, careful not to damage the box. You could slice it with a sharp knife as well. The presence of this tape, intact, indicates that you have a genuine, new, and unopened product.
2. Lift Top of Box (the Cover) Away from Bottom to Continue with Unboxing Google Home
As shown next, once the two pieces of thick tape is taken off, you can lift off the top shell part of the box. As shown next, you then can lift open the hatch of the inner box, to get at the speaker.
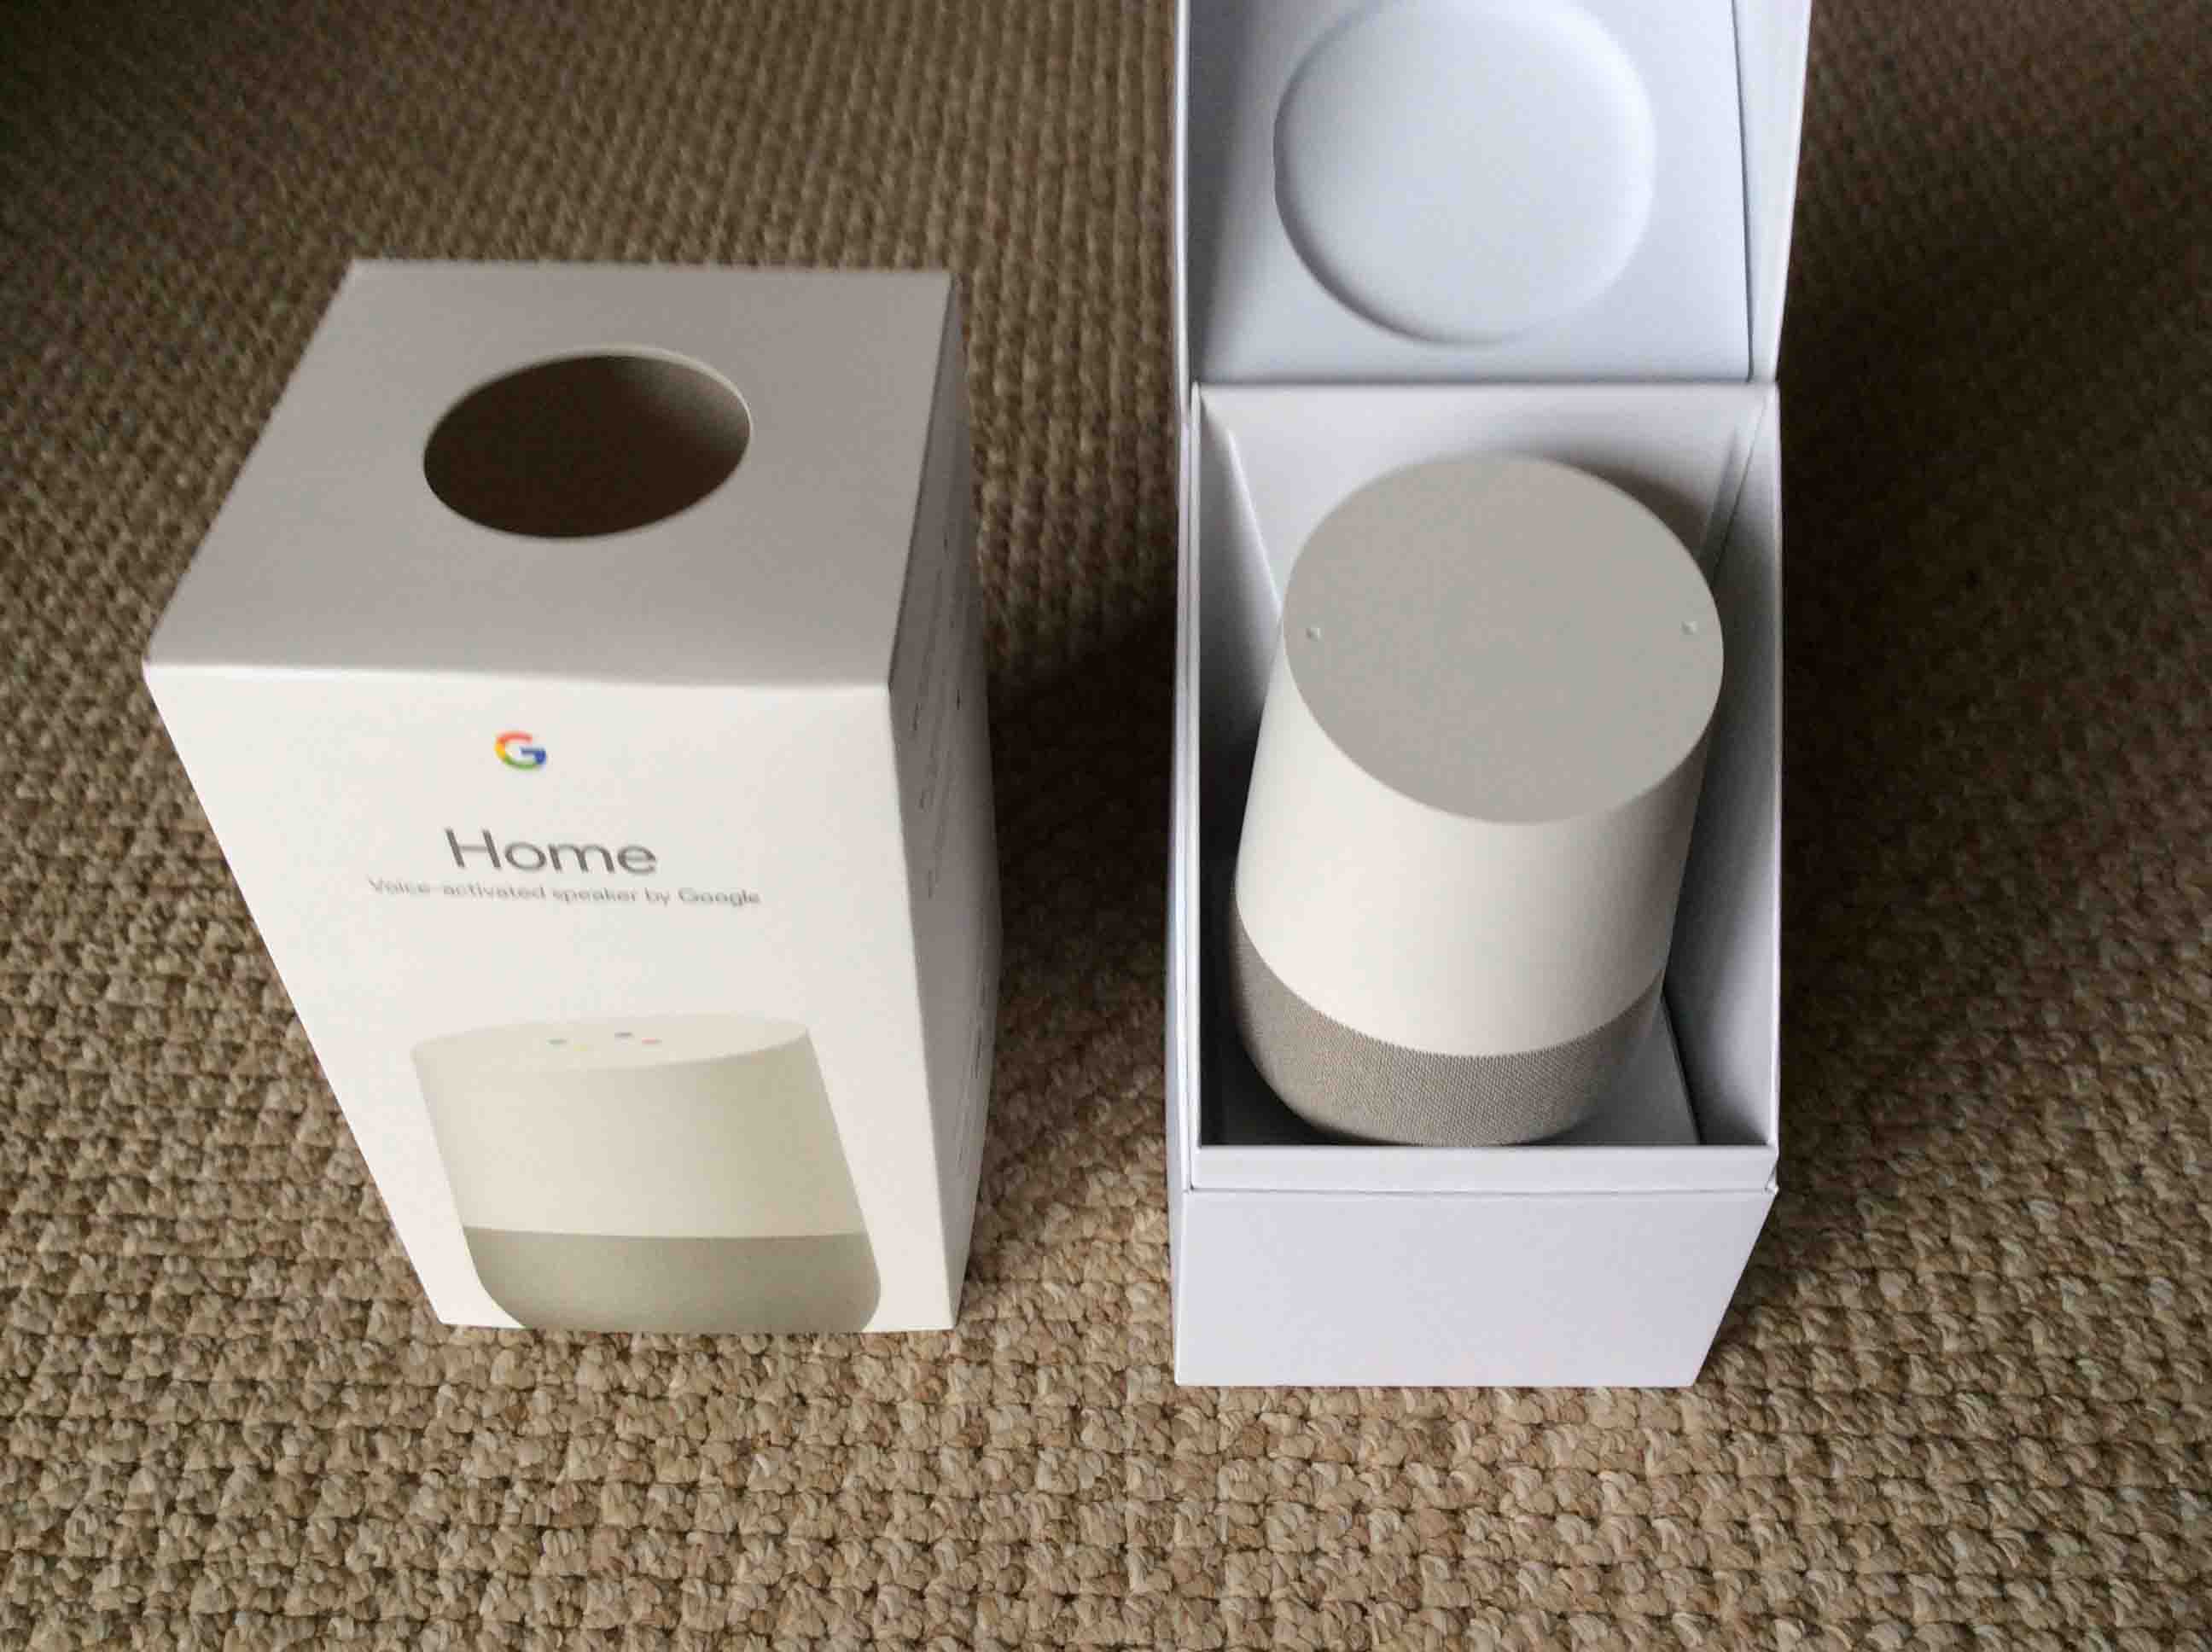
3. Remove Box Contents
Then, we opened the inner box hatch, and removed all the contents, which included the power adapter and cord, the speaker itself, and the user guides, as shown next.
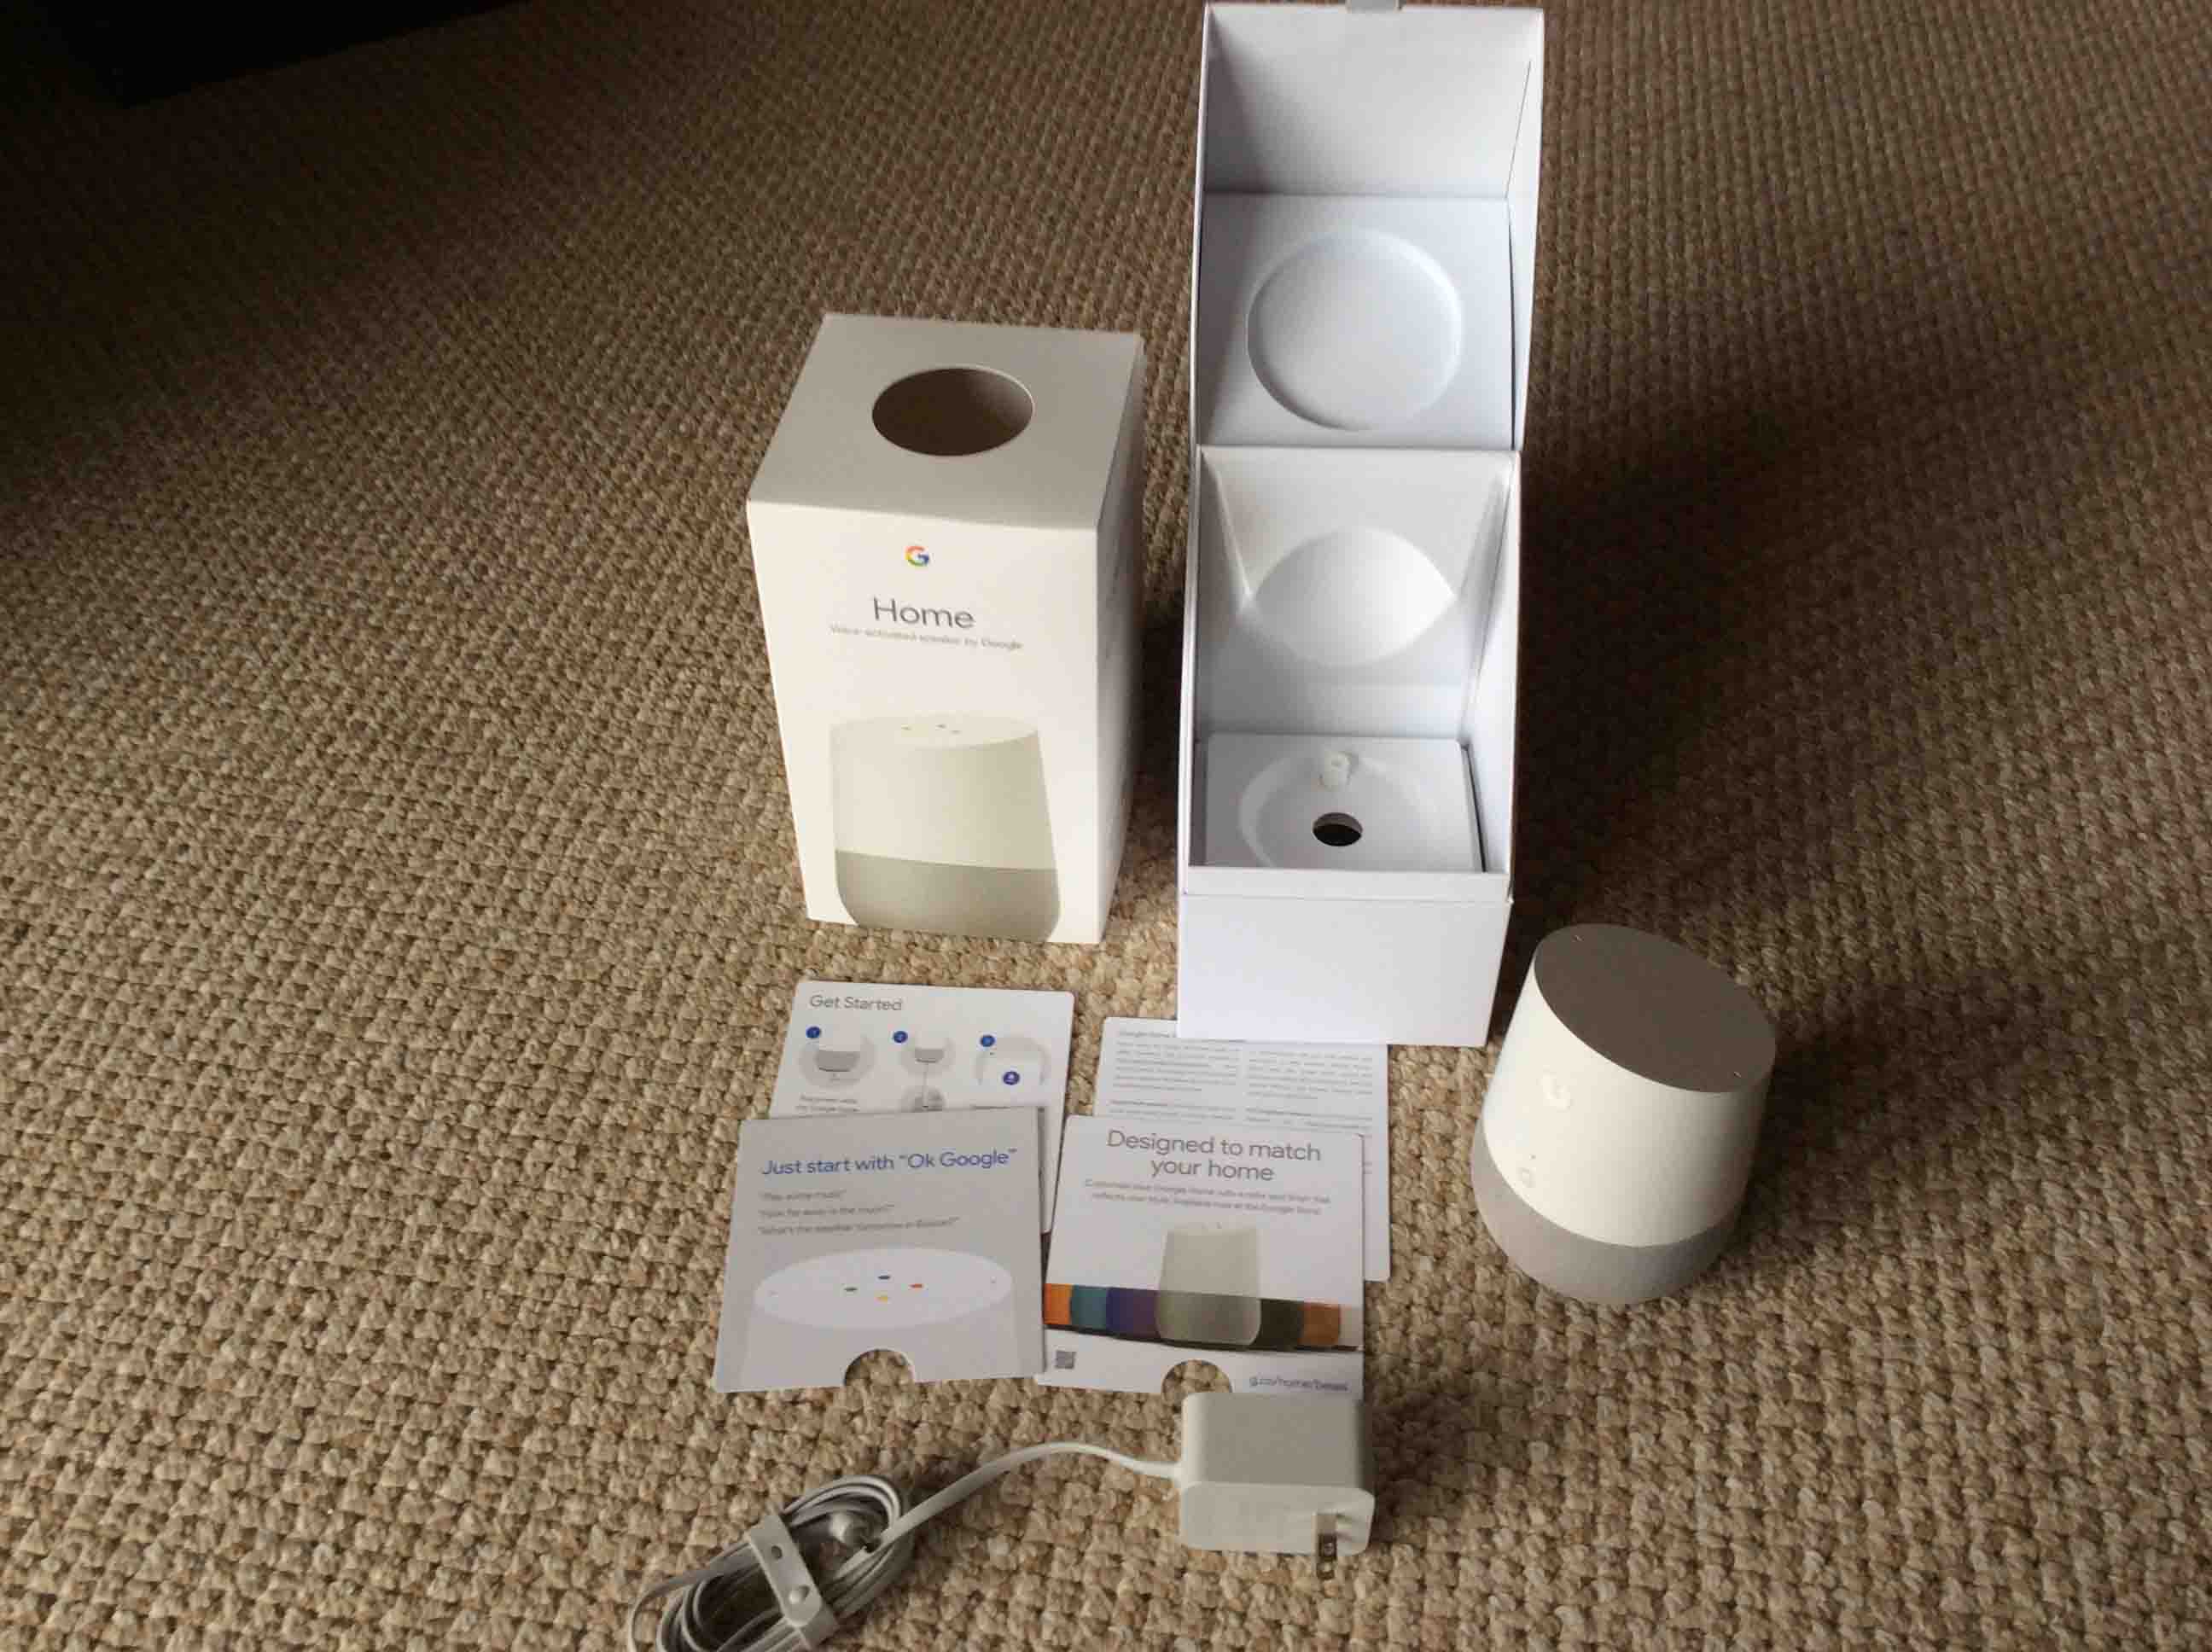
4. Check the Box Contents
As pictured above, you should find all these items in your Google Home speaker box, including the speaker itself, the power pack, and several mini pamphlets (manuals) and quick start cue cards.
5. Connect the Google Home to the AC Power Adapter Included
This amplified speaker operates from 16.5 volts DC, 2 Amps, positive center polarity, and comes with the necessary UL approved “wall wart” switching power supply adapter. Note that this device is not USB powered.
Turn the speaker upside down and locate the power port, as shown in the next picture.
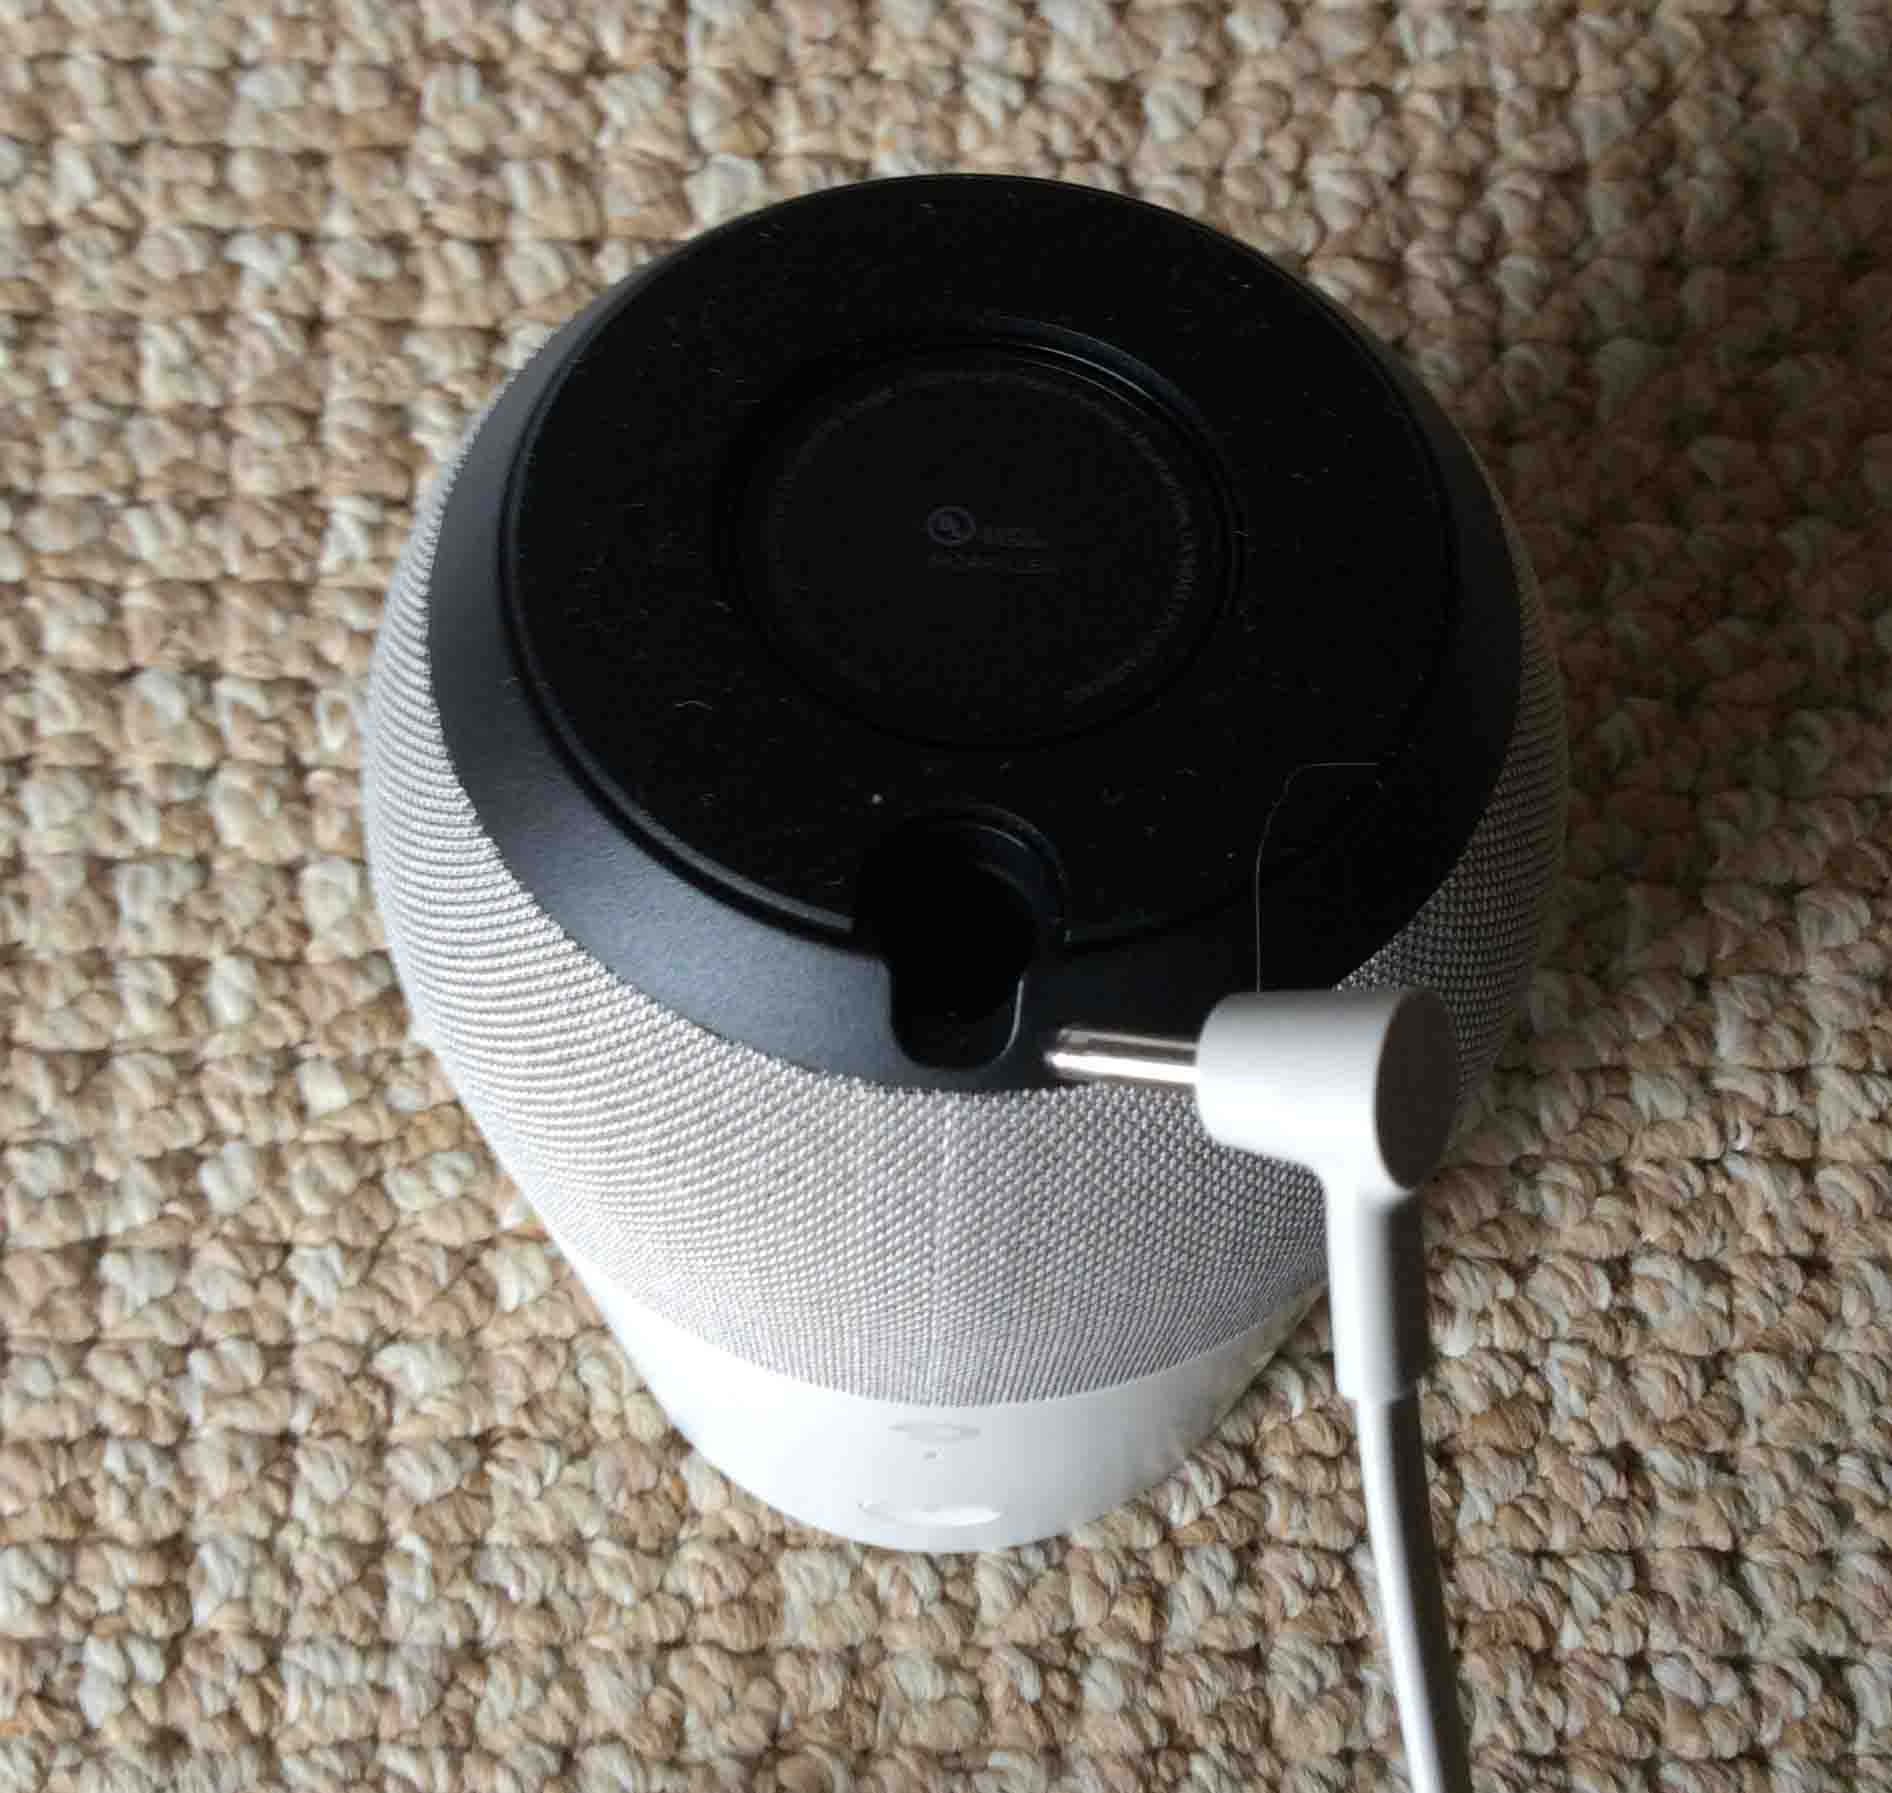
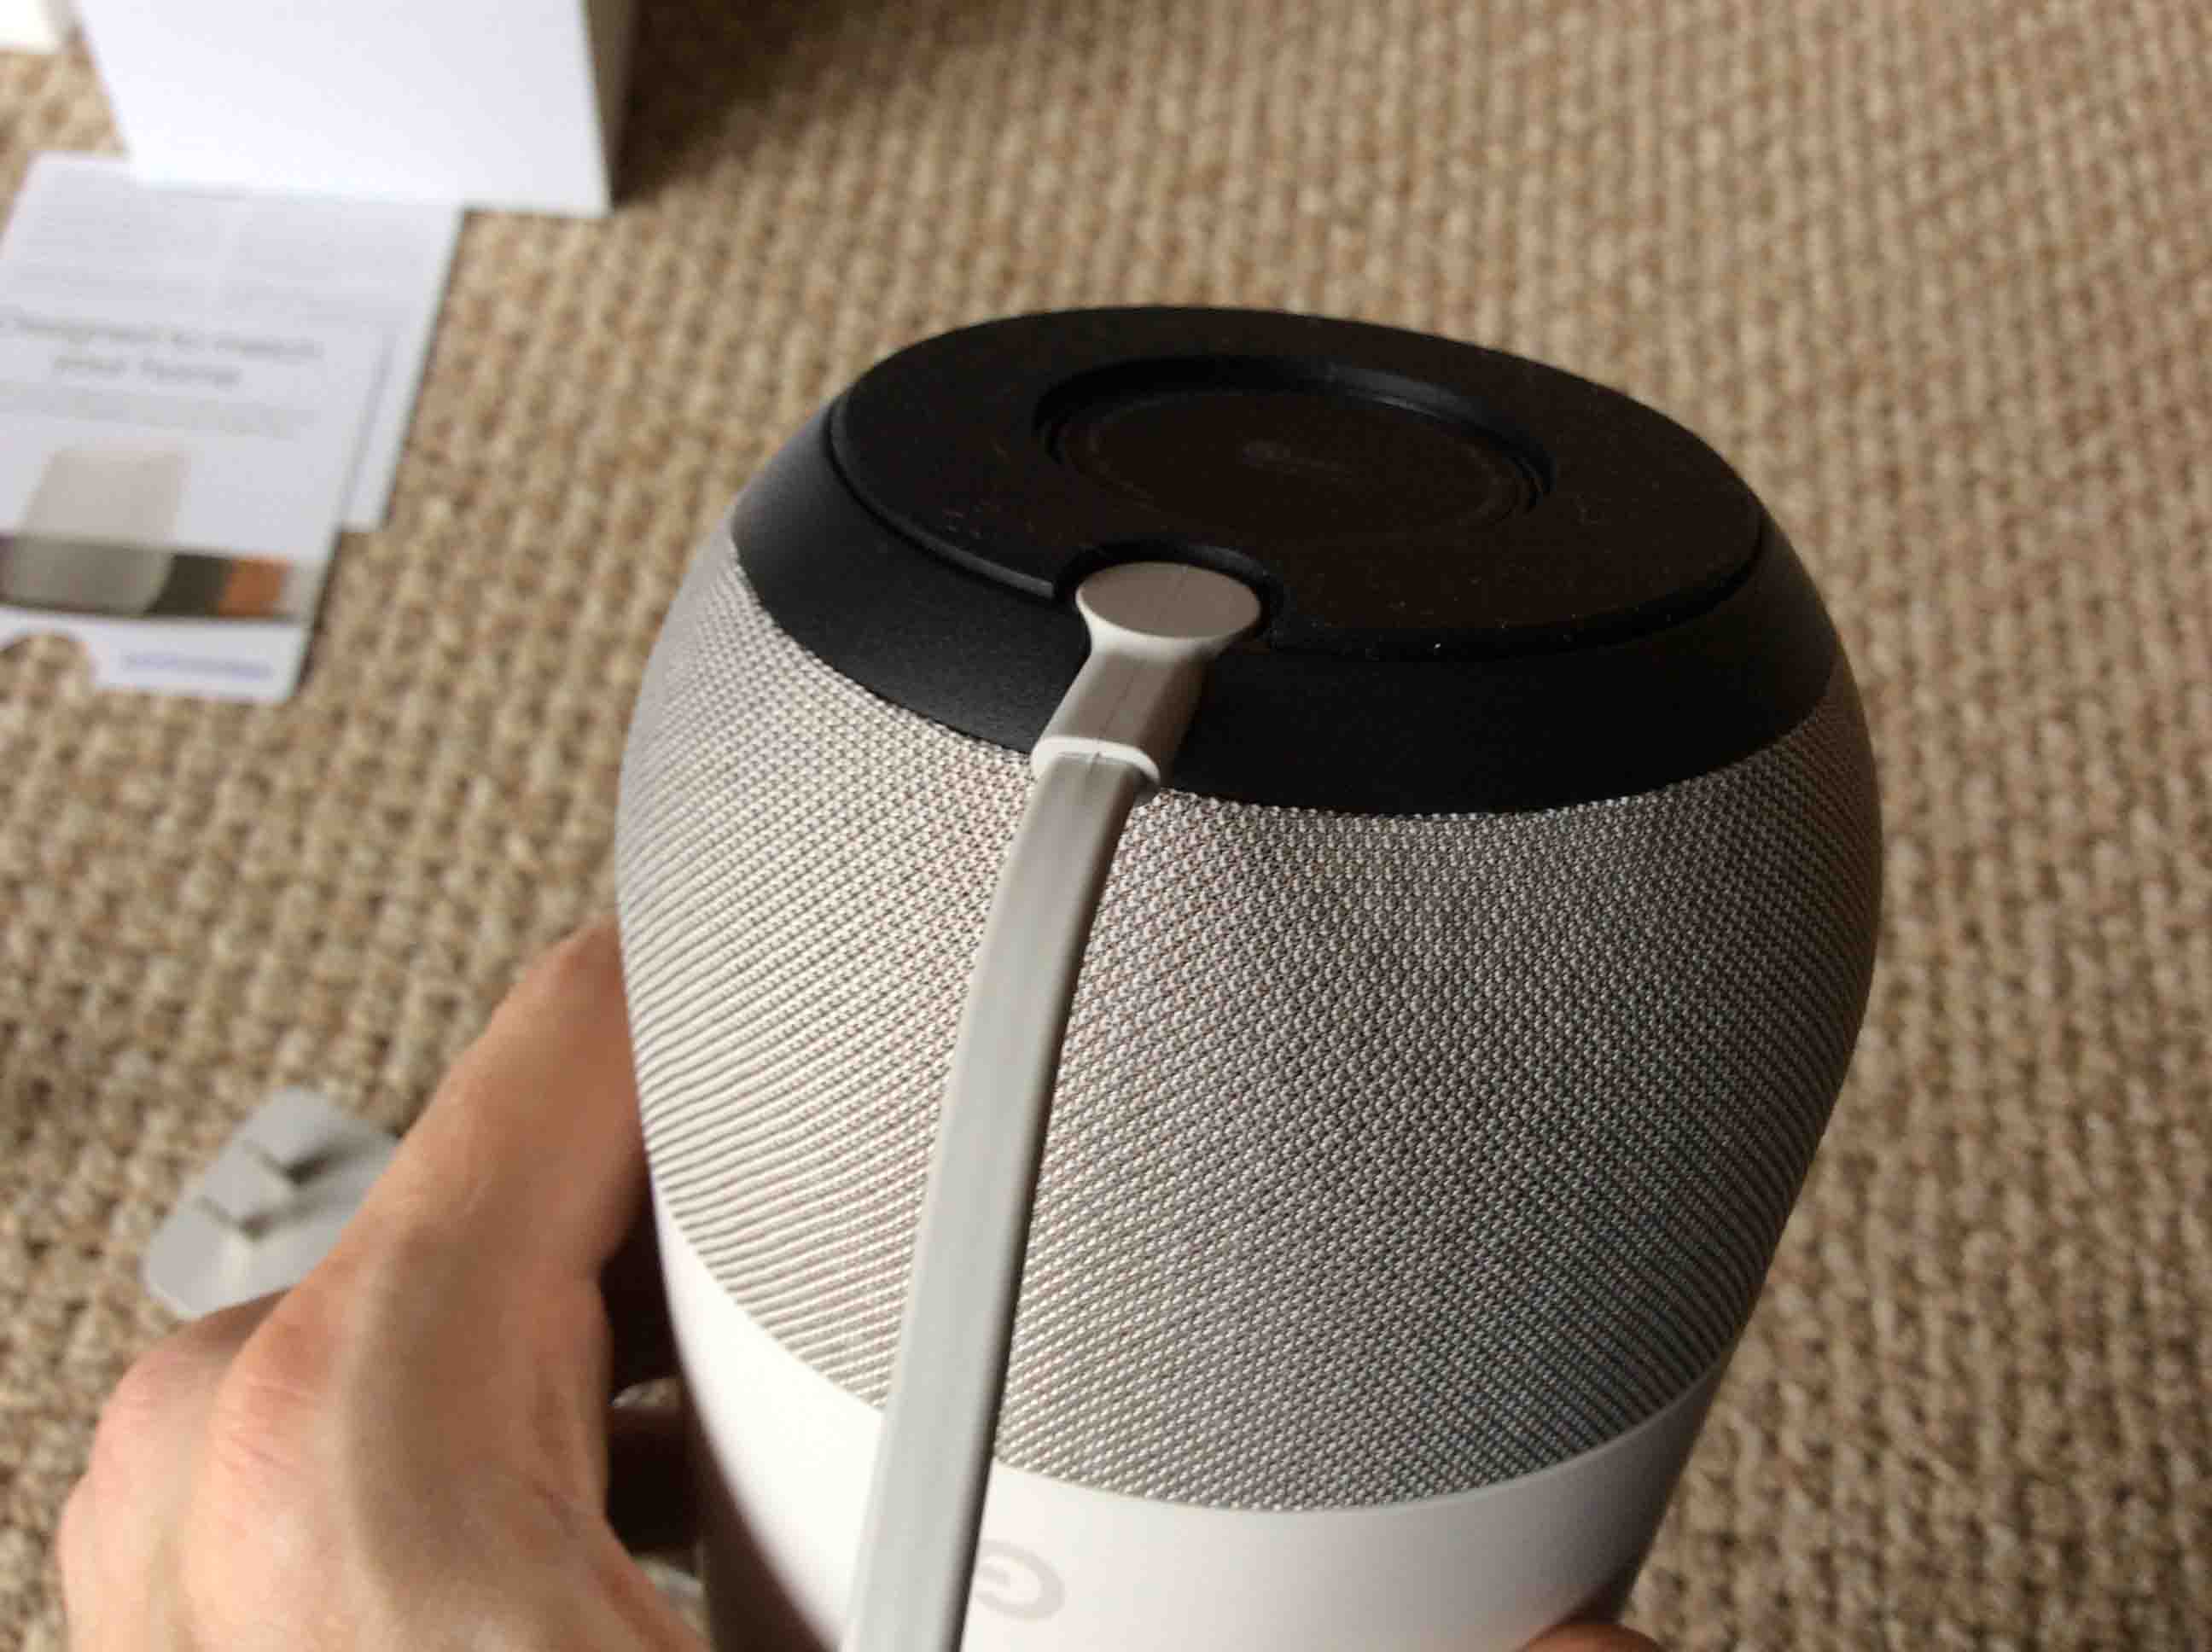
6. Insert the DC Power Connector Into the Speaker
Then, plug the white barrel power plug, as shown in the previous picture, into the power port jack on the speaker. The plug, connected to the speaker, is shown in the next picture.
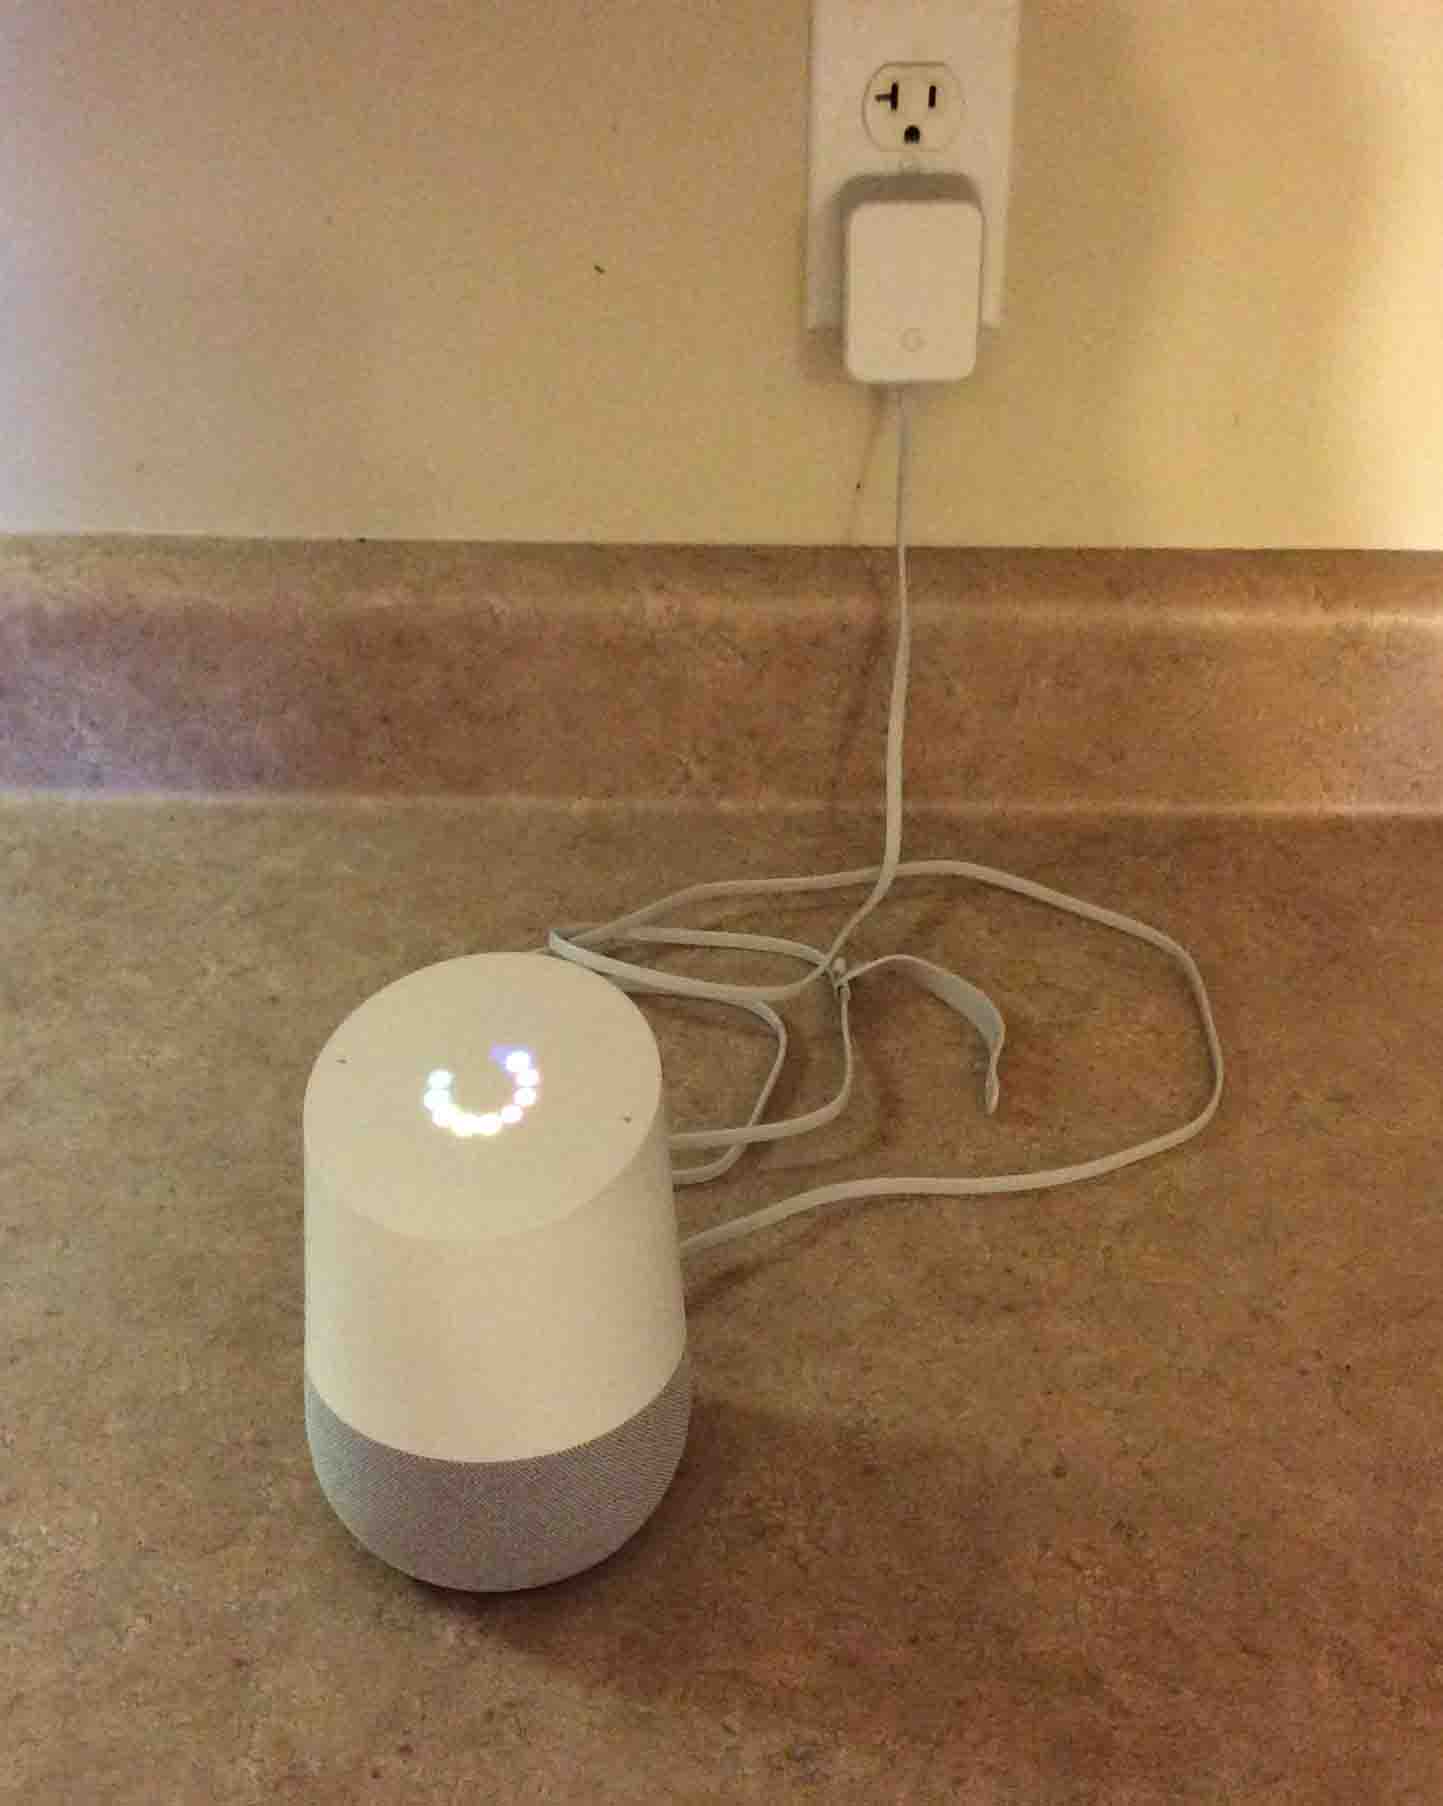
7. Plug the Adapter into Mains Power
Next, plug the adapter into a 120-volt AC outlet, as shown in the next picture. The boot process begins, which takes approximately thirty seconds; all the while, the red, yellow, green, and blue LED lamps on the speaker top touch panel, displaying spinning and blinking patterns, as shown in the next picture.
After booting completes, you’ll be prompted to set up your Google Home smart speaker. We’ll provide instructions for that shortly. Watch this post for future updates.
8. Follow our Setup Instructions
See our Original Google Home Smart Speaker Setup Instructions for help with getting your speaker online and running.
9. Unboxing Google Home is Now Done !
Finally, set up and enjoy your new, now unboxed speaker.
Related Posts to Unboxing Google Home
Other Posts About the Google Home
References for Unboxing Google Home
Revision History
-
- 2021-08-21: Revised the tags and internal links lists.
- 2019-04-02: Added key phrase targeting subheadings, and more tags. Also removed ad code.
- 2016-12-27: Originally published.