Choose Network Type Screen on Logitech Squeezebox Boom Wi-Fi Radio.
This post details instructions on how to change the WiFi network on the Logitech Squeezebox Boom internet radio and network music player.
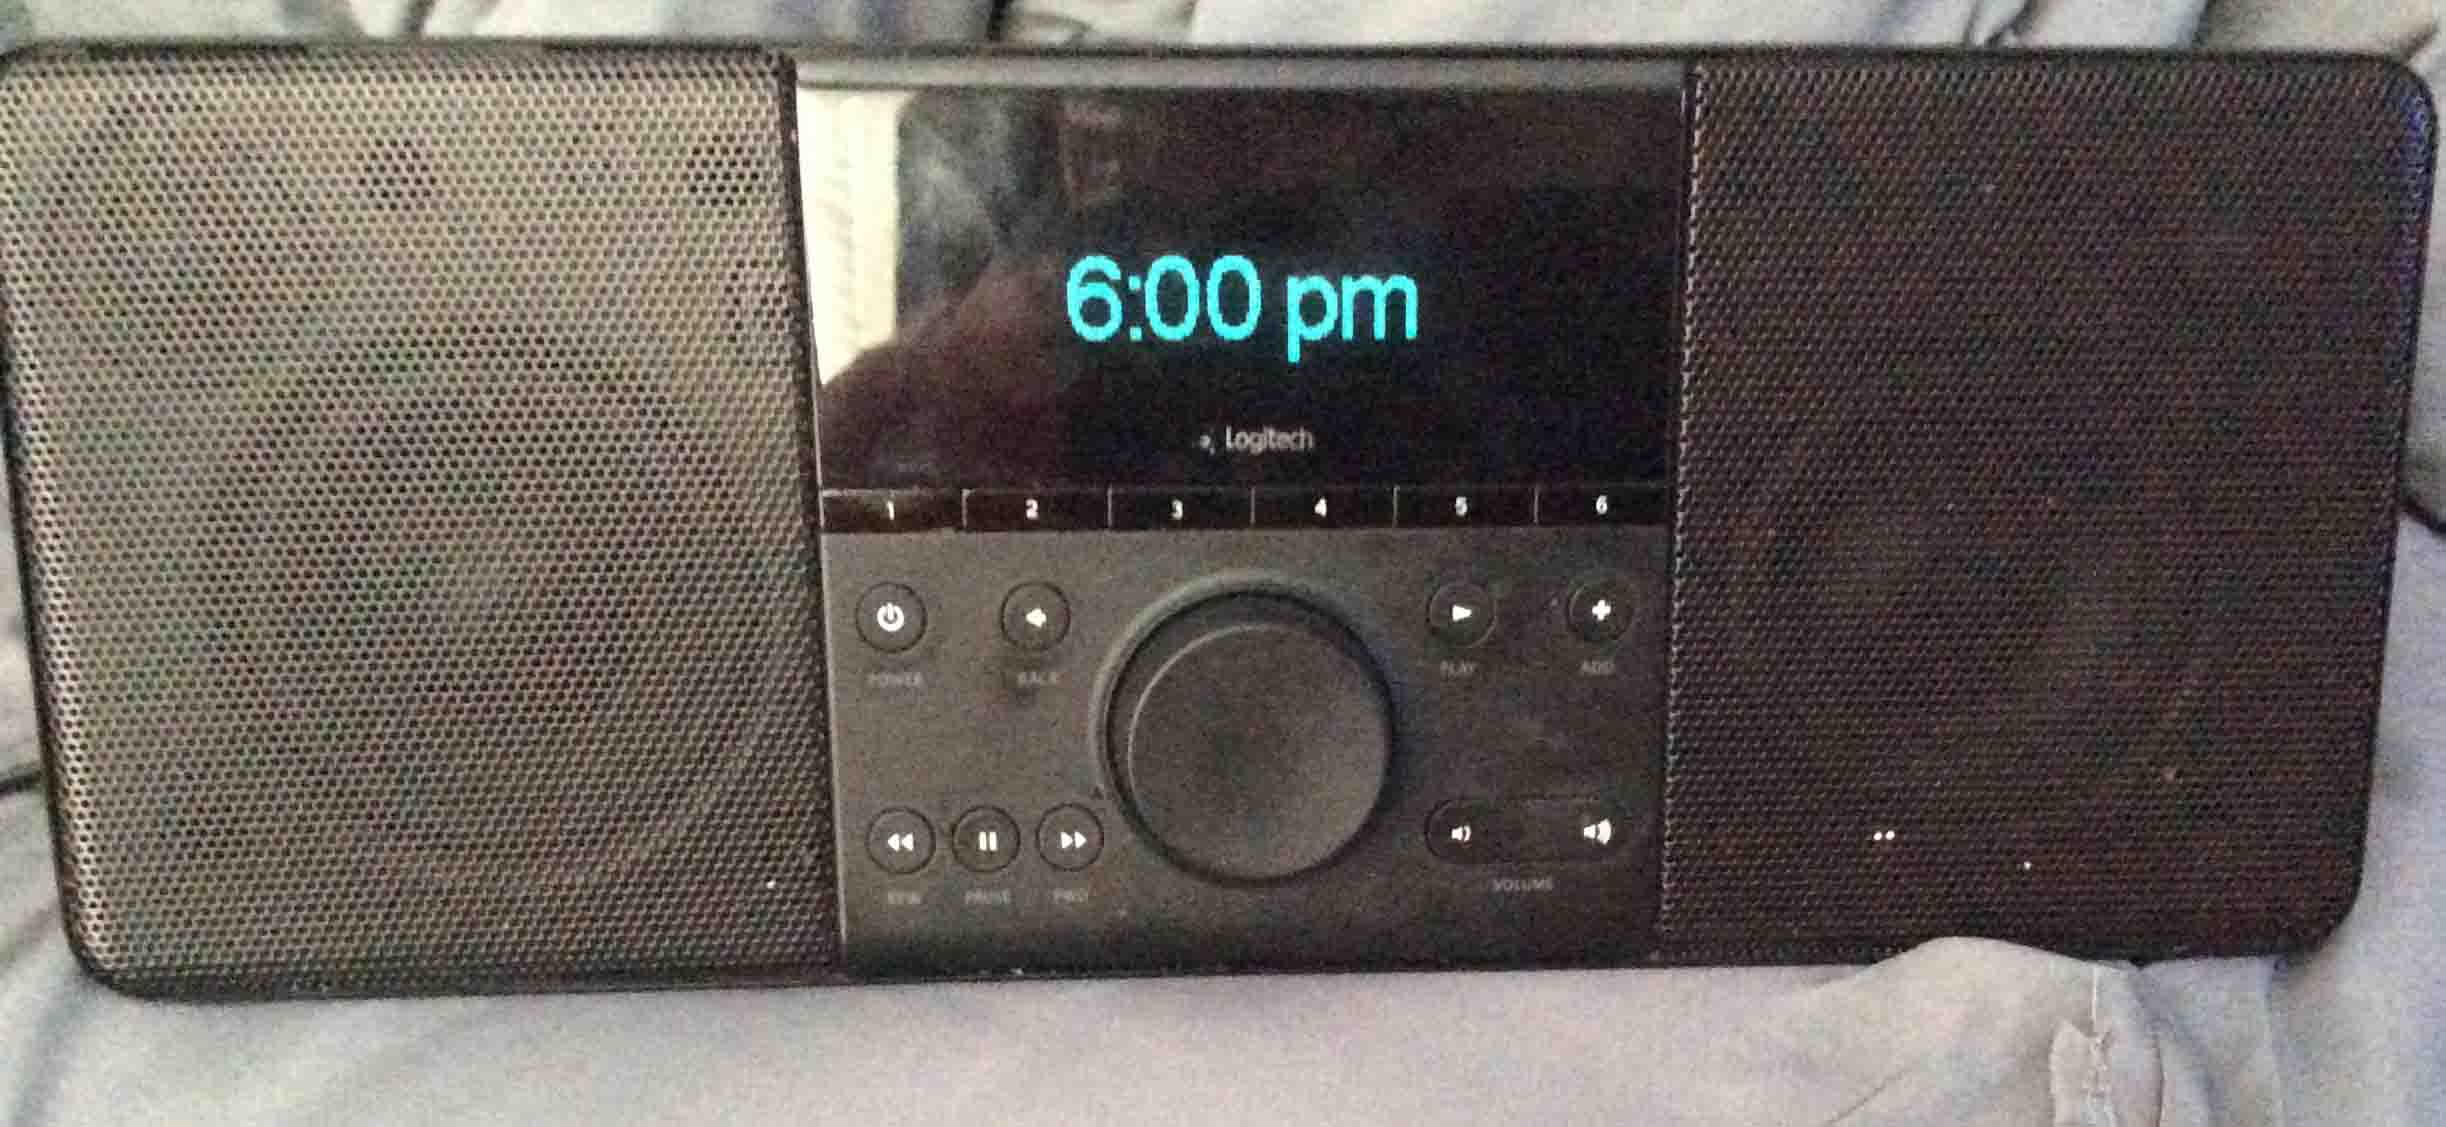
Here’s the scenario. You’ve used your Logitech Squeezebox Boom internet radio on the same WiFi network for years. Never had any problems with it. But either your current router has failed, or you’ve recently upgraded to a better wireless router. Almost surely, this router will have a different WiFi network name (SSID). Then, a few days after the upgrade, you visit your Squeezebox Boom. You see it awaiting your commands, as we see next next. The correct time displays as always, and you settle into your easy chair to jam to some hi-fi internet radio broadcasts.
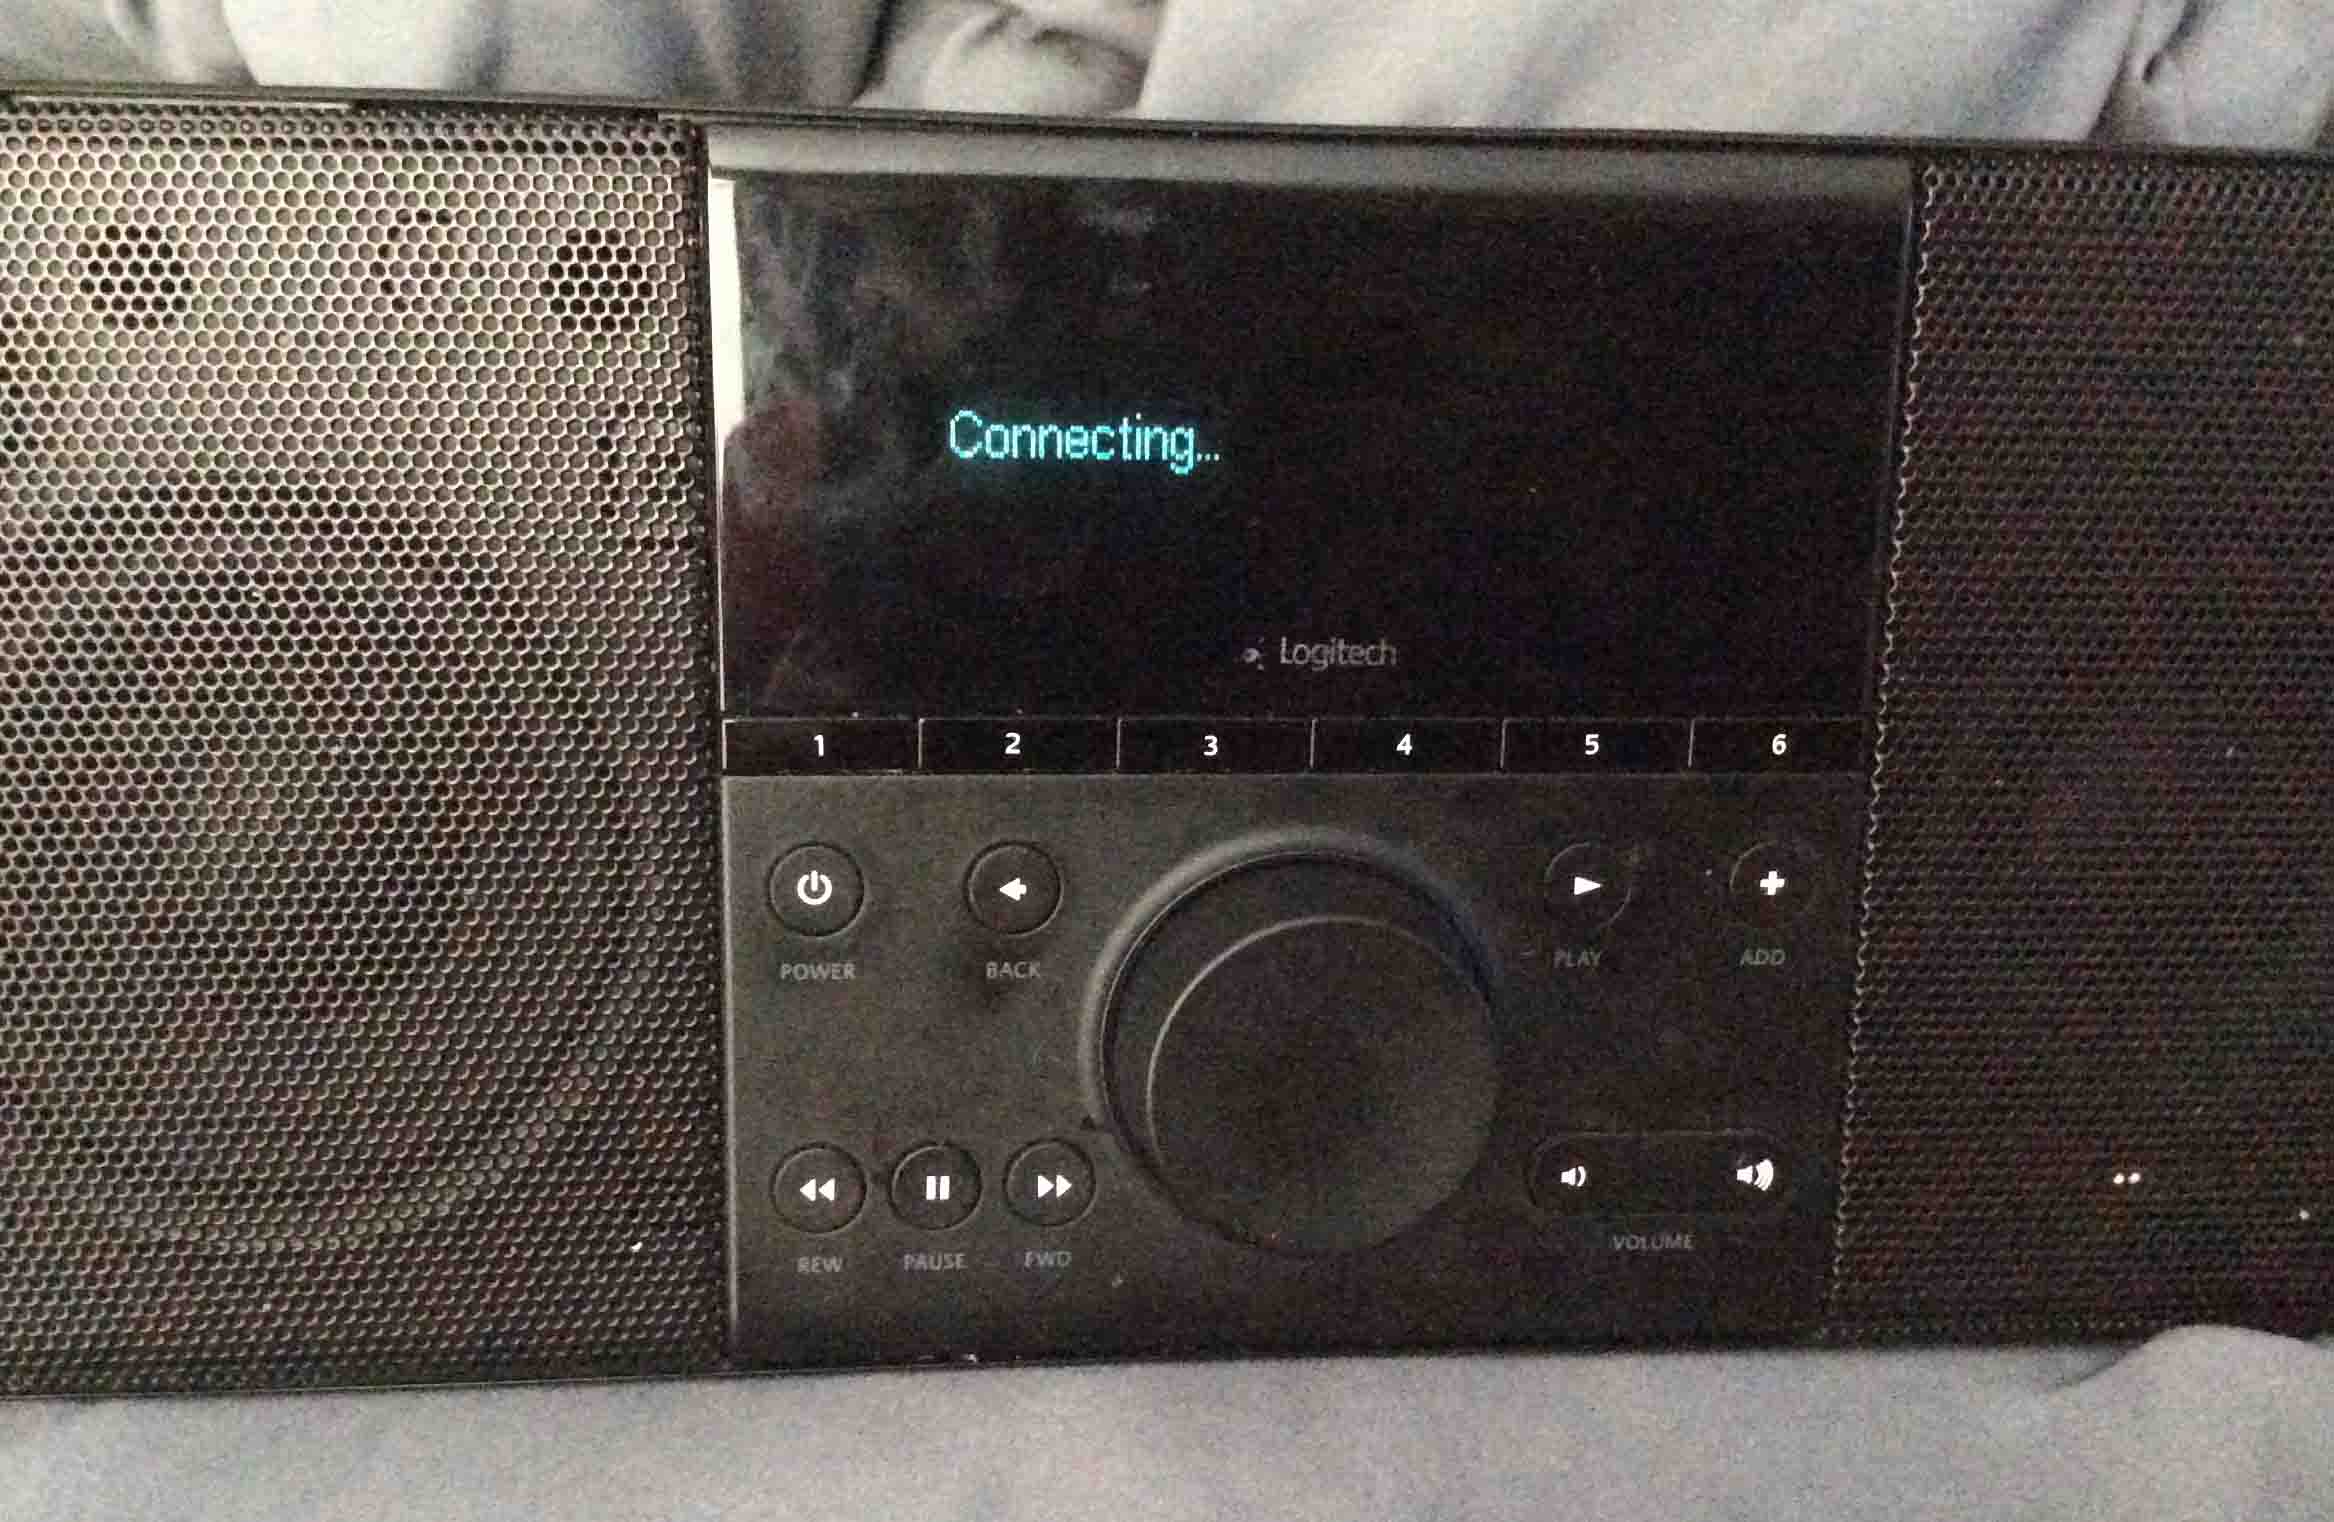
The radio gives no indication of a lost WiFi network connection until you try to play it. You press a favorite, and then the radio’s vacuum fluorescent display (VFD) screen shows a network / station connection being attempted as pictured next.
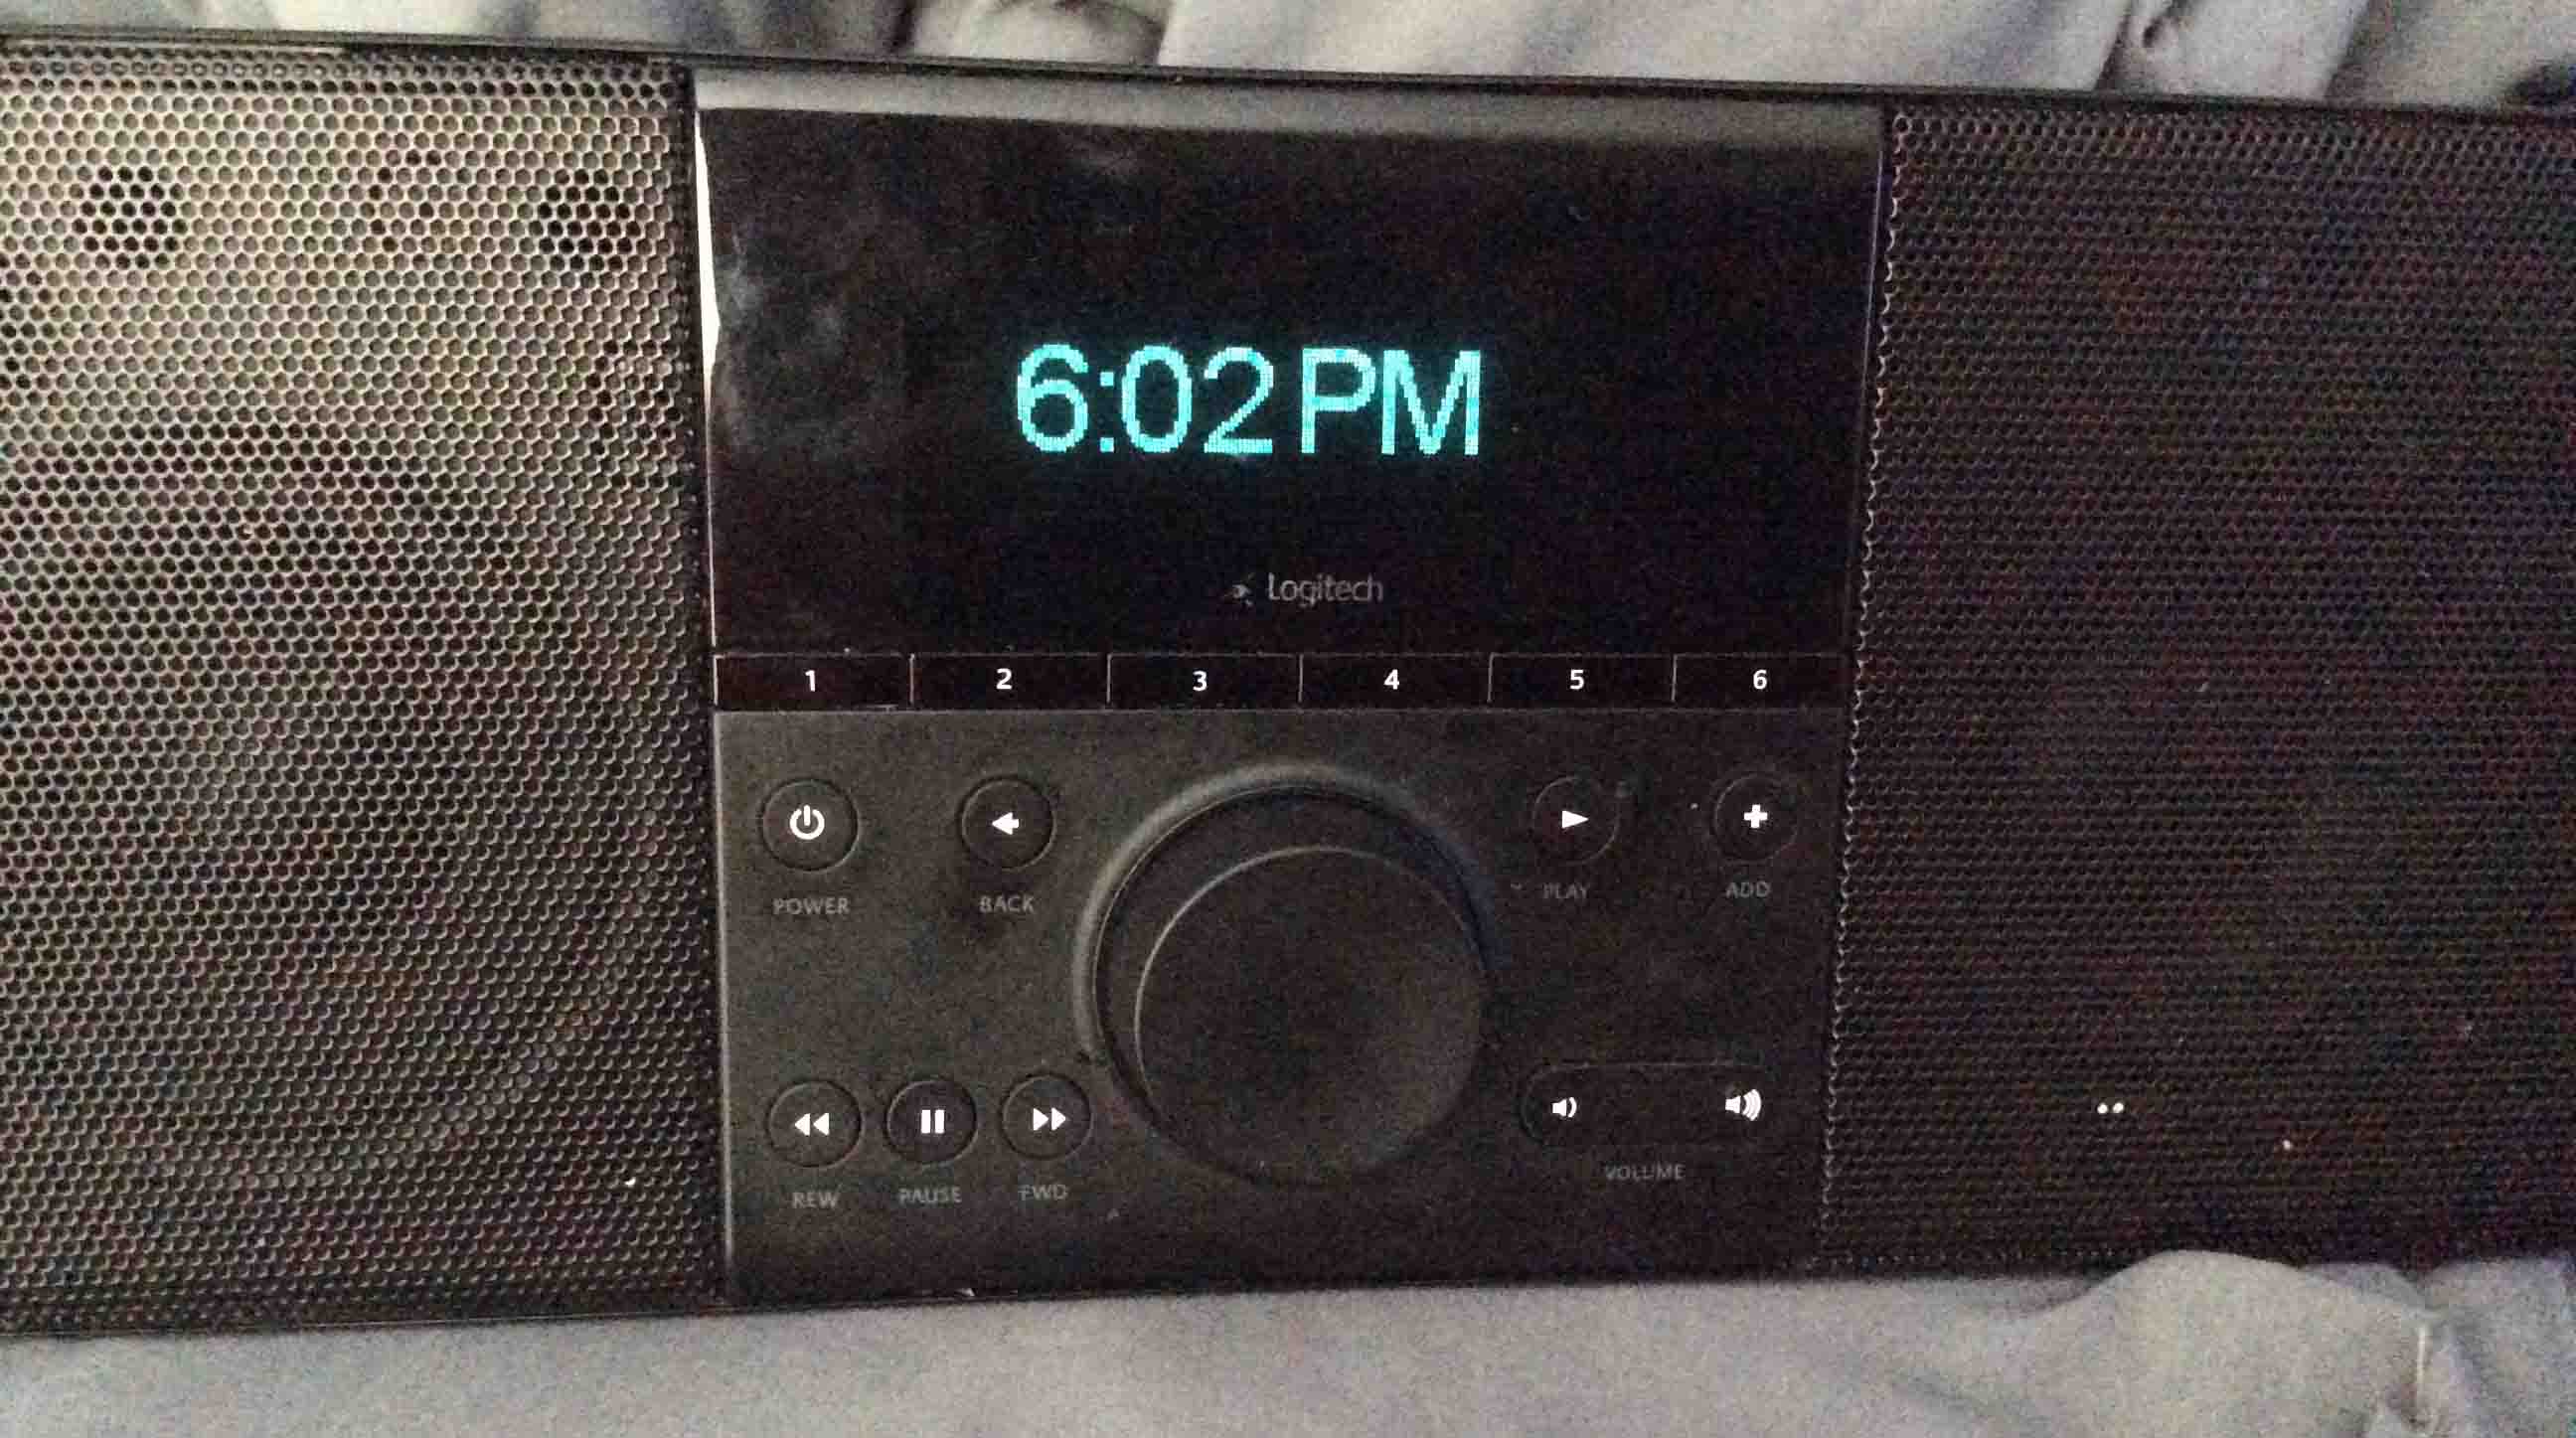
But after a minute or so, the radio’s display reverts to time-of-day once again, as pictured next. No error message appears though. It just doesn’t play. The “Connecting…” message above may time out. Then the radio goes back into standby / OFF mode. If this happens, this likely means that it could not connect to the WiFi network it used to.
You have to set up a new connection to your WiFi network to listen to your Boom radio.
We detail how to do this in the following steps.
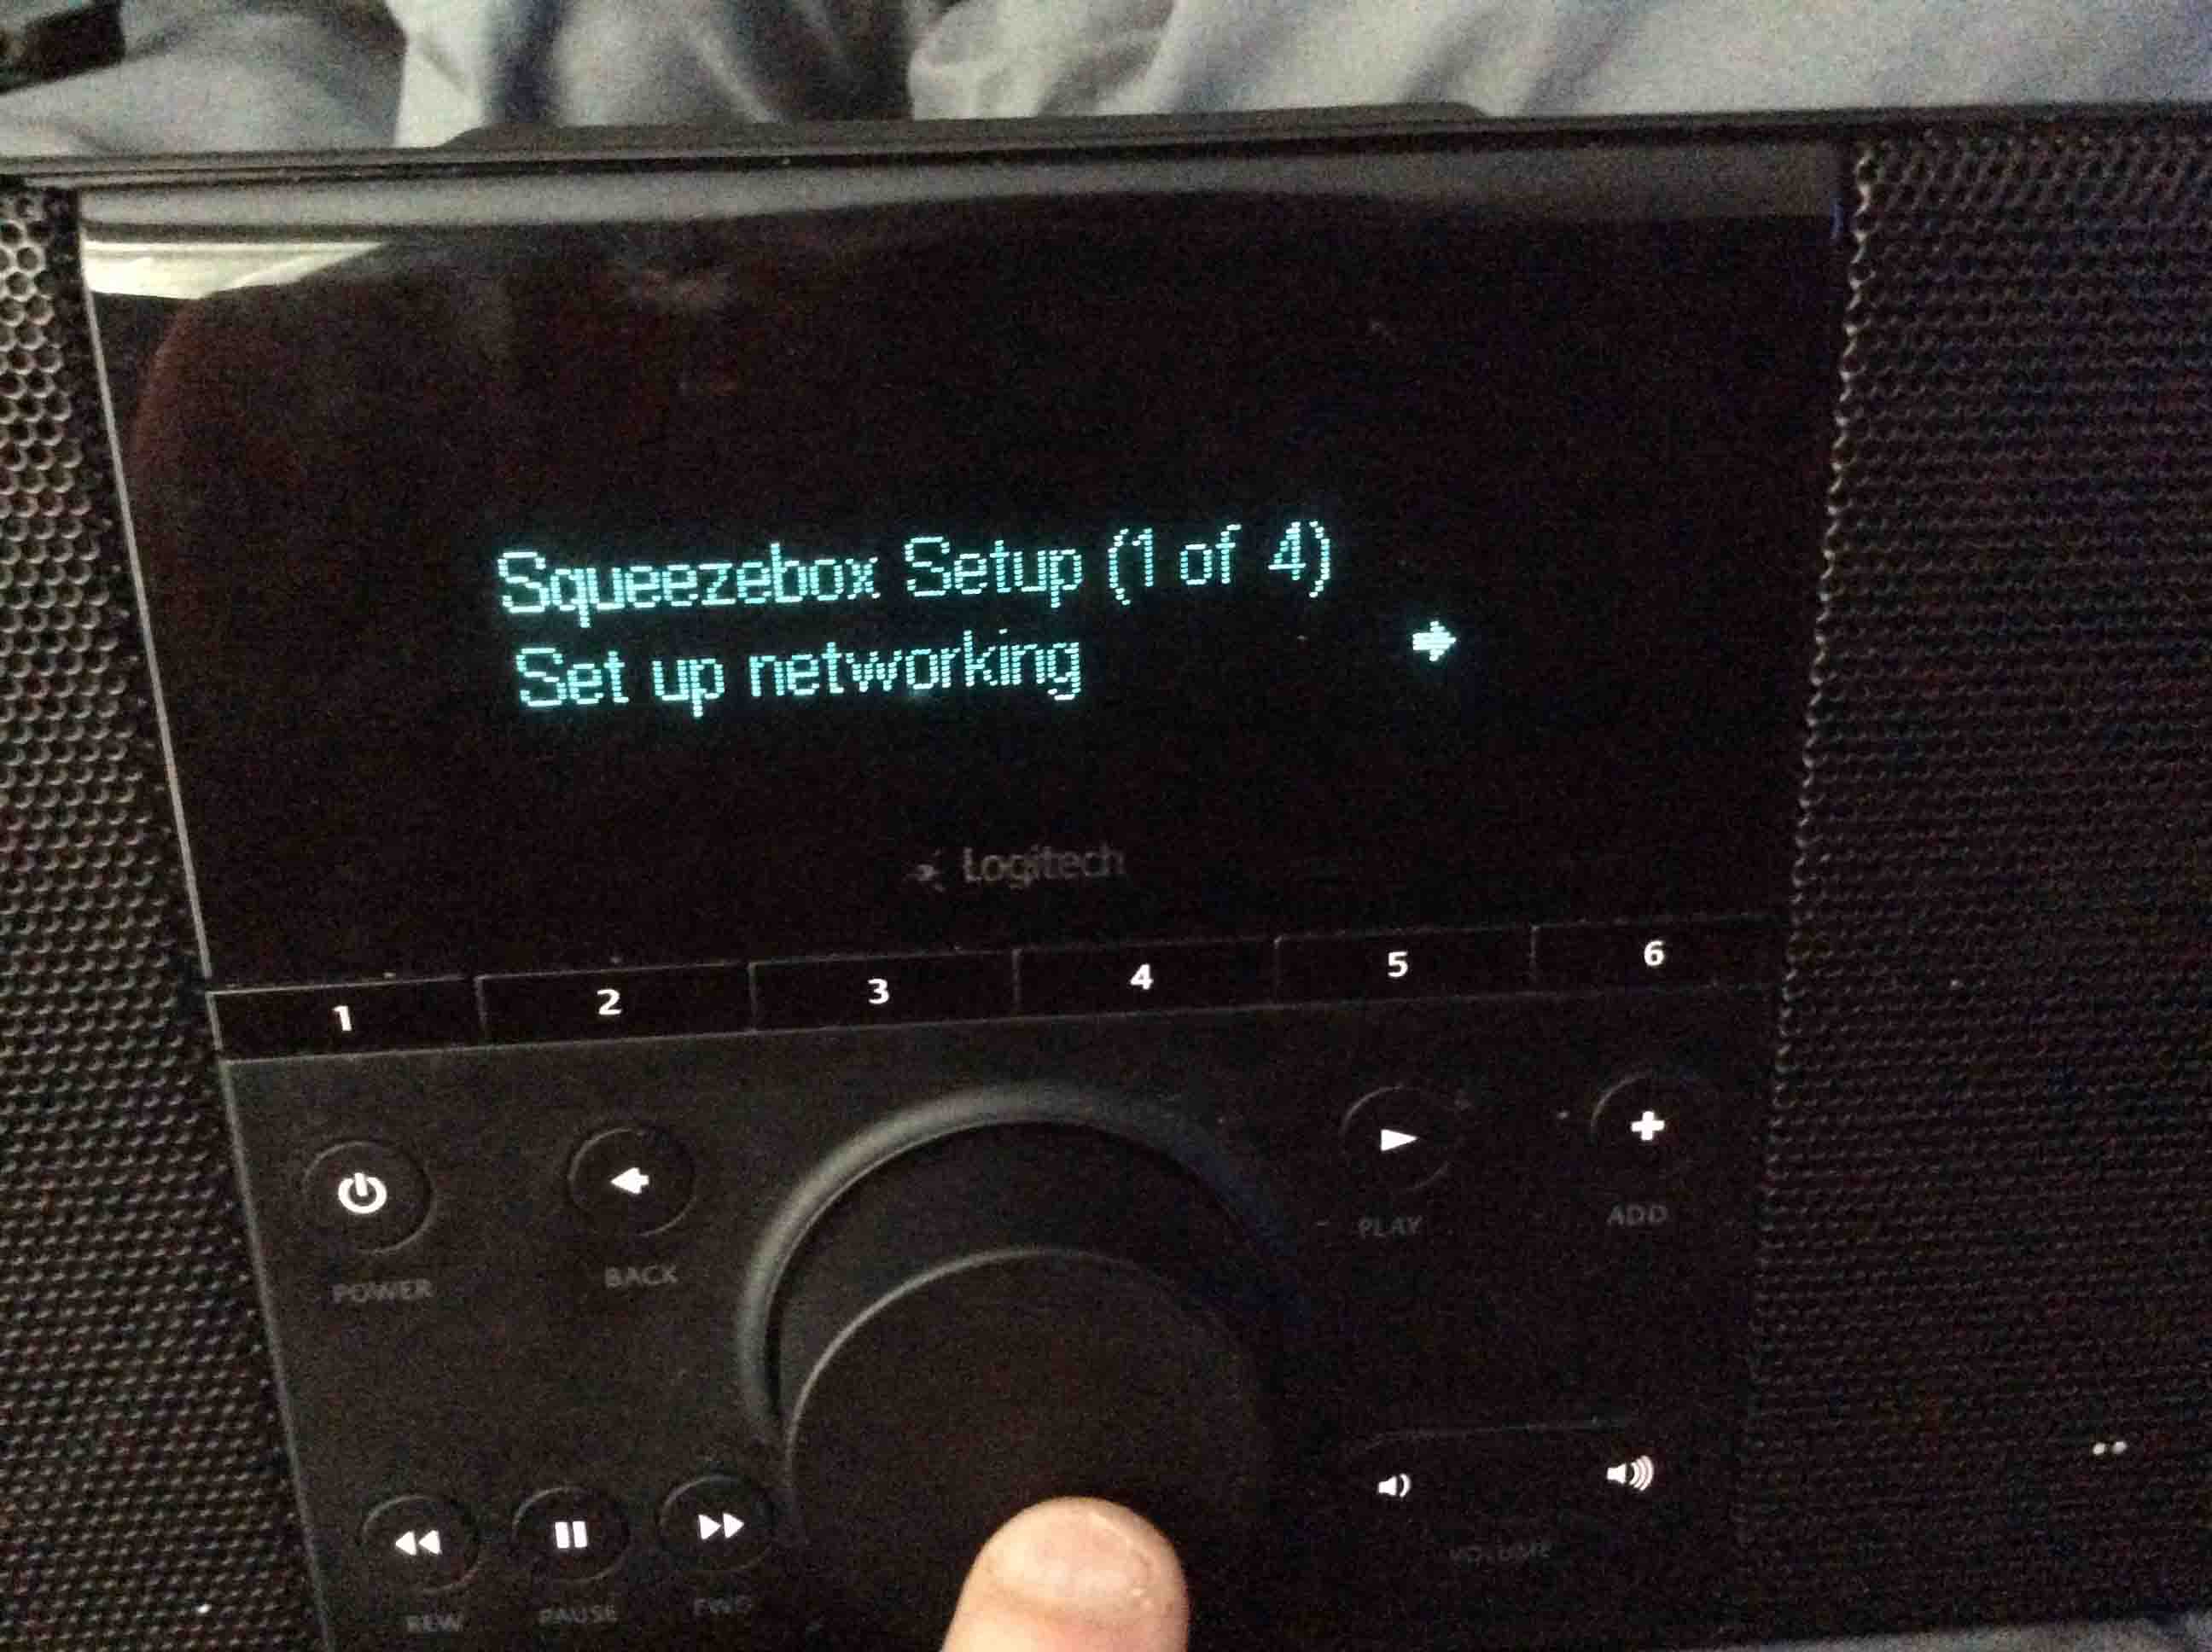
Initiate that procedure by pressing the power button, located just below the Favorites 1 button, just beneath the VFD screen.
The radio welcomes you to Squeezebox, and then displays the “Squeezebox Setup (1 of 4), Set up networking” prompt, as pictured in the screen shots next.
The Choose network Type screen appears as pictured next. The default setting for this screen, is Connect to wireless network. So do not turn the knob here. Or if you do, be sure to turn it back to this option.
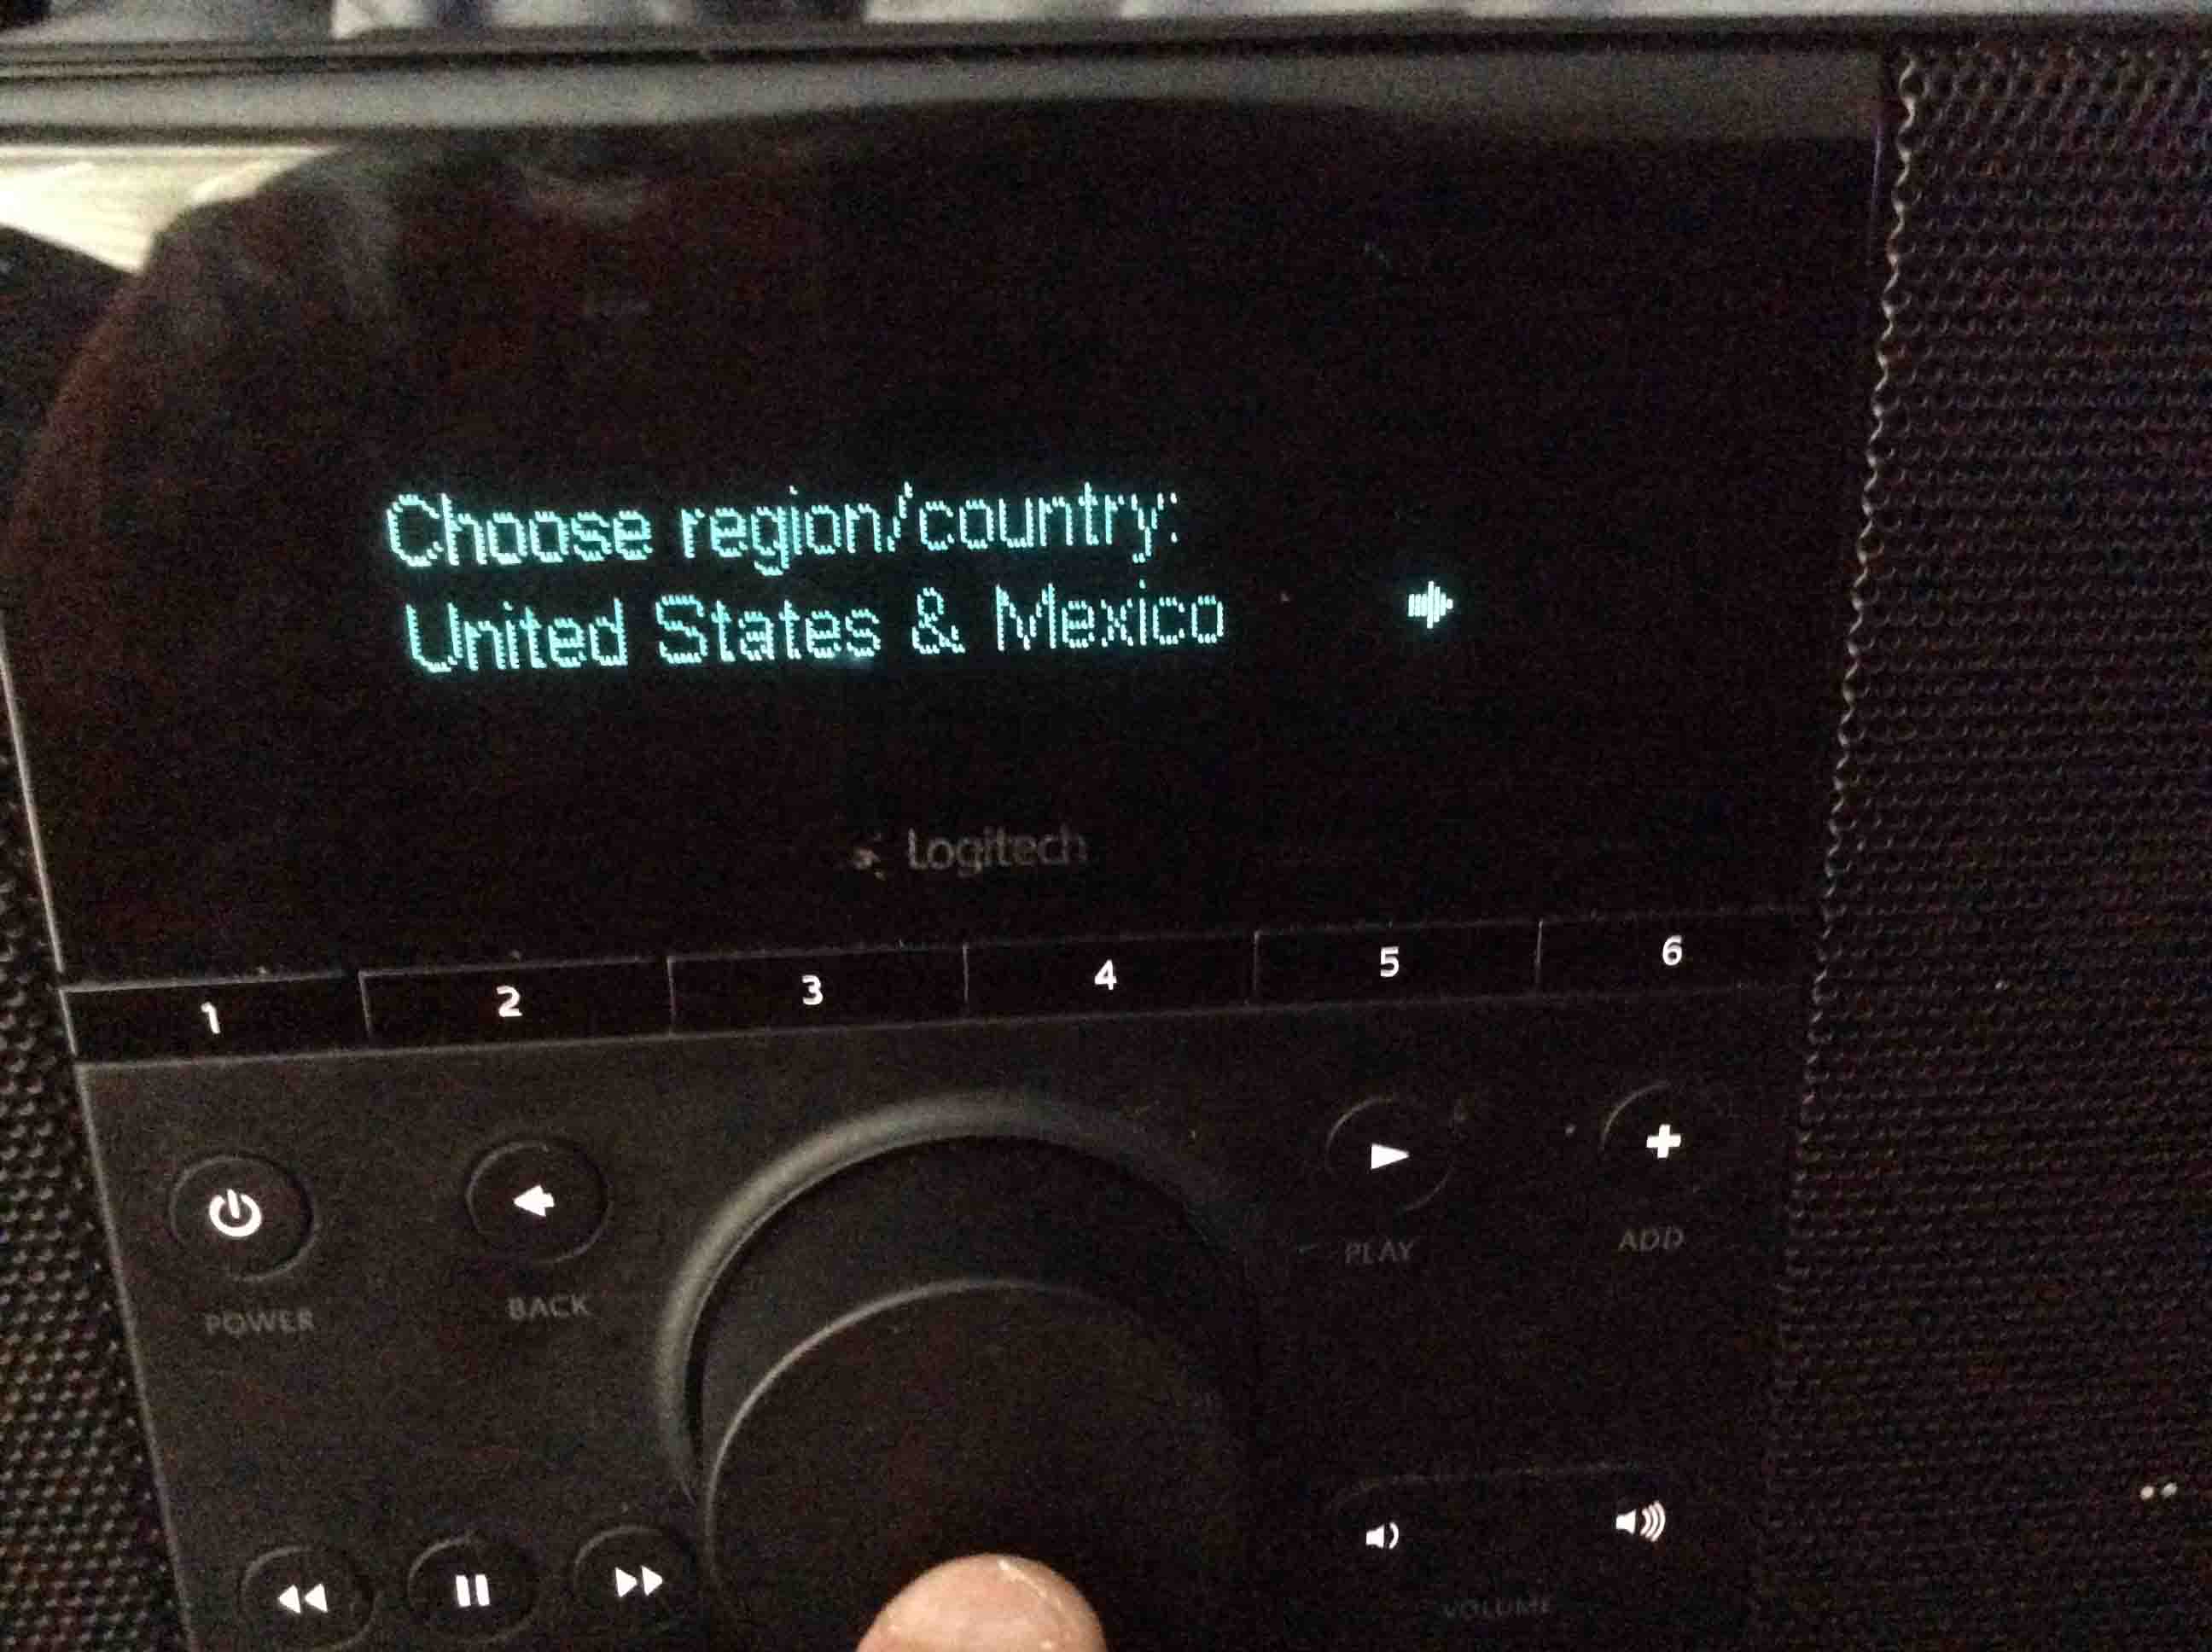
The Choose region/country screen appears, as shown in the next picture.
Turn the knob until your country / region appears. In this case, ours is, United States and Mexico.
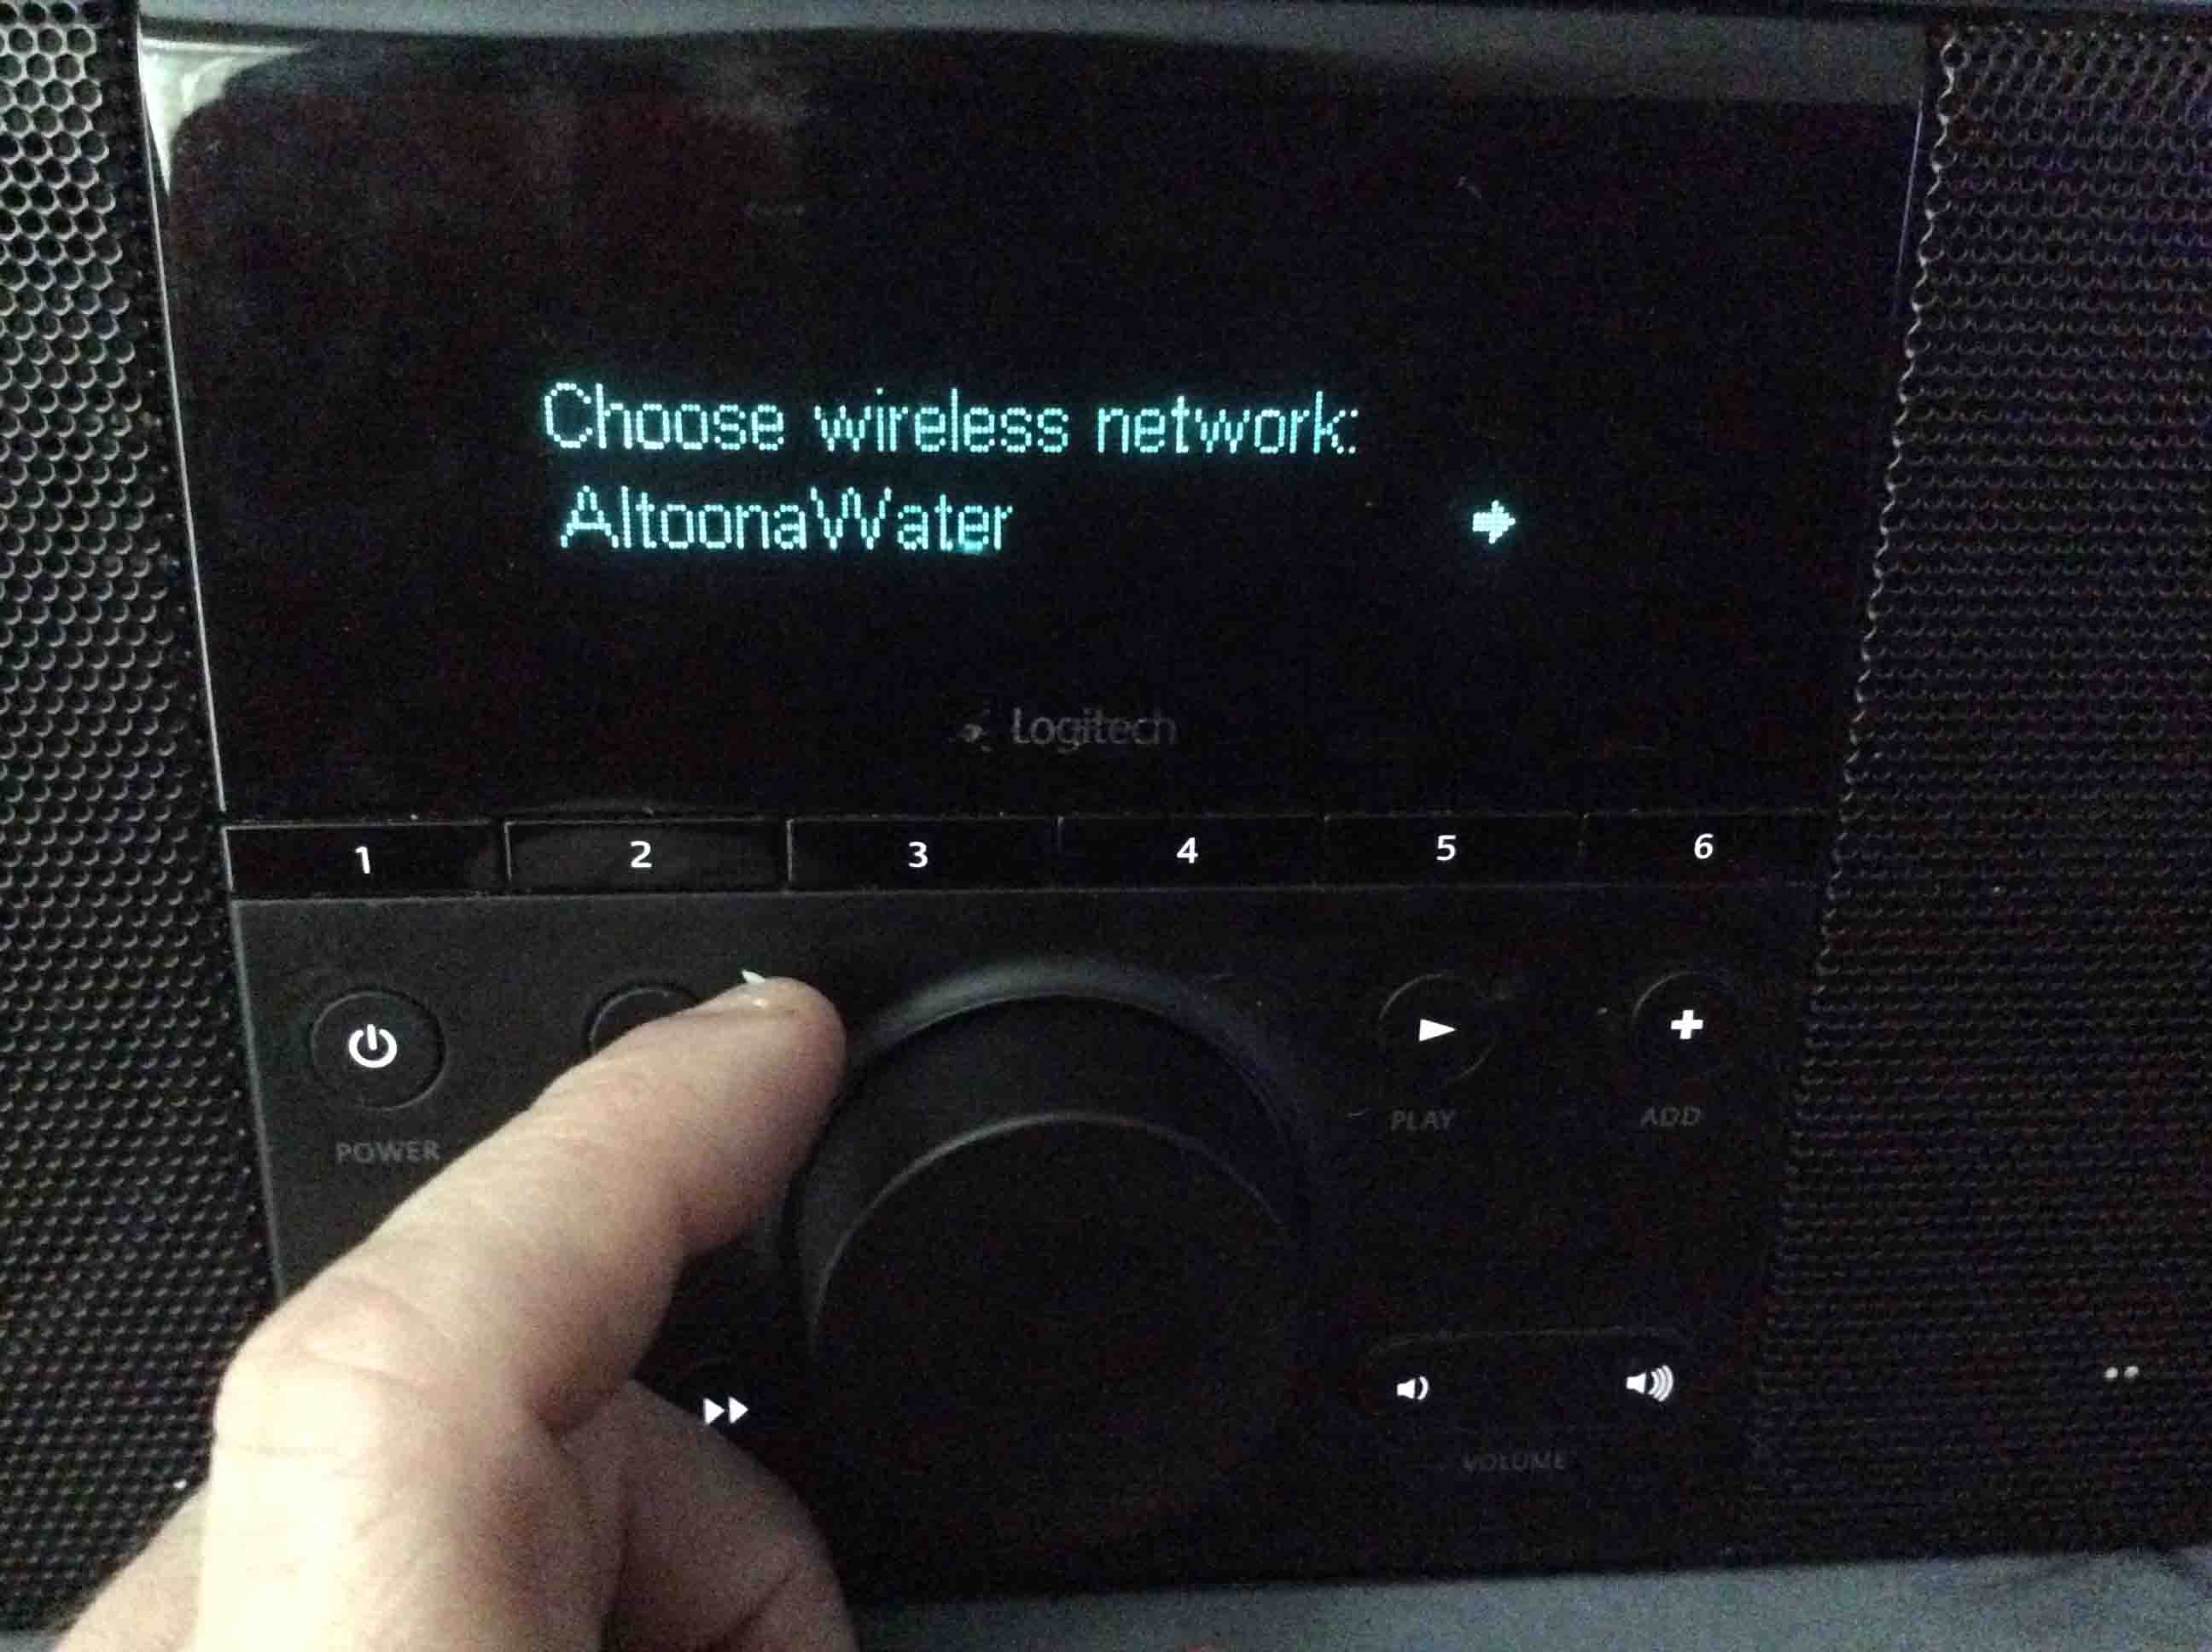
This starts a scan of the 2.4 Ghz. WiFi band. This scan builds a list of in-range wireless networks. You may scroll through these to find yours on the screen you next see.
Note that the Squeezebox Boom does not see 5 Ghz. networks. So if you have some set up on this band, this radio will not list them.
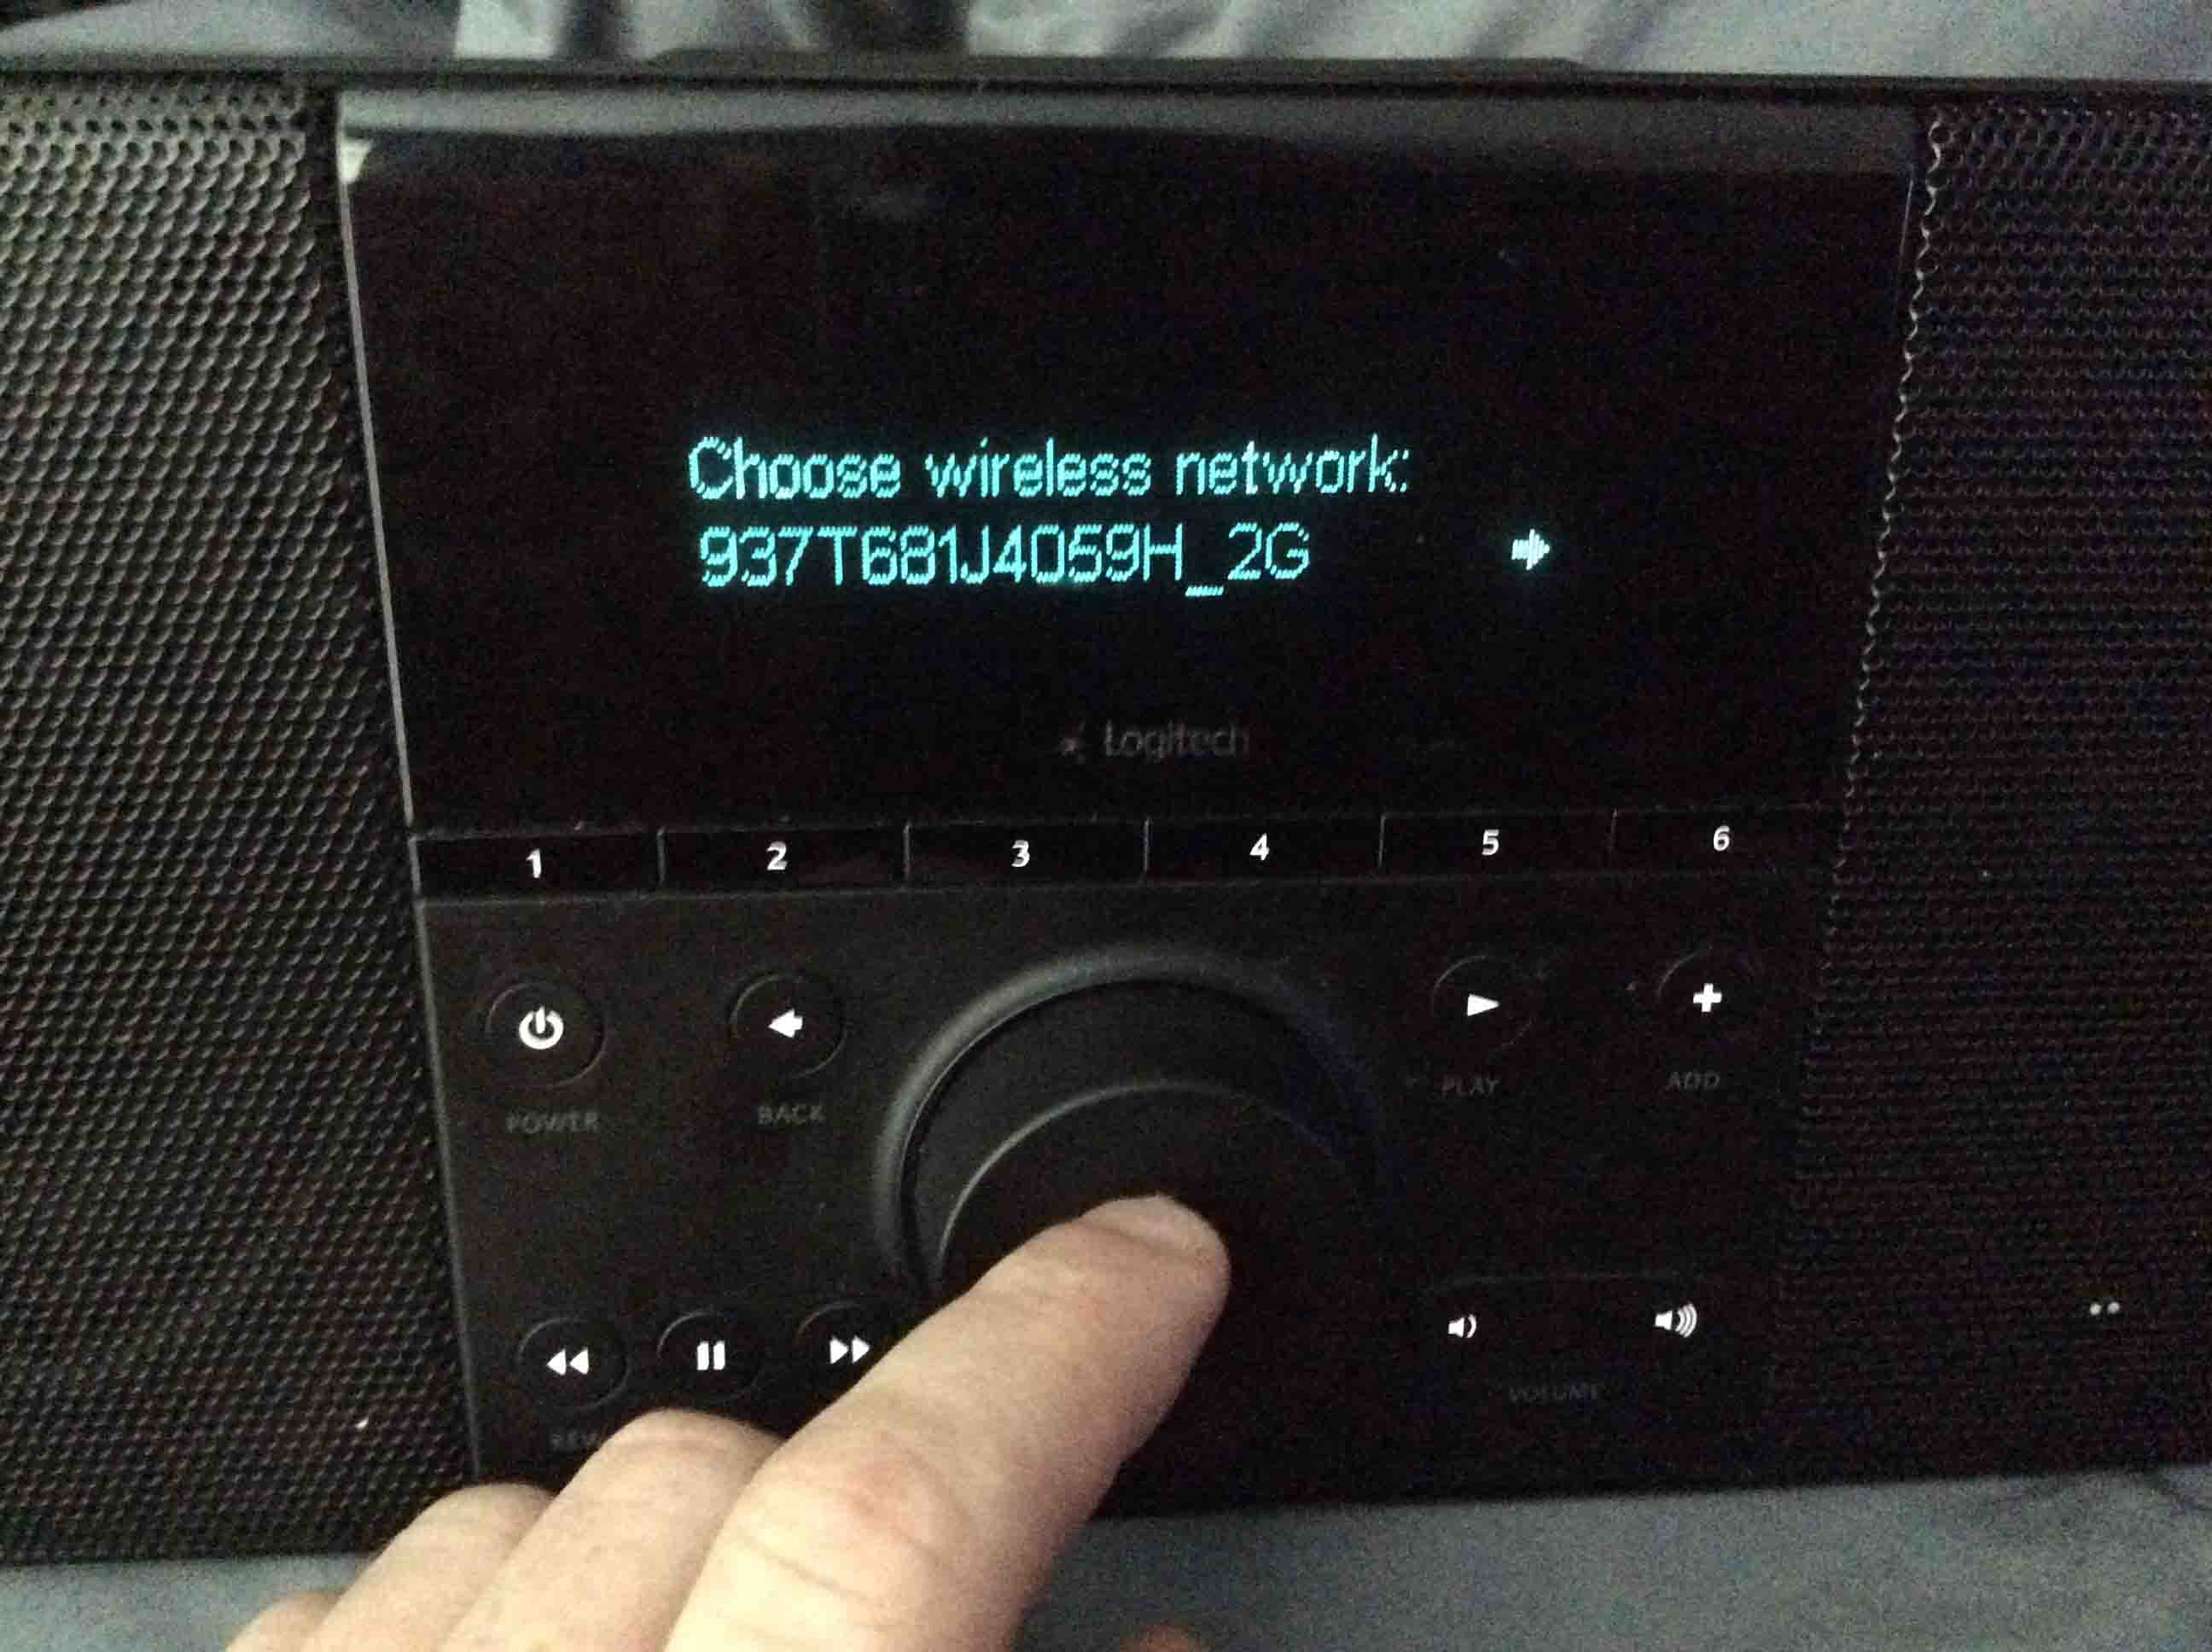
At the Choose wireless network screen, turn the knob left and right to find the WiFi network name with which you wish to connect. We did that on the next screen, and found the 937T671J4059H_2G network SSID. This is the one we want.
When the WiFi network name you desire appears, press the knob.
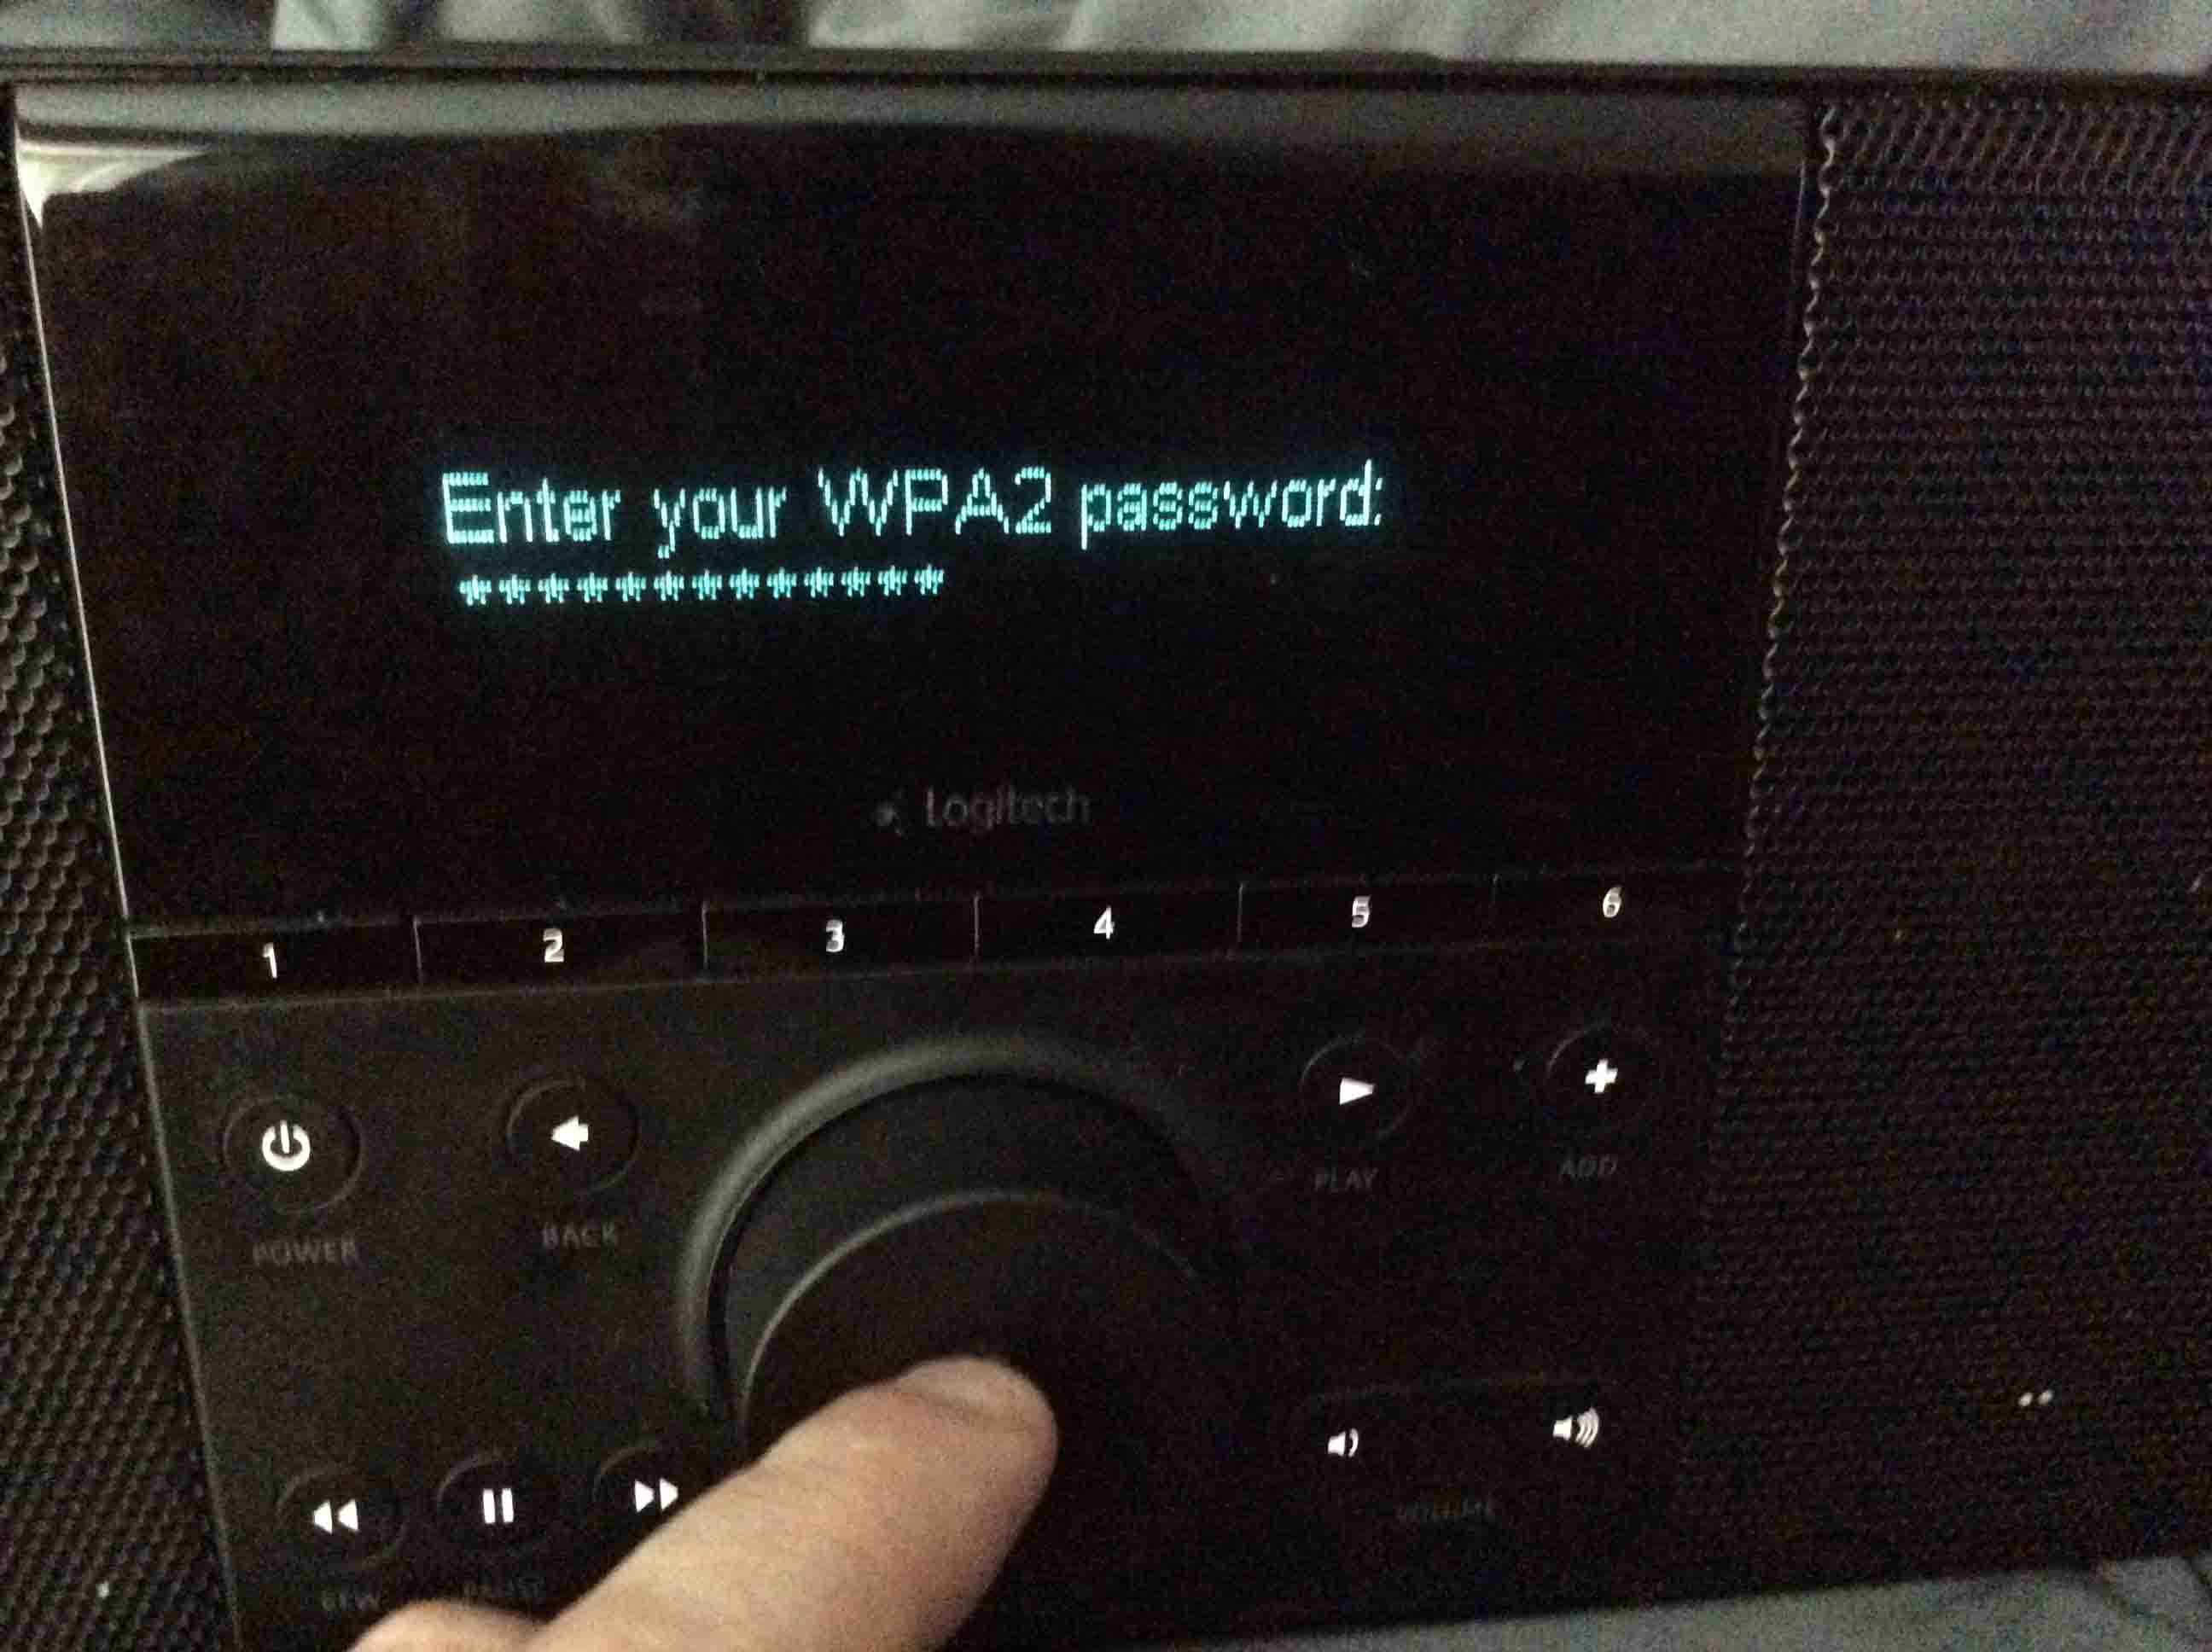
The radio then prompts for the WiFi password if the network you chose has one, as shown next.
Now for each character in the password, spin the knob left or right until the correct character appears. The row of stars **** then disappears. The characters of your password appear in their places as you enter them.
Press the knob to enter each character once it displays at the insertion point. This displays the character and moves the insertion point one position to the right.
When you’ve entered all the password characters, press the knob one more time, without choosing any more characters. This tells the radio that you’re done entering the password.
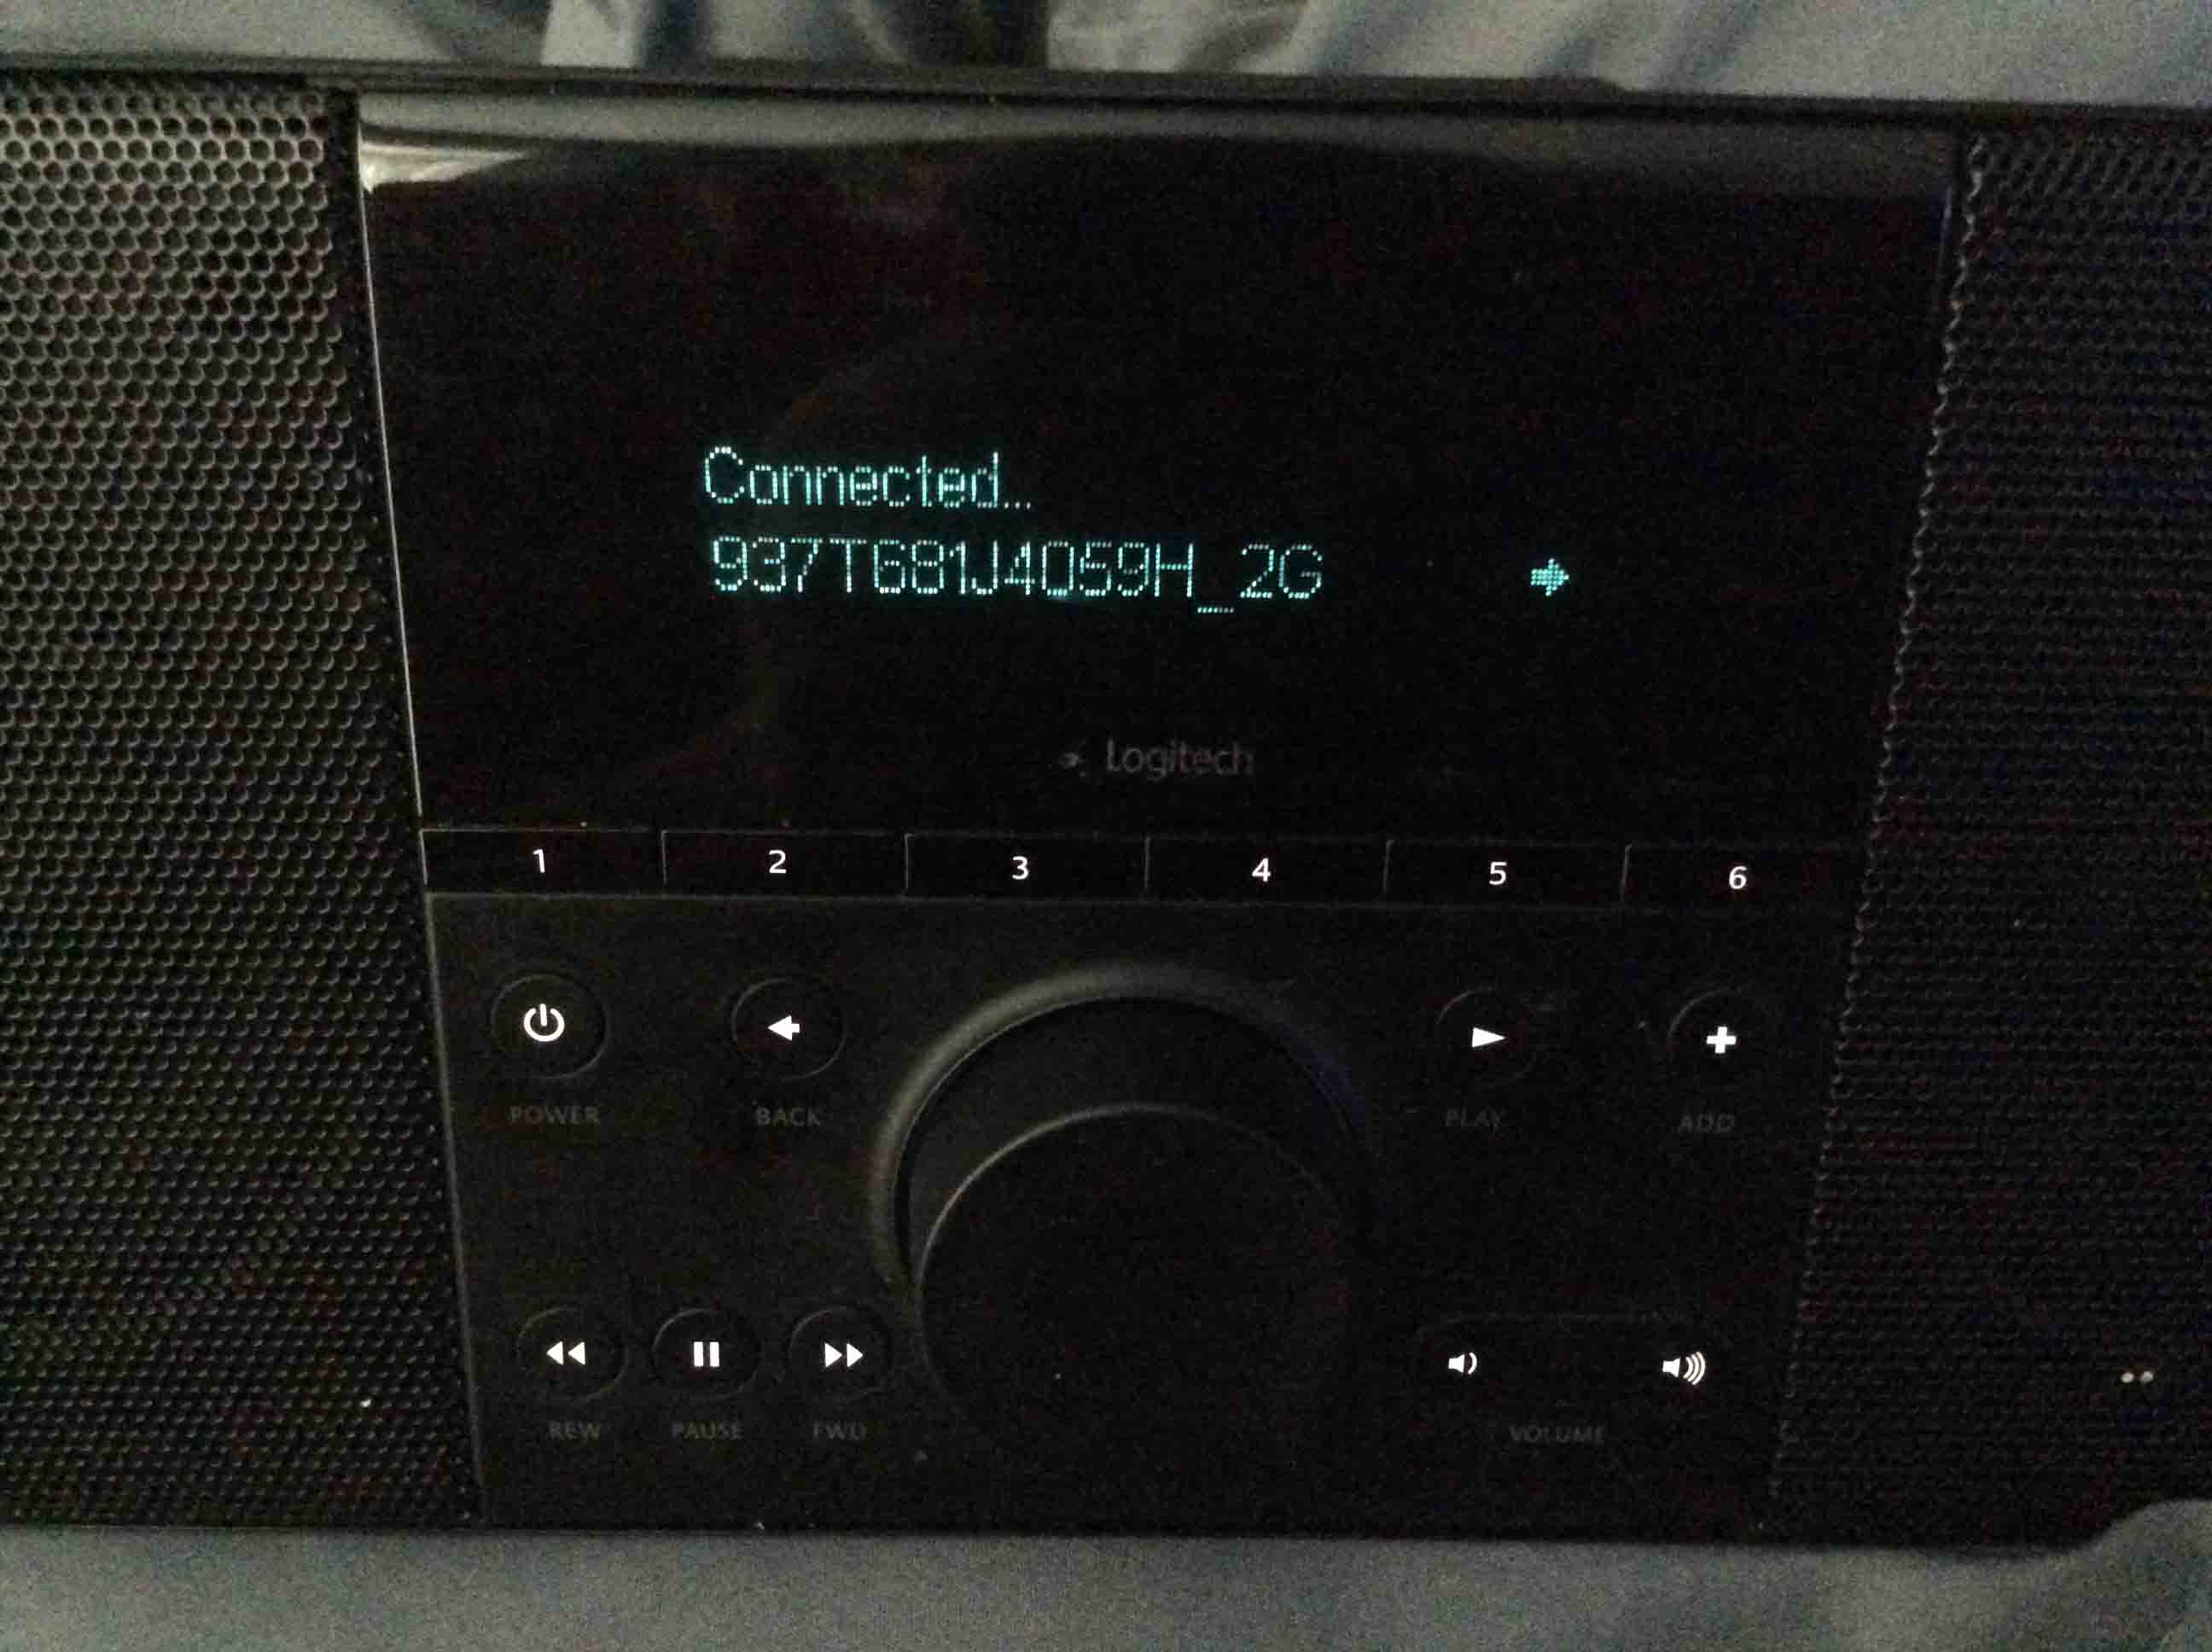
We entered the password for the 937T681J4059H_2G network we chose in the last step. Note that the password clearly displays during this process. So don’t do this where people can see it whom you do not wish to know it. For security reasons, we won’t show the password screen here. Instead, we show you what happens after you hit the knob once you put in the full WiFi password.
The screen then goes blank for several seconds.
Then The Connecting… message reappears. This time though, it shows the target WiFi network. Shown next.
We entered the right WiFi password above. So after perhaps thirty seconds, the radio successfully connects to your new WiFi network. It then displays the following screen.
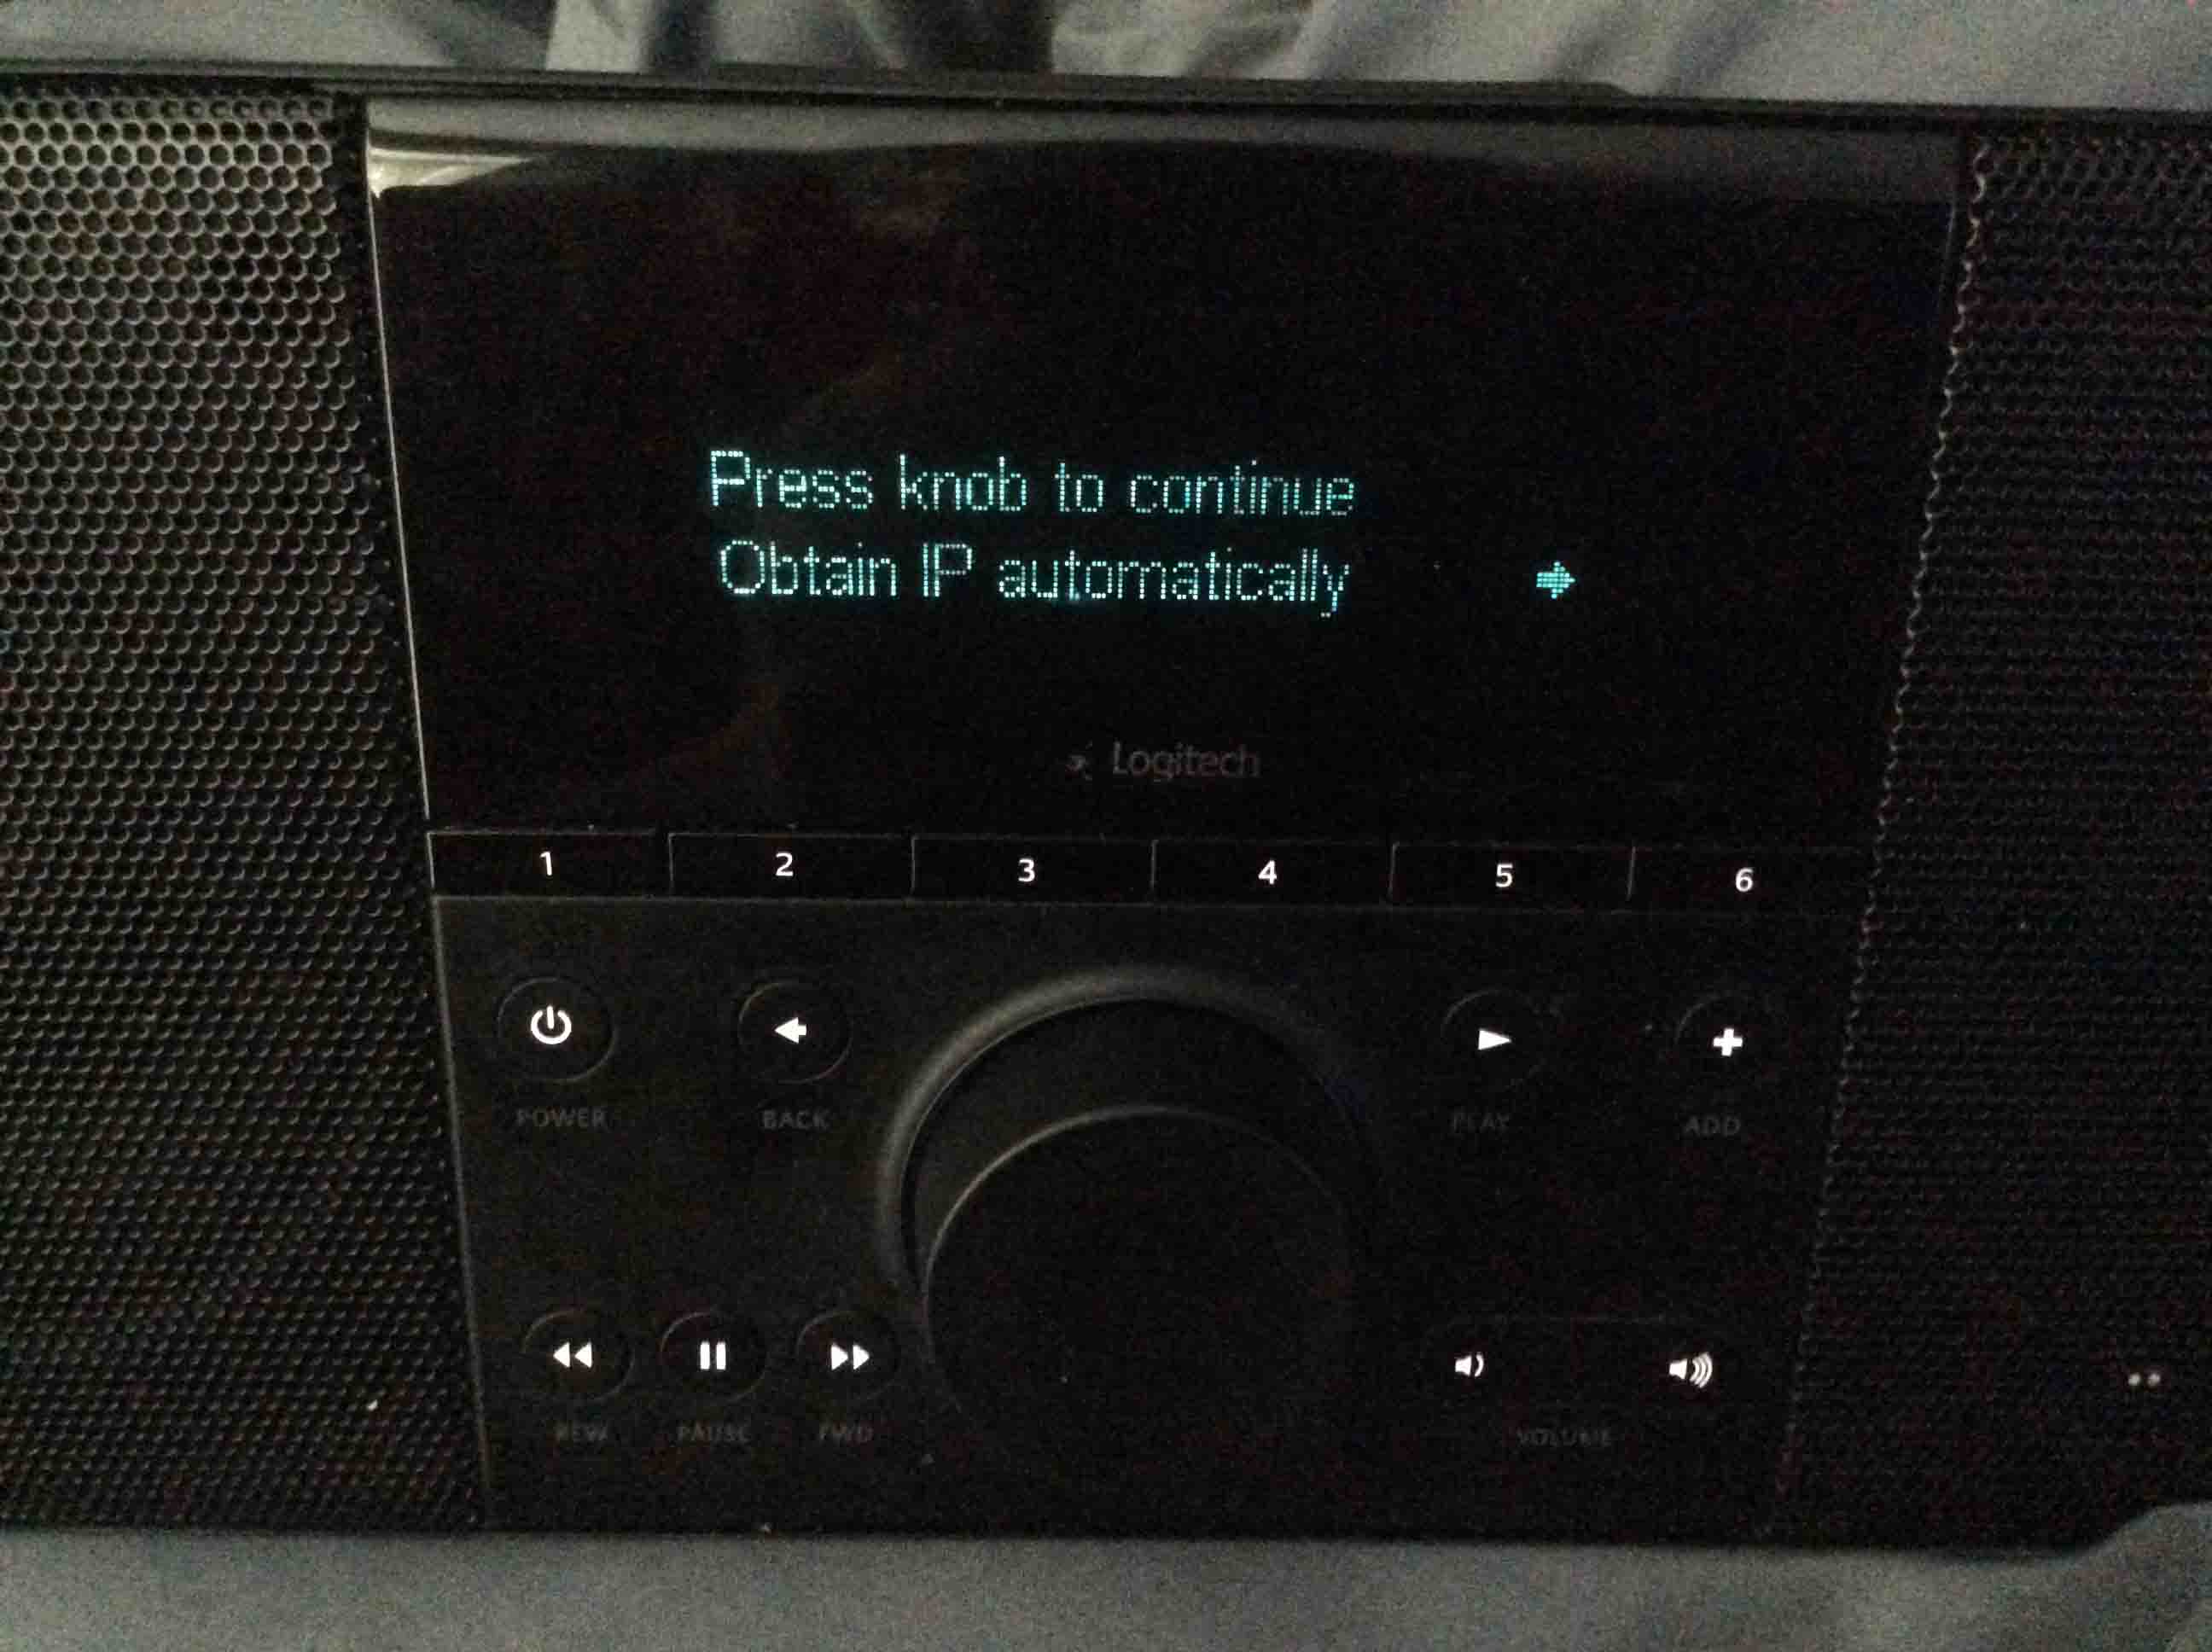
At this screen, press the knob, to wrap up the rest of the network setup process.
The following screen then displays. The next setting tells the radio how to obtain the network IP address. It can either get it automatically via DHCP, or through manual entry. In most cases, you’ll want to choose Automatically. If your network is different, you can manually enter the IP address if you turn the knob to change this setting to Manual. But we will not show that scenario here. In our networks, connected devices get their IP addresses automatically. Thus we will NOT turn the knob here.
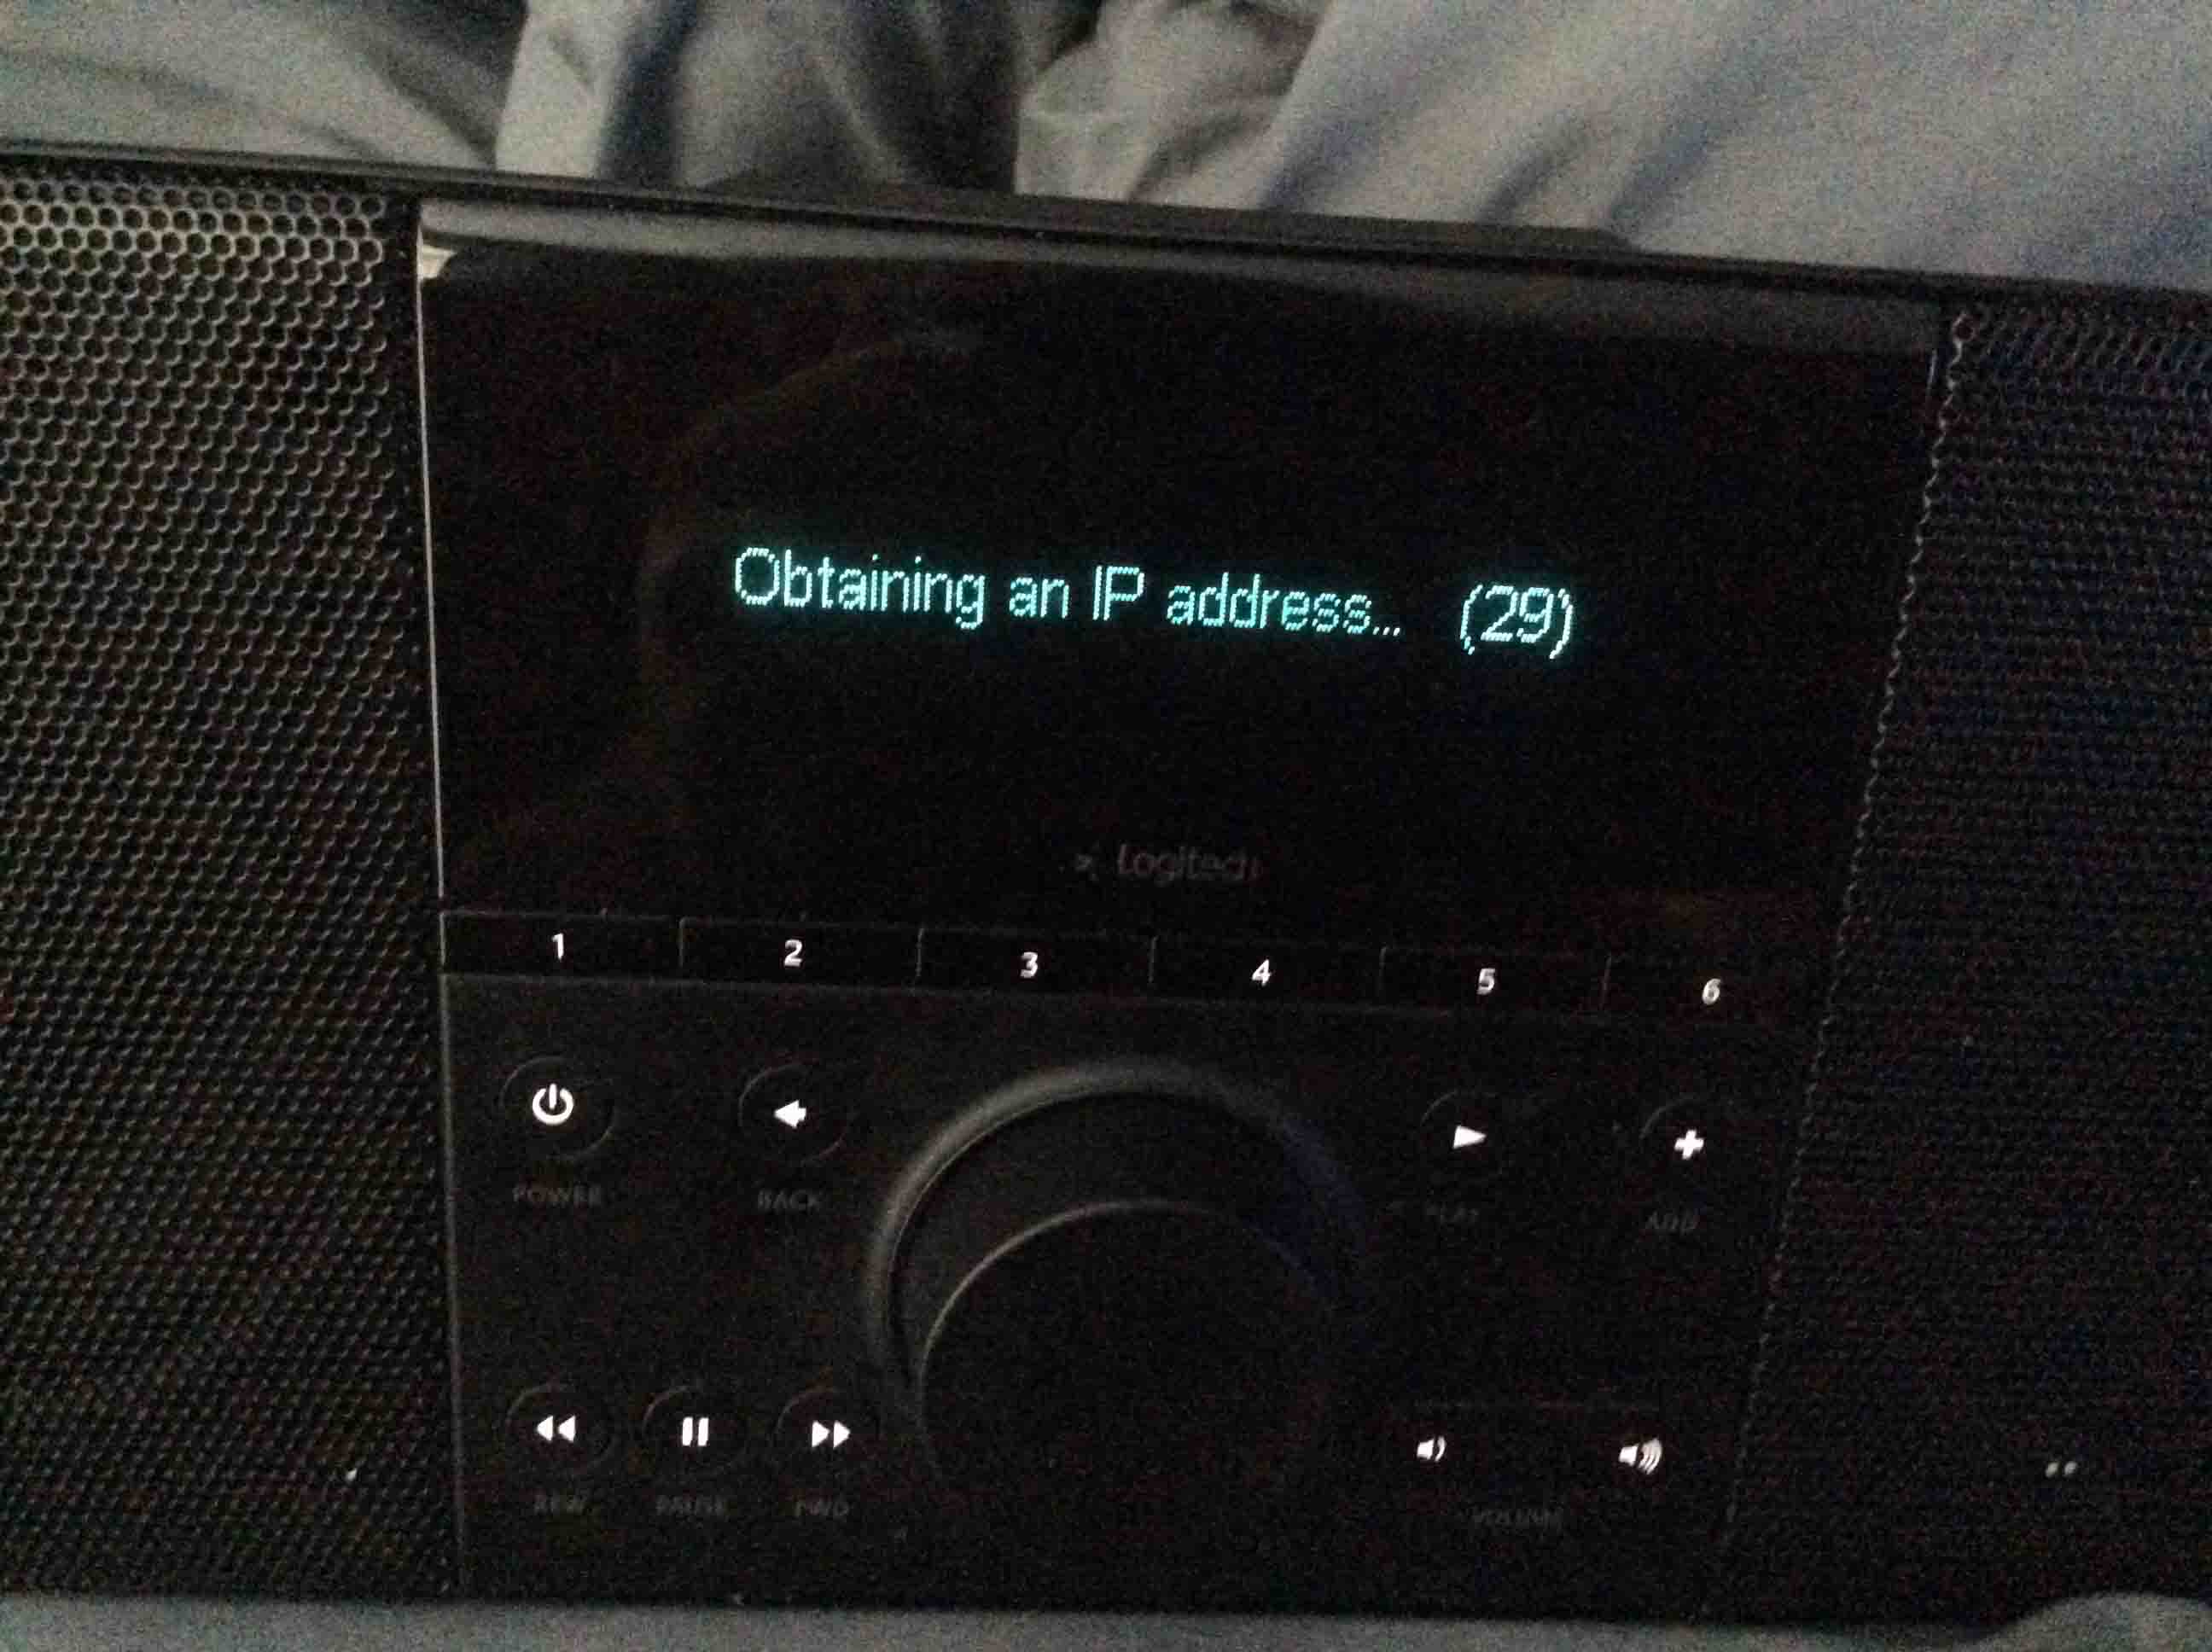
Instead, we accept the default (Automatically) setting, and press the knob to move on to the next screen.
The radio then tries to get its DHCP-assigned IP address, as shown next.
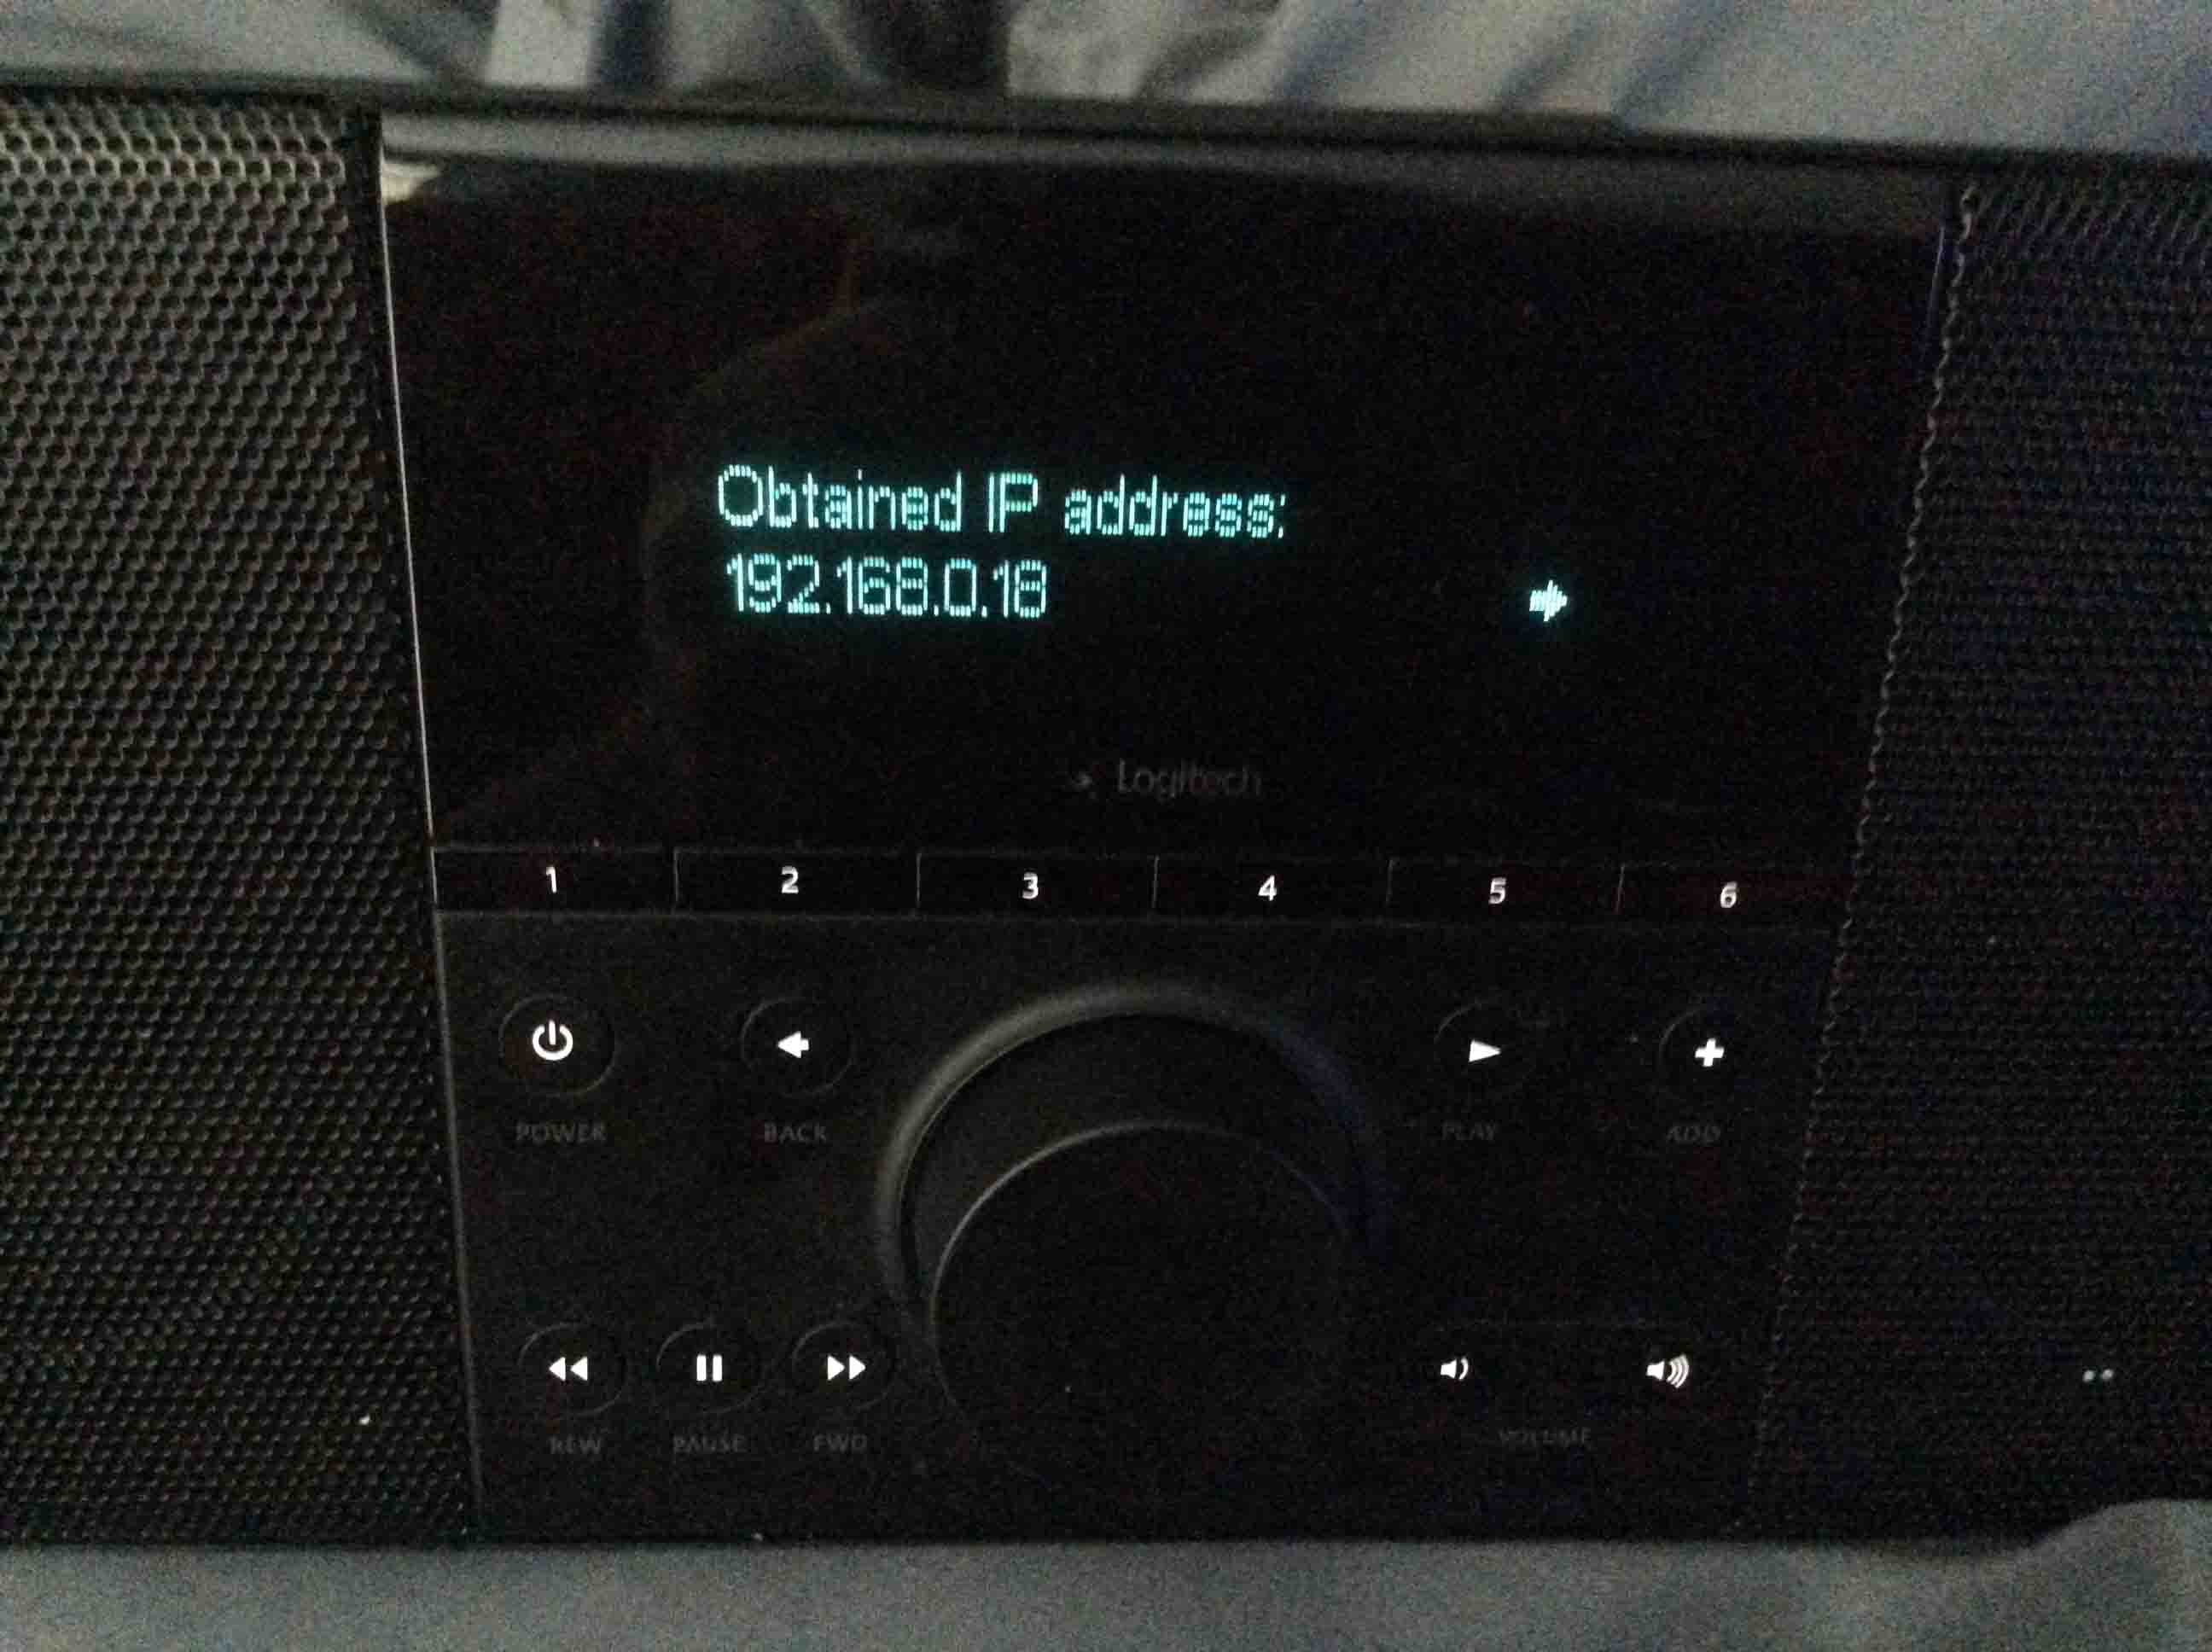
After some seconds, the Squeezebox gets its IP address. It displays this address on the screen as follows.
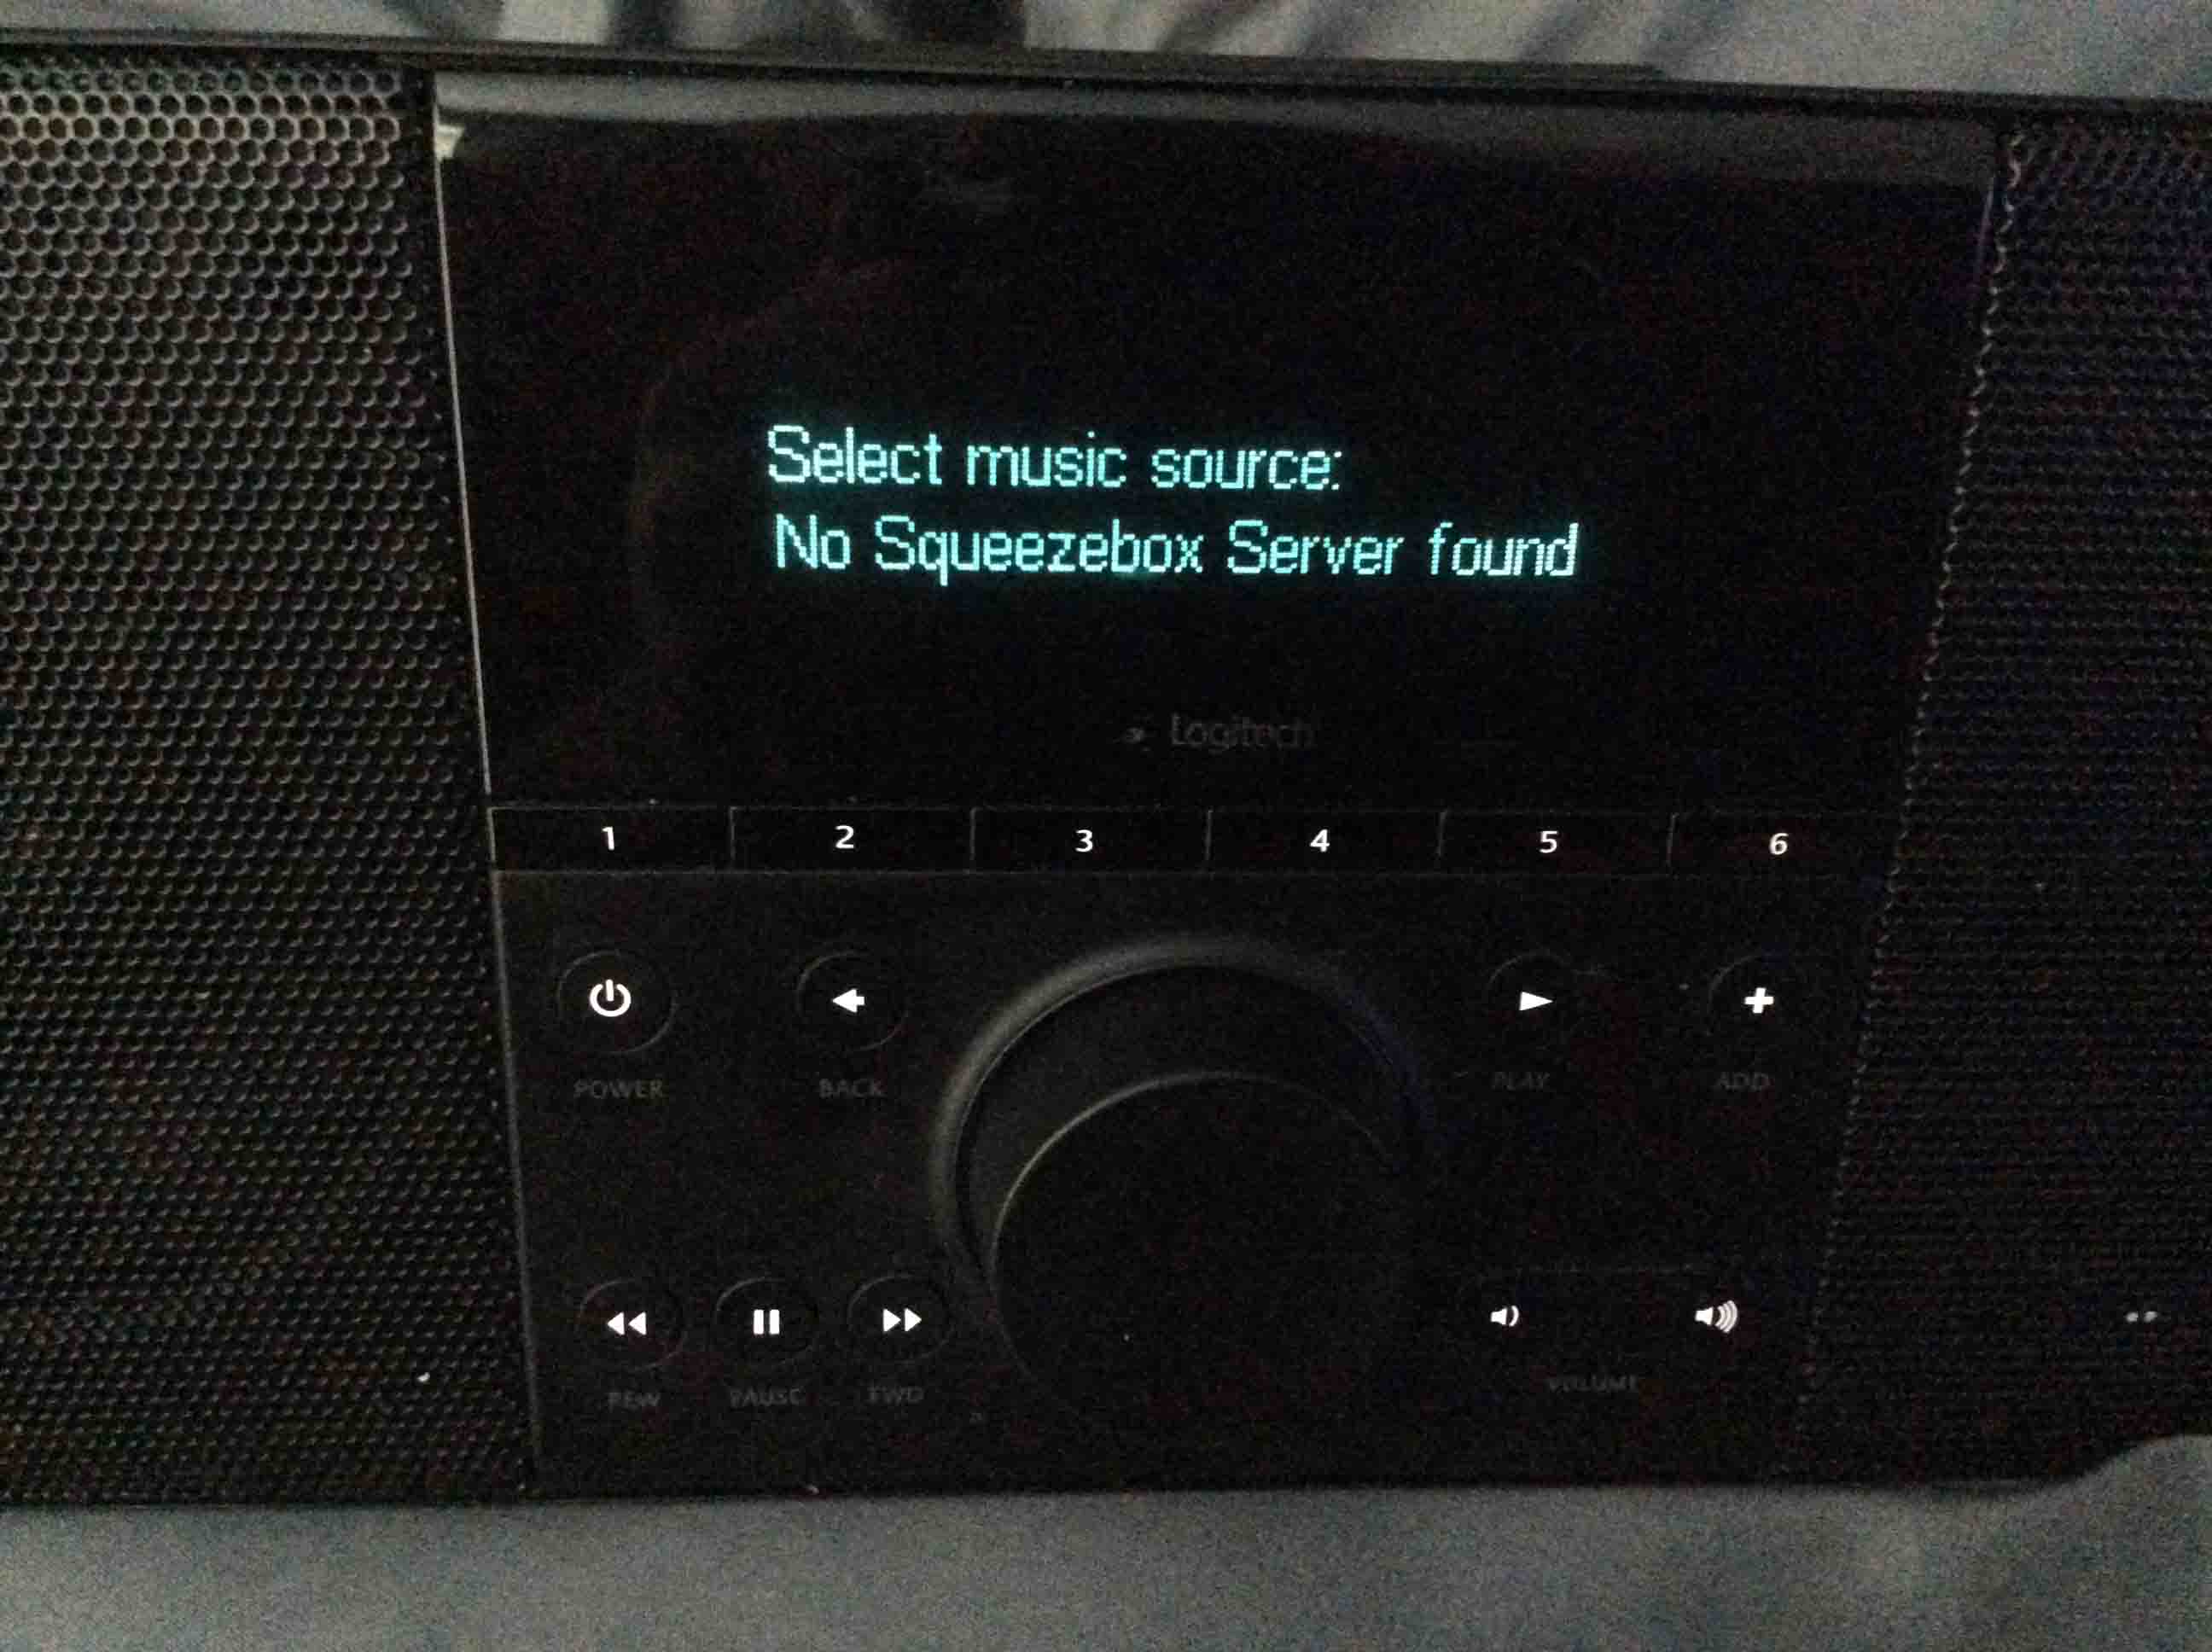
From here, press the knob. The Squeezebox then asks you to Select the music source on the following screen.
In this demo, we’re not running a local version of the Squeezebox Music Server software. So the radio displays No Squeezebox Server found message above.
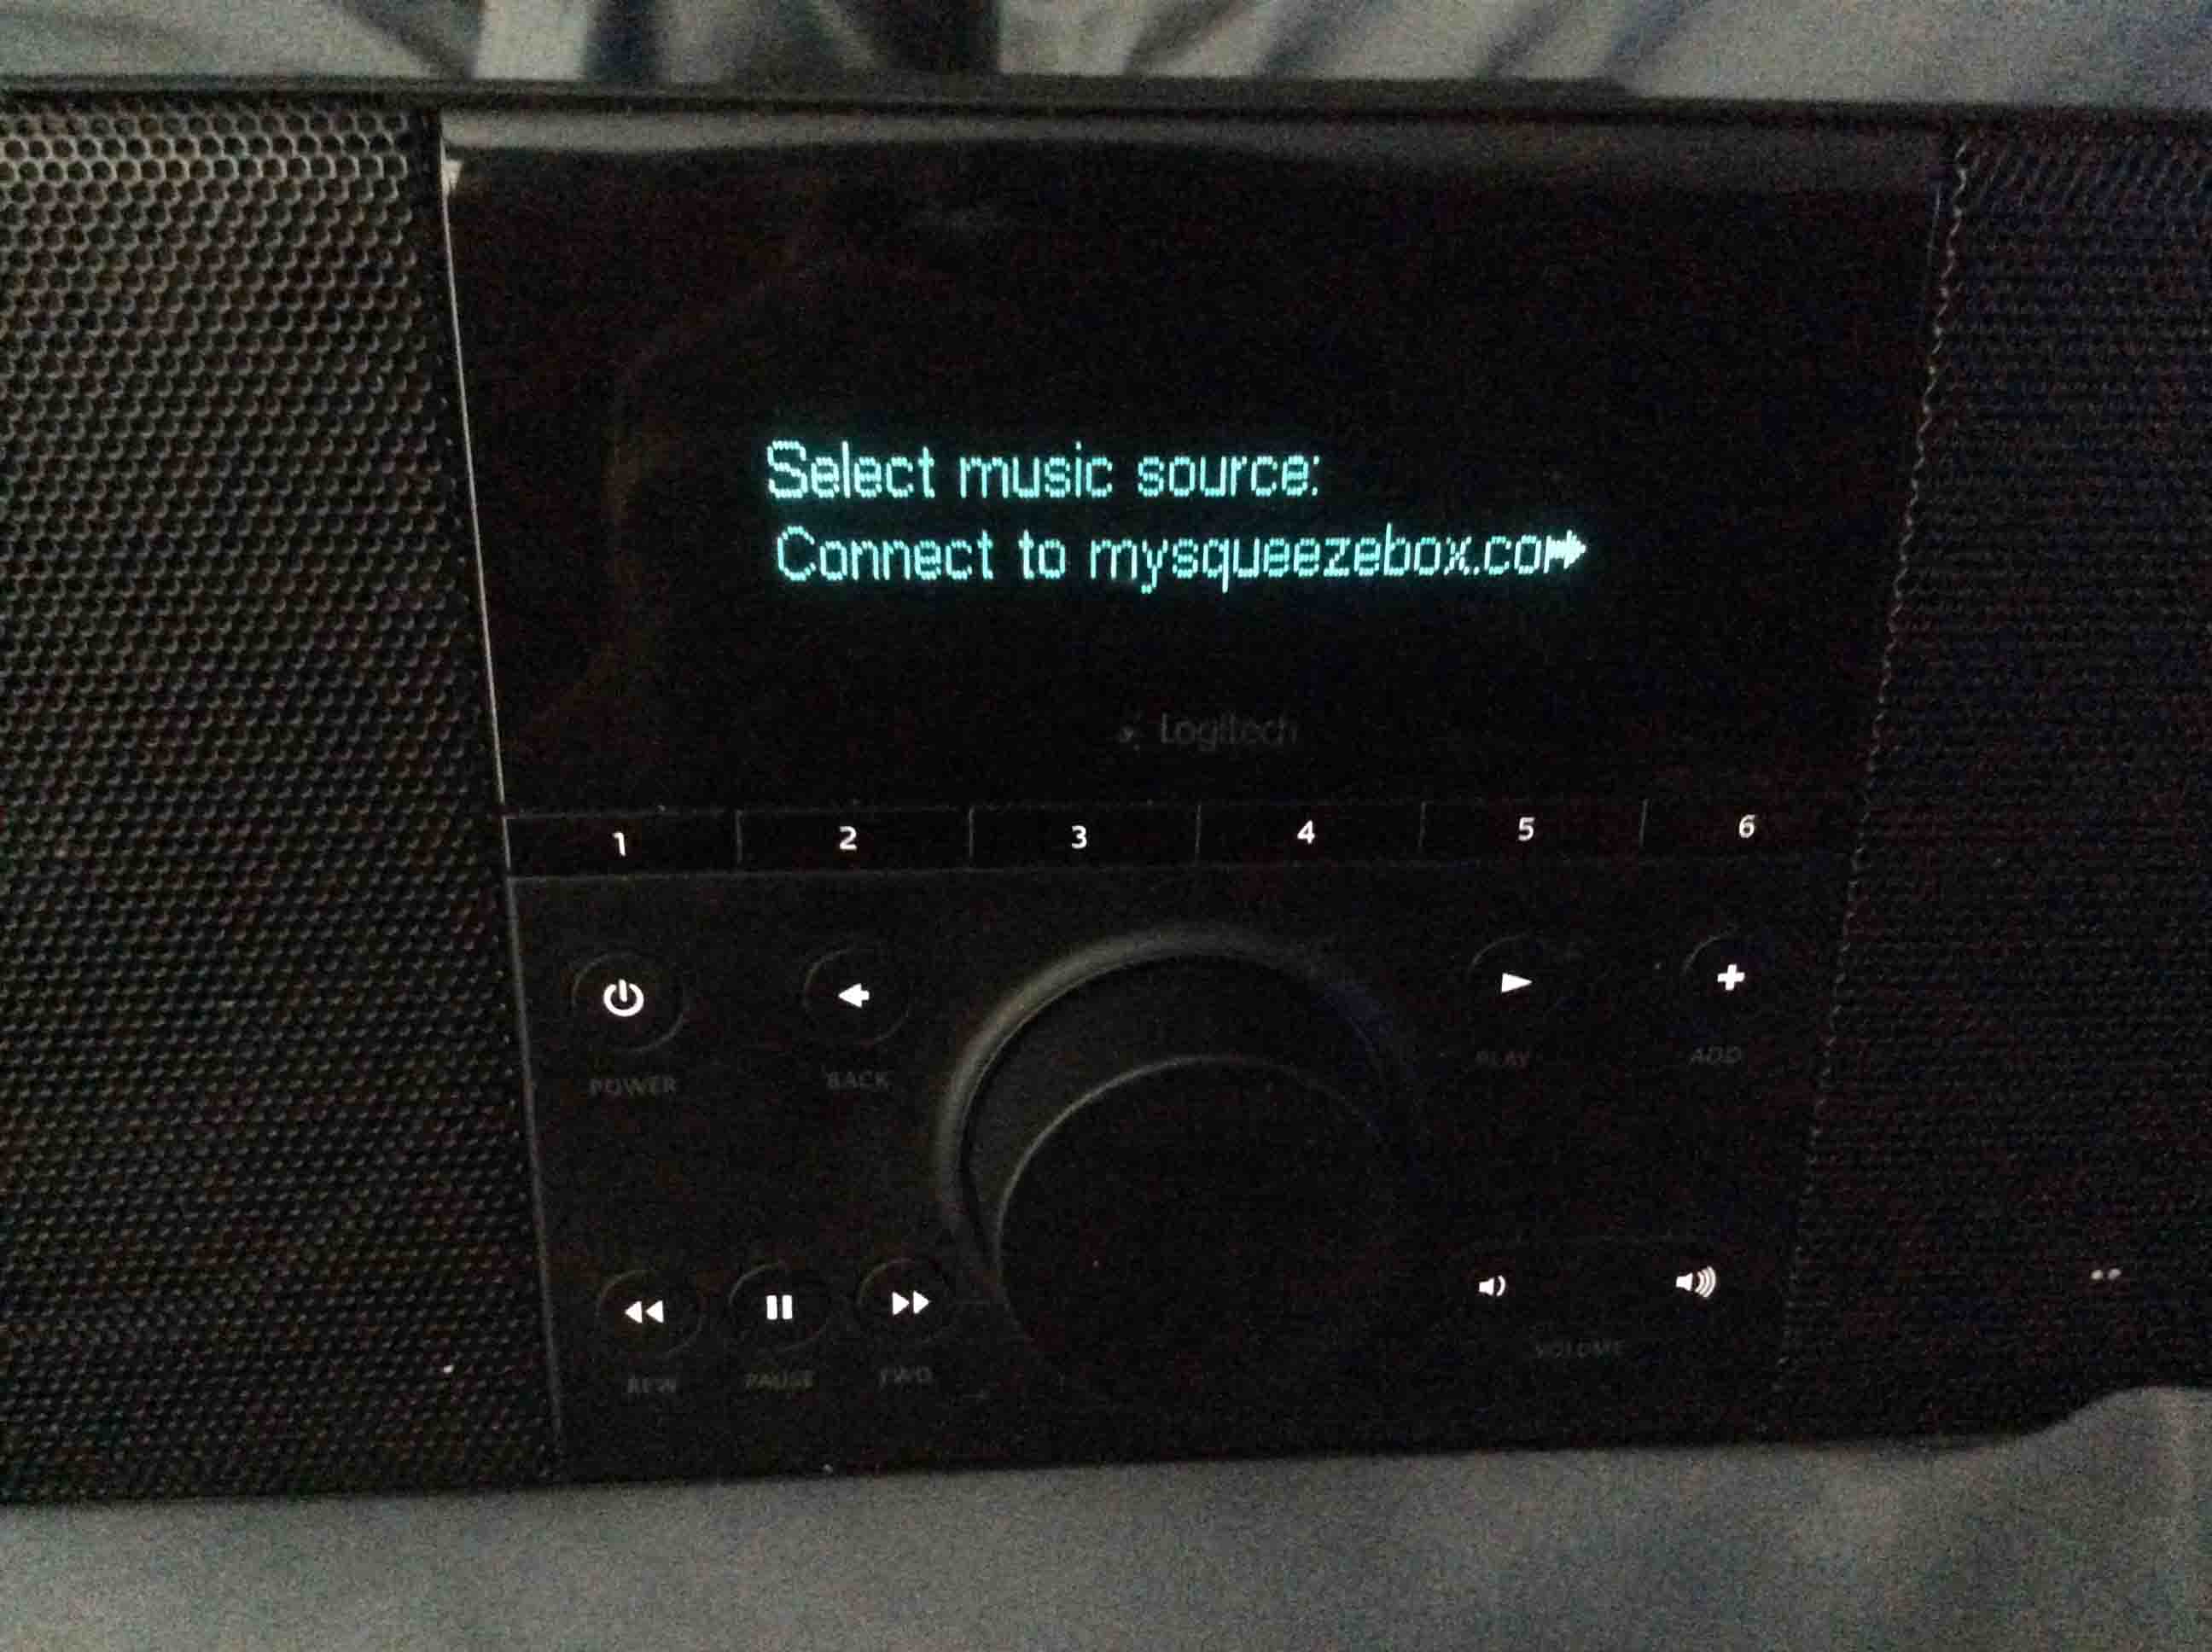
So, we turn the knob to select the Connect to myqueezebox.com internet-based music server, as shown next.
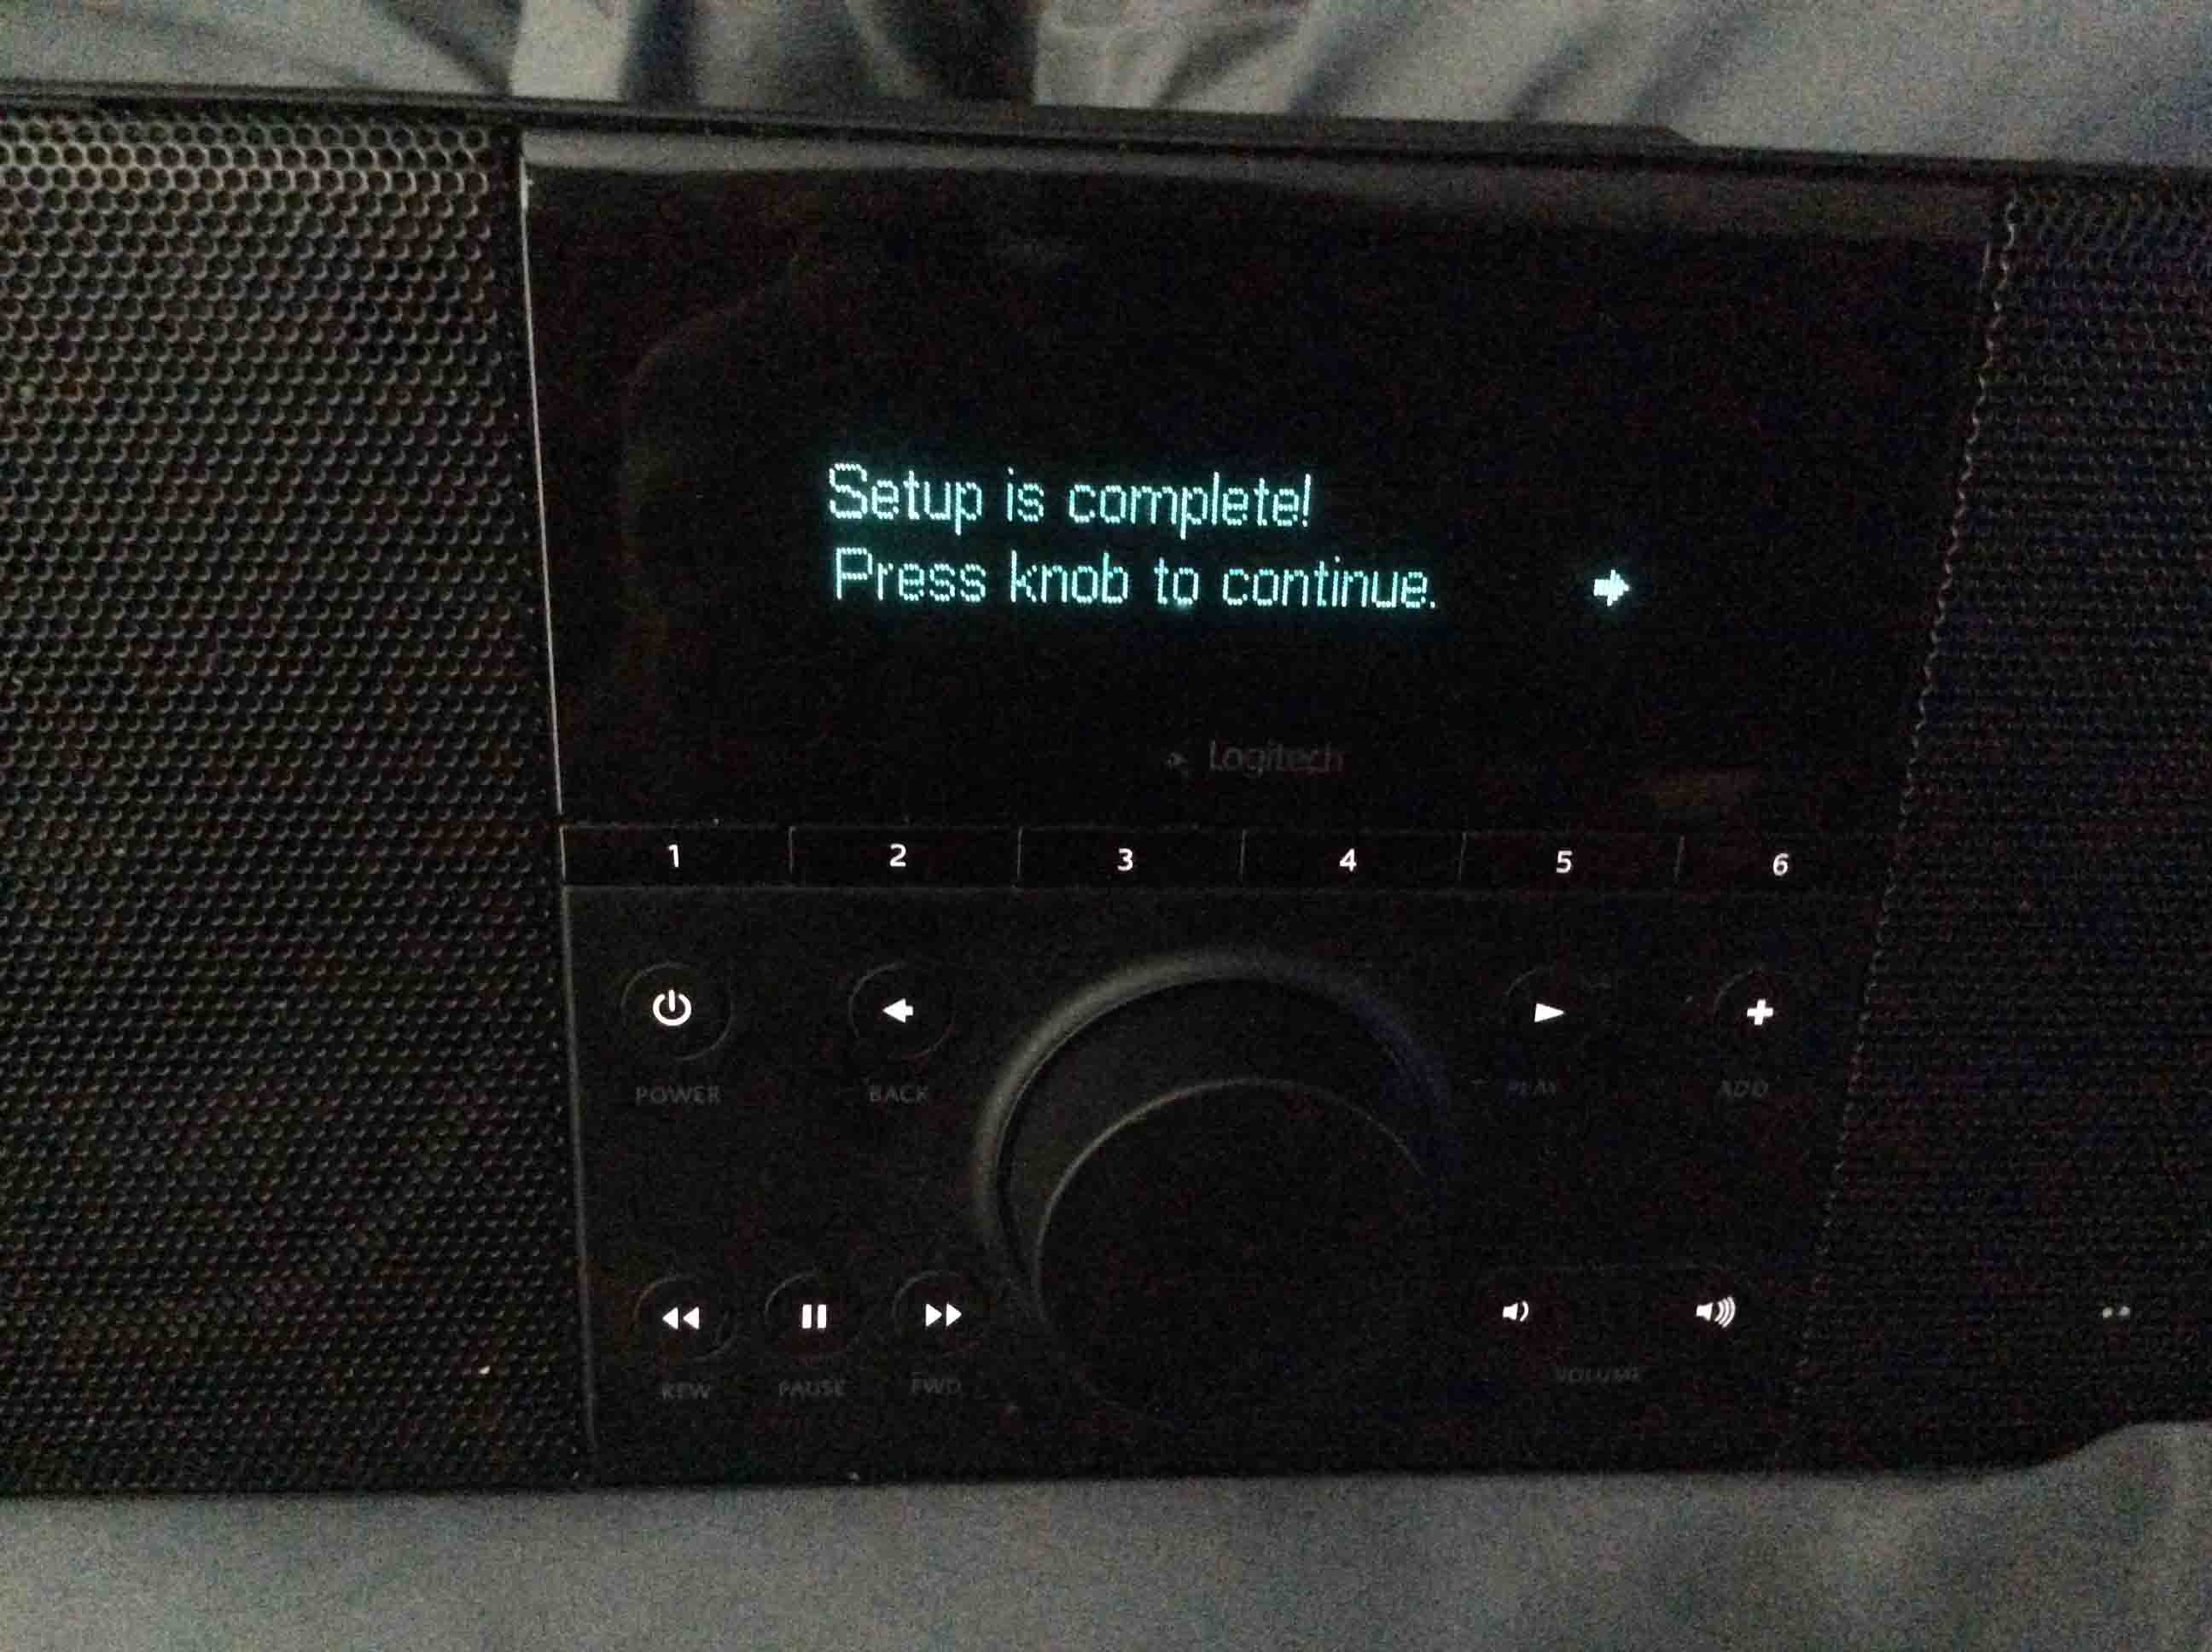
Press the knob again. You have now successfully completed the Squeezebox Boom’s network changing WiFi routine. So the Setup is complete! screen displays that message.
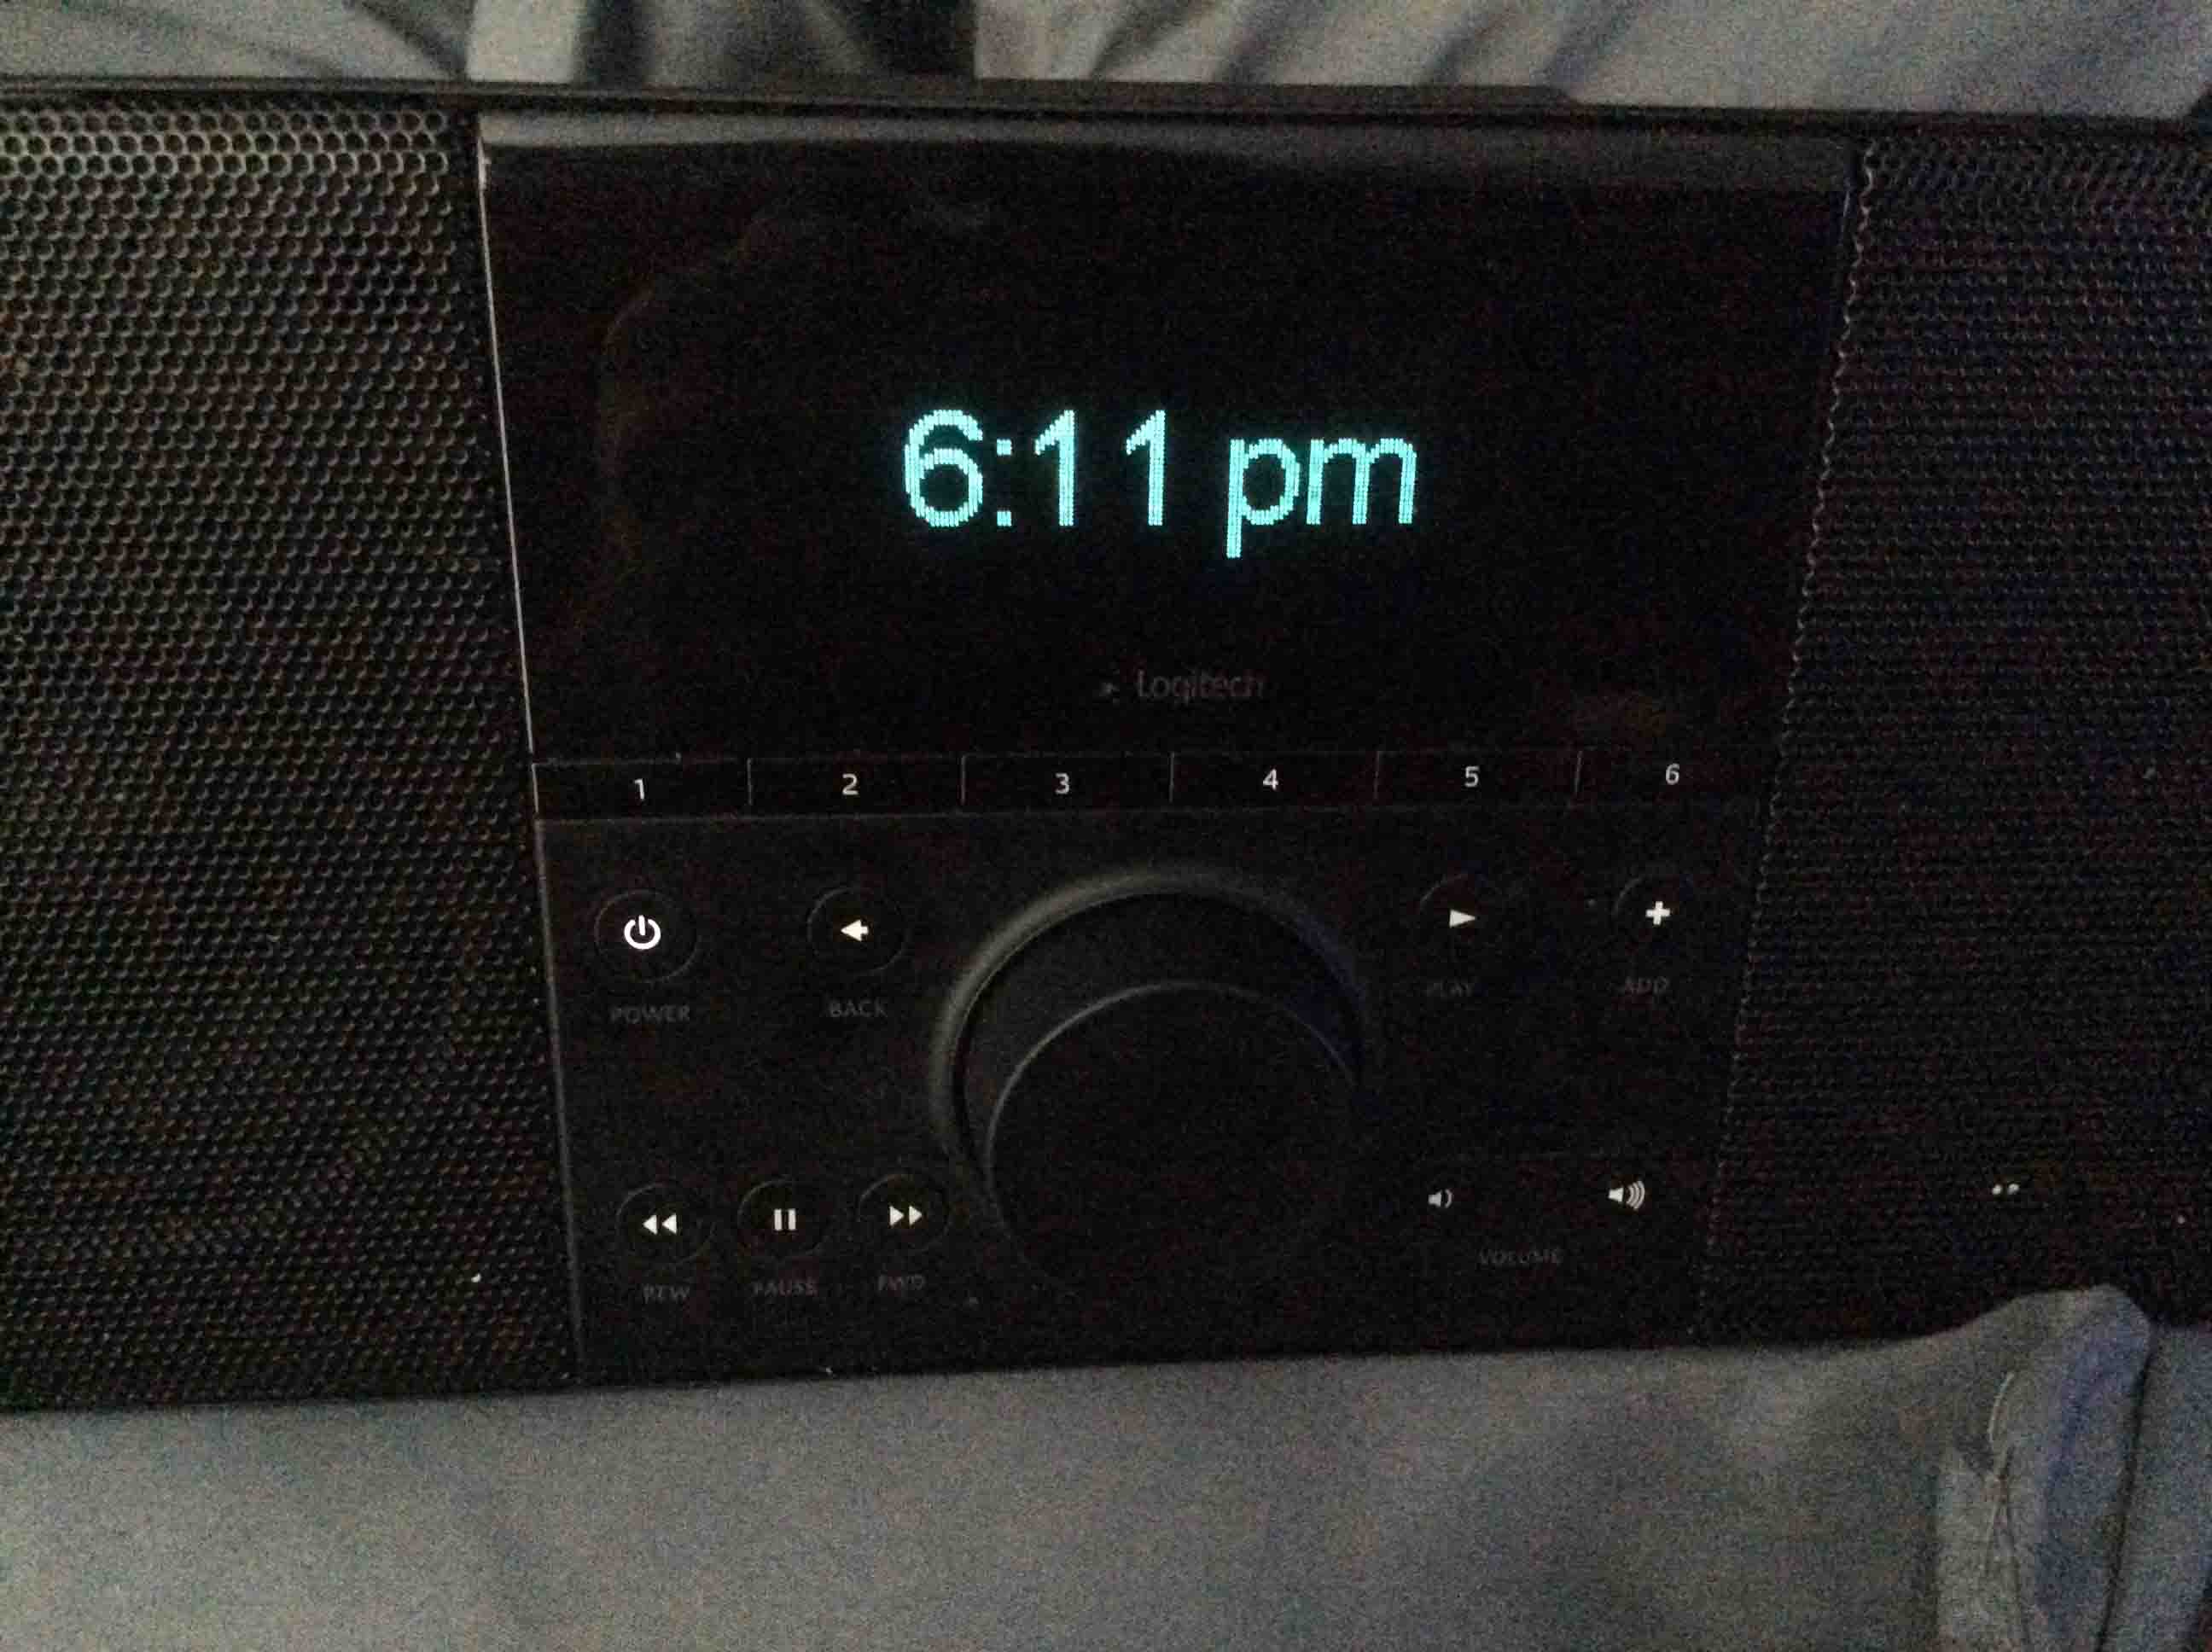
Press the knob one more time. Then the radio reverts to the standby / OFF mode if all went well. The time-of-day clock then appears again, as follows.
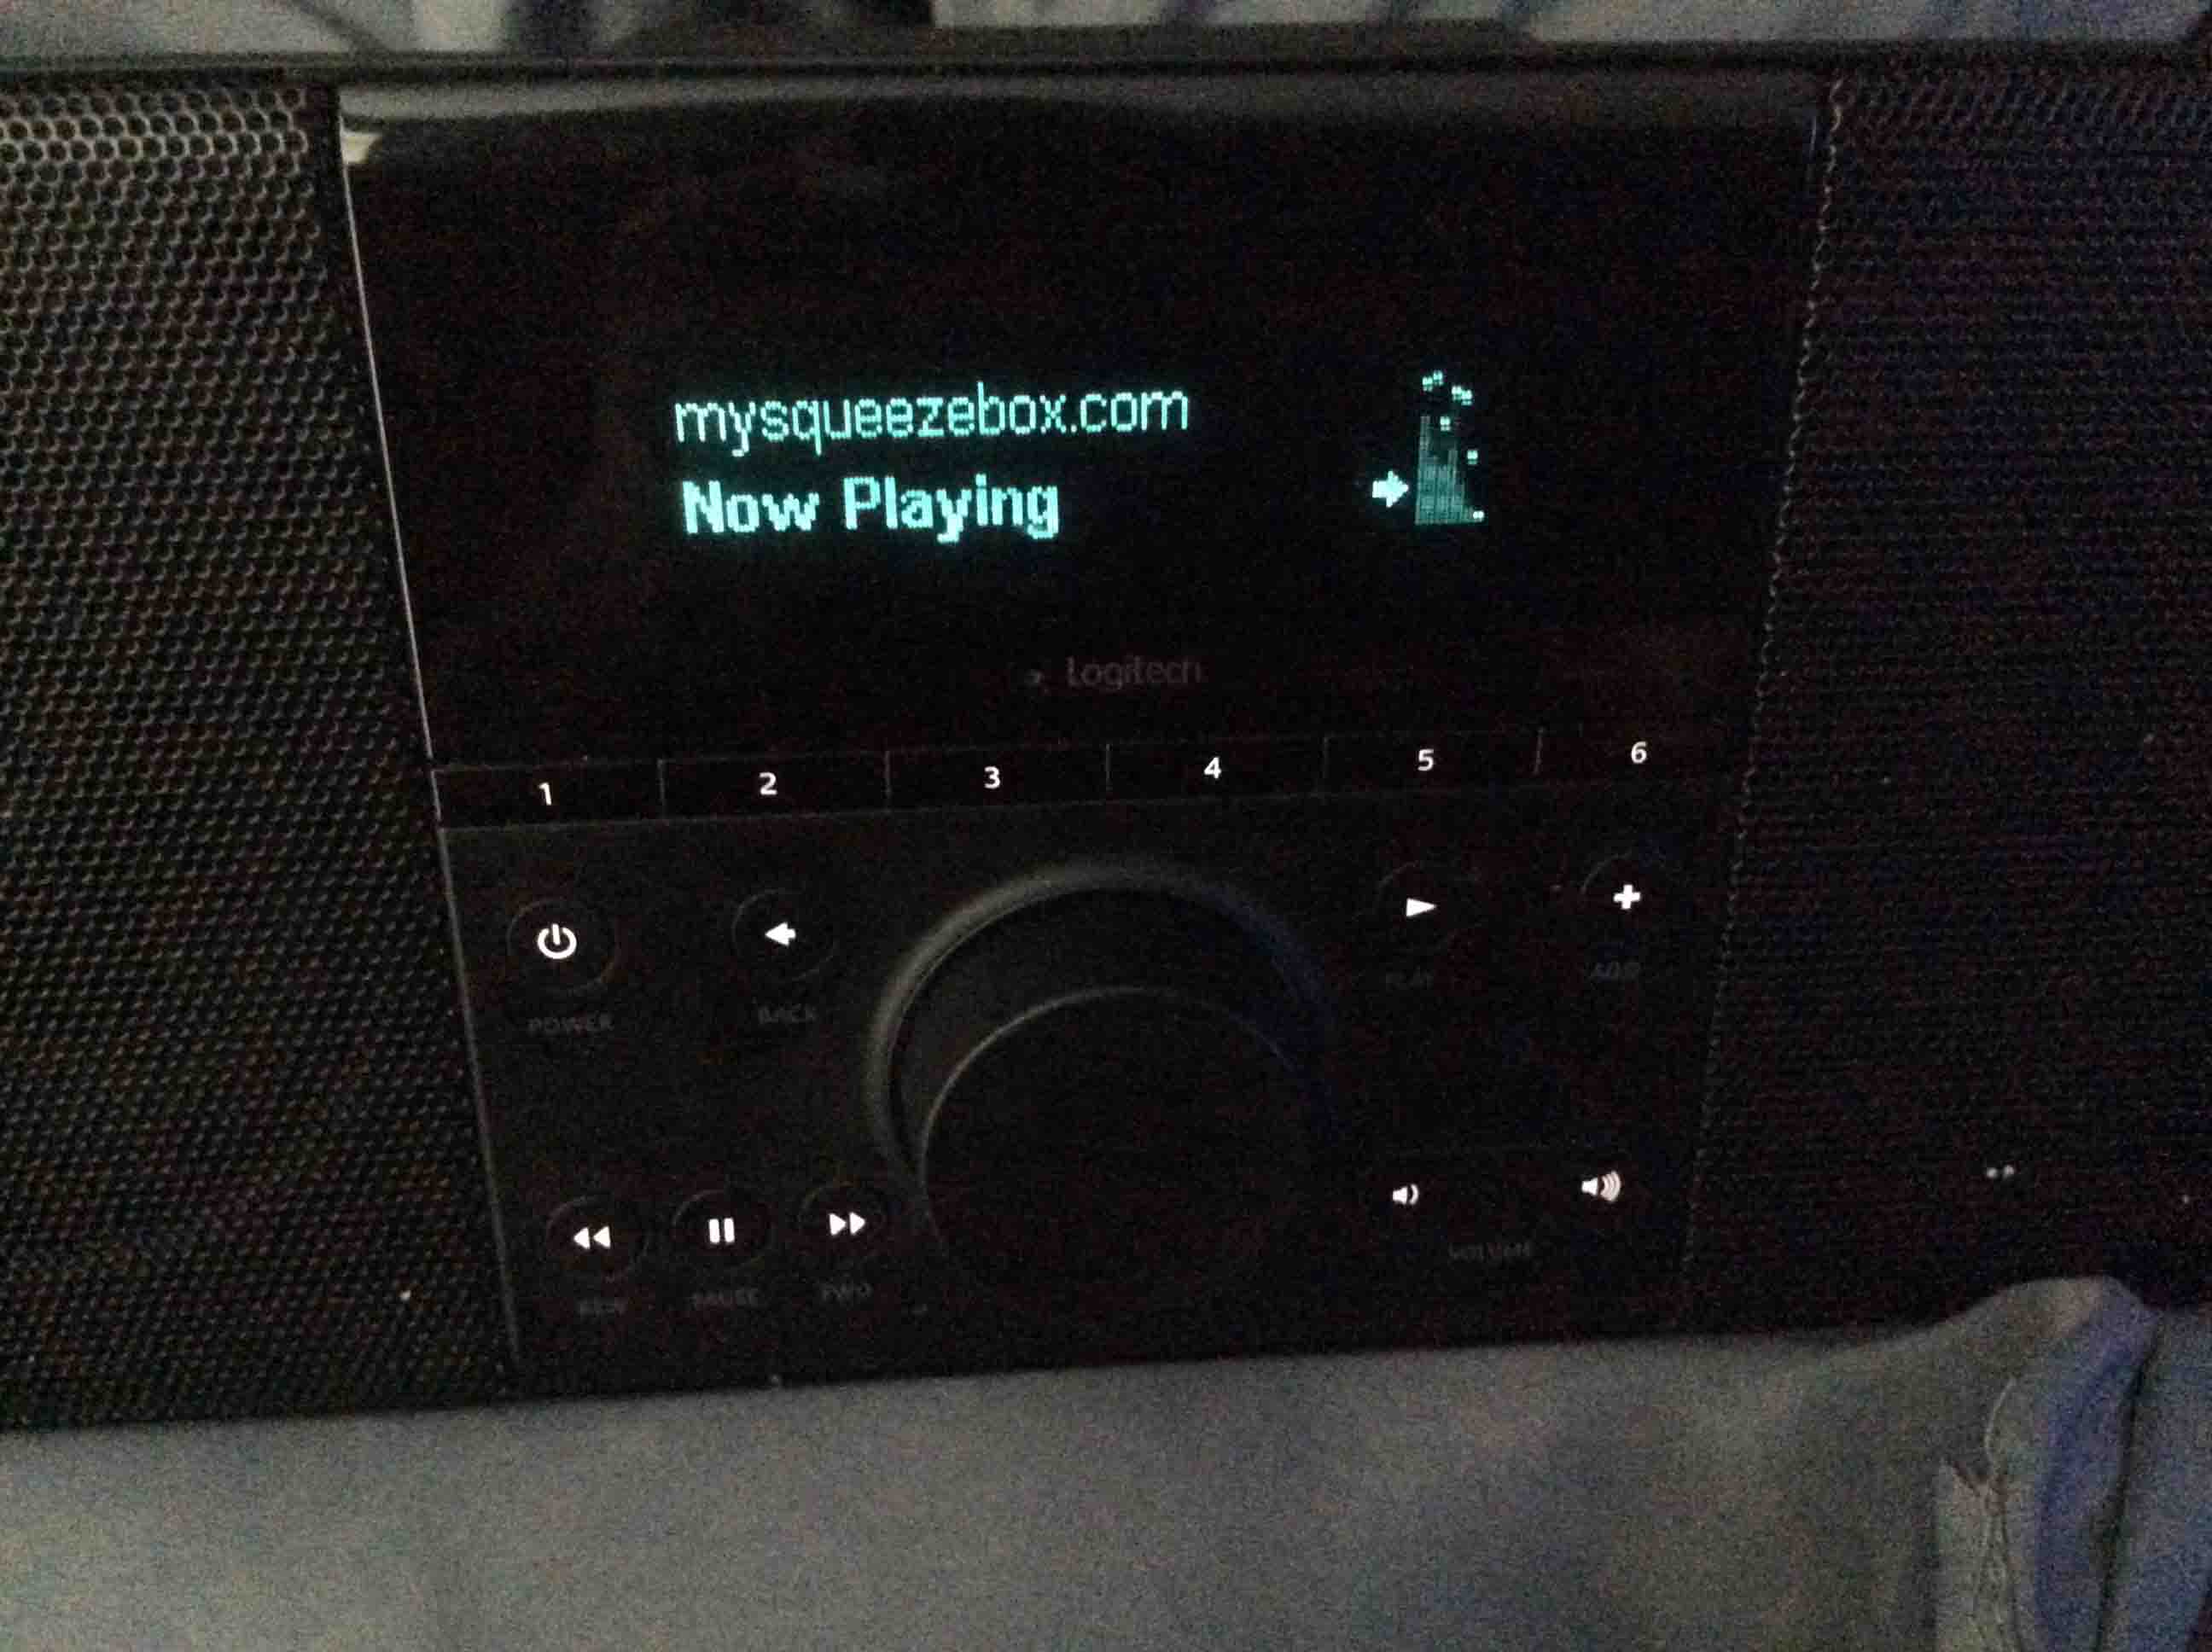
Finally, test the radio by pressing one of the favorites buttons you had previously set up on your other network. Or you can press the Power button. Then move to the Search option to find an internet radio station, and then play it. When it plays correctly, you’ll hear it if the volume is turned up a little. The play status then appears on the screen, as follows.
Your Squeezebox has now been successfully configured to connect to the new WiFi network.
This entire routine takes less than ten minutes normally.
The common Honeywell thermostat offers several ways (at least) to cut your heating and cooling…
To check battery on the JBL Go 3 speaker, the status lamp tells about the…
To check battery on the JBL Go 3 speaker, the status lamp tells about the…
We've enjoyed hot instant coffee and tea for more than a score now. So these…
We've enjoyed hot instant coffee and tea for more than a score now. So these…
We've enjoyed hot instant coffee and tea for more than a score now. So these…