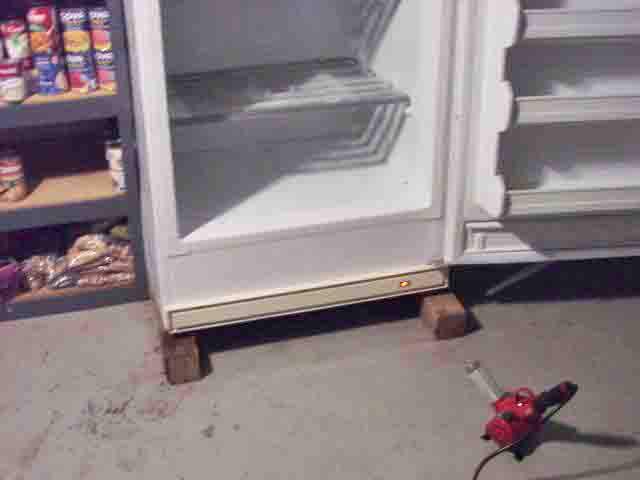
Typical upright stand up freezer, in need of defrosting.
A fast way to defrost a Frigidaire upright freezer, is to use a heat gun or blow dryer. The warm air really shortens this job, whether the freezer be a frost free or manual one.
We have lived in a few apartments with manual-defrost freezers. Indeed at this very moment, we have a manual-defrost Frigidaire upright freezer. And it needs semi-annual defrosting. So we defrost it once or two times per year. This keeps the cooling coils in the shelves clear and working efficiently.
Heat guns work best for this job, we feel. Why? Because of their built-in stand. That stand lets them sit on the floor (or on a nearby shelf). Then, you aim the blowing hot air through the open freezer door. Now you could use a hair dryer. But these generally do not free-stand the way we need. However if you only have a hair dryer, then use it. But you’ll just have to hold it throughout the job.
So to defrost our Frigidaire freezer, we perform the following routine every six months.
Unplug the freezer, without touching its thermostat. Leaving this alone preserves its current temperature setting. So you won’t have to figure that out again later. Plus, this cuts the chances of electric shock. We do not recommend defrosting a freezer that is still running.
Then, block open the door with a board. But don’t force it too far wide. Or you might break the hinges, the door, or the freezer case itself.
Next, remove all food to insulated coolers nearby. This keeps it from thawing during freezer defrosting.
Use these to sop up any water that collects on the freezer bottom.
Next, aim the heat gun from the floor up into the open freezer. Then turn it on. Make sure though, that its intake vent is fully open for max hot airflow. This also helps prevent heat gun overheating. Finally, position the gun far enough away from the freezer that no dripping water touches it.
Then, wait until all the ice inside melts. Mop the floor in front.
Defrosting ours takes most of an hour when it has heavy ice buildup.
Many tall freezers feature a drain plug that you can open. They connect a drain tube to this, which you can aim into a bucket. But if they don’t have a drain, wipe up the water as it trickles down.
Once all the ice melts, turn off the heat gun. Then set it in a safe place to cool, away from furniture, draperies, and carpets.
Then, wash out the freezer interior. Use a warm, soapy cloth. Then rinse it with another clean cloth. The inside may still be near freezing. So be quick about the wiping, to avoid cold hands.
We use an old but clean bath towel. Leave as little water behind as possible to help delay ice buildup again.
As you replace each food item, wipe off any wetness from it. This helps avoid having to defrost the freezer again too soon.
Using the heat gun accelerates the defrosting operation. With it, we can clear all ice from a Frigidaire in less than a half-hour. But without it, defrosting can take three to four times as long.
We also tried the pot-of-boiling-water trick. In this method, you place a pot of boiling water inside the freezer and then close the door. This seals in the heat from that pot.
This worked okay. But the pot required reheating on the stove every twenty minutes or so. The heat gun solution is in our experience, by far the most convenient. It’s a speedy means to defrost an ice-caked freezer.
Of course, caution is the word of the day when defrosting a freezer with a heat gun. At close range, an 1875-watt heat gun makes hotter (and thus, more dangerous) air than does a blow dryer. So put the heat gun at least two feet from the open freezer. This cools the hot air reaching the Frigidaire freezer interior. It cools it enough, that it does not melt any plastic parts in the freezer.
Also, large chunks of ice and many cups of water will run out of a freezer, as defrosting proceeds. For that reason, place plenty of towels in front of it on the floor. Then, position the heat gun close enough for effective defrosting. Yet put it far enough away that the water does not spill on it.
Keep the heat gun and cord well clear of the dripping water and ice. Keep things dry to cut the risk of electrocution. Whatever heat gun you use, should have the third (grounding) prong on its power cord. Finally, plug the heat gun into a GFI outlet, and avoid using of long extension cords.
Shows how to pair Amazon Echo to Bluetooth speakers. These include the generation 1 and…
Many speakers including this one, feature a status light that glows red while charging /…
Many speakers, including this one, feature a status light that glows red while charging /…
Here we cover the Amazon Echo Dot 3rd generation power cable specs. This is the…
The Sony SRS XB32 speaker charging indicator is a small LED light in the back…
Here we cover the Echo Dot 3rd generation power adapter specs. This is the wall…