A heat gun really speeds up how quickly a freezer defrosts, whether it be frost free or manual. Now we have rented a few apartments with manual-defrost freezers. In fact, we have a Frigidaire manual here right now. And as such, it requires semi-annual defrosting.
We’ve only tried this defrost freezer procedure on upright, vertical units (those with a vertically positioned door). However, this method will defrost a chest freezer also (those with a horizontally-positioned door on their tops). In that case, just find a place above the freezer. Then aim the hot air down into the open chest.
For either chest or upright freezer defrosting, heat guns work well. Why? Because they have a stand that allows for sitting them on the floor or shelf. From there, you can aim the hot air stream through the open freezer door.
So to defrost our Frigidaire upright freezer, we perform the following procedure every six months:
How to Defrost Freezer with Heat Gun: Step by Step
1. Disconnect Freezer from Power
Unplug the freezer, without touching its thermostat. Leaving this alone preserves its current temperature setting.
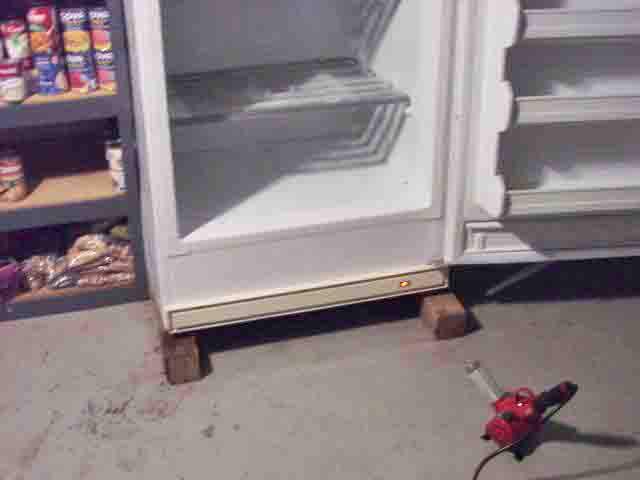
2. Prop Freezer Door Open
Then, block open the freezer door with a board. Take care not to force it too far wide. If you’re not careful, you break the hinges or the door.
3. Move All Freezer Contents to Insulated Coolers
Next, remove all food items. Store them in some insulated coolers. This way, frozen meat, vegetables, and bread, remain rock-solid while you defrost the freezer.
4. Break Out the Heat Gun, to Continue with How to Defrost Freezer
Next, aim the MHT Products heat gun from the floor up into the interior of the freezer. Next, turn it on, making sure that you turn its intake vent completely open. This gives maximum hot air discharge with minimal chance of overheating.
5. Watch that Ice Quickly Melt Away to Continue with How to Defrost Freezer with Heat Gun
Then, wait until all the ice inside has melted; periodically mopping up the floor at the freezer’s front. This can take the better part of an hour for heavily accumulated ice in a deep freezer.
6. Every so Often, Wipe up Water from Melting Ice
Many tall freezers feature a drain tube that you can route into a drain or bucket. But if not, then wipe up the water as it drips down to the freezer bottom.
7. Done with the Heat Gun
Once all the ice melts, turn off the heat gun. Then set it in a safe place to cool. Be sure to keep it away from furniture, draperies, carpets, and other flammable items.
8. Clean Inside of Freezer to Continue with How to Defrost Freezer
Then, wash inside the freezer with a soapy cloth and warm water. Then rinse it out with another clean cloth. Now the interior may still be near freezing. So spending too much time on this step may chill your hands. Therefore, be quick about it.
9. Thoroughly Dry the Freezer Interior
Then, dry the inside of the freezer with an old but clean bath towel. You may need several. Then leave as little water as possible. This helps to lengthen the time before the next defrosting.
10. Power Up the Freezer Again
Wipe off the cord, especially the AC plug. Make sure there’s not dirt or corrosion on the prongs. If so, clean it up. Also, inspect the cord for damage, and replace if you see any. Look for fraying, nicks, or stiff spots.
11. Move all Food Back into Freezer
As you replace each food item, wipe off any water from them. This avoids having to defrost again too soon. So make sure your food containers are dry before putting them back in the freezer.
Advantages, Benefits, and Pros of How to Defrost Freezer with Heat Gun
Seriously Cuts Freezer Defrosting Time
Using the heat gun speeds up the defrosting. With it, we can clear all ice from our Frigidaire in less than a half-hour. But without the heat gun, defrosting can take two to three hours.
No Need to Hold Heat Gun Once Set Up
We used to use a hair blow dryer. However unlike the heat gun, these have no floor stand. So you’ve either got to hold the dryer in your hand throughout the entire freezer defrosting operation. Or you must find some way to position it on a chair to aim the air stream. For this purpose thus, heat guns are highly convenient.
Requires Less Work
We’ve also tried the pot-of-boiling-water trick. For that you place a pot of boiling water inside the freezer and then close the door. This seals in the heat.
Now this worked okay. But the pot required reheating on the stove every twenty minutes to keep the freezer ice a-melting. So the heat gun solution is by far the most speedy to defrost a freezer. Plus there’s no reheating or risk of spilling hot water involved.
Disadvantages, Cons, and Problems with How to Defrost Freezer with Heat Gun
Risk of Severe Burns
Of course, caution is the word of the day when defrosting a freezer with a heat gun. At close range, an 1875-watt heat gun can produce hotter (and thus, more dangerous) air than a blow dryer. So position the heat gun at least two feet from the open freezer. This assures that the hot air reaching the freezer is not so hot that it melts any plastic parts.
Beware of Falling Ice and Water
Also, some large chunks of ice and water will fall out of the freezer. So place plenty of towels in front of the freezer on the floor. Then position the heat gun close enough for effective defrosting. Yet keep it far enough away that the water and ice do not hit it.
Risk of Electric Shock
Keep the heat gun and cord well clear of the dripping water and ice. And to virtually eliminate the risk of shock, the heat gun should have the third (grounding) prong. And you should plug it into a GFI outlet, avoiding extension cords.