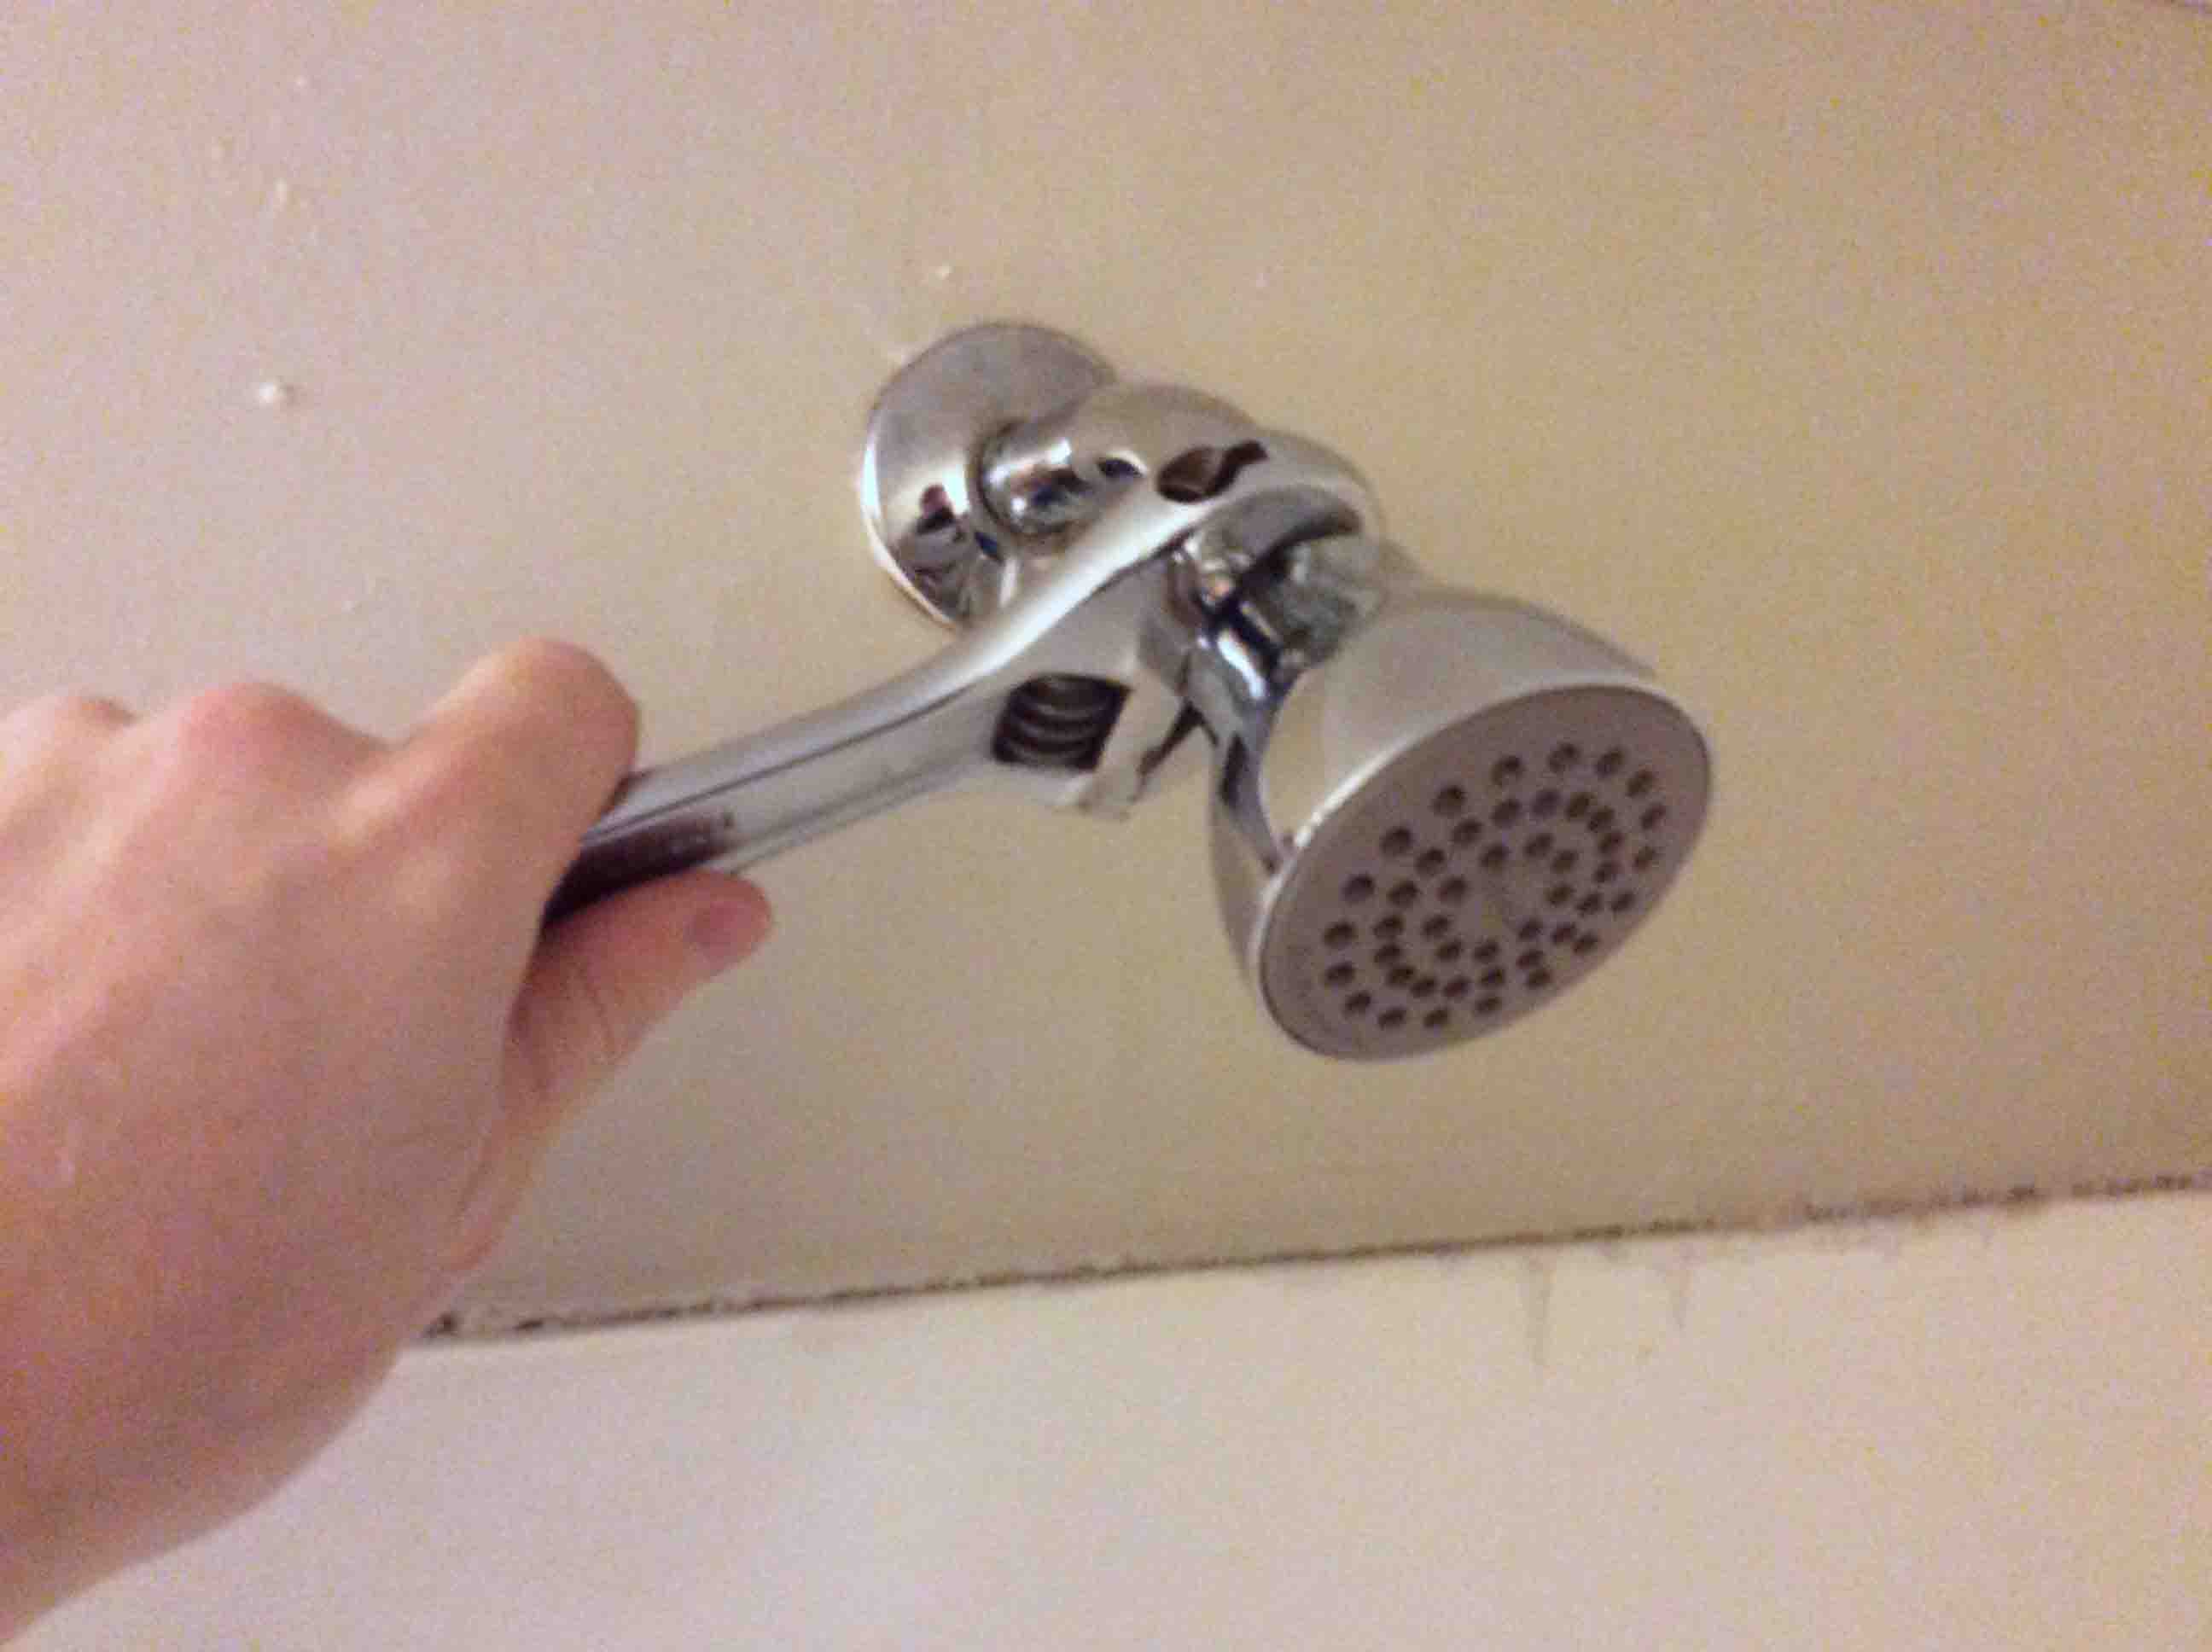
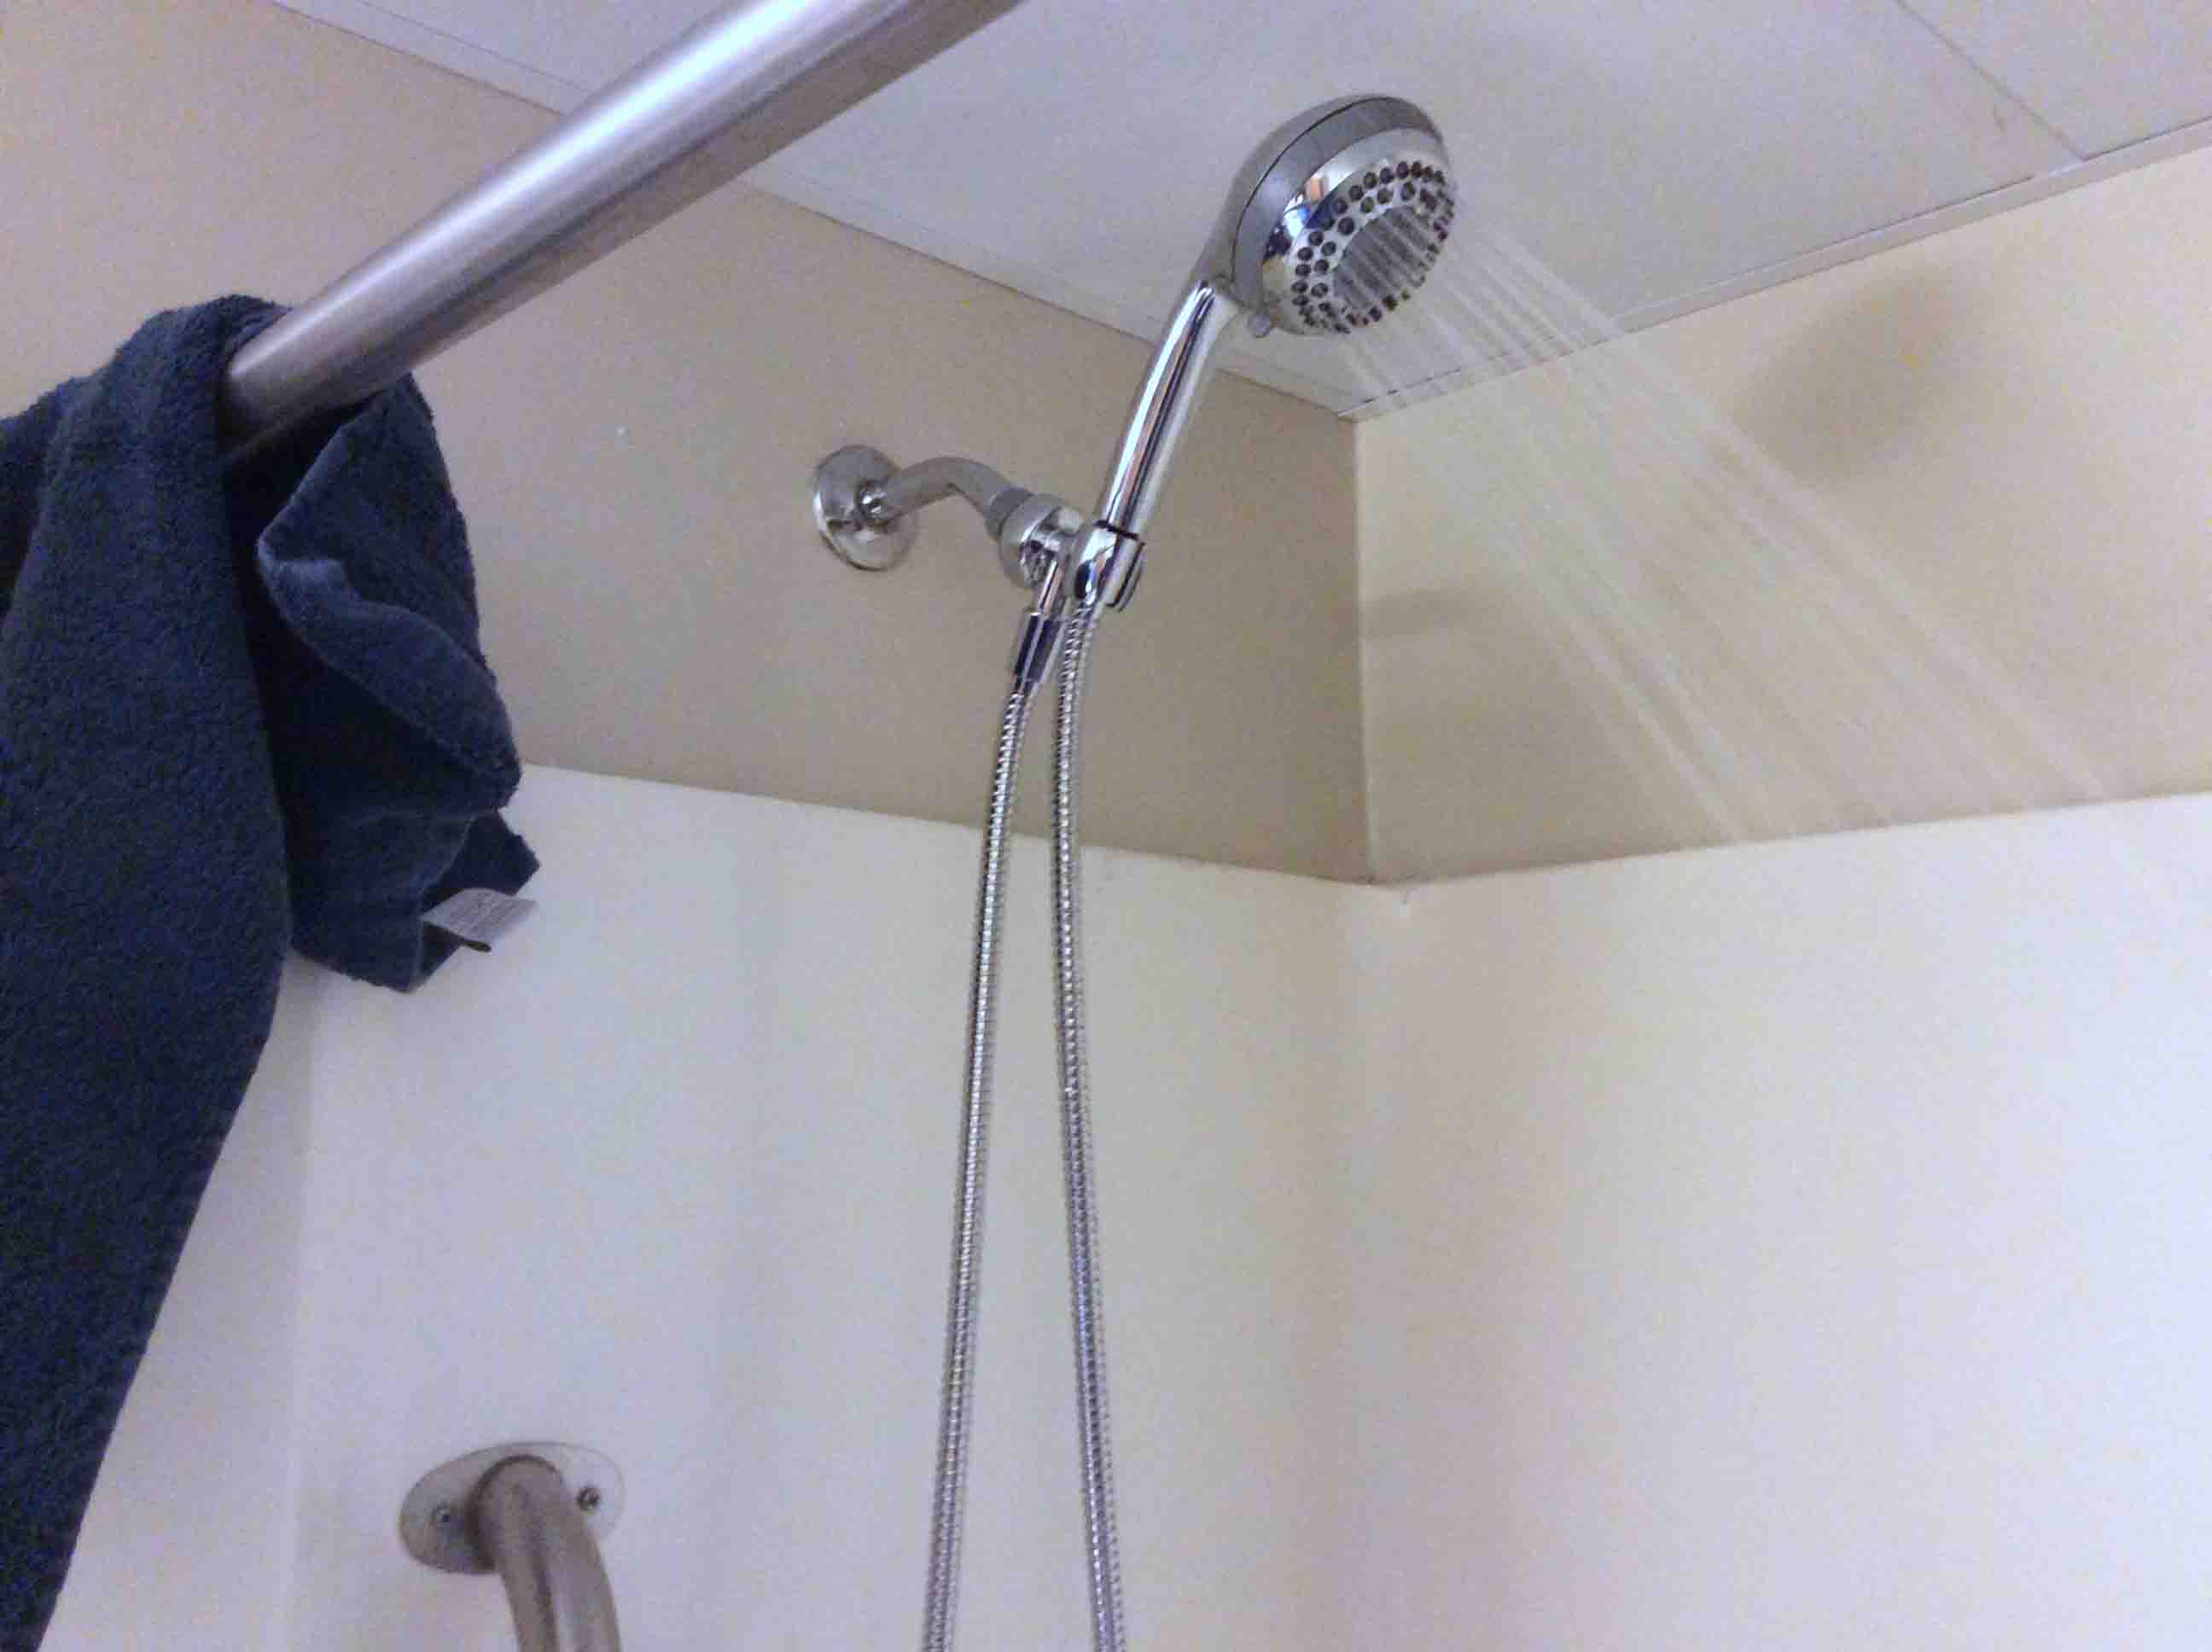
Waterpik hand shower after installation, and working properly.
We installed our new hand held massaging shower head, in less than fifteen minutes. In this piece we cover the instructions on how to install hand held shower head.
We needed no tools or supplies, except for when removing the old shower head. For that, we used a Crescent adjustable wrench. Here’s how we did that.
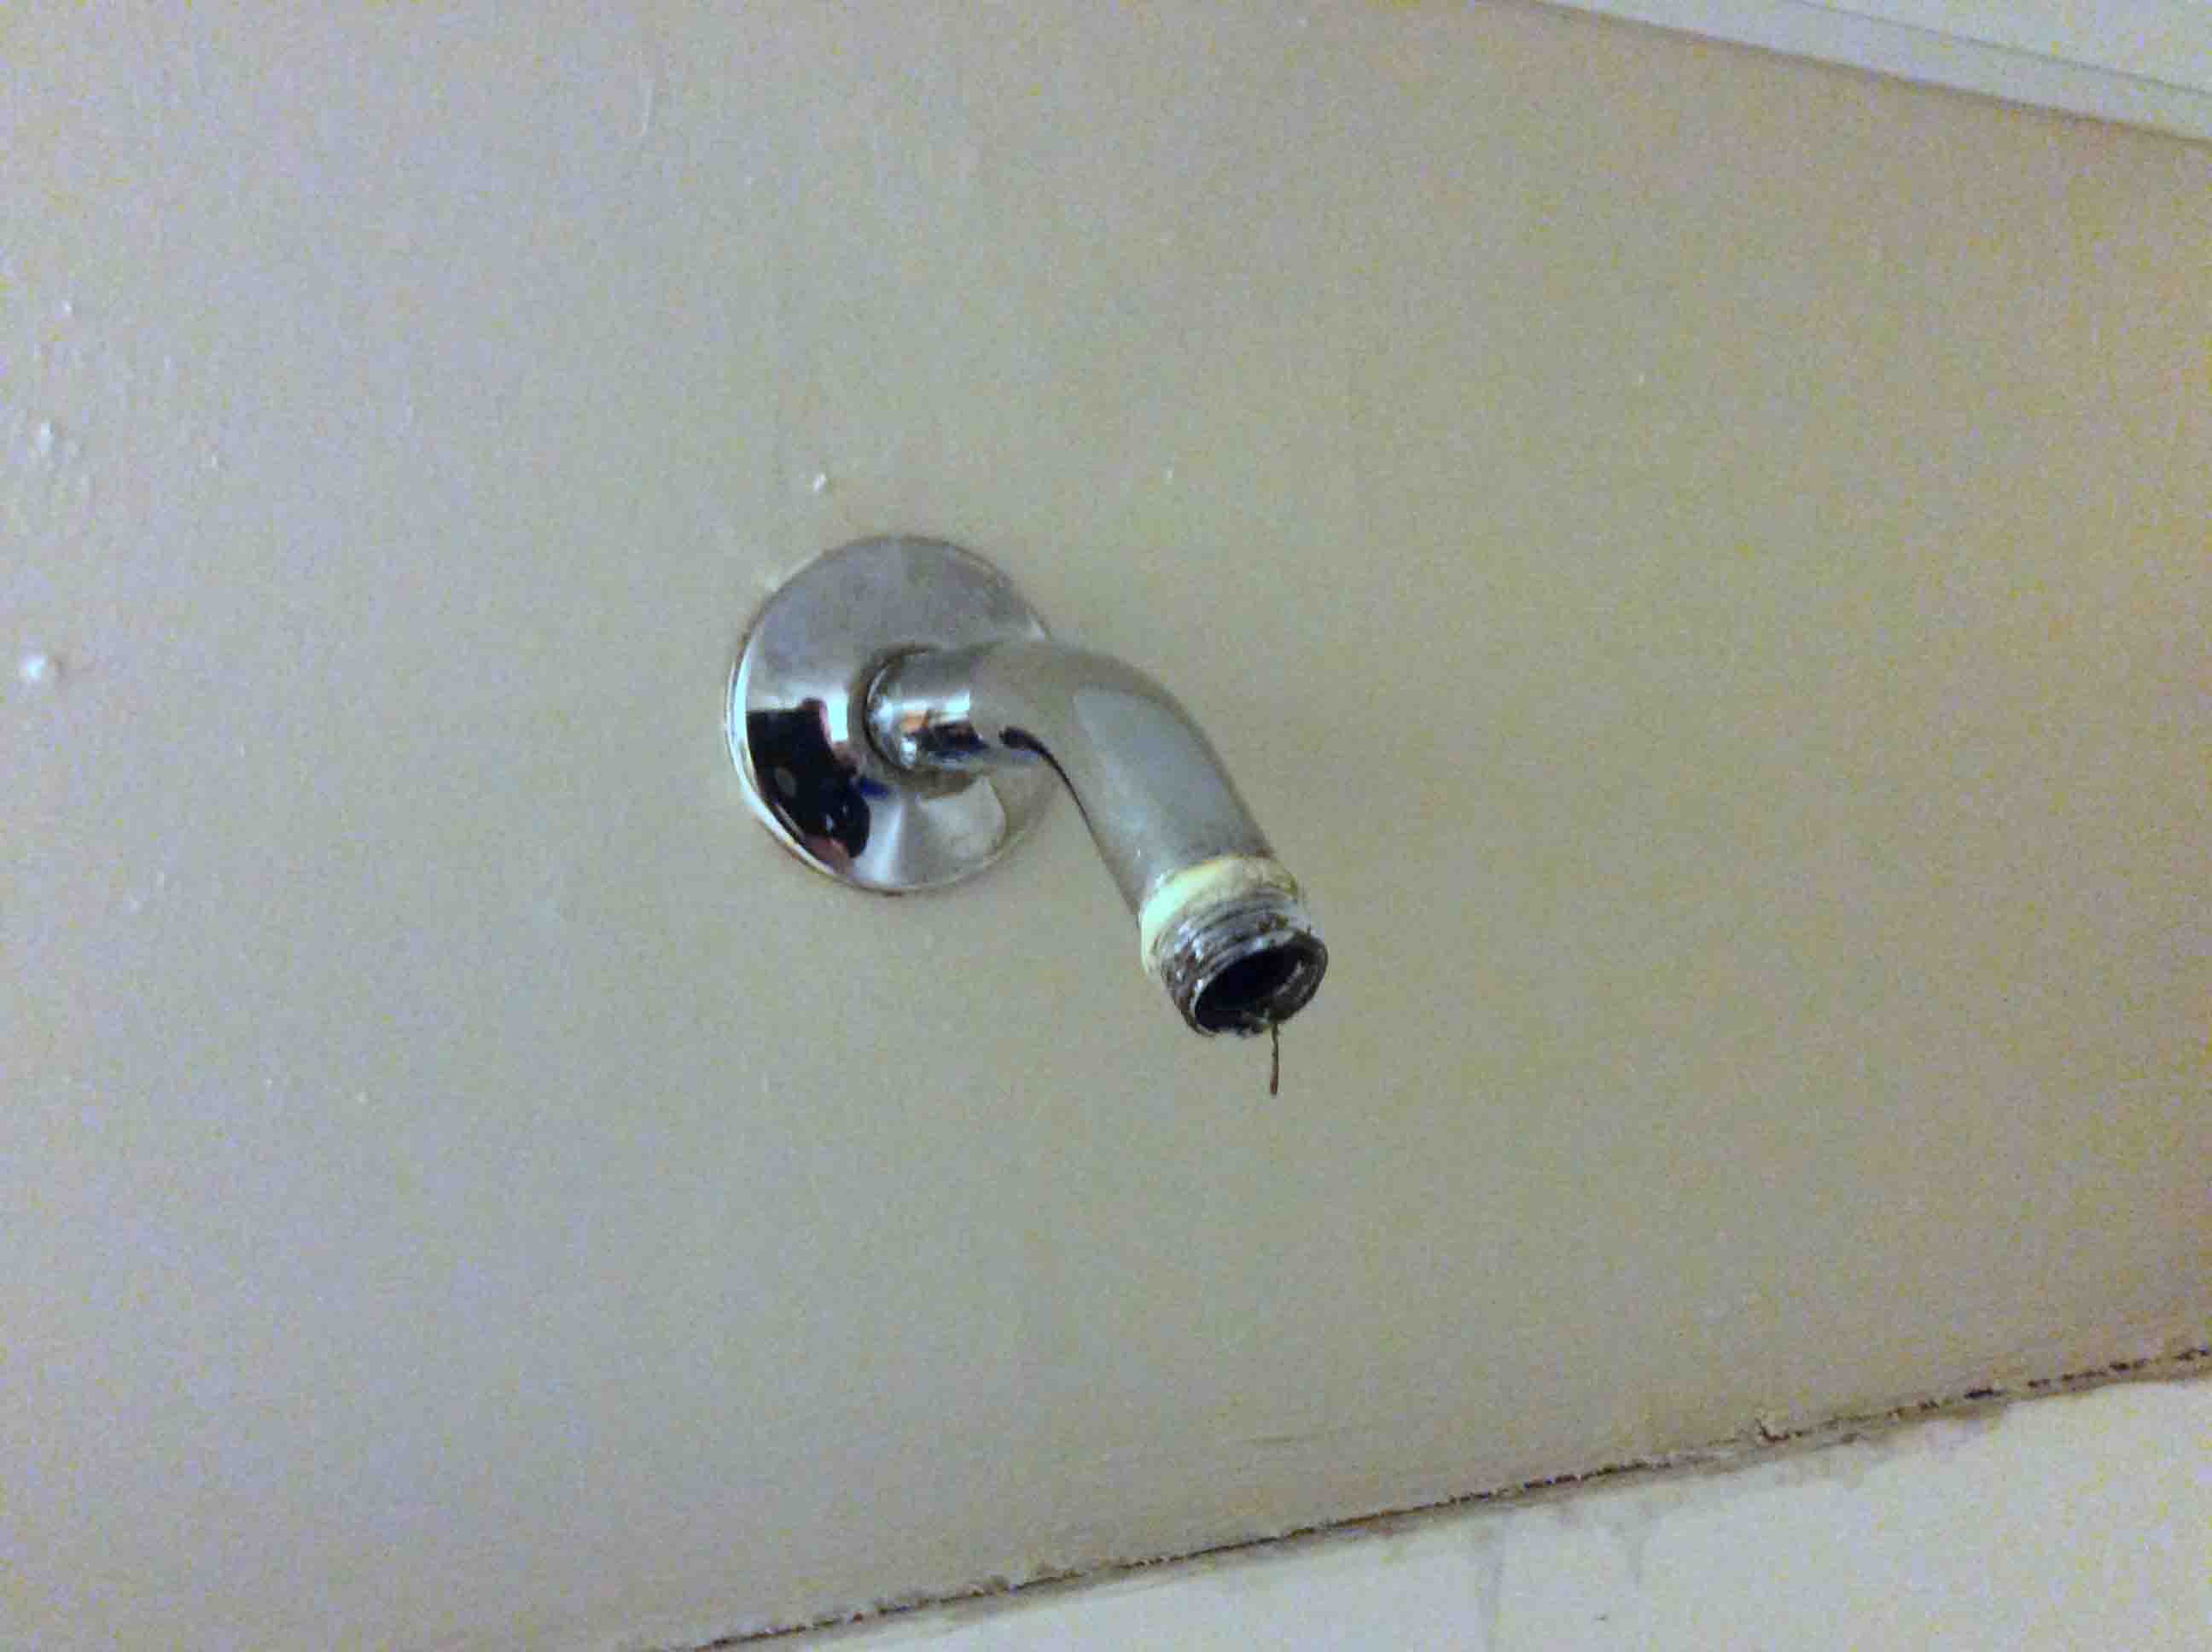
Now to the hardest task in installing a new hand held massaging shower head. This is probably removing the old fixed mount shower head. Especially if it’s at least several years or decades old, or shows signs of metal corrosion.
Note the debris hanging off the water pipe threads in the next picture. Good idea to clean off any old plumbers tape and putty sealants. This ensures washer seal integrity when you screw on the new shower head holder.
The old Teflon tape comes off of the threads, just like letting out sewing thread from a spool.
Use a dry old rag to remove excess remaining joint compound from pipe threads. For stubborn areas, deep within the threads, use a small screwdriver to pick it out. Don’t worry if you can’t get the threads completely clean. A little old sealing compound is harmless, especially if it’s still pliable. It will become a contributing part of the new seal once you tighten the fitting onto it.
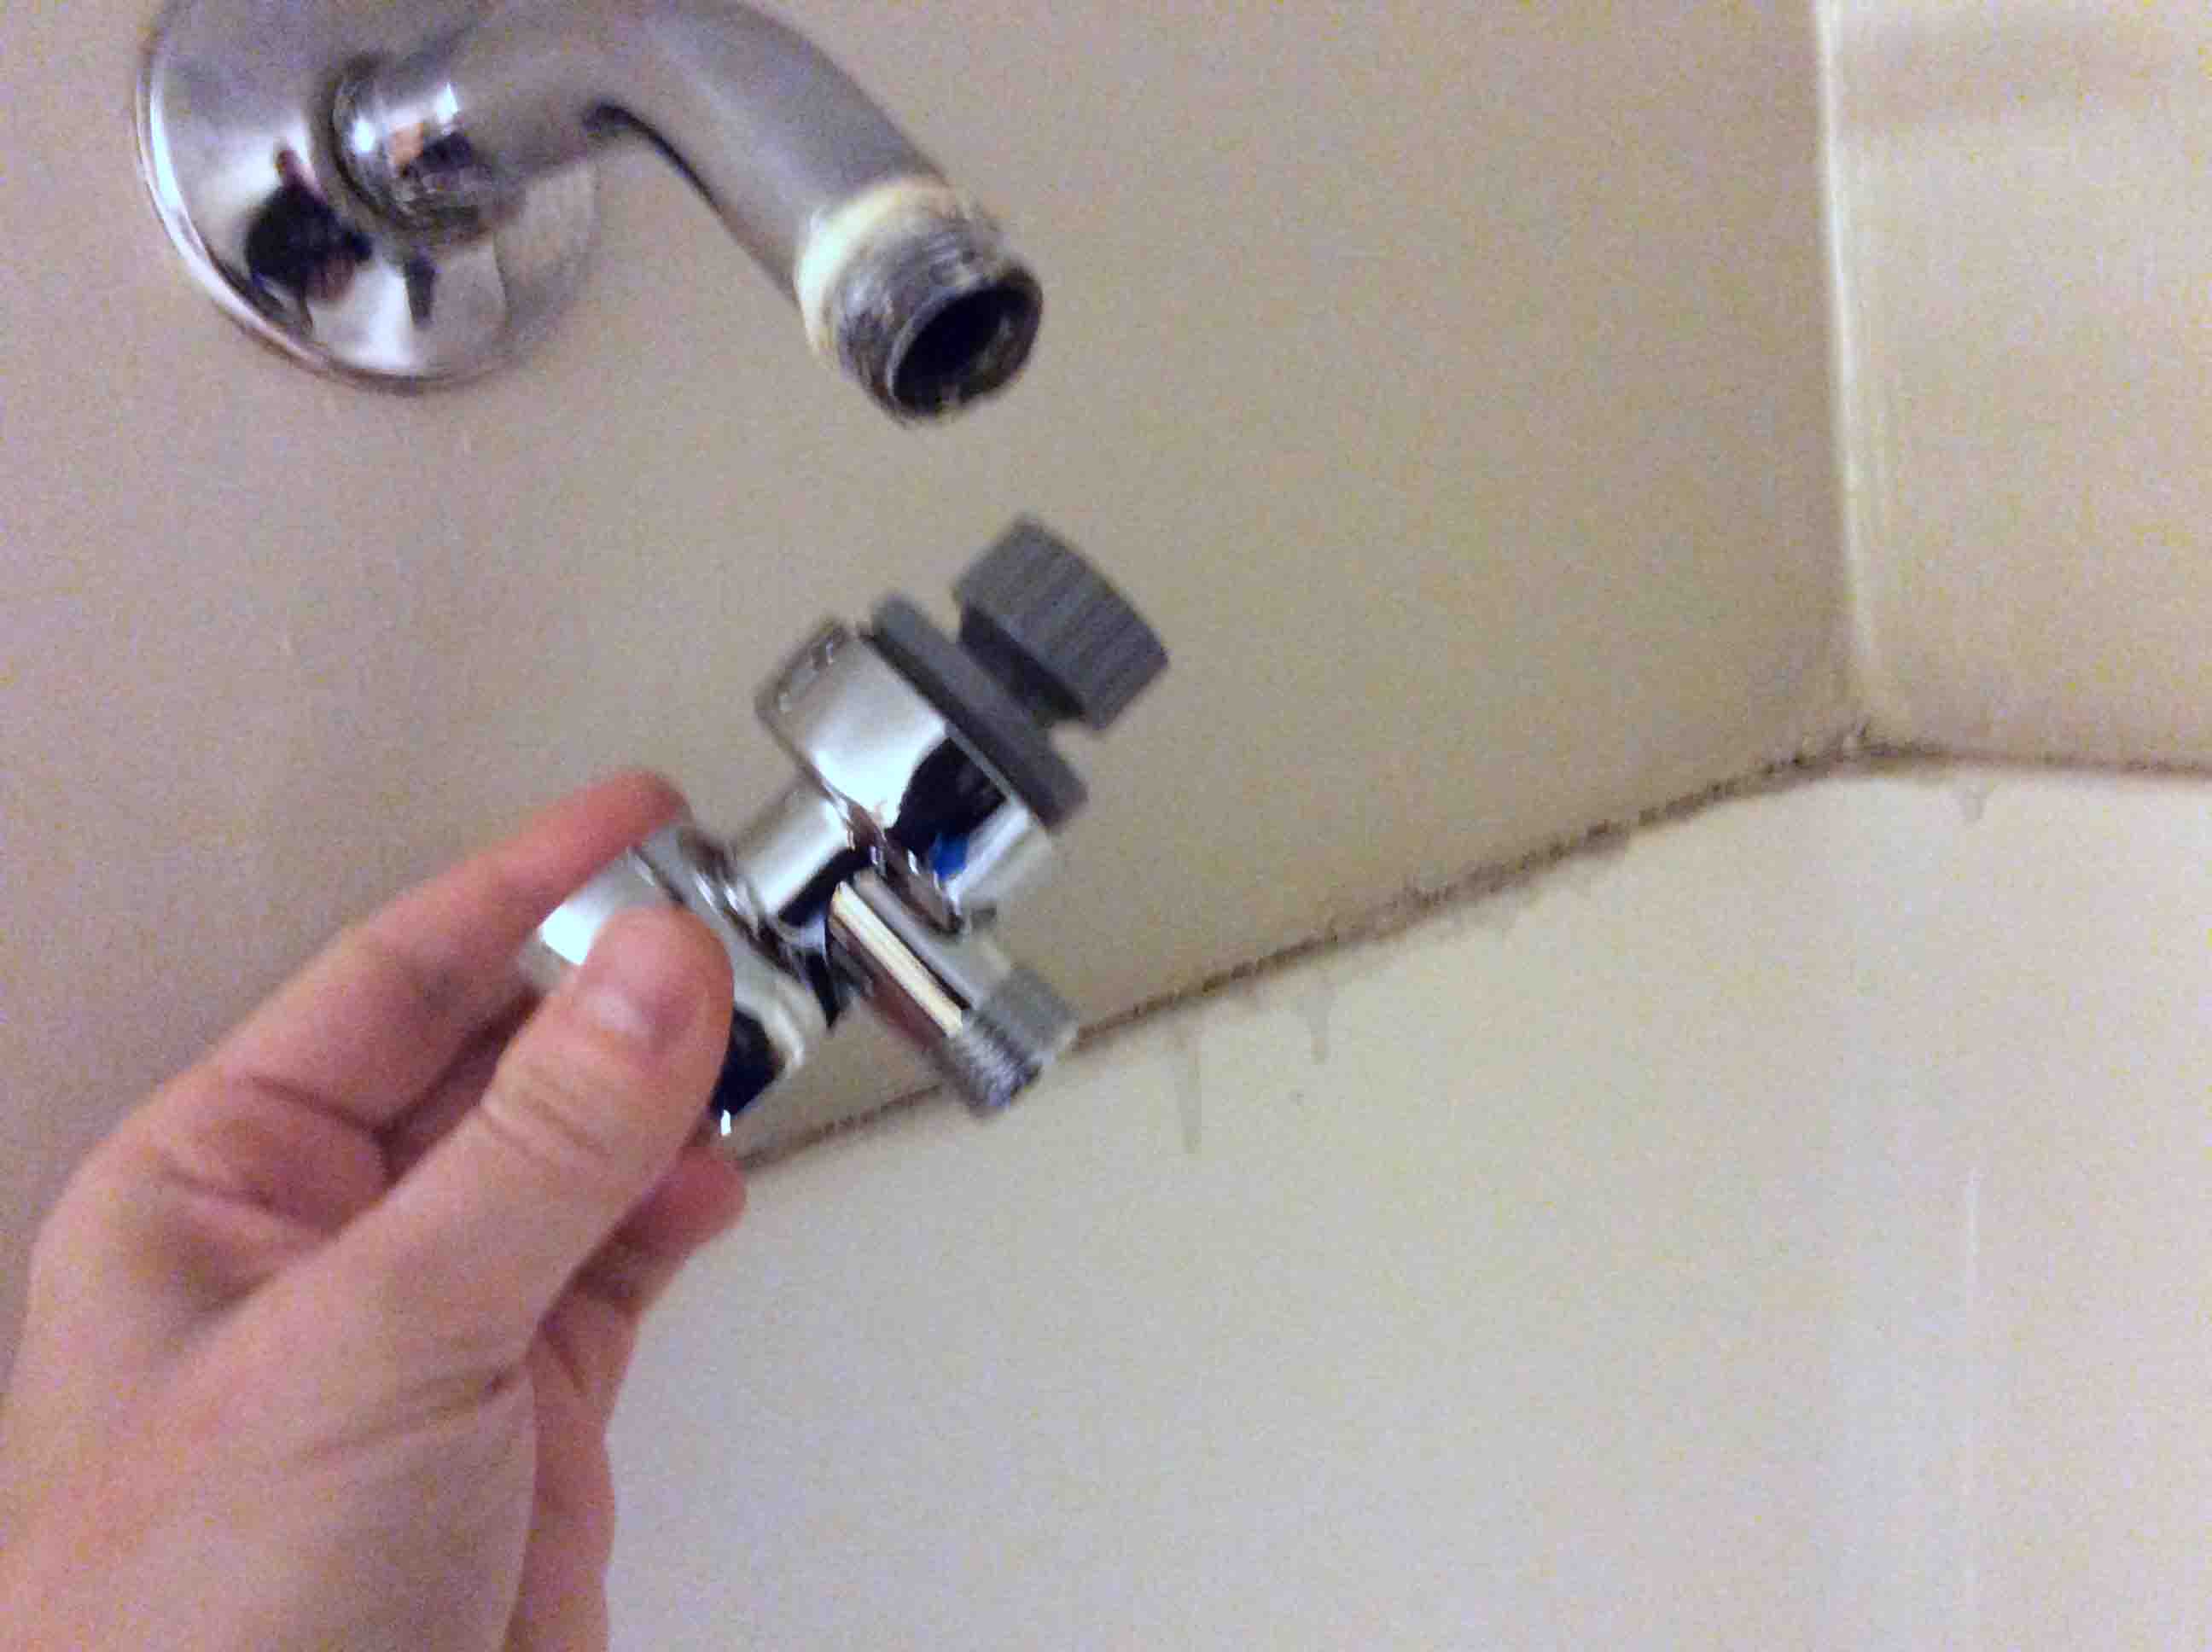
Thread the ball joint part (gray in photo below) of the holding bracket onto the source water pipe.
This bracket also carries water from the pipe to the shower hose. It’s typically plastic, even though it seems like chrome metal in this case. Over tightening a plastic fixture onto a metal pipe can result in cracking and leaking of the fixture. Finger tightening should seal well. No pipe wrenches needed, and are in fact, discouraged on plastic attachments.
Today’s sealing washers come with new shower heads. They form strong and resilient water tight seals with the source pipe. They well stop all leakage even when you just hand tighten the fixture.
Now the threaded joints might leak after hand tightening. So for added protection and peace of mind against leaks, apply the Teflon tape (our first choice). Wrap it in a clockwise direction several times around the source pipe threads.
If neither finger tightening nor Teflon plumbers tape stops the leaks, then try plumbers paste. Apply lots of that to all pipe threads. Indeed, thread sealants like this typically provide the best leak stoppage But they can get messy. Why? Because they often ooze and drip as you tighten the fixture over them. So wipe off any excess putty after installation. Then trim away any excess tape sealer too.
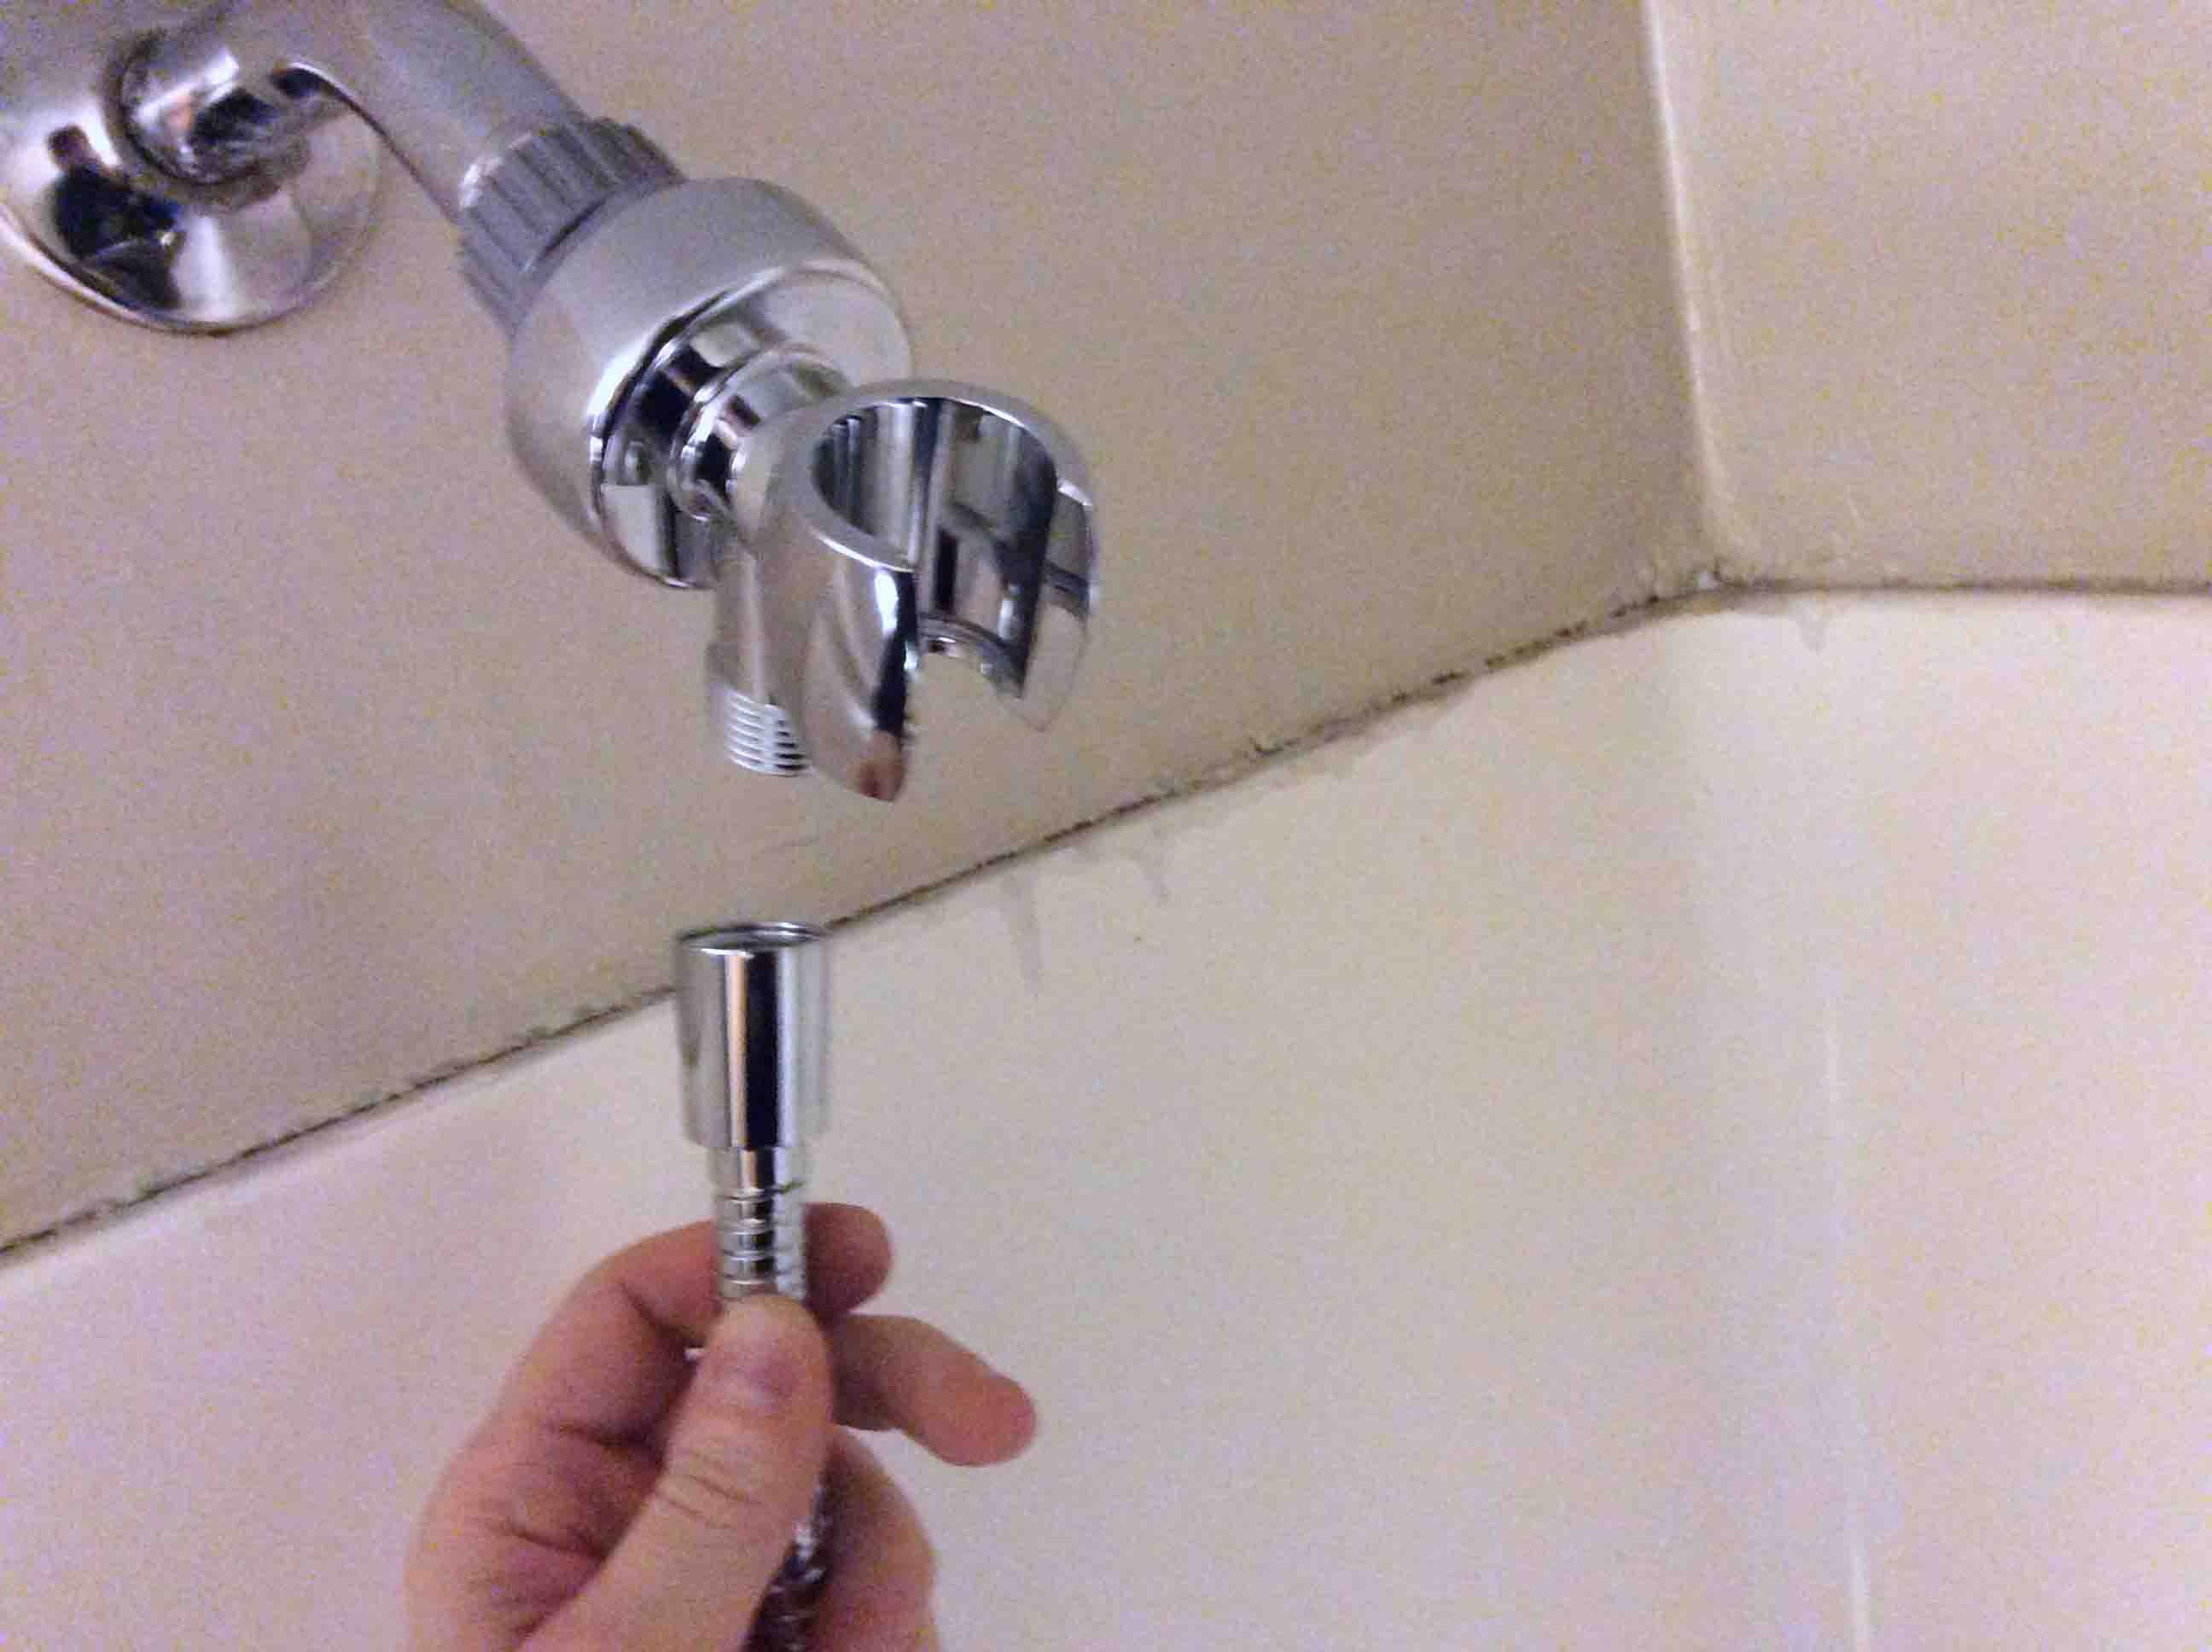
On this Waterpik shower head, we find a large nut at the back of the silver holder. This locks the holder in place once you’ve positioned it. Position and lock the head in the desired spot as follows:
To twist the holder around, unscrew the gray lock nut. Loosen it just enough to unlock the holder from the ball joint. But do not completely loosen this nut, as the assembly might come apart and drop out internal parts.
With the holder unlocked, position it as you wish. For most shower head installations, plum the hand held unit. That is, place the holder so that the head and hose are vertical when seated in that holder. This helps assure that the shower head won’t fall out. It further assures that the hose will not kink while hanging. In our setup, the shower head ended up quite close to the ceiling. So we had to bend the holder forward a bit for adequate clearance. This introduced some light bending at both ends of the hose, but not enough to worry over.
Once you positioned the holder on the ball joint, lock this joint in place. Do that by hand tightening the gray locking nut. Further, if you do not plan on re positioning this joint ever, then tighten an extra quarter turn. Use an adjustable wrench for this. But be careful not to mar the finished surfaces of the holder. However, do this only if absolutely necessary. Again, over tightening these plastic joints can permanently damage them. Just a little force goes a very long way with plastic threads.
Some shower hoses need a specific hose end for the shower head. Then the other end goes on the source pipe. In these cases, they usually label the ends.
Now many hose ends, the holder threads, and the ball joint are likely a softer plastic. So avoid using wrenches or pliers to tighten this joint. The plastic is delicate and could easily break. But leakage still might occur here after hand tightening. In that event, try the sealing tape or pipe joint compound to stop if. However, if none of these works, then the holder piece is likely defective. So return the shower head to the store for replacement.
Chrome-finished plastic scratches and mars with very little force. So use only your hands to secure these fittings to prolong finish life. But you still may need an adjustable wrench or vice grips. If so, then wrap fittings with an old dish rag before you start. Then, set the wrench jaws around that. This lowers chances of scratching.
Sometimes even hefty elbow grease can break these joints. But you need little force to make a good seal.
Below is our Waterpik massaging shower head after installation, and appears to be functioning properly. No leaks found. But don’t rush to conclude that the installation is over just yet. Run the shower through a few paces as follows, to make sure leaks do not show up.
Our Waterpik has eight different spray settings. Adjust to each of these, while water fully ON to make sure the settings lever moves easily. Also, different sprays place differing back pressures on the hose and fittings. Particularly for the most constrictive settings, check that no leaking occurs.
This not only stresses the joints and hose. But it also helps to seat the rubber sealing washers into their final positions.
Run with all hot water first for a minute or so. Look for leaks. Then, run at cold for a minute or so. Again, watch for leaks.
For the first week or so, keep an eye out for leaks at any of the joints. Chances are that if no leaks in the first week, then they’ll probably never leak.
This hand held shower head project is complete. Enjoy, and by all means, stay clean.
The JBL Go 2 speaker by Harman Kardon is a low power, hand-held style unit…
Shows how to fix Honeywell wireless thermostat connection failure issues. You might see these on…
Shows how to connect HP DeskJet 3630 series to WiFi. Note that doing this will…
Here, we show how to reset the Wonderboom speaker version 2. which returns it to…
We give here the JBL Clip reset directions, that return it to its default settings…
The JBL Boom Box JBL by Harman Kardon is a moderate to higher power, boom…