Windows 10, "Use Computer Without Display," Window with the "Set Text To Speech," Option Highlighted.
Some Windows 10 programs, such as Apple’s iTunes app, rely on the Windows 10 default system voice when applying voice clips to older iPod Nanos. You can change the text to speech voice that iTunes and apps like it use in Windows 10 by following the procedure below.
As with prior Windows versions, text to speech translation ability is built into the operating system, and so, is free to the Windows user; that is, you pay nothing more for it specifically. The biggest differences between this procedure in Windows 10 as compared with Windows 8, are the following:
Otherwise, the Windows 10 and Windows 8 procedures are essentially the same. In this document, we’ll run through the Windows 10 version of how to change the default system voice below.
Ours is located vertically at the left edge of the screen. However, you can choose the location of your task bar as well as whether it’s always on the screen, or only appears when you mouse over the screen’s edge. So yours may be oriented differently.
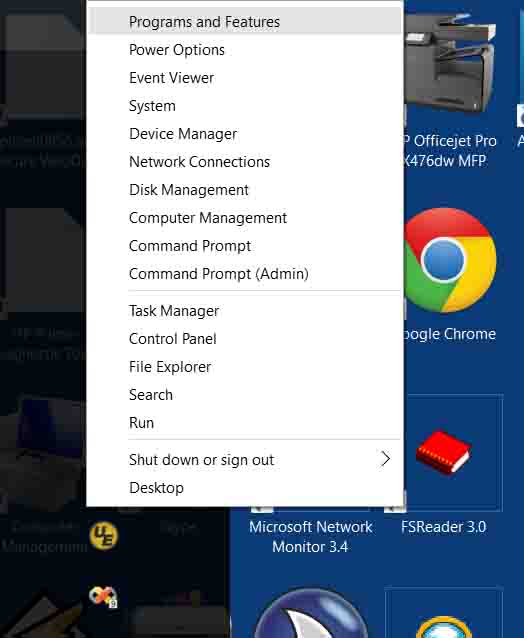
This reveals the Start Context Menu.
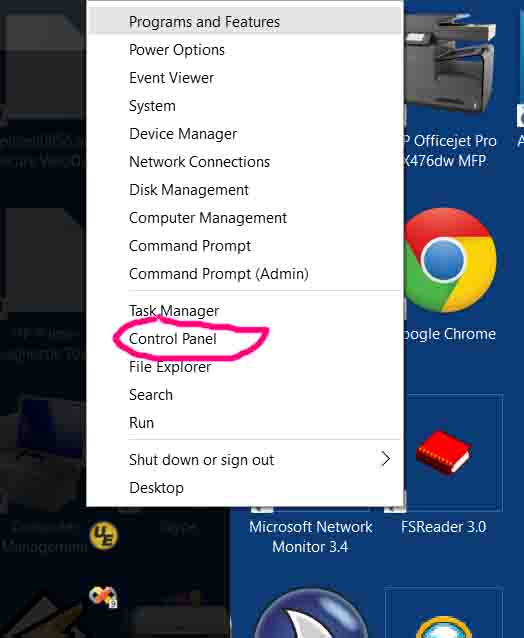
It’s on the Start Button Context Menu.
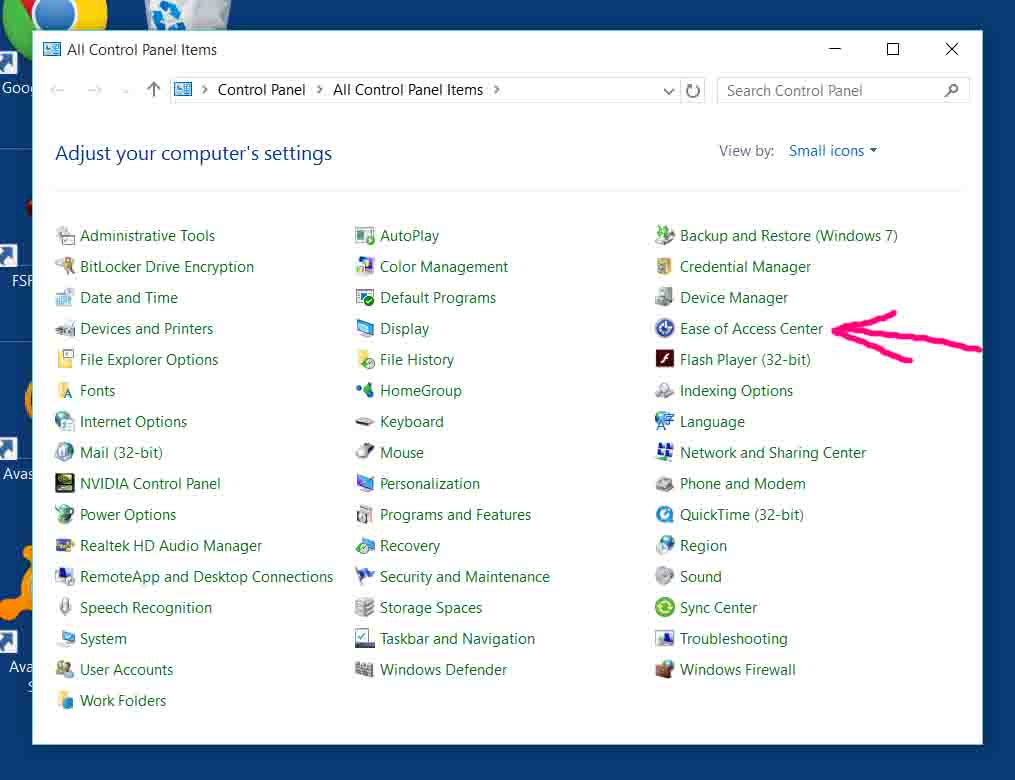
The Windows 10 Control Panel window opens as shown next.
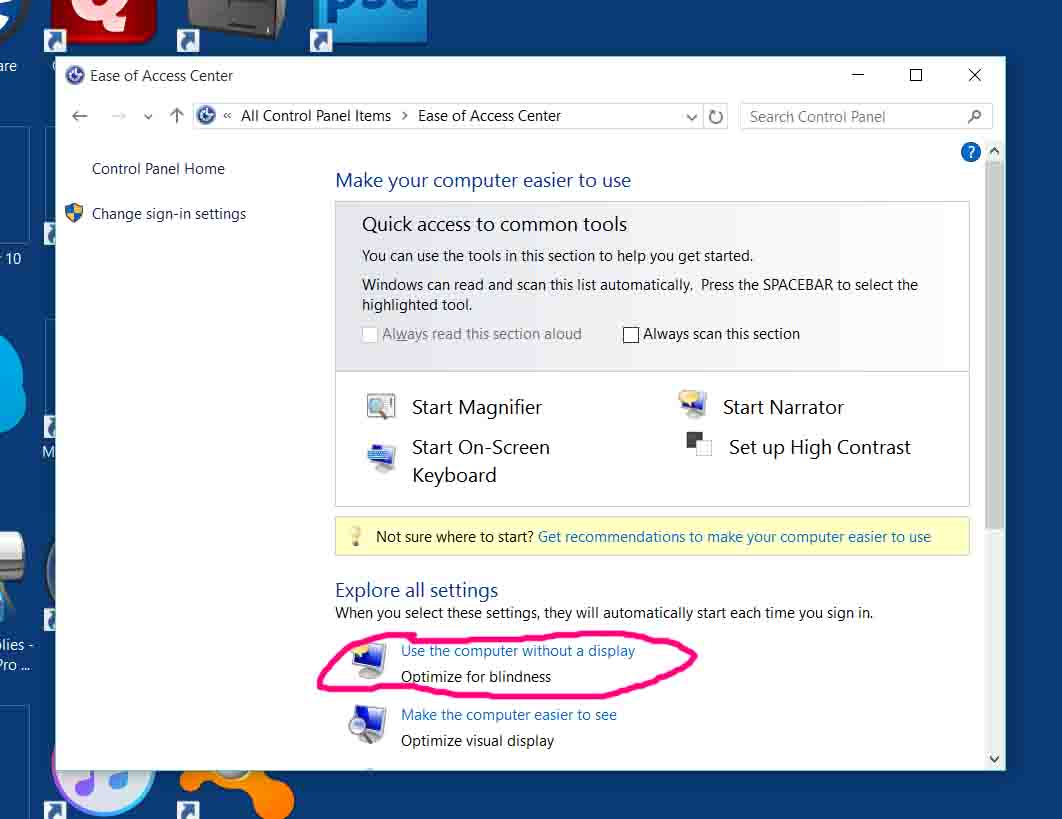
Find this in the Control Panel window, as highlighted by the pink arrow in the previous picture. Picking this option produces the Ease of Access Center dialog box, shown next.
Described as Optimize for Blindness.
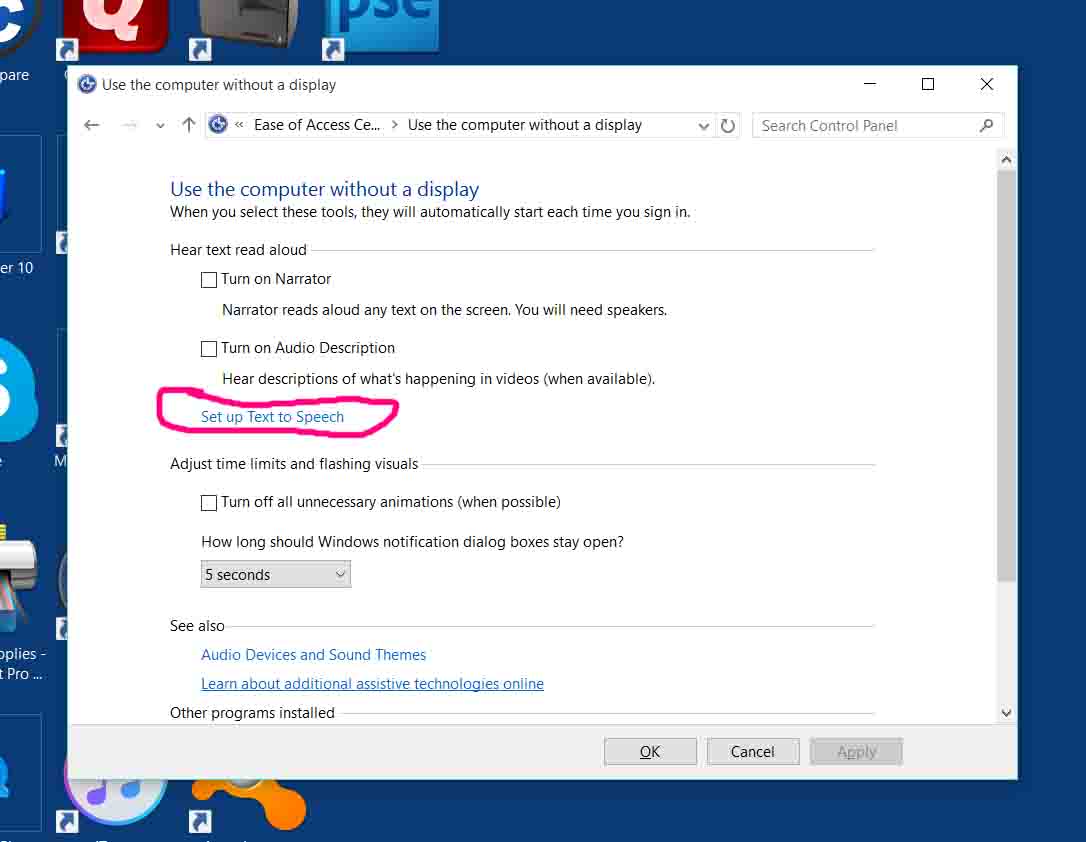
Then, the Use the Computer Without a Display window results, as follows.
Find the Setup Text To Speech item circled in pink in the last picture.
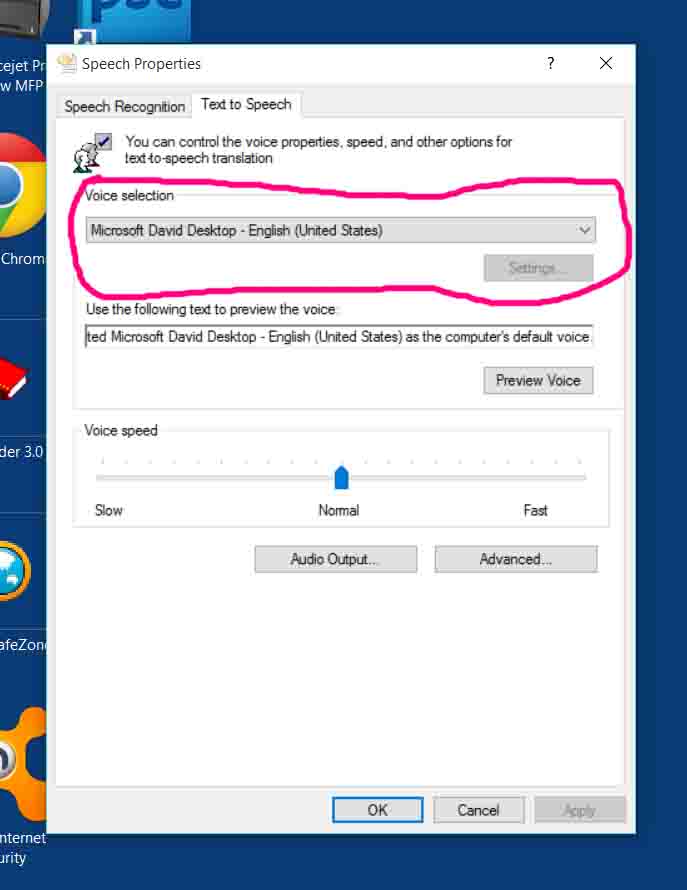
The Speech Properties window then appears as shown next. Note that we’ve circled the Voice Selection area in pink.
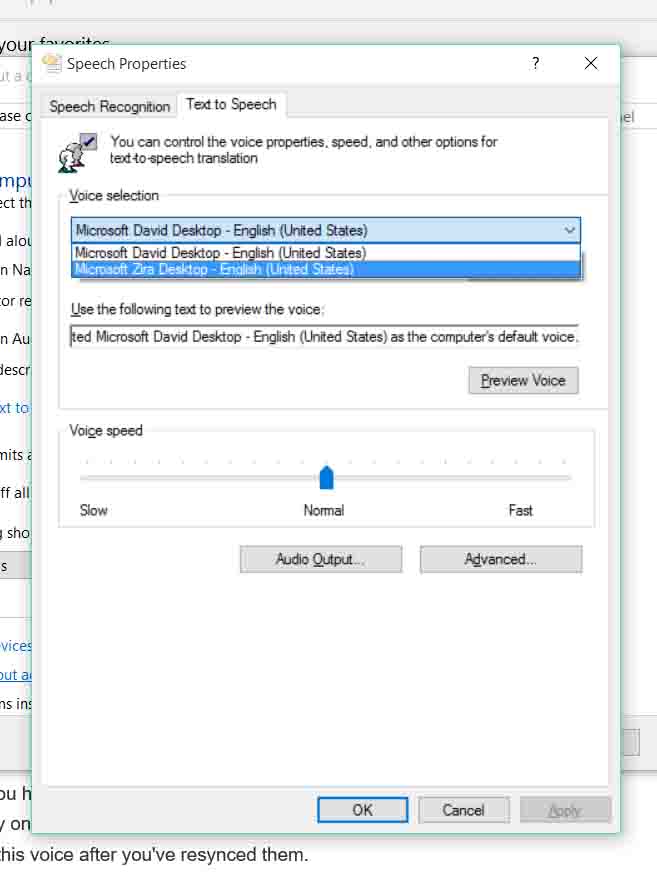
Choose the default system voice from the Voice Selection pull-down menu, circled in the last picture. There are two voices listed in our demo here (David, and Zira). We picked the Zira voice, as shown next.
Note that upon clicking the voice you want in the list, and if you have your computer speakers turned on and up, you’ll hear a sample of that voice played through them. Furthermore, you can sample each voice in the list by selecting it as described.
You have now changed your computer’s default system voice. Thus, iPods that utilize iTunes et al that rely on this voice in generating their voice menus while syncing, will now speak with this voice after you’ve resynced them.
Press the Okay button to do that.
Finally, enjoy “text-to-speeching” on your Windows 10 computer.
The JBL Go 2 speaker by Harman Kardon is a low power, hand-held style unit…
Shows how to fix Honeywell wireless thermostat connection failure issues. You might see these on…
Shows how to connect HP DeskJet 3630 series to WiFi. Note that doing this will…
Here, we show how to reset the Wonderboom speaker version 2. which returns it to…
We give here the JBL Clip reset directions, that return it to its default settings…
The JBL Boom Box JBL by Harman Kardon is a moderate to higher power, boom…