Amazon Echo 2nd generation Alexa speaker, top view, showing the light ring and the volume, mic mute, and action Buttons.
How to change WiFi on Alexa Echo? First, put the Alexa based speaker into Setup mode. There, you choose the desired WiFi network. That’s a simple summary of how to switch WiFi networks for Alexa speakers.
Below, we walk through changing WiFi on Alexa, with an Amazon Echo Dot 2 speaker. But, this WiFi change process is about the same for the other speakers in the Alexa line. These include the Dot 1, 2, and 3, the Echo 1 and Echo 2, and the Tap. Also, we do this demo on our iPad iOS tablet.
We assume that you linked the Alexa App to your Amazon account before.
Note also that we took the screen shots below from an iOS based iPad Air. But a similar Alexa app for Android you can get from the Google Play store.
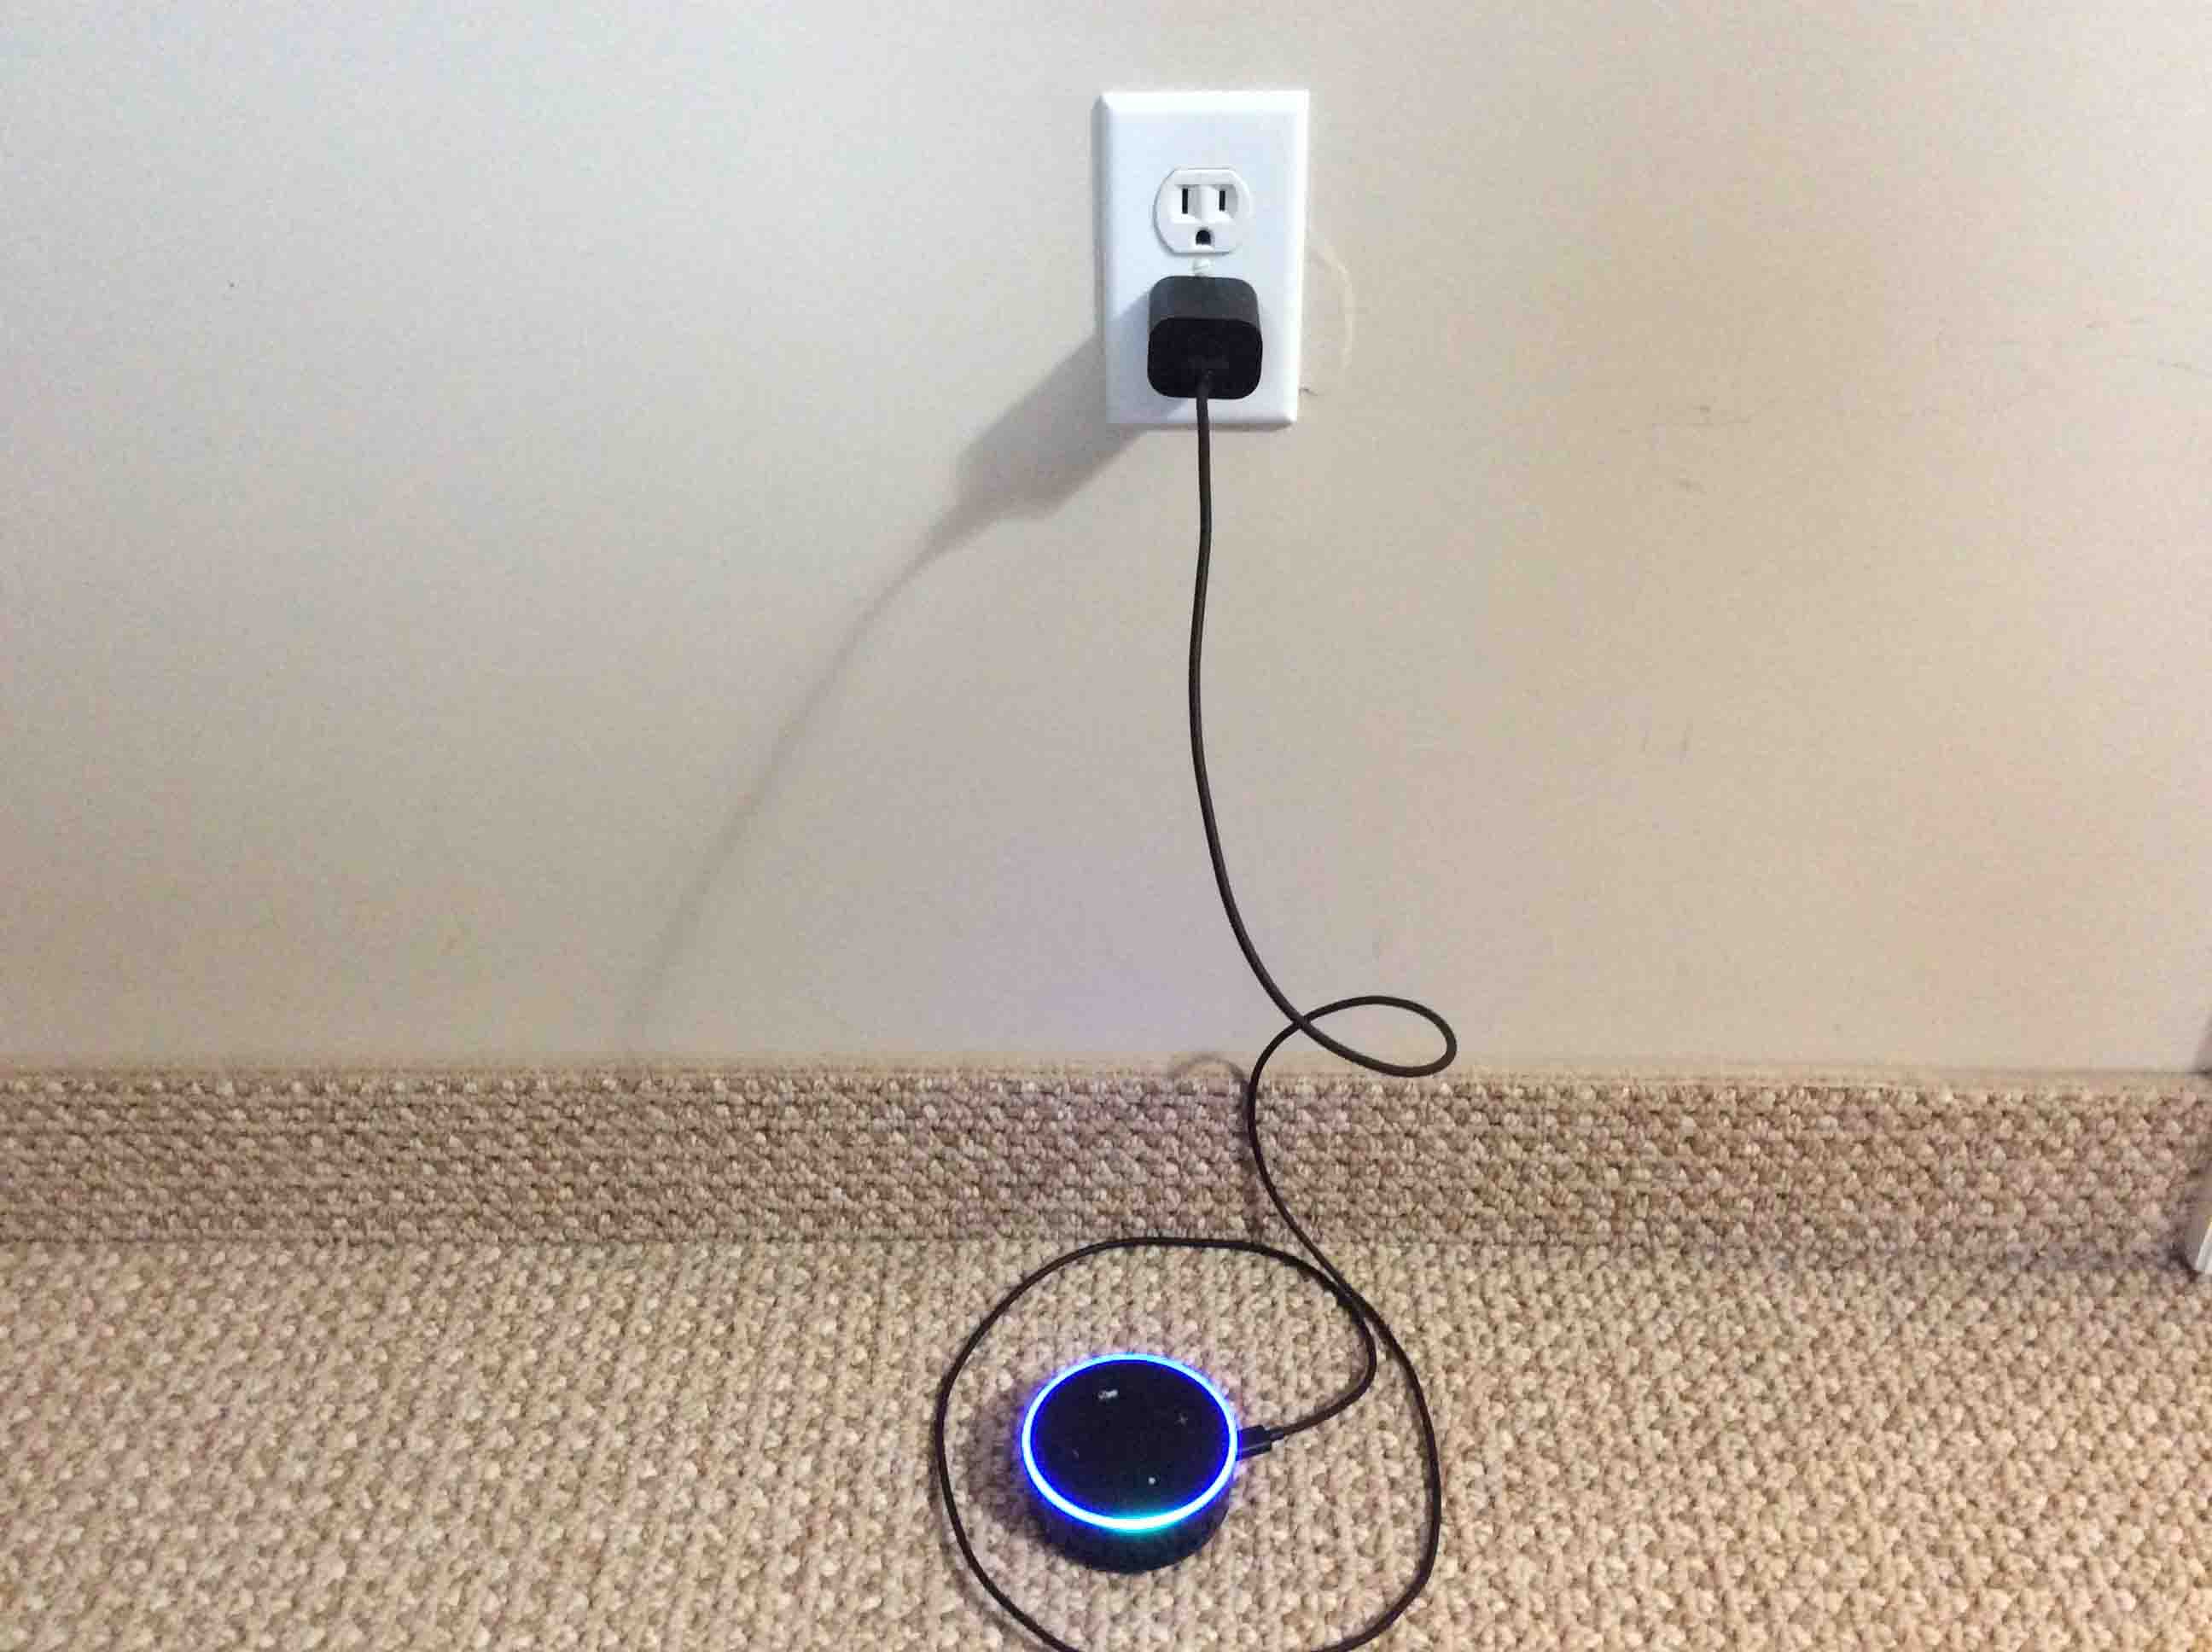
If not already running, plug your speaker into a power source. You must power on the speaker to access the network settings stored in it, as detailed below.
To begin, run this app on your tablet or phone. Doing so grants access to your current Alexa settings.
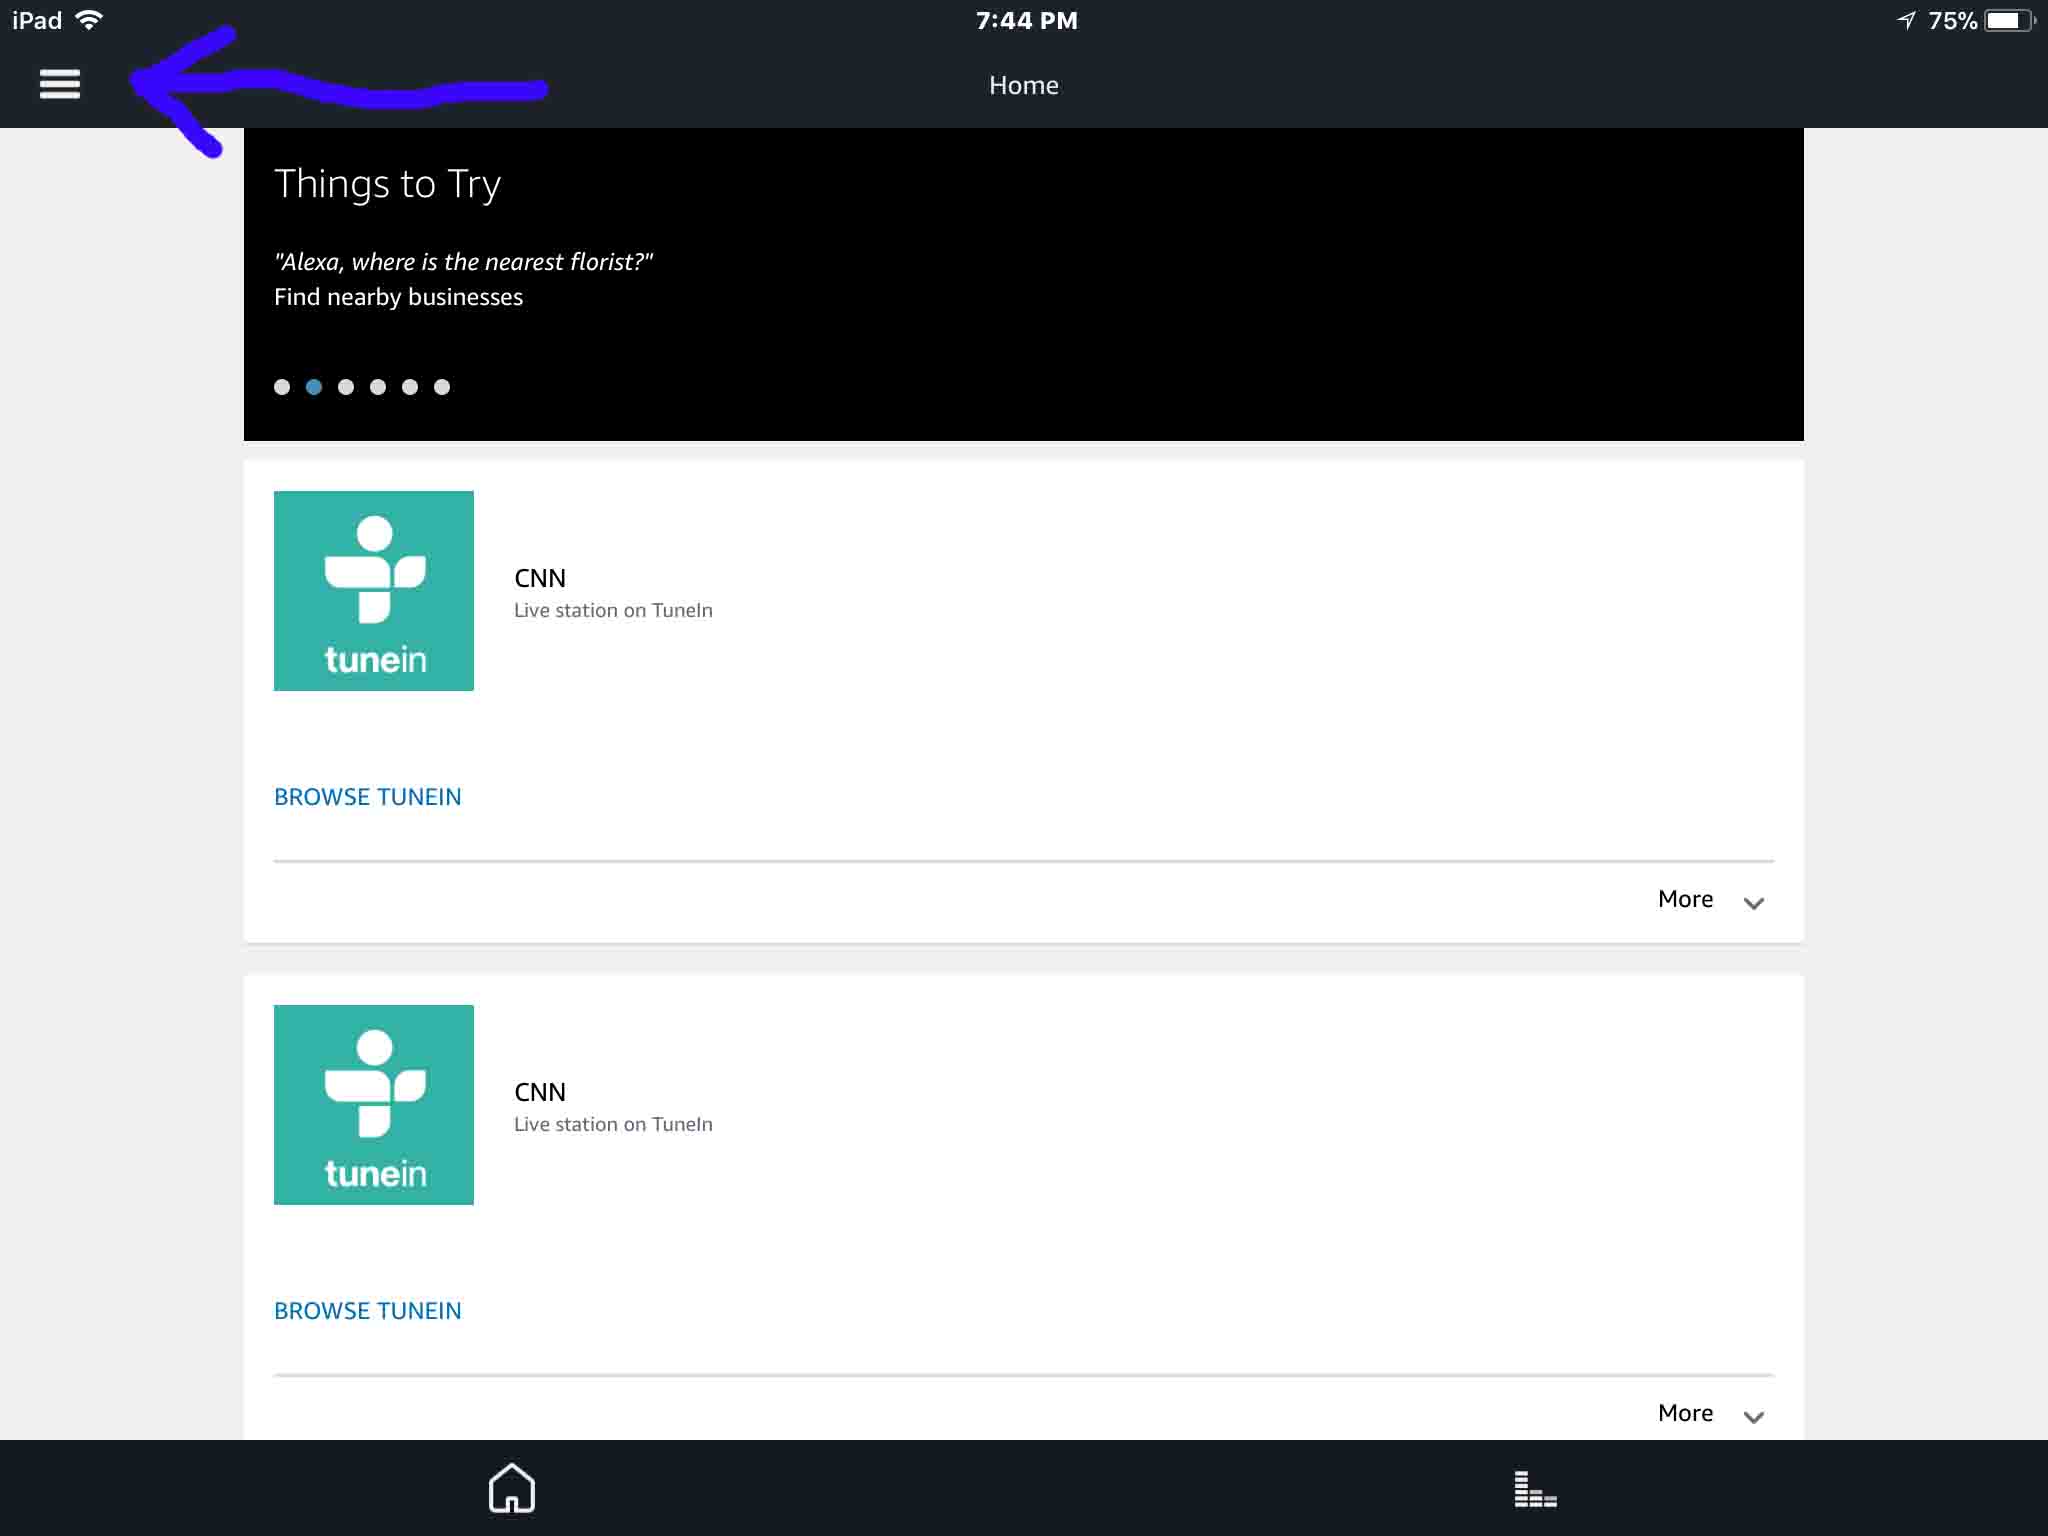
The Alexa app Home screen then appears as pictured next.
The blue arrow in the last picture points at the menu control.
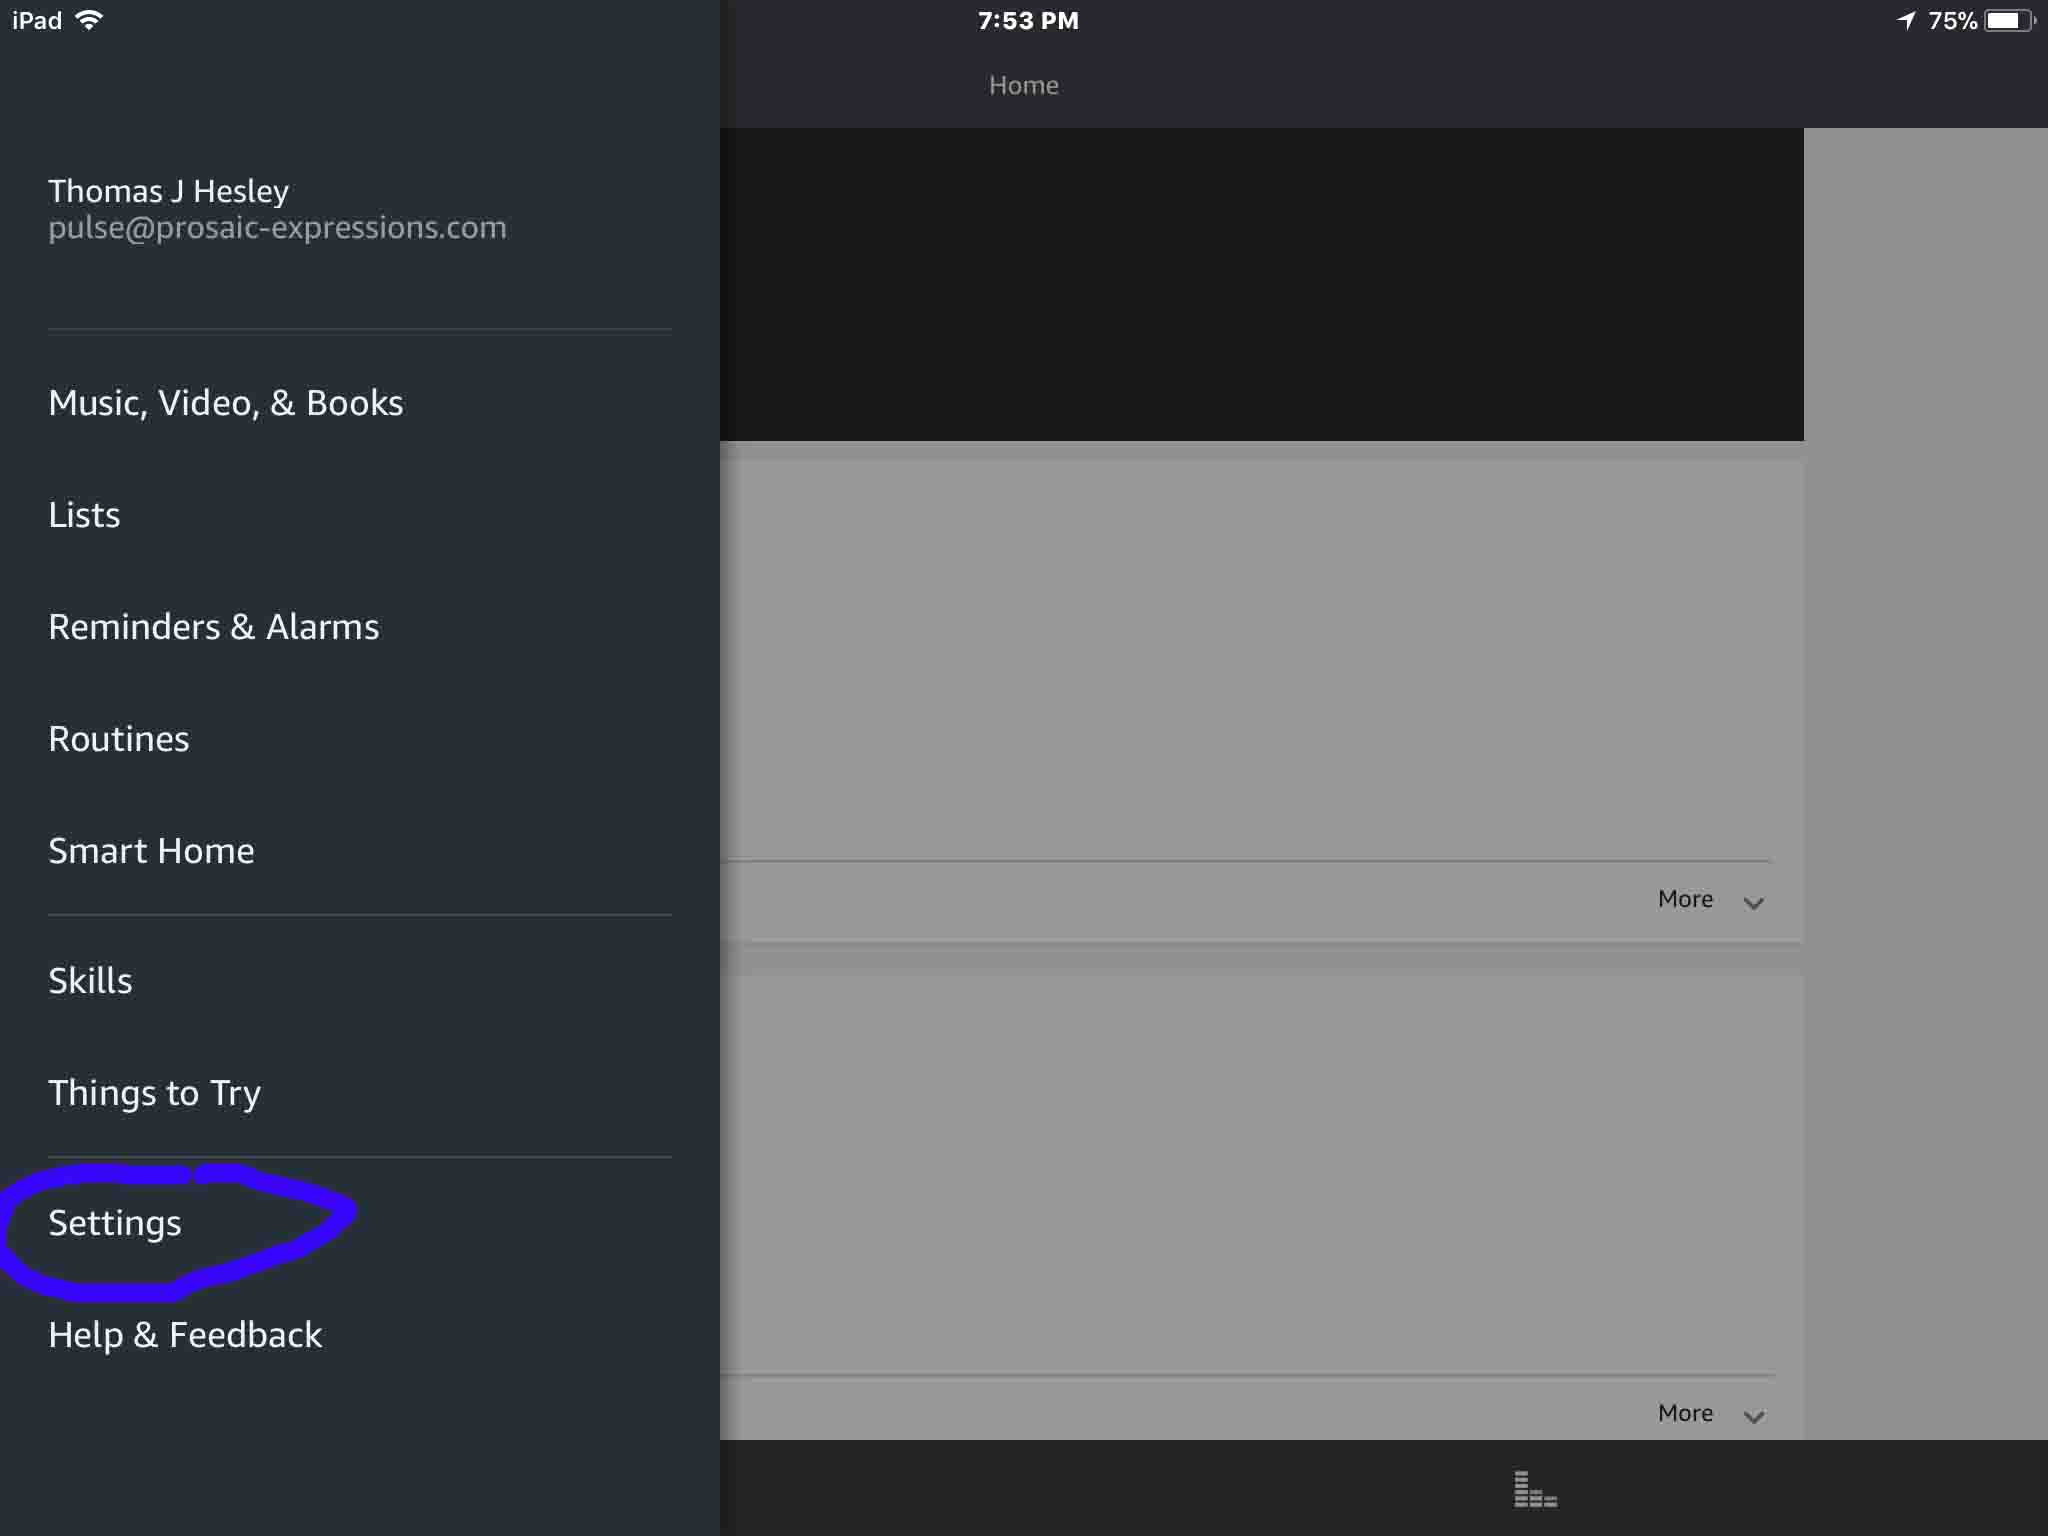
Tapping it brings up the main menu, shown next.
We circled the Settings menu item in blue in the last picture, found in the black-background menu at left-screen.
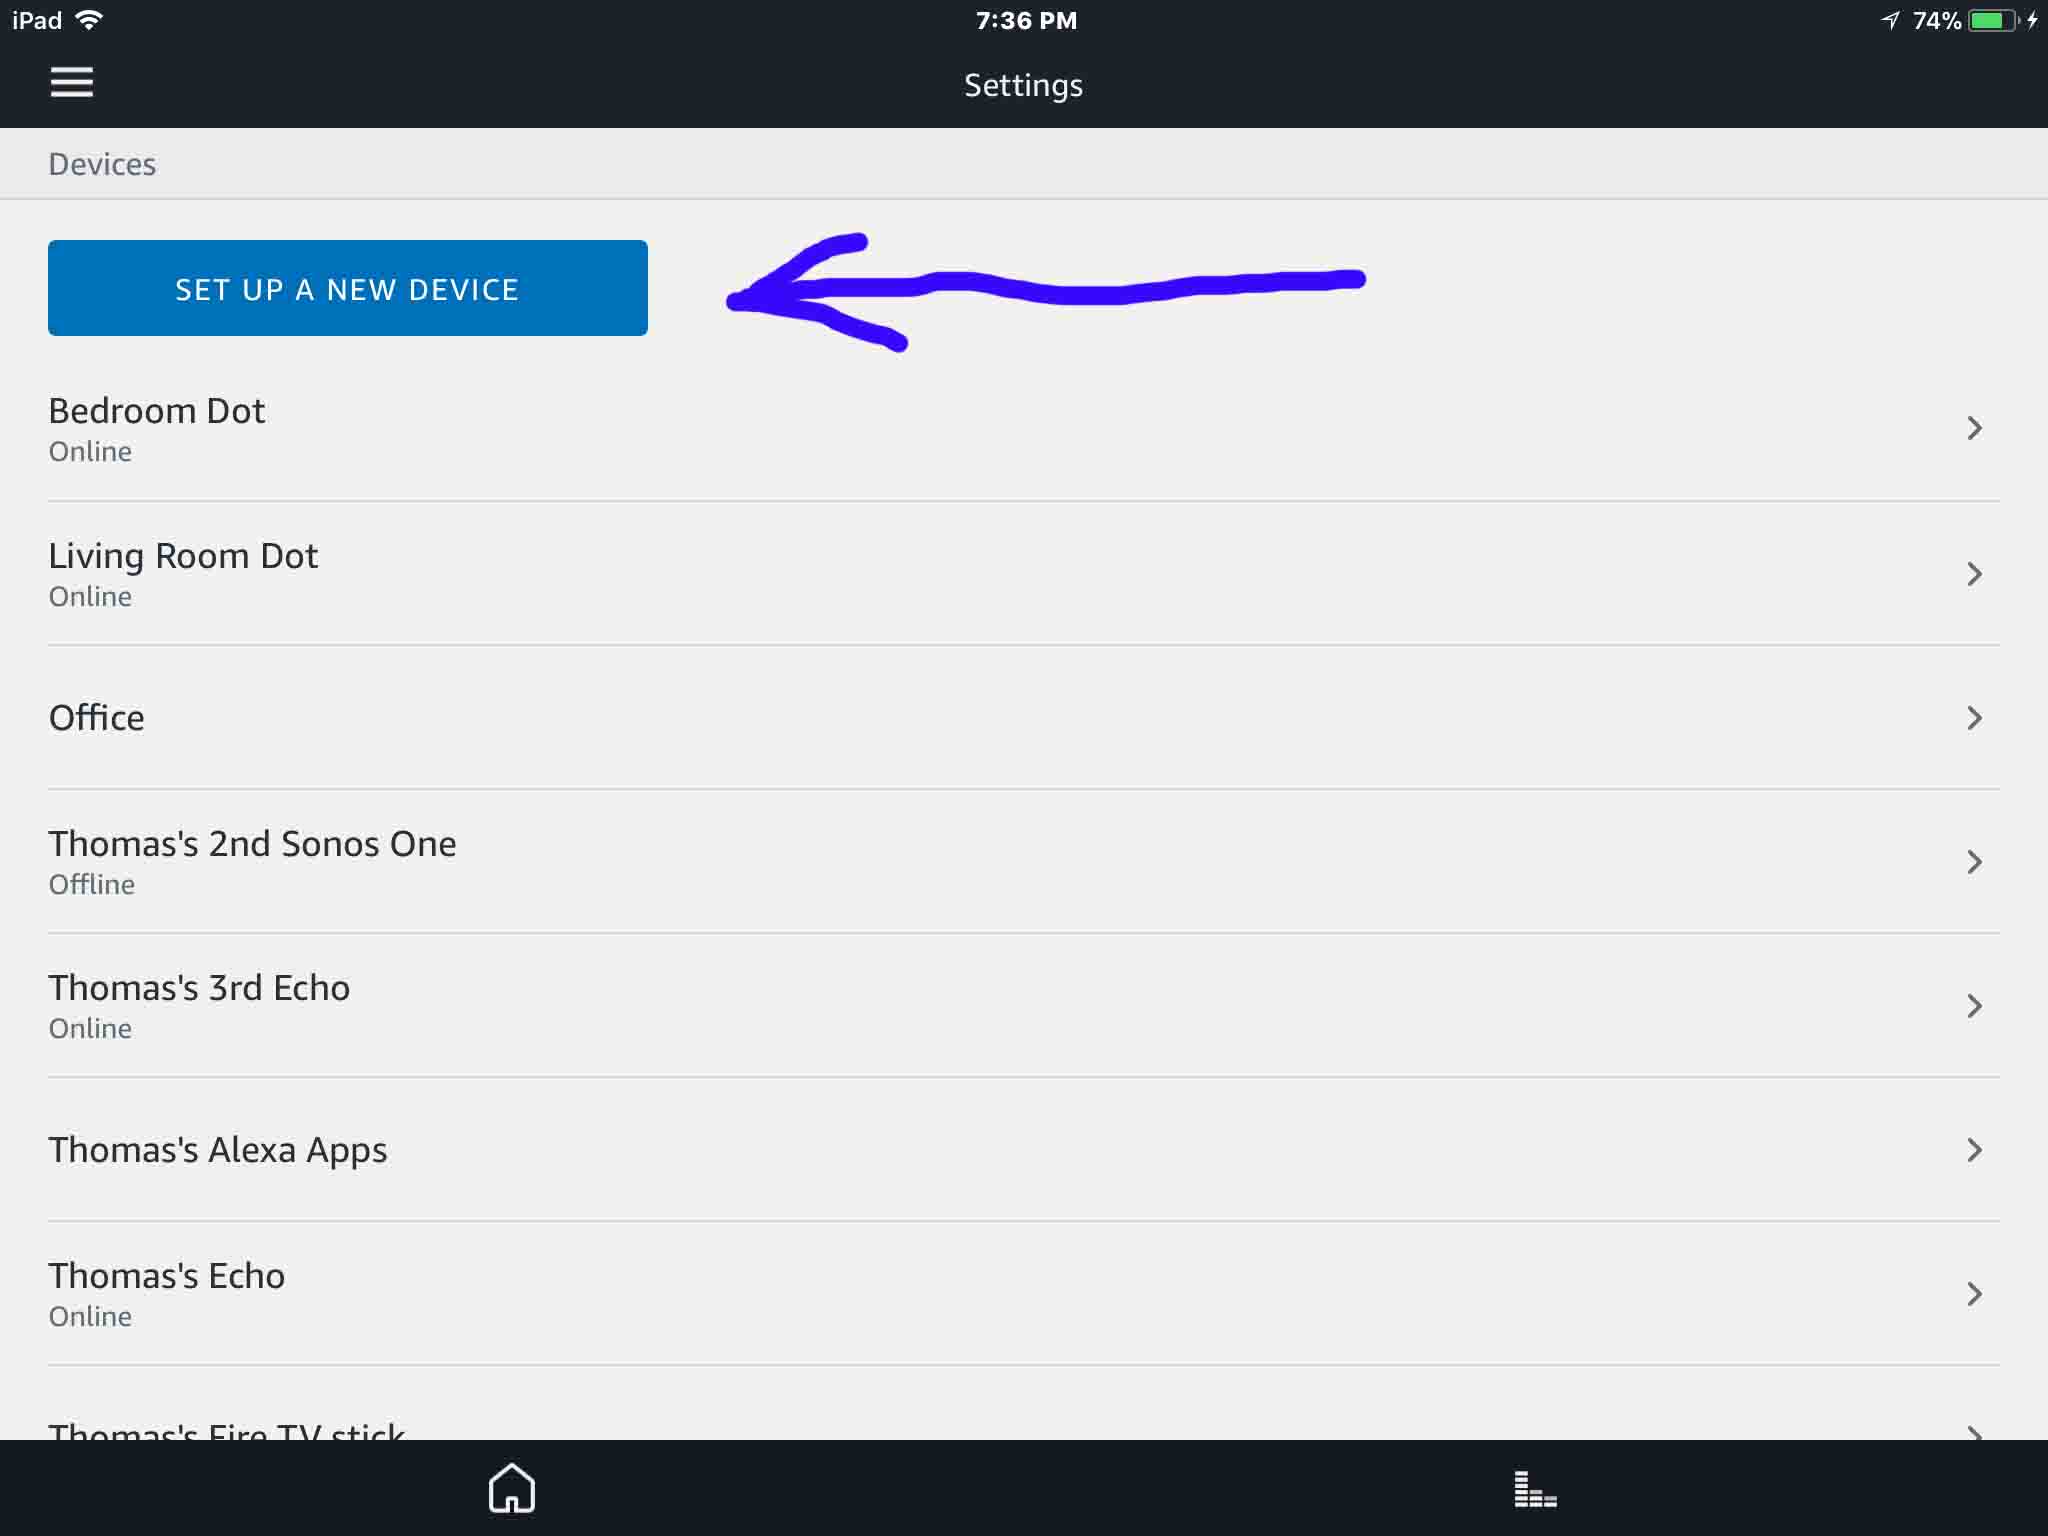
The Settings screen then appears pictured next.
Note on the Settings screen in the last picture. The Alexa app lists all our previously set up speakers.
If the speaker you’re changing the WiFi for appears, then tap that entry. Then jump down to step 6 below. There, you can change the saved WiFi router network. Also there, you avoid the steps to set up a new speaker.
But if your speaker does not show, then you must set it up from scratch. In that case, you’ll prepare the speaker to set up WiFi first. Do this if adding a new smart speaker to your Amazon account. In that case, continue on with the next step (Step 5a).
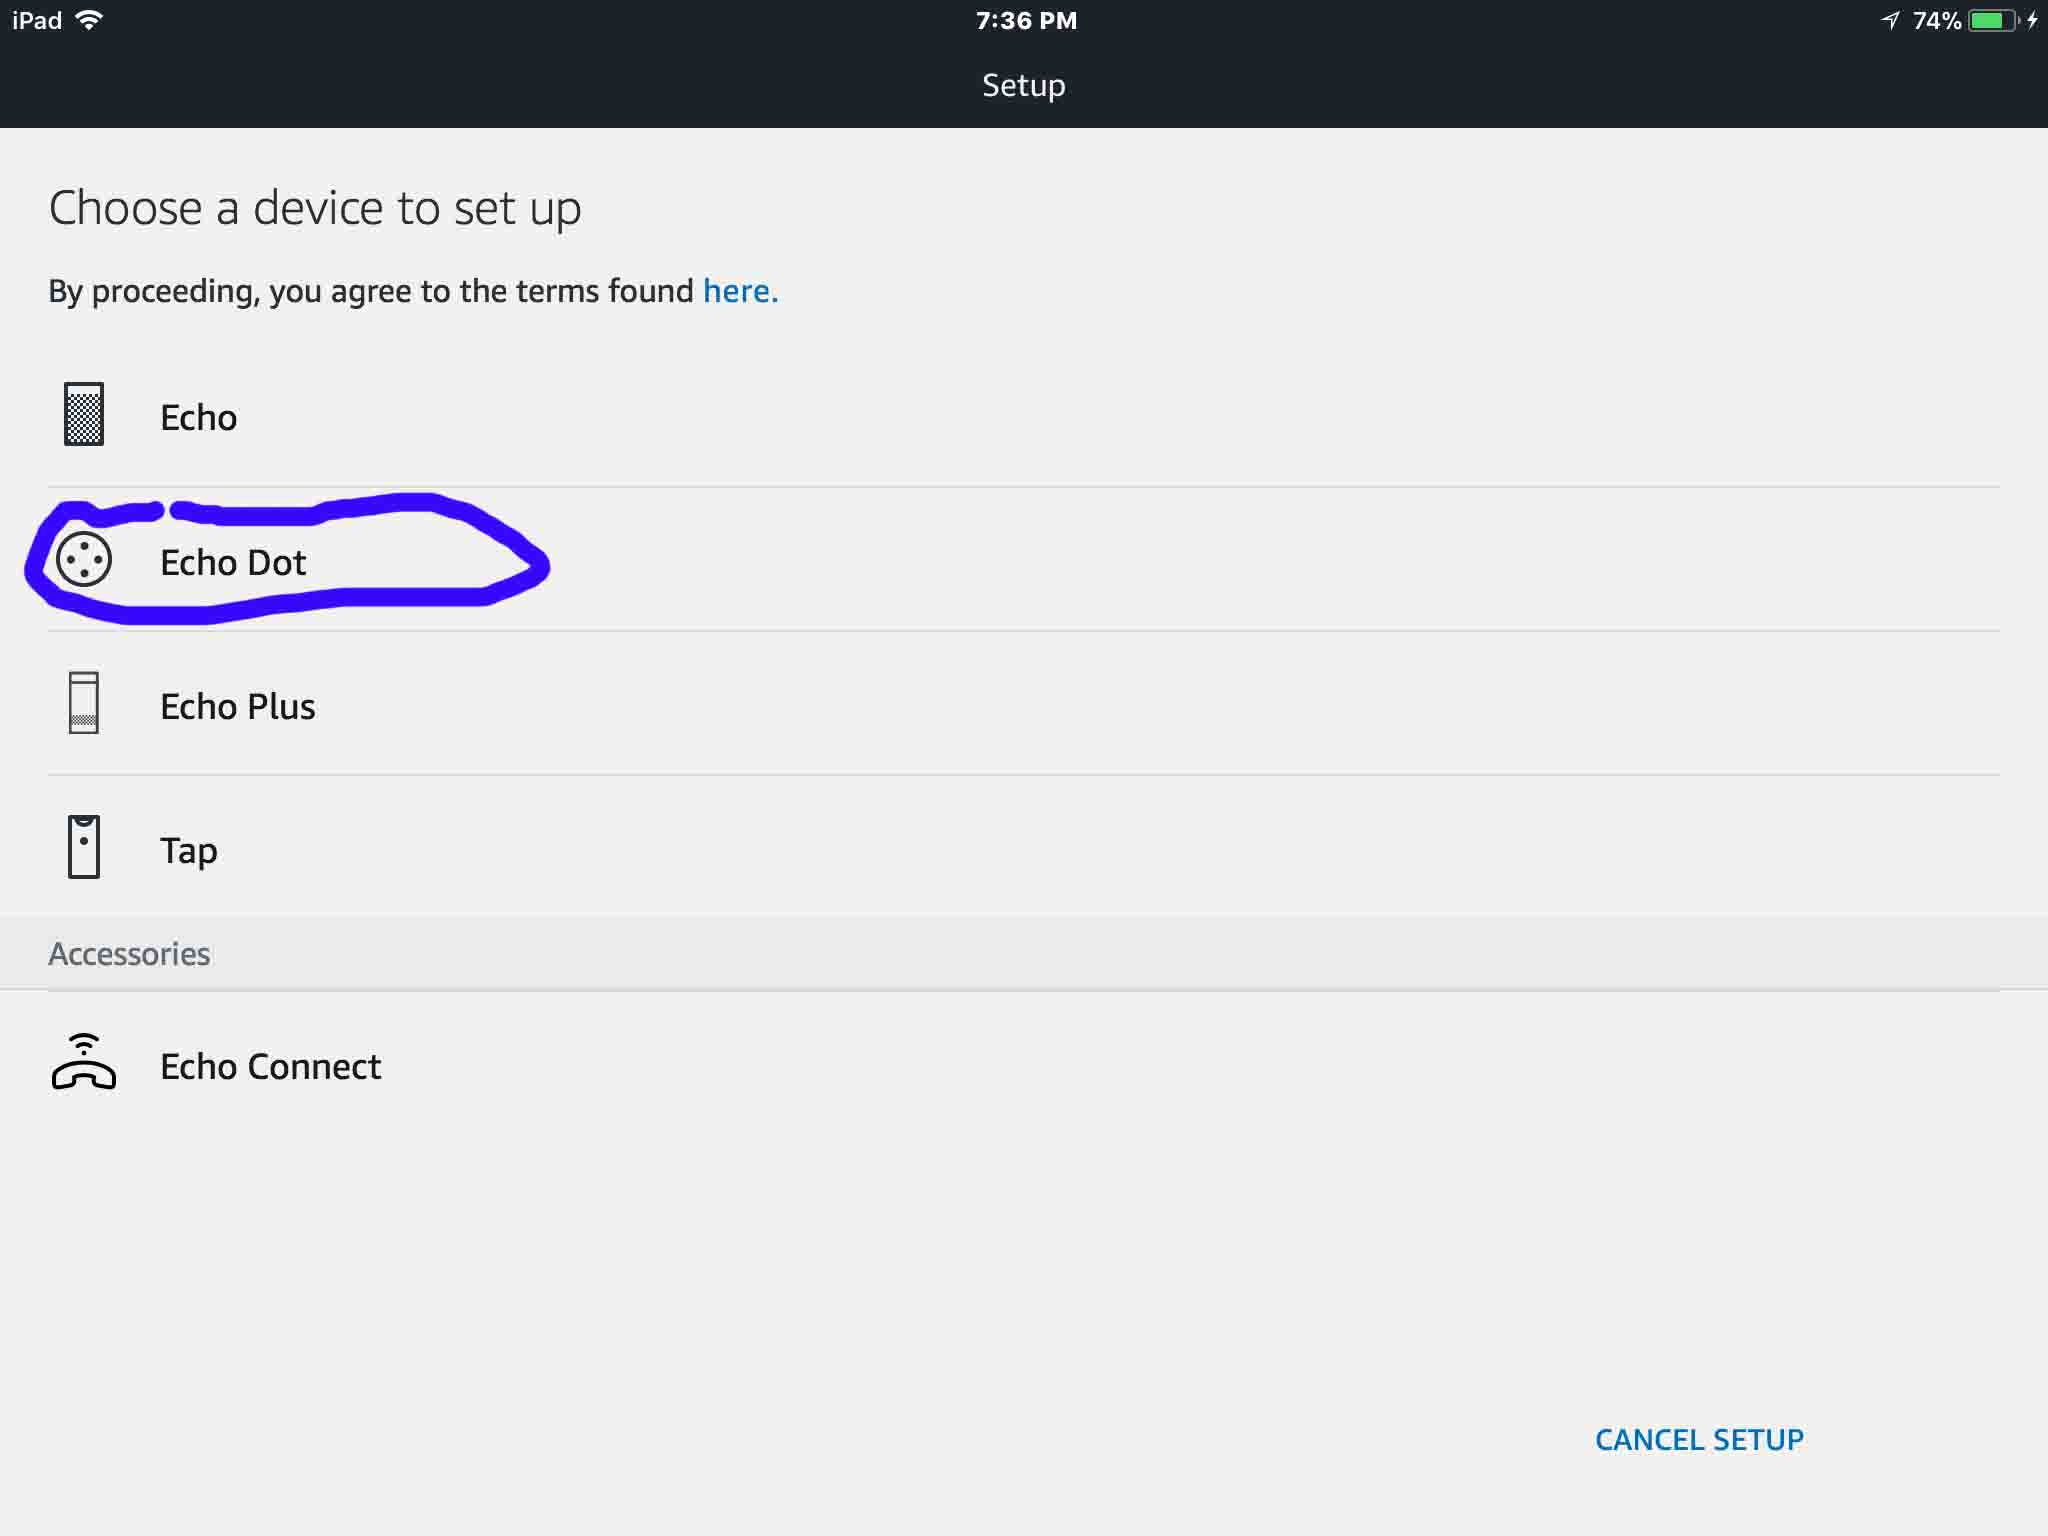
The blue arrow in the last picture points at the Set Up a New Device button. The app then shows the Set Up a New Device screen, as shown in the next picture.
From the list of devices shown in the last screenshot, tap the speaker type to set up. We picked Amazon Echo for this demo.
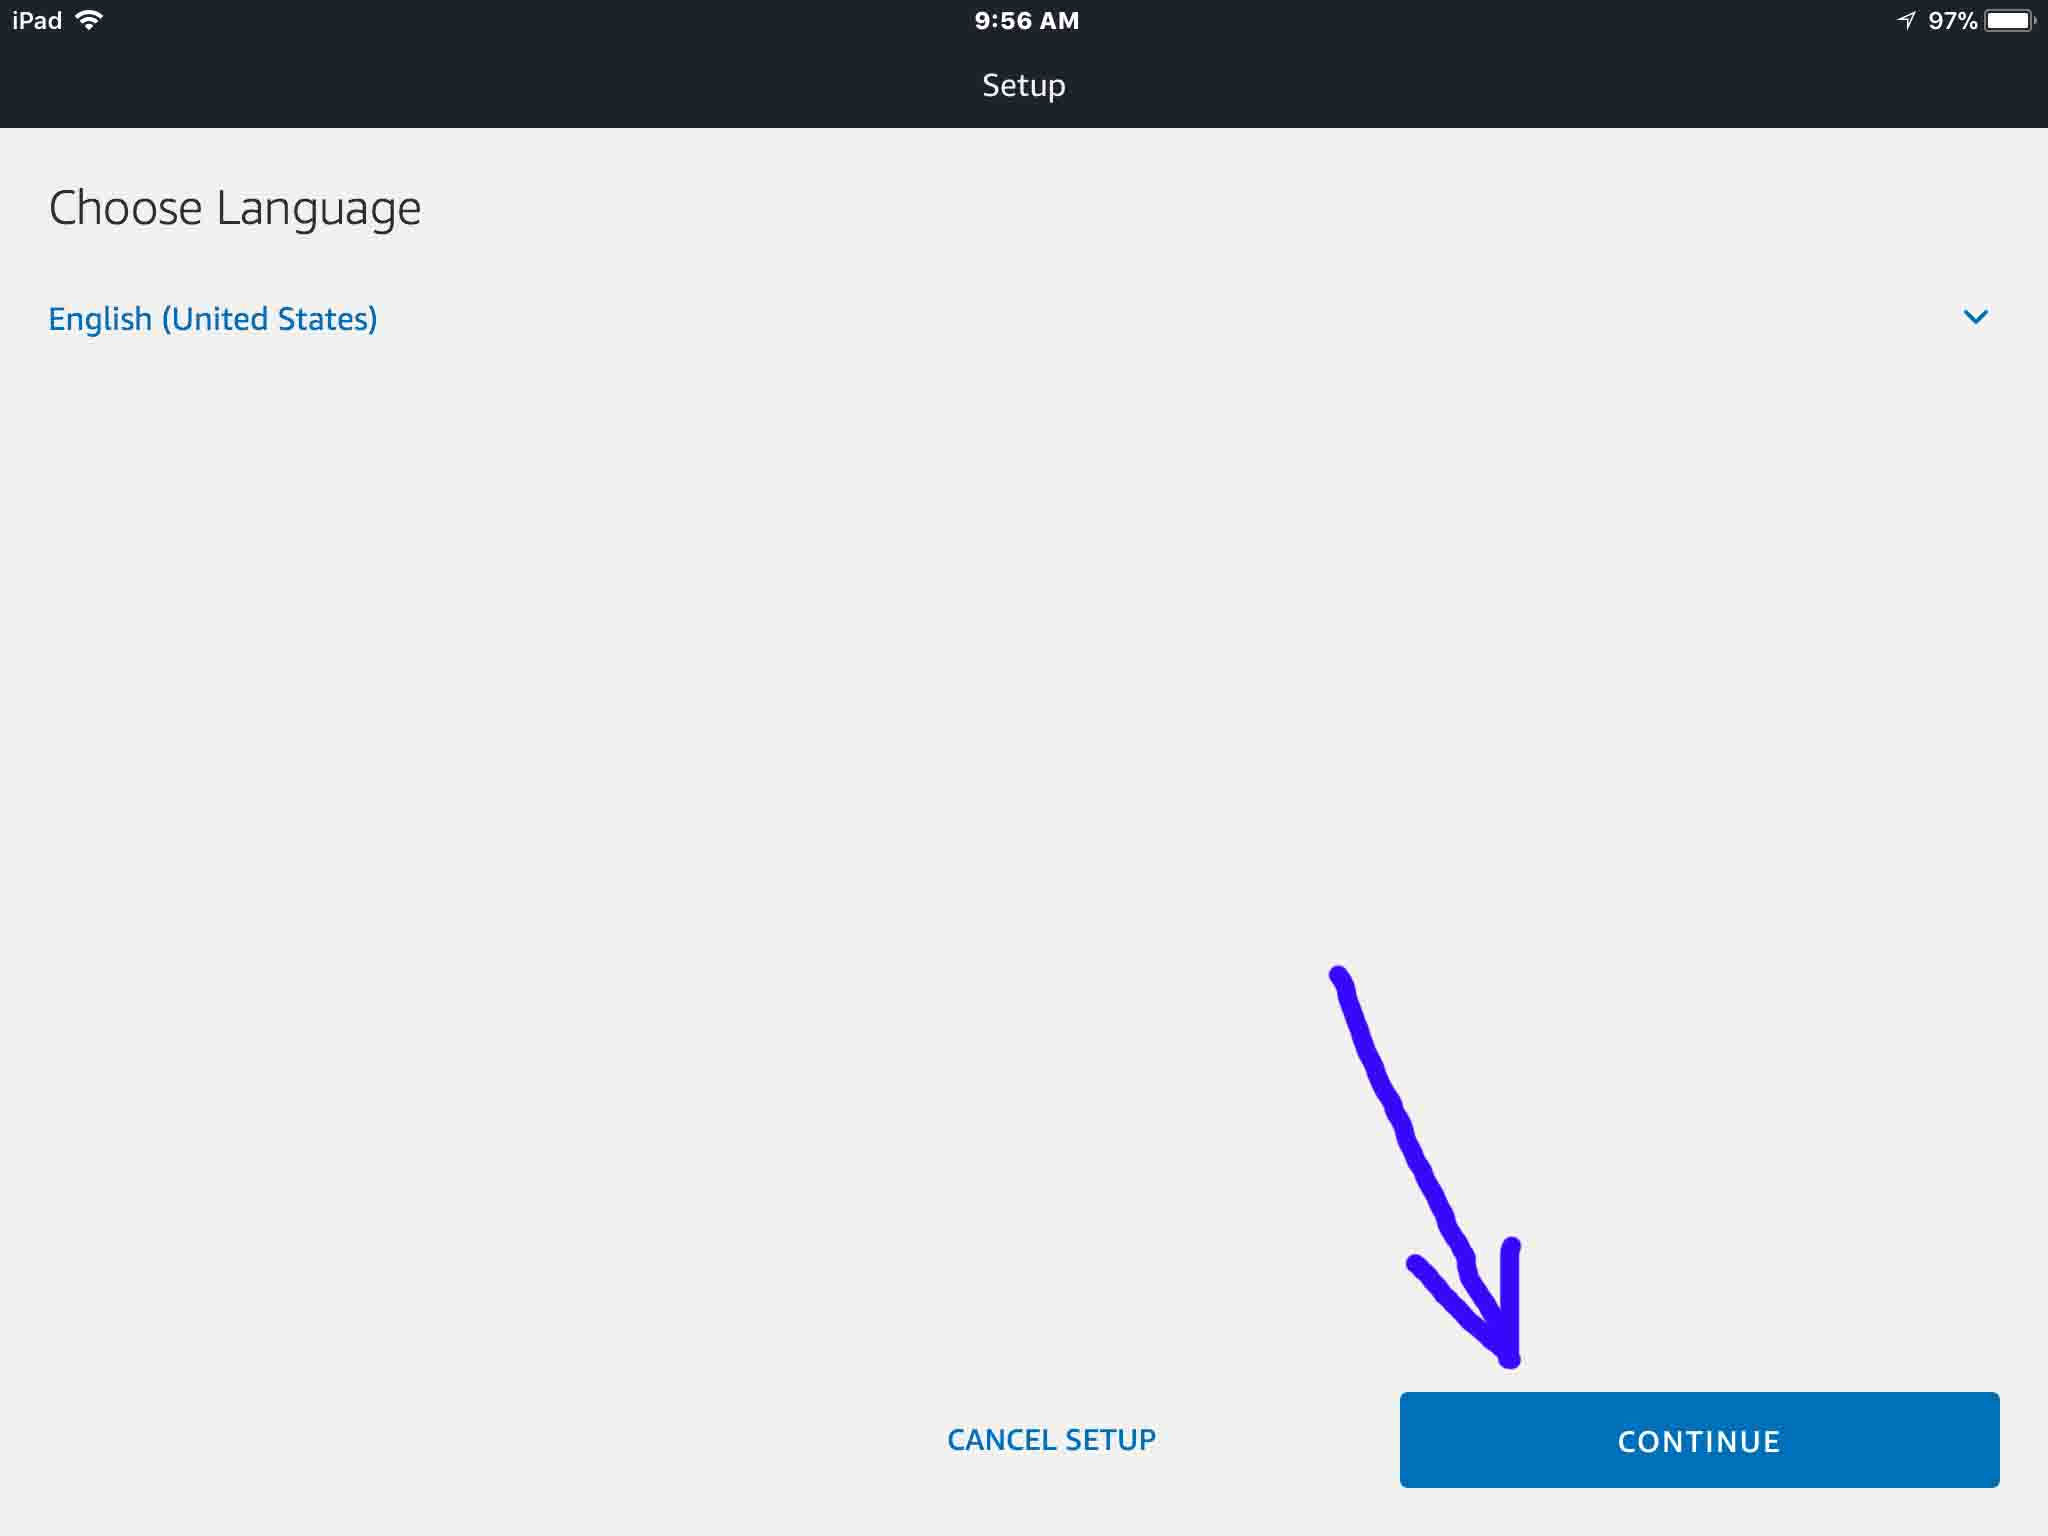
The app then shows the Choose Language screen, as seen next.
In our case, the correct language choice already shows in blue in the last picture: English (United States). But to change this, tap on this link.
A list of language options then appears, with the current language choice checked. There, you tap your preferred language.
The blue link then reappears, showing the language you picked.
Once the desired language displays, tap the blue Continue button.
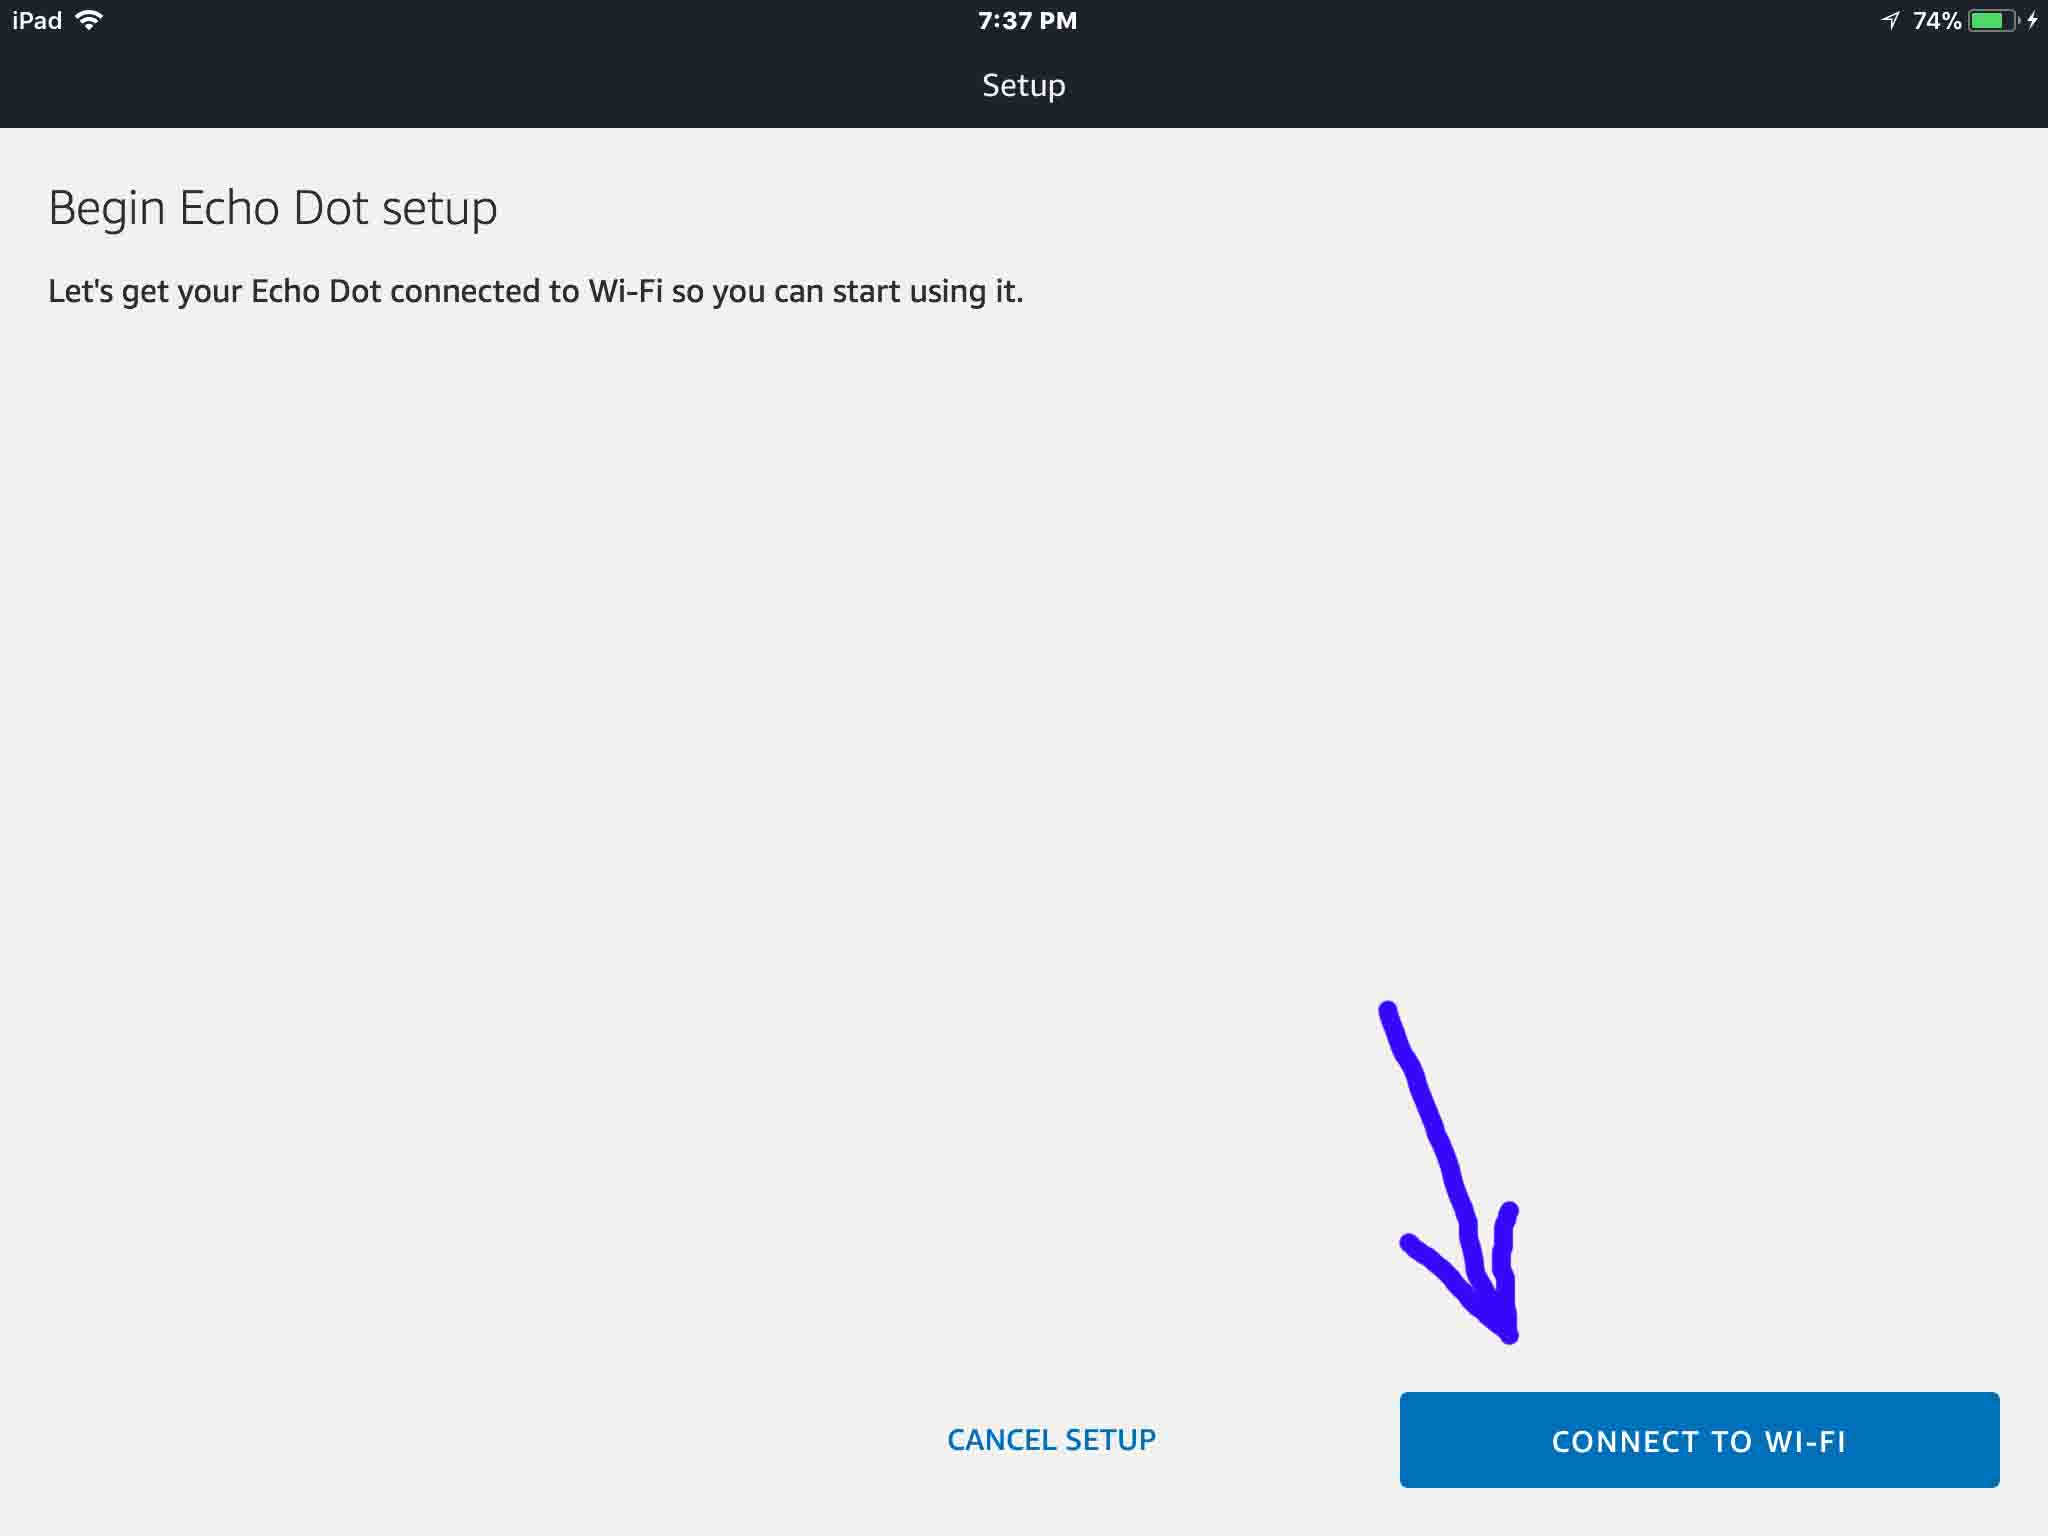
Alexa then shows the Begin Echo Dot Setup screen, as seen in the next step.
See this screen as shown next. From here, connecting to WiFi is the same for both a new speaker, and one with which you’re just changing WiFi on.
The Setup->Wait for the Orange Light Ring screen then shows, as seen next.
Wait for a minute or so. Your Alexa speaker light ring should then glow in a slowly spinning orange-yellow pattern.
If the orange light does not appear after a couple minutes, force setup mode as follows.
The spinning orange blip then appears on the light ring, as seen next.
Do not proceed to the next step until you’ve heard this announcement, and see this rotating orange glow.
Do not place the smart speaker into WiFi setup mode until the screen above appears on your mobile device. If you do, and then advance the Alexa app to this point, you might confuse the app sometimes. This confusion forces you to set up the speaker as a new device, though you may not have wanted that.
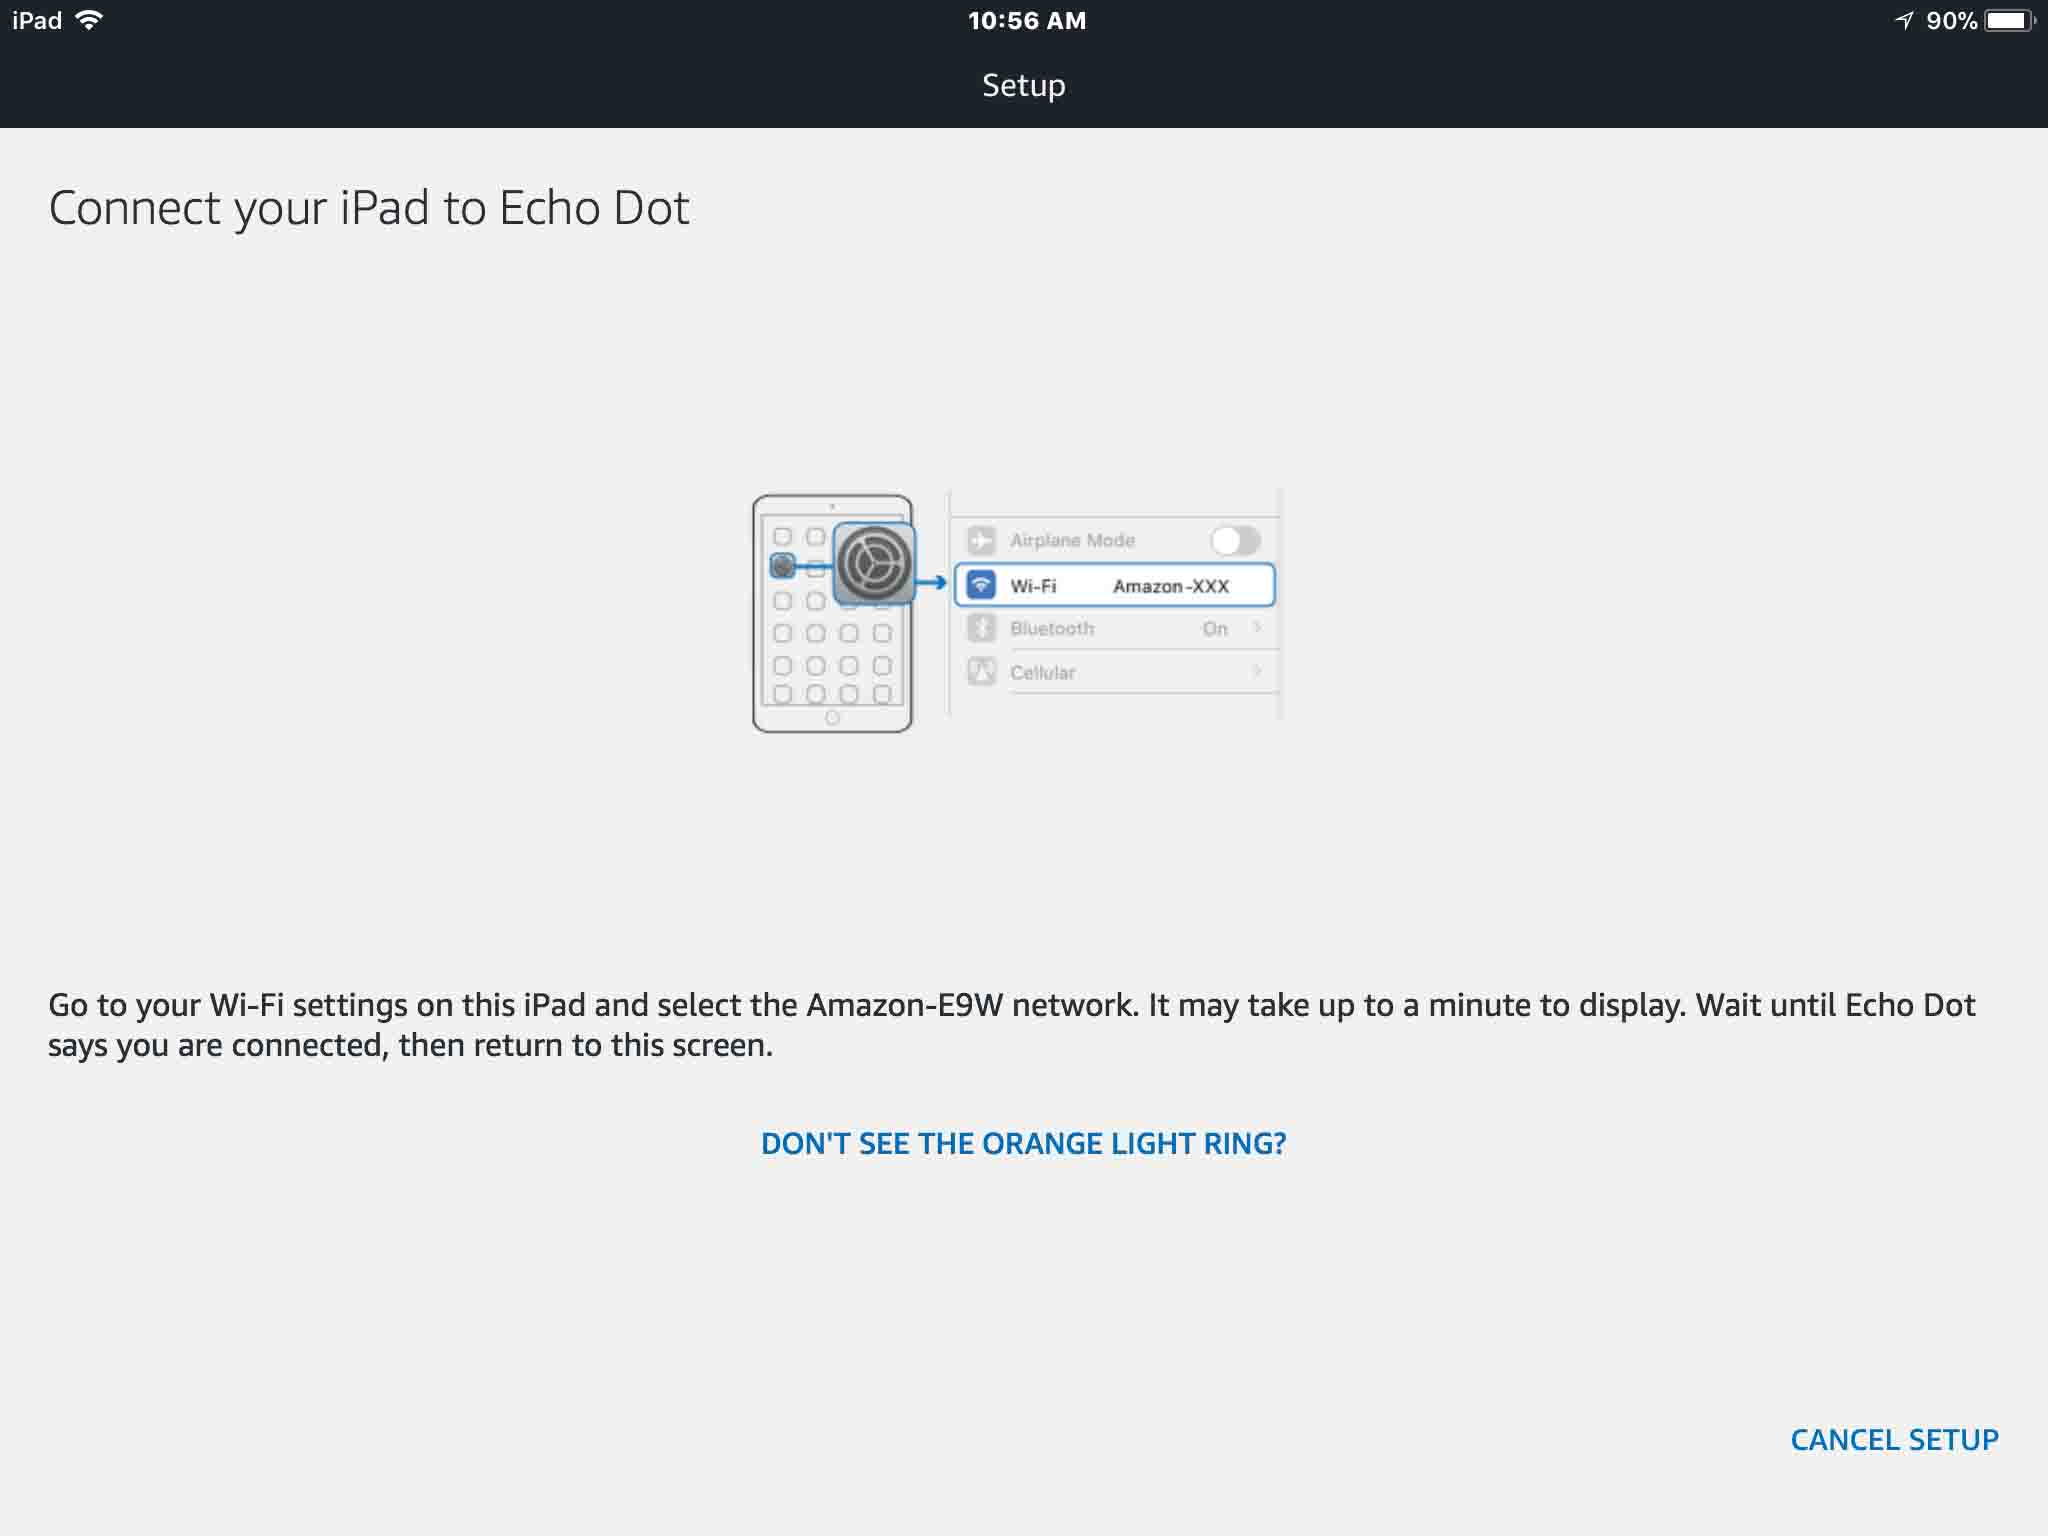
This brings up the Echo Dot Setup->Connect your iPad to Echo Dot creen, as shown next. This screen stays up until you link your mobile device to the speaker’s WiFi network. Do that in the next step.
The speaker then creates this Amazon-xxx ad hoc network for setup purposes. Continue with the next step to link your mobile device to the speaker.
Press the Home button on your mobile device. This hides the Alexa app.
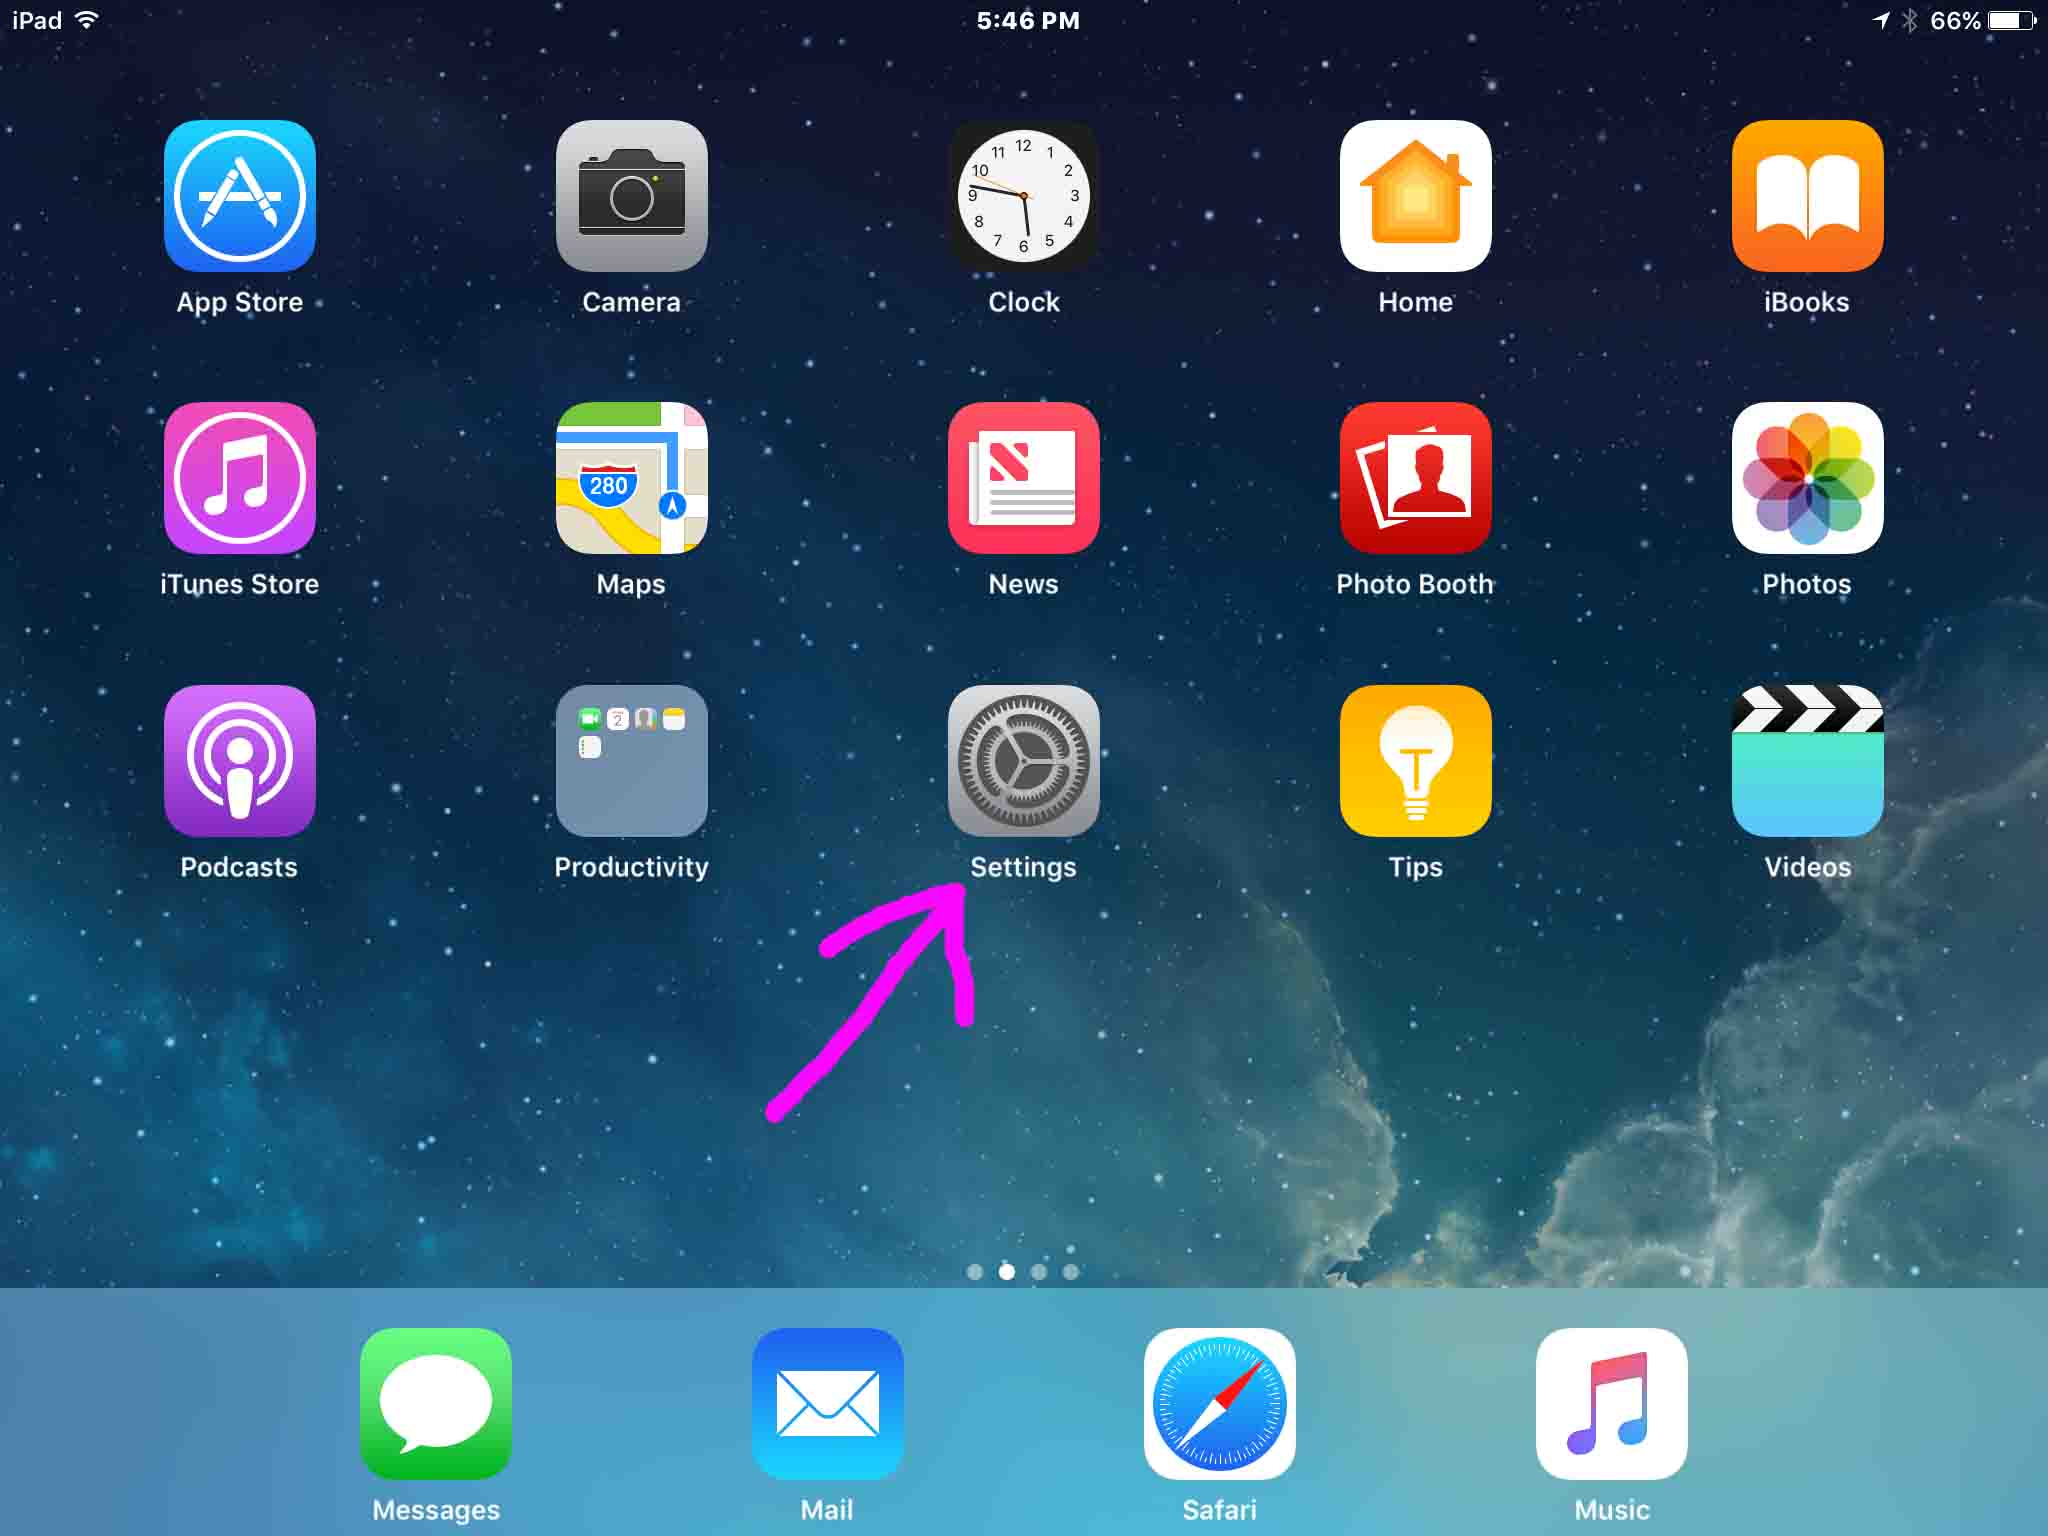
Then, find the Settings app and tap it. On our iPad, we find that app on the second home page as seen next. Note that this app may appear elsewhere on your device.
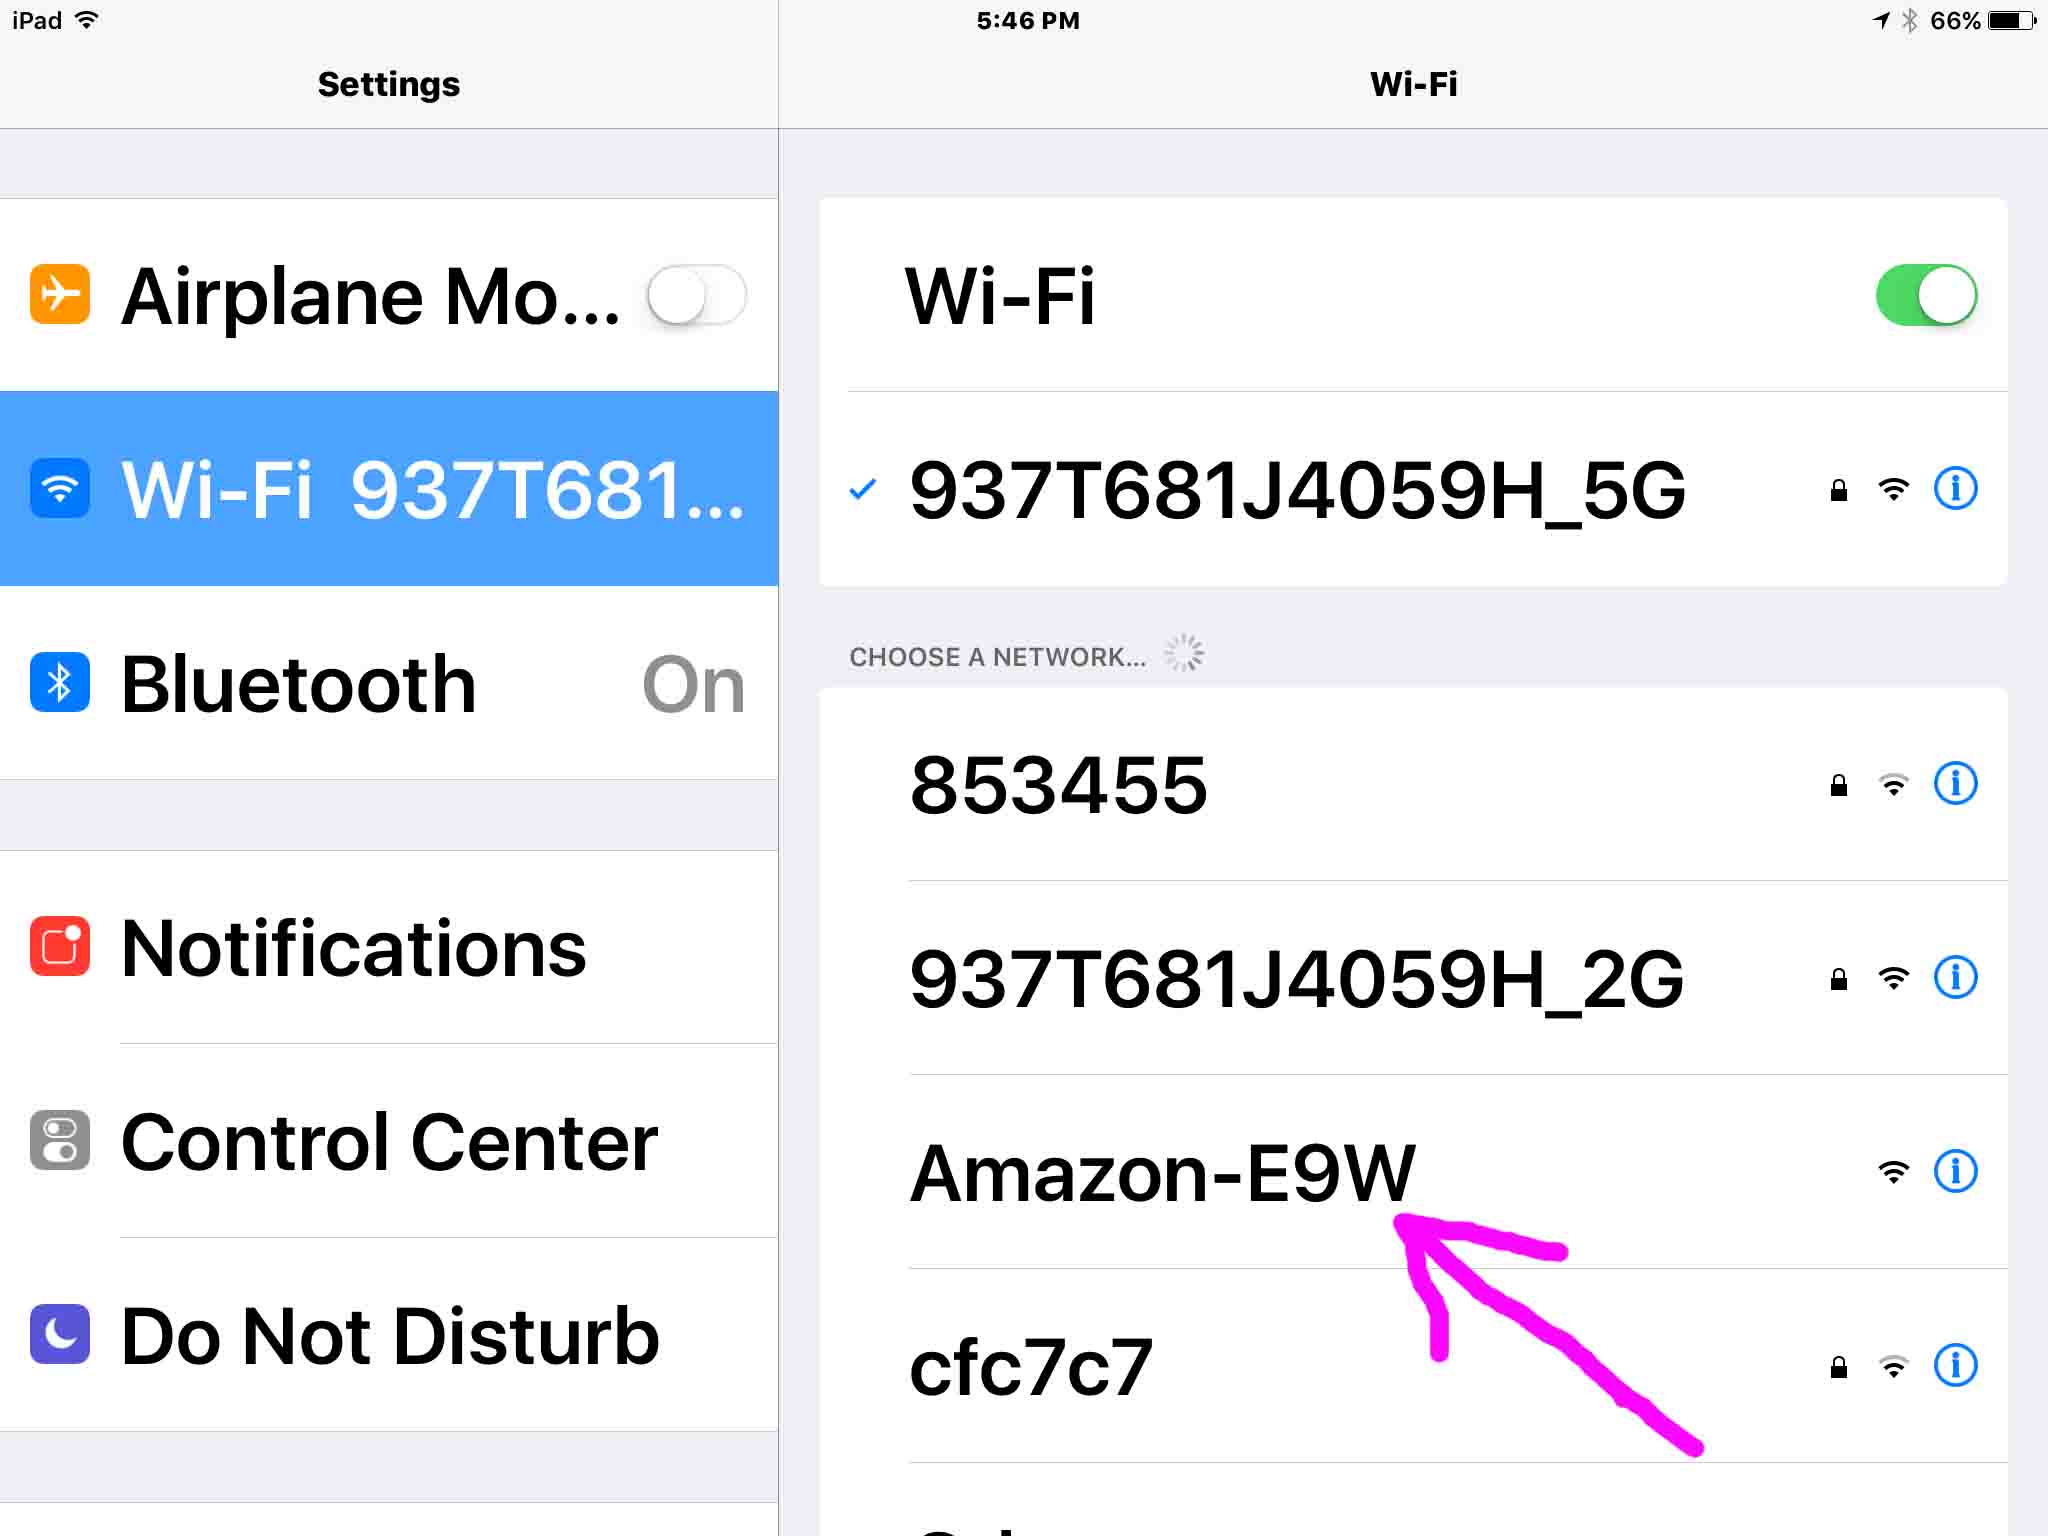
This starts a scan for in-range Wi-Fi networks by your device to which you can change Alexa WiFi to. Our iPad found the list of networks shown next. Note that it found the Amazon-E9W network. Our Echo Dot, running in setup mode, broadcasts this WiFi SSID when the light ring glows orange.
If you do not see the Amazon-XXX network, move your tablet closer to your Alexa speaker. Then, wait some seconds for this WiFi network to appear. If you still do not see it, reboot your speaker. Then, once the light ring goes out, repeat from step 5 above. The orange ring must show, to see the Amazon-XXX network.
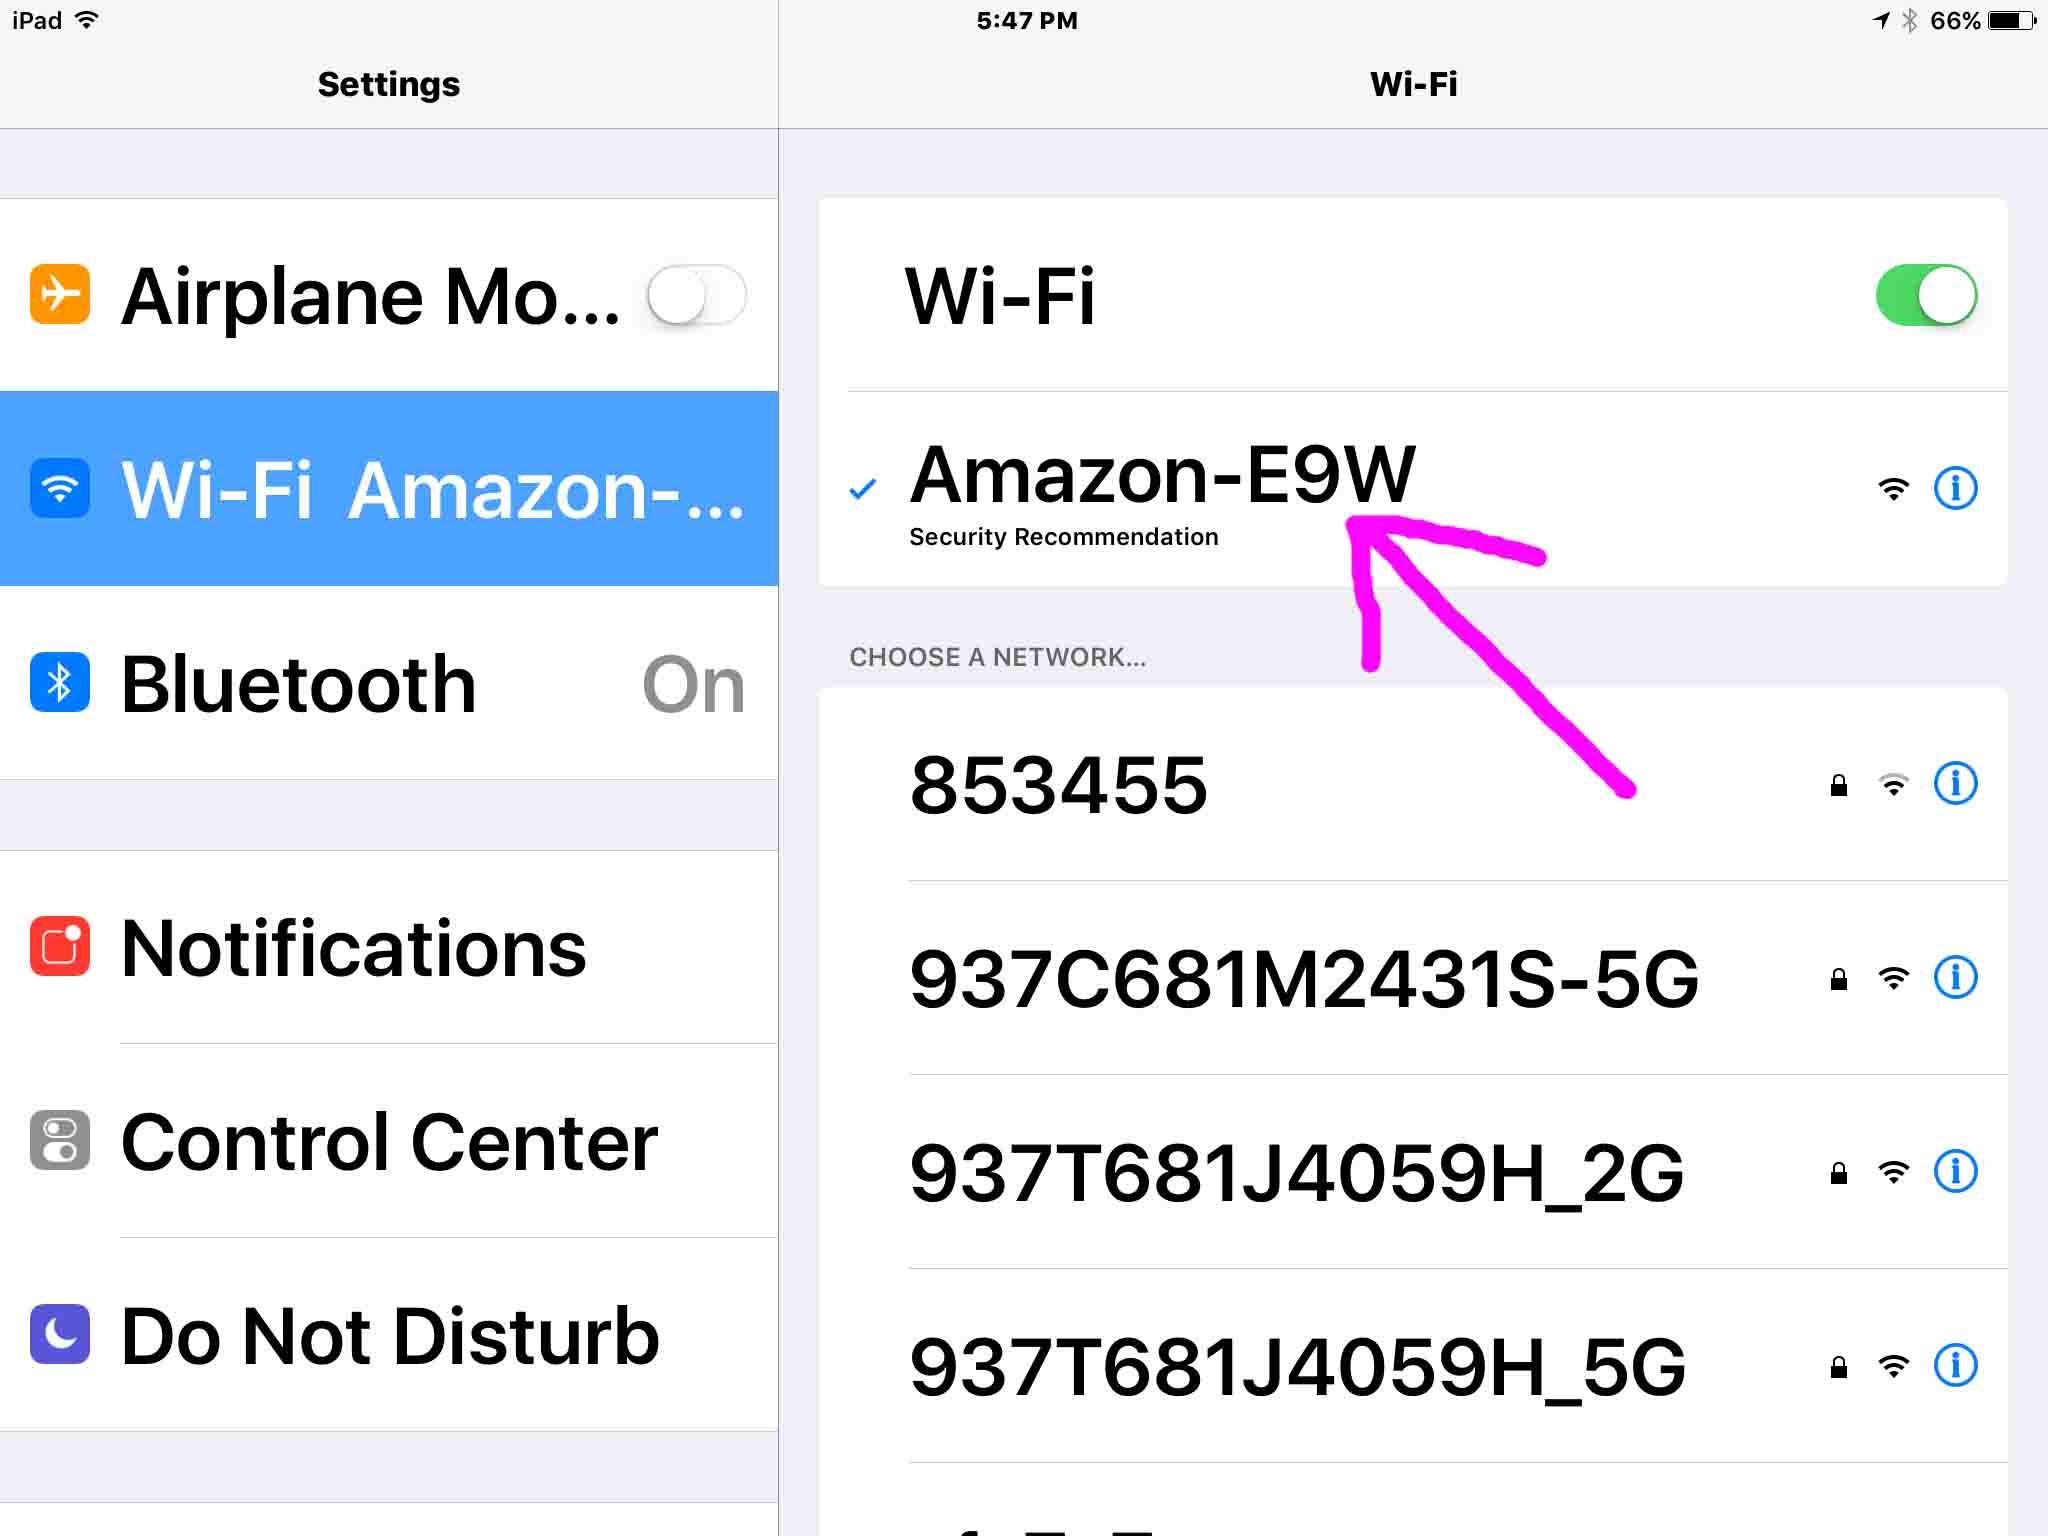
The connection should occur quickly to the unsecured Amazon-XXX WiFi network. Unsecured WiFi nets need no password.
Once linked as seen next, your Wi-Fi settings screen should look like the next picture.
Your speaker should also say the following: “You’ve connected to Echo Dot. Go ahead and finish the setup in the Alexa app.”
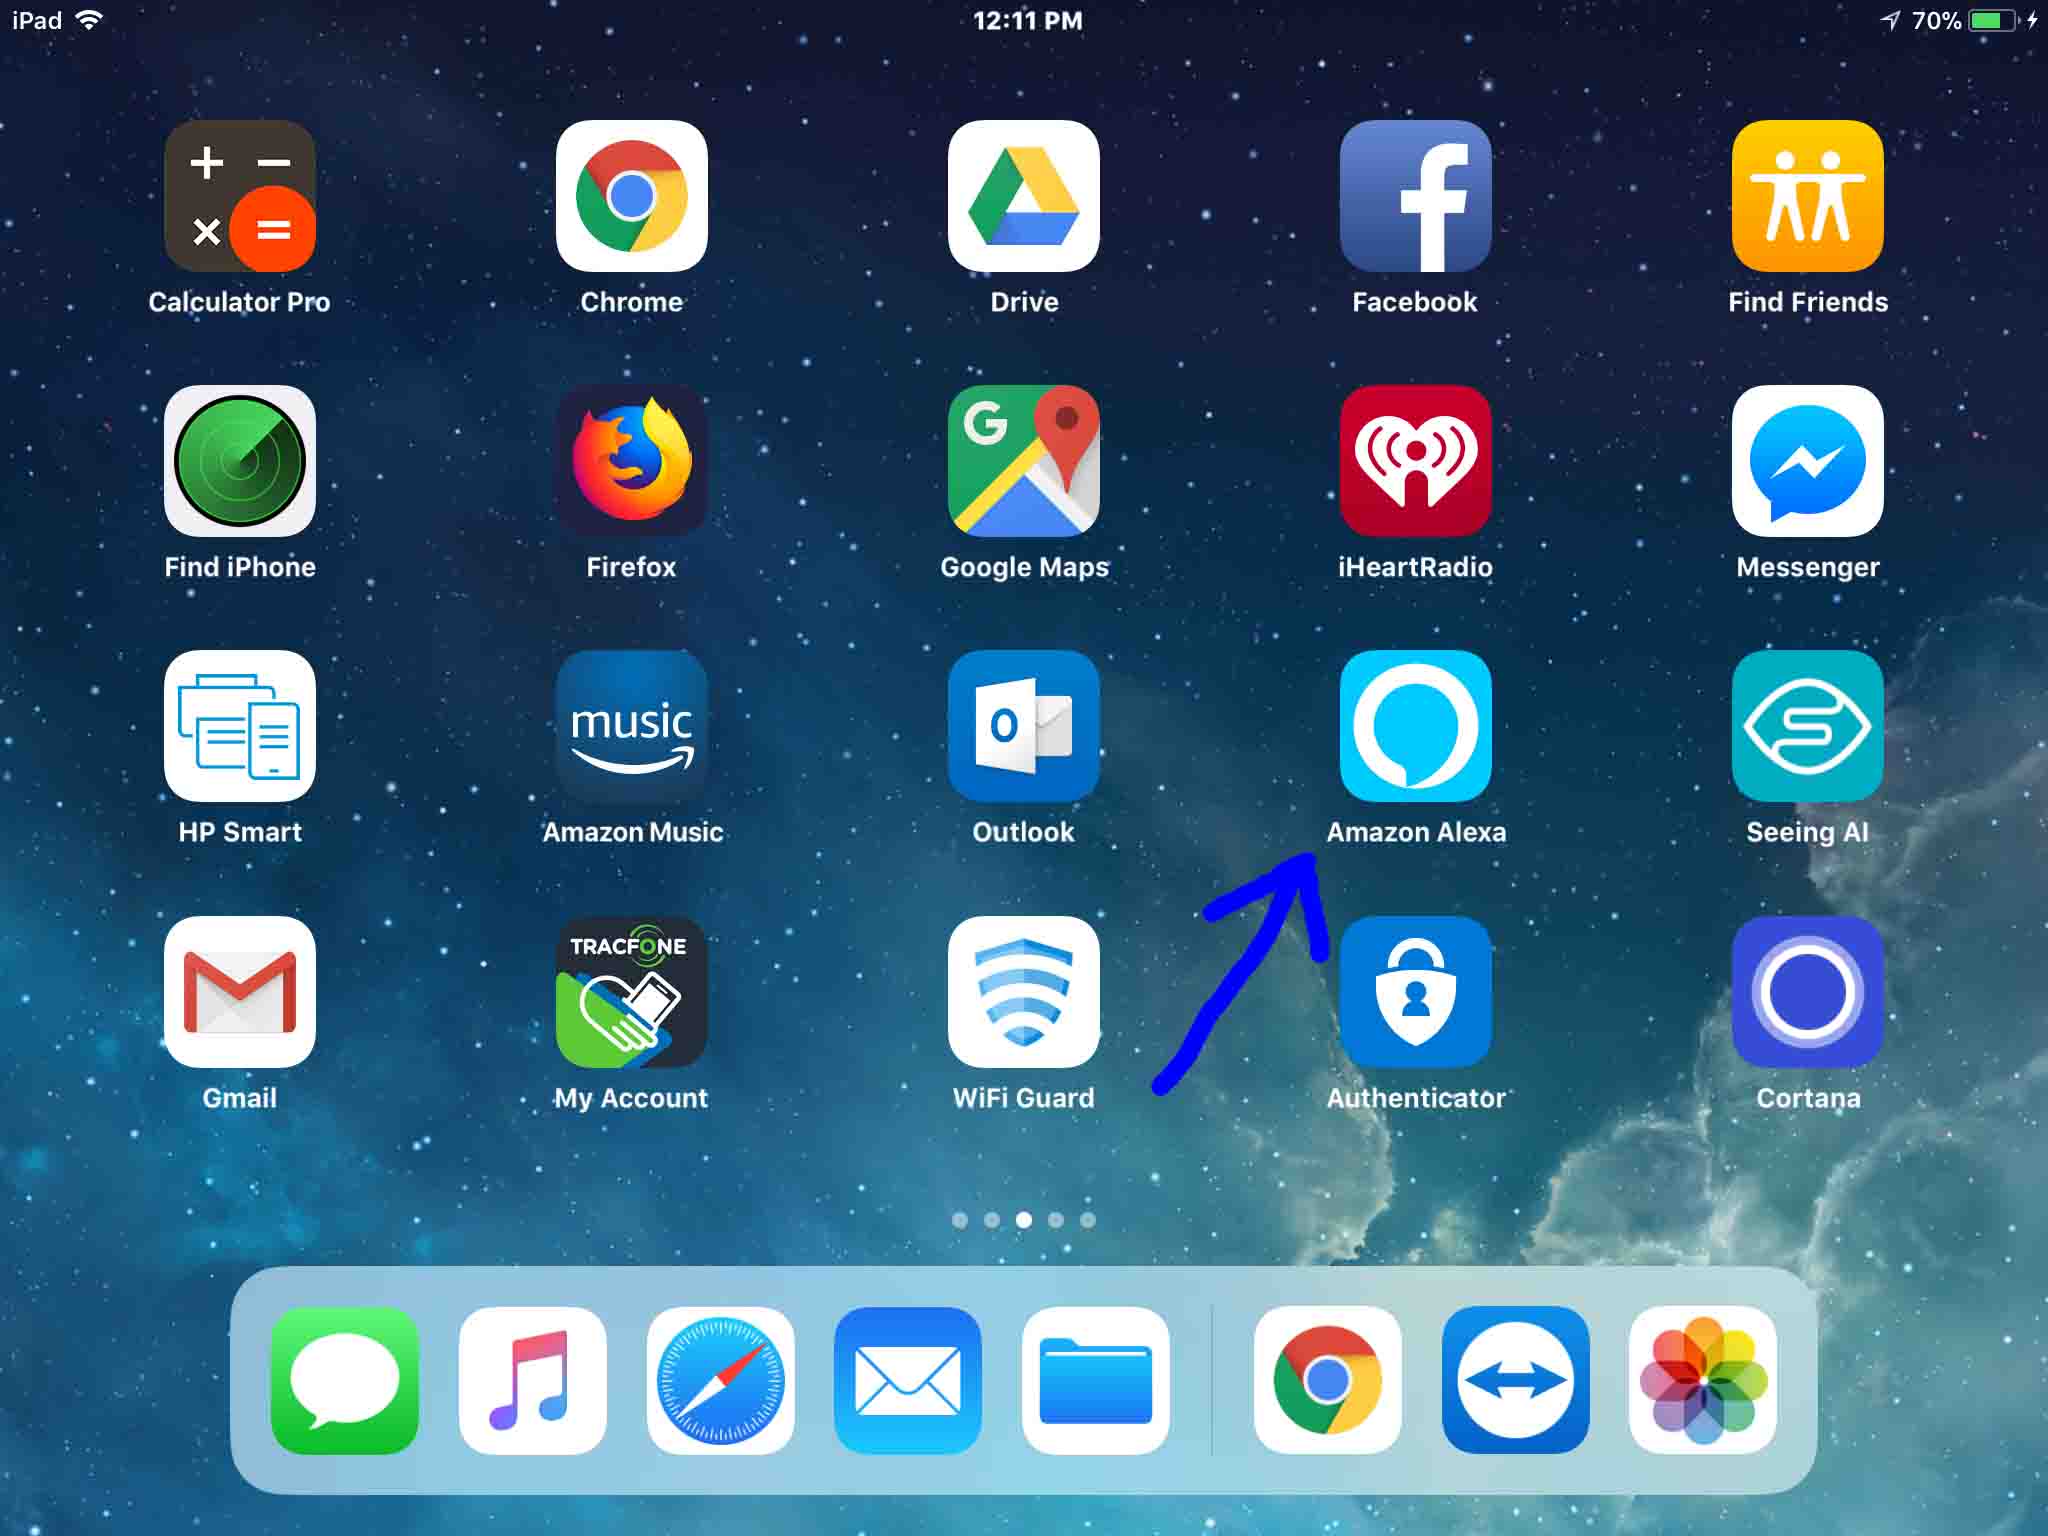
To go back to the Alexa app, press the Home button. This brings up the Home page.
There, find the Alexa app. Ours is on Home Page 3, as shown below. Tap the Alexa app to bring it up.
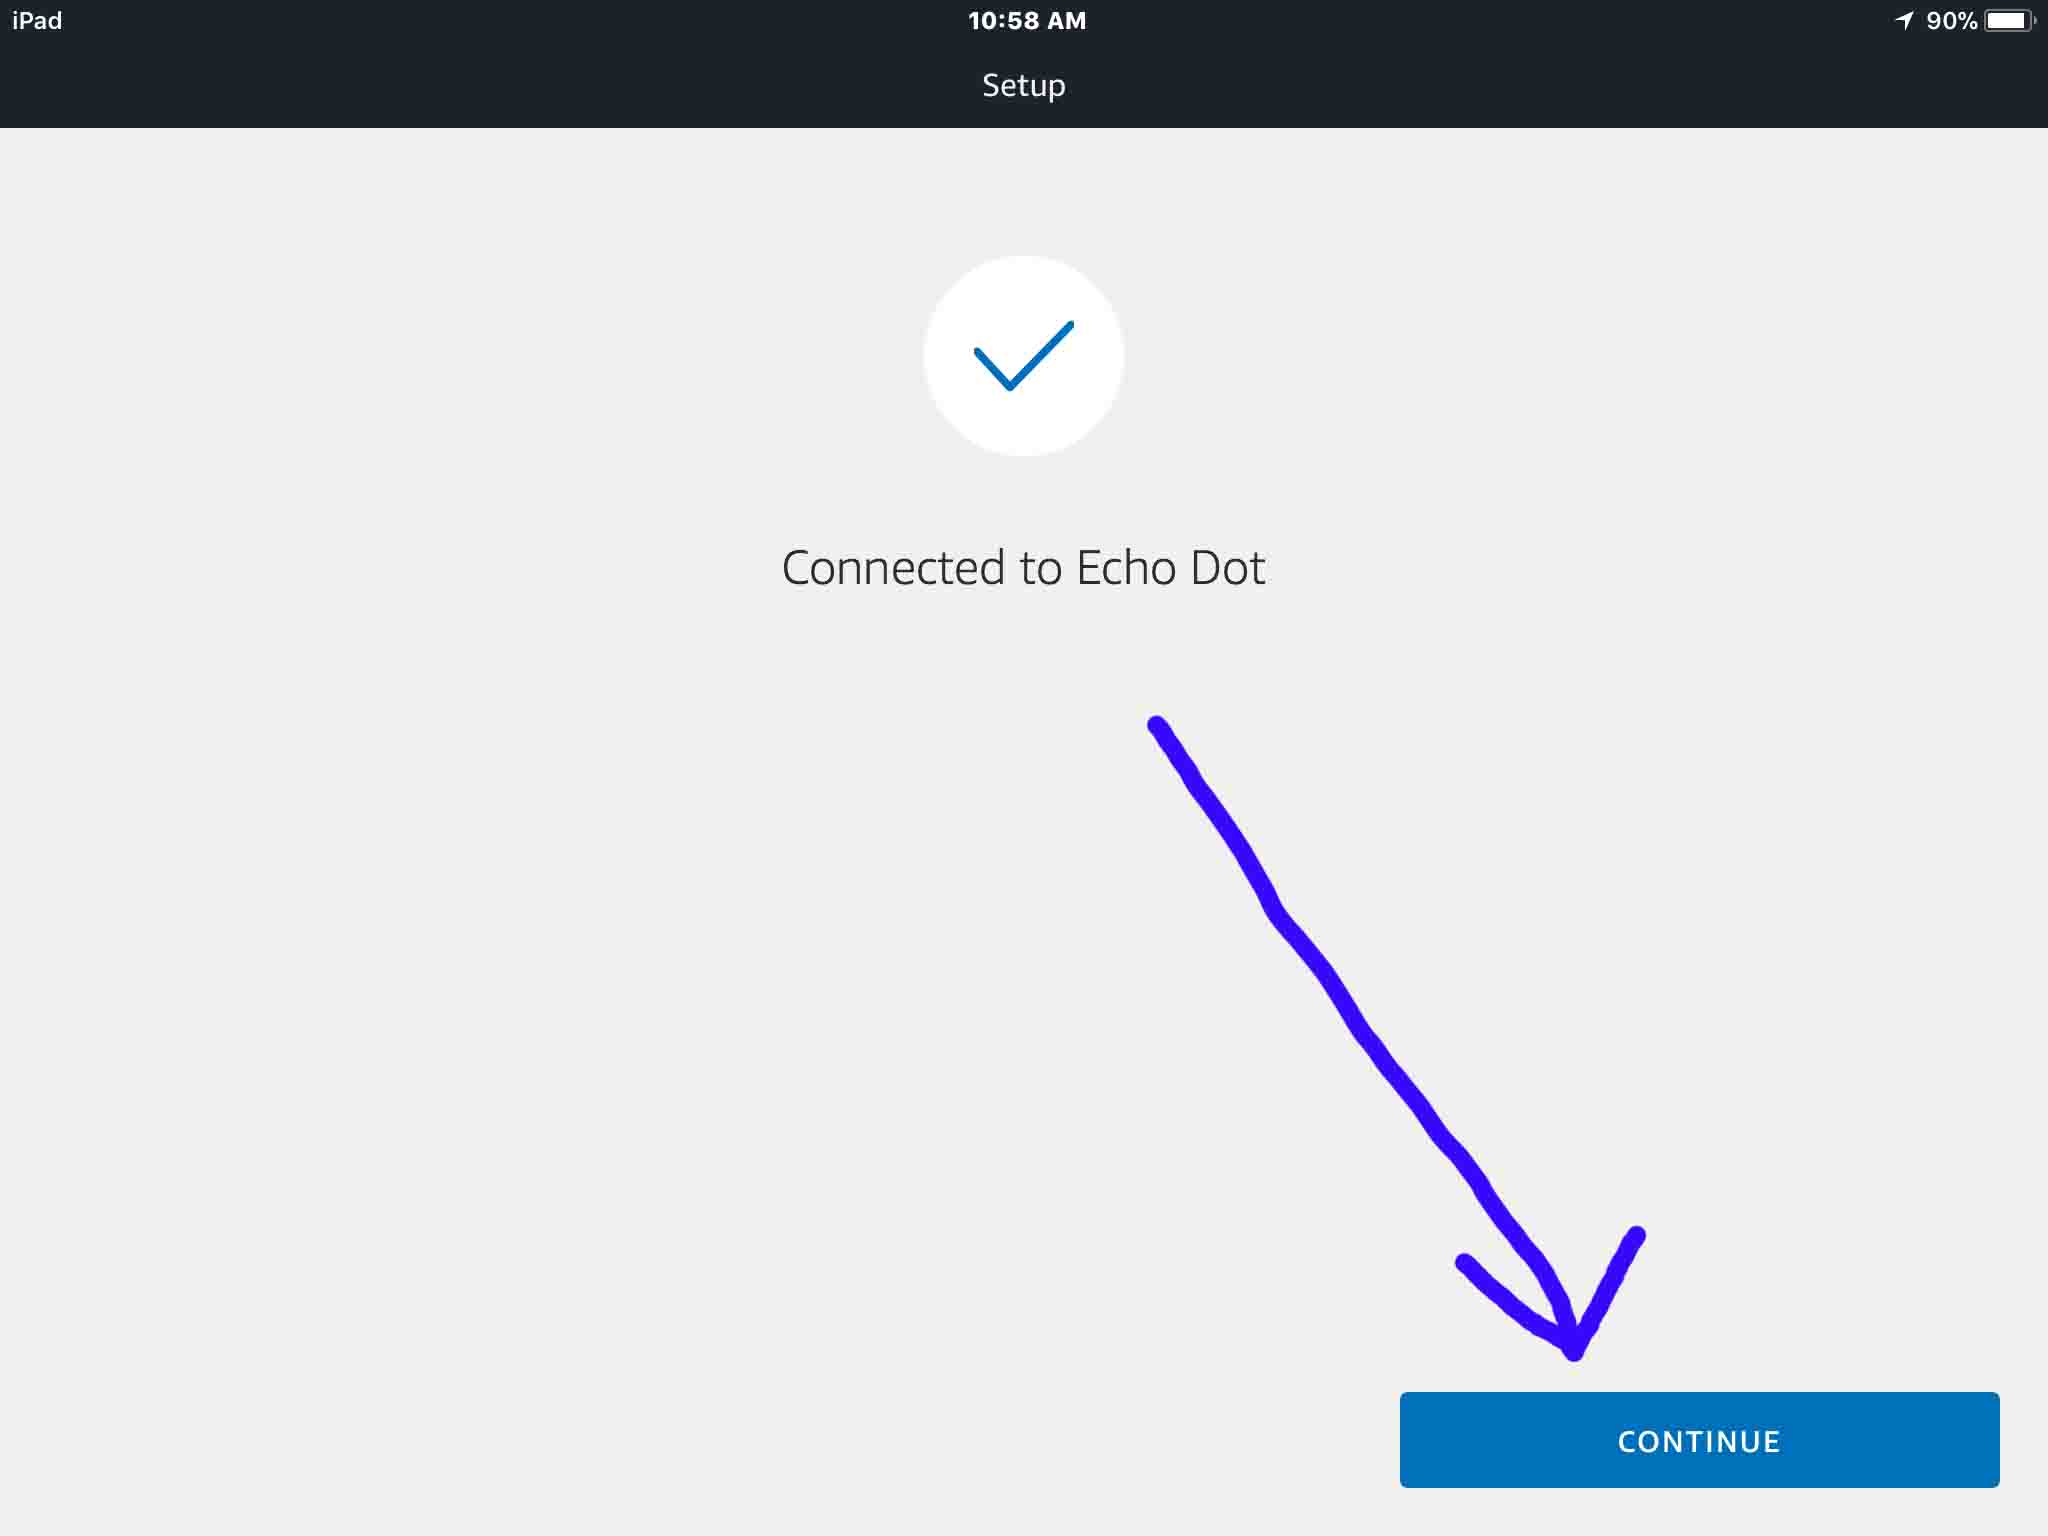
The following screen then appears. It shows the mobile device linked to your Alexa speaker.
Find this button on the screen seen above. This starts a scan by your speaker for WiFi networks.
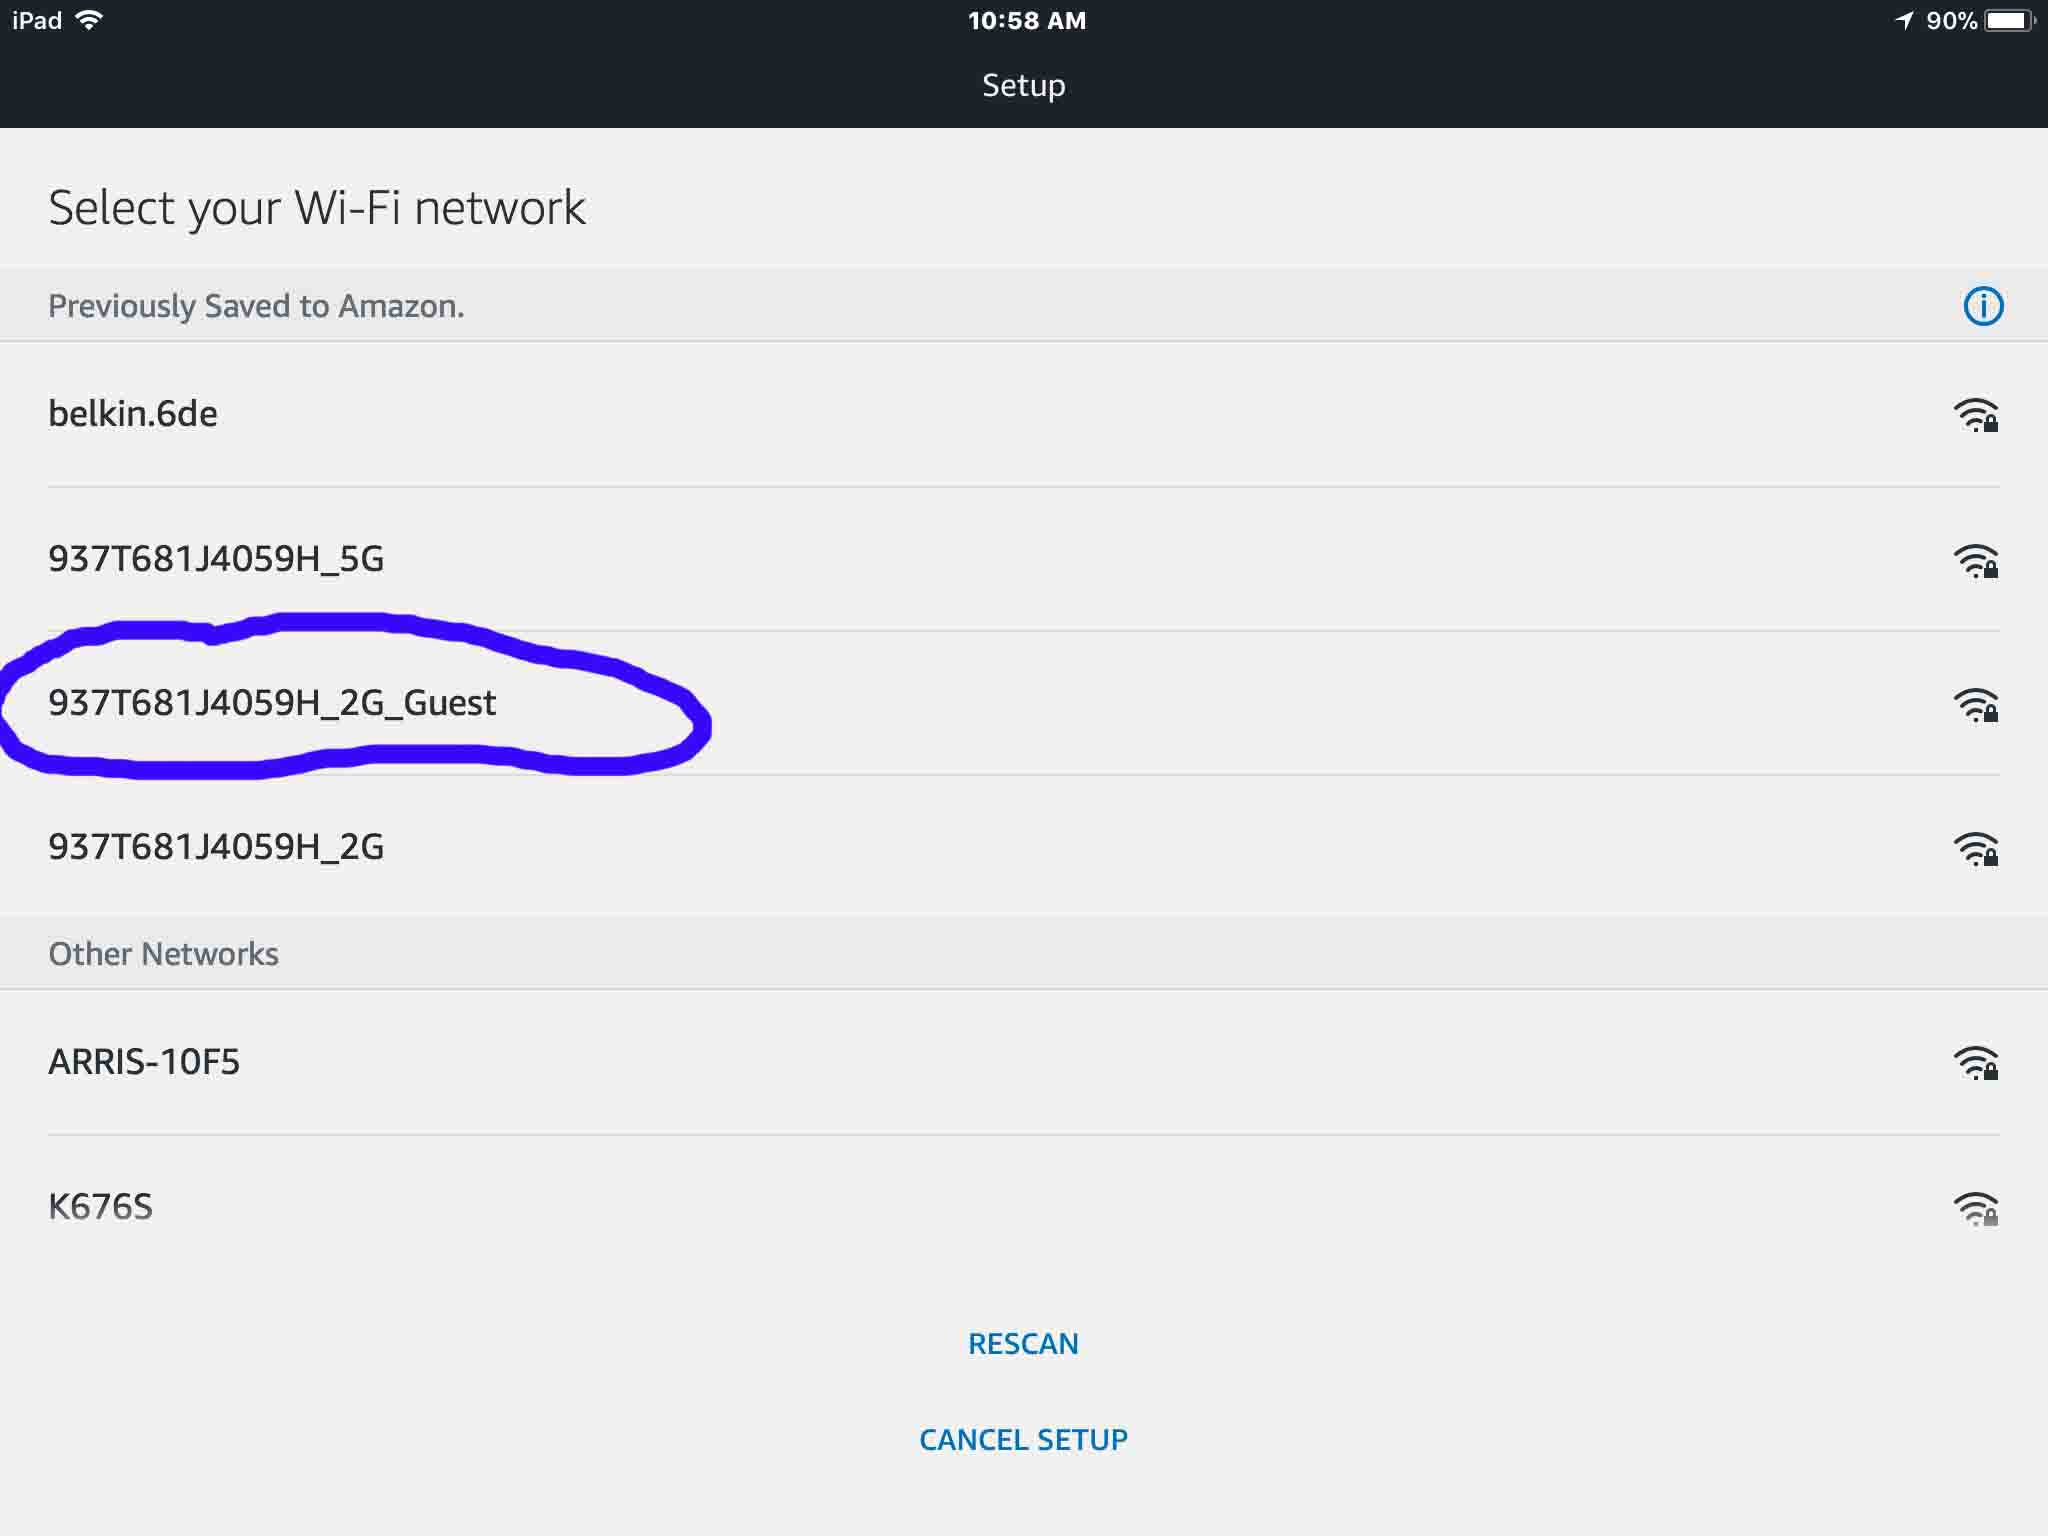
Once the scan completes, the Choose Your Wi-Fi Network screen shows, as seen next. This shows a list of in-range WiFi networks found by your smart speaker.
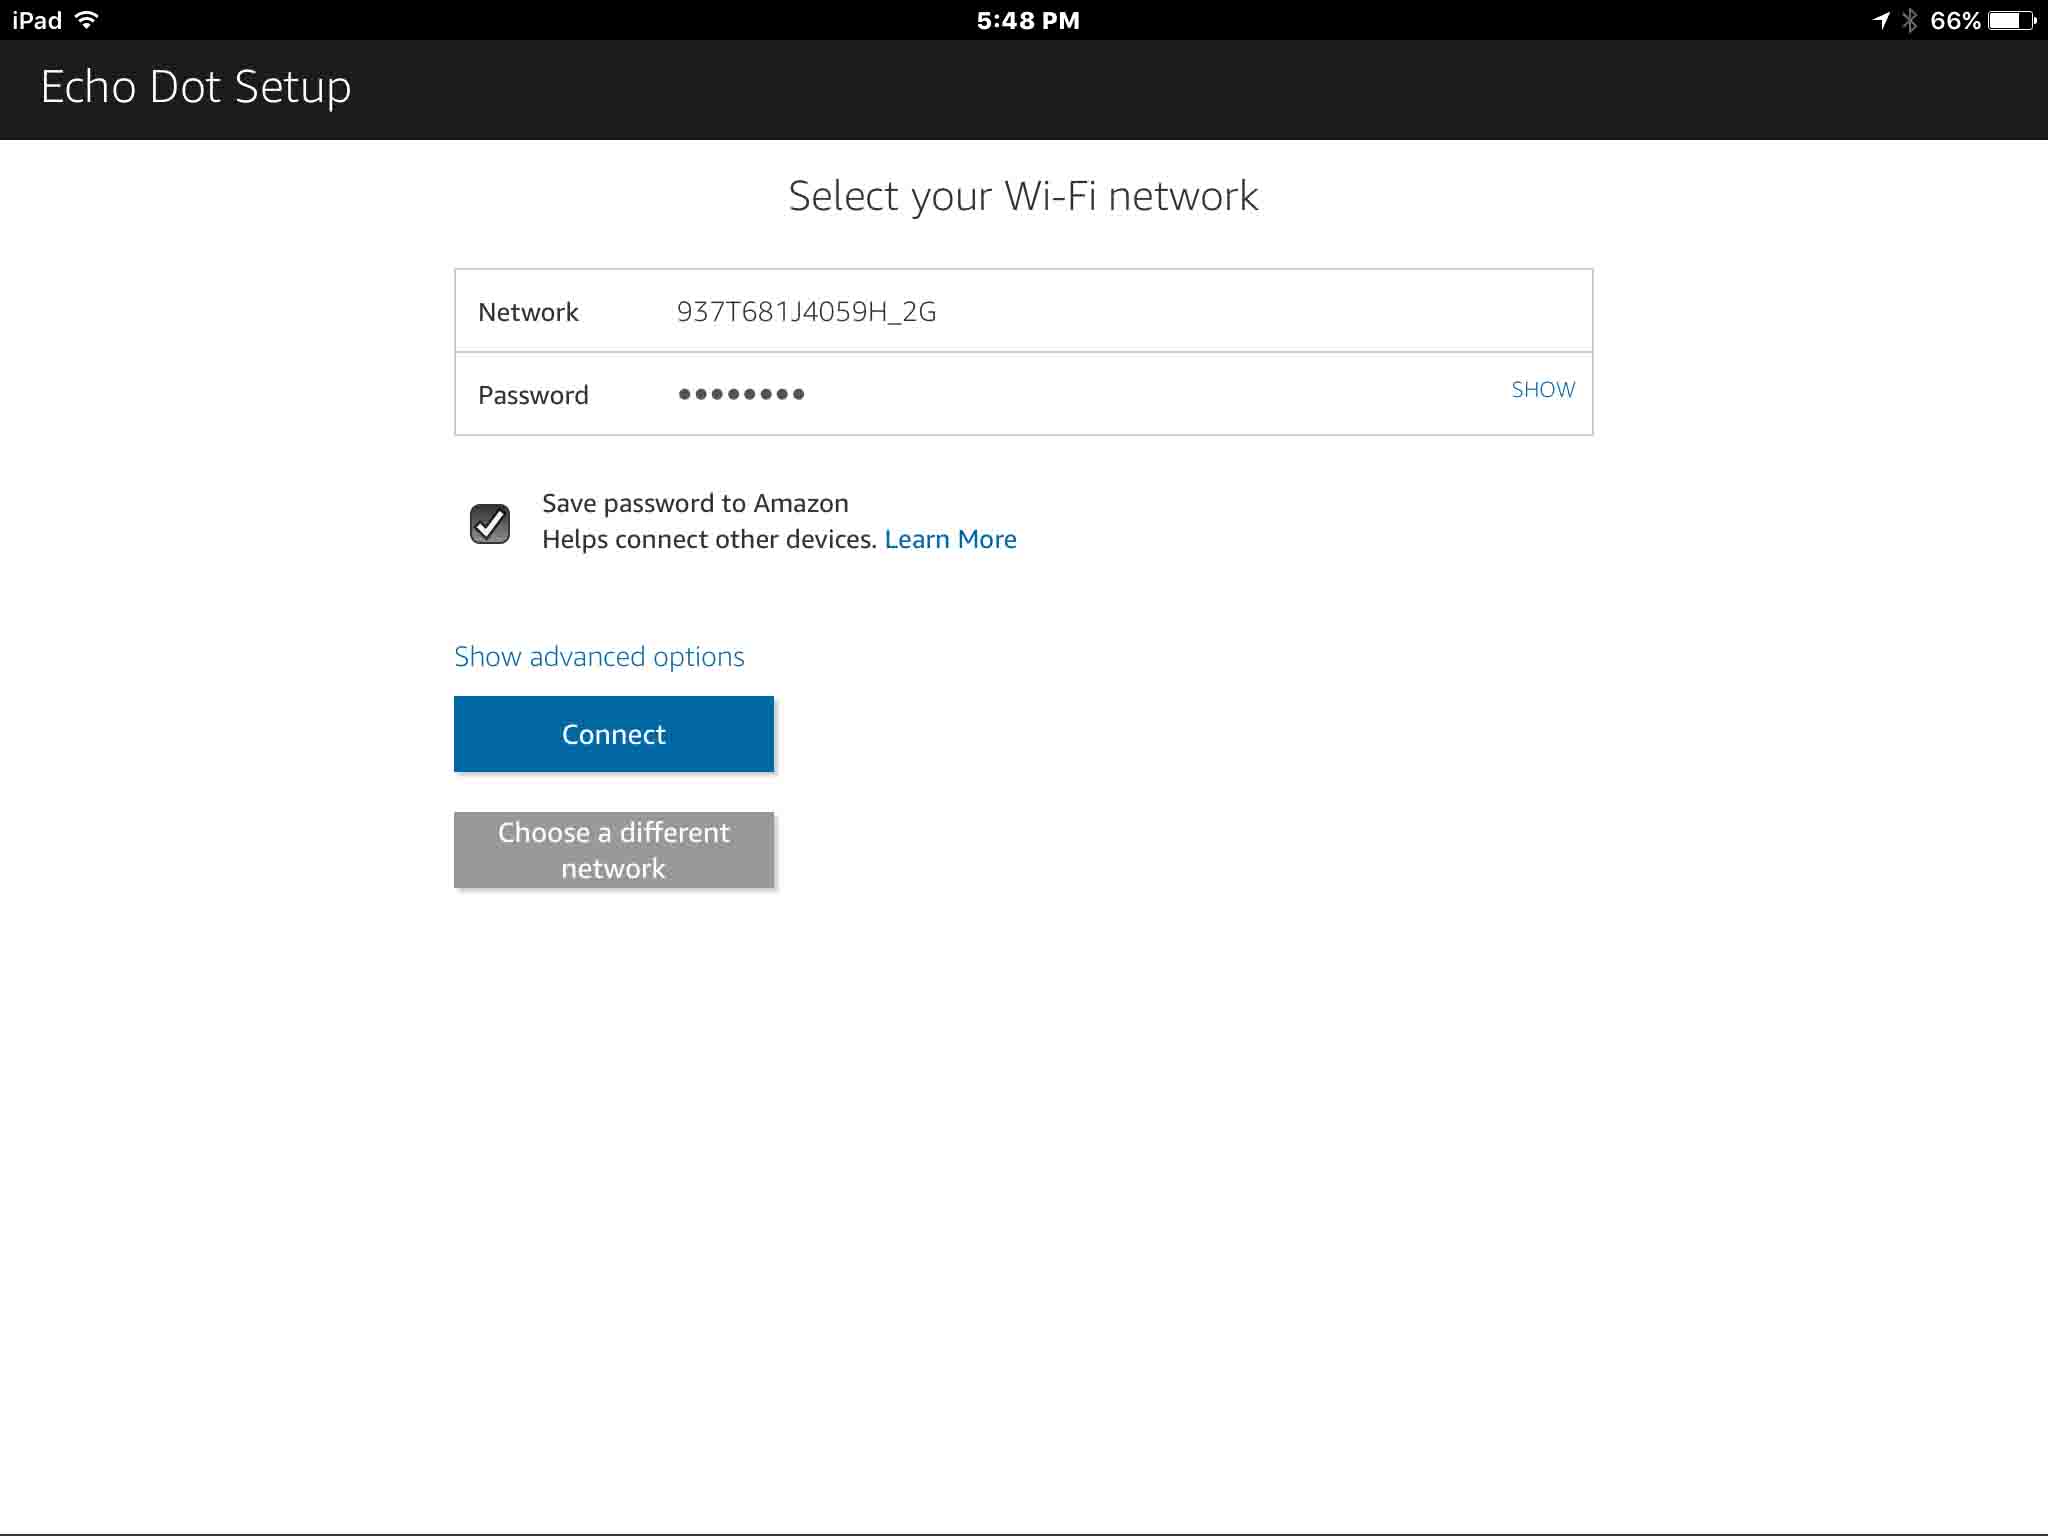
Pick the network to which to hook up Alexa speaker, on the Choose Your Wi-Fi Network screen above. In our case, we picked the 937T681J4059H_2G guest network. If you never linked with this network before in your Amazon account, the app asks for a password, shown next. The screen you see may differ slightly. But the password prompt function is the same.
A password request may not appear when changing WiFi on Alexa. Why not? When you’ve previously entered this WiFi network on Amazon, the system remembers that password for this network. You probably saved WiFi networks to Amazon when you connected any Alexa speaker before. So, the app issues no password prompt if your account has this WiFi network saved.
Use that virtual keyboard to punch in your WiFi network’s password. When finished, hide the keyboard. You should see a screen like the following, showing the password entered.
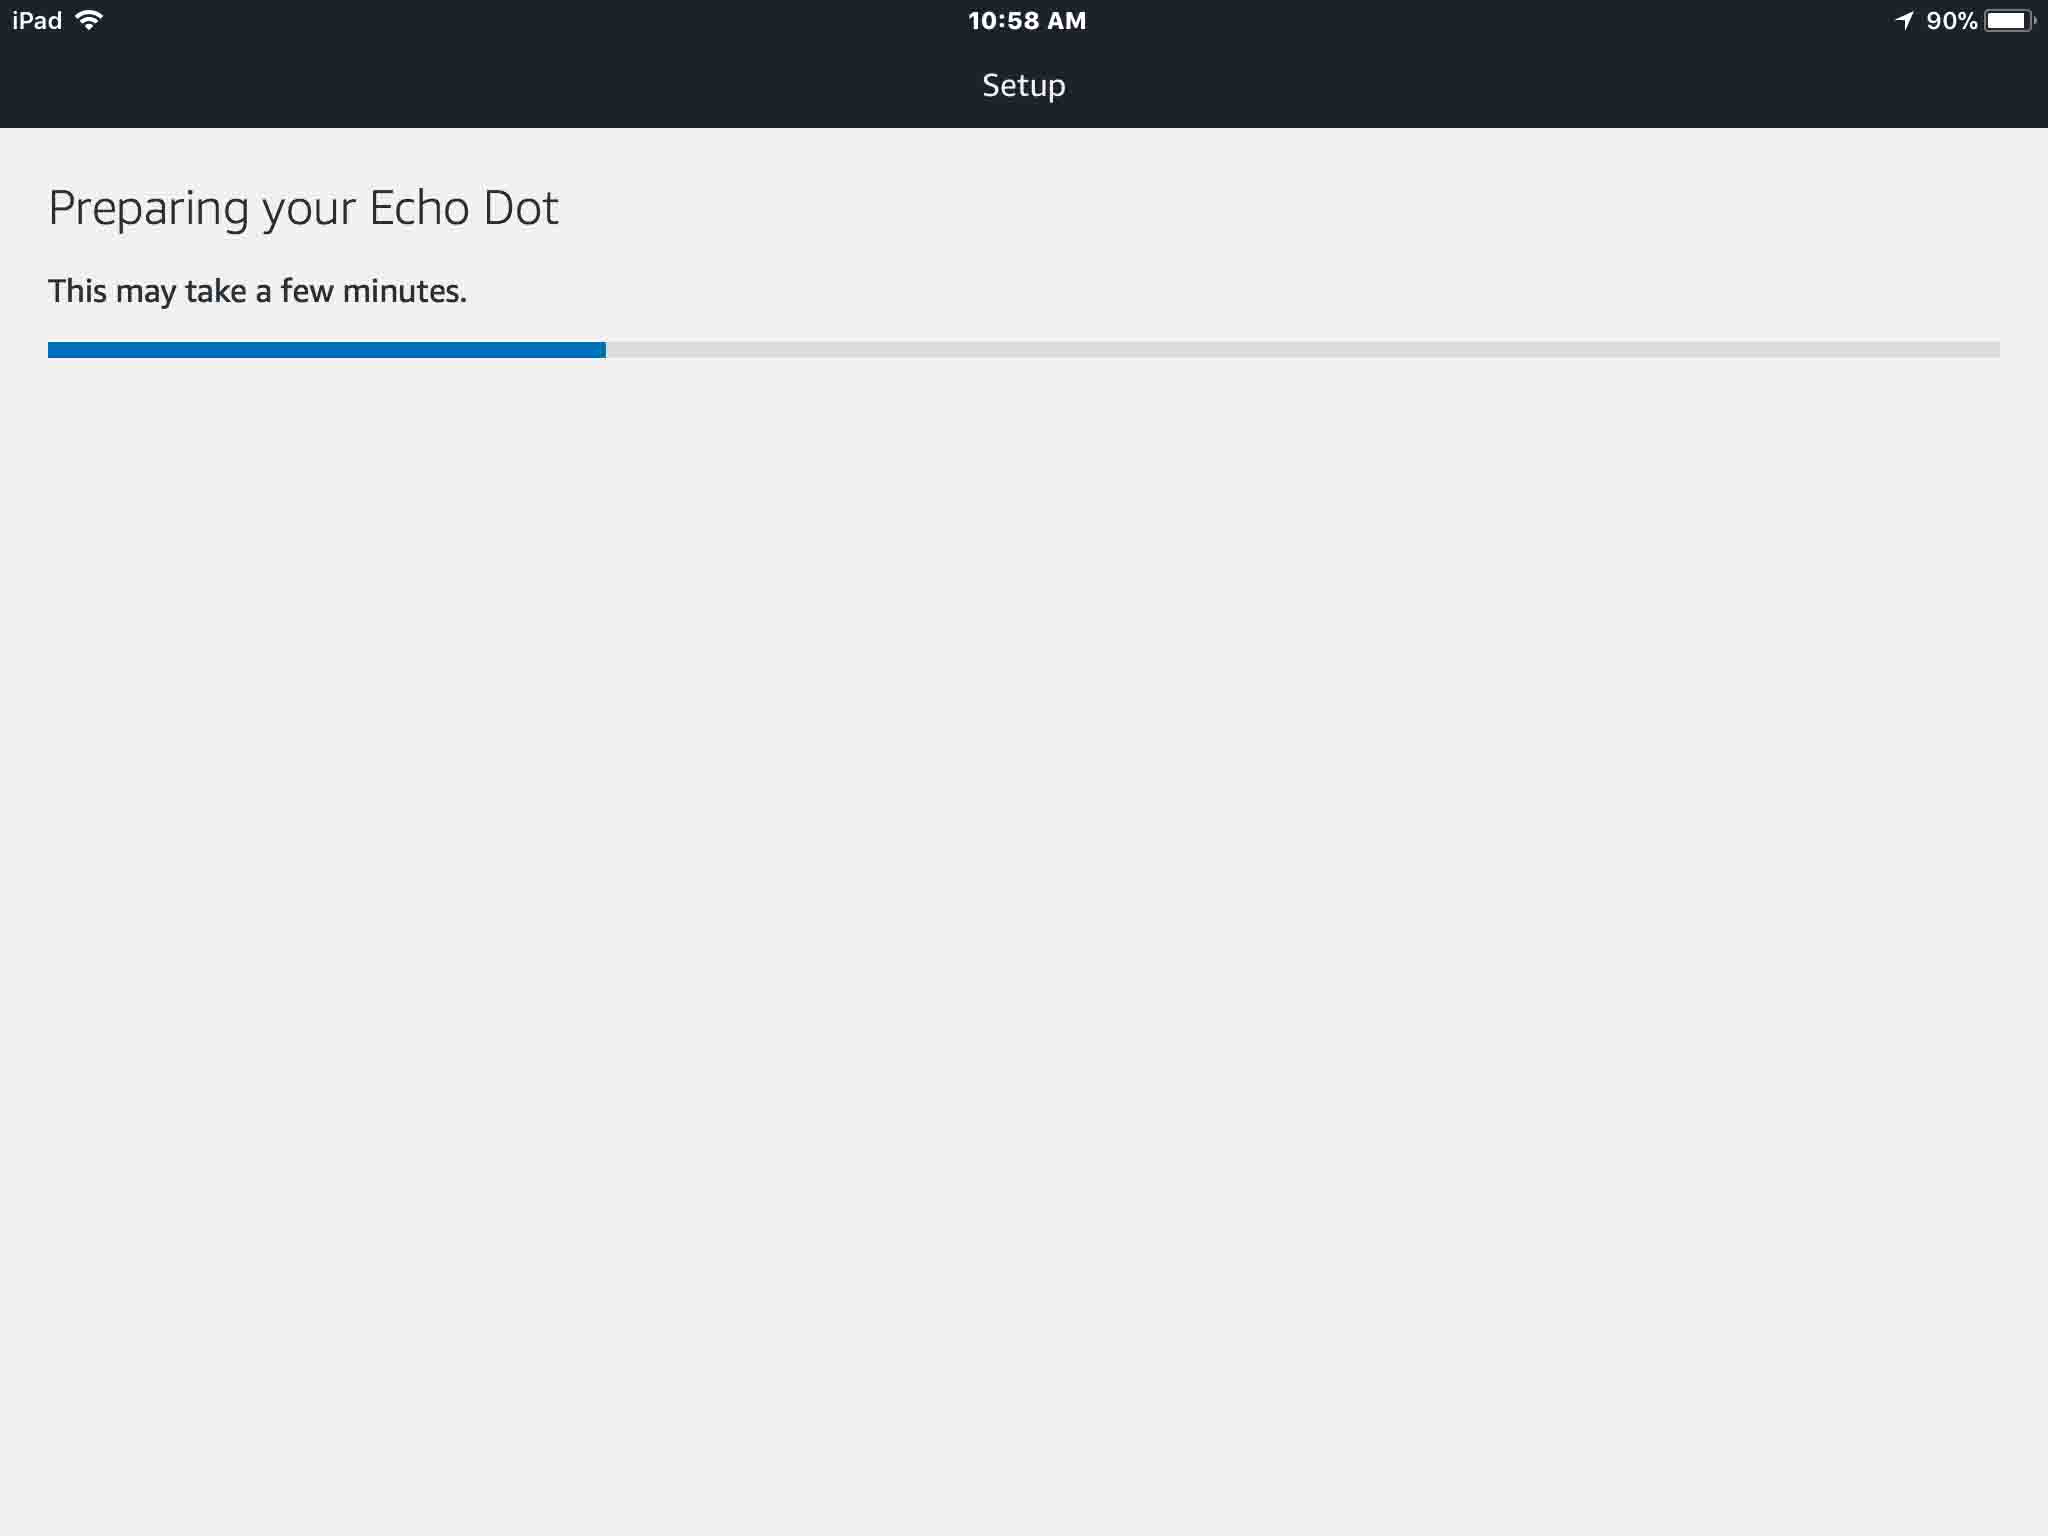
Pressing Continue begins attempts by your Alexa speaker to link to the WiFi network chosen in step 13.
During this process, the Preparing your Echo Dot screen appears. It shows a progress bar as the change WiFi on Alexa process runs through, seen next.
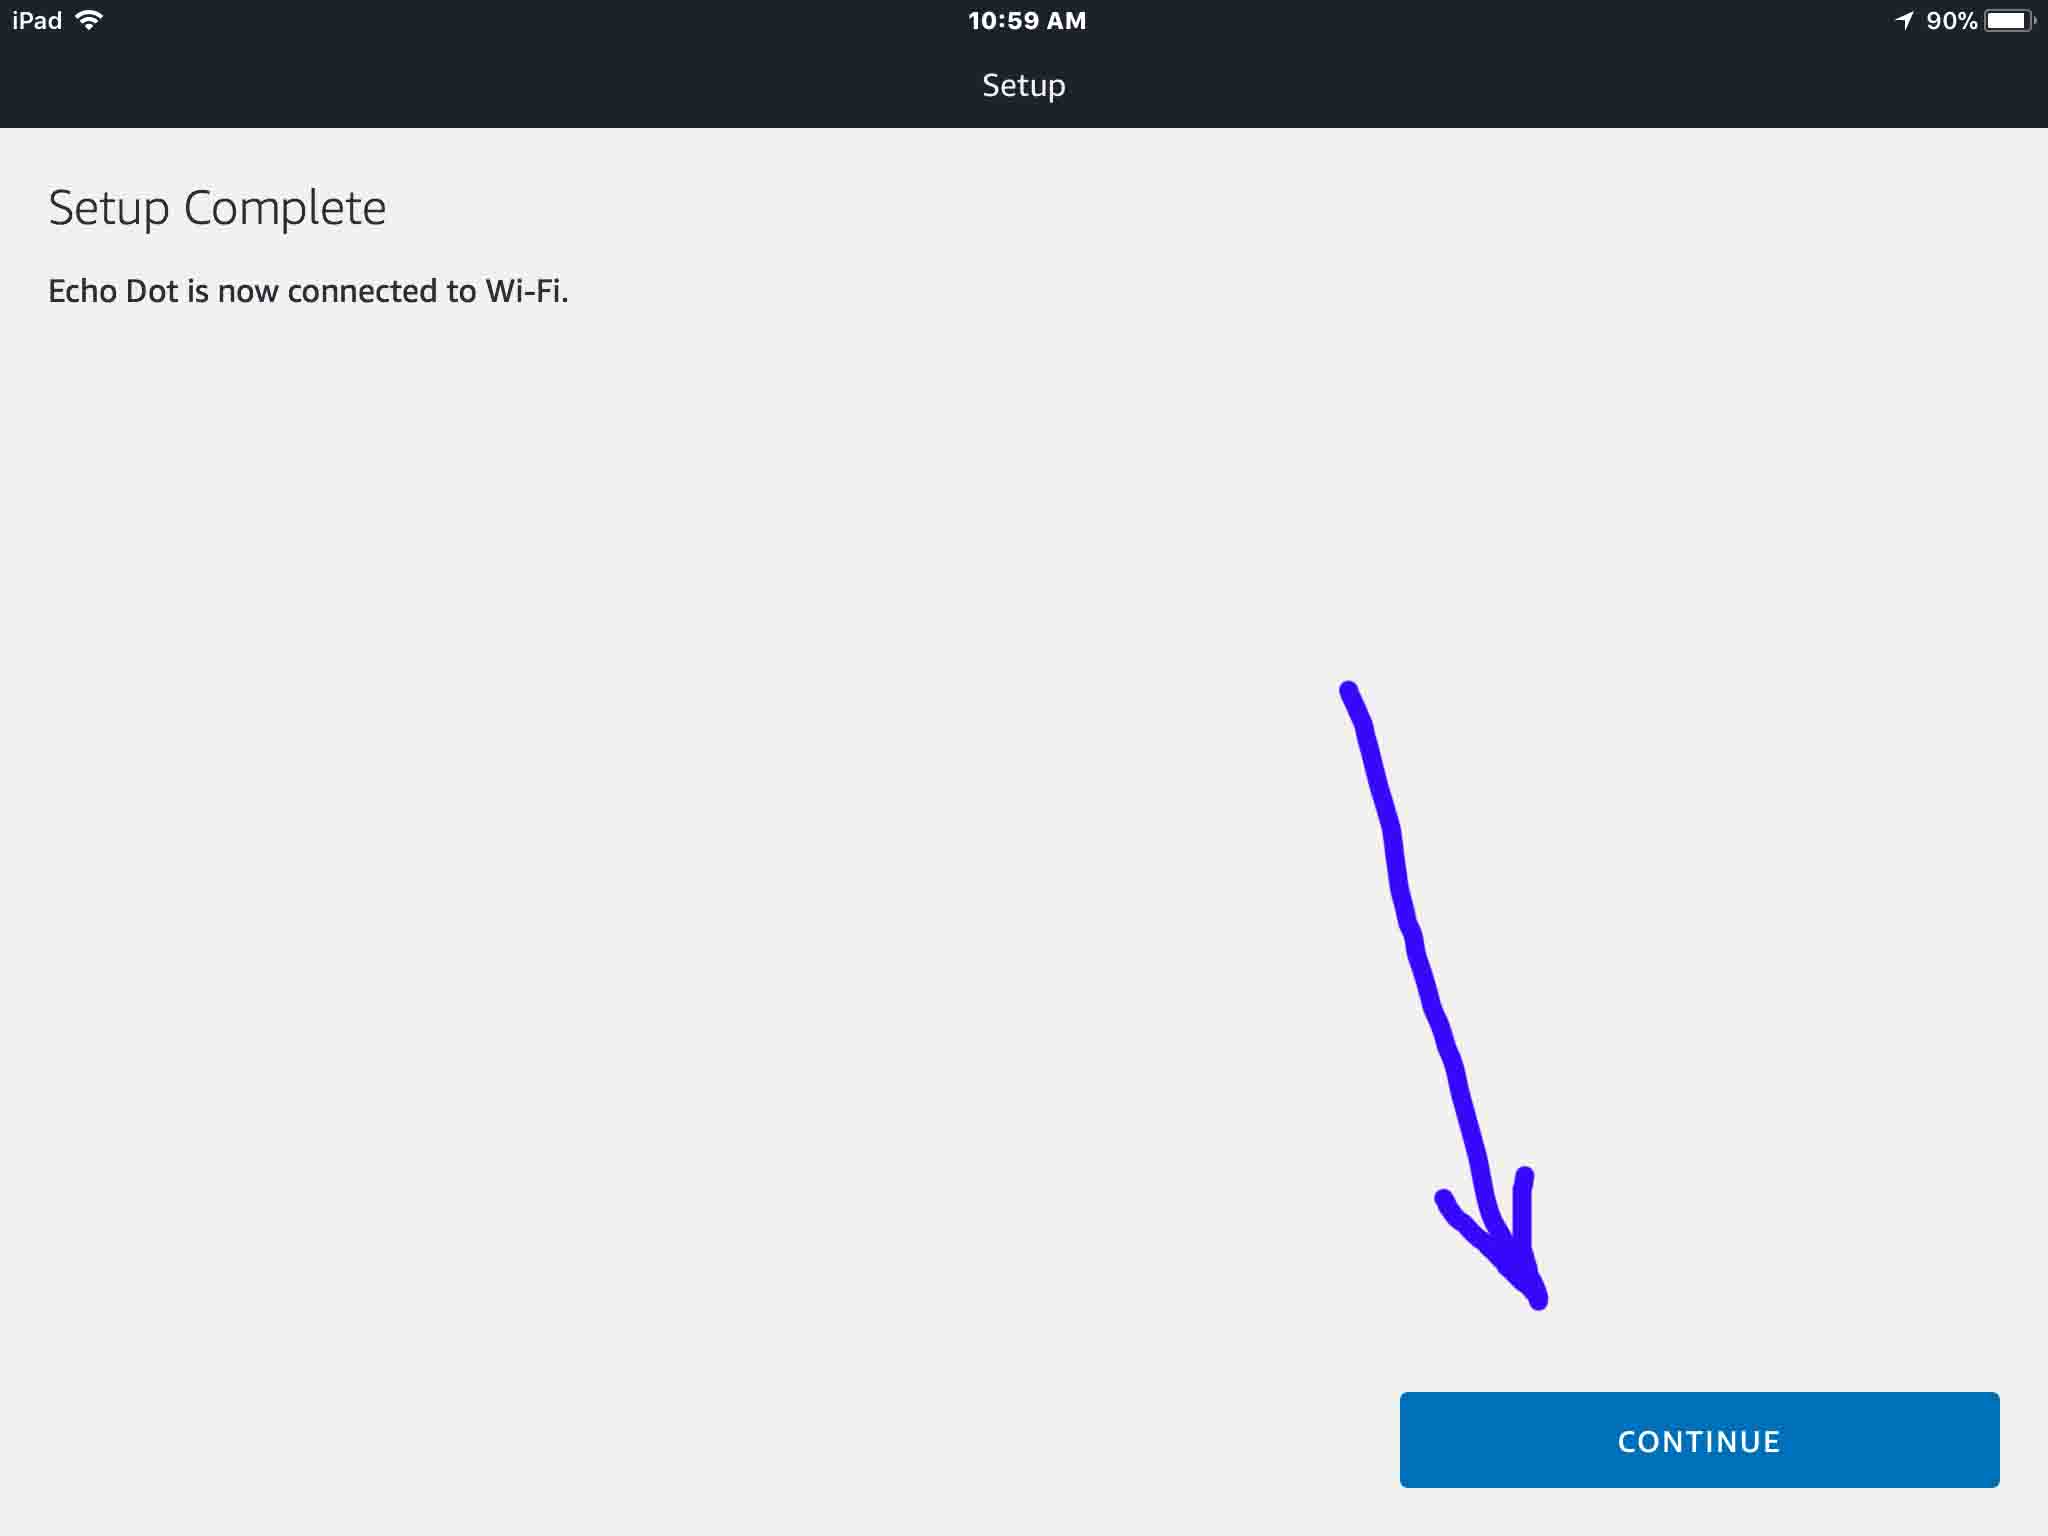
If all goes well, the Setup Complete screen appears, as shown next. Your speaker has successfully changed to the new WiFi network you set. Plus, Alexa connected successfully with the Alexa servers at Amazon too.
Finally, your Alexa speaker should say, “Your Echo Dot is now ready.”
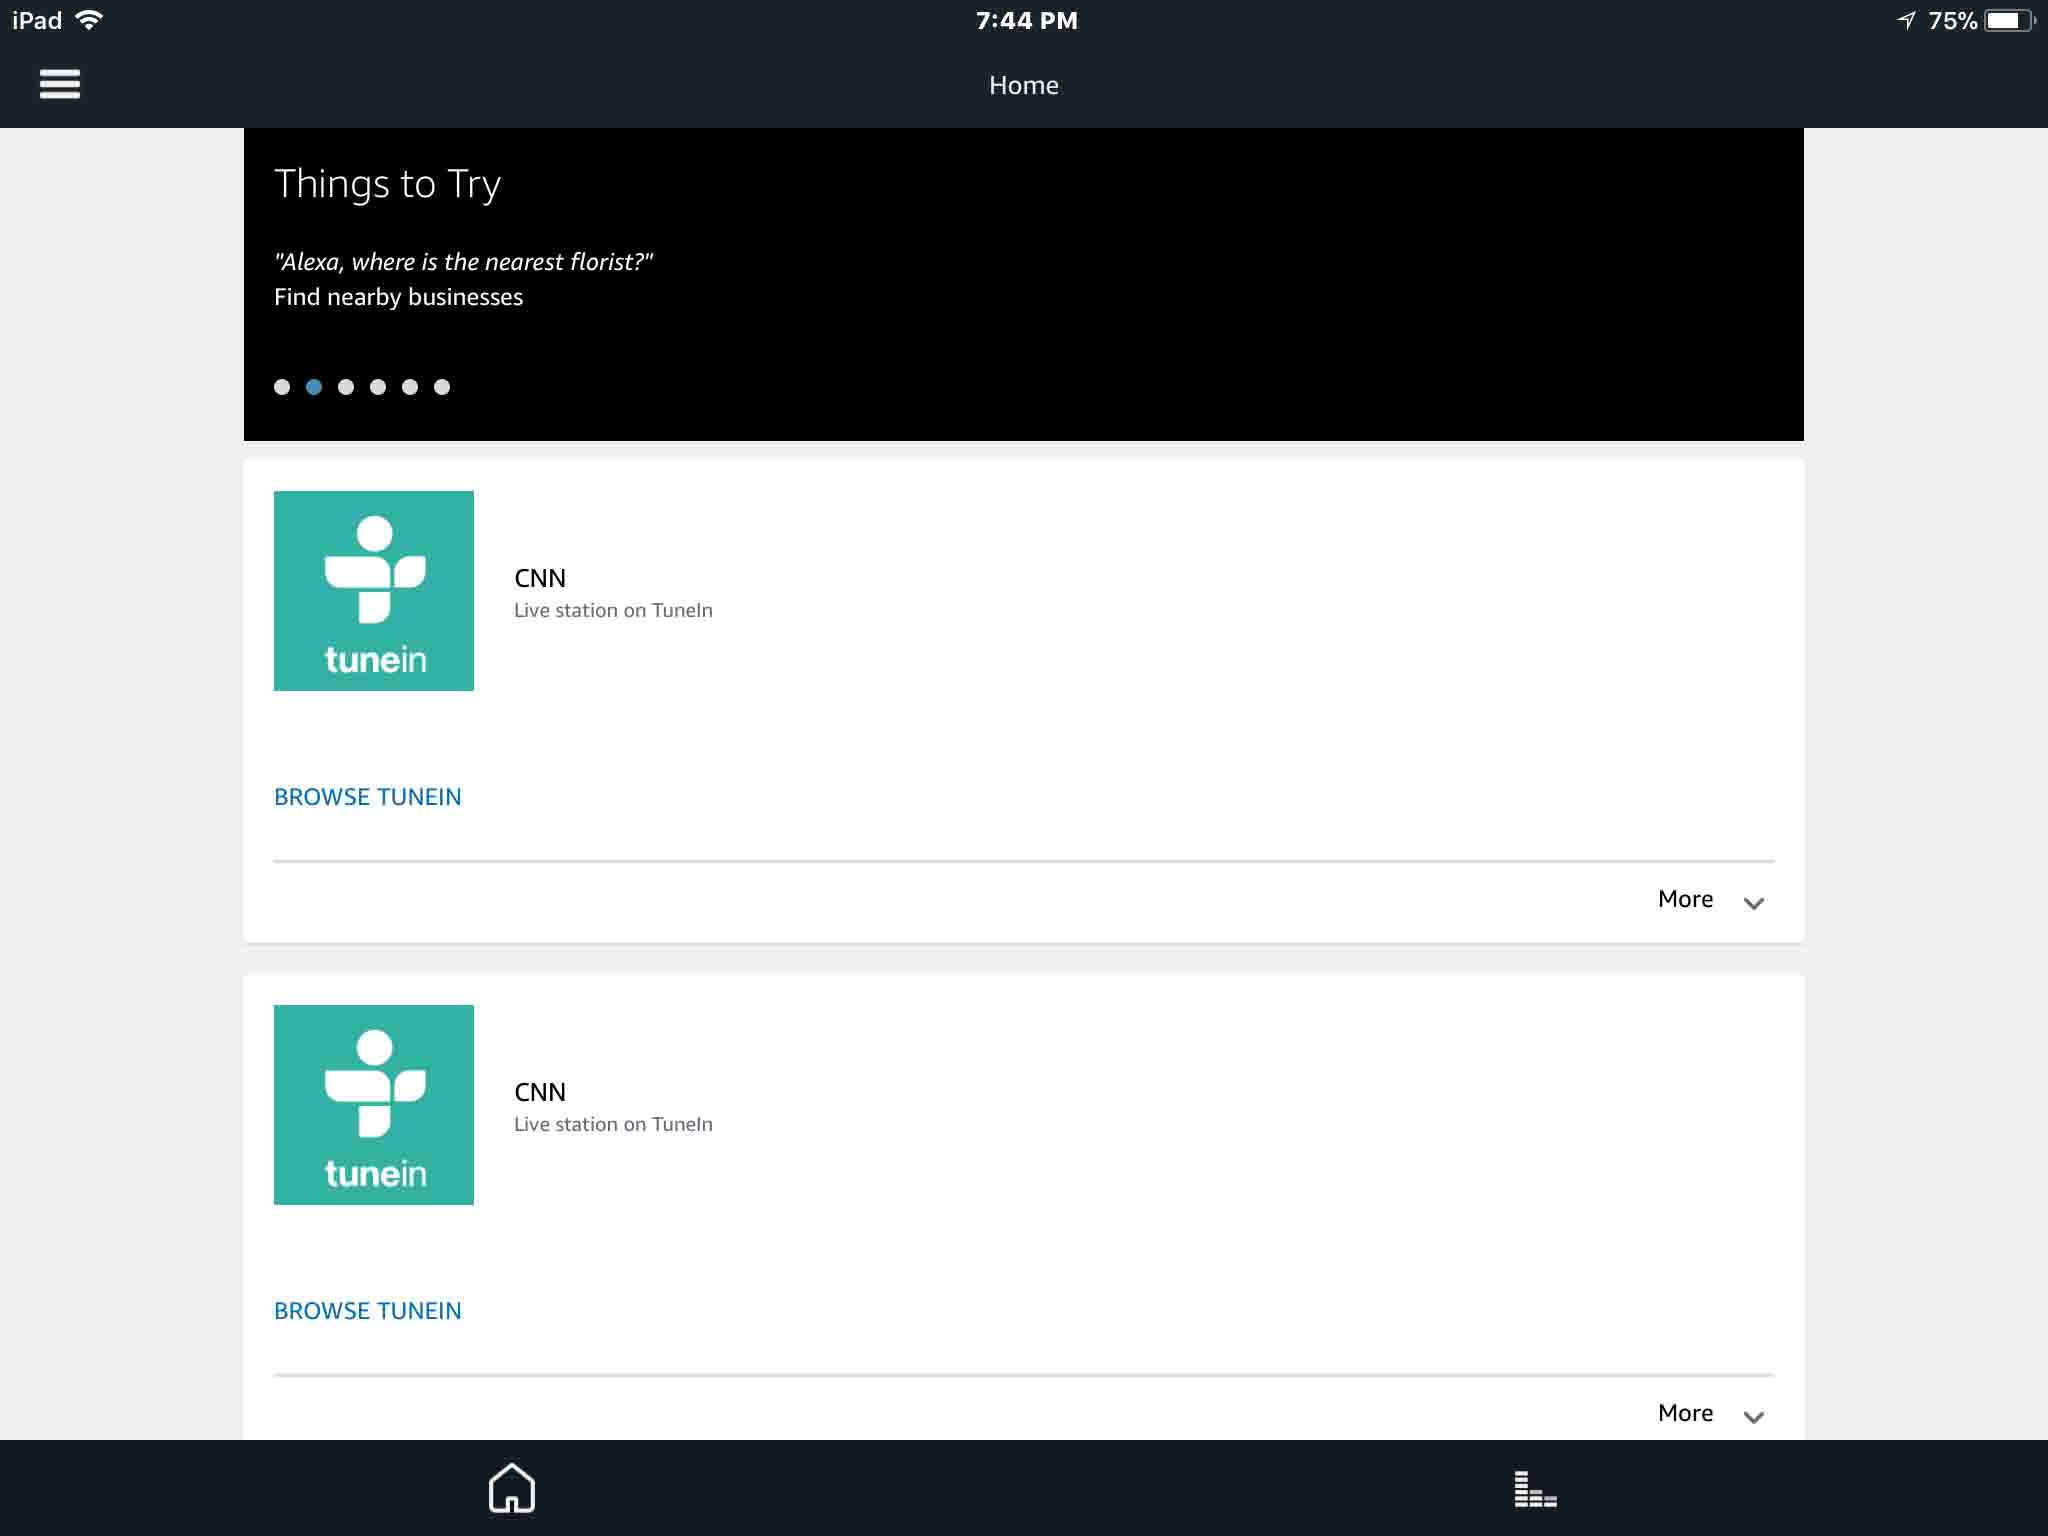
Tapping Continue here returns you to the Alexa App Home screen, as shown next.
Ask, “Alexa, what time is it?” or “Alexa, what’s the weather?” If she responds correctly, then the speaker is ready for use.
Follow this procedure any time you wish to change your speaker’s Wi-Fi network.
Gives a safe routine to defrost a freezer fast with a heat gun. now a…
You can charge the JBL Clip 3 conveniently via the hidden USB charge port. Here,…
The Charge 3 JBL comes with an AC charger adapter, whose specs , type, and…
We review the Panasonic model NN-SN778 here. Now it comes packed with high power output. …
The common Honeywell thermostat offers several ways (at least) to cut your heating and cooling…
To check battery on the JBL Go 3 speaker, the status lamp tells about the…