Google Home smart speaker, front view, with box open.
Gives the procedure for Connecting Google Home to Honeywell WiFi Thermostats. Now we bought a Google Home smart speaker with the Google virtual assistant, and were pleased to learn soon after, that Google Home now supports connecting our Honeywell Total Connect Comfort (TCC) thermostat.
We checked under the smart home devices option in the Google Home App. Honeywell is now listed there, and it found our home thermostat we scanned for smart devices on our home network. No problems entering our TCC account into Google Home. We’ll detail how that’s done below.
Google Home abilities for Honeywell’s collection of IoT devices is awesome, as it allows you to issue voice commands through that intelligent speaker, to control the thermostat, and read out its current status as well as the indoor temperature readings. Currently, the functionality seems a bit basic; you can read and set the current temperature on the thermostat. But that’s all. We’re hoping more functions for furnace control and status checking (like filter and furnace maintenance reminders) will appear soon. We’re now going to run through how setting up this link works, now that they have developed it.
Since we’ve owned the Honeywell RTH9580WF internet enabled thermostat, pictured next, for a year or so now, we’ve already set up an account at the TCC website. Thus, we won’t describe how to do that here, as account setup over there is easy to achieve by following the instructions at the TCC web site. However, a TCC account is required by Google Home, as it is for the Amazon Echo Dot for example, in order to control your Honeywell TCC devices. So, set one up, if you do not have one already.
We also assume that you’ve installed and set up your Google Home smart speaker with the Google Home App on your tablet computer.
To get started, you’ll need a TCC account. So, as mentioned above, if you don’t already have one, head on over to the Honeywell portal website here, and create one. Be sure to save your user Id and password, as you’ll need this information when configuring the Alexa Honeywell TCC ability below.
We’re using an iPad Air computer tablet in this scenario. This app is located on page three of our iPad’s home screen, although yours may appear in a different location, depending on how many apps you have installed as well as how you might have arranged them.
Upon running this app, the Google home screen appears, as follows.
Scroll down the home screen until you see the Browse All link, as shown next.
Find this at the bottom of the Google Home screen, circled in purple in the previous picture. The What Can You Do? screen then appears. On that screen, we’ve scrolled down the page until we found the Control The Home entry, as circled in purple.
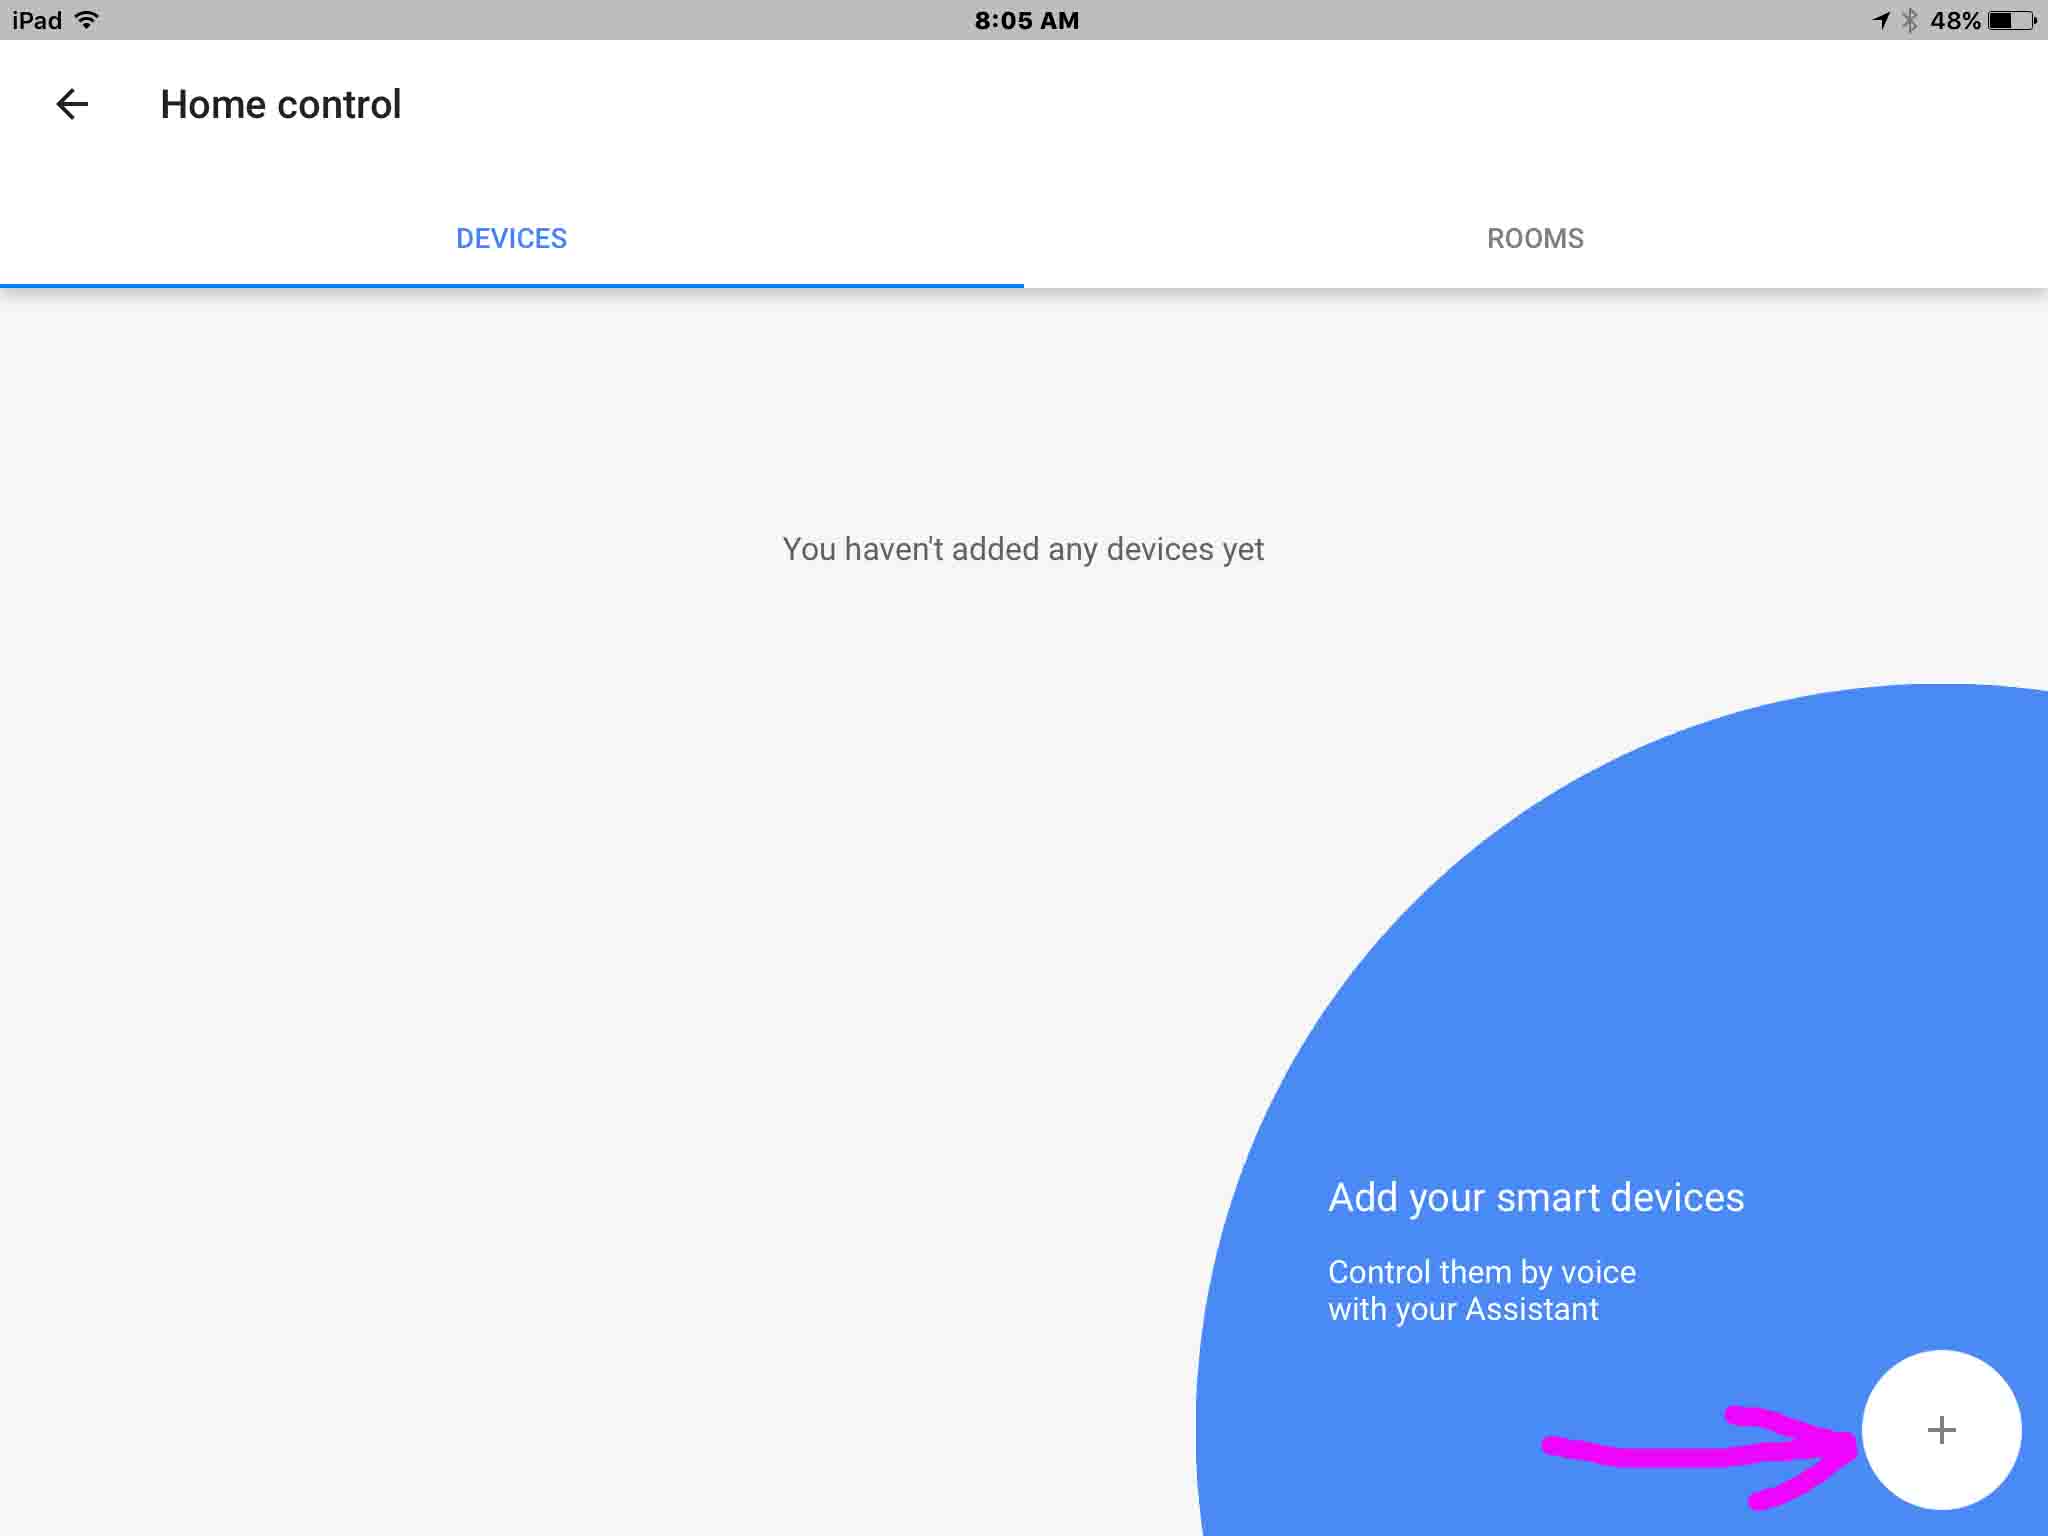
See this shown in the last picture. The Home Control screen then appears, as pictured next.
Find this pointed to by the purple arrow in the previous picture. You then get the list of available device manufacturers whose smart devices you can add, as shown in the next picture. The Honeywell ability now appears on this screen, as pointed at by the pink arrow in the next picture.
Run the red Honeywell setup item on the Add Device screen, as shown in the previous picture. The app then displays the Total Connect Comfort log In screen as shown in the next picture, prompting you for your TCC account login Id and password.
Enter the email address and password you created your Honeywell TCC account with, in the spaces provided.
If you’ve entered the user Id and password for a valid Honeywell TCC account, the TCC EULA page then appears, as shown next.
You should then see the TCC Devices Registered Successfully screen display briefly, as shown next.
Do this if you are not automatically redirected back to the Google Home app, and the Select Rooms screen, as shown next.
Press Done if you do not want to associate your thermostat with a room at this time, you may press the Done button in the top right corner of the above screen and skip ahead to step 16 below.
Find this pointed at by the pink arrow in the previous picture.
The Choose a Room screen then appears, and is shown in the next picture.
We’ve chosen the Kitchen room for our thermostat in the previous picture.
Doing this updates your room choice for the current thermostat, and returns you to the Assign Rooms screen, as shown next. Note that the room associated with our thermostat has changed to Kitchen.
Find this in the top right hand corner of the screen.
The You’re All Set screen then displays, as shown in the next picture.
This returns you to the Home Control screen, which now shows your thermostat with your chosen room location for it, as displayed next for our case.
If you see your thermostat listed, then all is finished, and you can no begin speaking commands to Google Home. Some of the commands that might work follow in the next section.
Note that the Honeywell TCC ability on Google Home appears to not currently support questions that ask for some status aspects of the thermostats (humidity, current program settings, status of furnace fan, et al). We hope that such questions can be asked of Google Home in subsequent releases of the Honeywell ability. Any ability offering should be able to respond appropriately to the following questions.
Finally, we’re happy to see this initial Honeywell ability on Google Home, which hopefully, will improve and expand rapidly.
Gives the procedure for Connecting Google Home to Honeywell Thermostats. Now we bought a Google…
We bought a Google Home speaker with the Google virtual assistant, and were pleased to…
In this post gives the Add Honeywell Thermostat to Google Home procedure. Now we have…
In this post gives the Connect Honeywell Thermostat to Google Home procedures. Now we have…
Explores solving Honeywell thermostat connection problems. We find all of these on our Honeywell RTH9580WF…
In this post, we give the Connect Honeywell Thermostat to Google Home procedure. Now we…