Alexa Echo Spot speaker, showing its Connect To Network screen.
Here, we give the Amazon Echo Spot change WiFi network instructions for the Amazon Alexa Echo Spot smart video speaker. Note that you need not completely erase your Echo Spot settings to reconnect it to a new WiFi network. Further, you need neither a tablet nor phone with the Amazon Alexa app, because the Echo Spot features its own touchscreen and has all the necessary provisions for reconnecting it to a different WiFi network.
We assume here that the Amazon Alexa App has previously been set to your Amazon account, and that the Amazon Echo Dot you’re updating has been added to your Alexa app prior. The screen shots below were taken from an Apple iPad Air. But a similar Alexa app for Android is also available from the Google Play store.
Note that you can change WiFi networks on the Spot whether or not it successfully connects to a network currently. However, the speaker must be up and running before you begin.
Also, the network you choose must have internet access. The speaker will not function on many limited access or closed wireless networks.
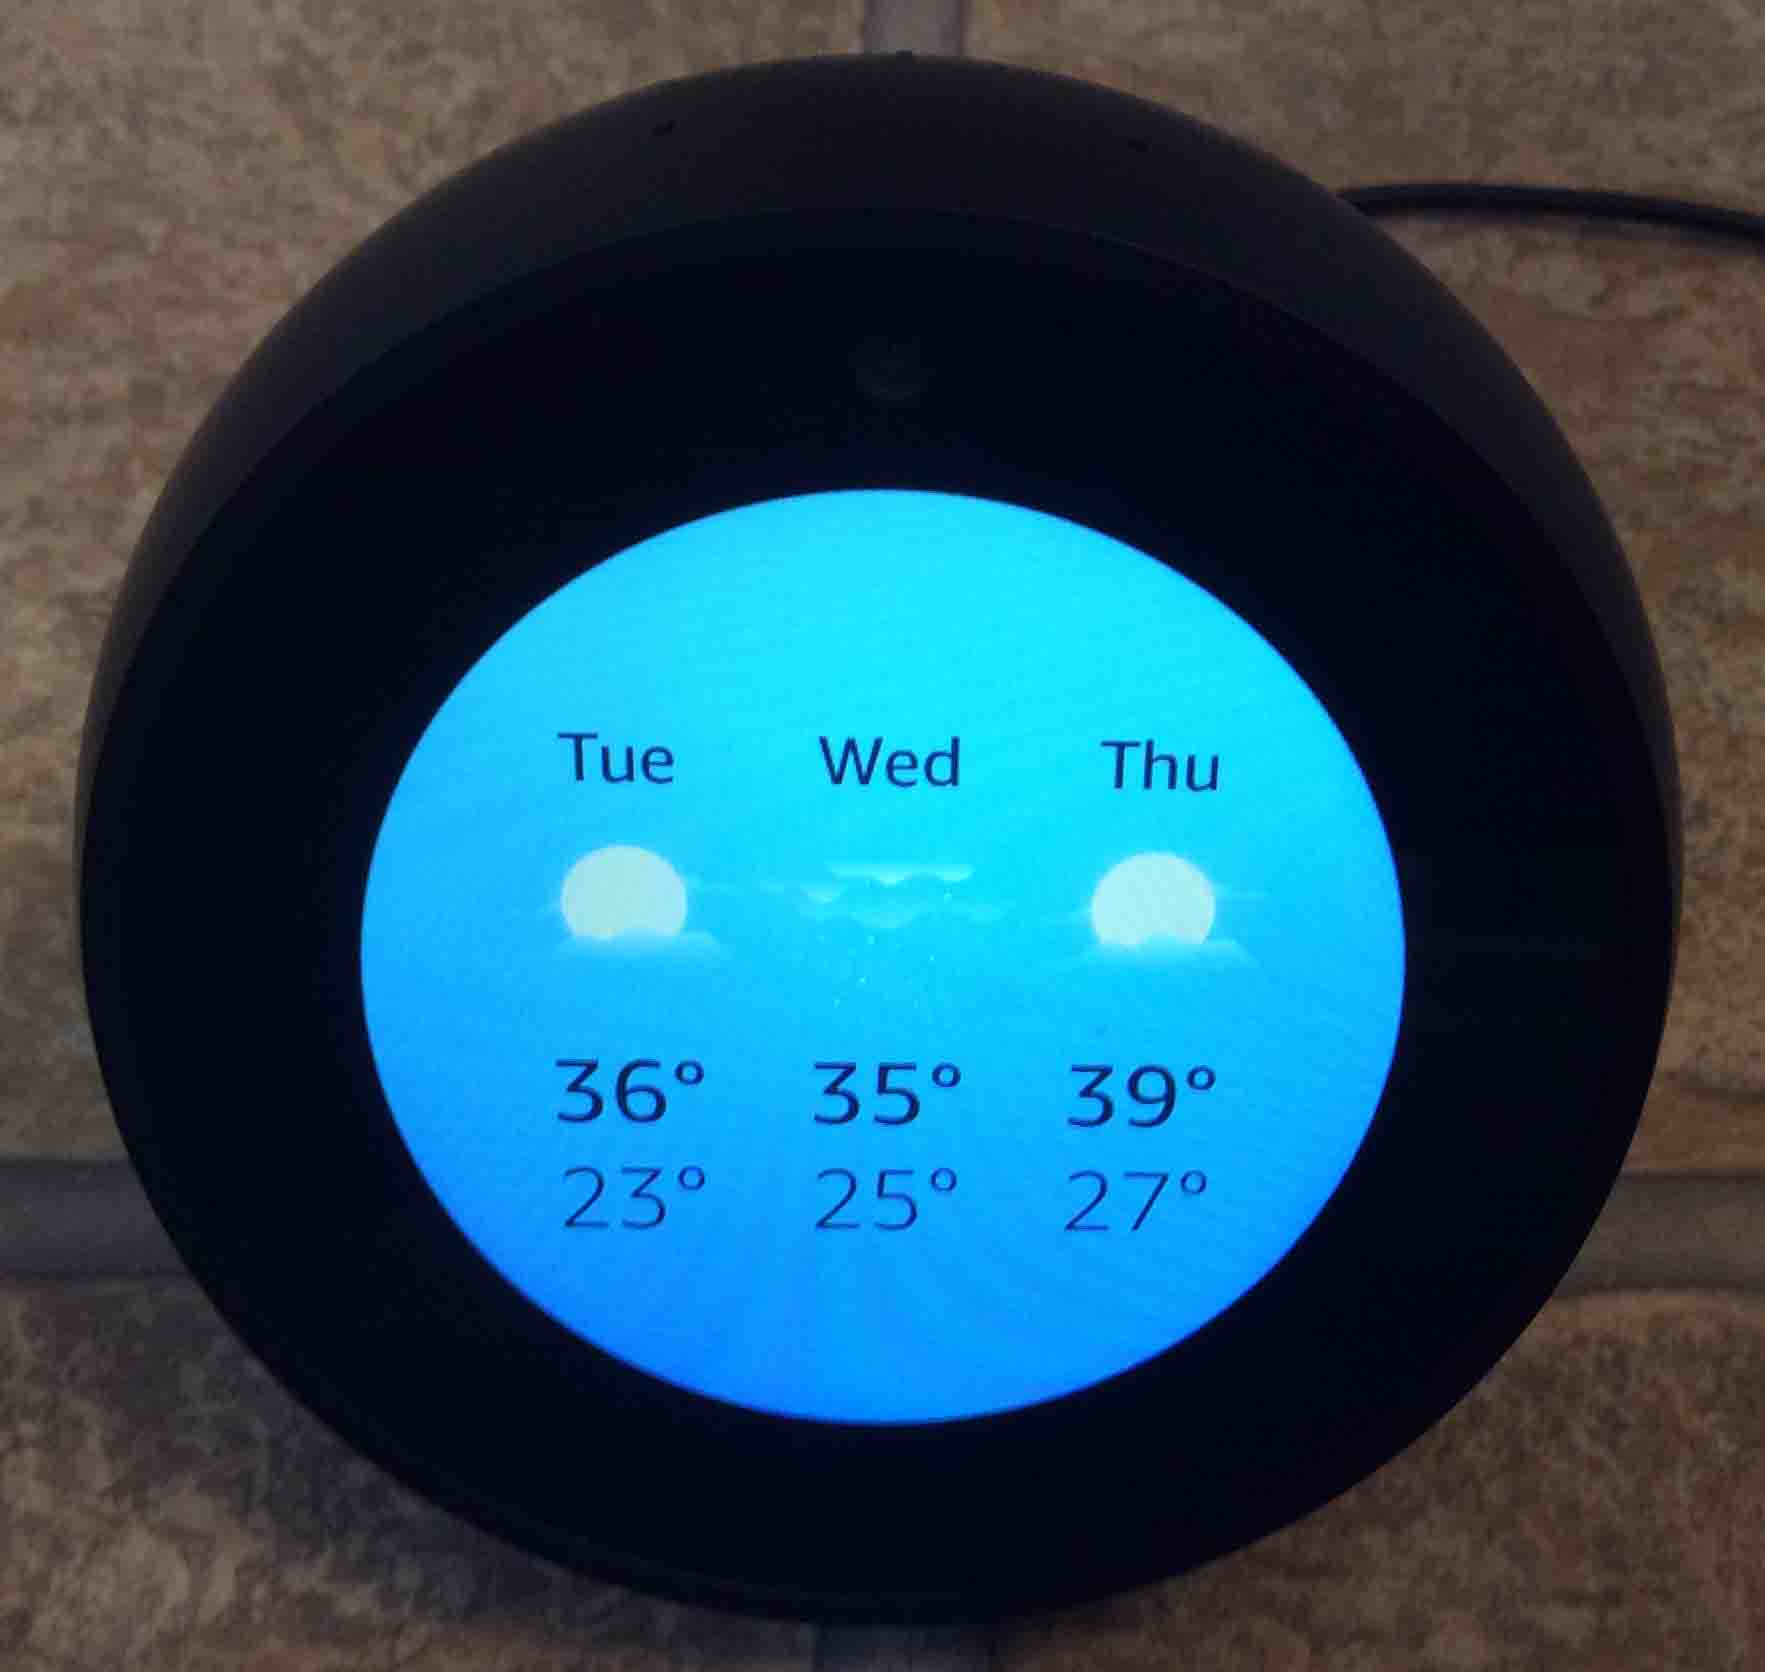
After several to ten seconds, a Home Screen appears as pictured next.
Do this by Swiping down from top of screen
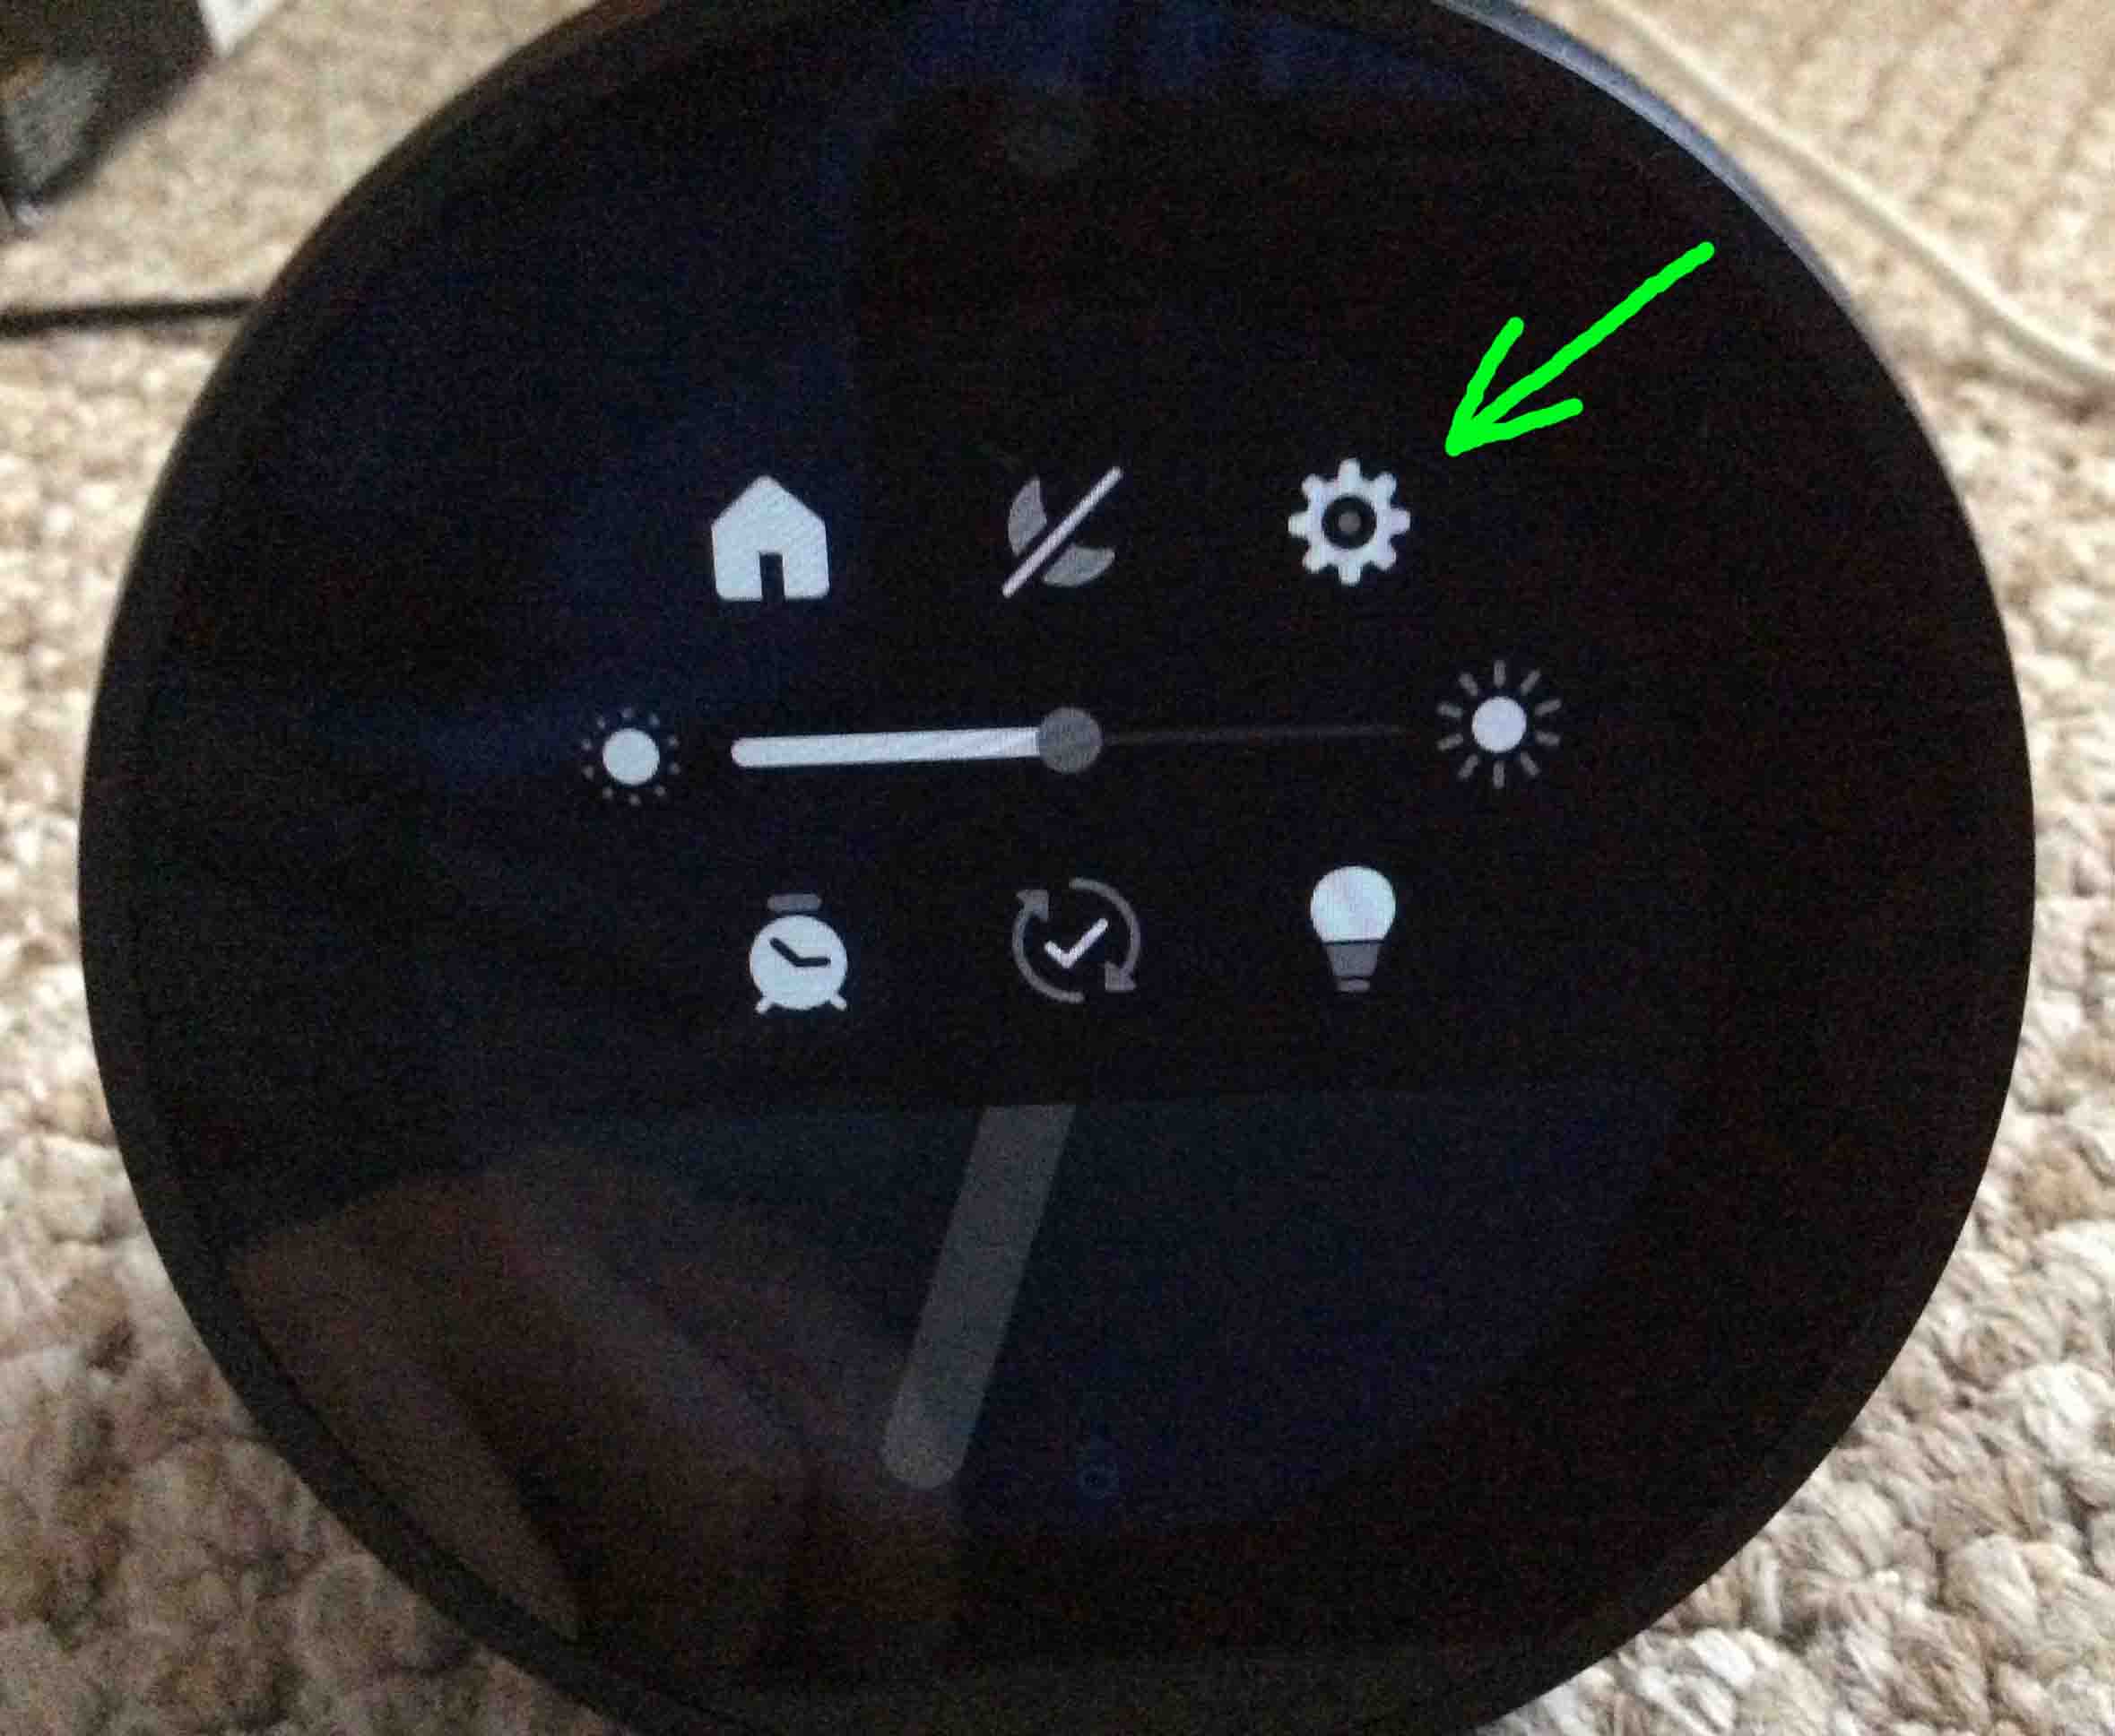
The Actions menu then appears as shown next.
Find the Settings button on the Actions menu, as pointed at by the green arrow in the last picture.
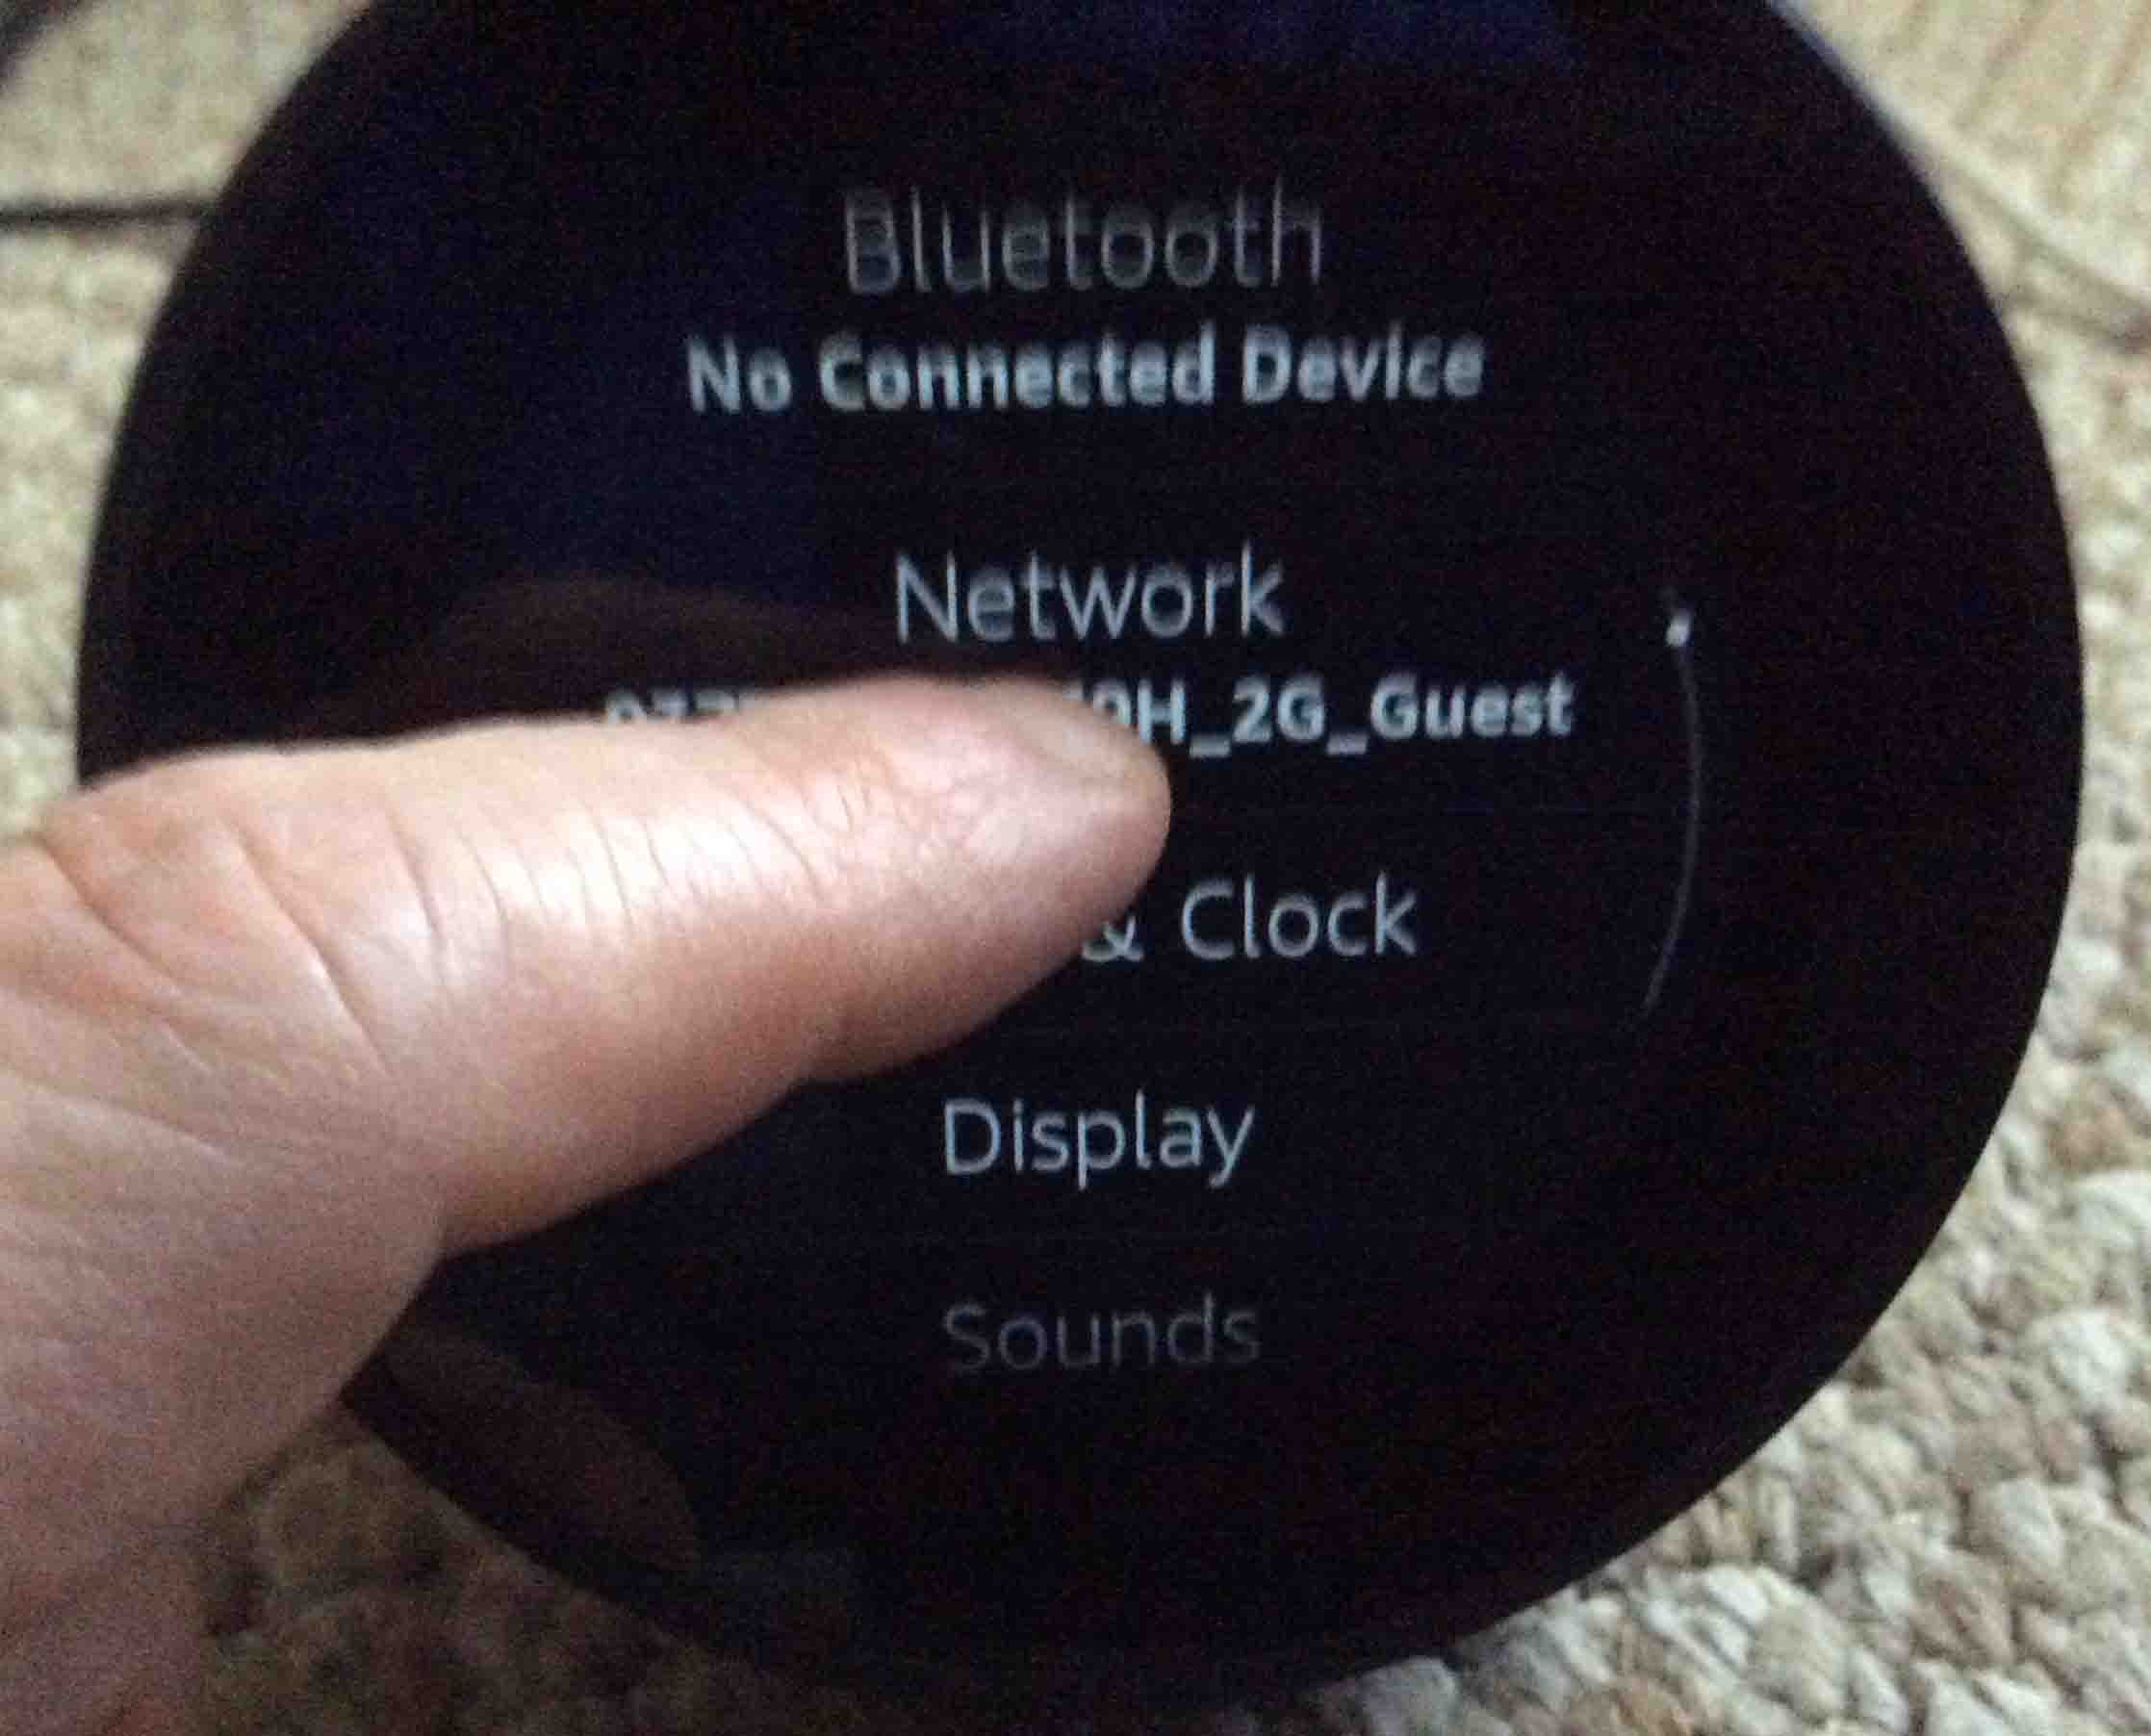
The Settings screen then appears, as shown in the next picture.
Find the Network Settings option shown in the last picture.
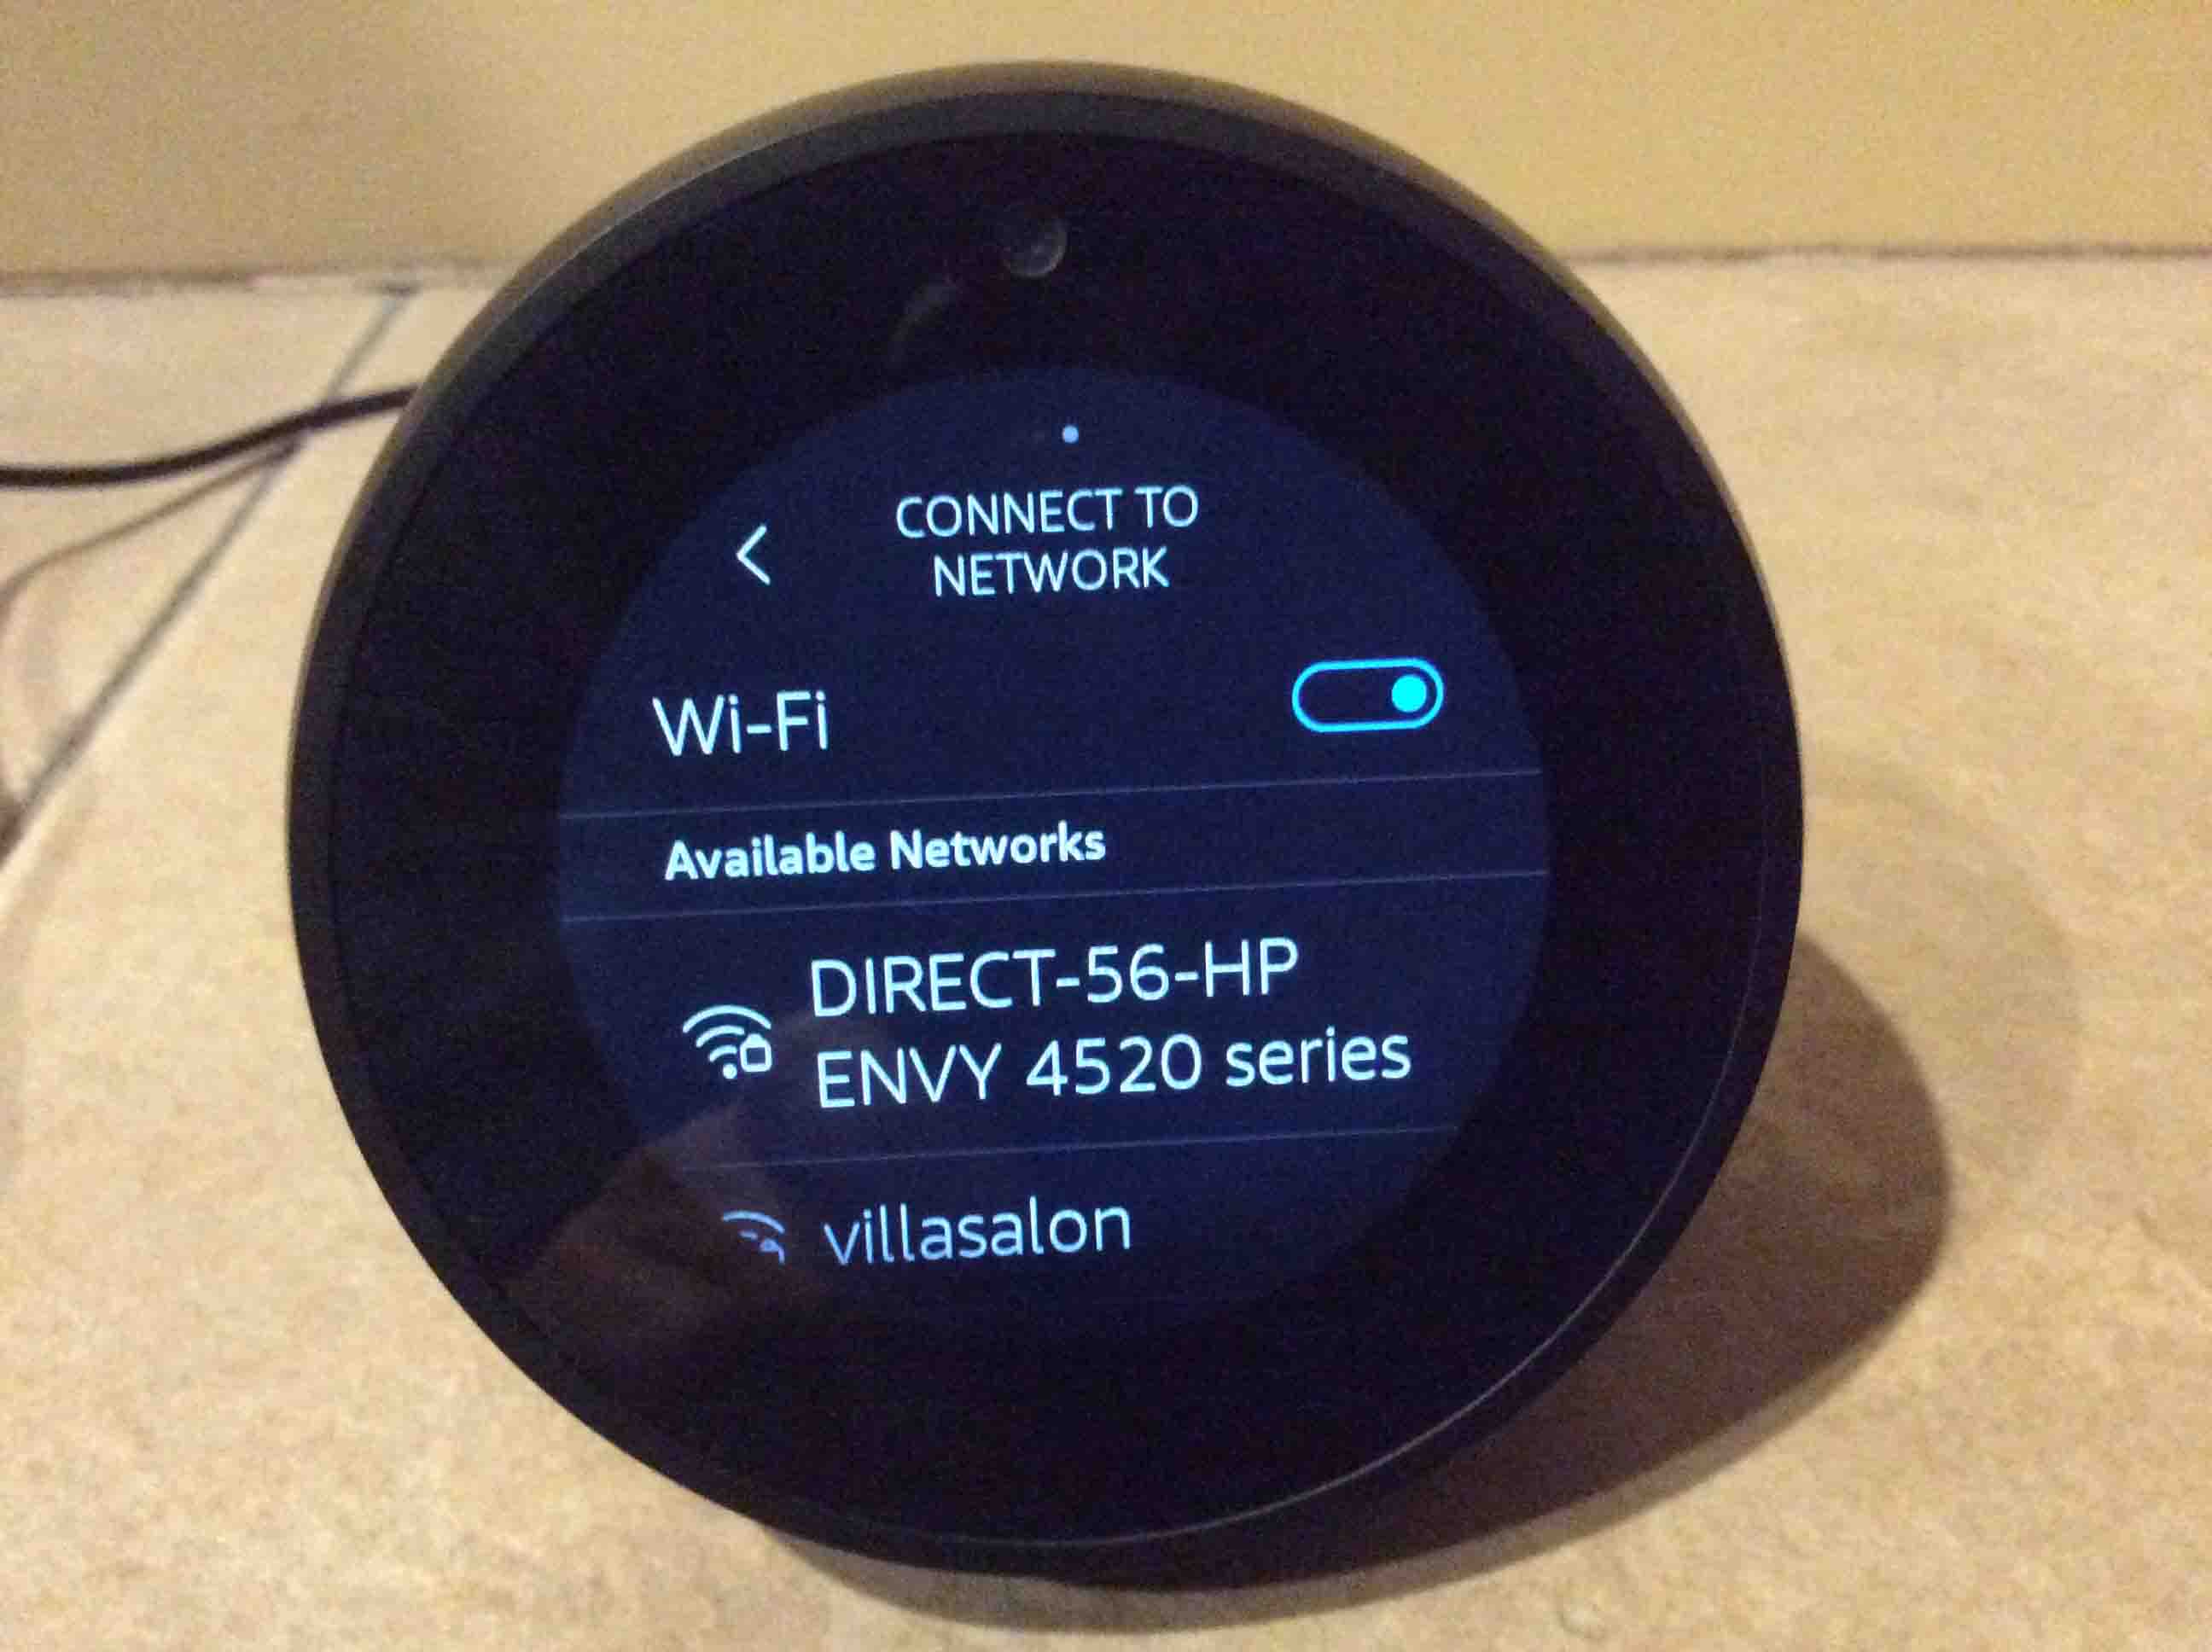
Tapping Network Settings brings up the Connect to Network screen, as shown next, and gives access to the Amazon echo spot WiFi settings.
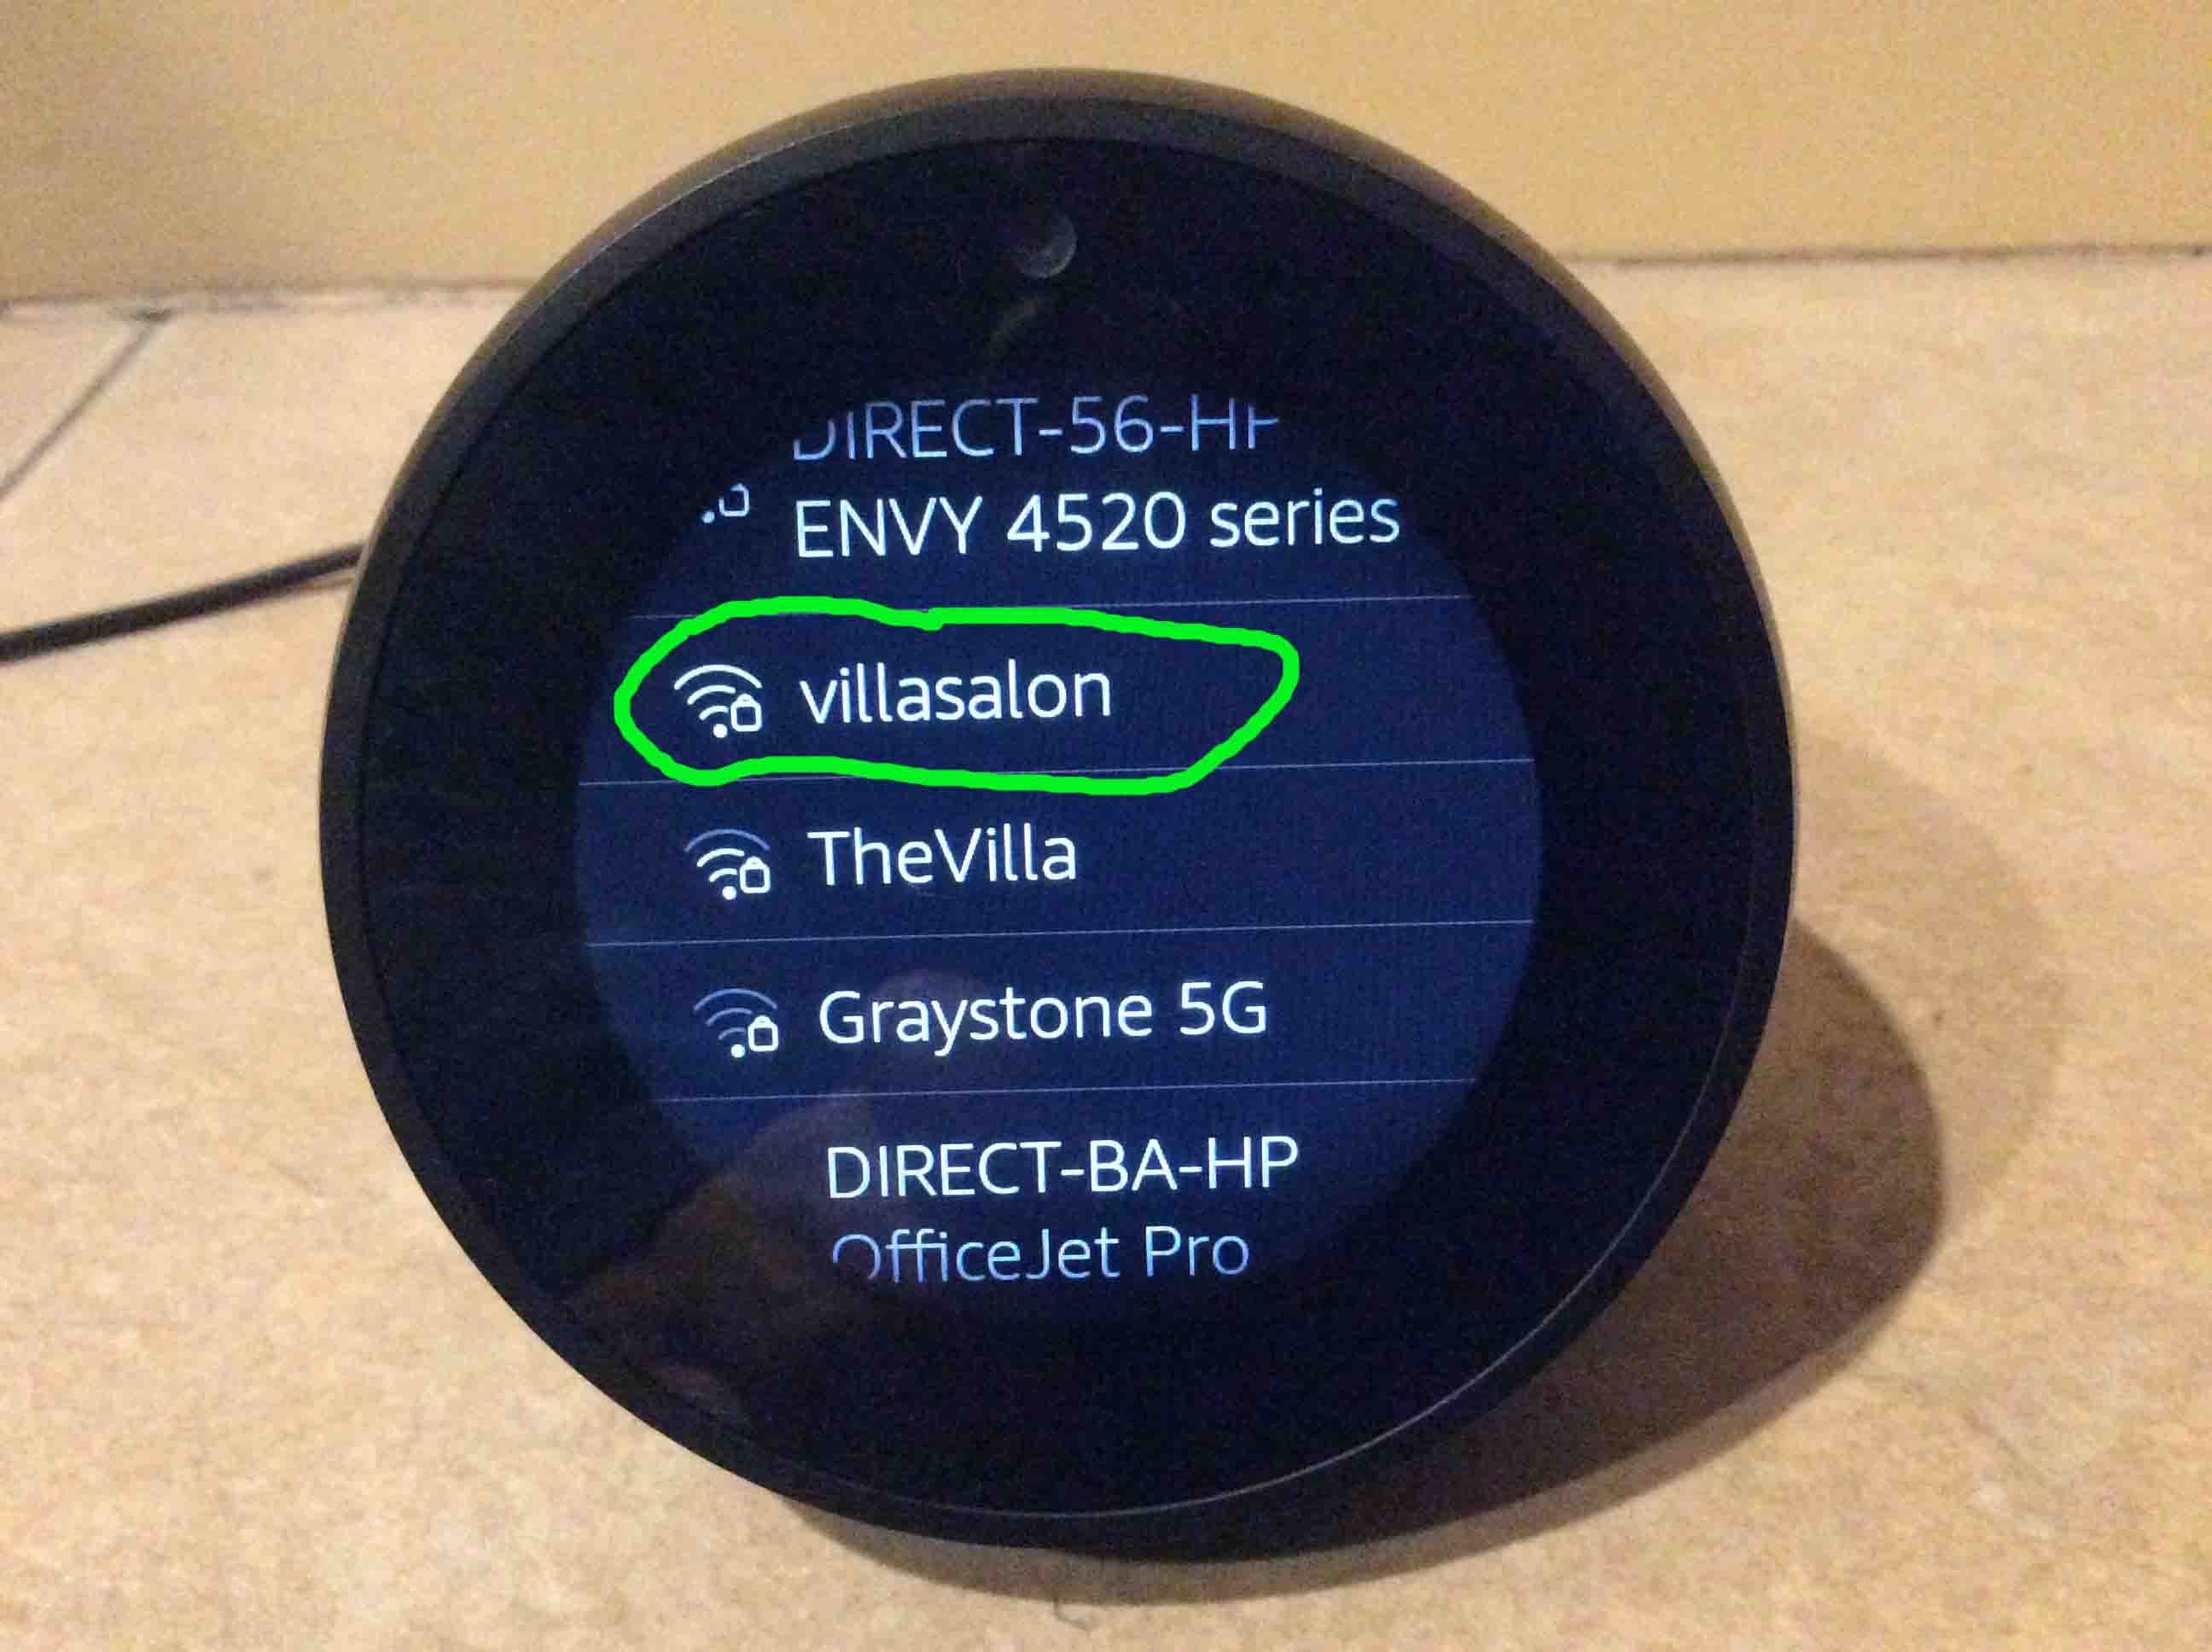
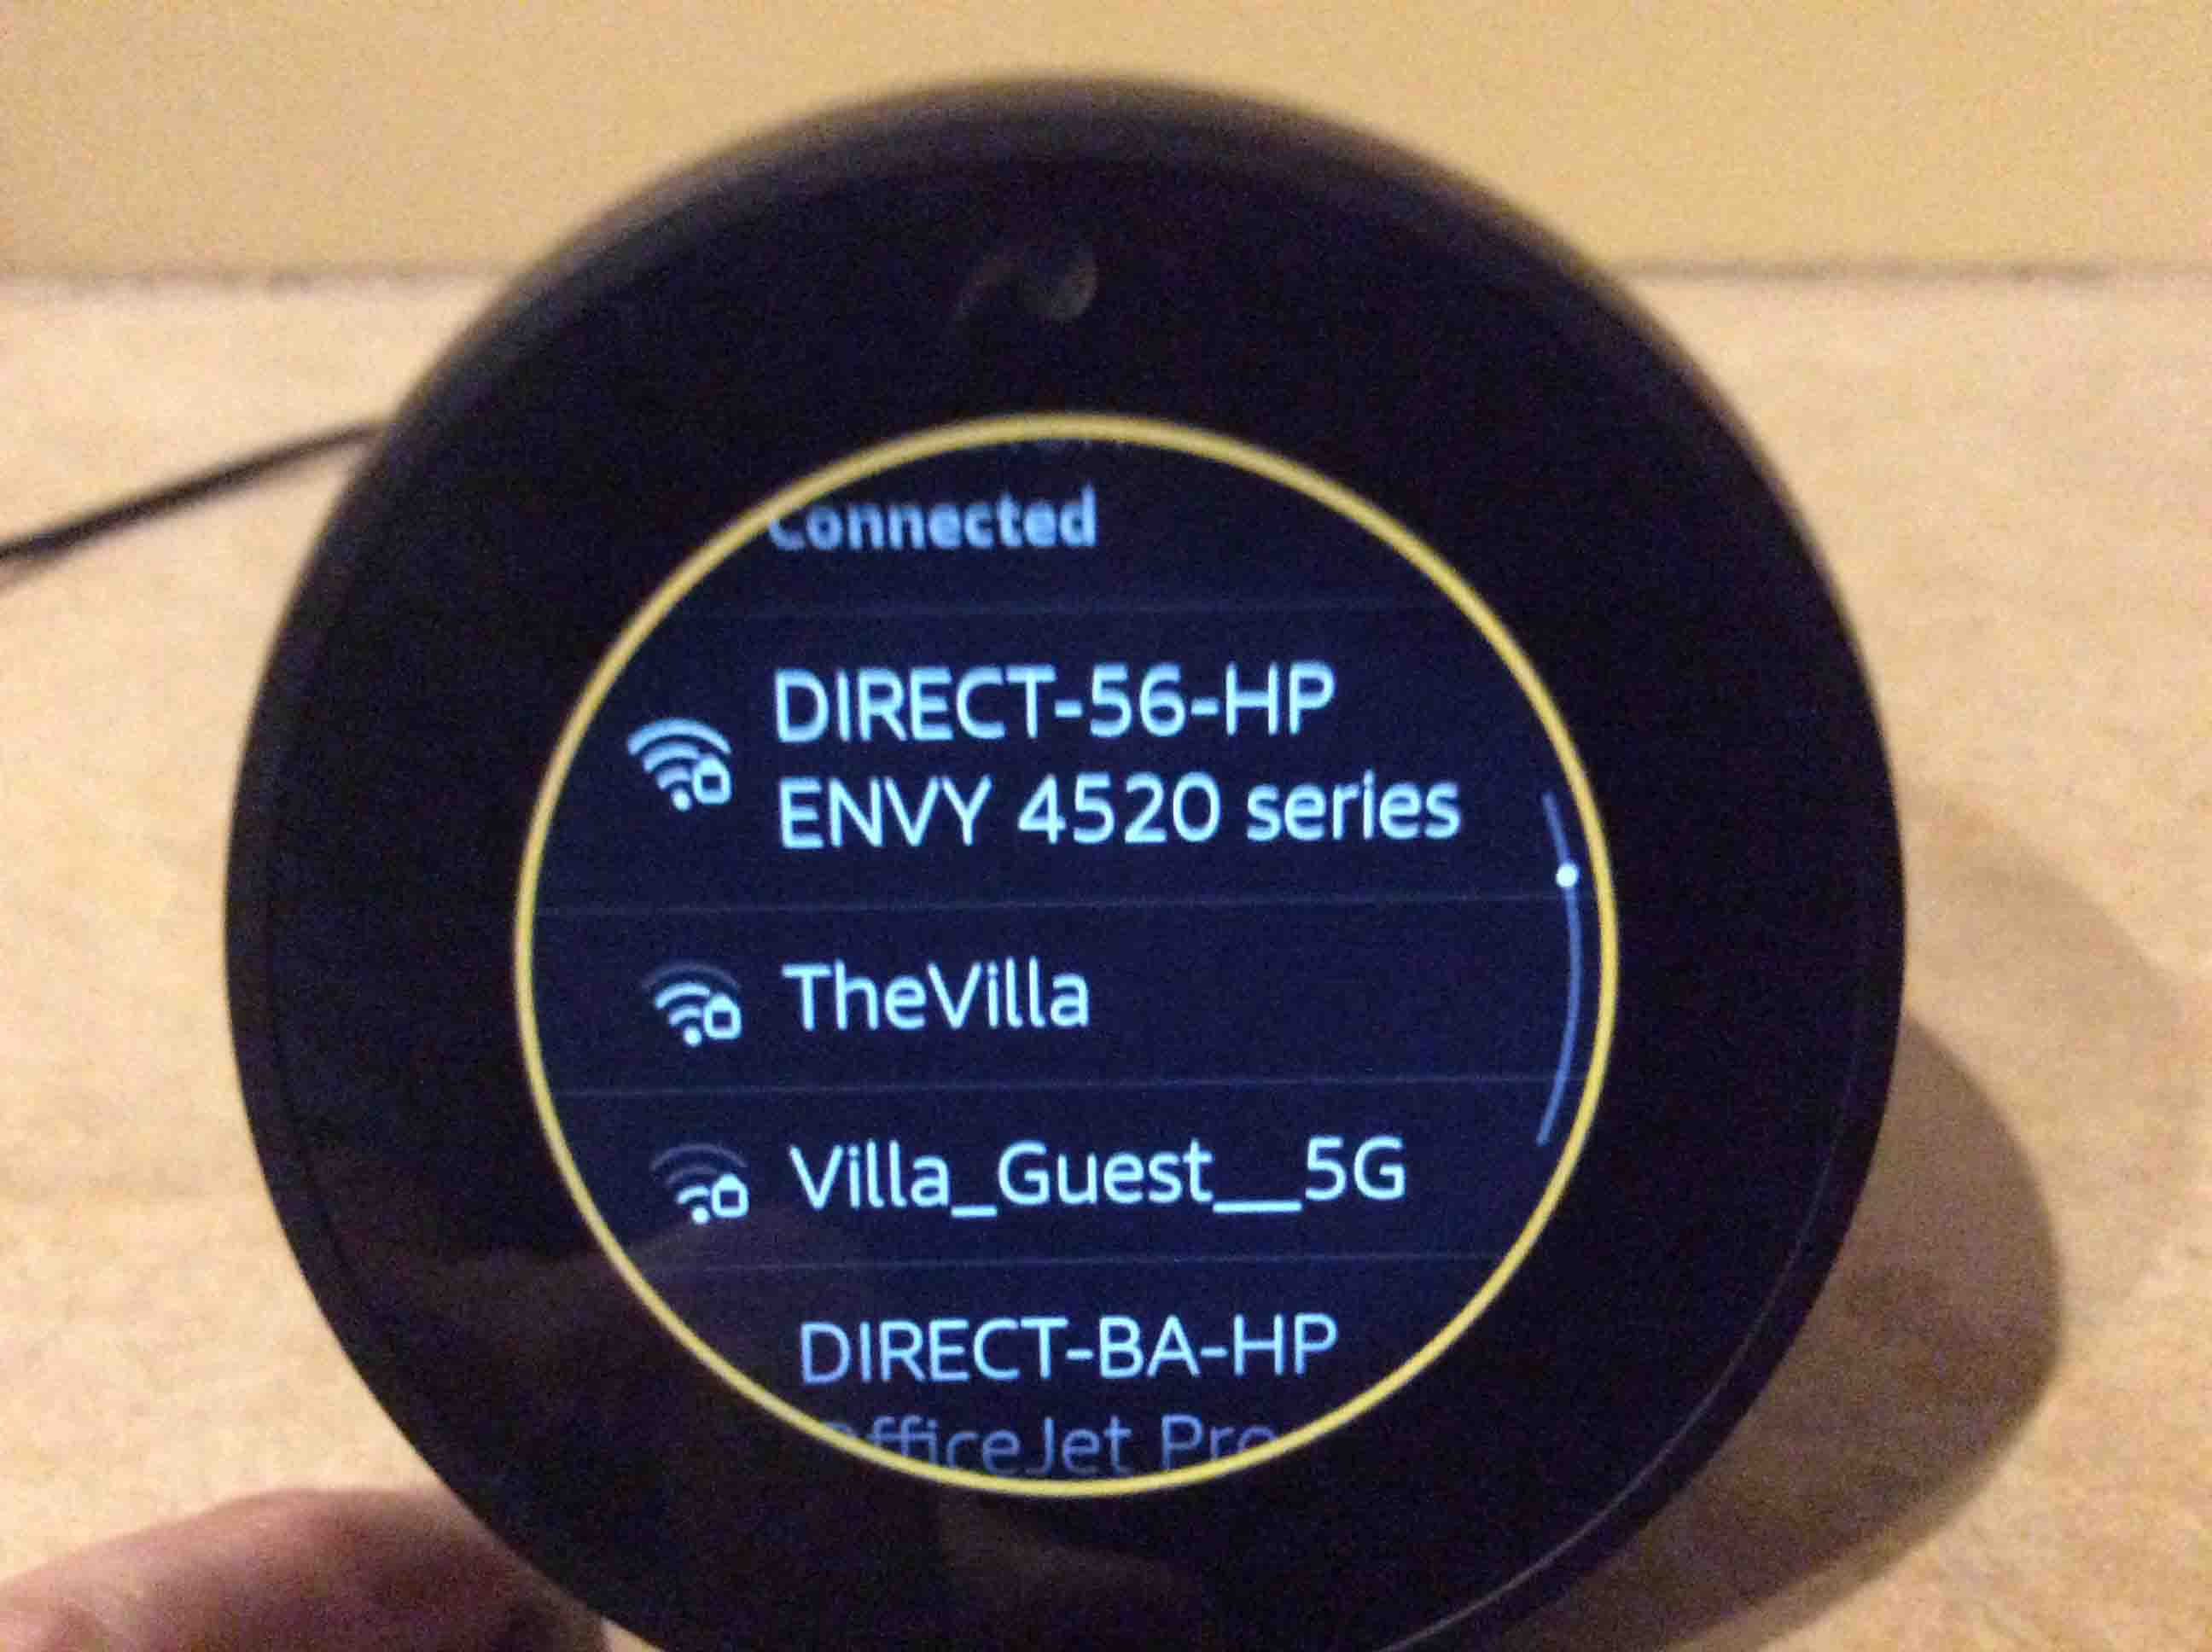
The Connect To Network screen lists all available and saved WiFi networks. So to find the wireless network you wish to connect your Echo Spot with, swipe up and down on this screen until you see it. If you don’t see your desired network, then perhaps your speaker is too far away from it. Move the Spot closer to that access point / router if this happens.
In this scenario, we’re going to connect to the villasalon WiFi network. This SSID is circled in green, in the following picture.
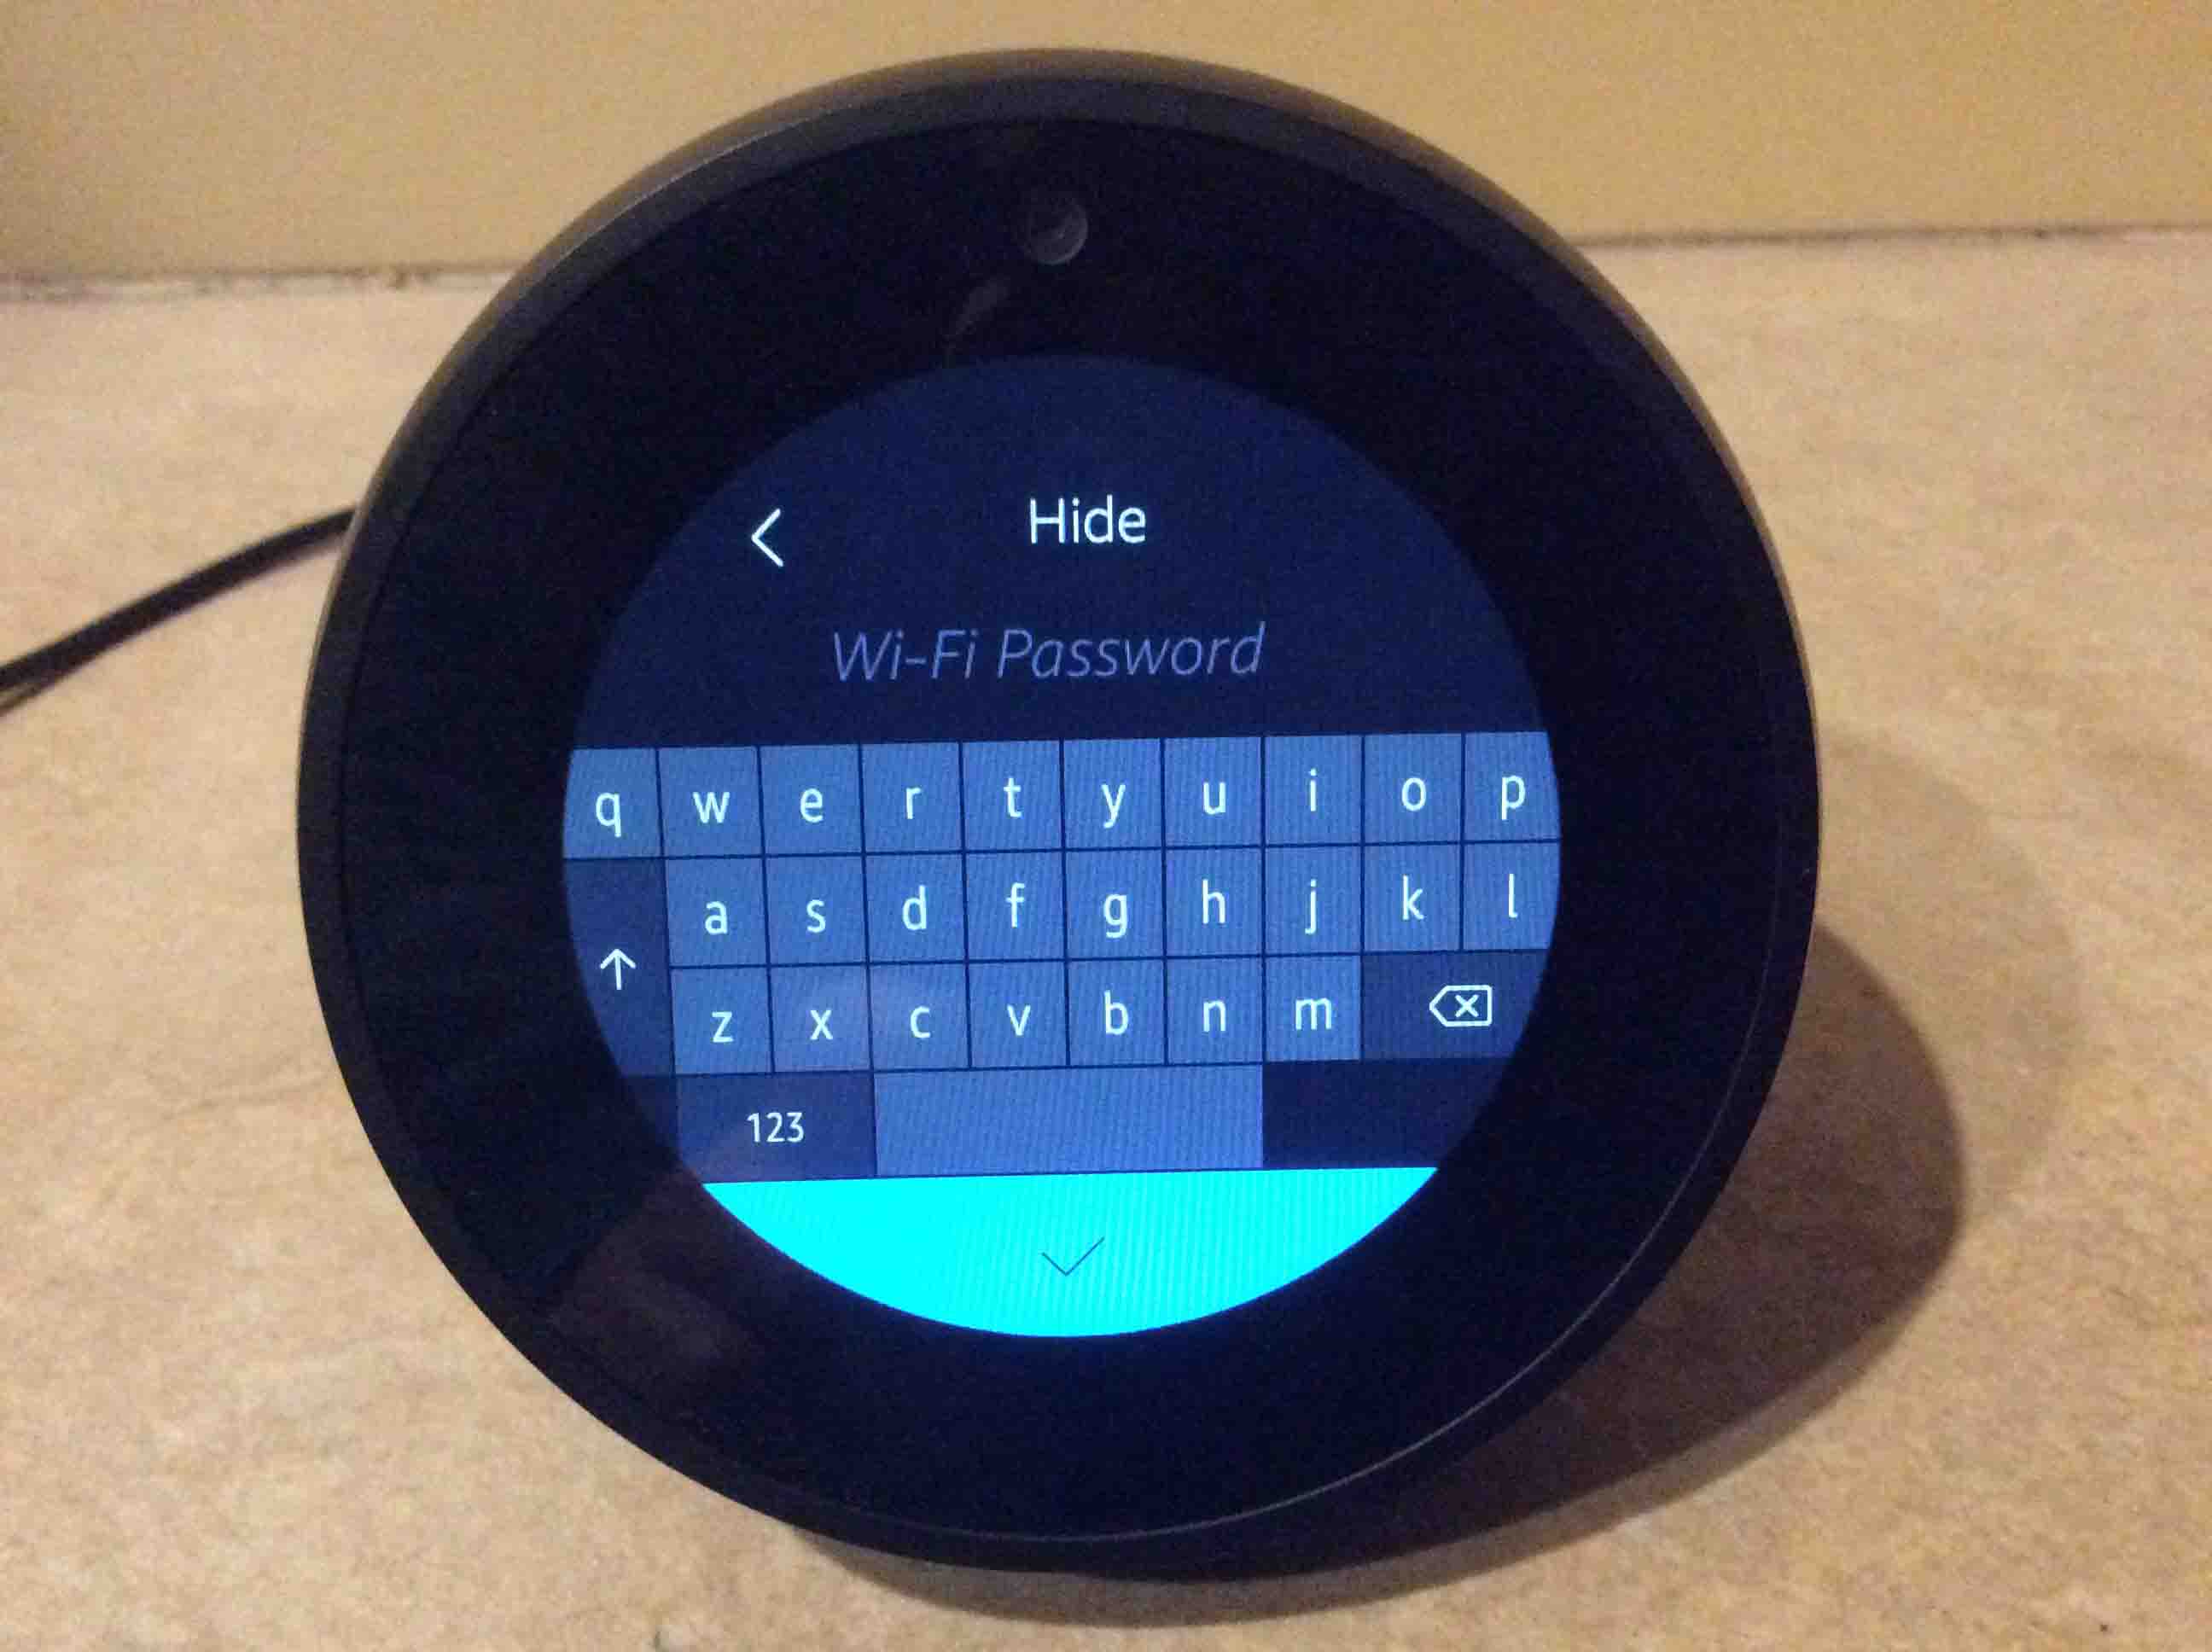
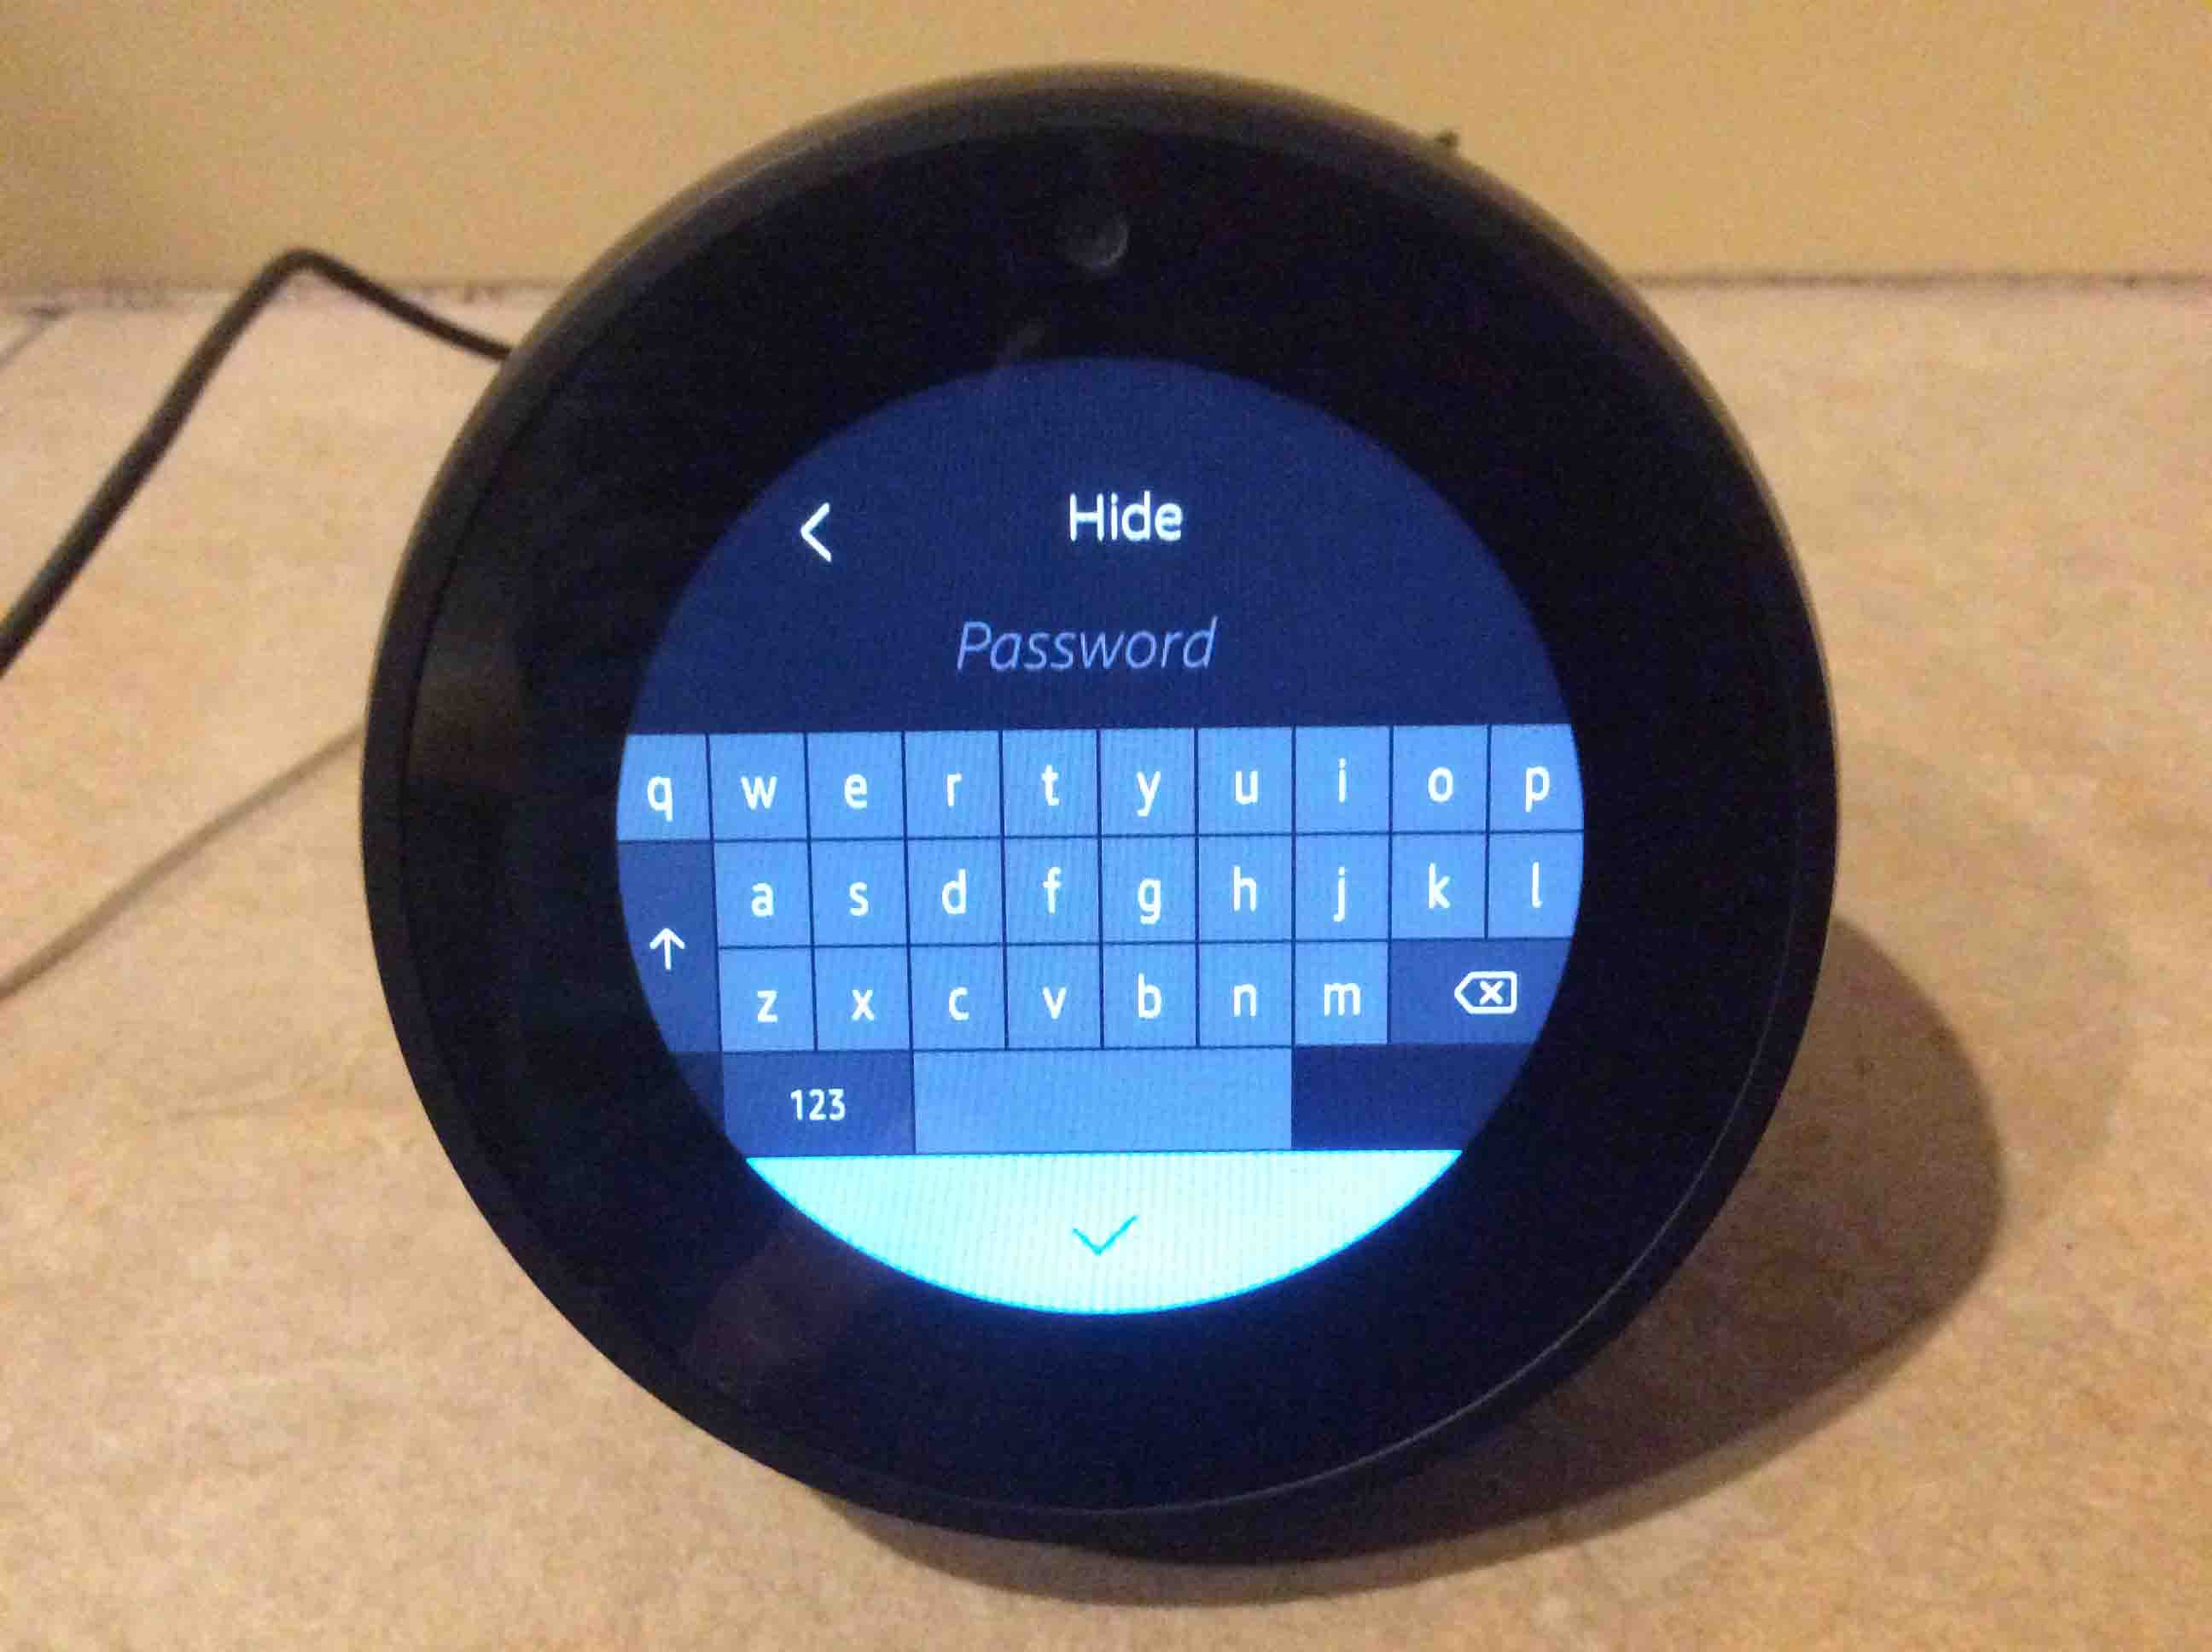
If your chosen WiFi SSID is a password protected network (as it well should be), the Echo Spot then prompts you for its WiFi password, as shown next. Our villasalon network is indeed secured with a password.
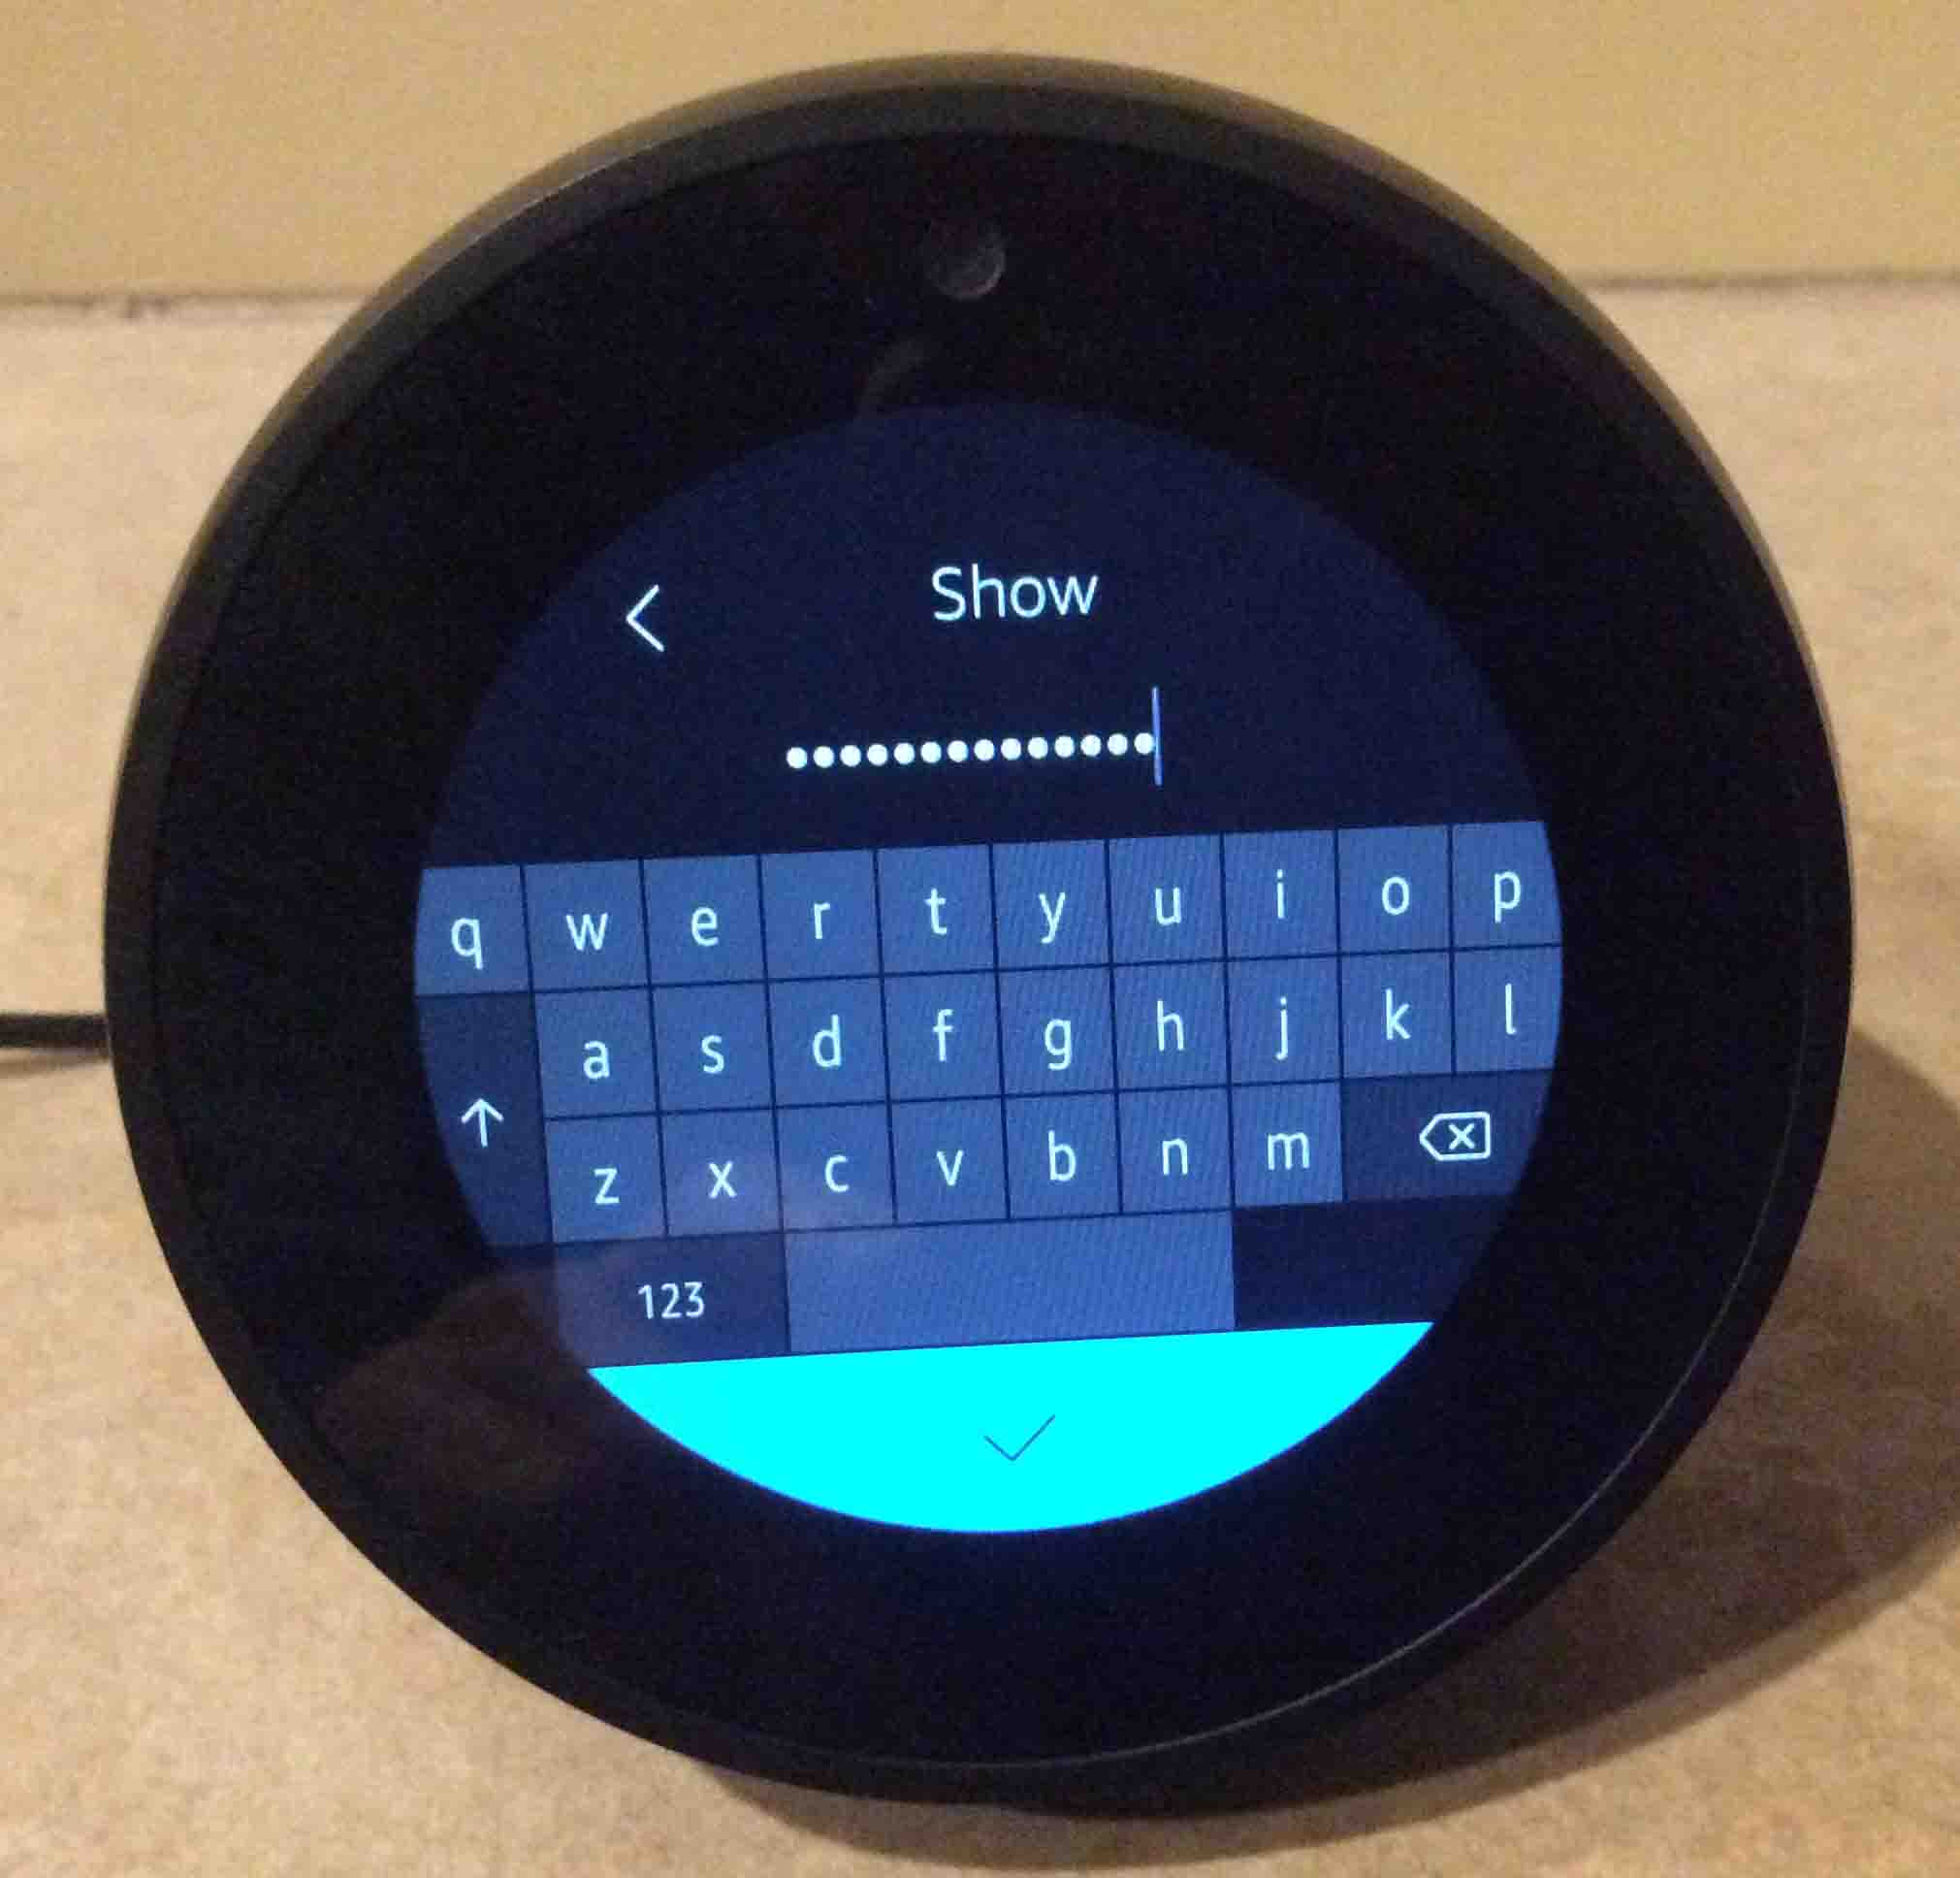
Skip ahead to the next step if you want to see the password characters appear onscreen as you enter them.
But if you want them hidden, then find the Hide Password option at the top of the screen. Hiding the password characters makes them show up as stars (*). However, you need not hide the password if you’re alone or do not care if anyone looks over your shoulder and sees it.
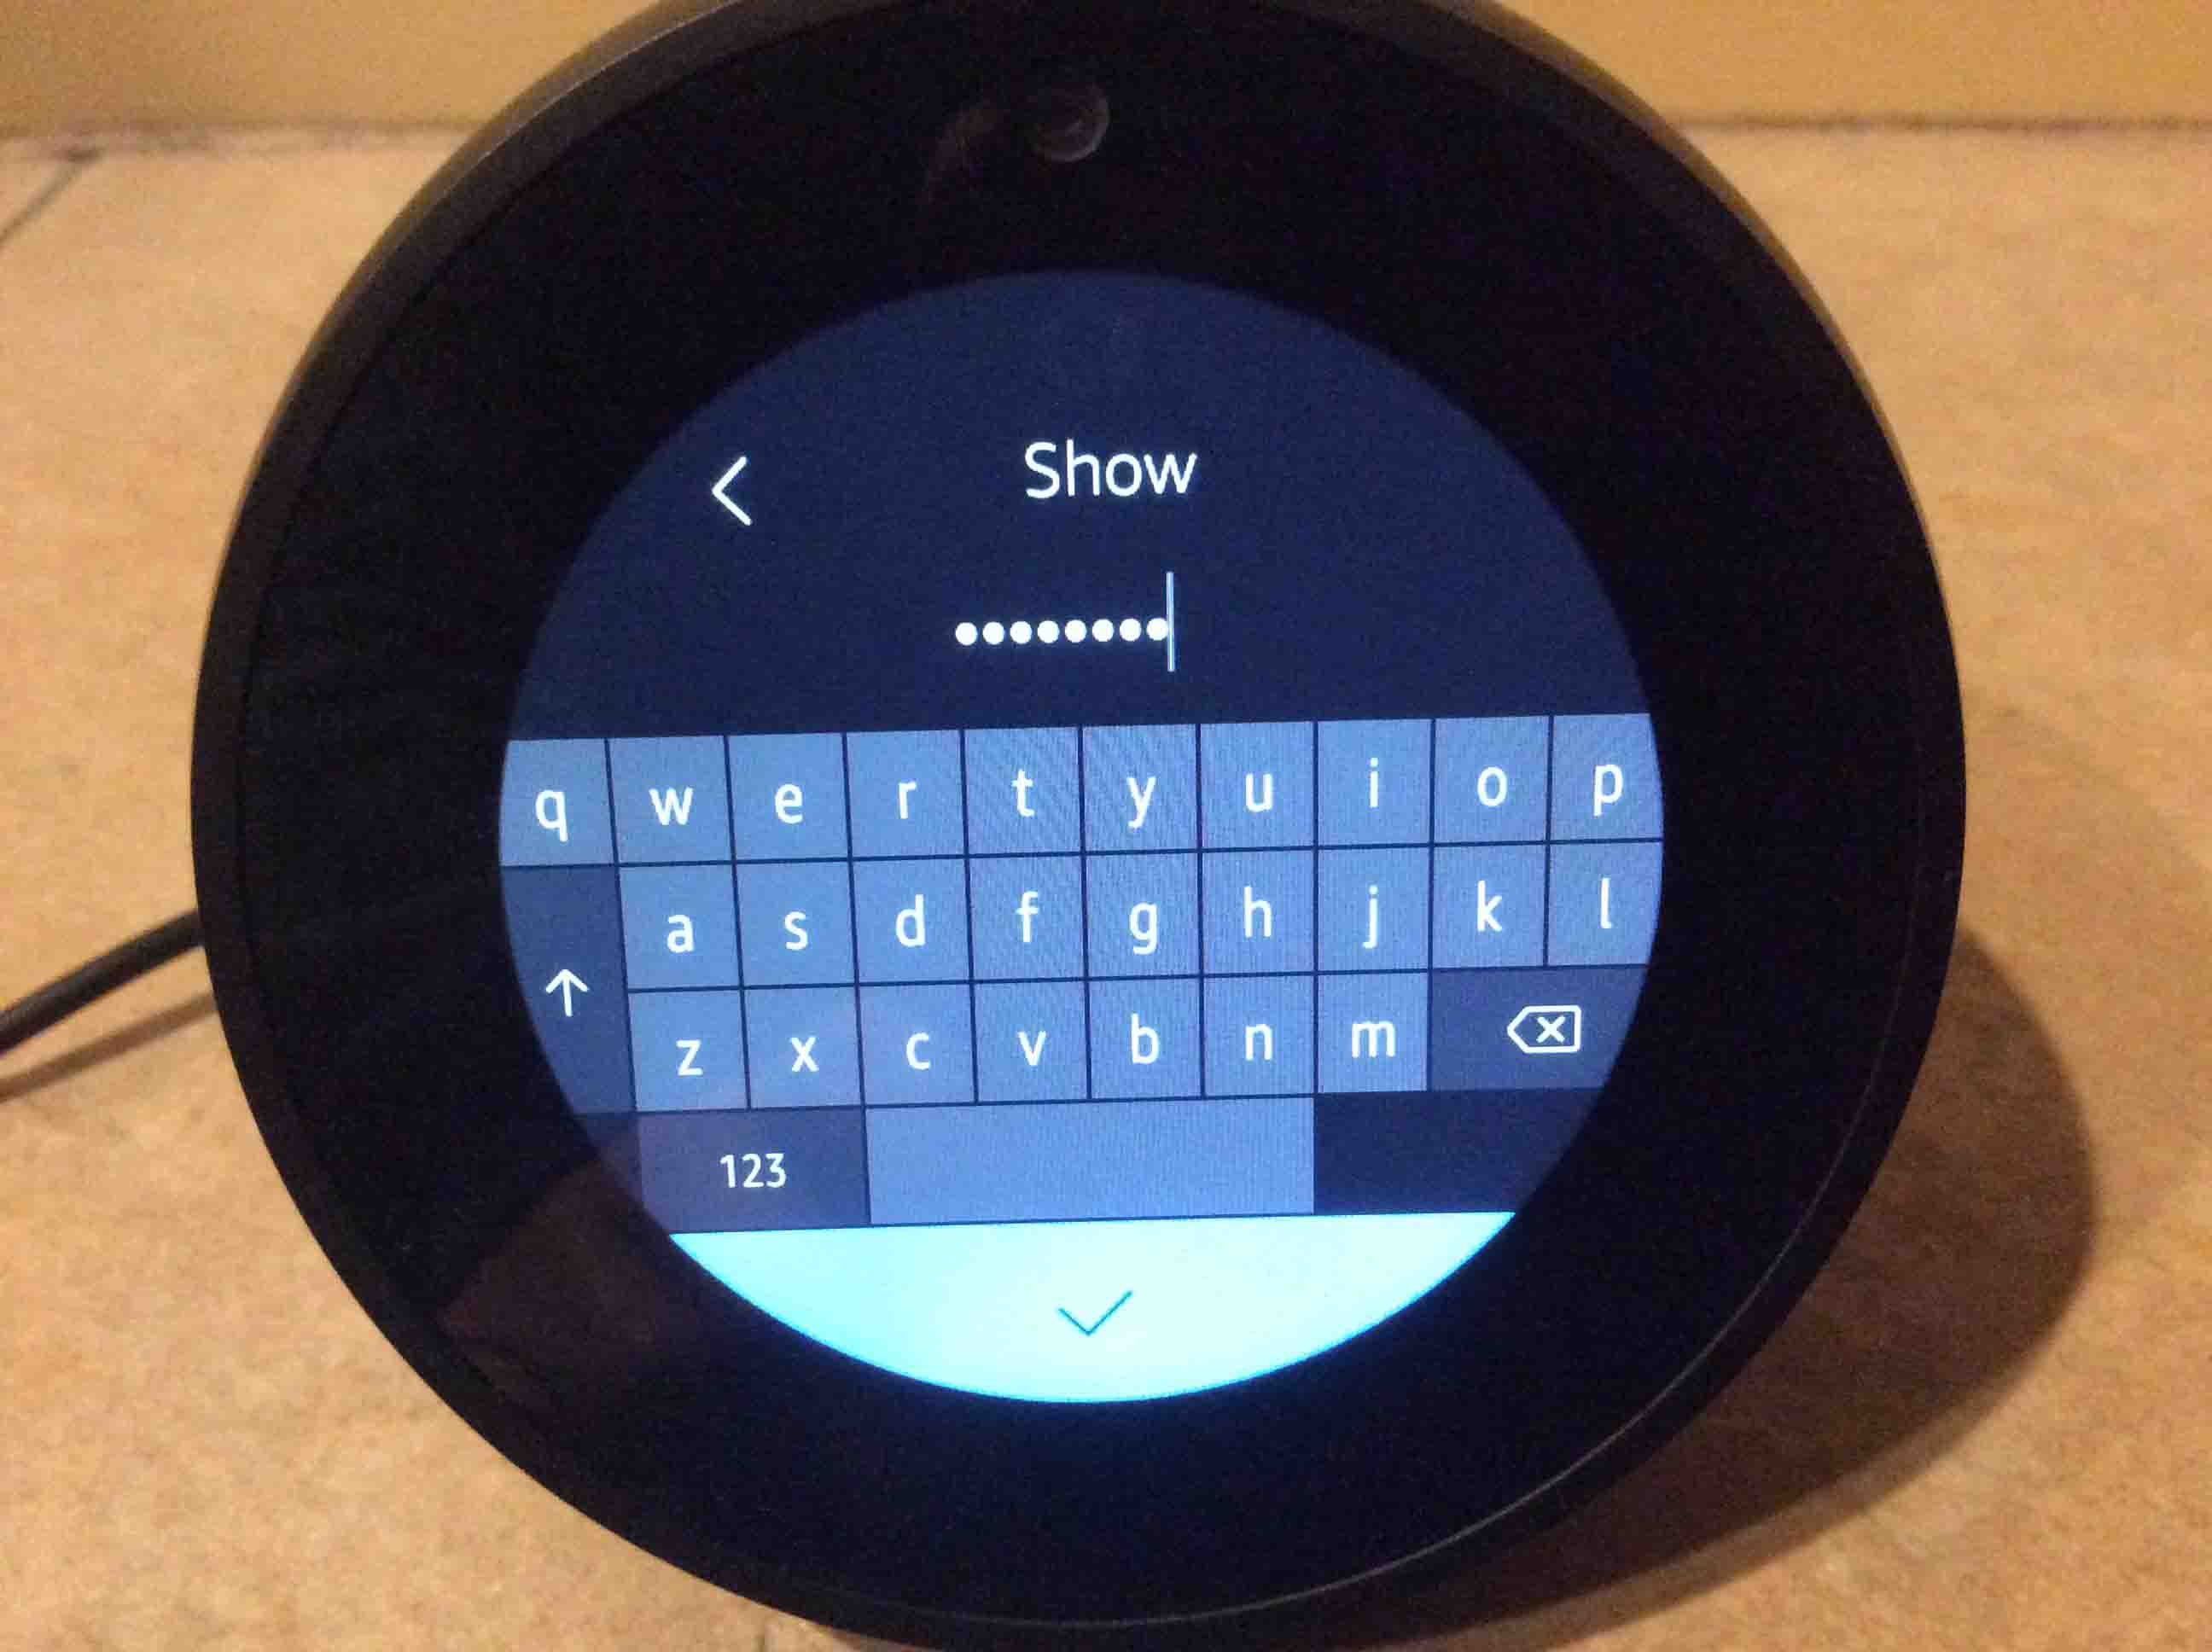
Type in the WiFi password for the internet connection you’ve chosen, using the onscreen virtual keyboard that comes up, as shown next. We’ve hidden our password. So we got the star characters as we typed ours in.
Once you’ve typed the WiFi password, tap the gray check mark button at the bottom of the screen, as shown in the last picture.
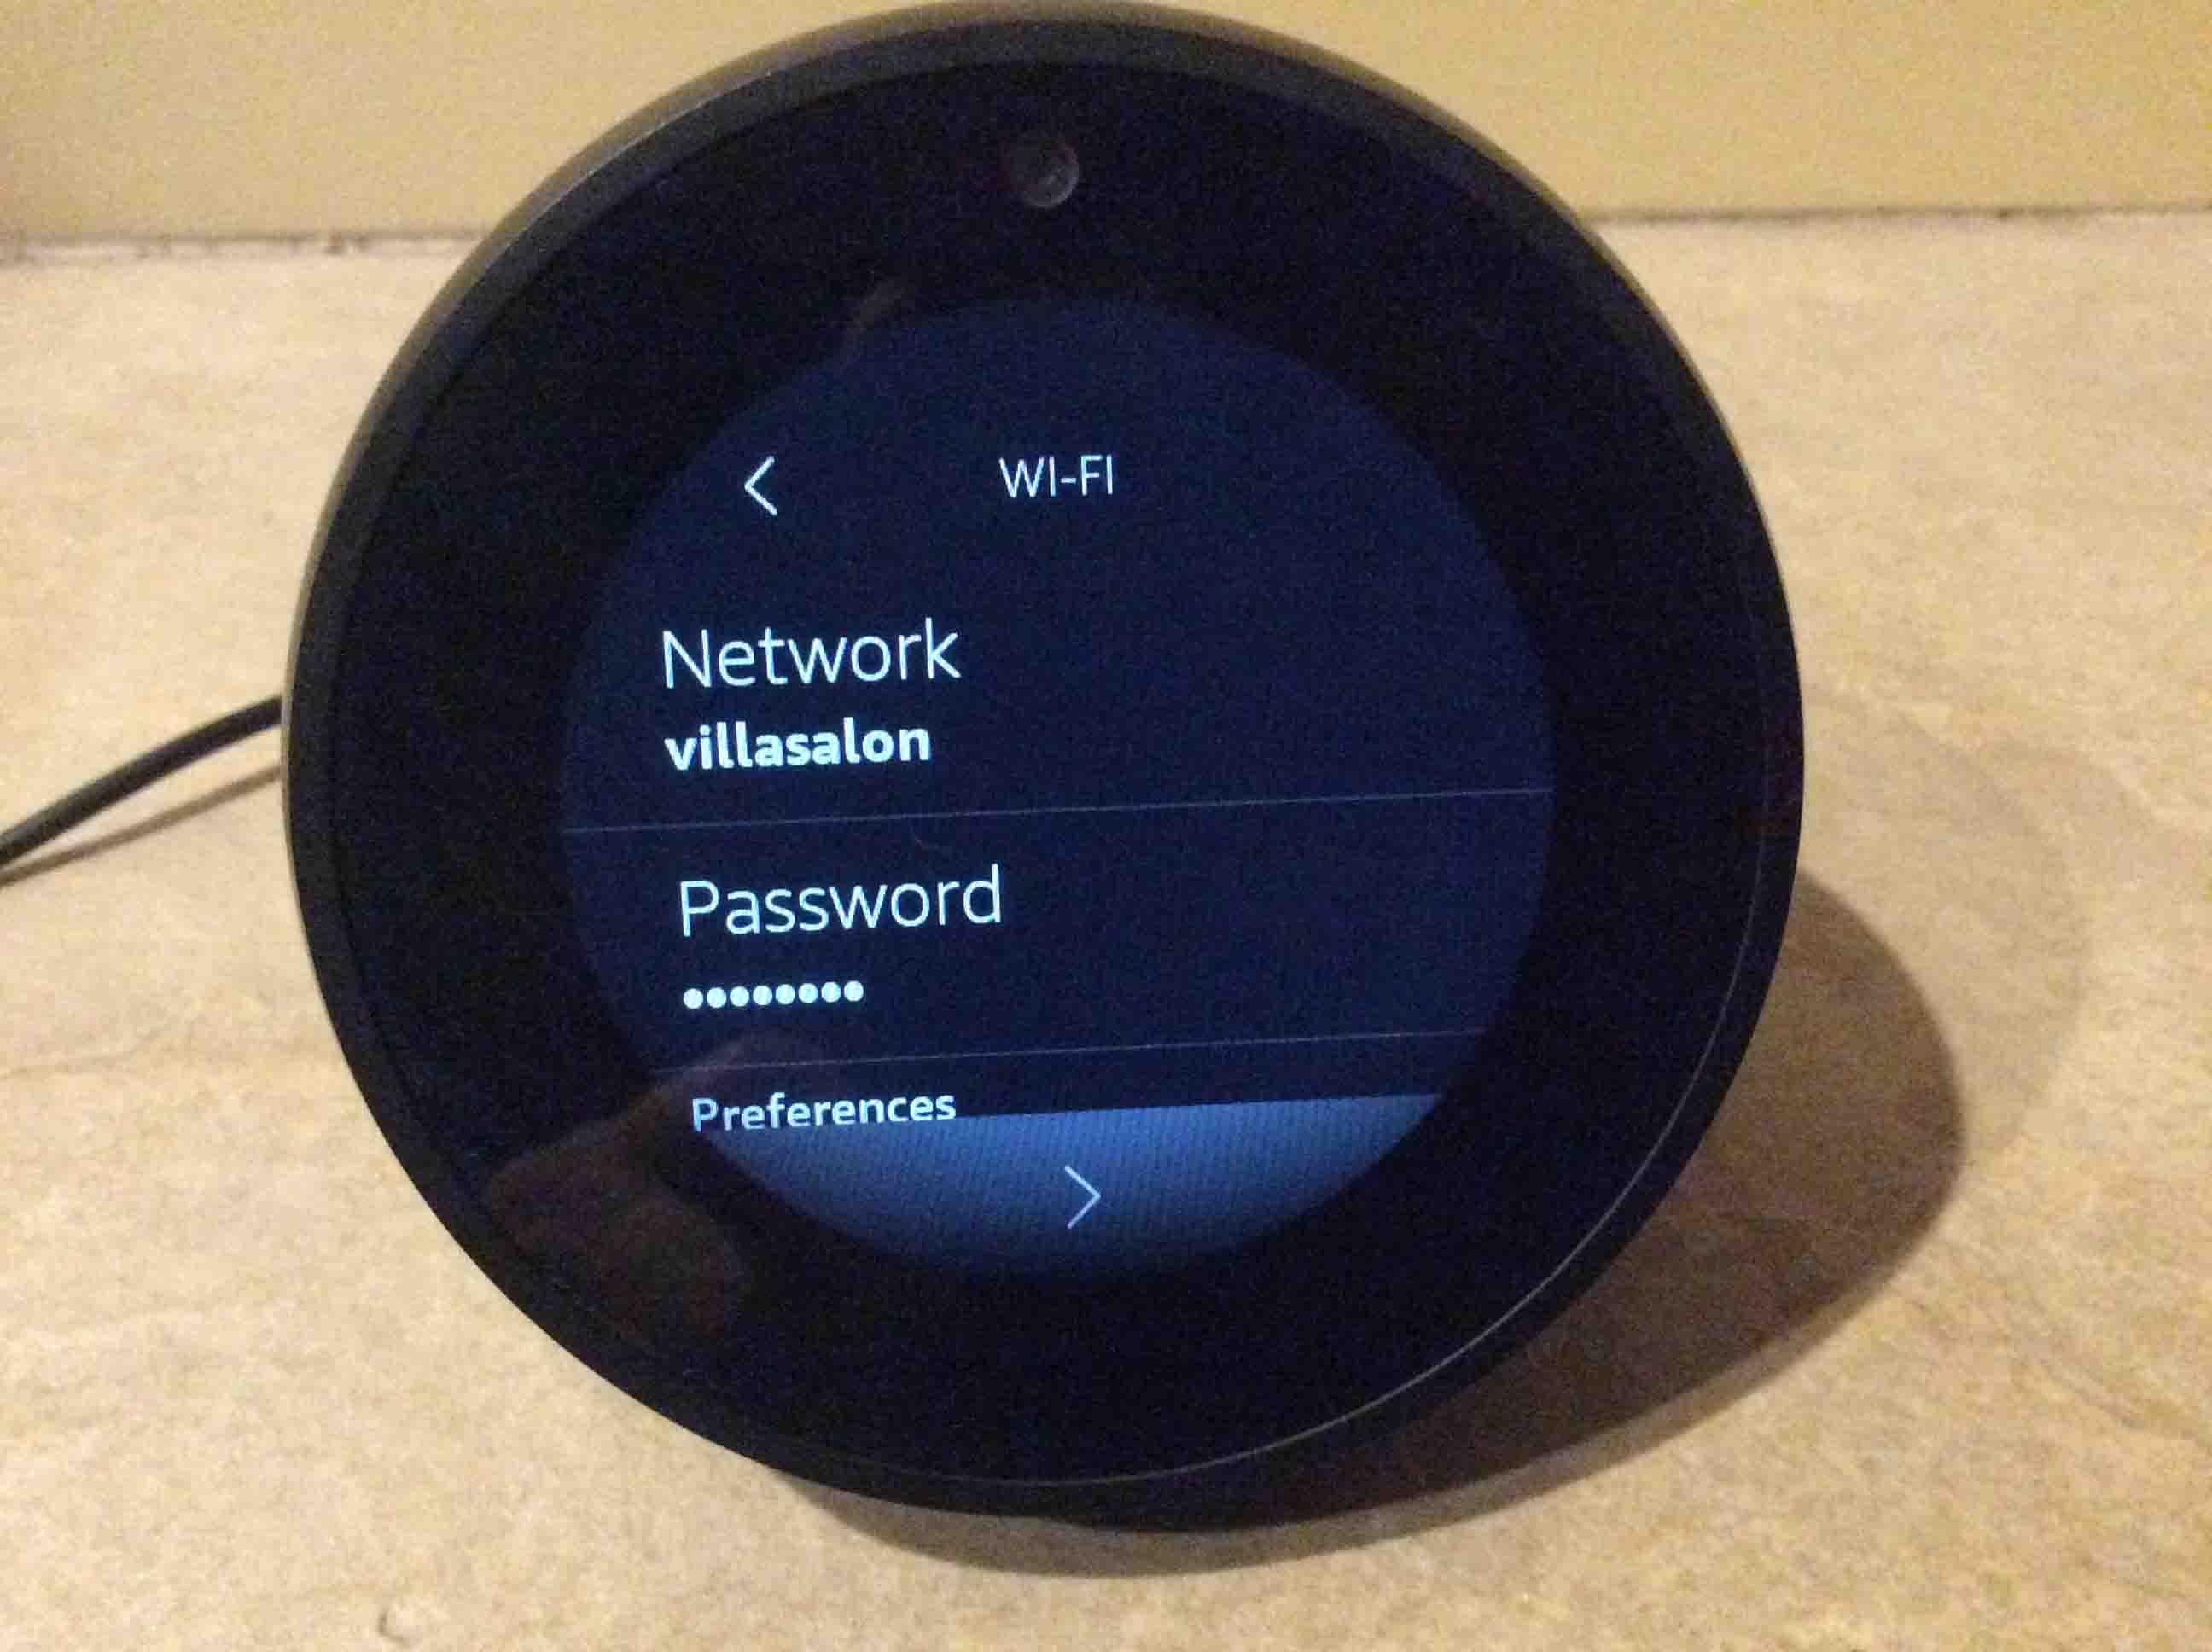
The Echo Spot then displays the Wi-Fi Network Confirmation screen, as shown next. Note that the villasalon network name appears, along with the password field (star characters).
If this is the WiFi network you want, then proceed to the next step. If not, then tap the Back button, located in the top left (ten o’clock) on the screen, to select a different WiFi network from the list of available wireless networks.
Find the Continue button at six o’clock at the bottom of the Wi-Fi screen in the last picture (the > button).
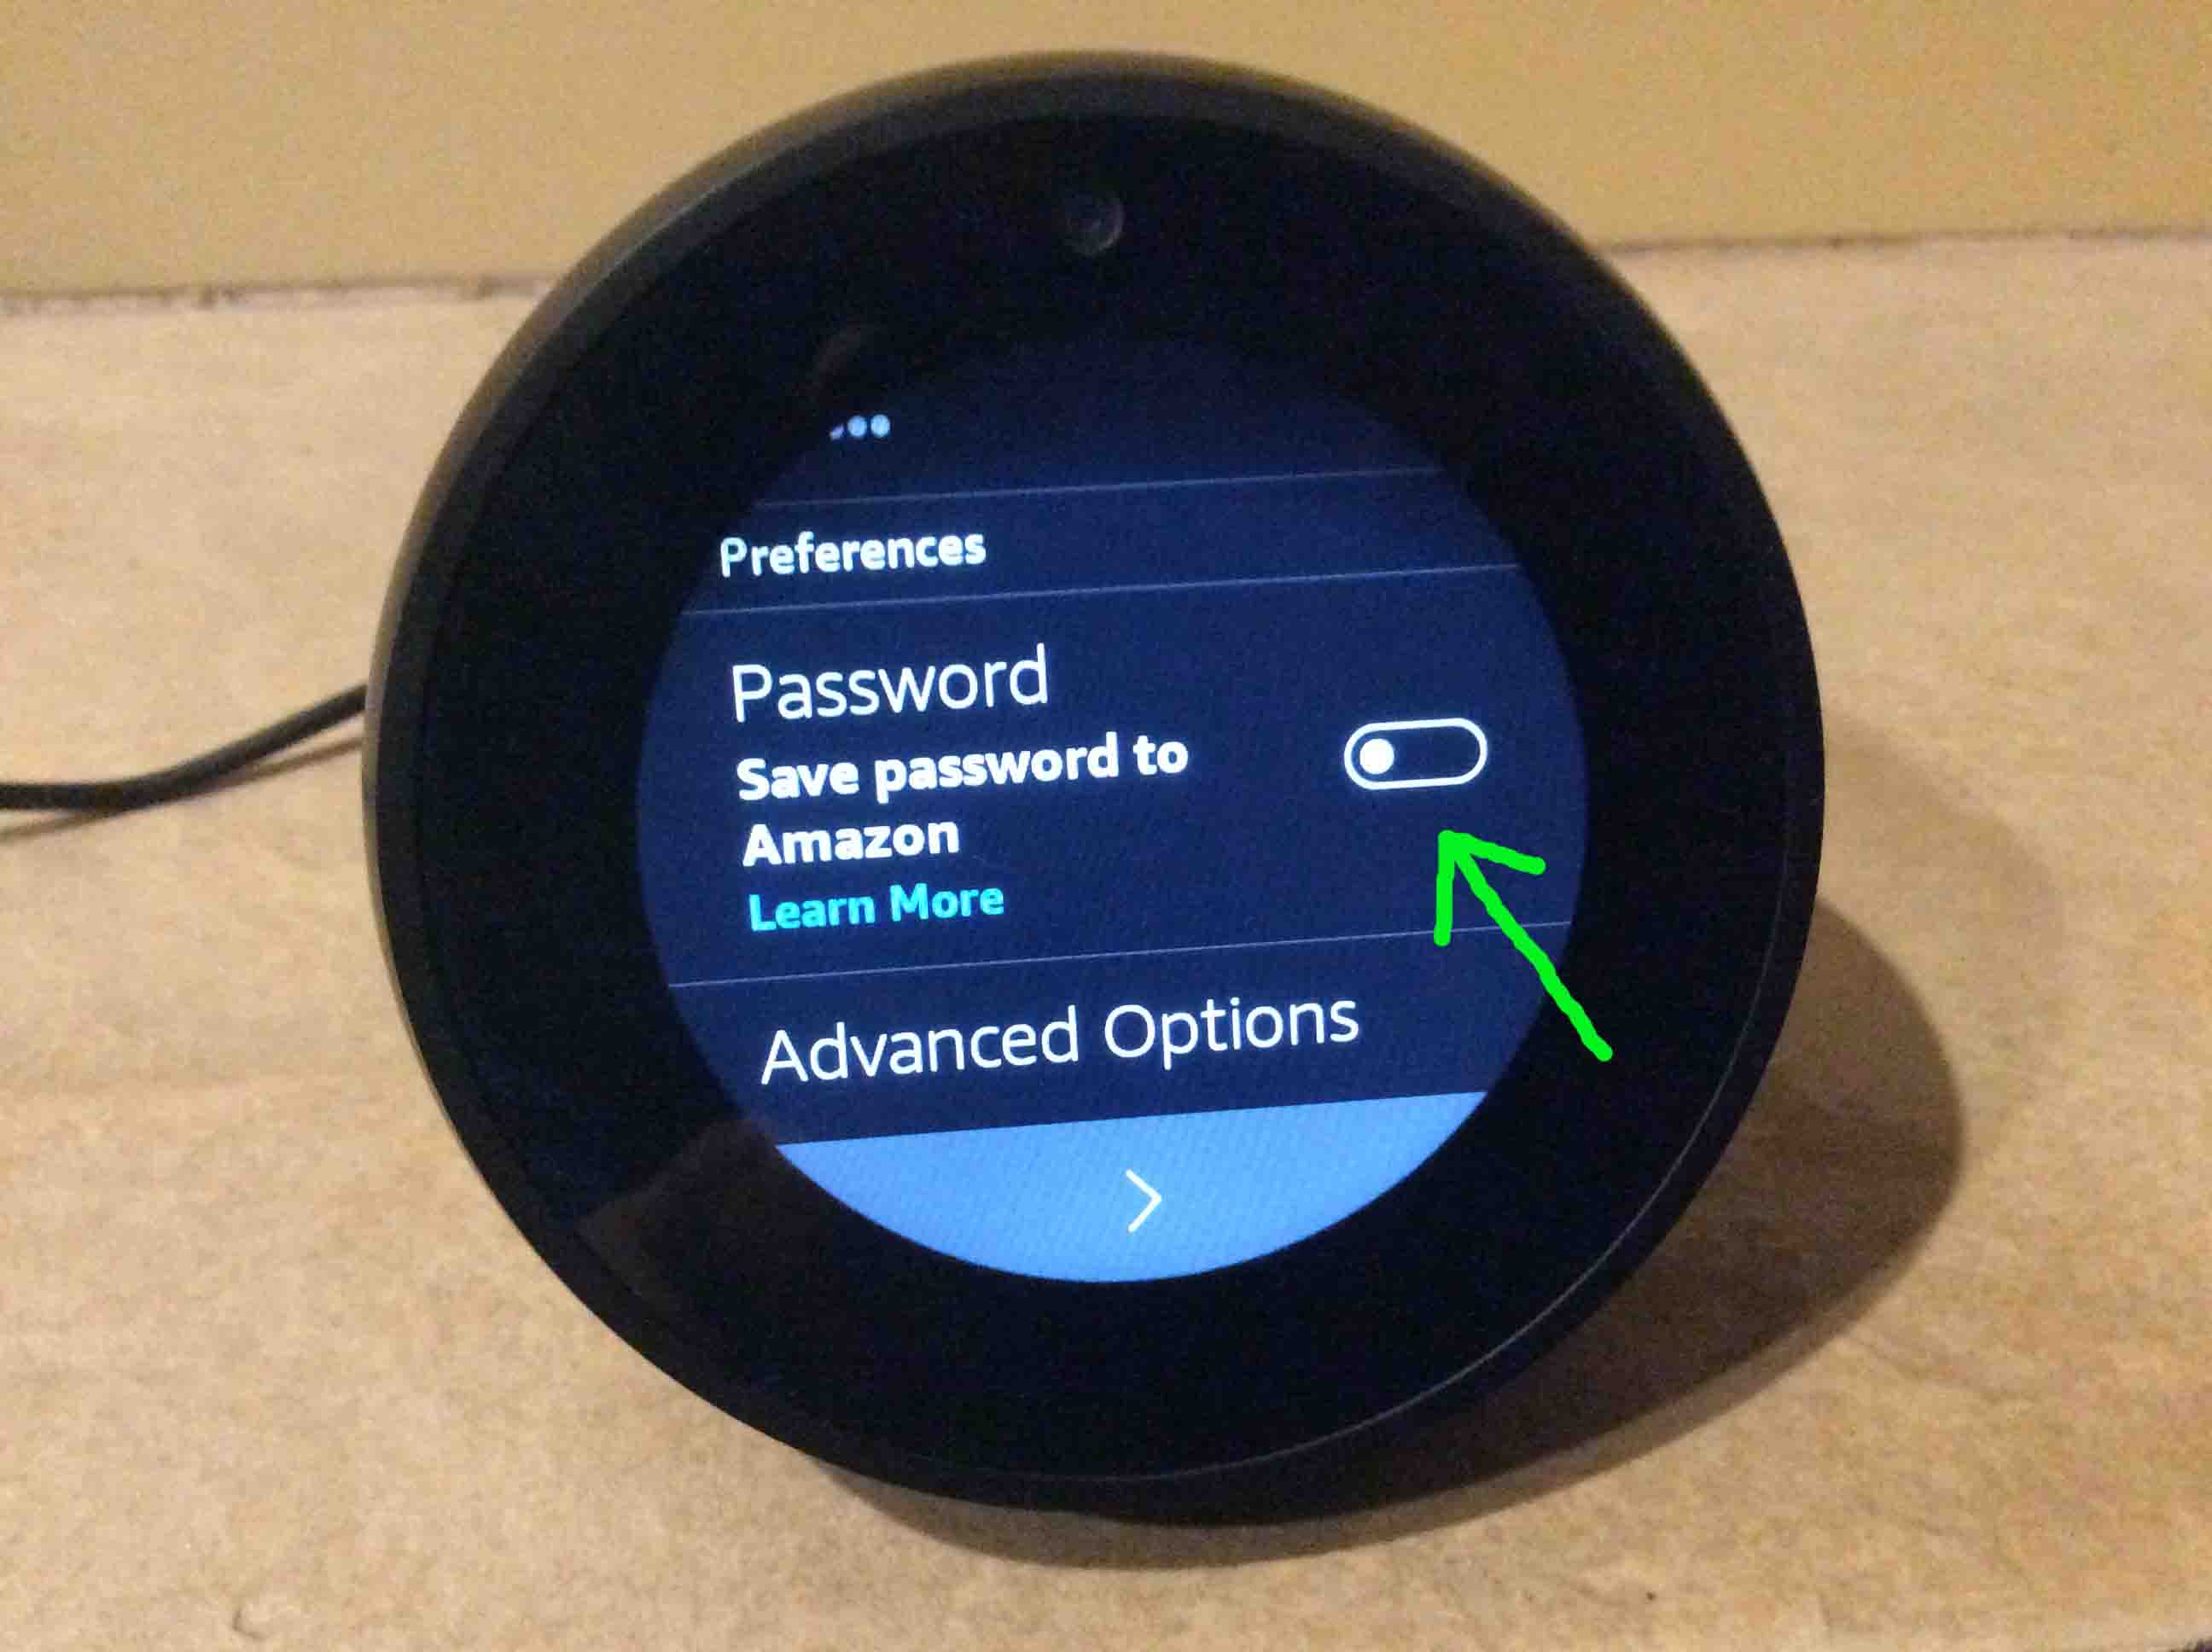
The Echo Spot then asks if you wish to save the WiFi password you entered above to Amazon servers, as shown next.
This option is ON by default. If you want to save your password, then skip ahead to the next step.
But if you with not to save your wireless password, then tap the toggle switch at three o’clock on the prompt screen shown next. This moves the switch to the left (OFF) position.
Here, we opted not to save it. Why? Because NOT saving it, in future demos, lets us use villasalon as a brand new WiFi network, and avoid the system automatically connecting to it anytime we’re in range of villasalon.
Note that as of this writing, once you save the network password to Amazon, you cannot remove it from their list unless you ask their customer service agents to clear your saved passwords list in your Amazon account. Avoiding the time involved with messaging them is another reason not to save the password.
Find the Continue (>) button at the bottom of the screen shown in the last picture.
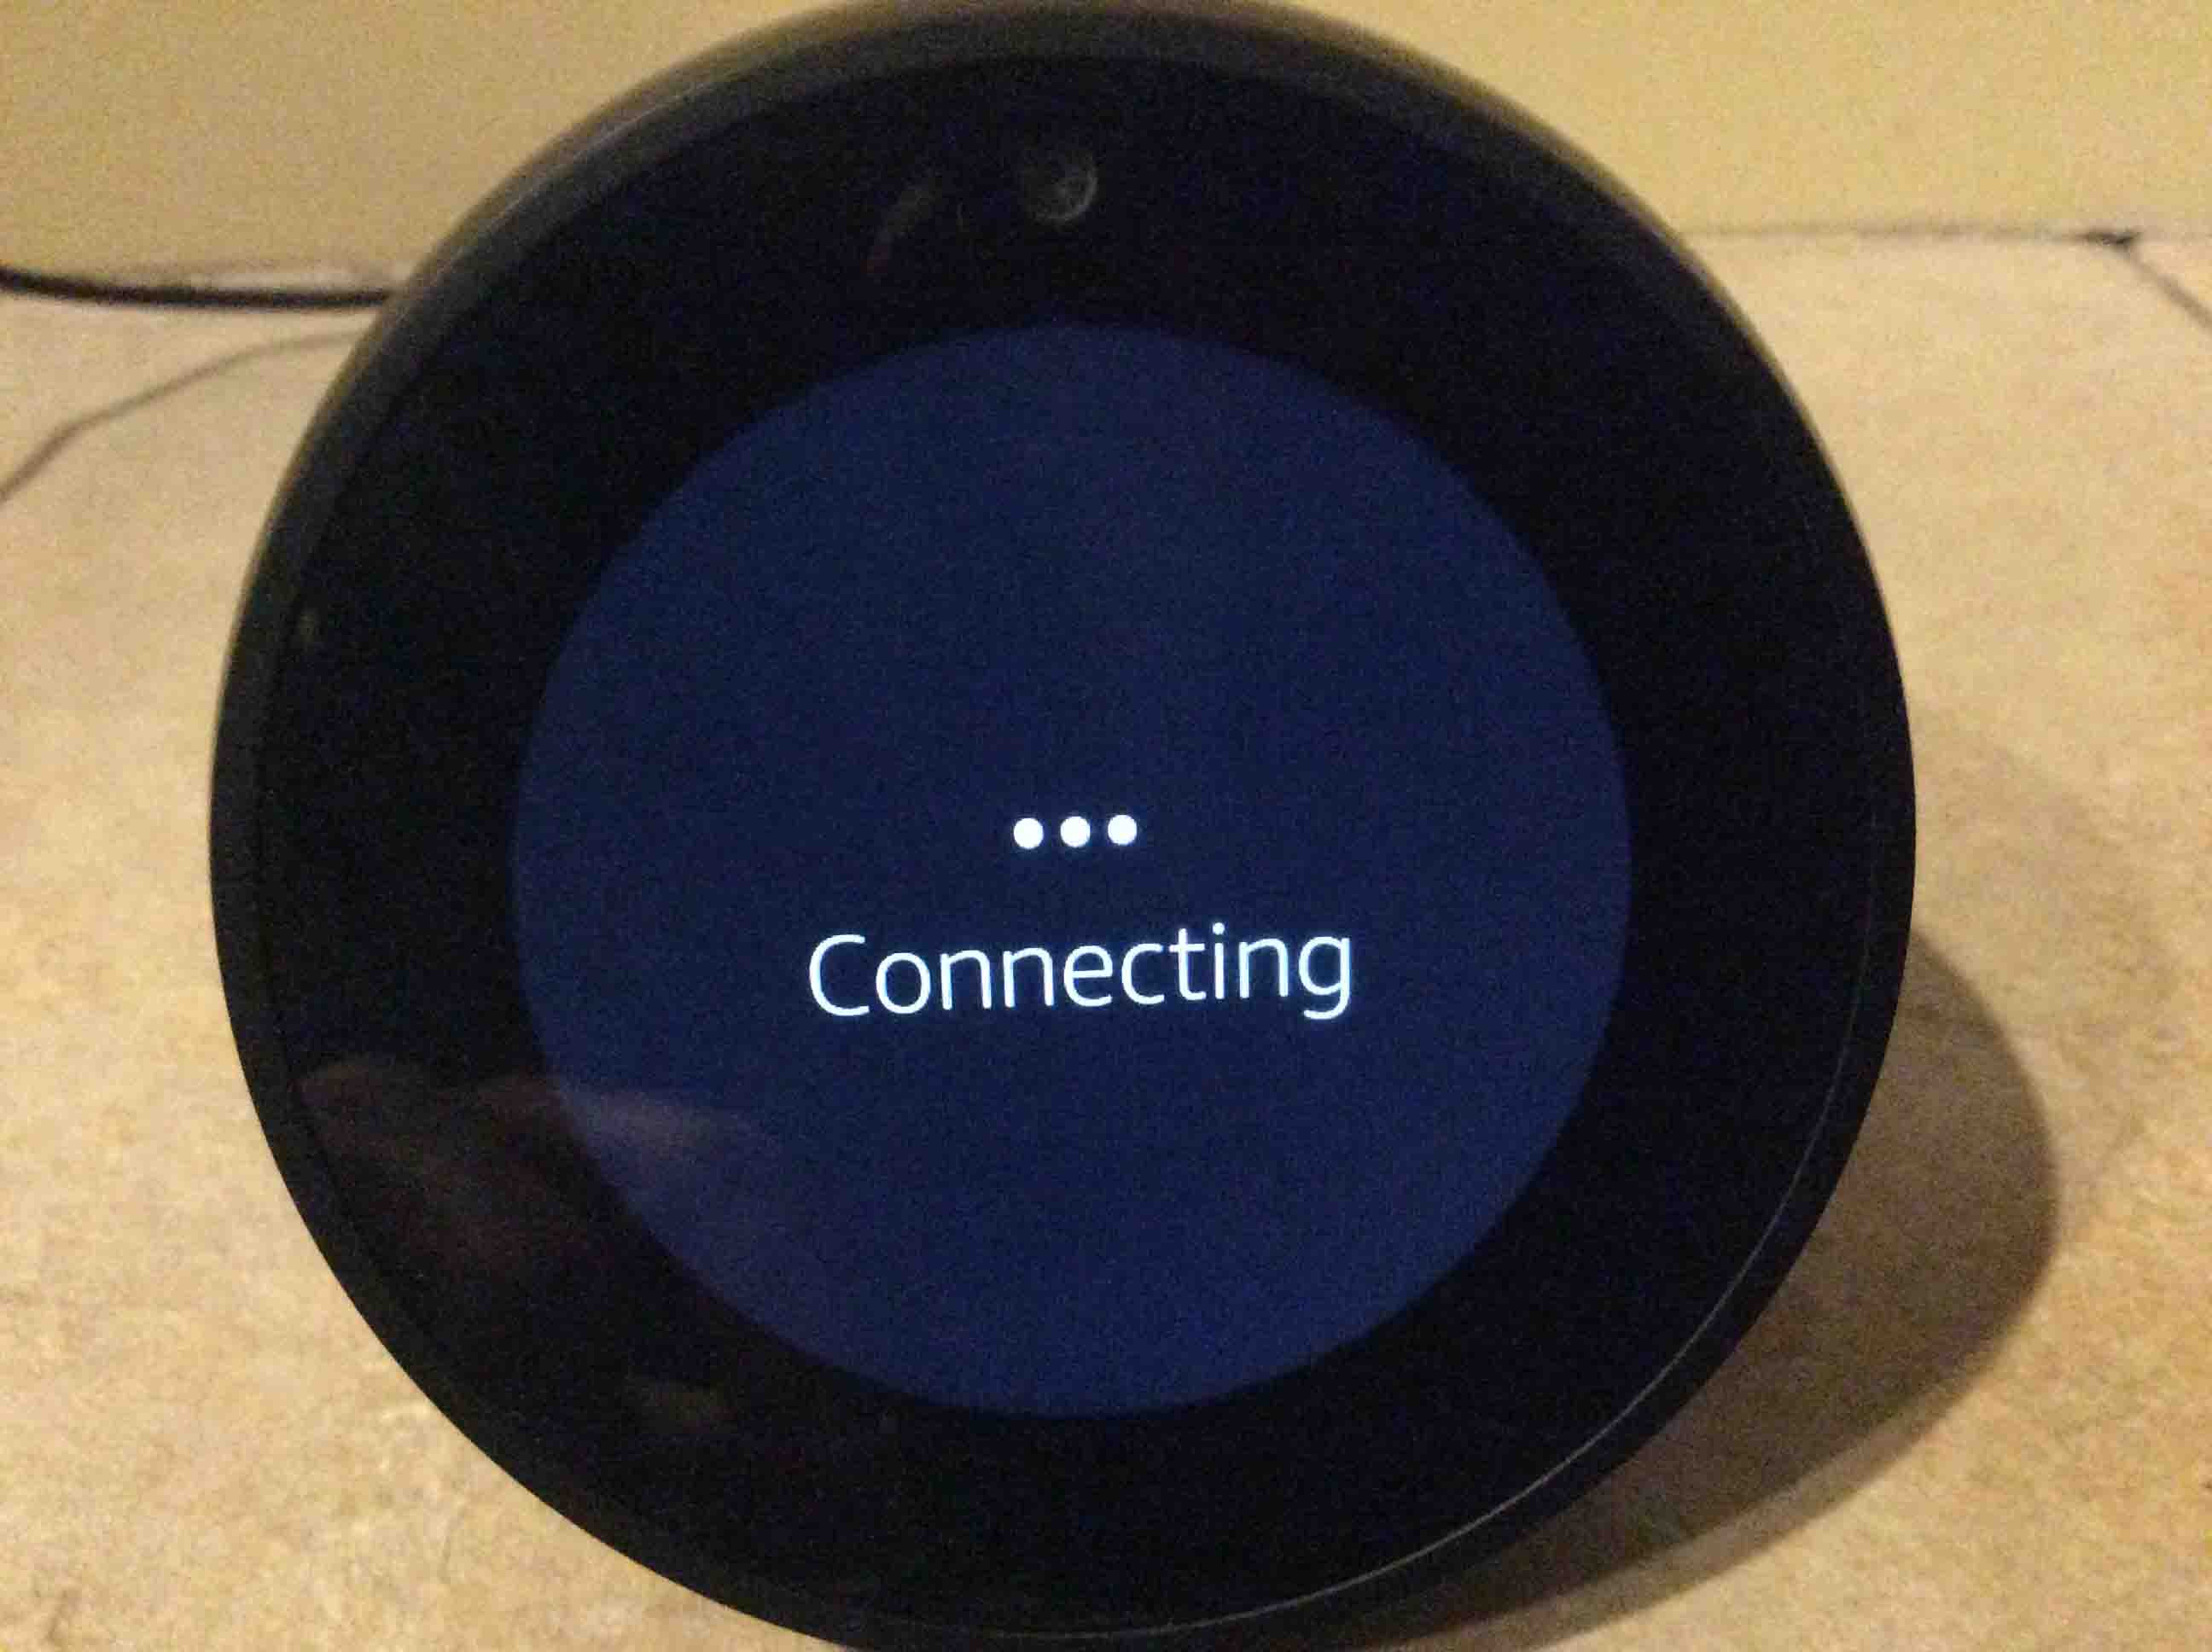
The Echo Spot then attempts to connect to the WiFi network you entered above. While it does this, it displays the Connecting screen, as shown next.
After ten to thirty seconds, a WiFi connection is made successfully (or not).
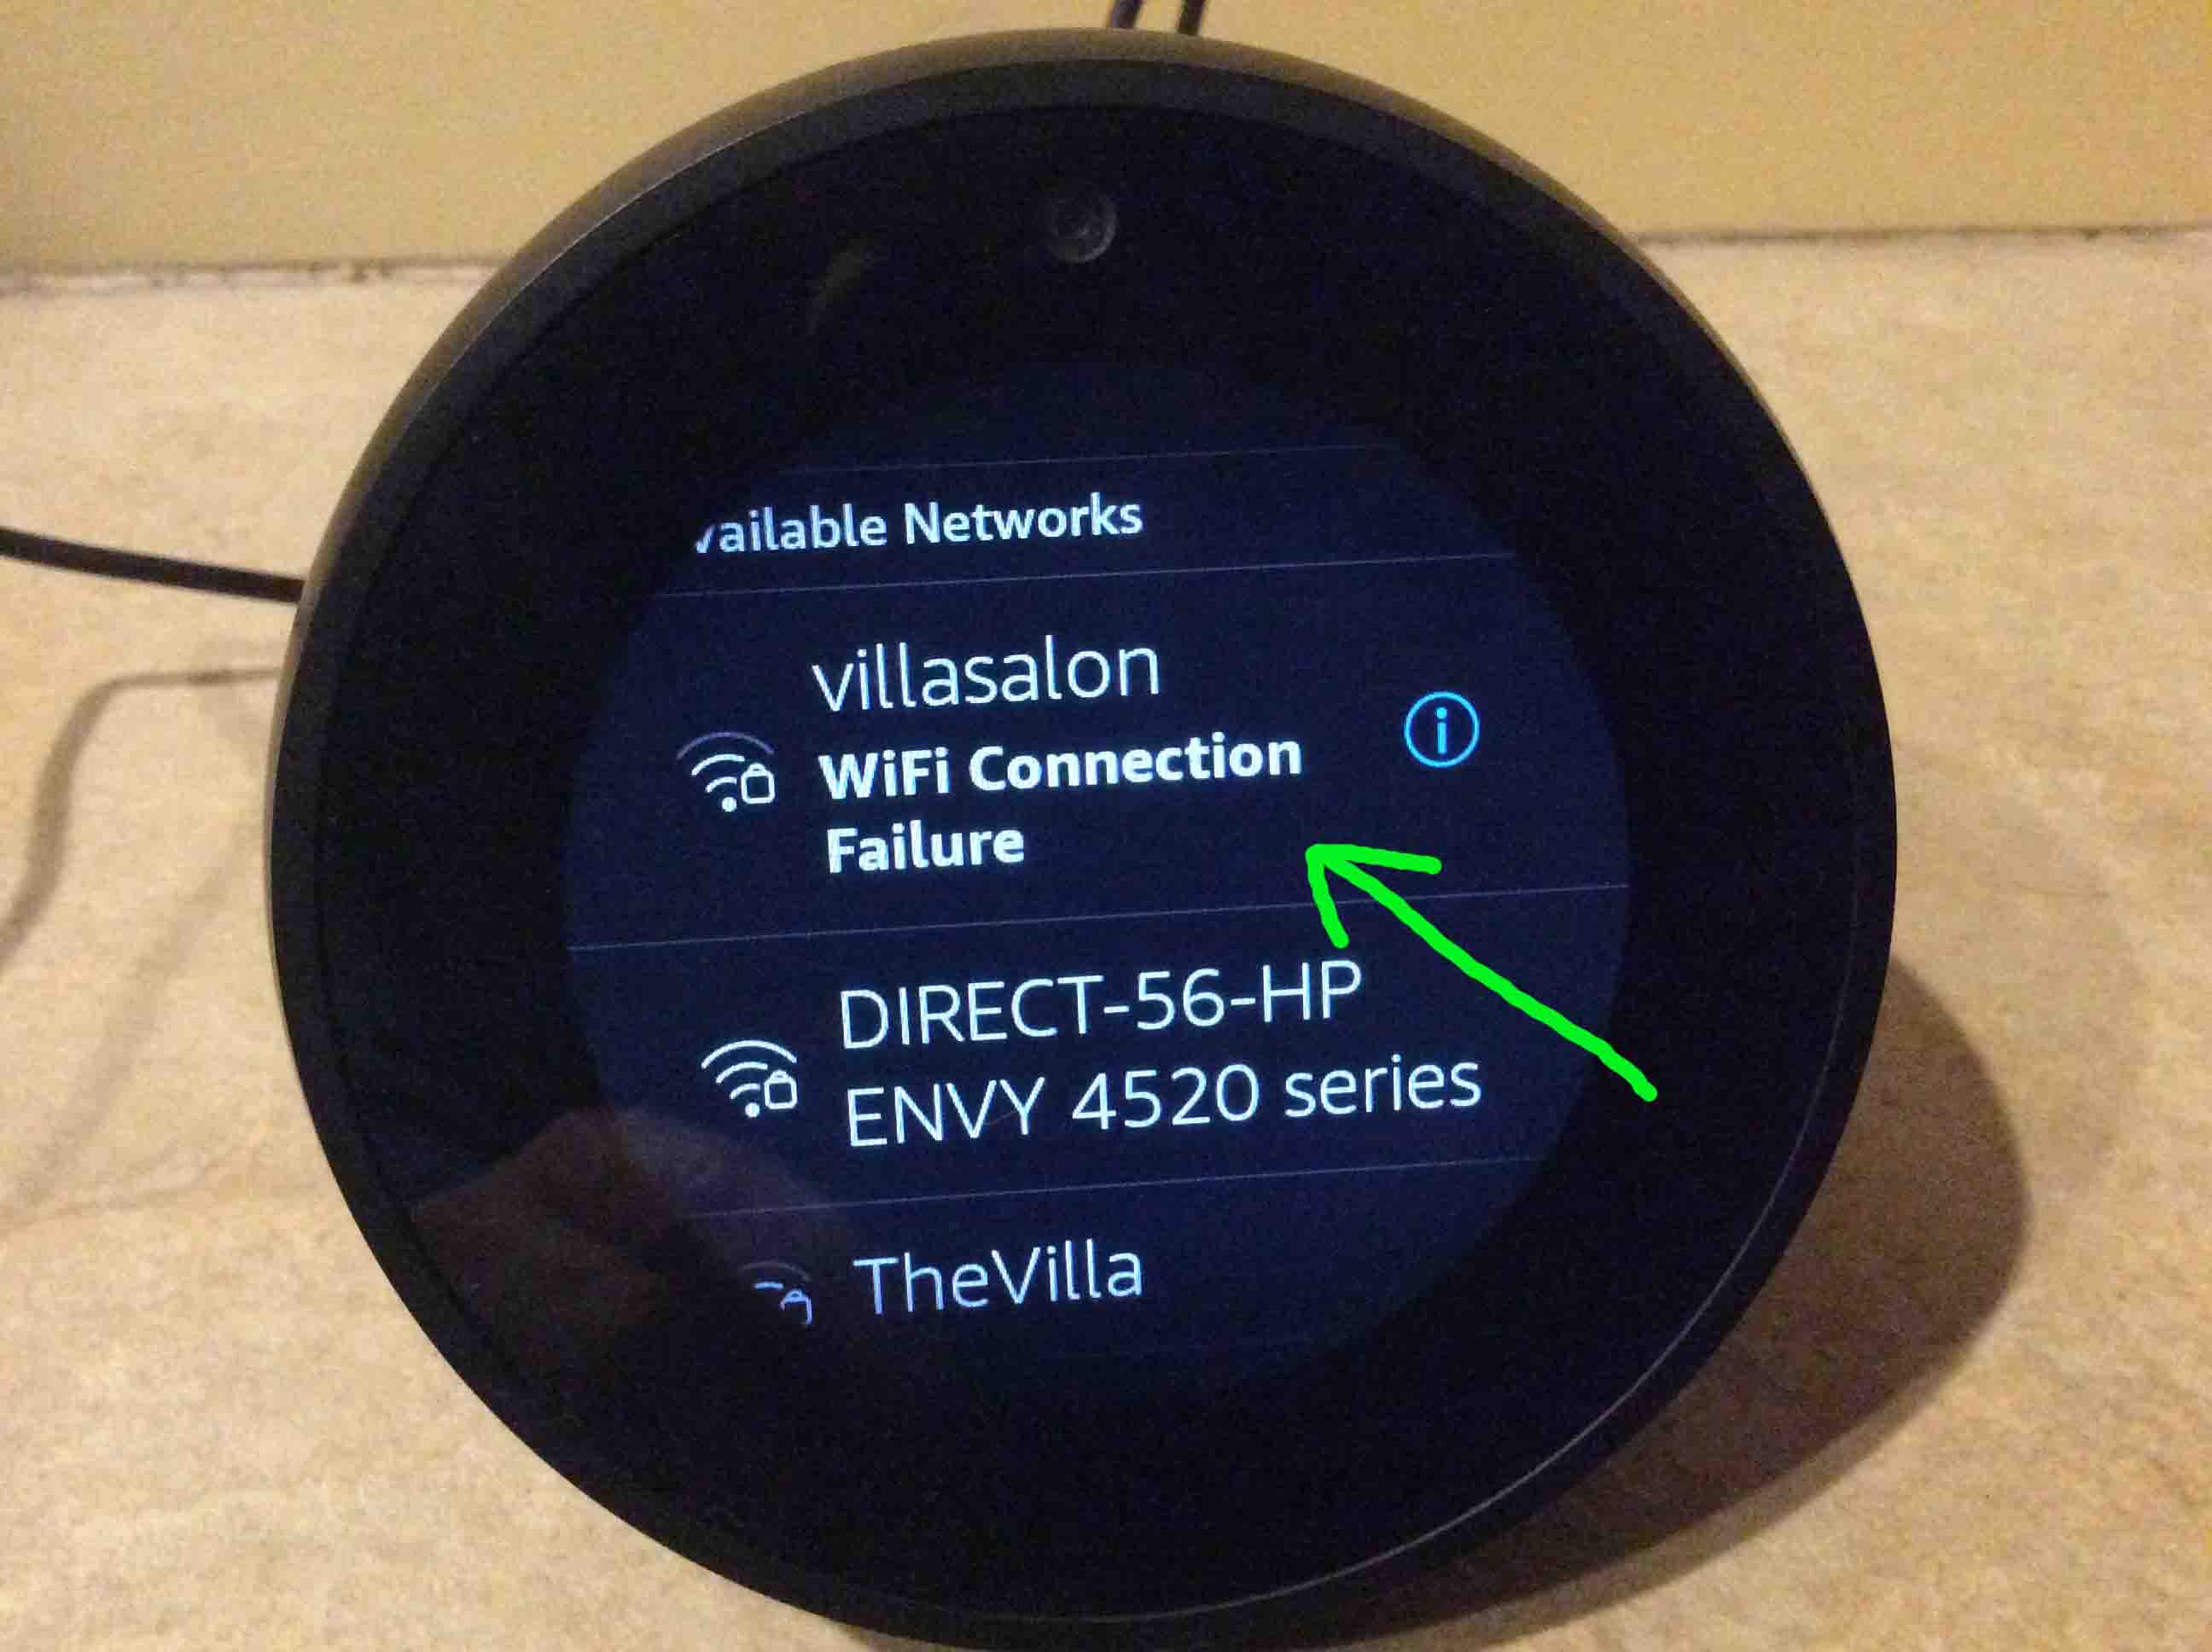
If connecting fails, then the Echo Spot returns you to the list of available WiFi networks screen, with a WiFi Connection Failure message on your chosen network list item, as shown next. From there, you can either choose a different wireless network, or pick the same SSID again and retry entering its password.
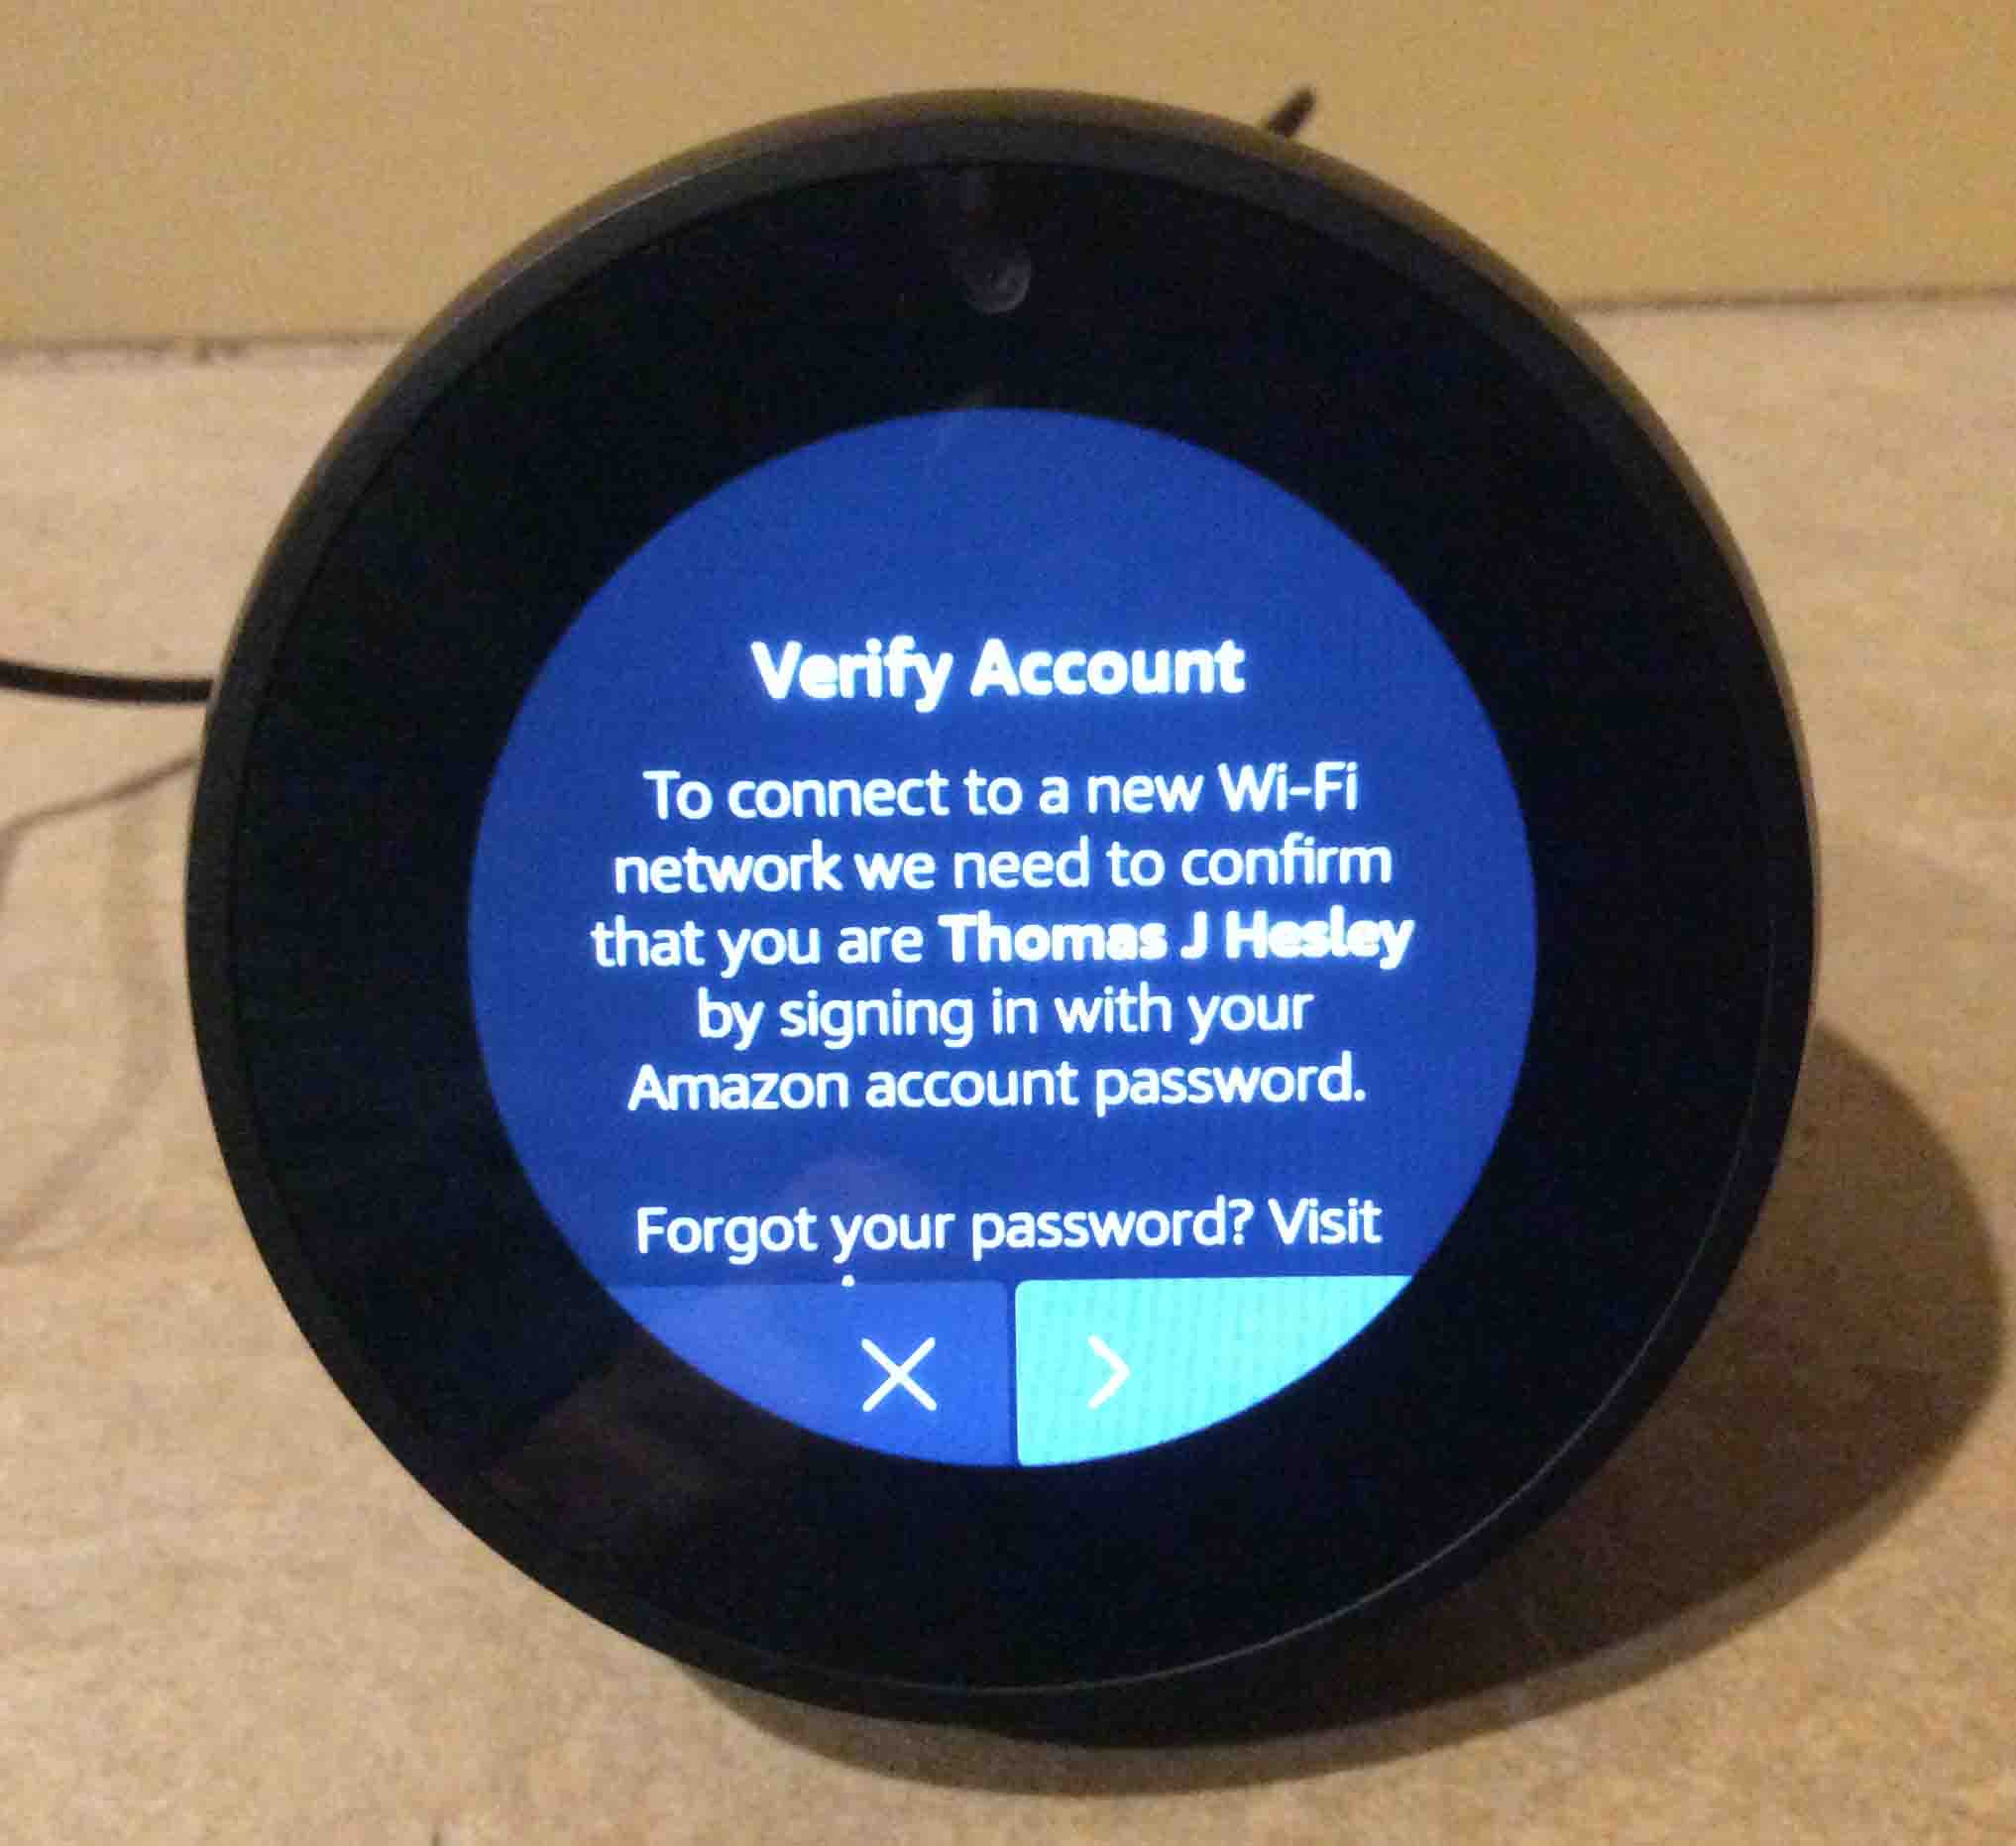
But if all goes well with making the new WiFi connection, you’ll see the Verify Amazon Account screen come up, as shown in the next picture.
This screen says, “To connect to a new Wi-Fi network we need to confirm that you are <your Amazon account name> by signing you in with your Amazon account password.”
Find this button shown in the last picture, at five o’clock (lower right on the touchscreen).
The Alexa Spot then prompts you for your Amazon account password, as shown in the screenshot shown in the next step.
Skip ahead to the next step if you want to see the your Amazon account password characters appear onscreen as you enter them.
But to keep them secret, then find the Hide Password option at the top of the screen. Again, hiding password characters makes them appears as asterixis (*).
We chose to hide ours for this demo.
We typed in ours using the little virtual keyboard, as shown in the next picture.
Find and tap the checkmark button on the bottom of the round Echo Spot screen, at the six o’clock position.
After a short pause, and if all went as it should, you’ll see the Connected screen, as shown next.
Your Echo Spot has now successfully to the new WiFi network. Then, if that network has full internet access, you can again give voice commands to it. Test this out as follows if you wish.
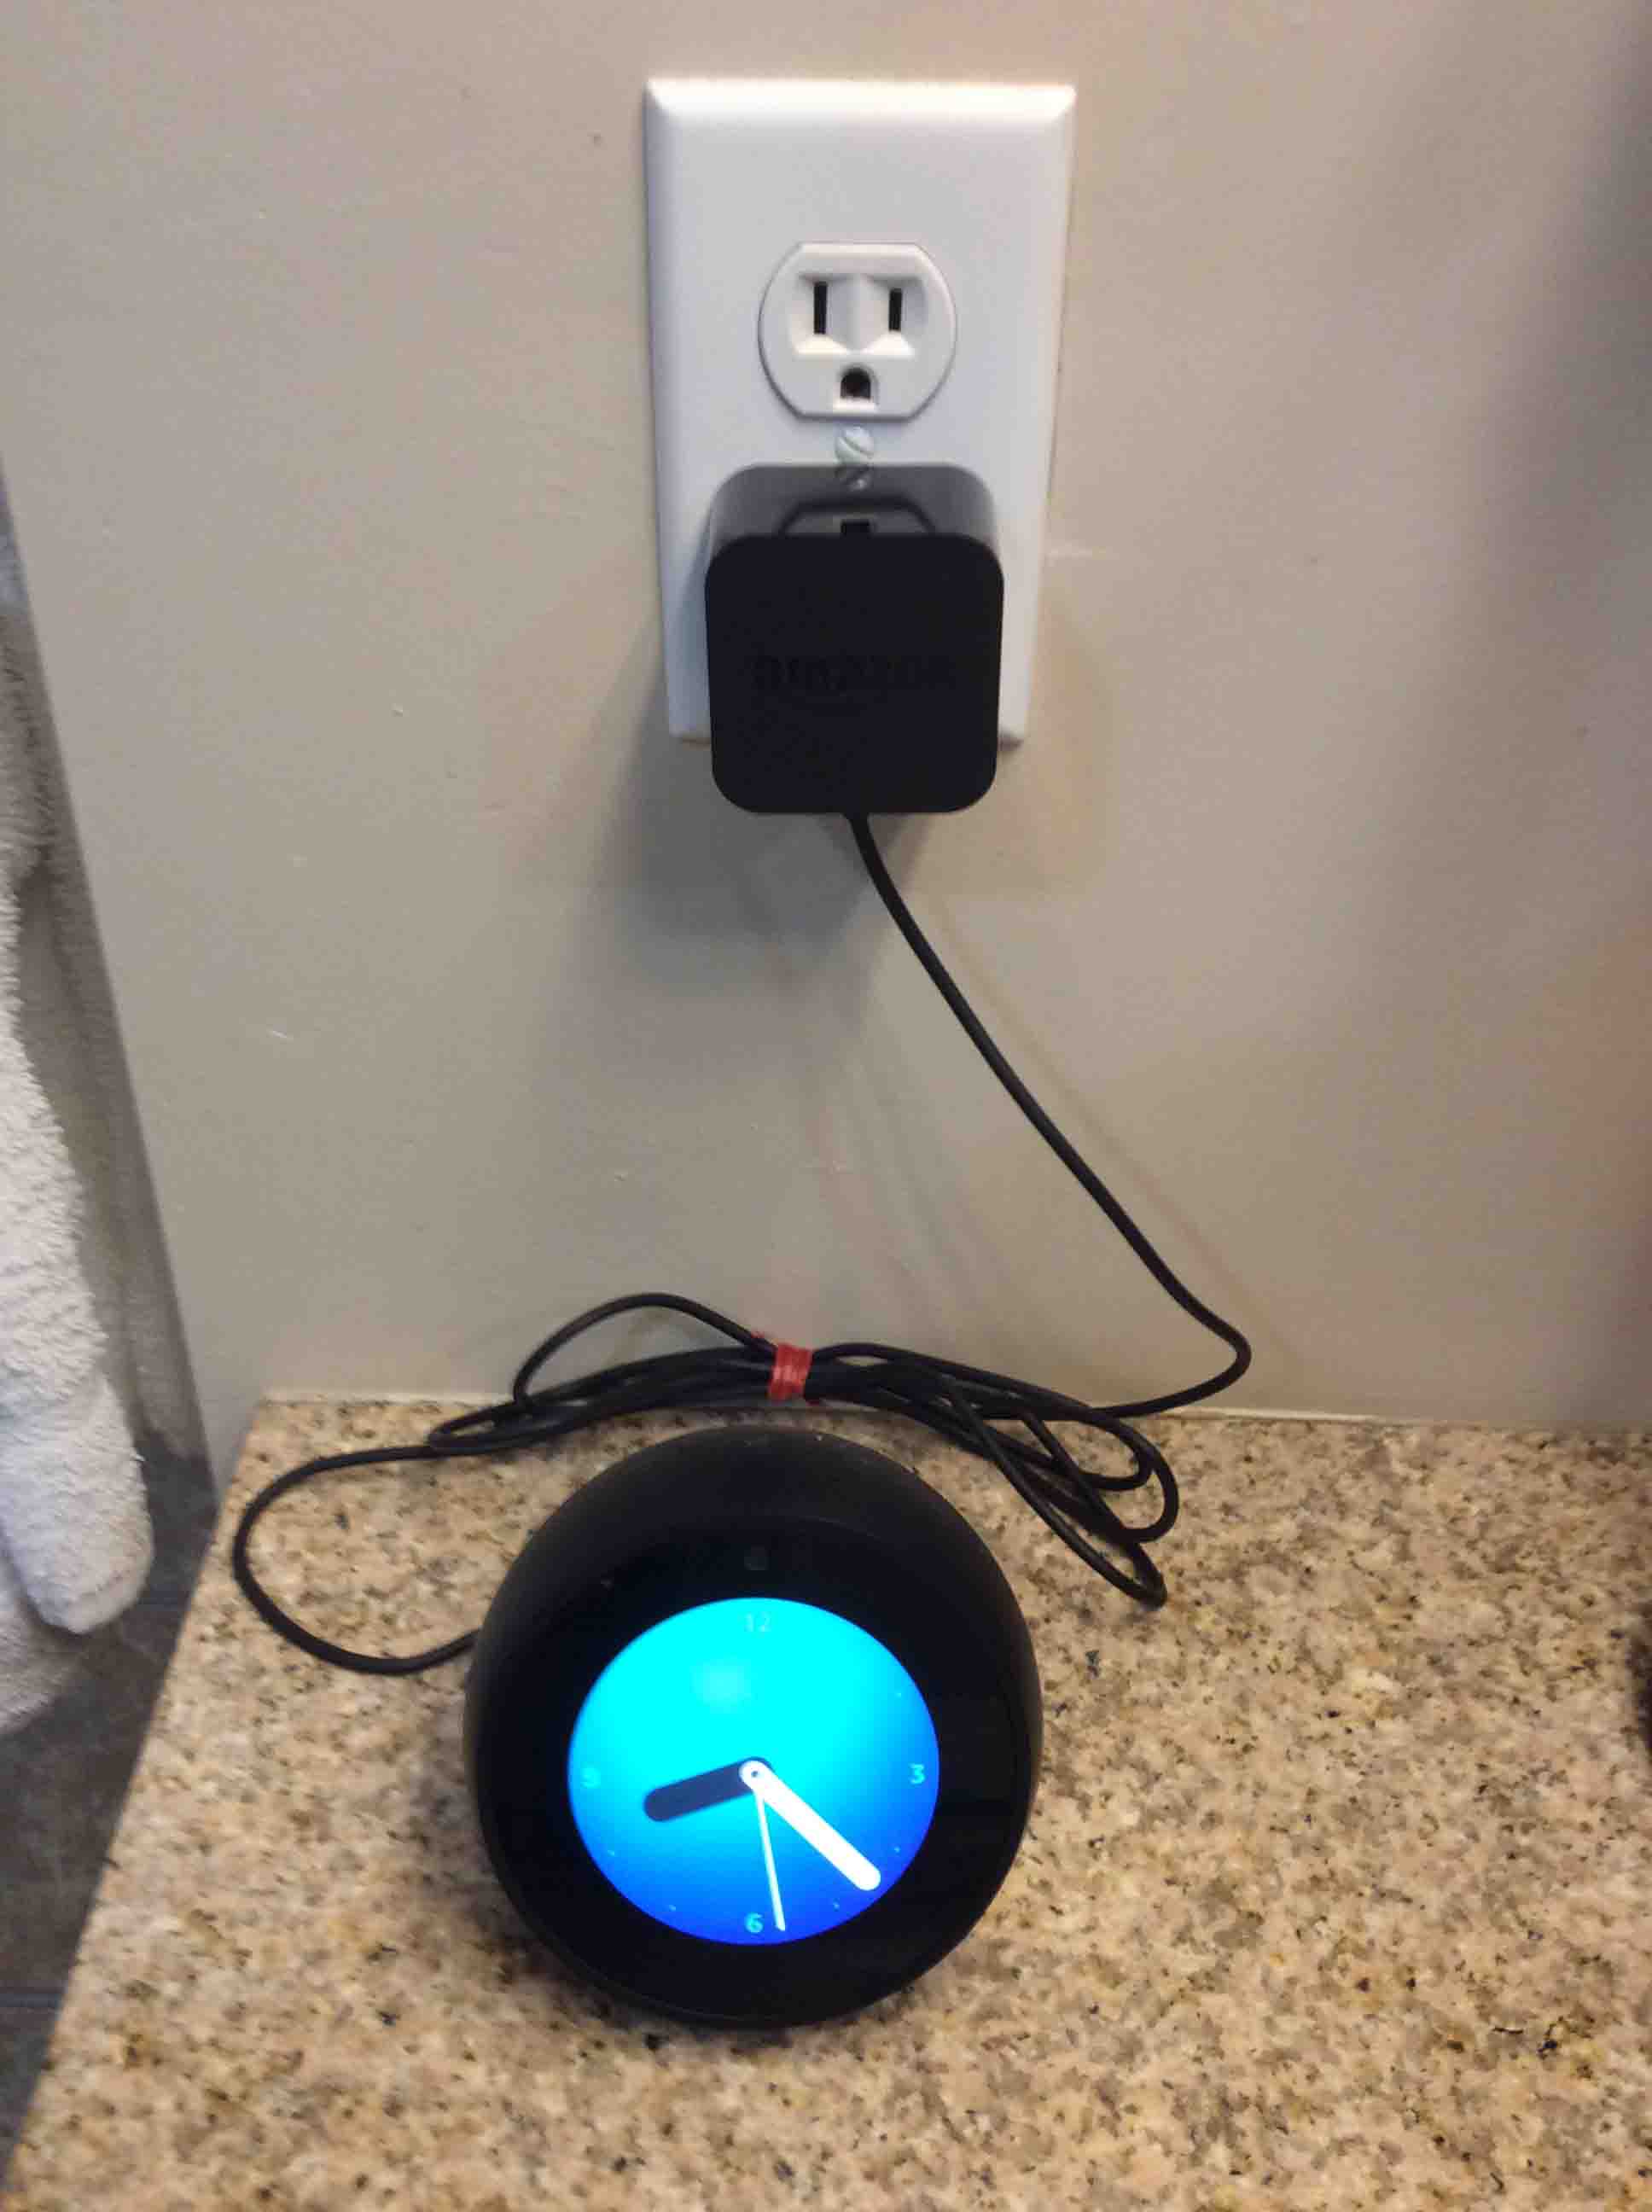
Say the command, “Alexa, go home.” This takes you back out of the WiFi connected screen, and displays a home screen, as shown next.
You’re all done, and successfully we hope!
Shows how to pair Amazon Echo to Bluetooth speakers. These include the generation 1 and…
Many speakers including this one, feature a status light that glows red while charging /…
Many speakers, including this one, feature a status light that glows red while charging /…
Here we cover the Amazon Echo Dot 3rd generation power cable specs. This is the…
The Sony SRS XB32 speaker charging indicator is a small LED light in the back…
Here we cover the Echo Dot 3rd generation power adapter specs. This is the wall…