This post details what you’ll need for Google Home setup. Shows how to set up a Google Home smart speaker assistant device on your home WiFi network and how to access the speaker from the Google Home app.
What You’ll Need Before Starting Google Home Setup
A WiFi internet Connection
None of the Google Home devices manufactured thus far has an Ethernet RJ45 port. So, your only choice is to connect them to the Google Assistant service via your internet-connected wireless network. Note that the voice assistant on your Google Home speaker device will not function without a properly configured wireless internet connection.
A Google Account
Go to https://myaccount.google.com/ to set up a new account there if you do not already have one. Typically, your account user name is your email address.
The Google App
This app is available in the Google Play (Android) store, as well as the App Store (iOS). Download and install the appropriate version on your tablet. For this demo, we’re using an iPad Air running iOS 10.2.
Google Home Speaker Setup Procedure
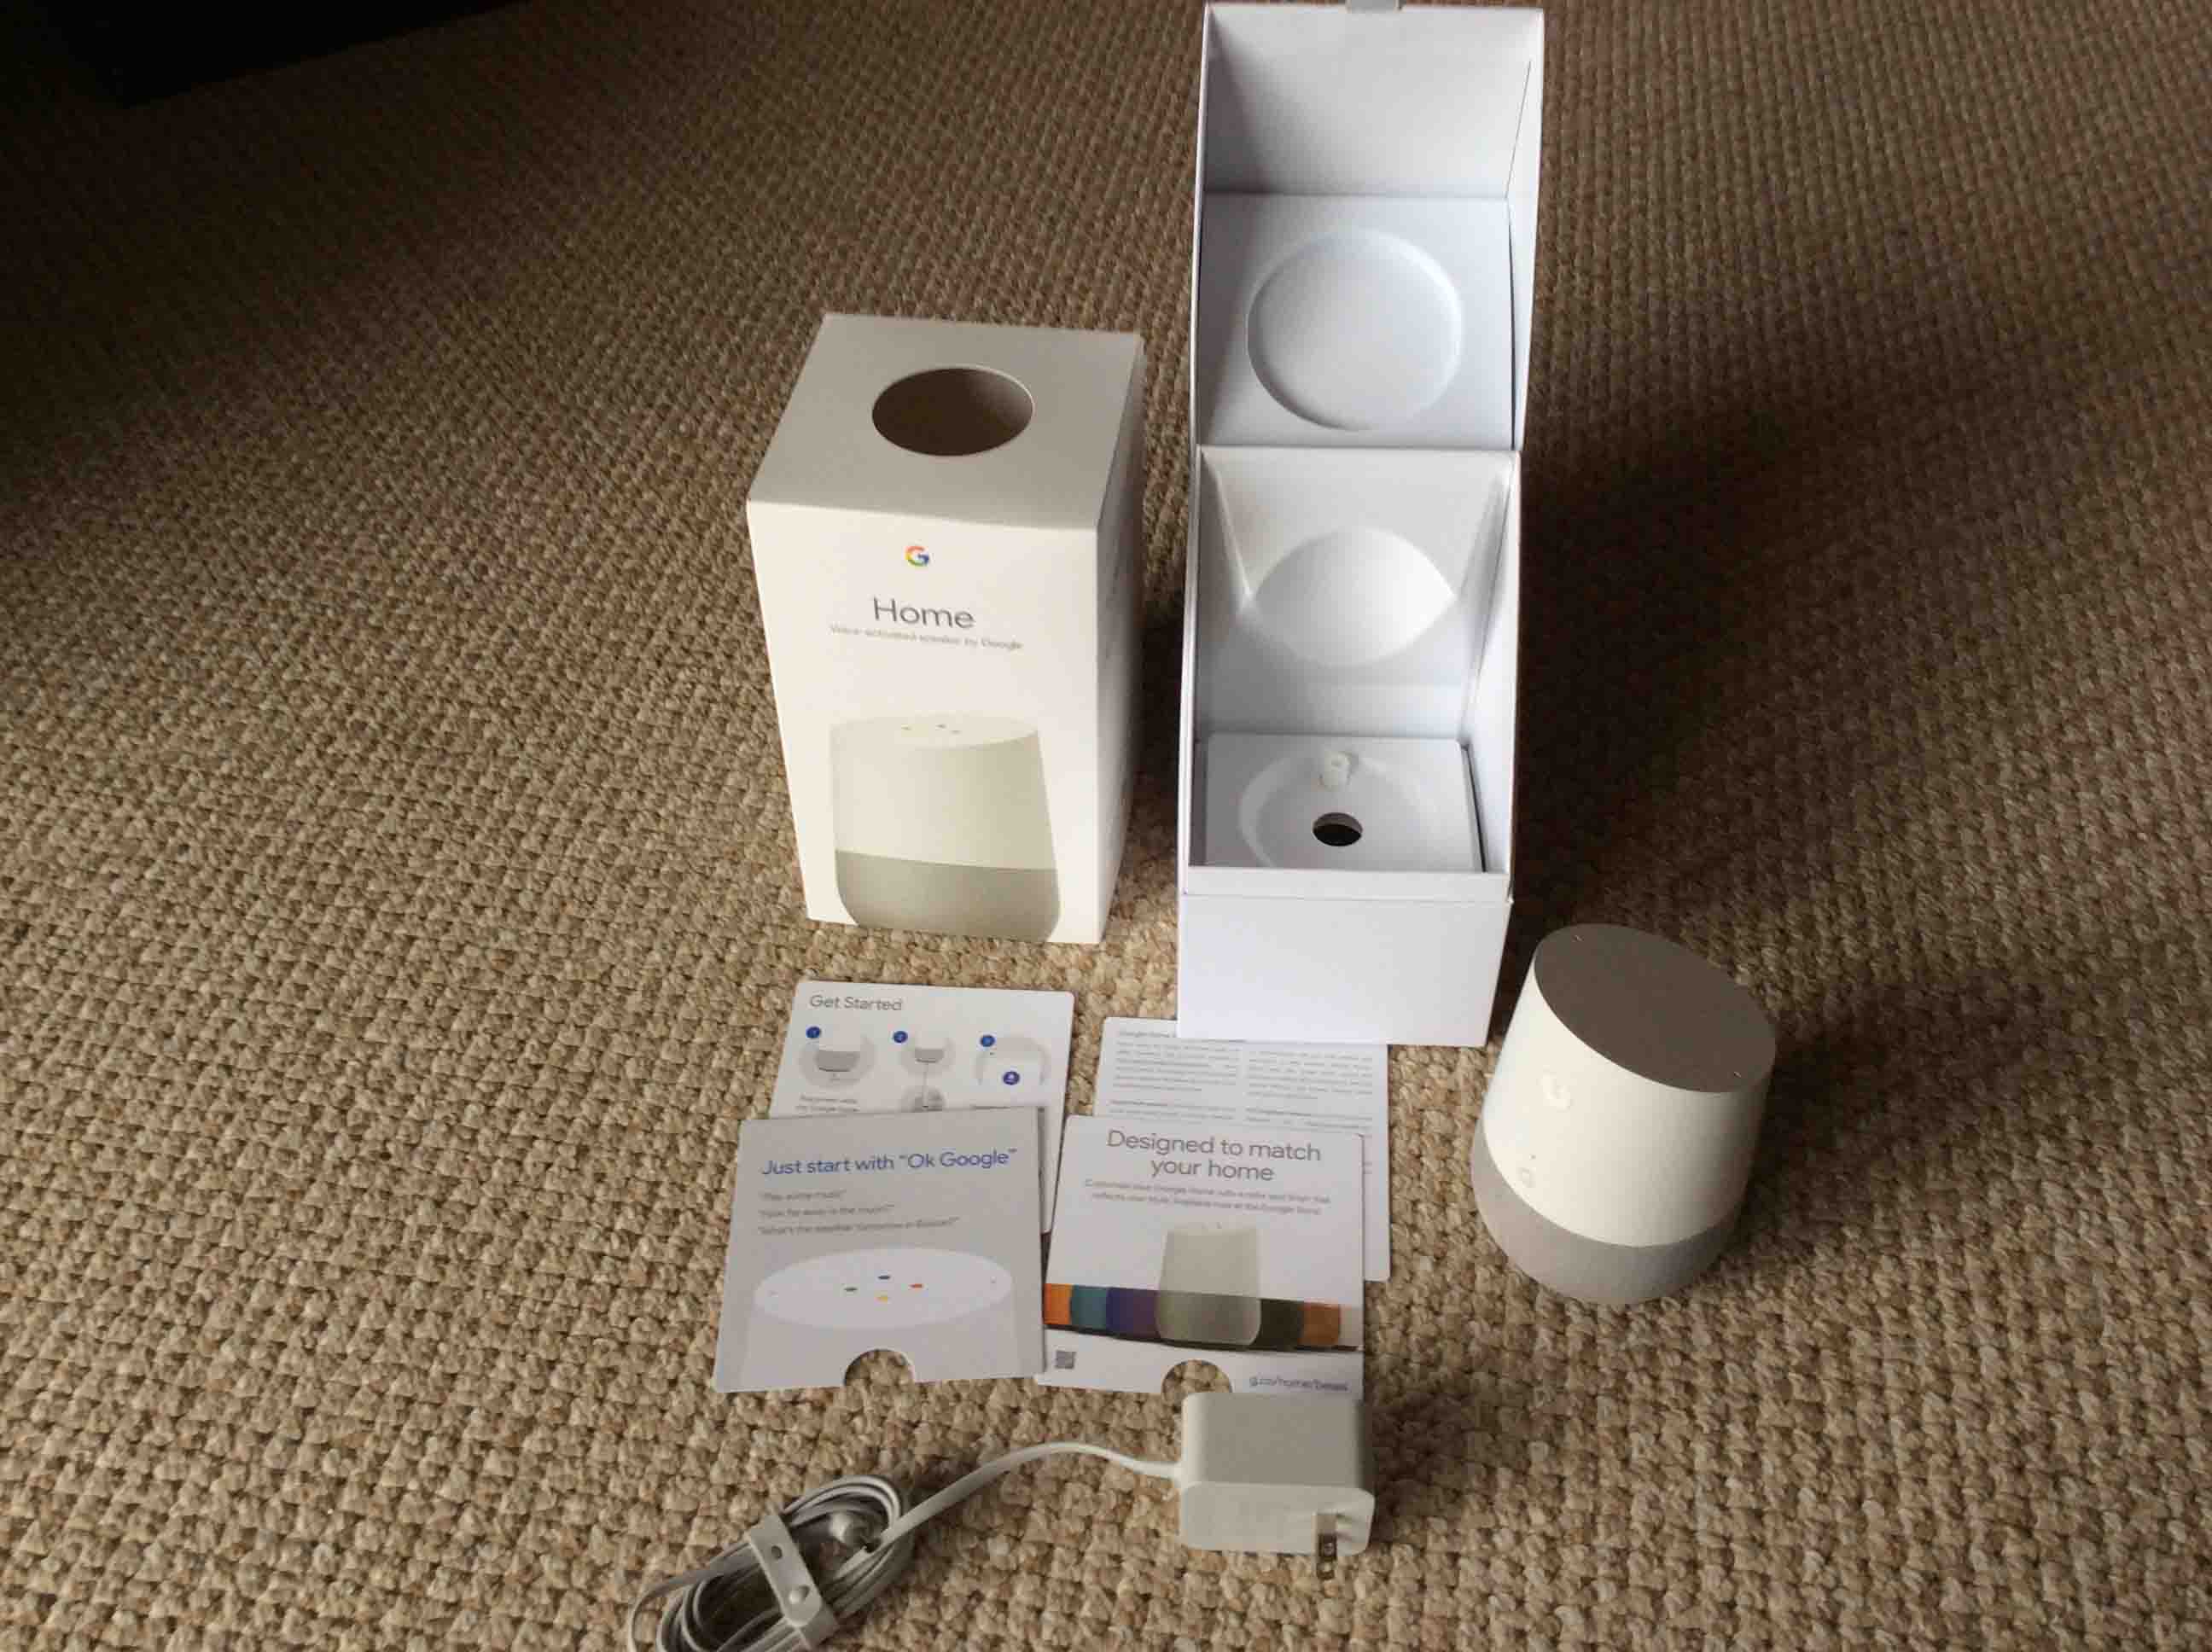
1. Unpack your Google Home Device (If New)
The unit comes in a fair-sized white box. Remove the tape securing the box bottom closed. Open the box and spread the contents out on a table. You should have the speaker and the power pack adapter. For more detailed unboxing instructions, see our post here.
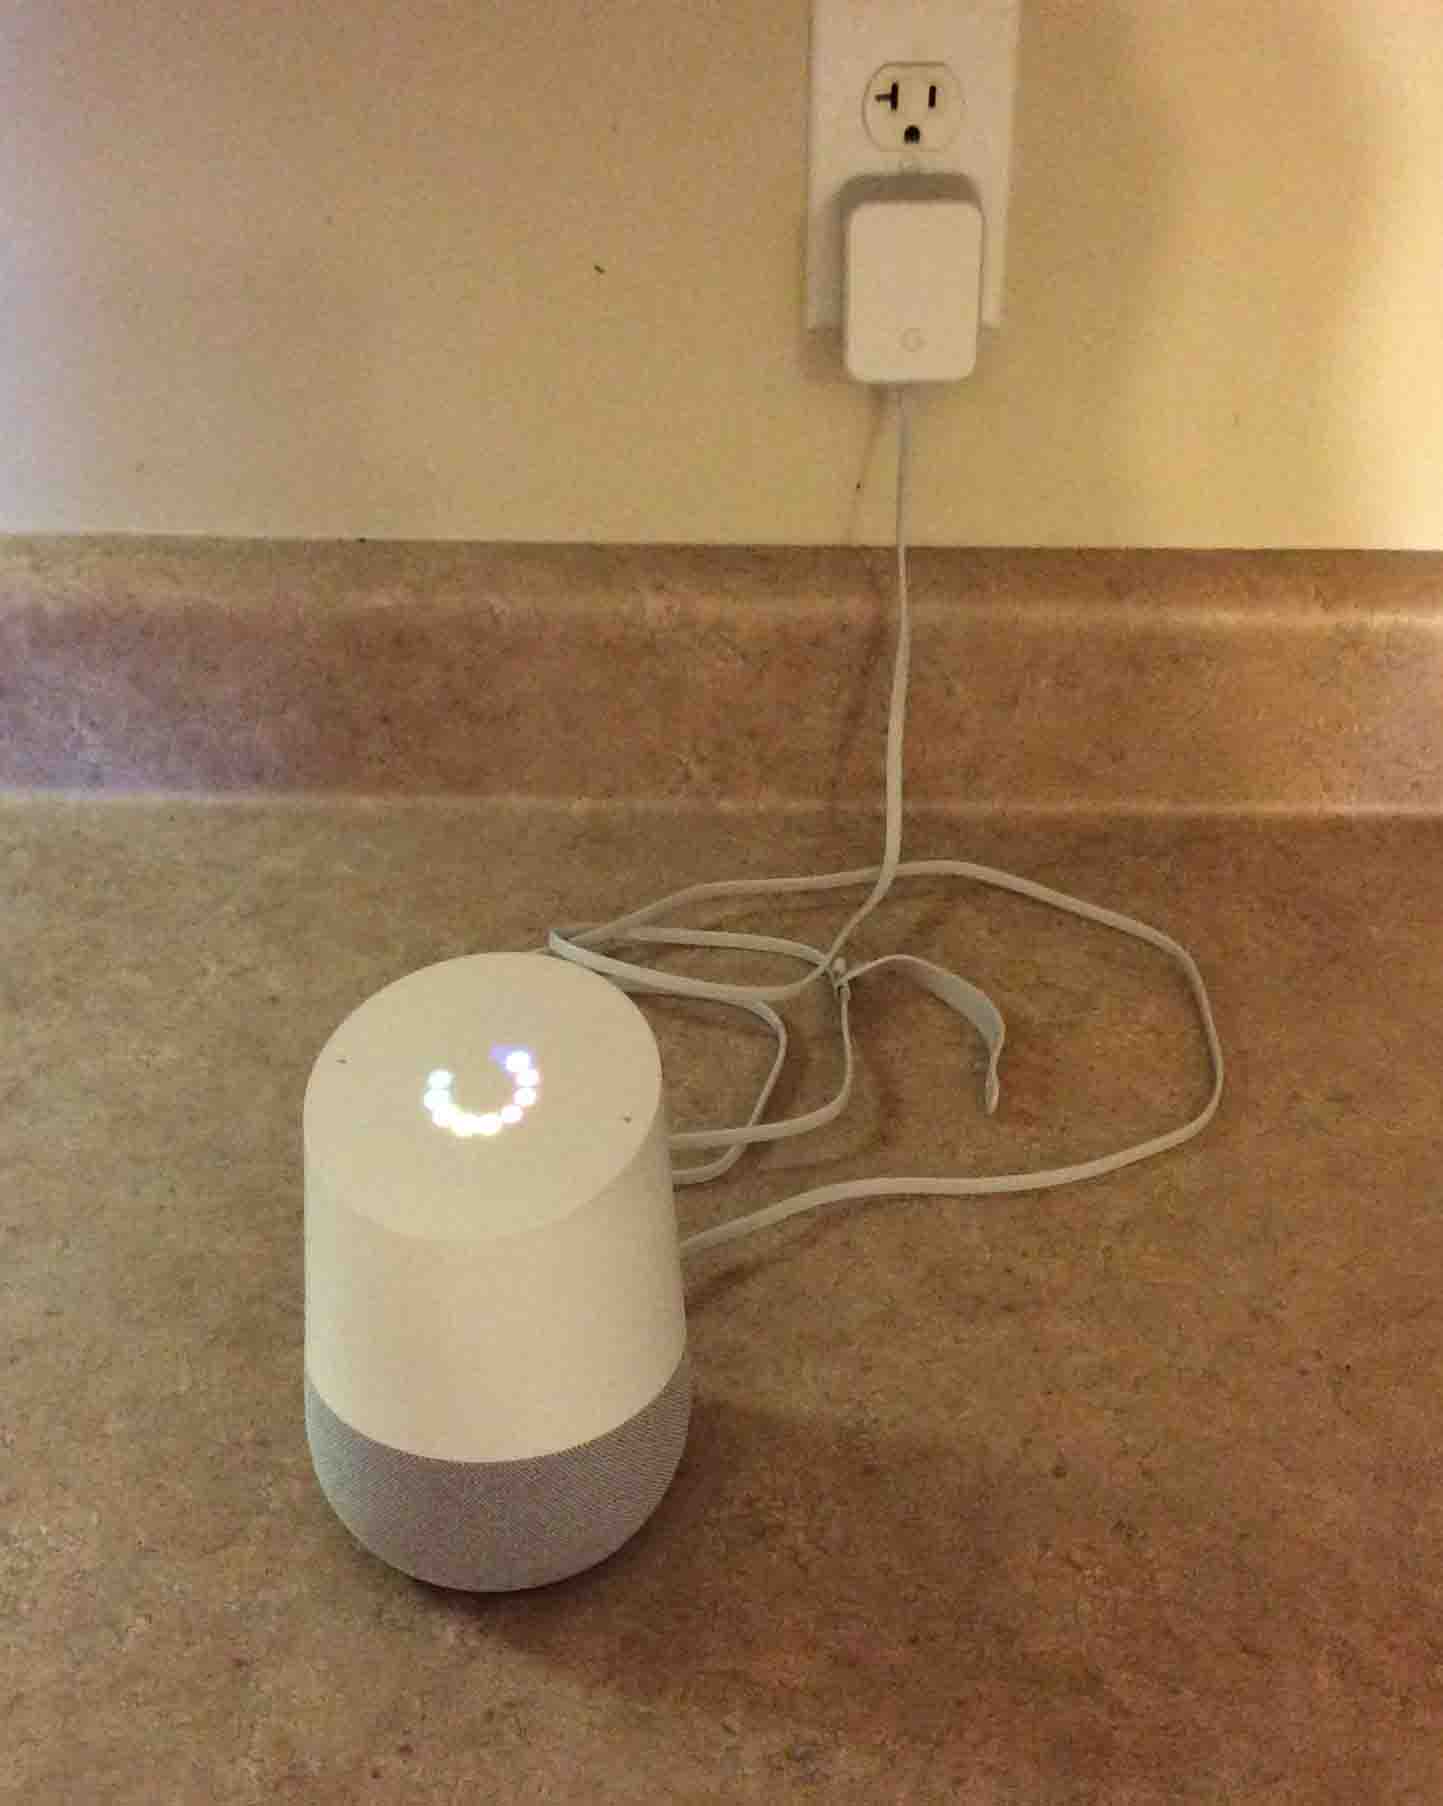
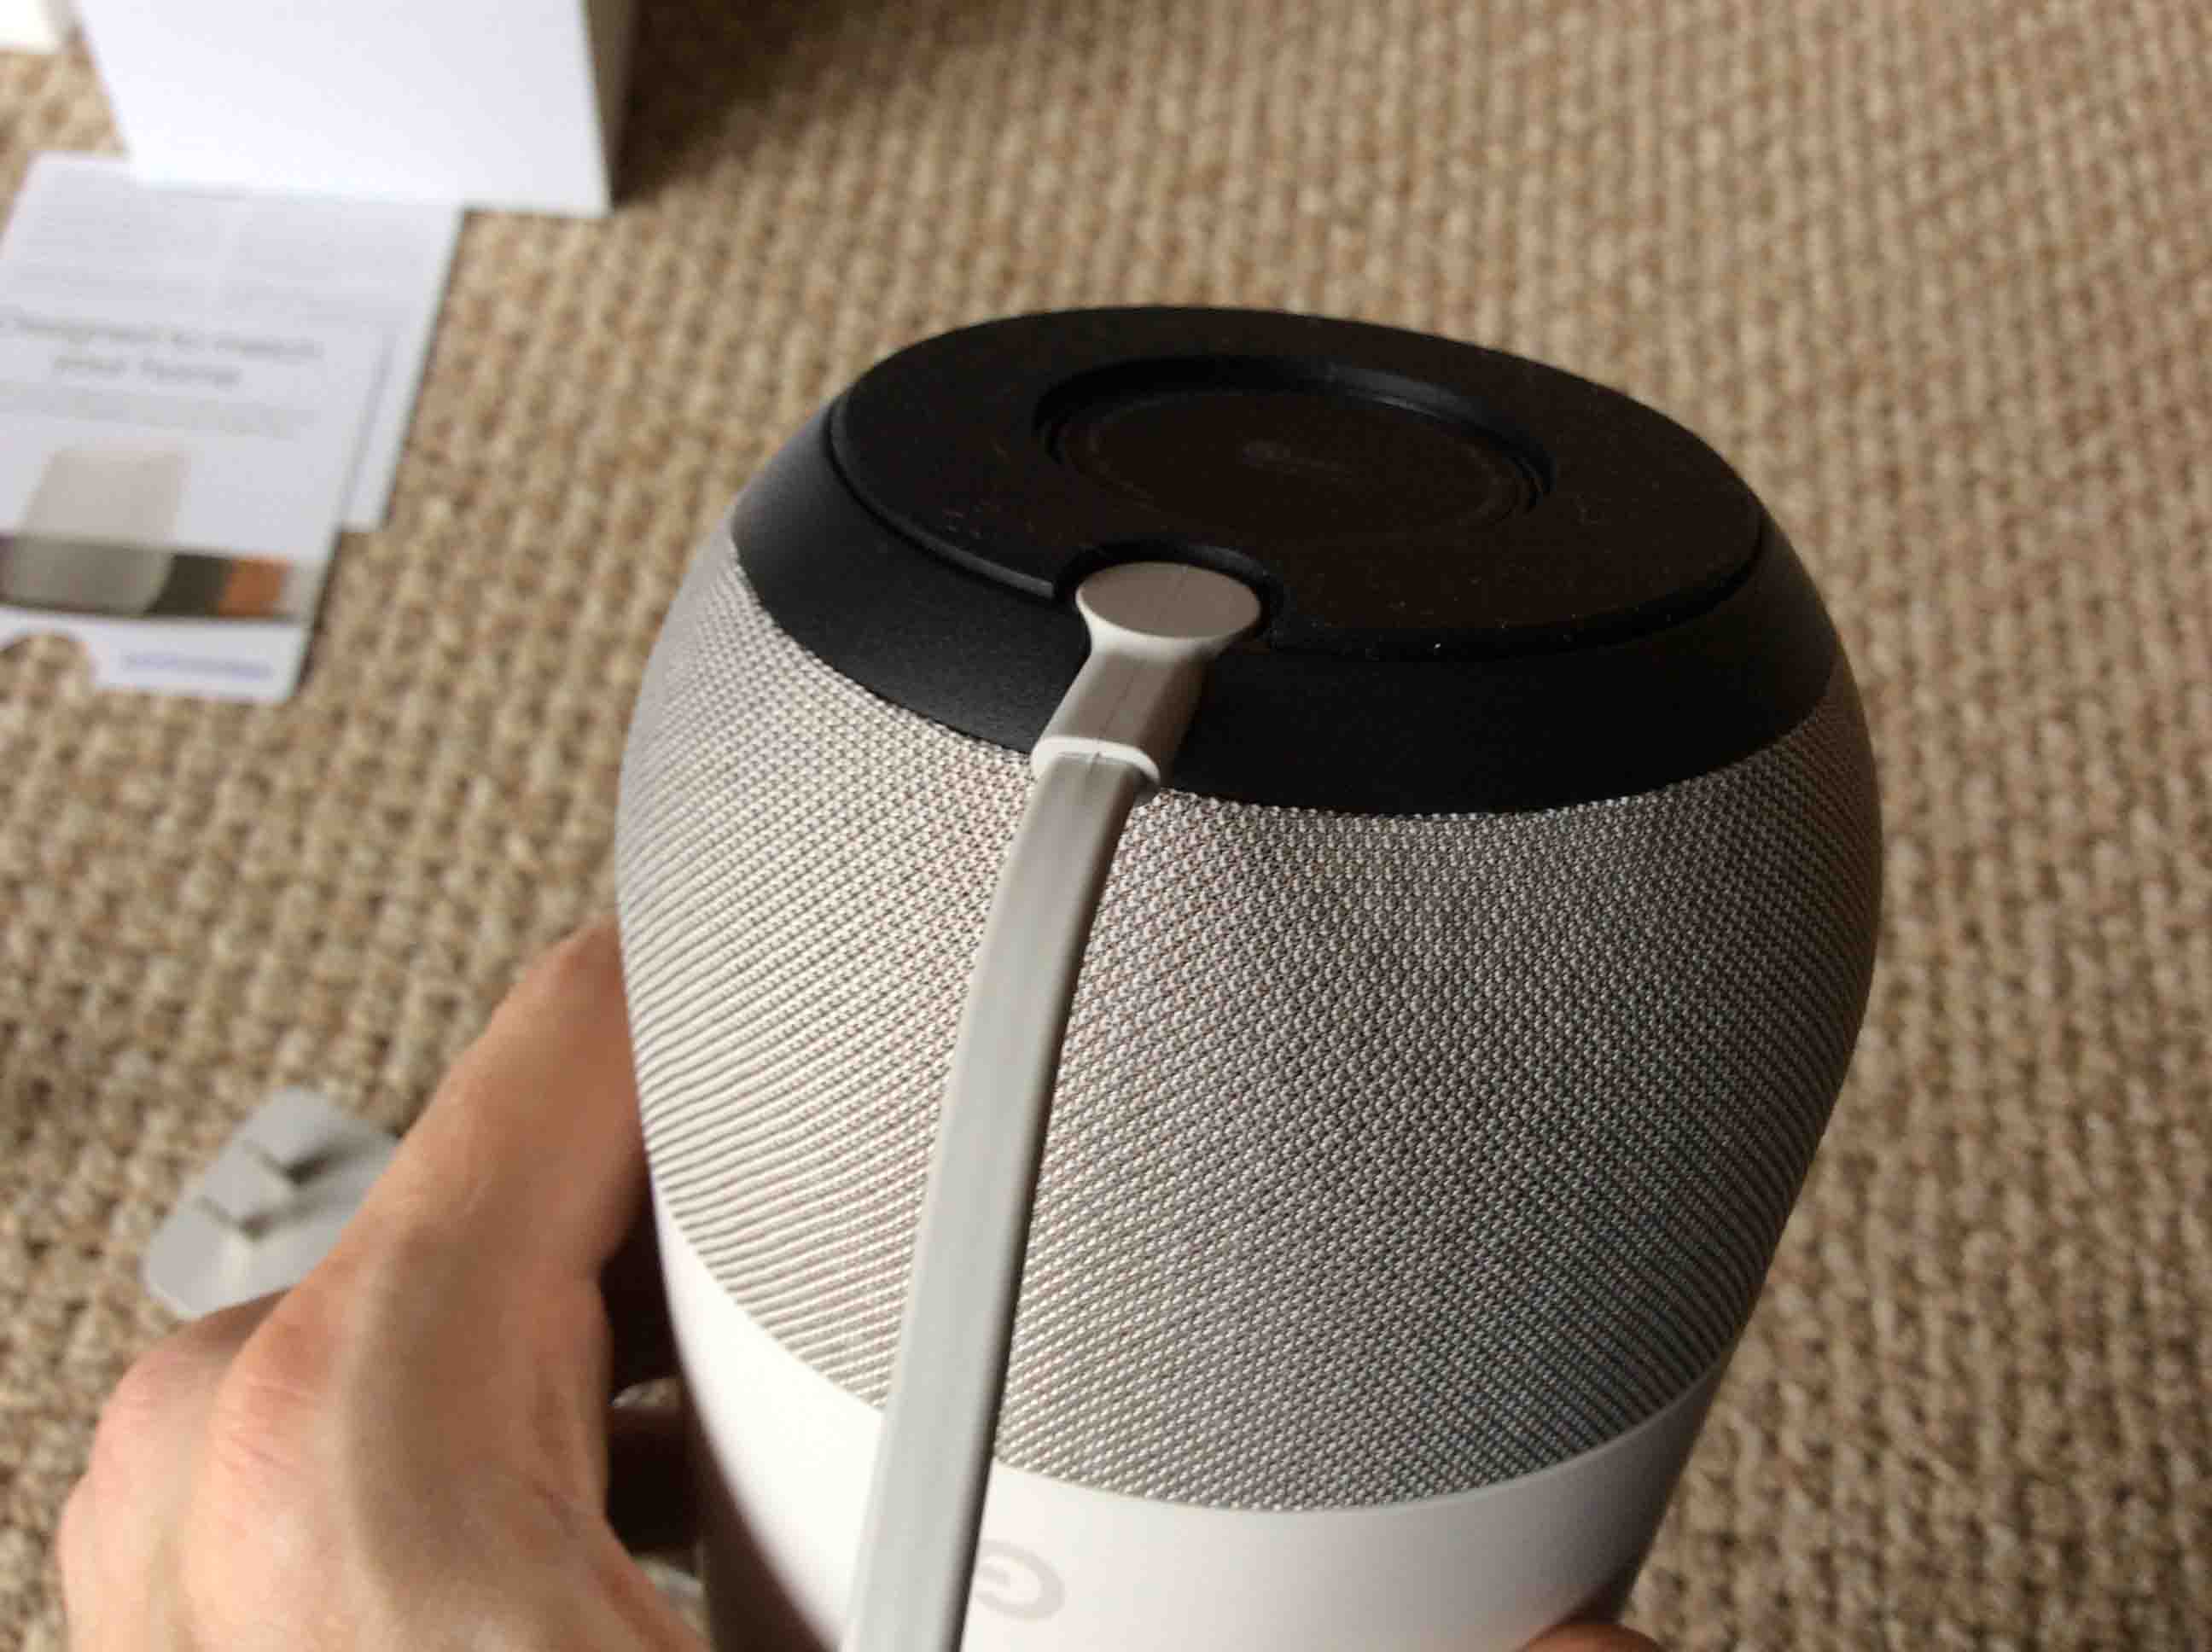
2. Connect your Google Home to AC Adapter
Connect the barrel DC connector end of the power adapter to the jack port on the underside of the speaker, as shown next.
3. Plug AC Adapter into a 120 Volt Outlet
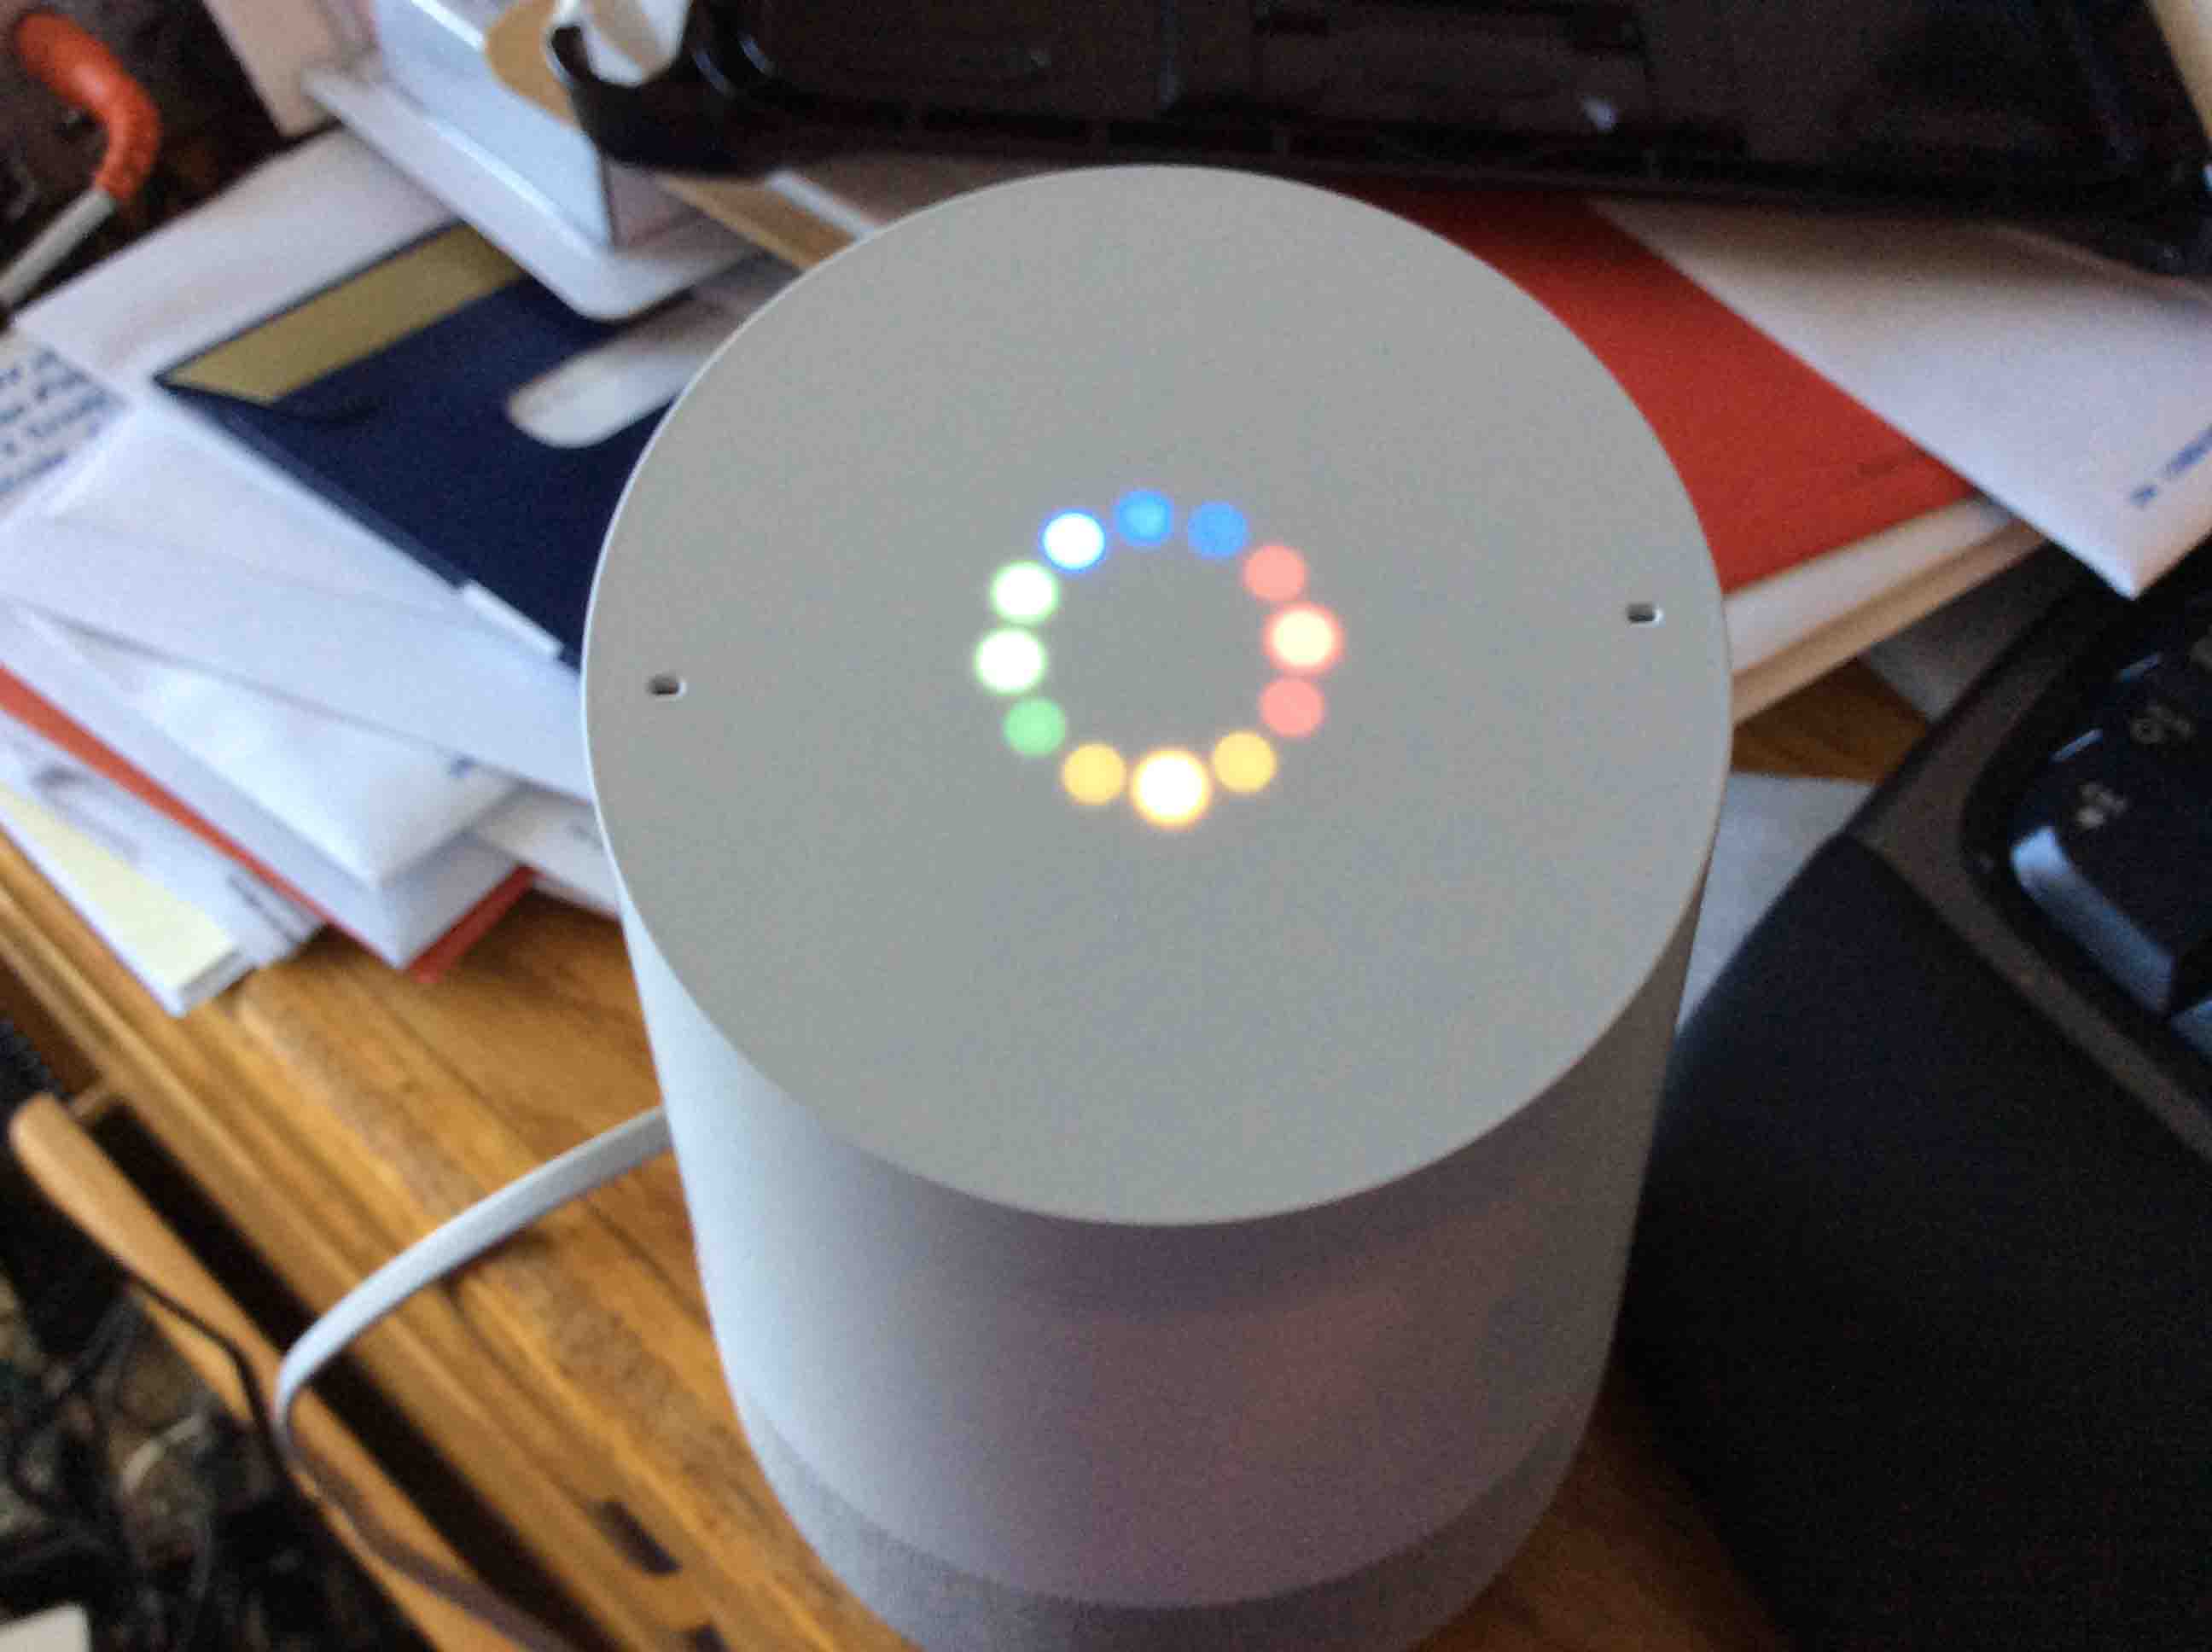
The speaker then goes through various states while booting and the light patterns spin and change colors on its top, as shown next.
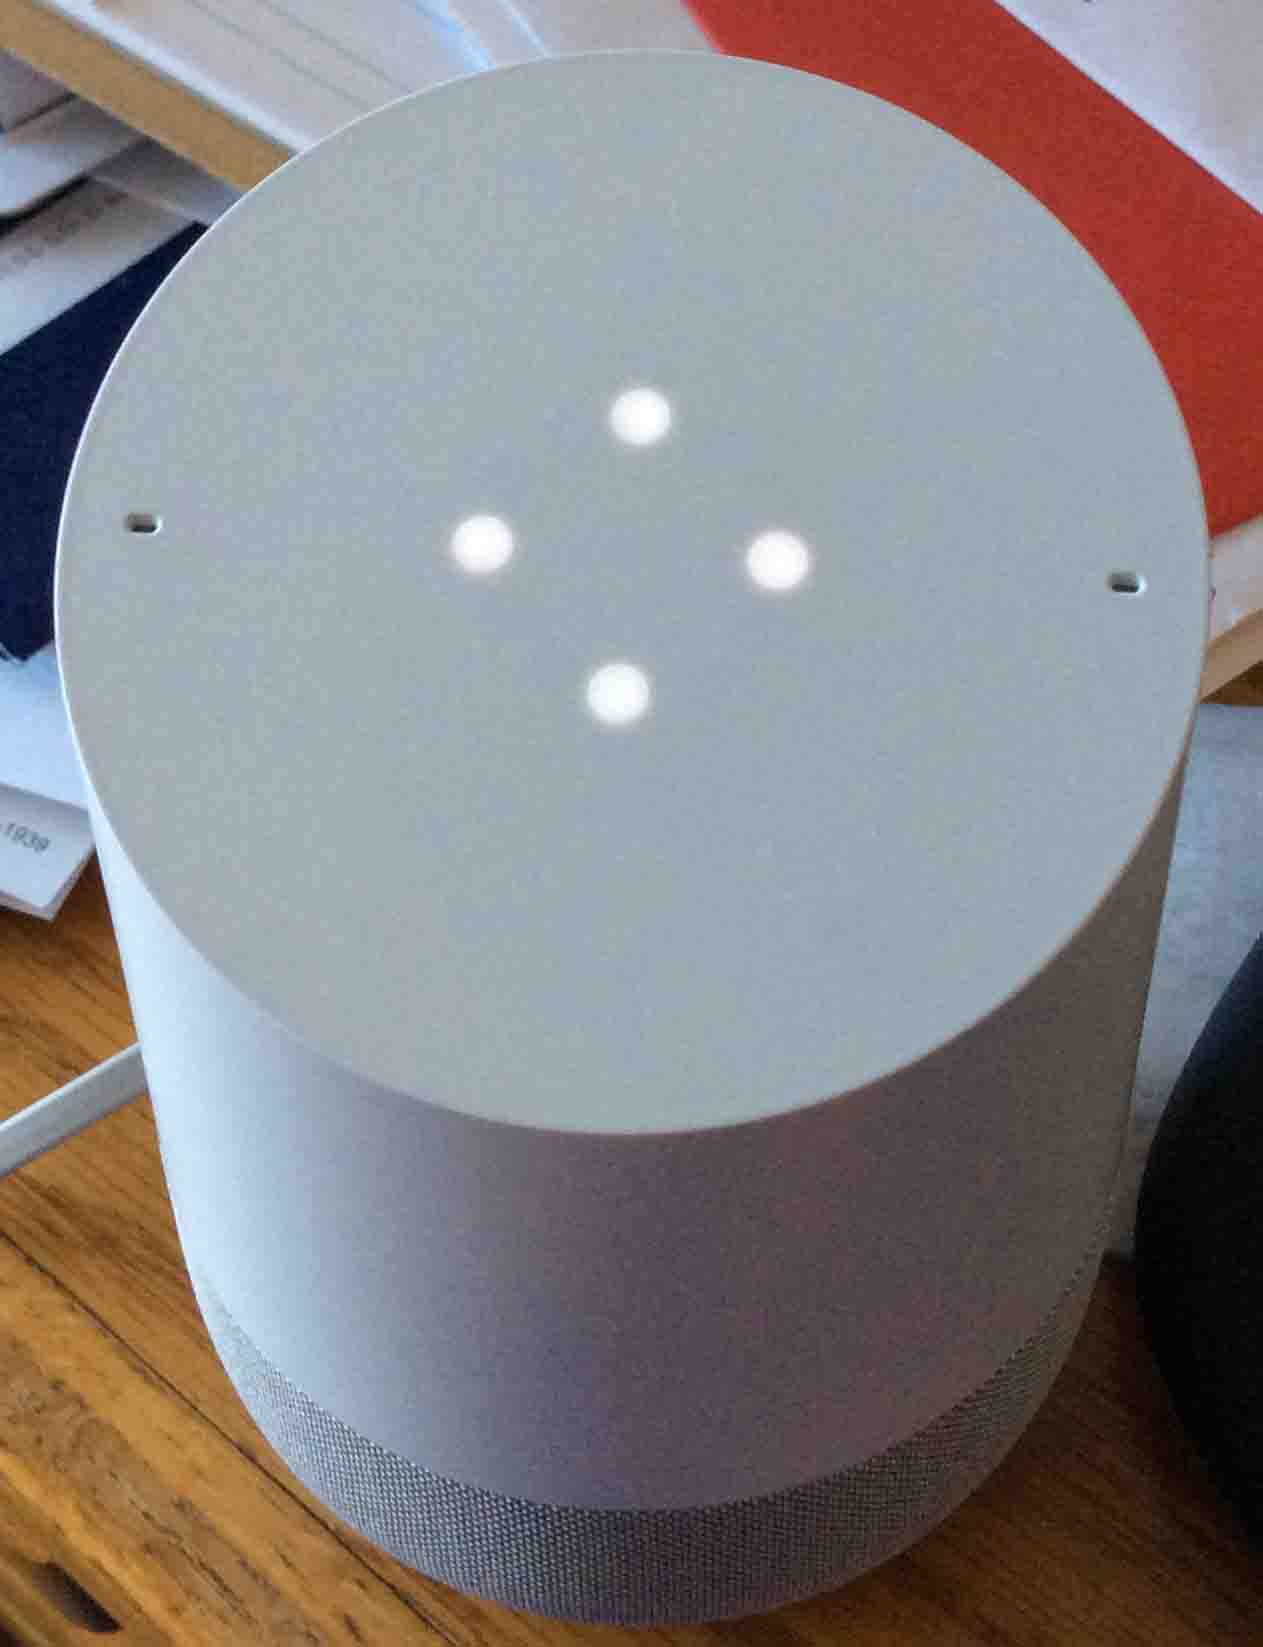
The unit takes about thirty seconds to completely boot up. Upon boot completion, the speaker should prompt you to set it up, and the light pattern on the top should look as follows.
If it does not, perform a hard reset, as described here. However, if you bought your speaker brand new, it should already be in factory default (ready for setup) condition.
4. Run the Google Home App to Continue with Google Home Setup
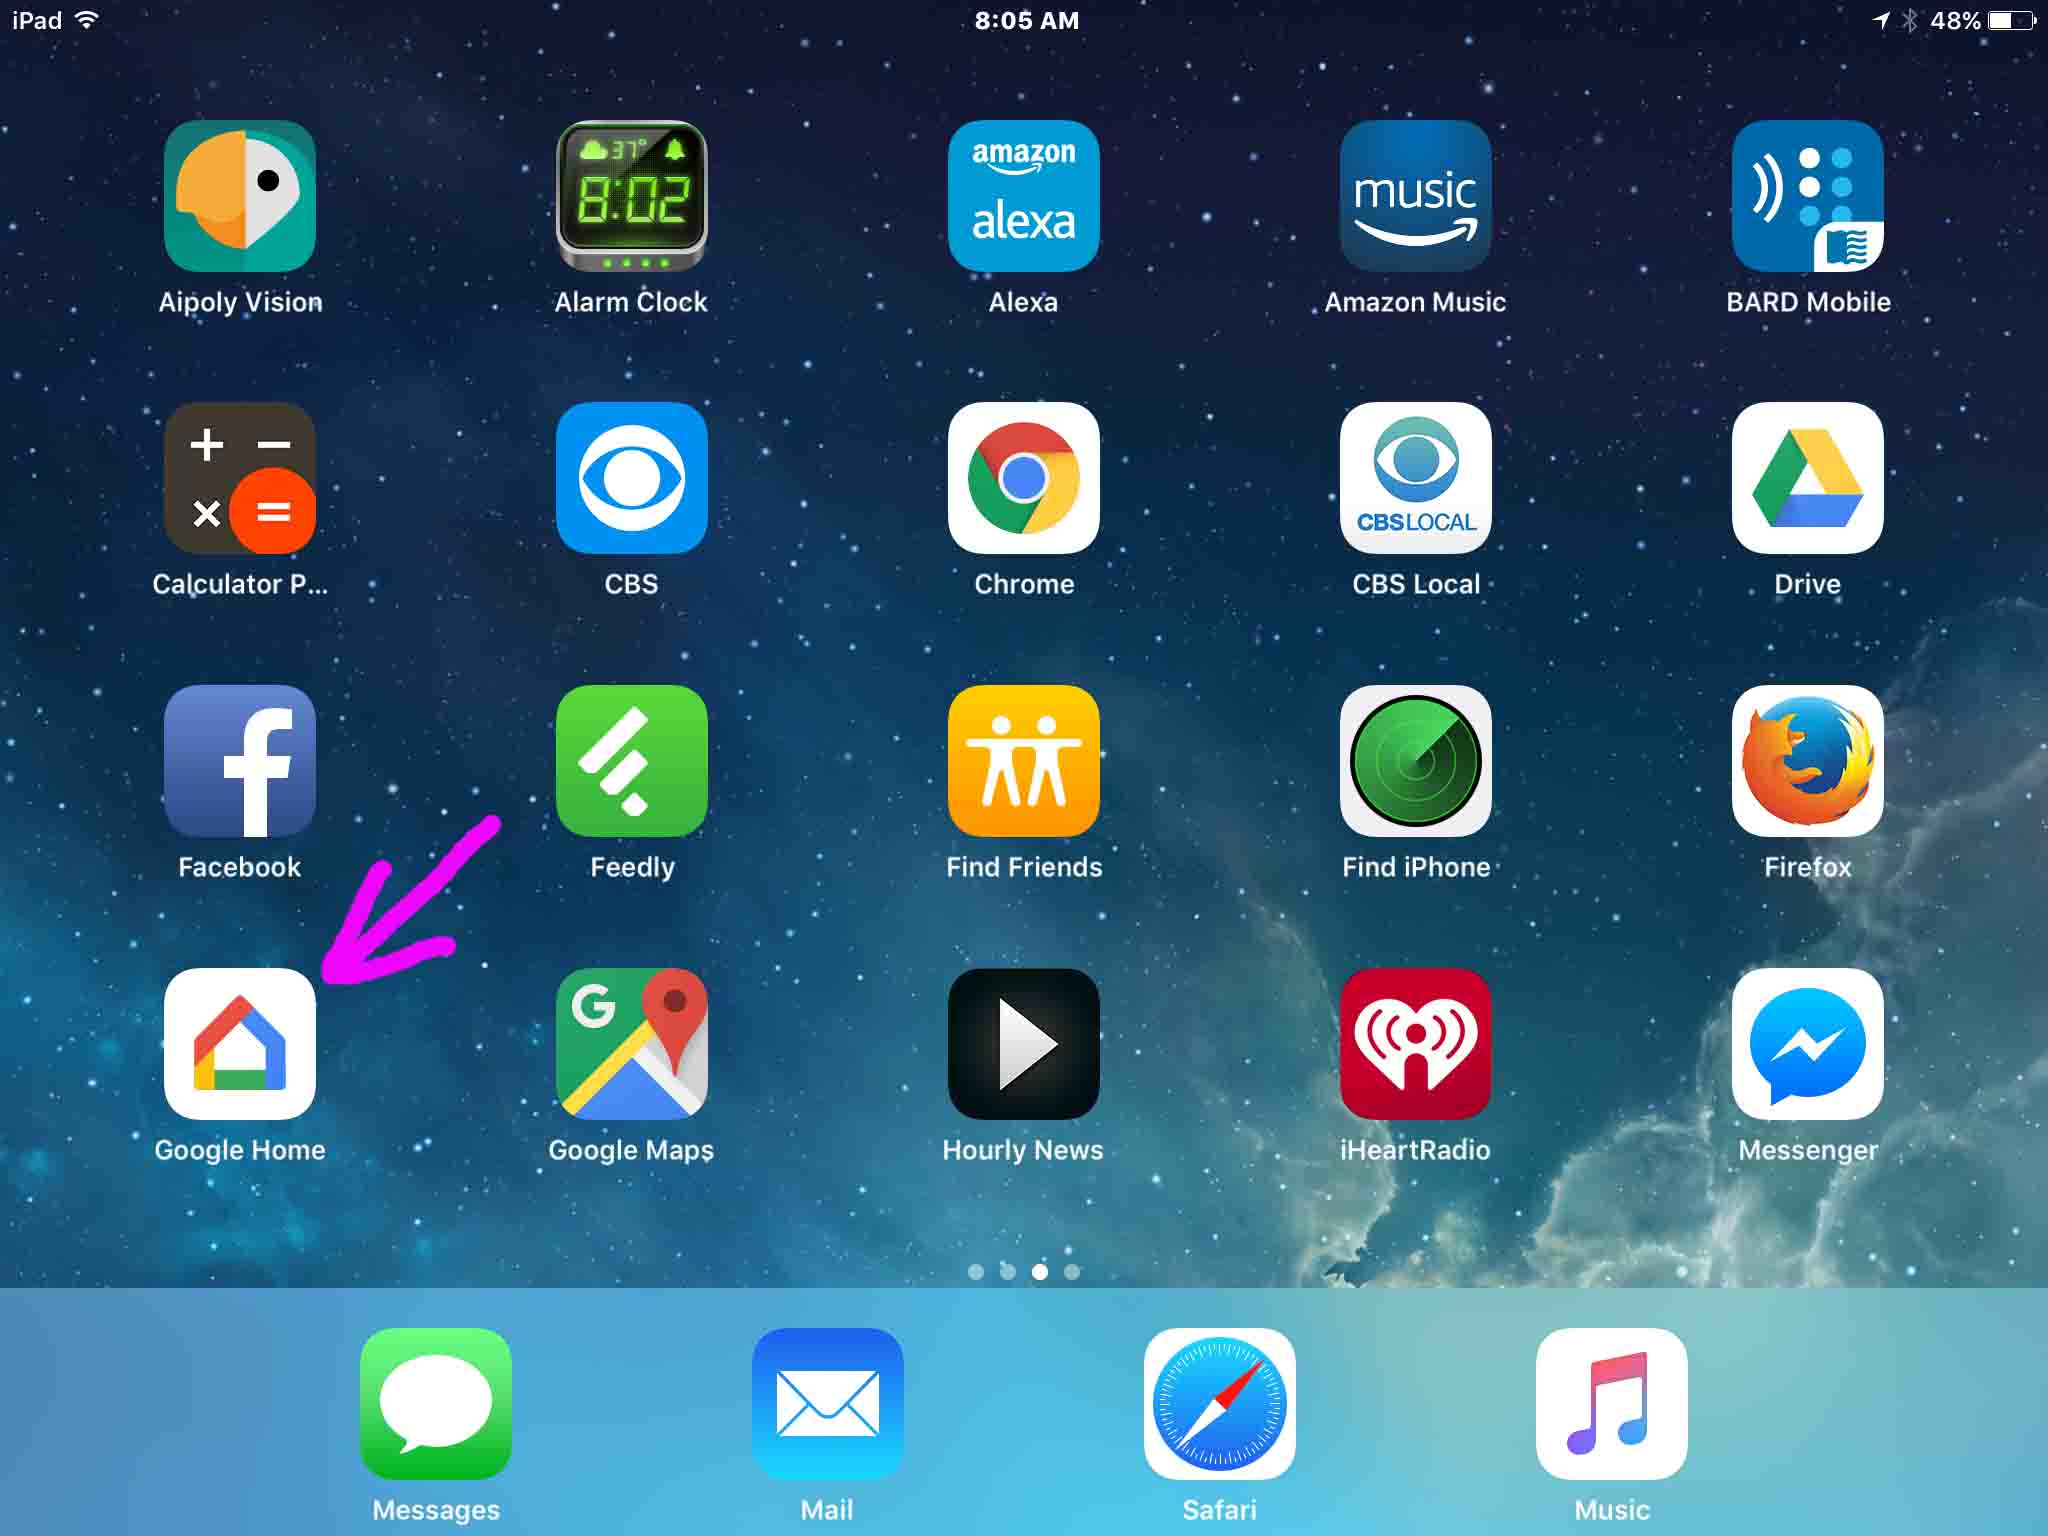
Move your tablet within a few feet of the speaker and bring up the Google Home app. The is located somewhere on the home screen pages, depending on where you might have moved it. In our case, it’s on home page three on our iPad Air.
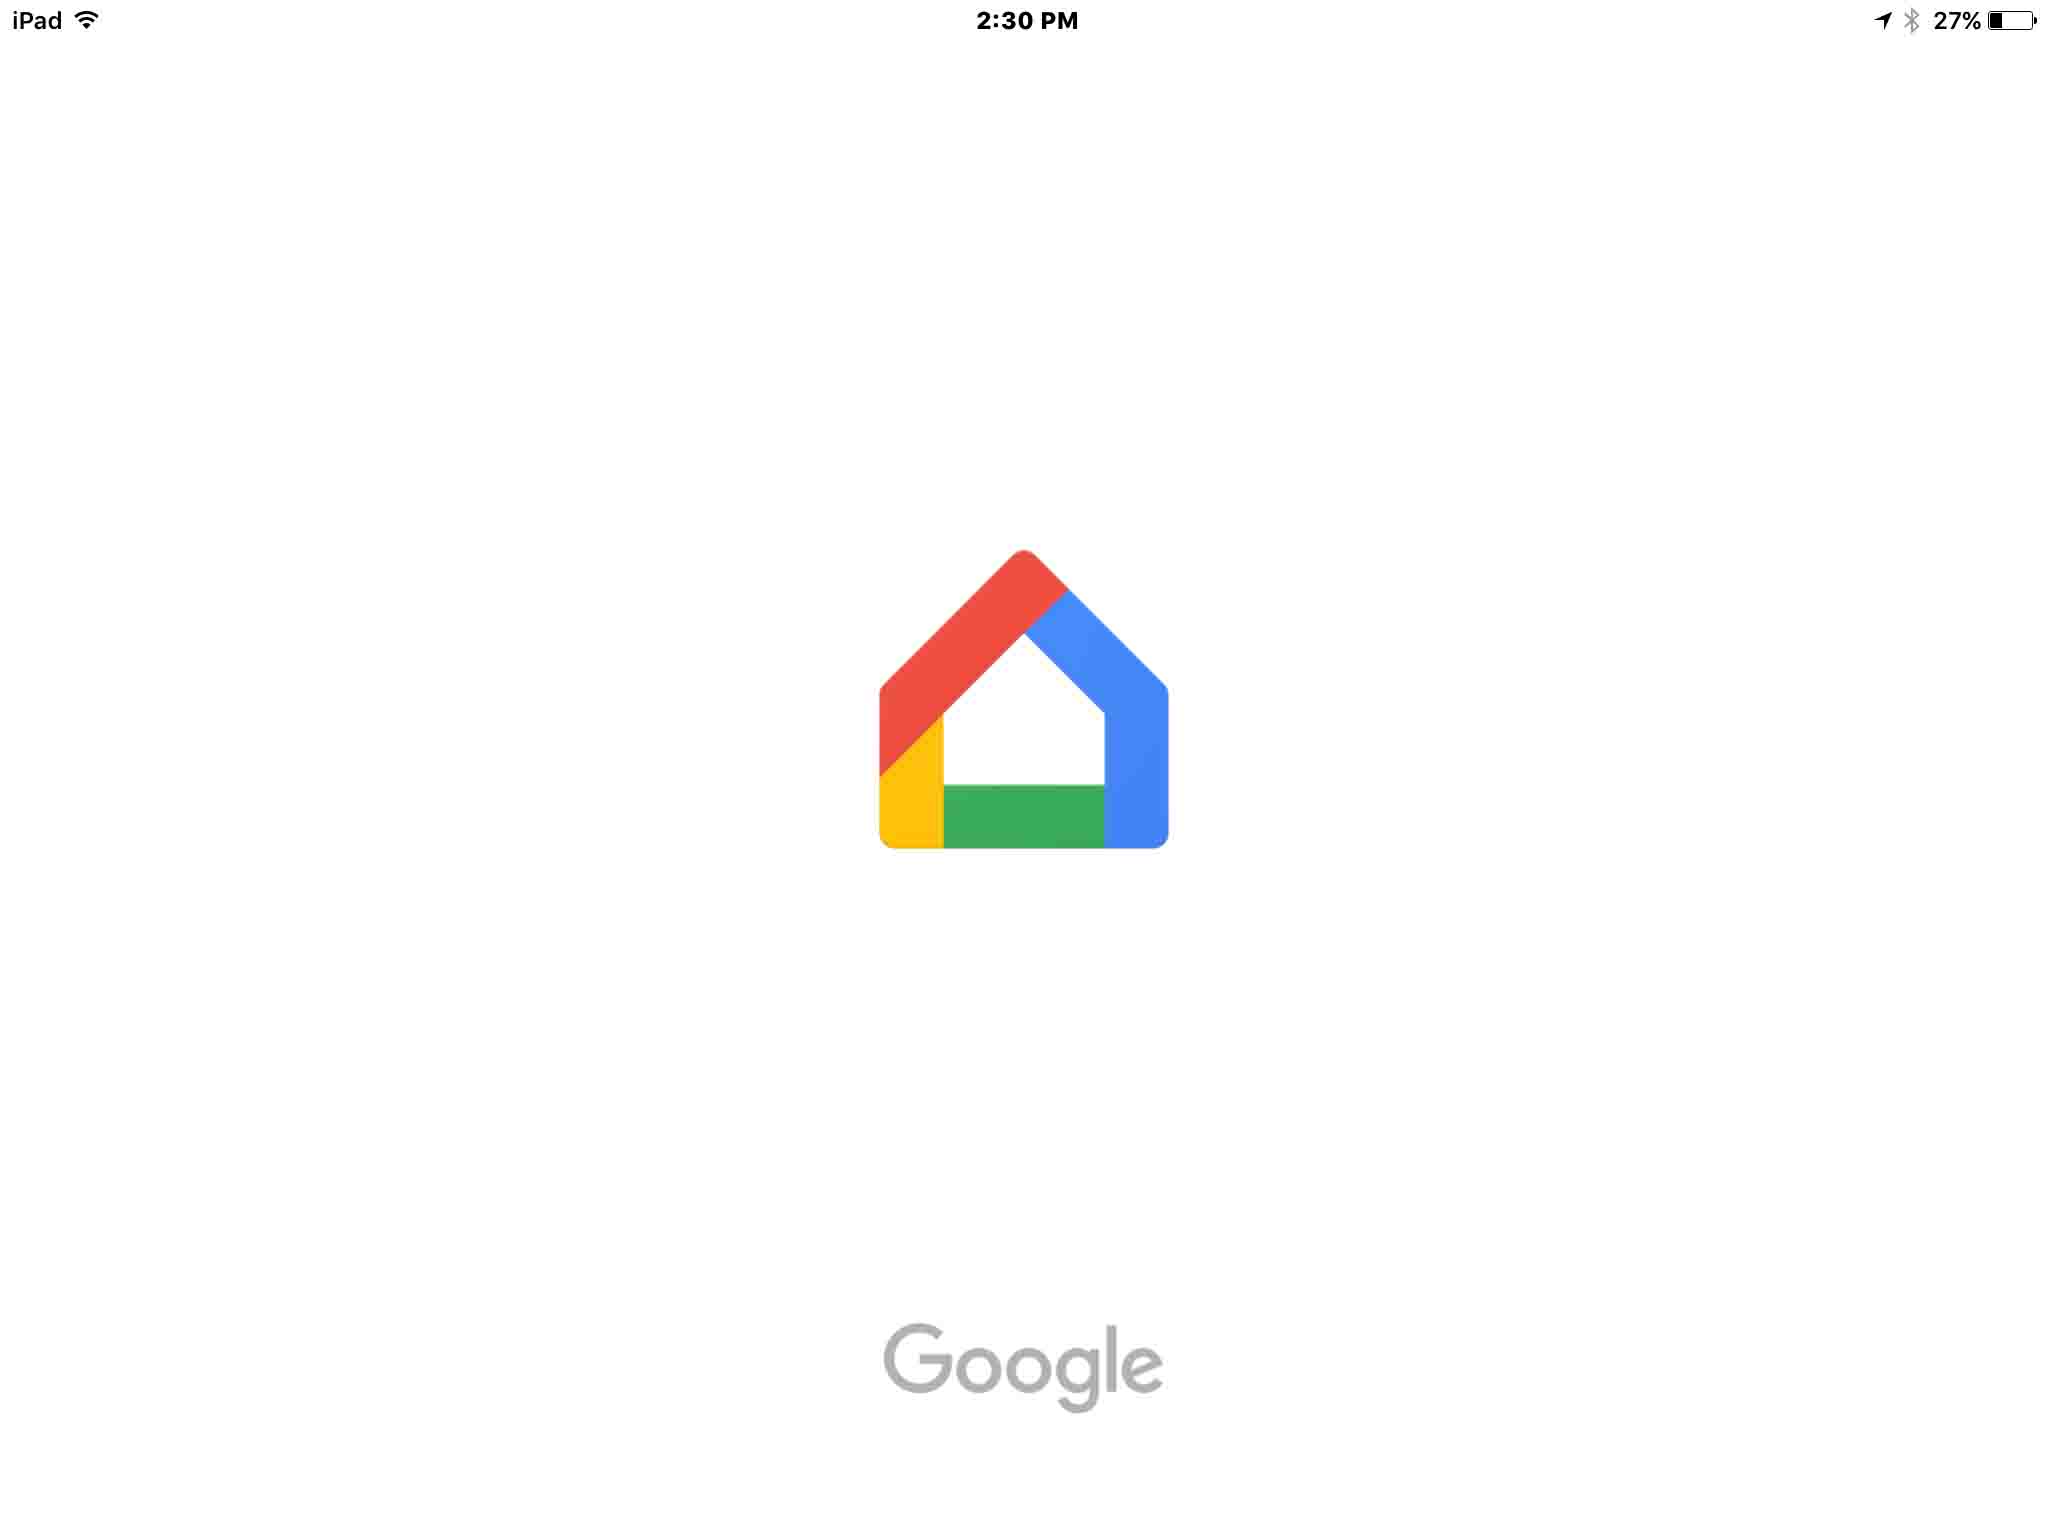
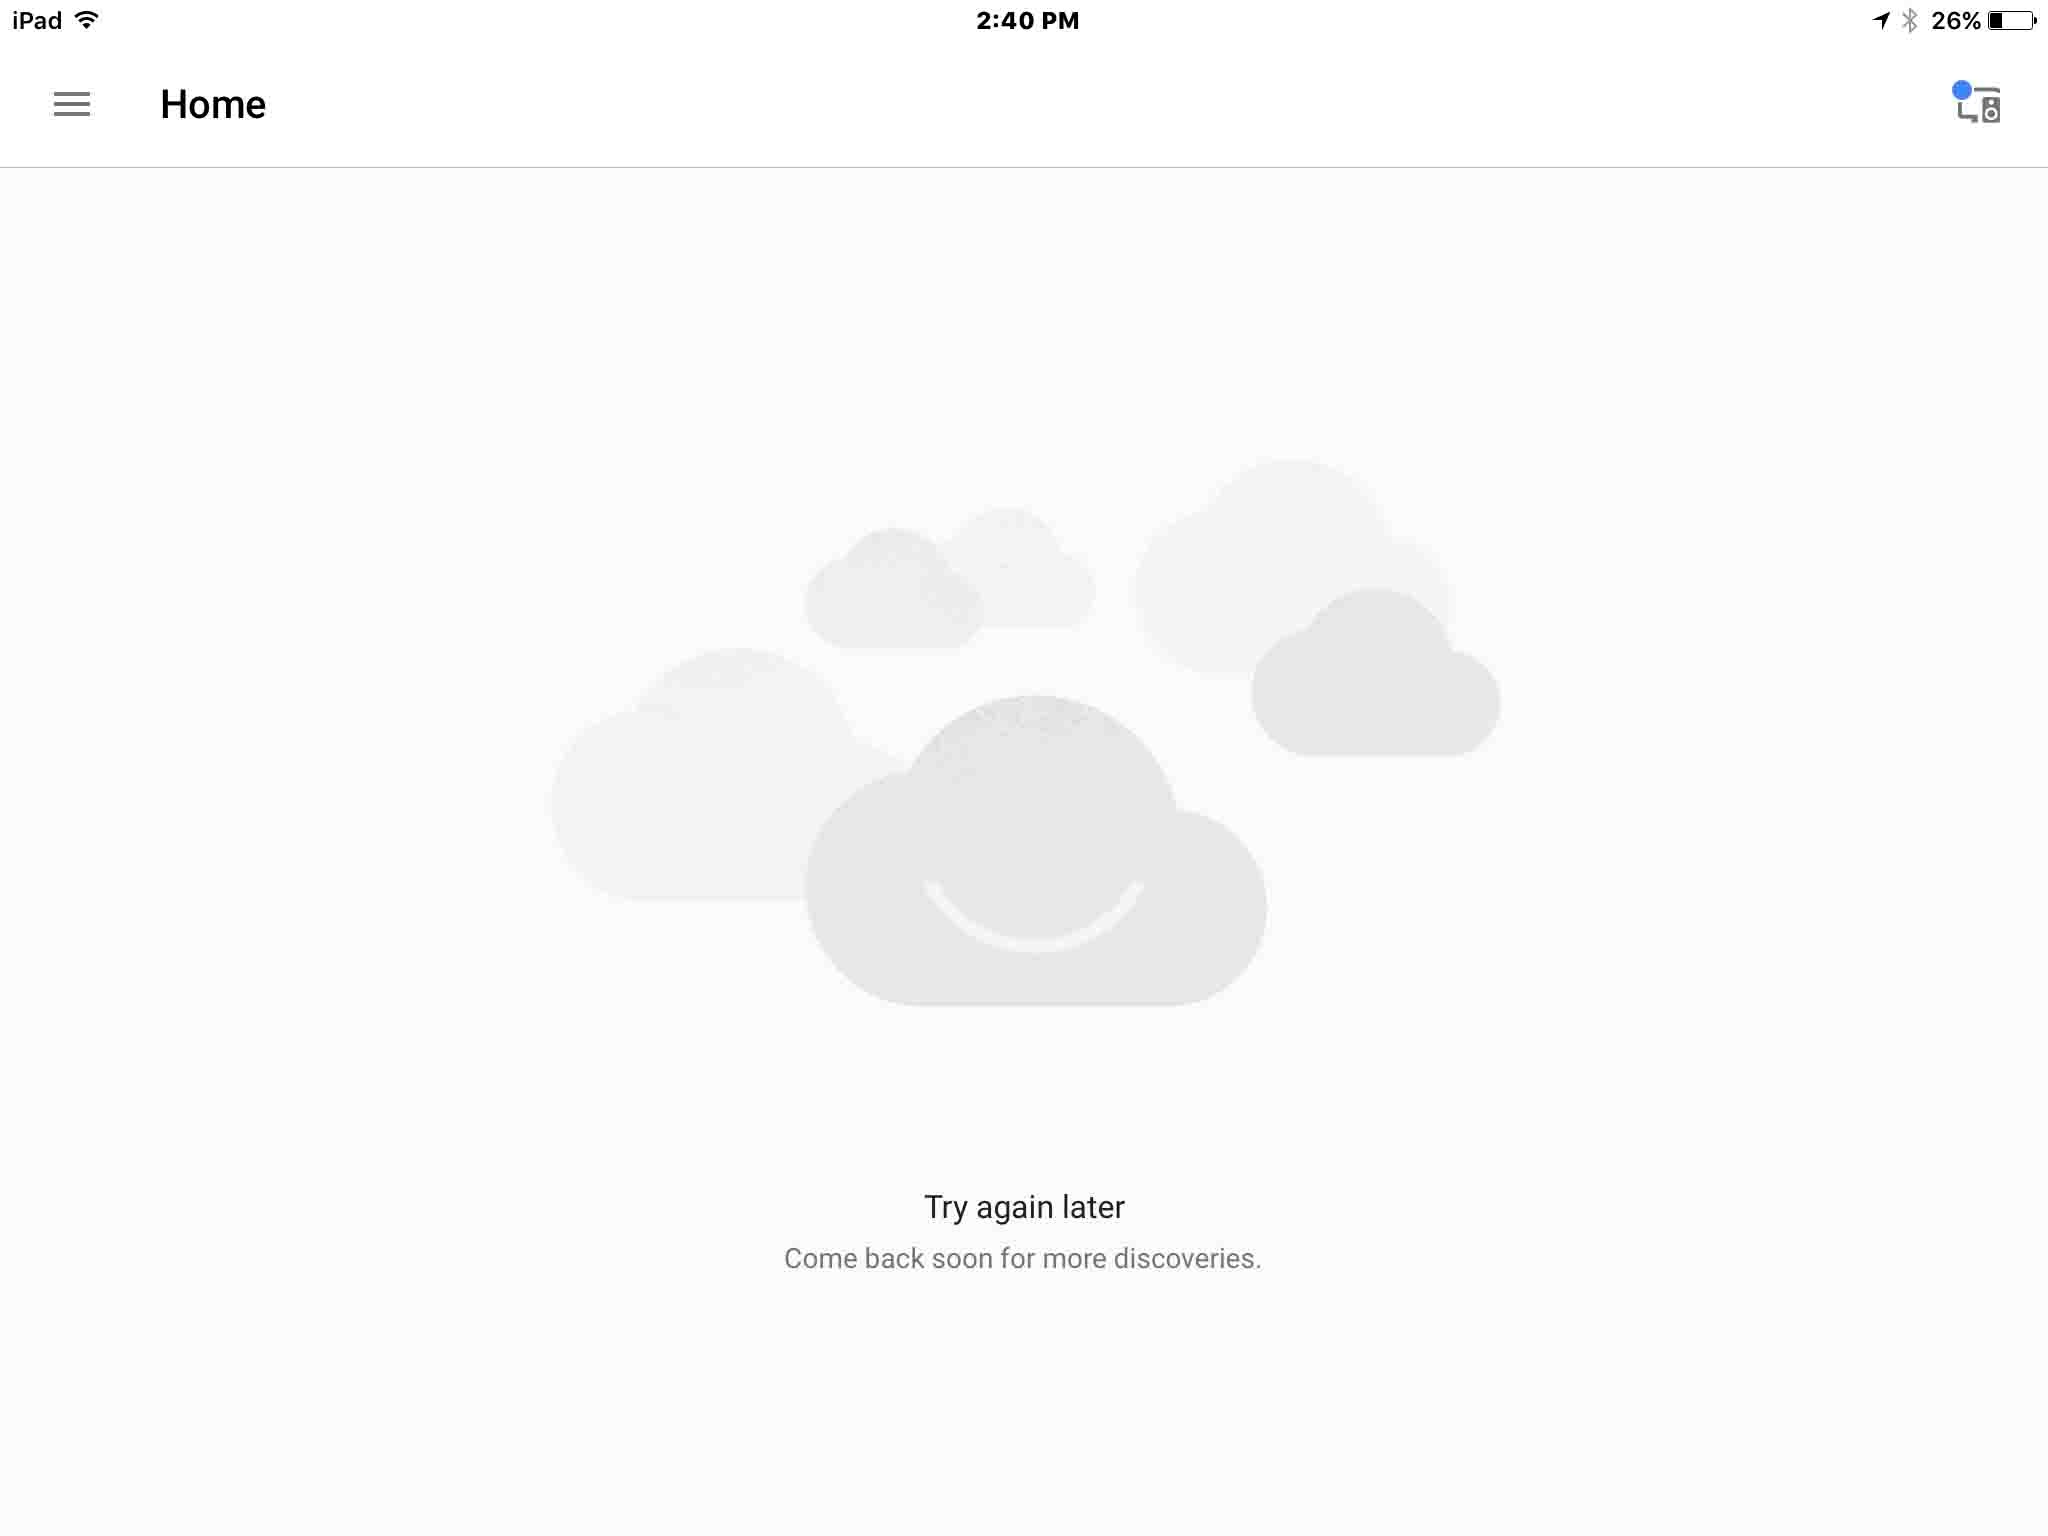
We got the following screen at Google Home App startup.
After a short period, you’re taken to the home screen. Ours displayed as follows.
5 . Bring up the ‘hamburger’ Menu on the App’s Home Screen
by tapping the three lines at the top left corner of the home screen. The app’s main menu then displays, as follows.
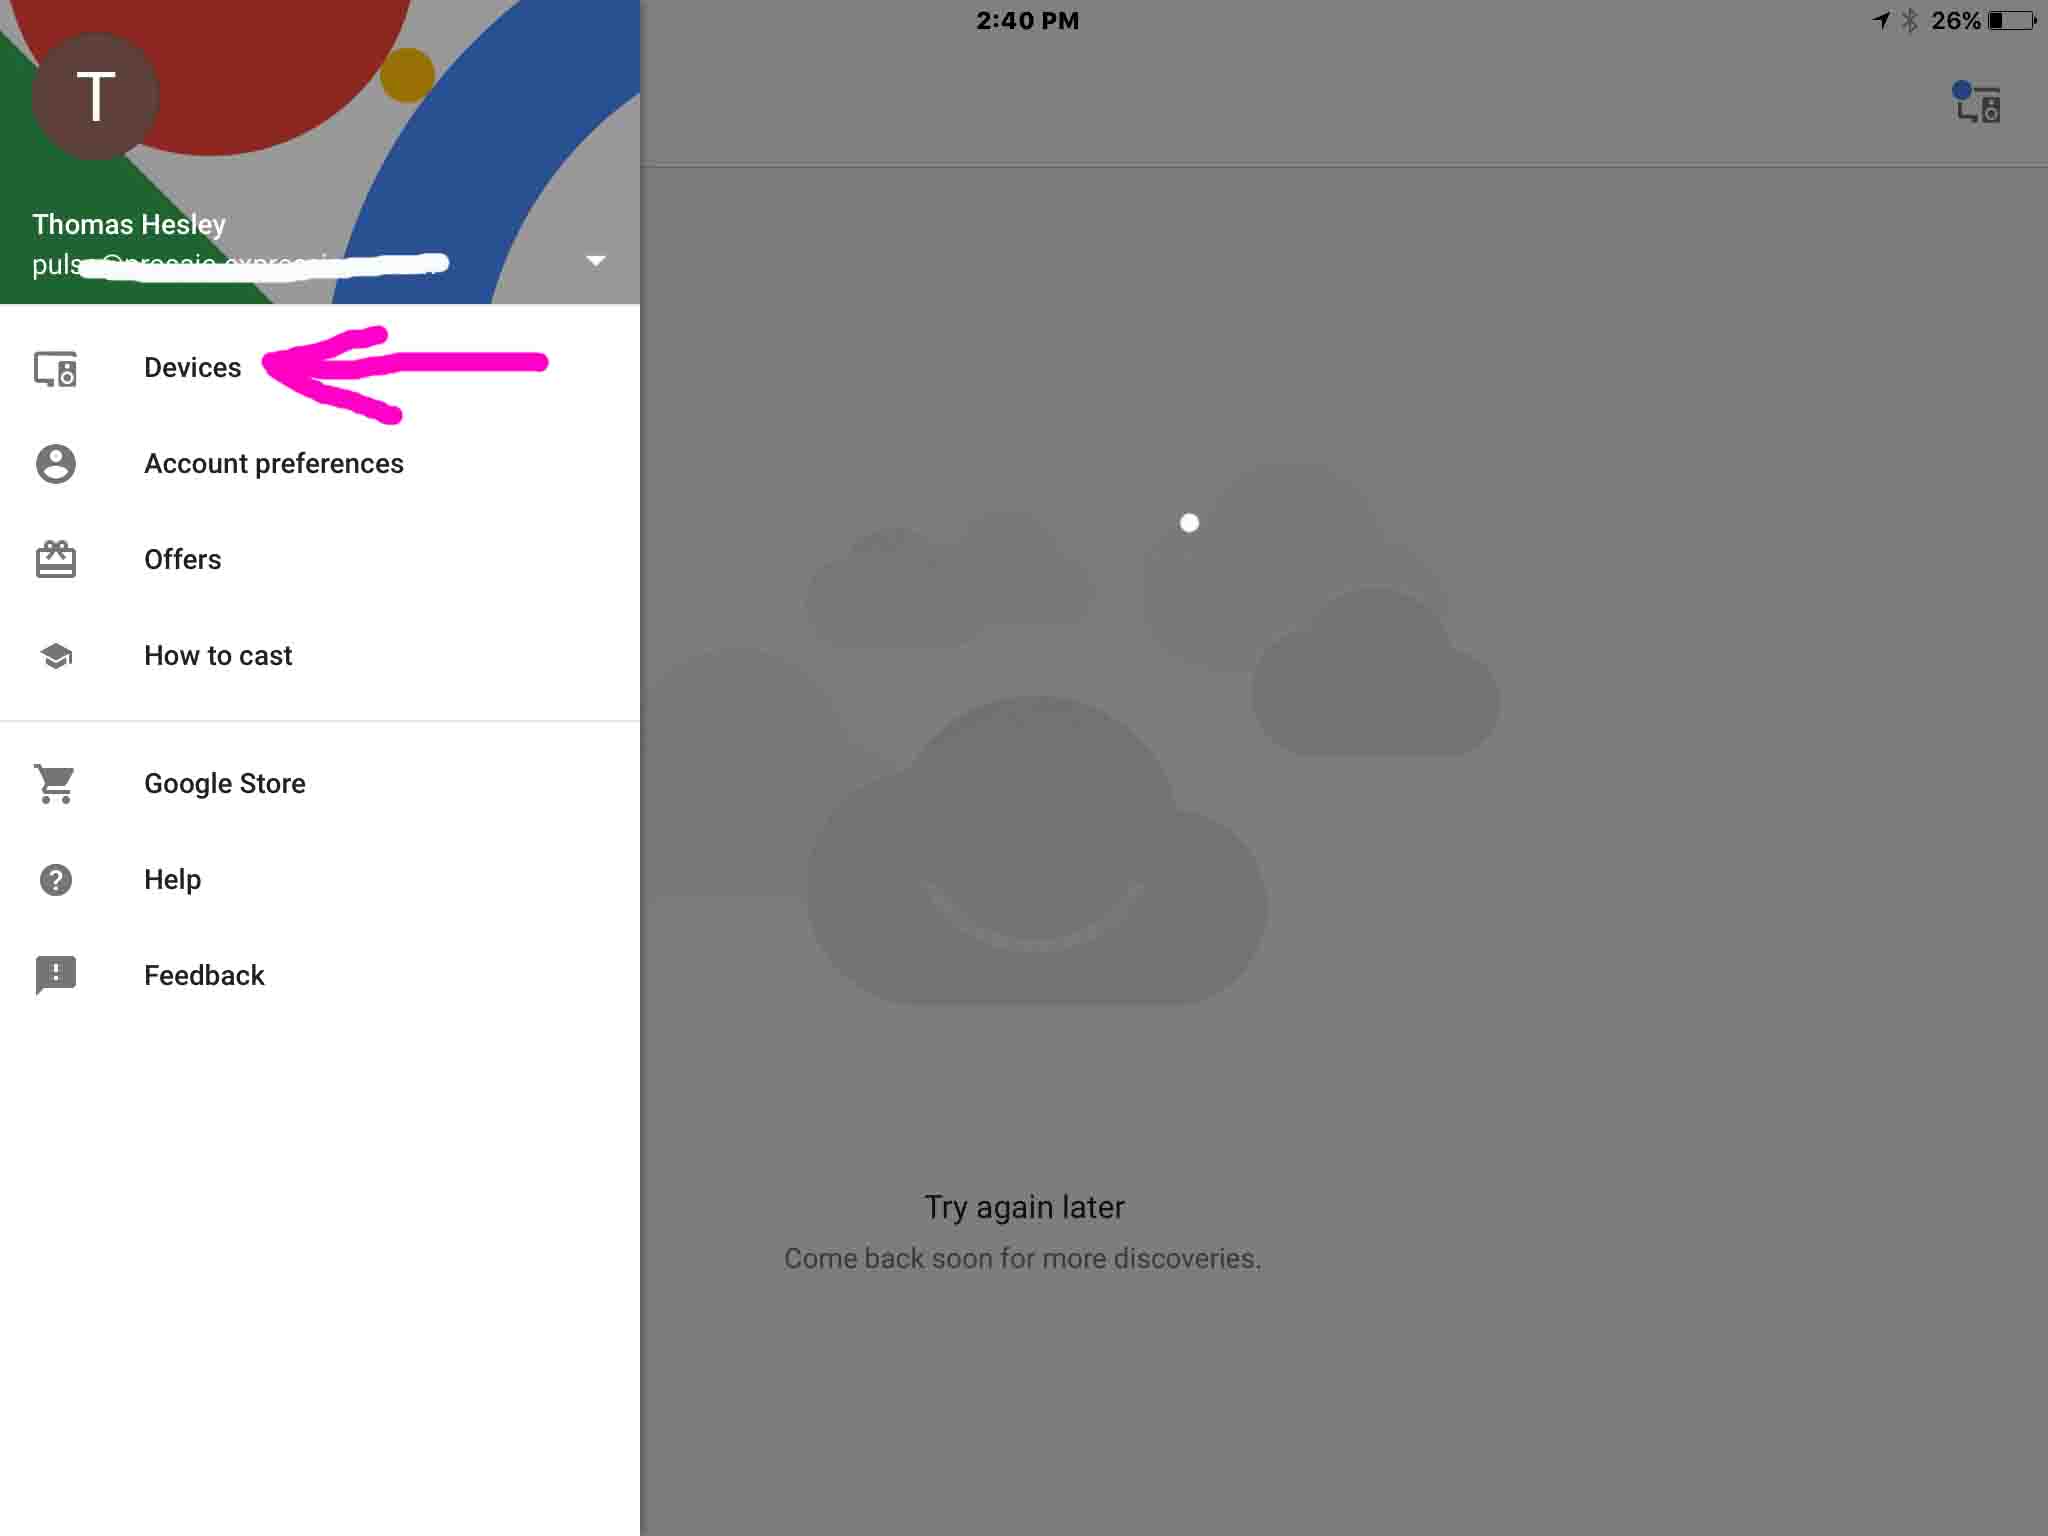
6. Tap the Devices Menu Item
Find the Devices menu pointed to above by the purple arrow. You’ll then see a list of devices the app discovered. Your new Google Home speaker should appear in this list, similar to the way ours did, as shown next.
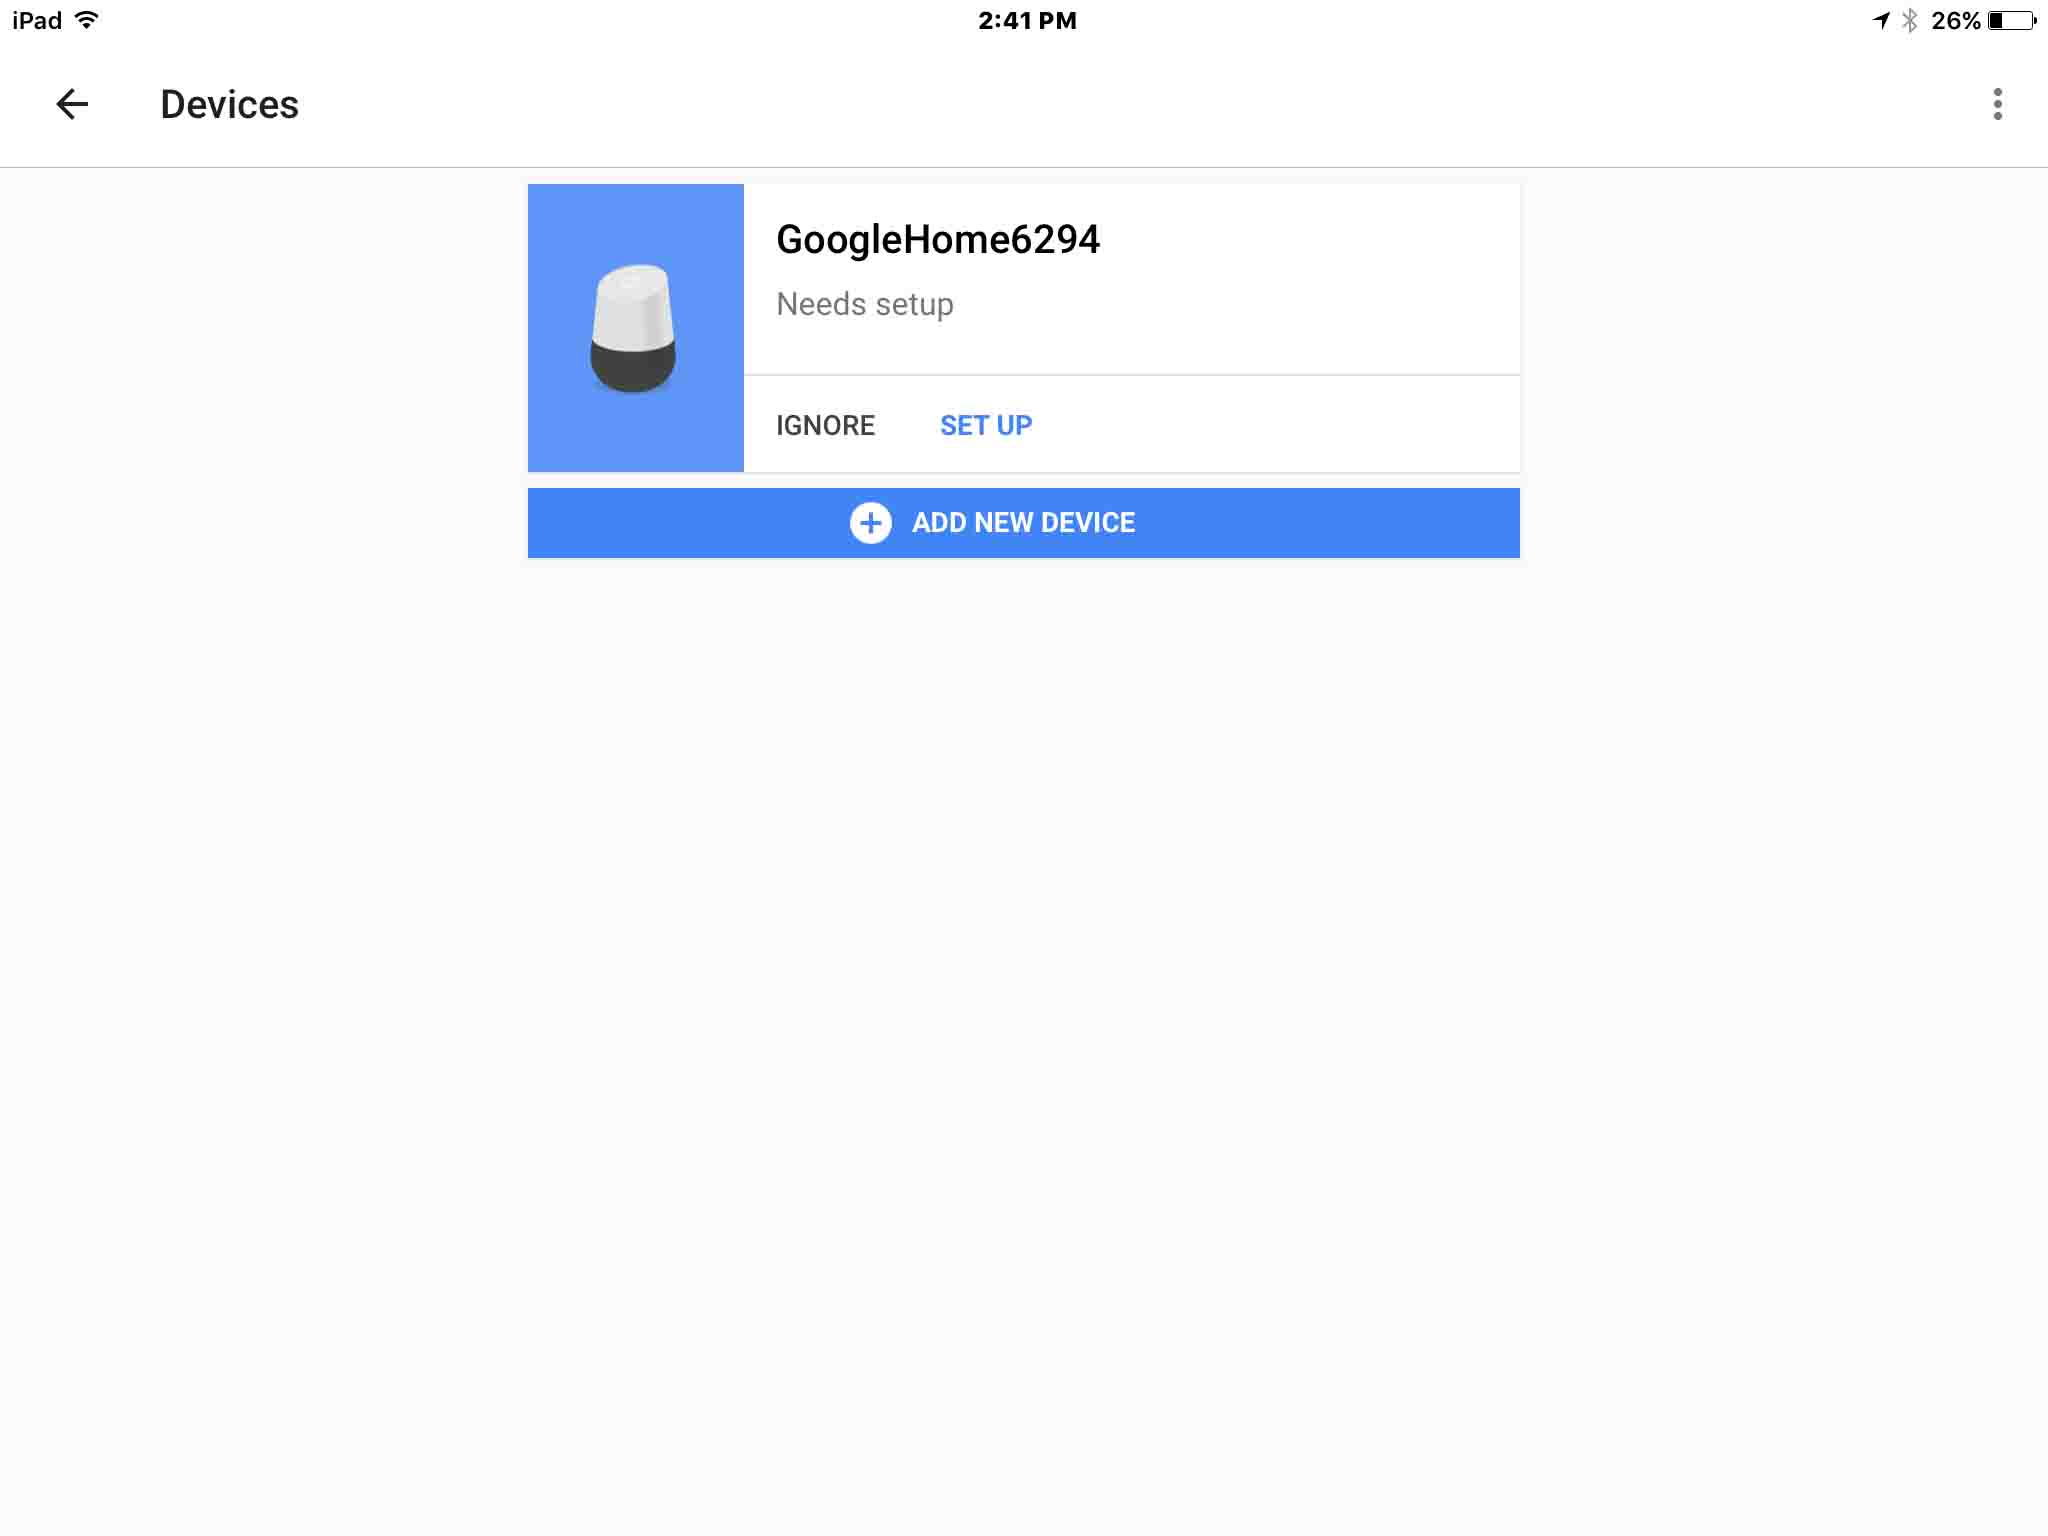
7. Tap the ‘Add New Device’ Blue Bar
in the previous screen. You’ll then get the Add New Device screen, as shown next. In this scenario, the Google Home speaker begins broadcasting a Wi-Fi hotspot that we connect to with the tablet in the next steps. This allows configuration of the speaker’s onboard network settings.
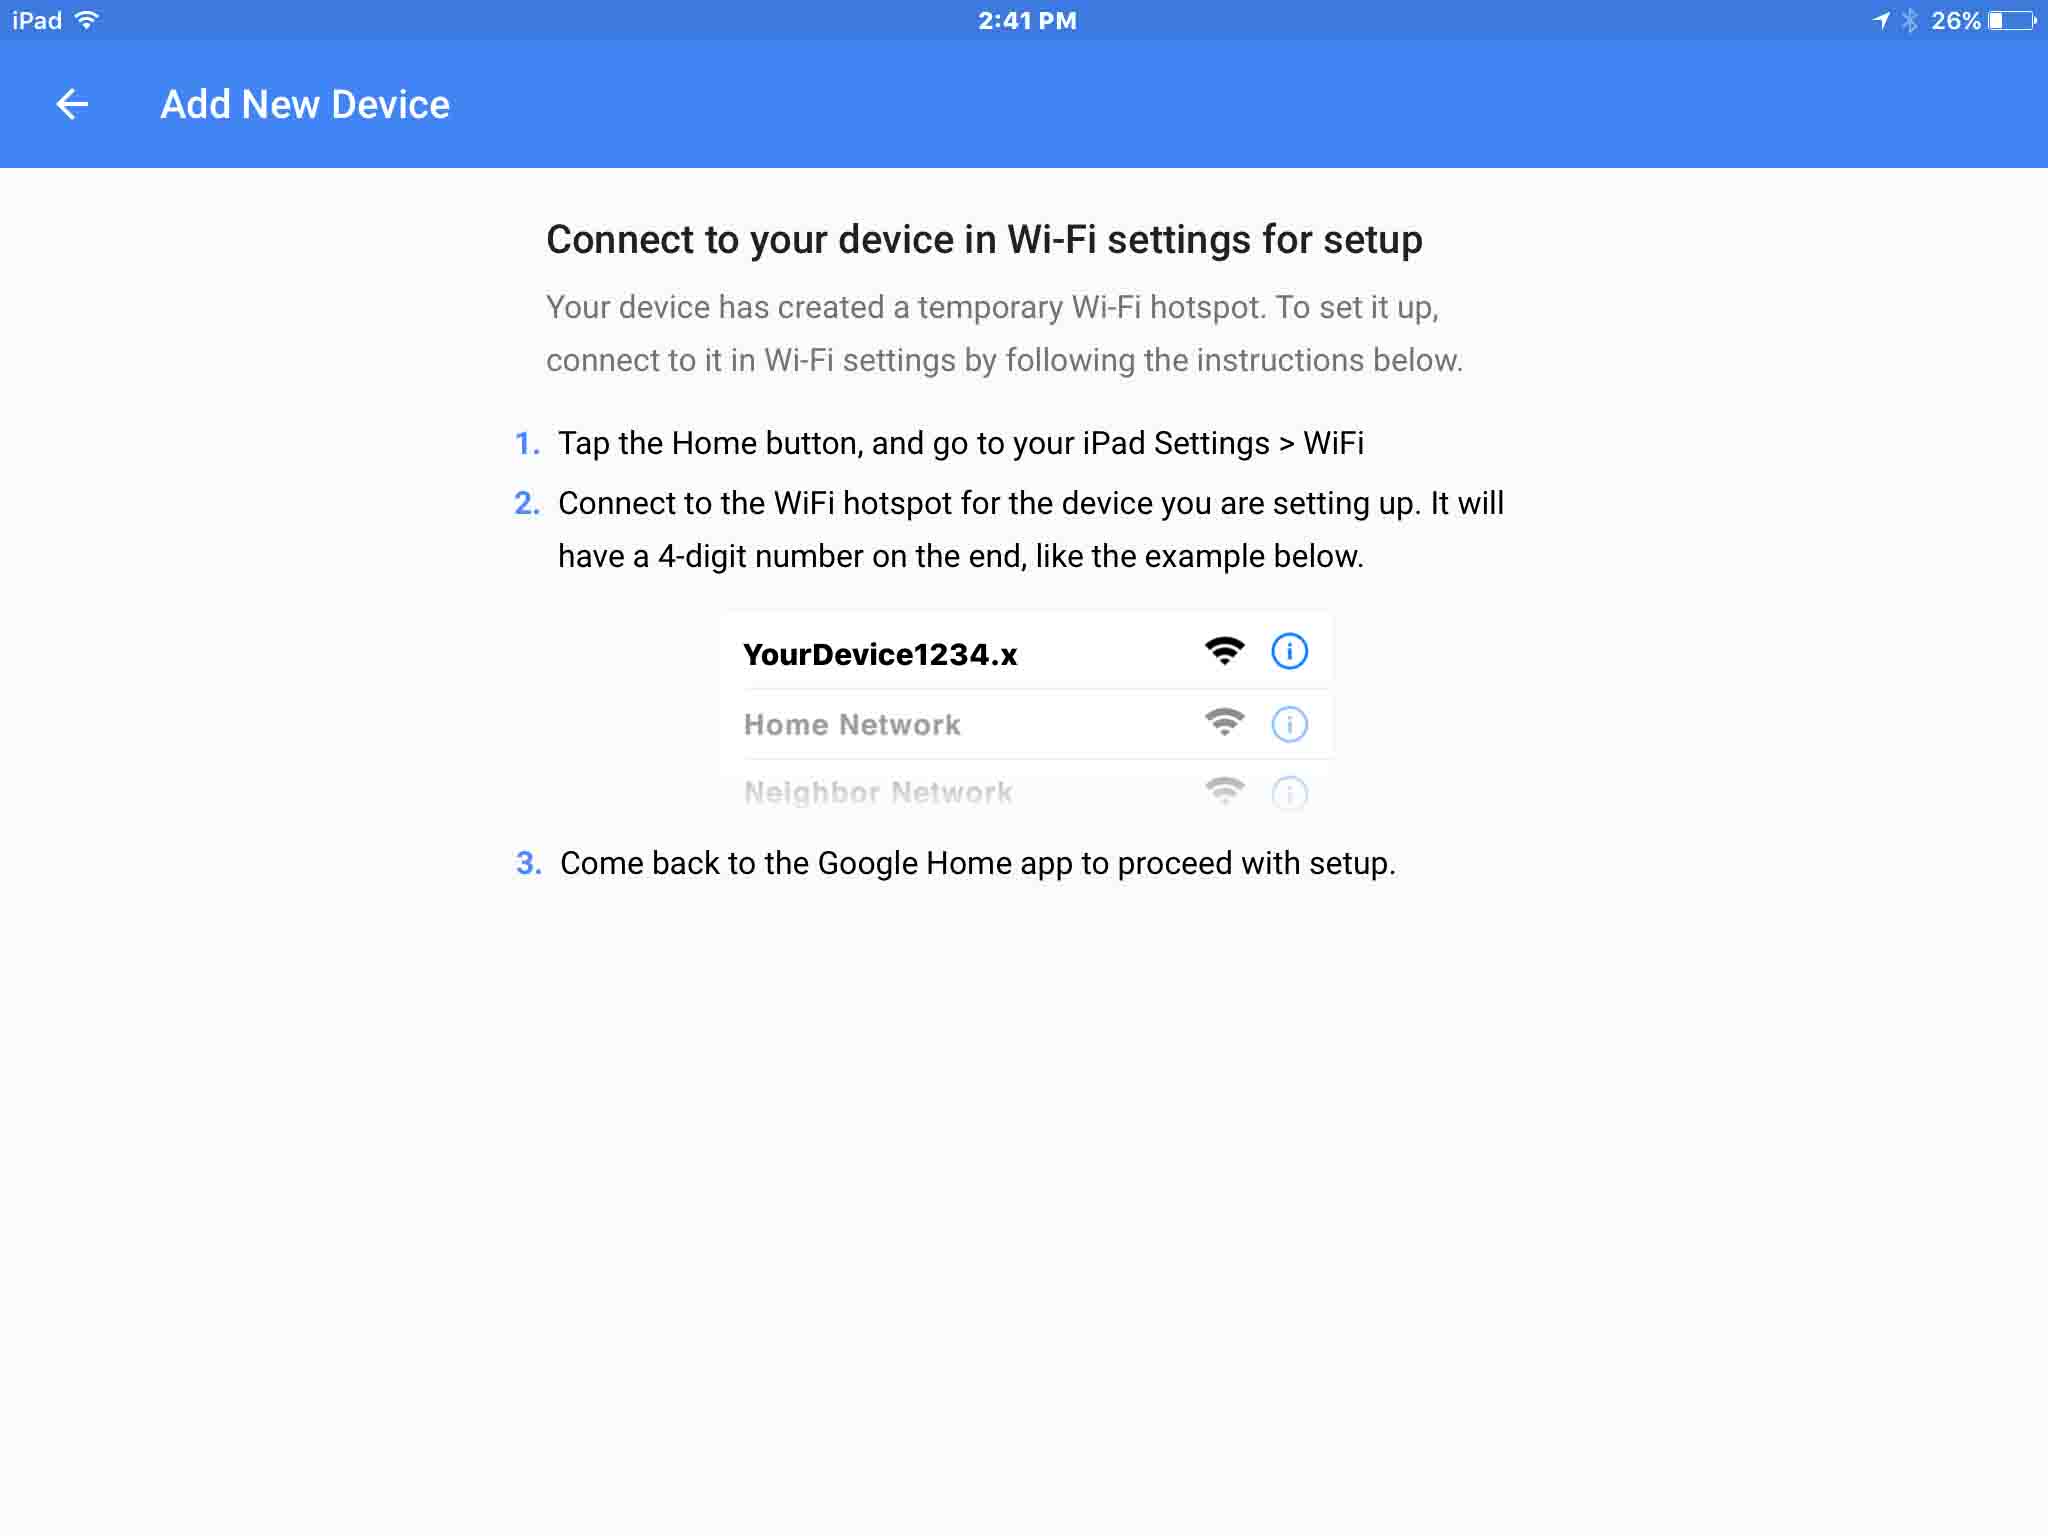
8 . Go to your Tablet’s WiFi Settings to Continue with Google Home Setup
On an iPad, we went back to the Home screen, tapped the Settings app, and got the following screen.
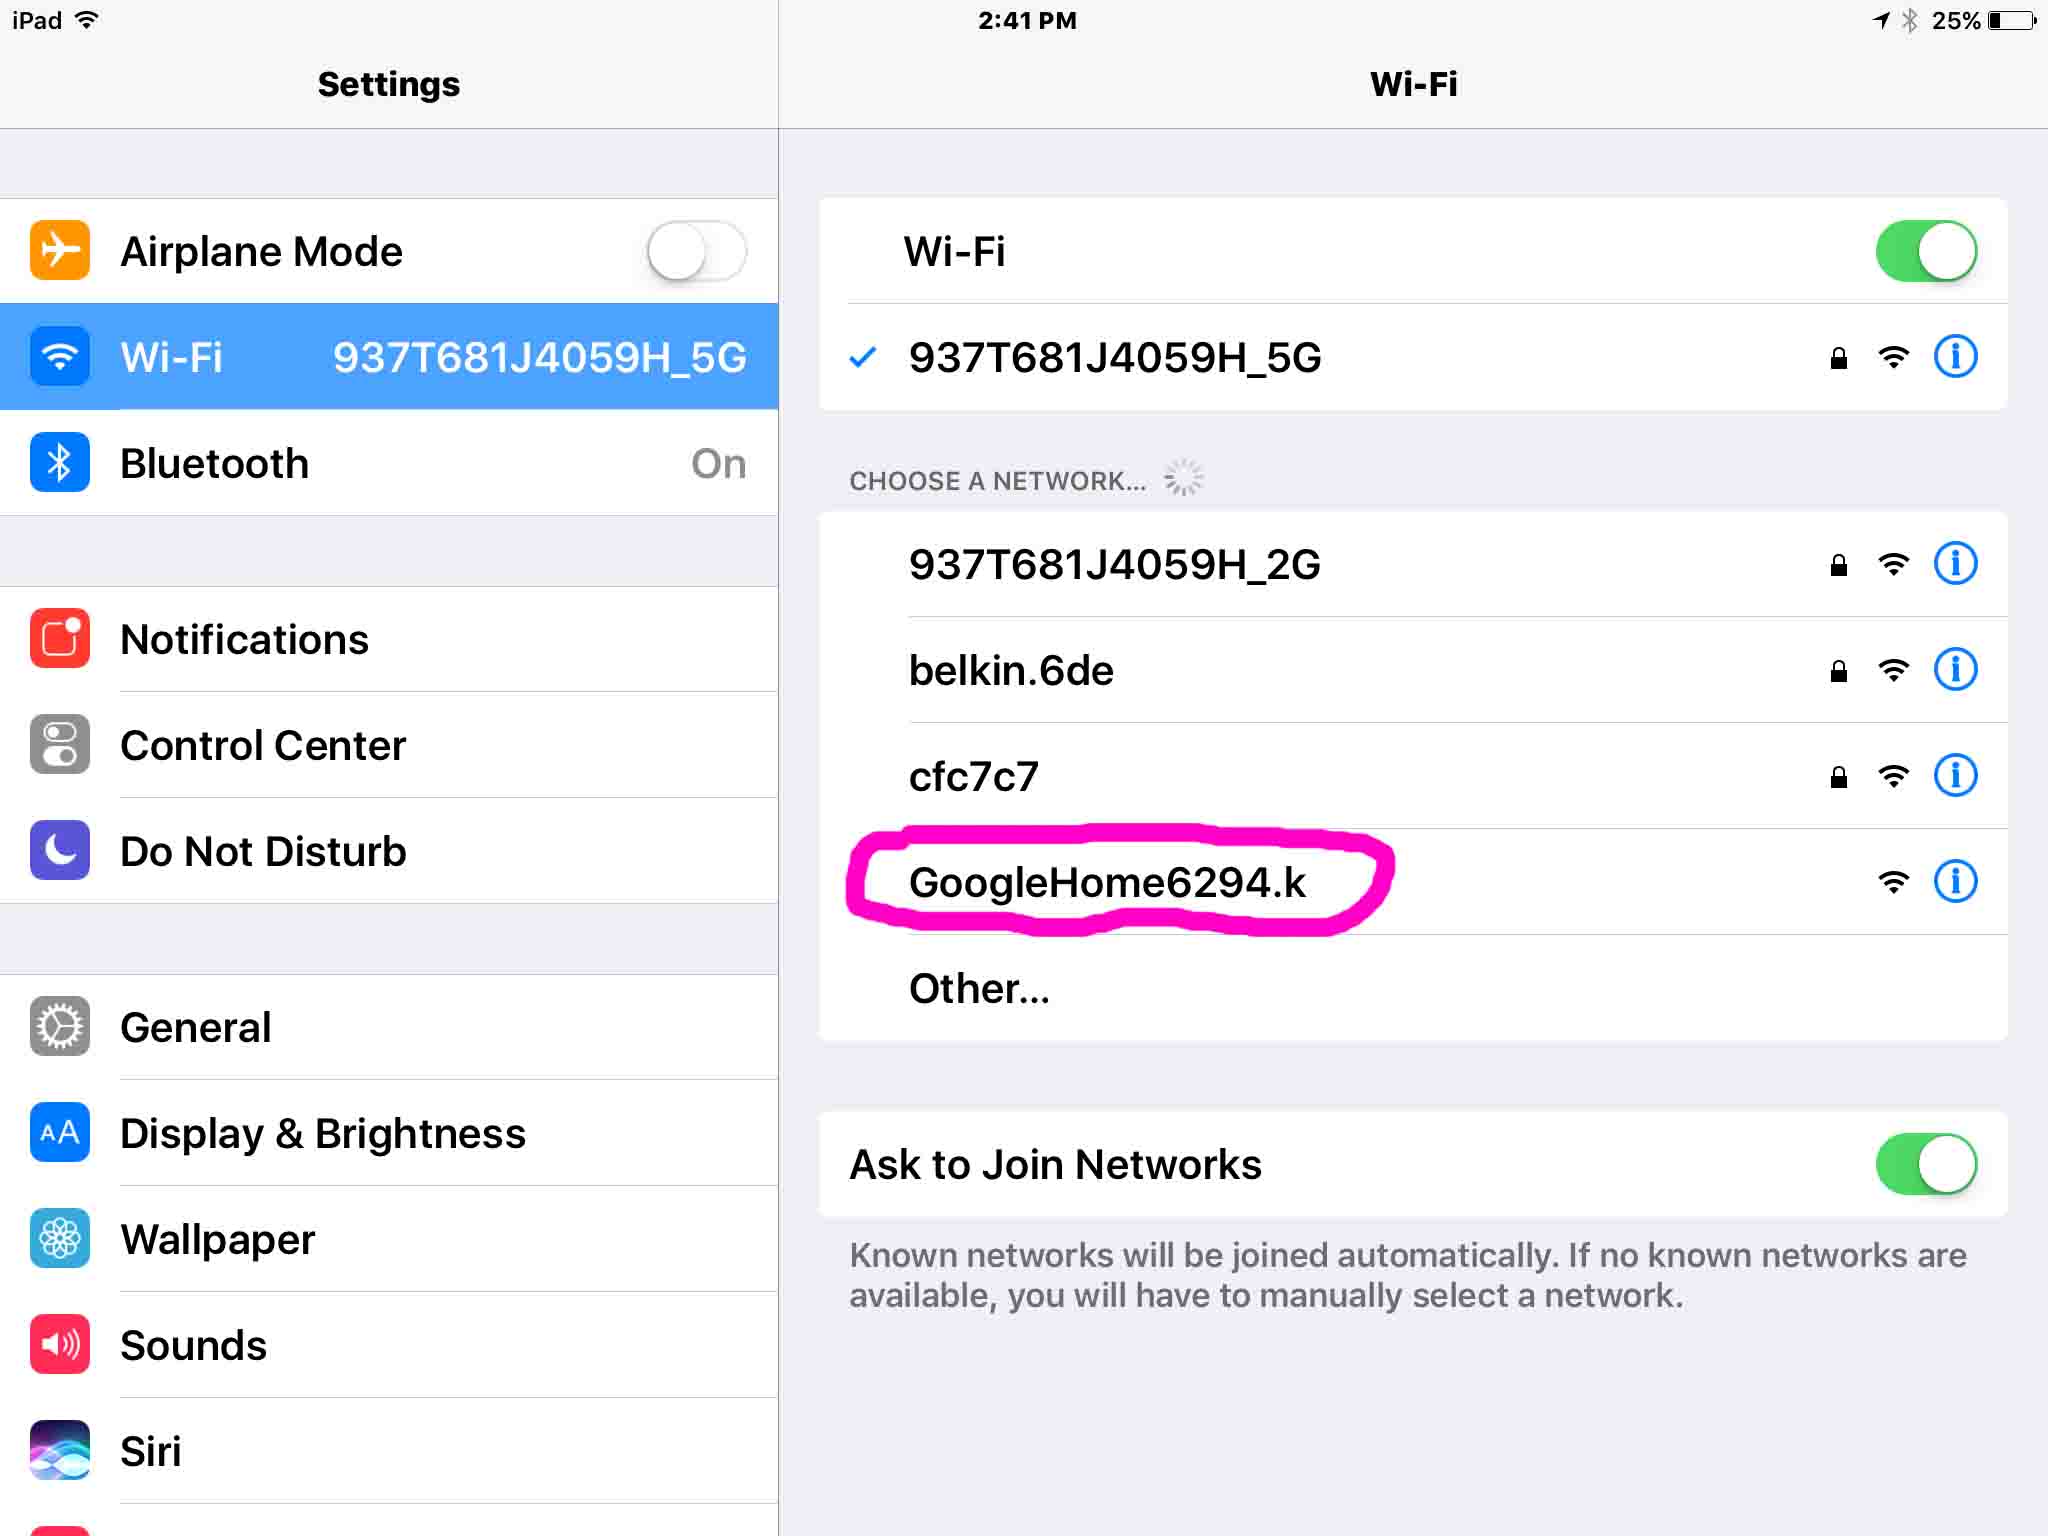
9. Tap the GoogleHomeXXXX.Y Hotspot Item
Ours is as circled in purple in the previous picture. Tapping this temporarily disconnects your tablet from your current WiFi network, and establishes a direct WiFi connection with your Google speaker, as shown in the next picture.
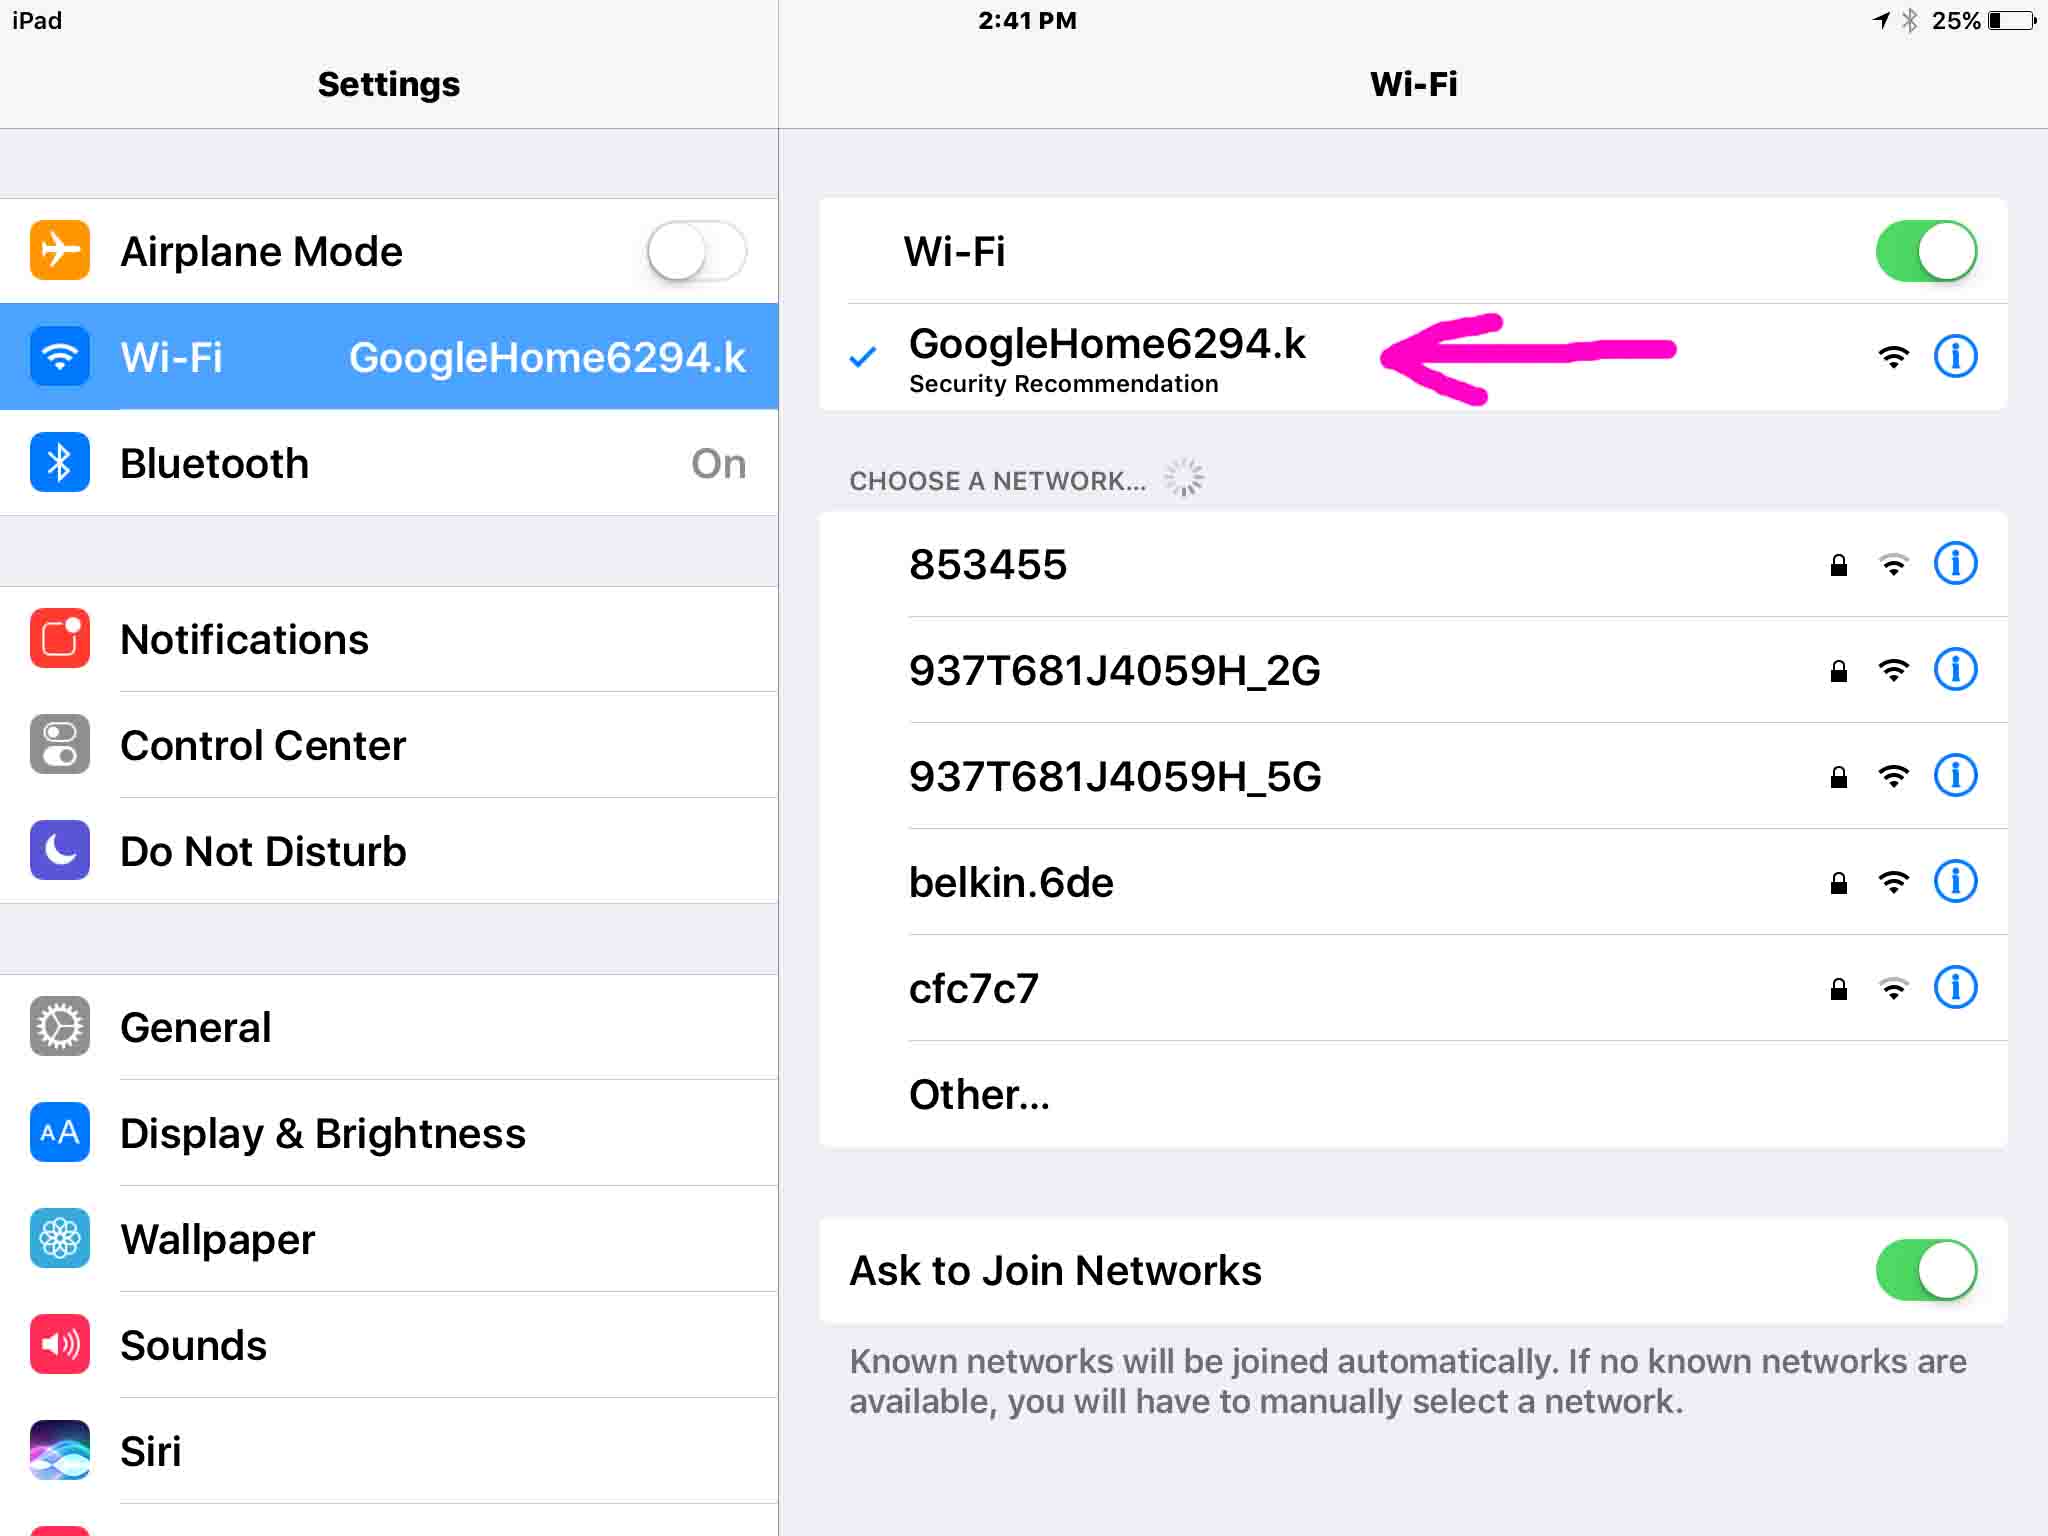
10. Return to the Google Home App
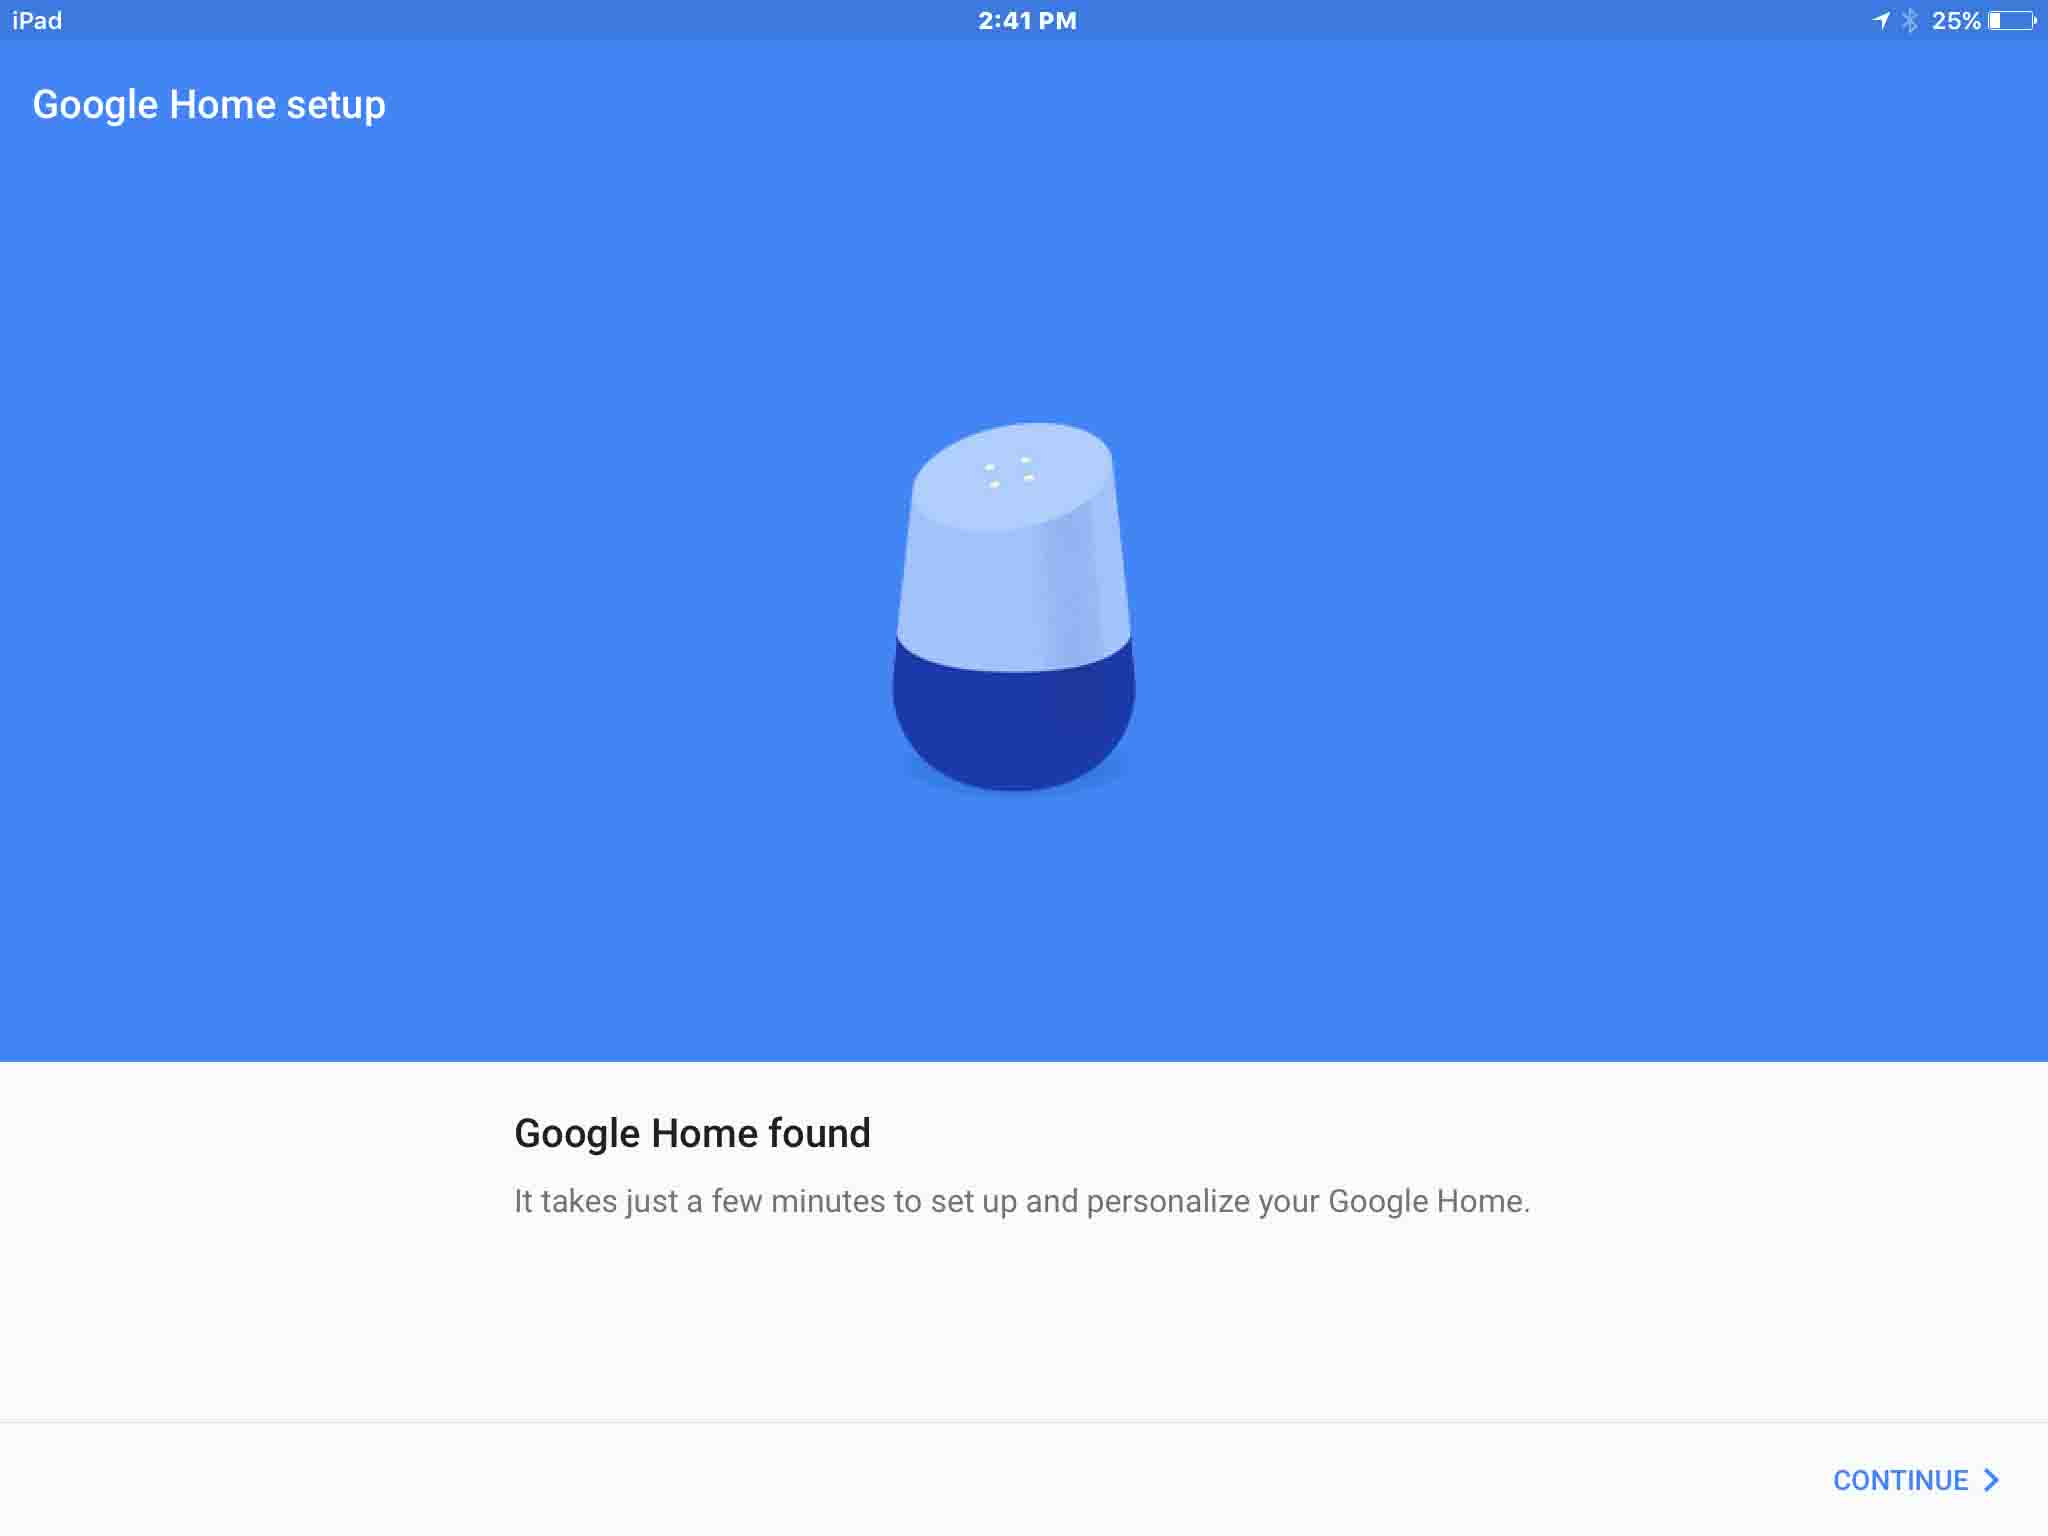
Once your tablet has successfully connected to your Google Home Speaker, as shown in the previous picture. leave the iOS Wi-Fi Settings screen and again bring up the Google Home app. The following Google Home Setup screen then appears, indicating that your Google speaker has been detected.
11. Tap the Continue Link
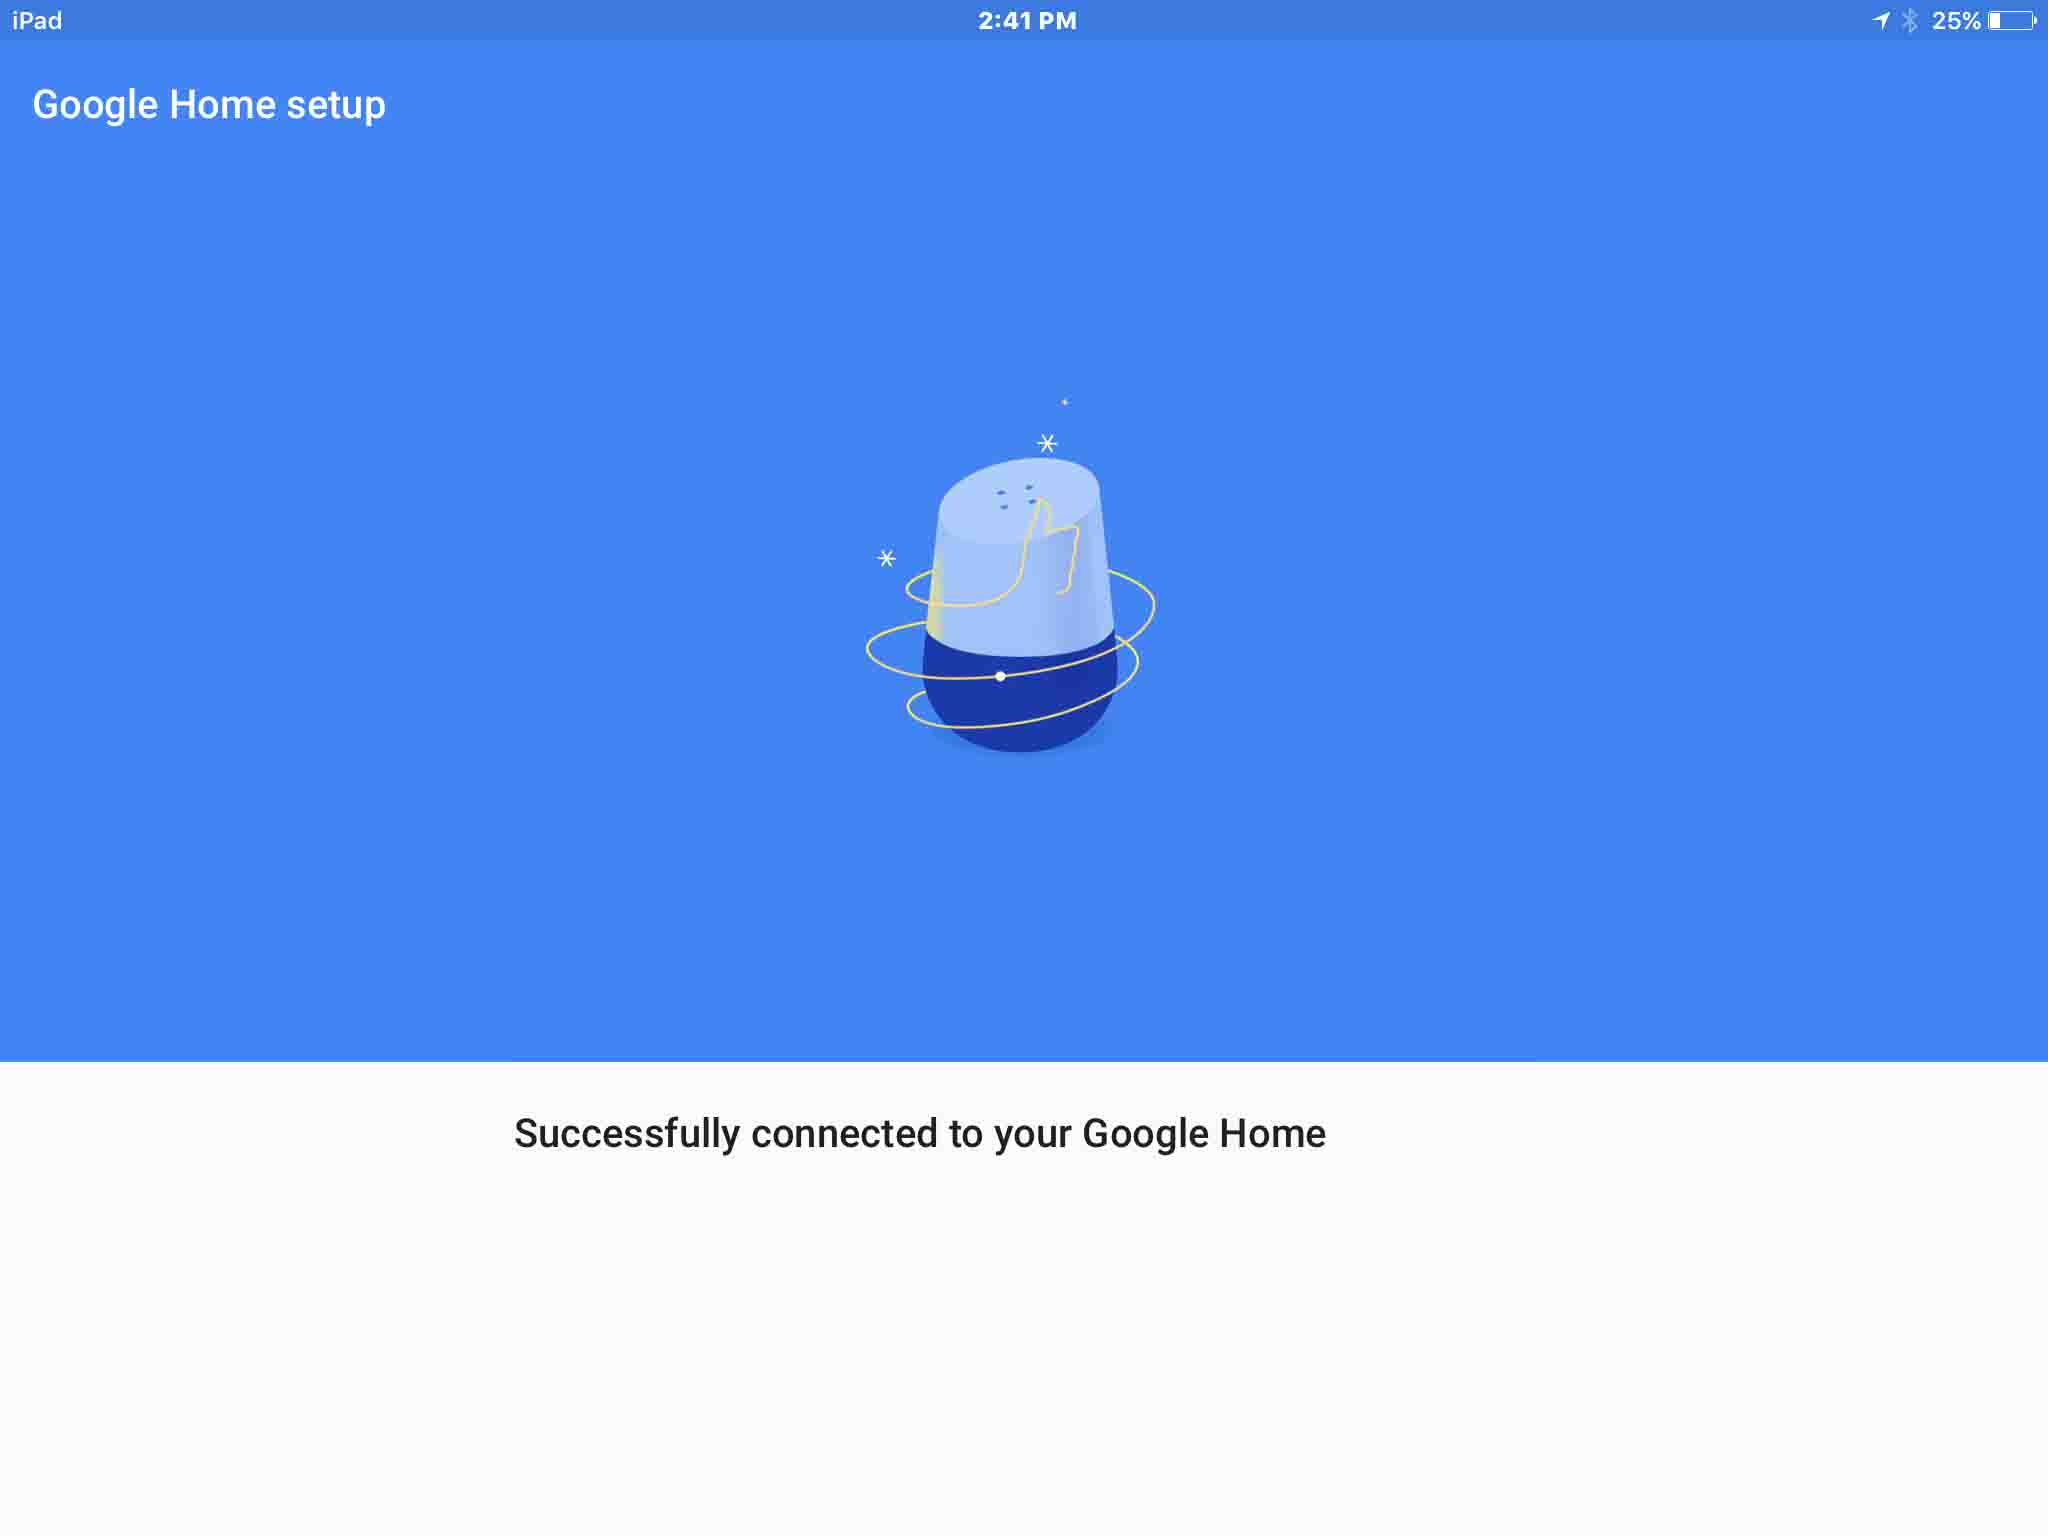
in the lower right corner of the Google Home Setup screen, as in the previous picture. Your tablet then connects to the speaker, and as it does so, the speaker with some orbiting particles in motion displays. After several seconds, the status message on this screen changes to indicate that a successful connection has been established, as shown next.
After a short pause, the app issues a play-a-test-sound prompt, as shown in the next picture.
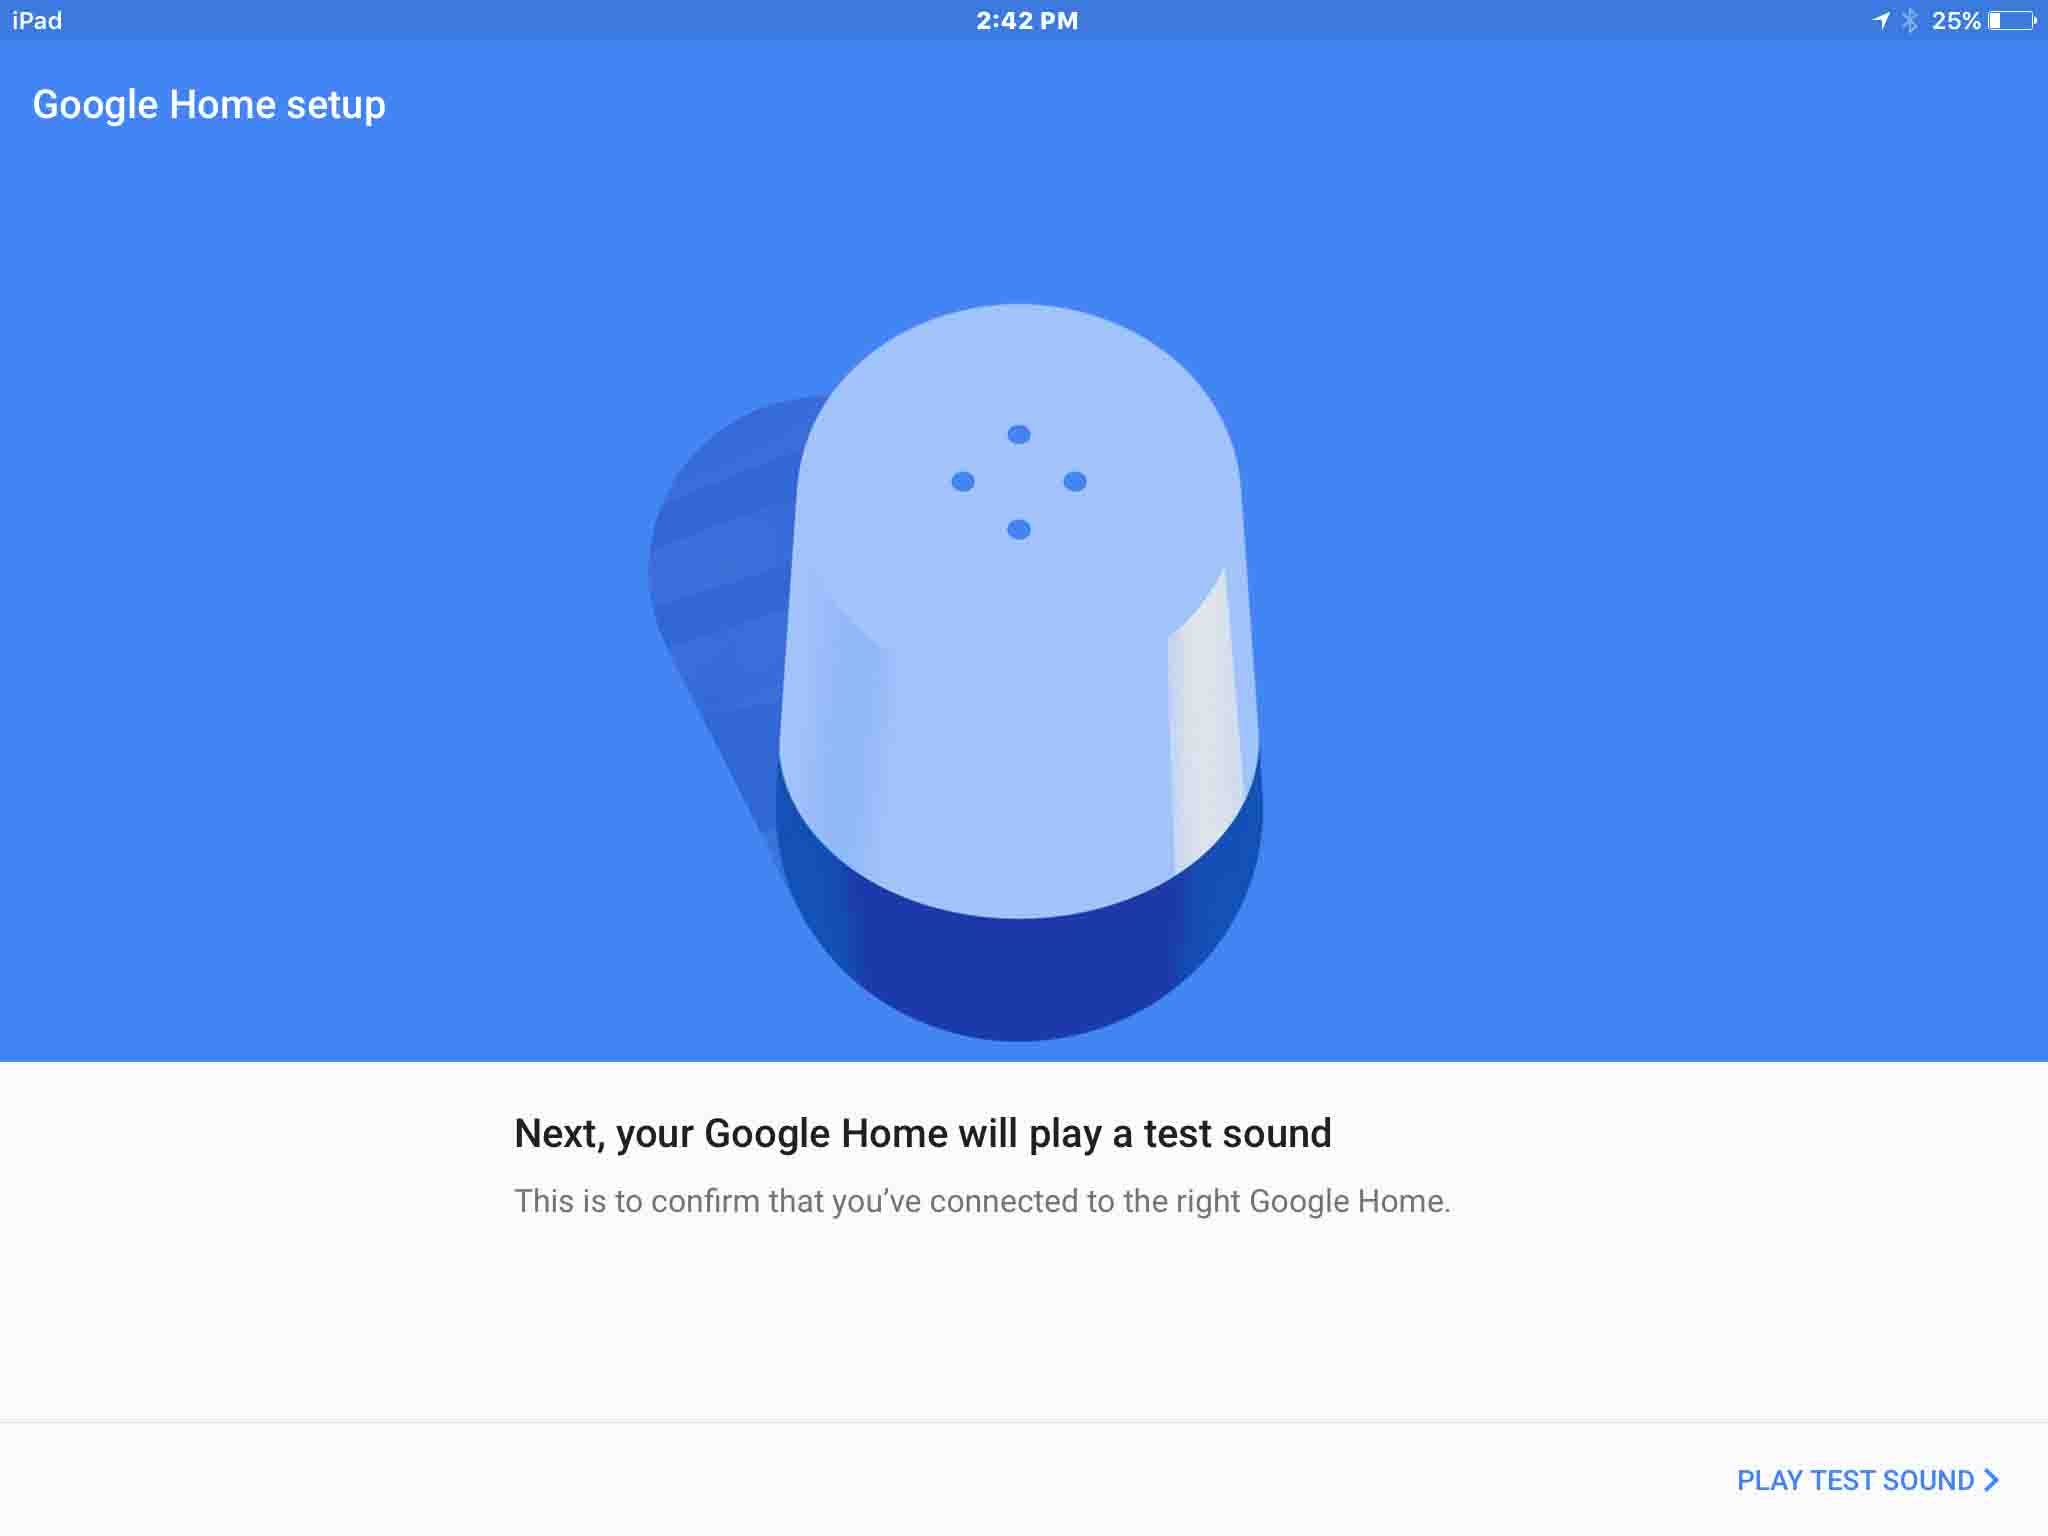
12. Tap the Play Test Sound Link to Continue with Google Home Setup
in lower right corner of the screen. If all is well, you should hear a “blink” sound from your Google Home speaker, and then, the following screen displays on your tablet.
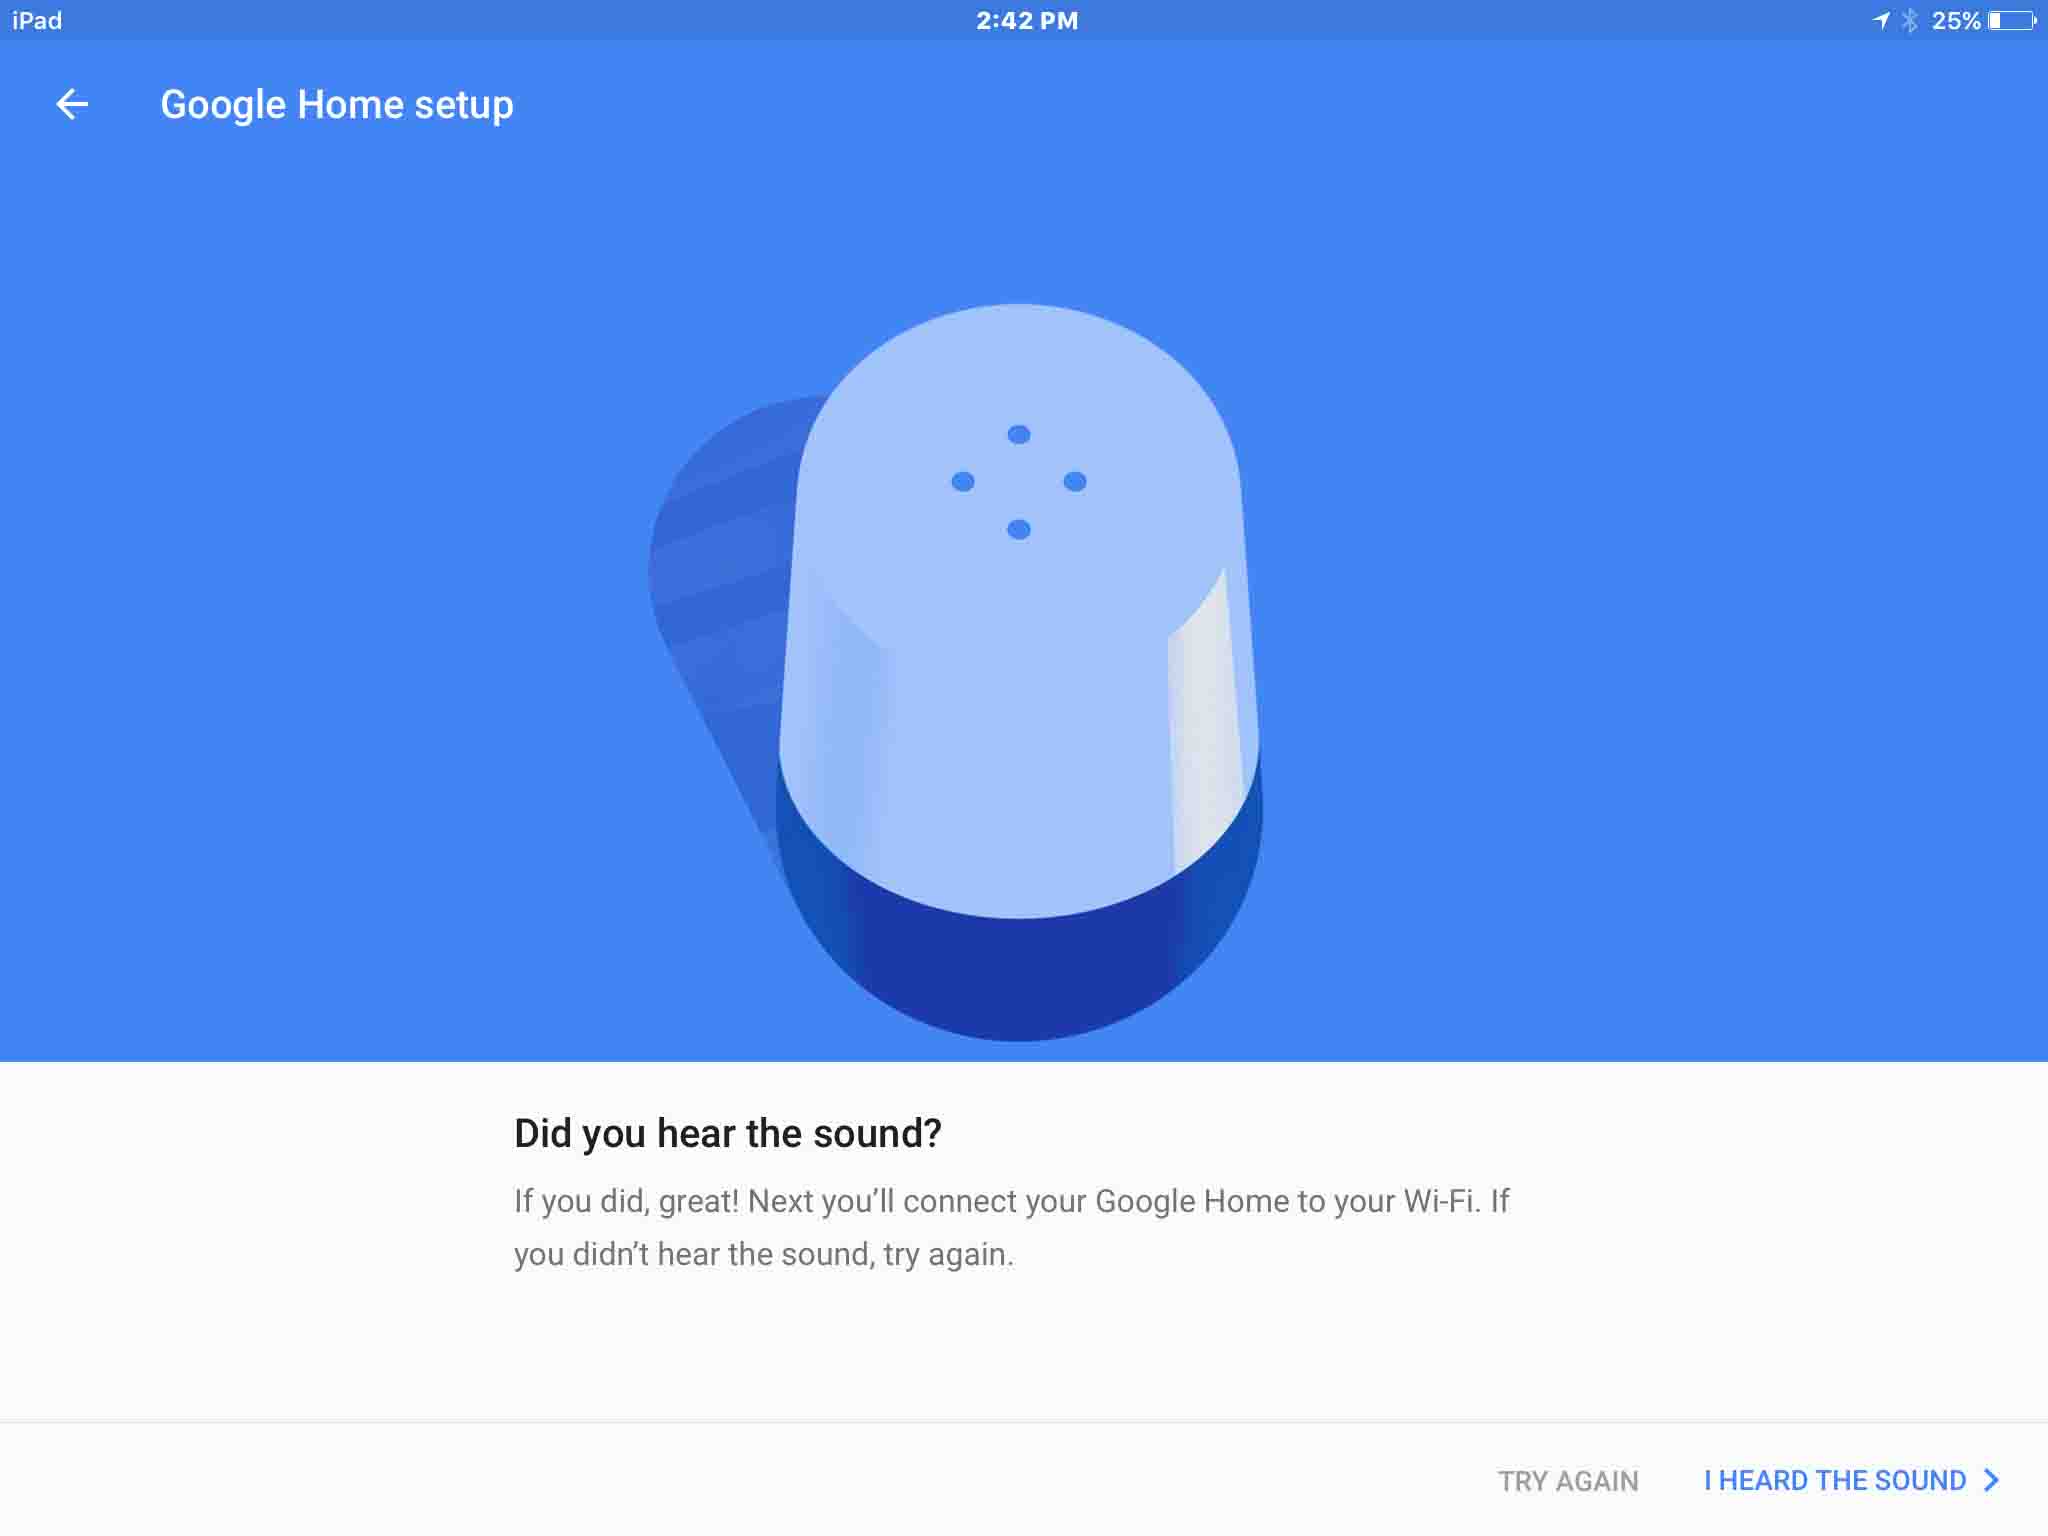
13. Confirm that you Heard the Test Sound
by tapping the I Heard The Sound link, at the bottom right corner of the screen in the previous picture. This then takes you to the language selection prompt, as pictured next.
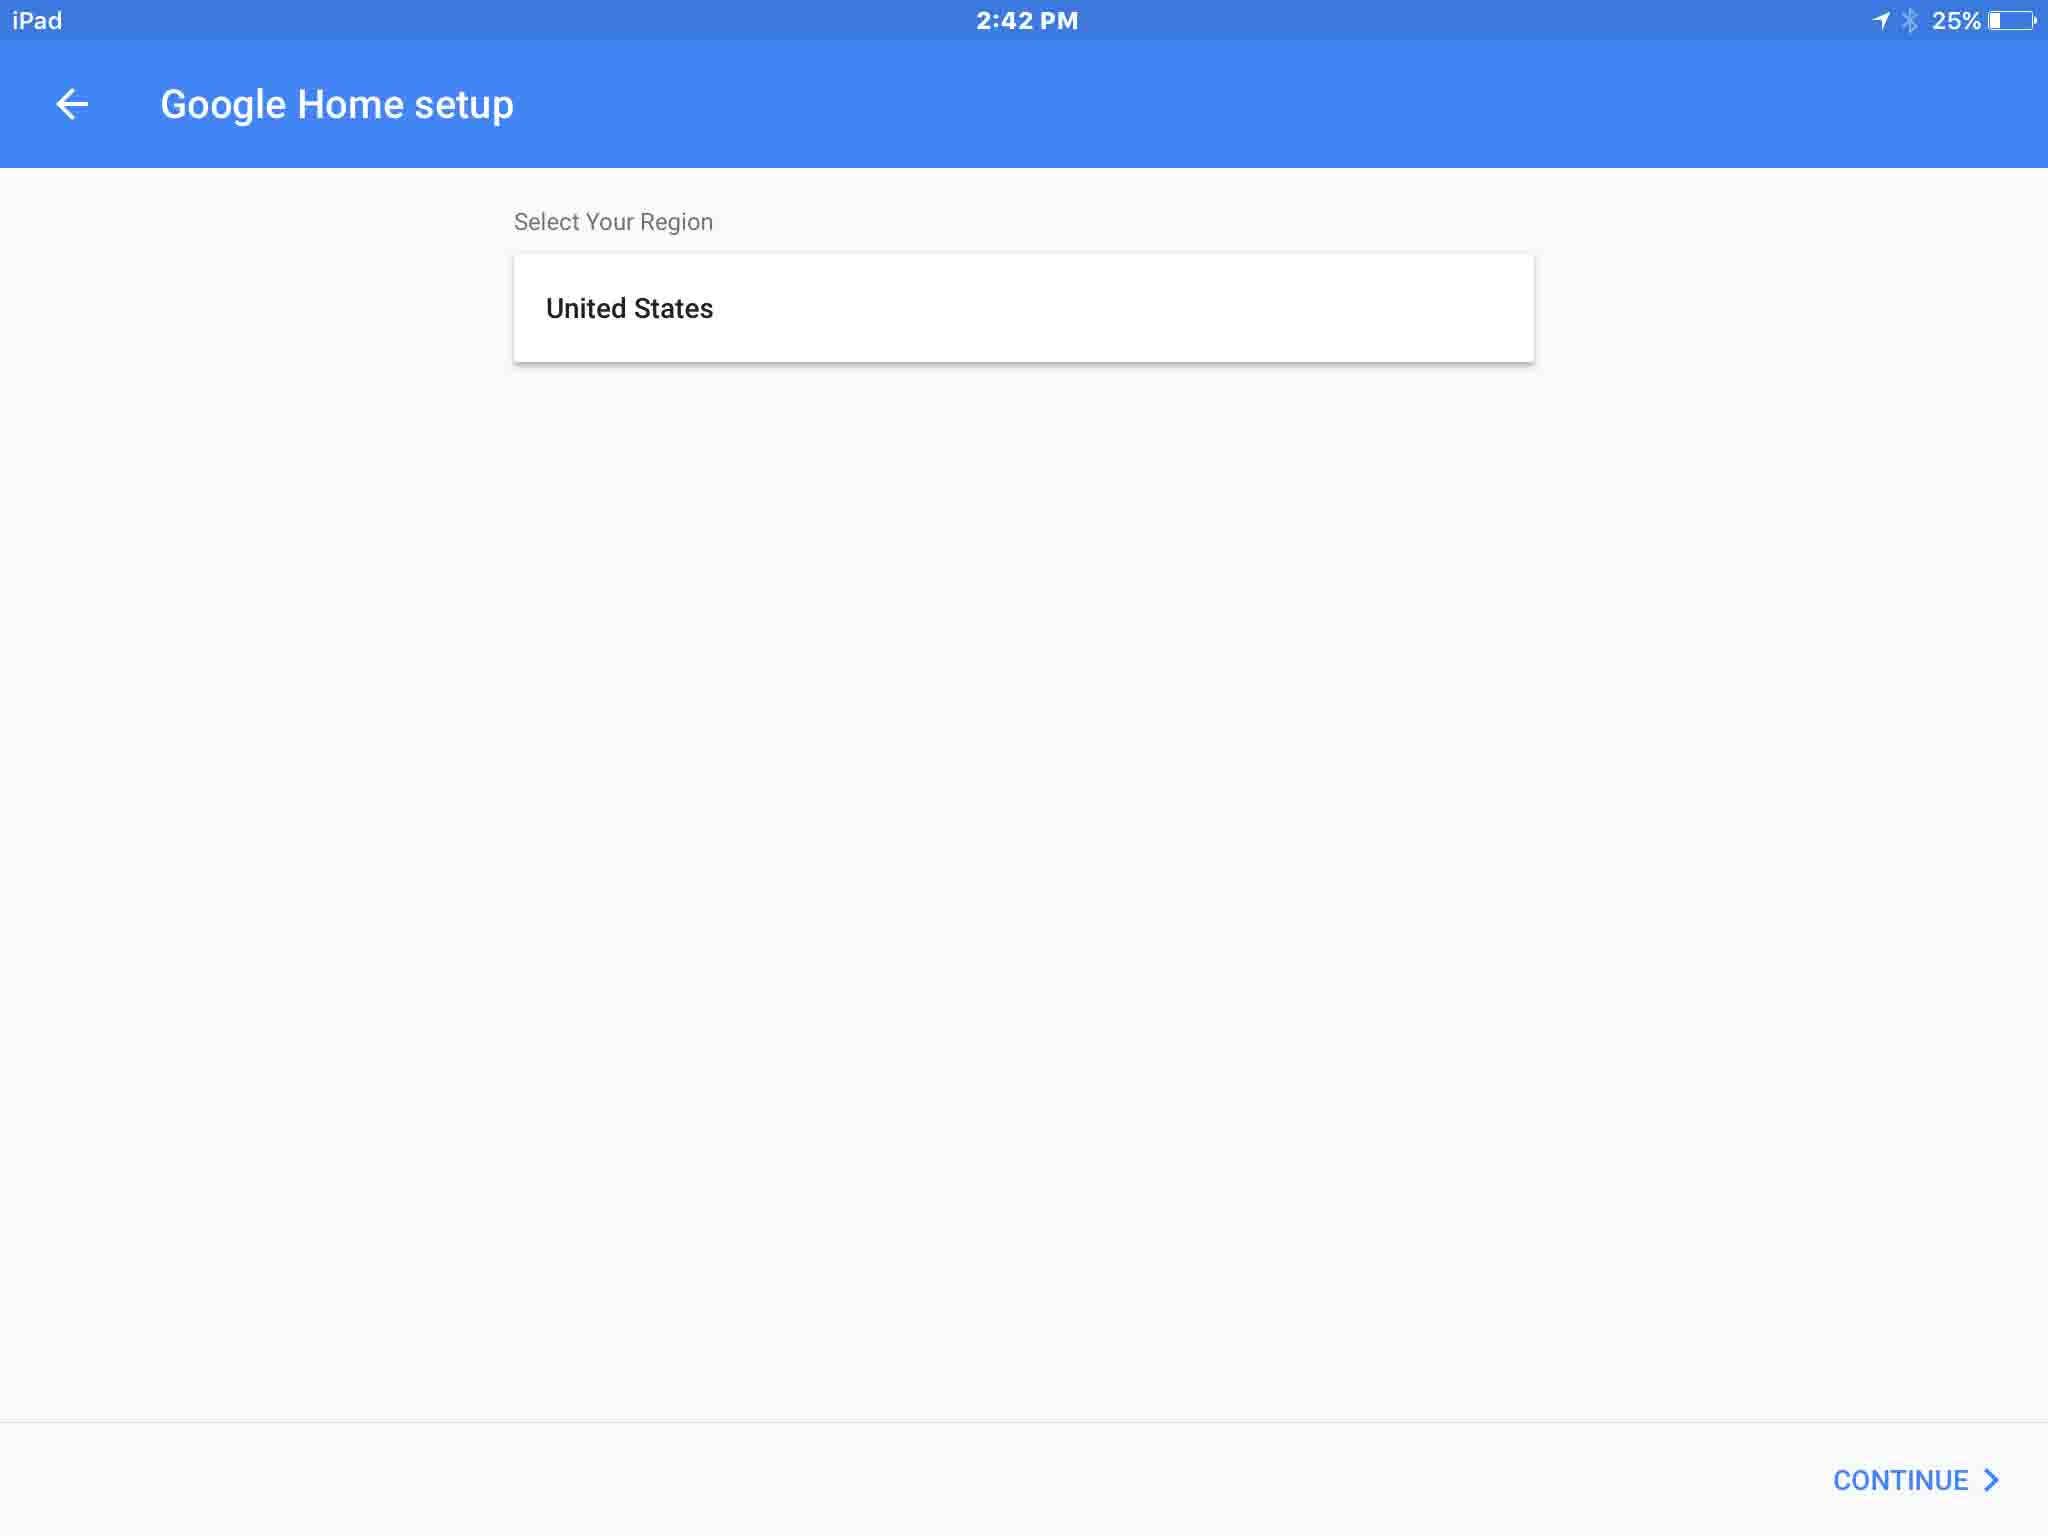
14. Choose your Desired Language
on above screen. Then, you’ll be prompted to select the room in your home or office, in which your new Google speaker will be placed, as shown next.
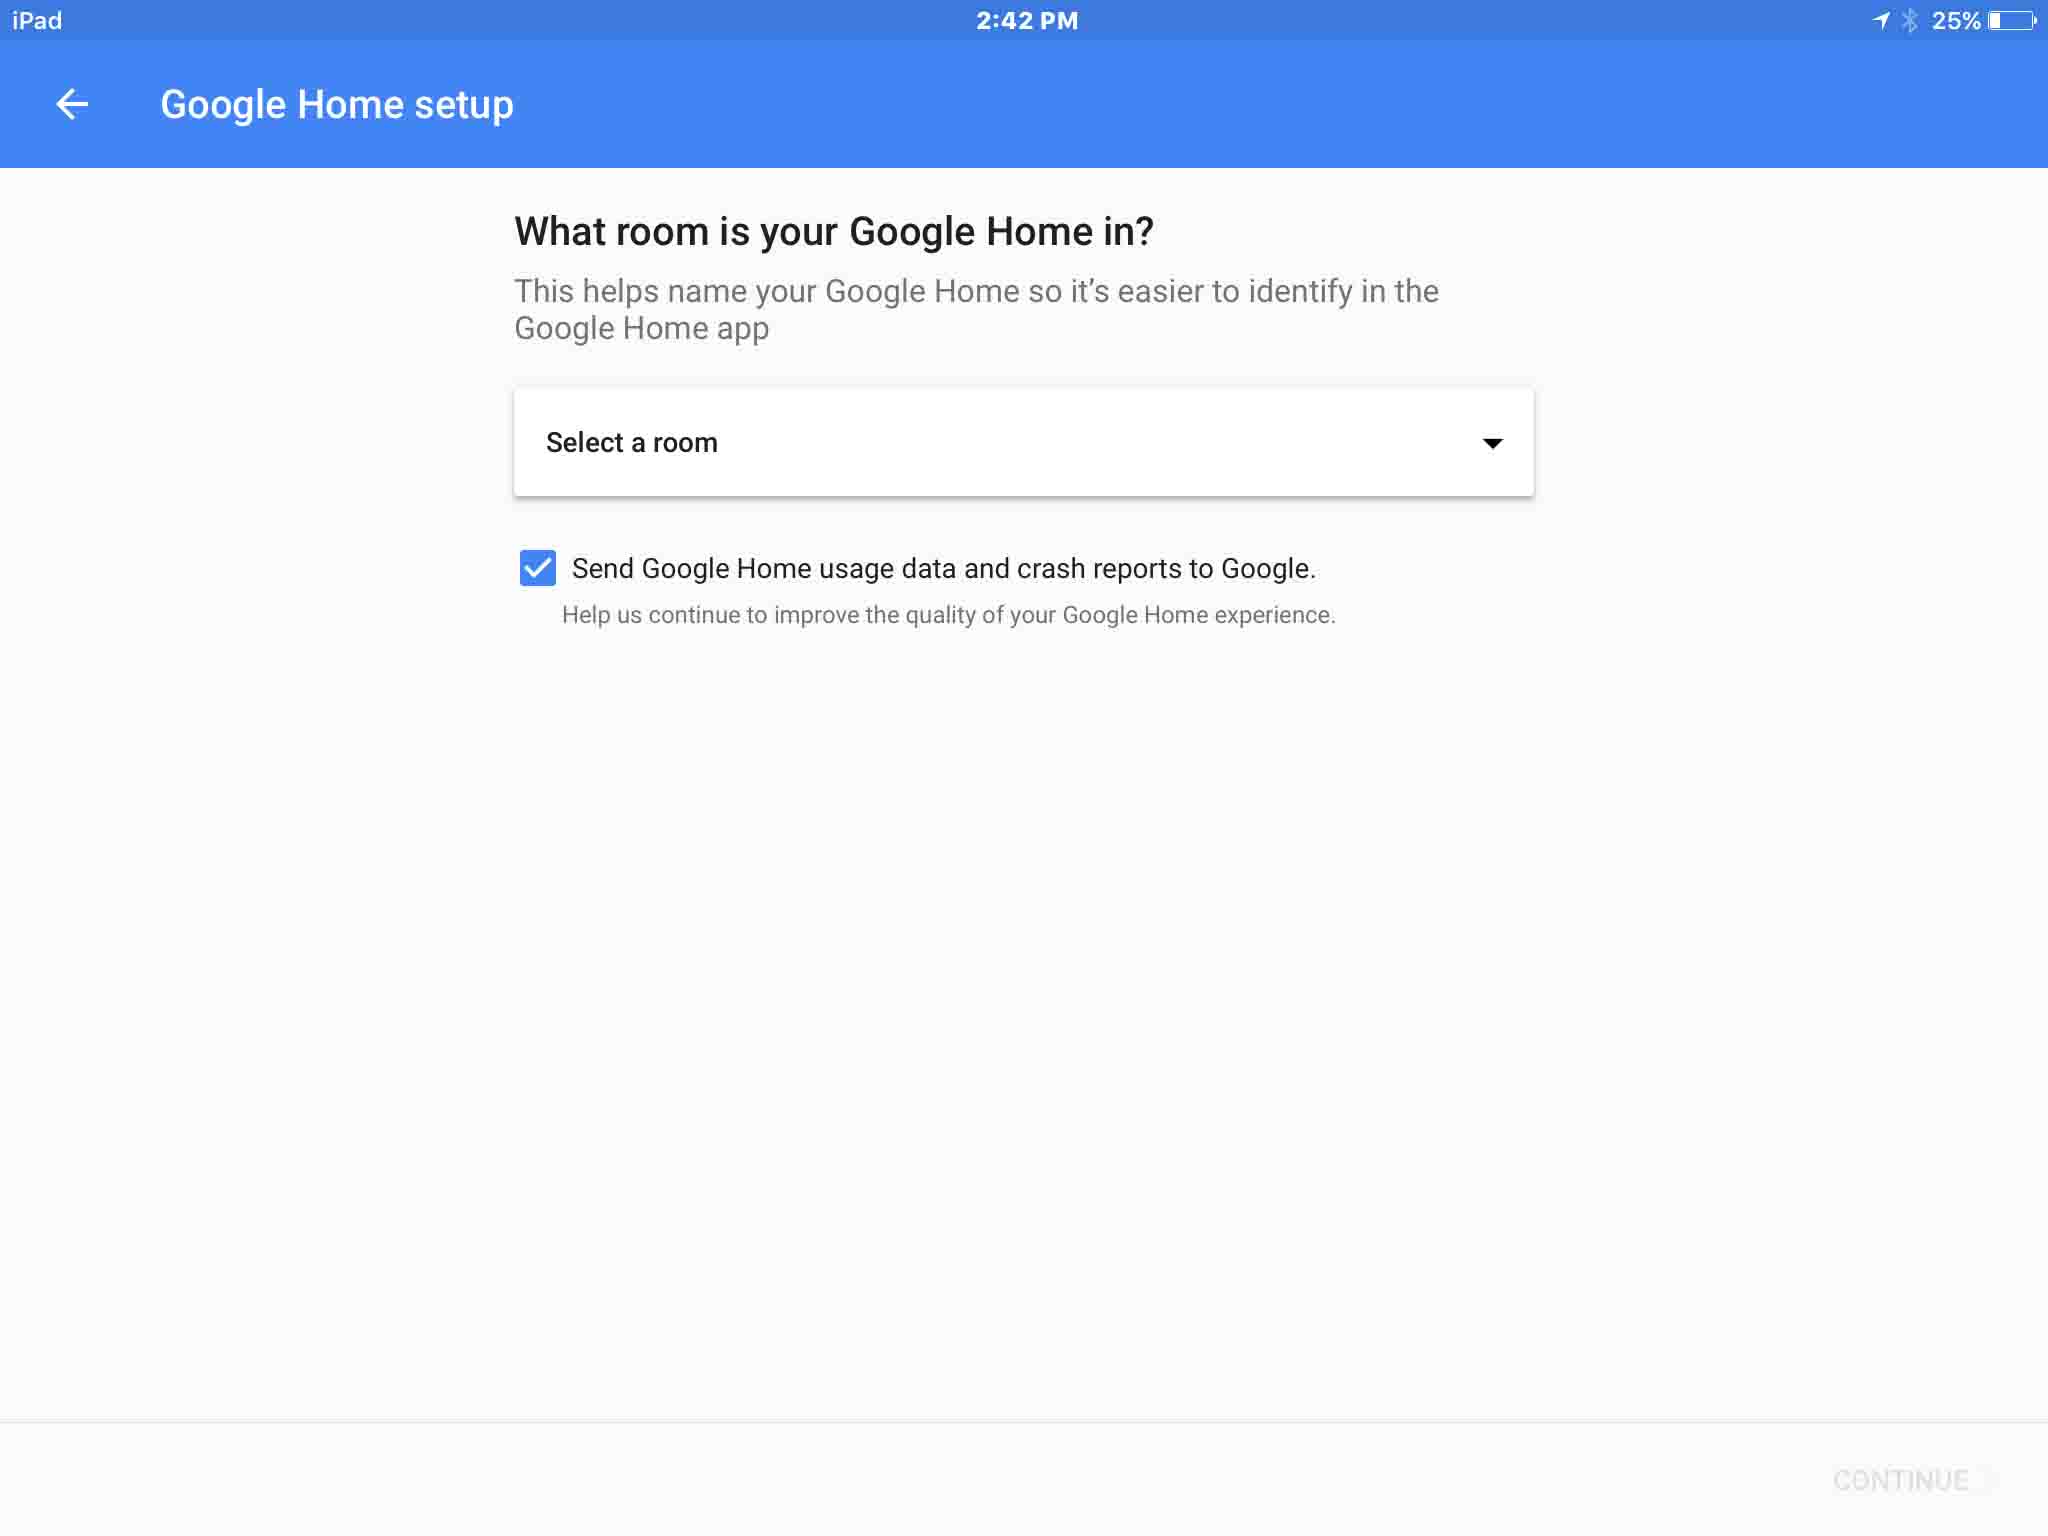
15. Select a Room Name for your Google Home Speaker
Choose a room from the Select Room list, as shown in the next picture. This is a fairly large list; too large to all fit in the window. However, you can single-finger swipe up to scroll the rest of the list into view. When you find the appropriate room name for your speaker, tap it.
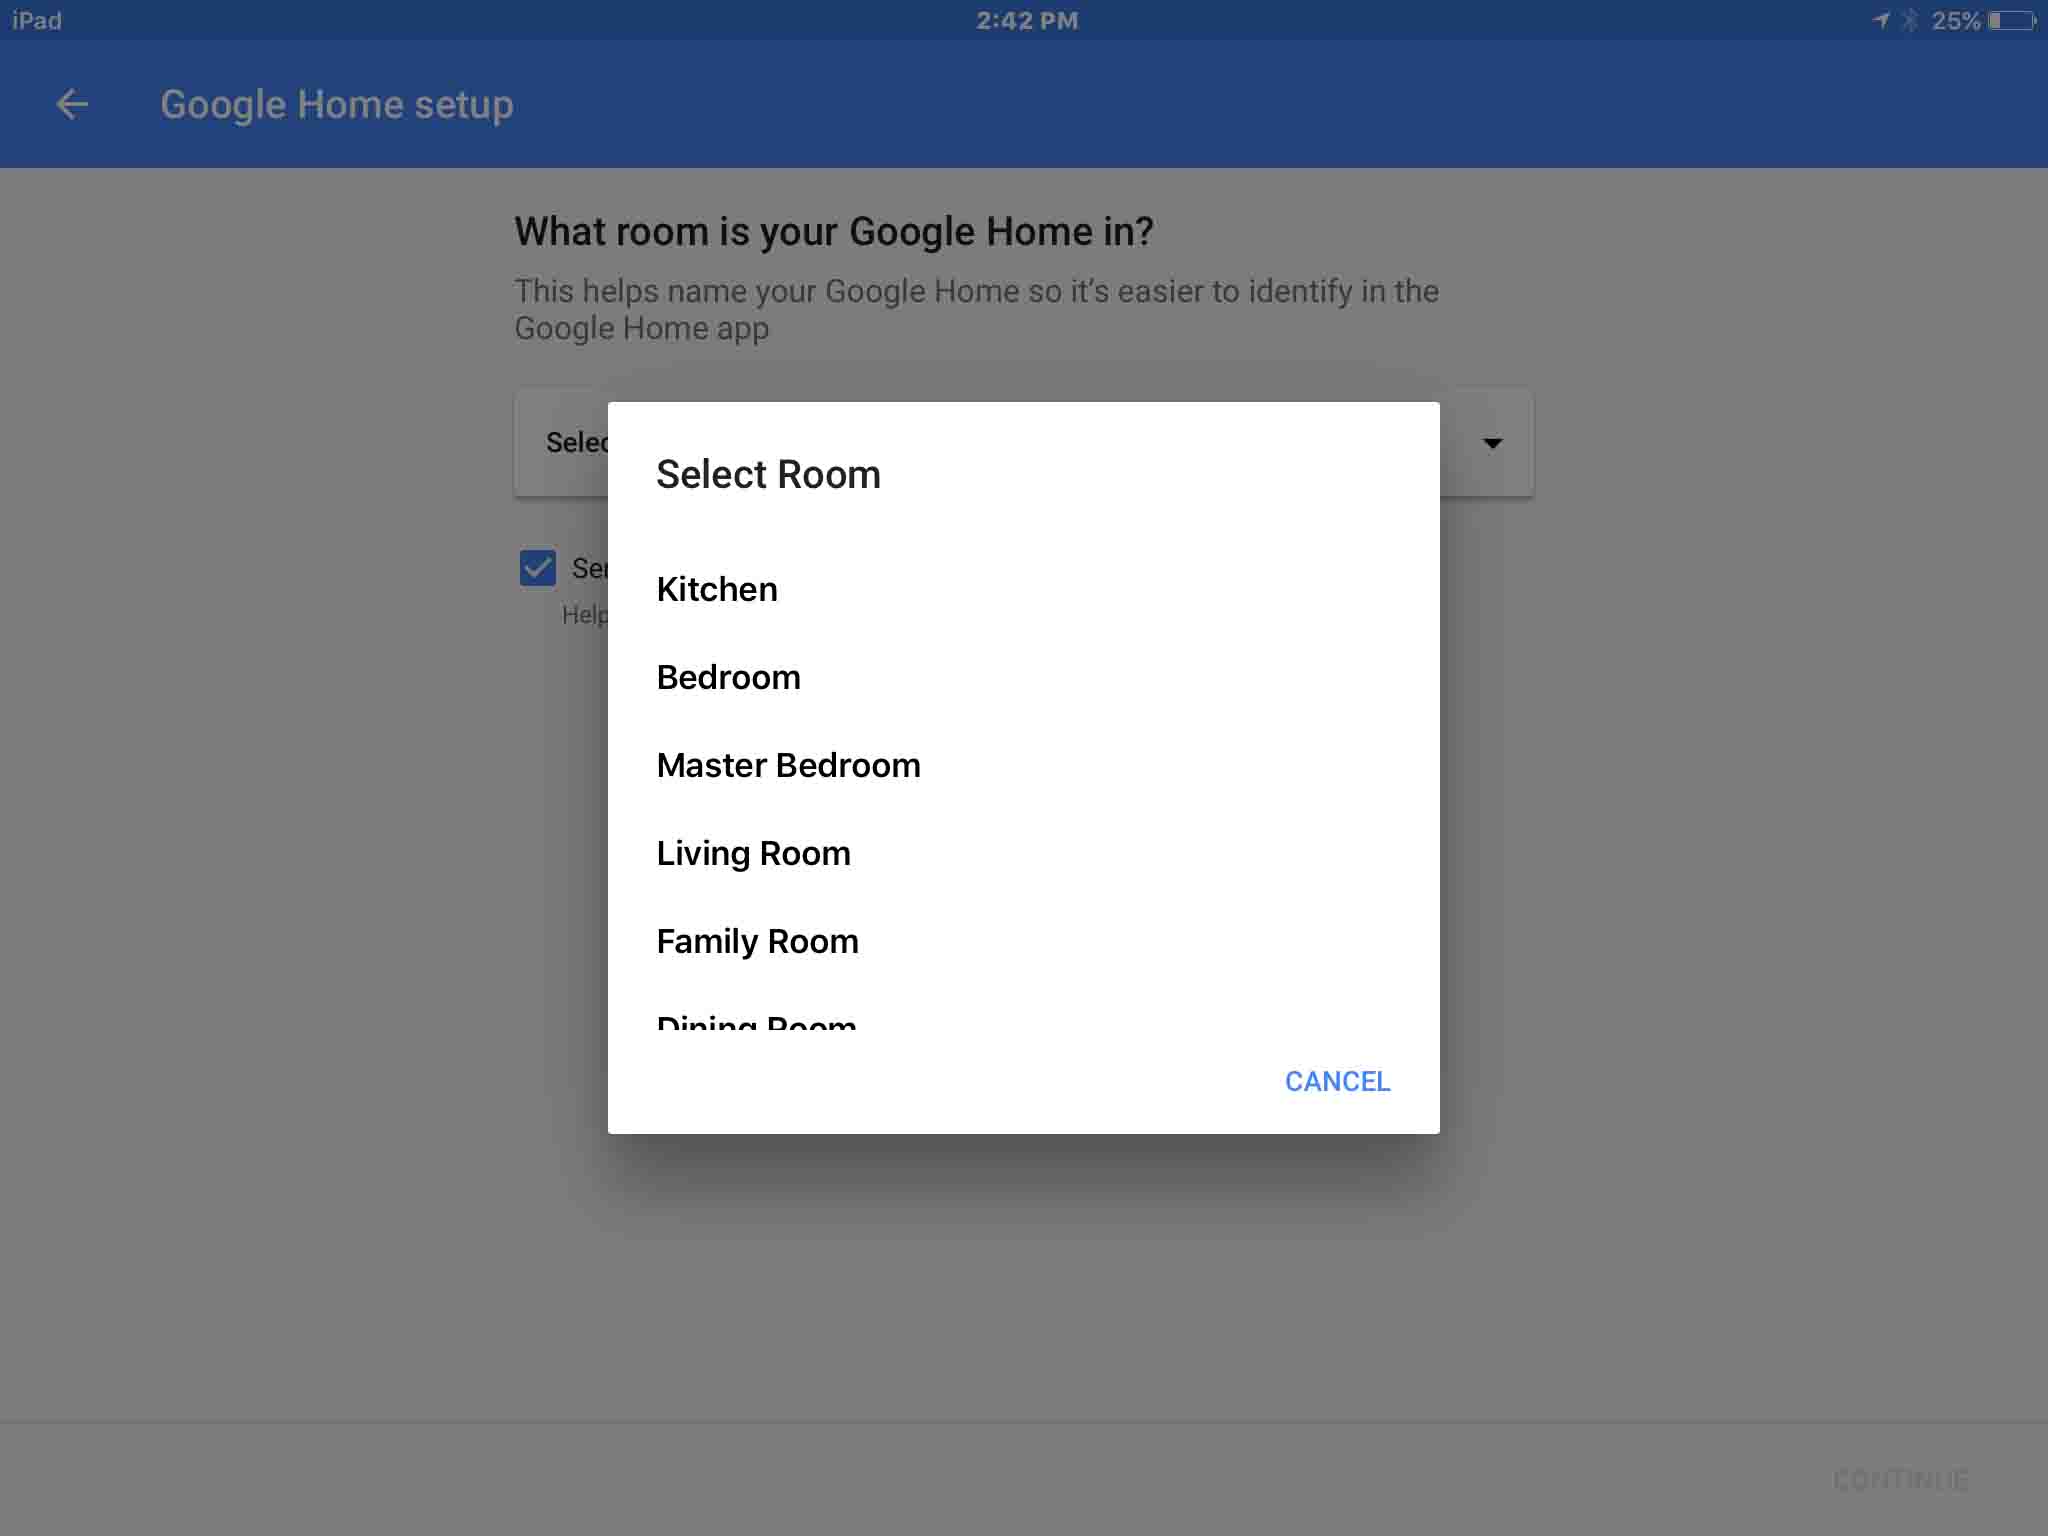
We chose Living Room for our speaker, as shown next.
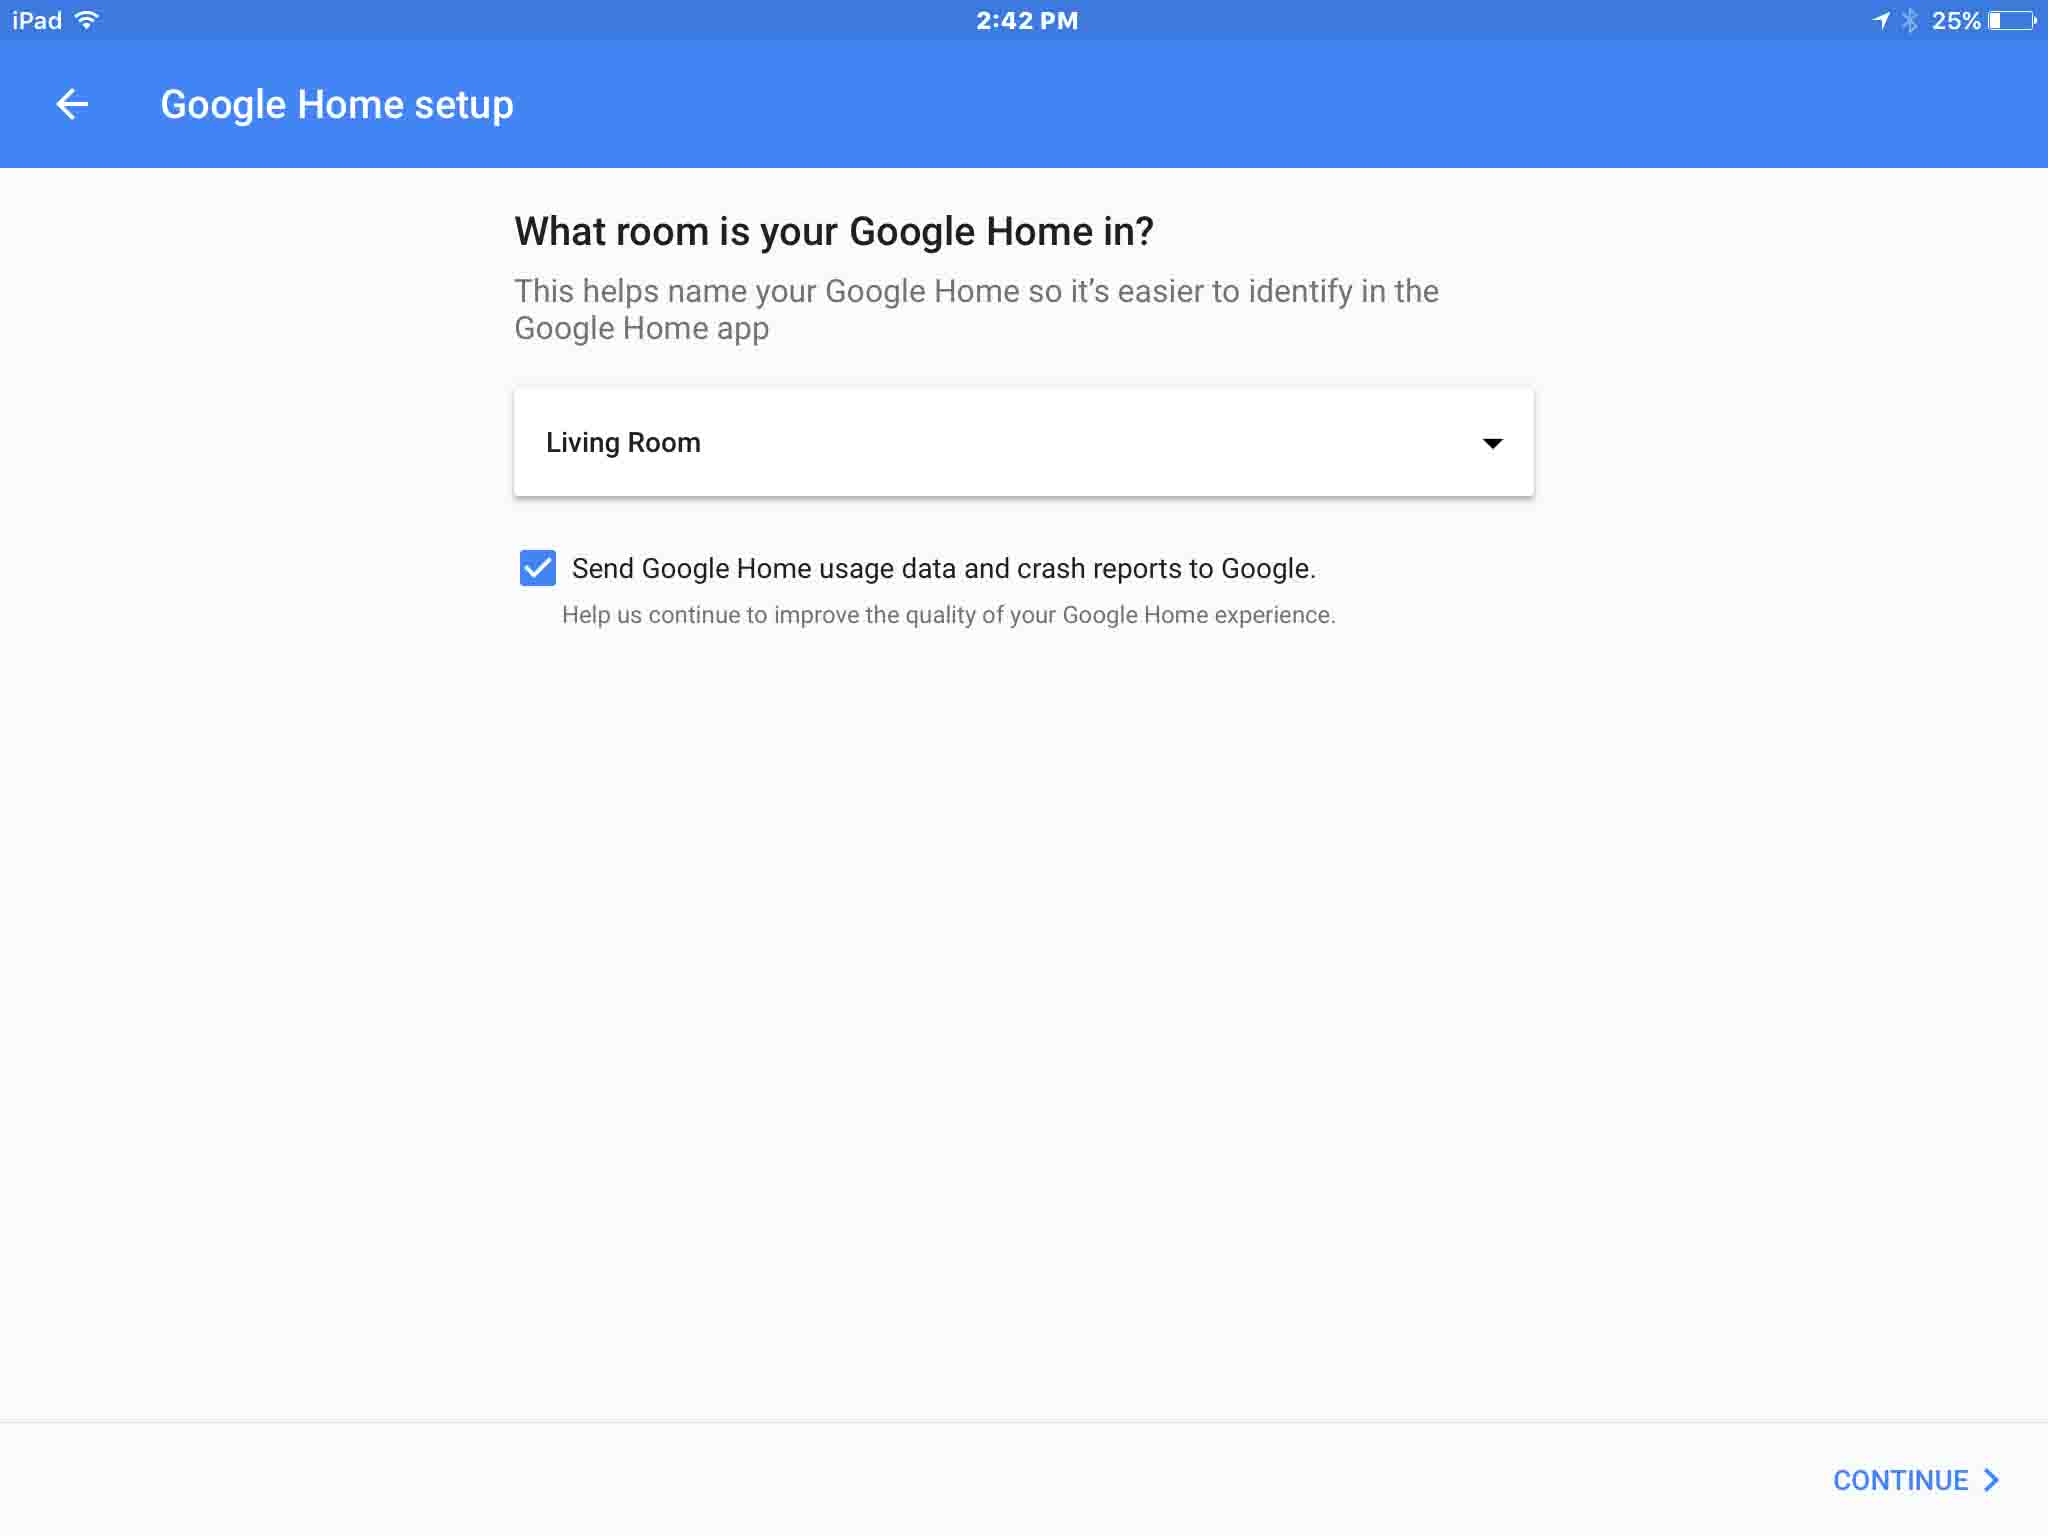
16. Click the Continue Link to Move Forward with Google Home Setup
Tap the blue Continue link in the lower right corner of the screen. You’re then taken to the Select Wi-Fi Network prompt, as shown next. Sometime prior to this, the speaker has done a scan of the WiFi bands (supports both the 2.4 and 5 Ghz. wireless bands). It then puts the in-range WiFi networks it found into the drop-down list on the screen pictured next.
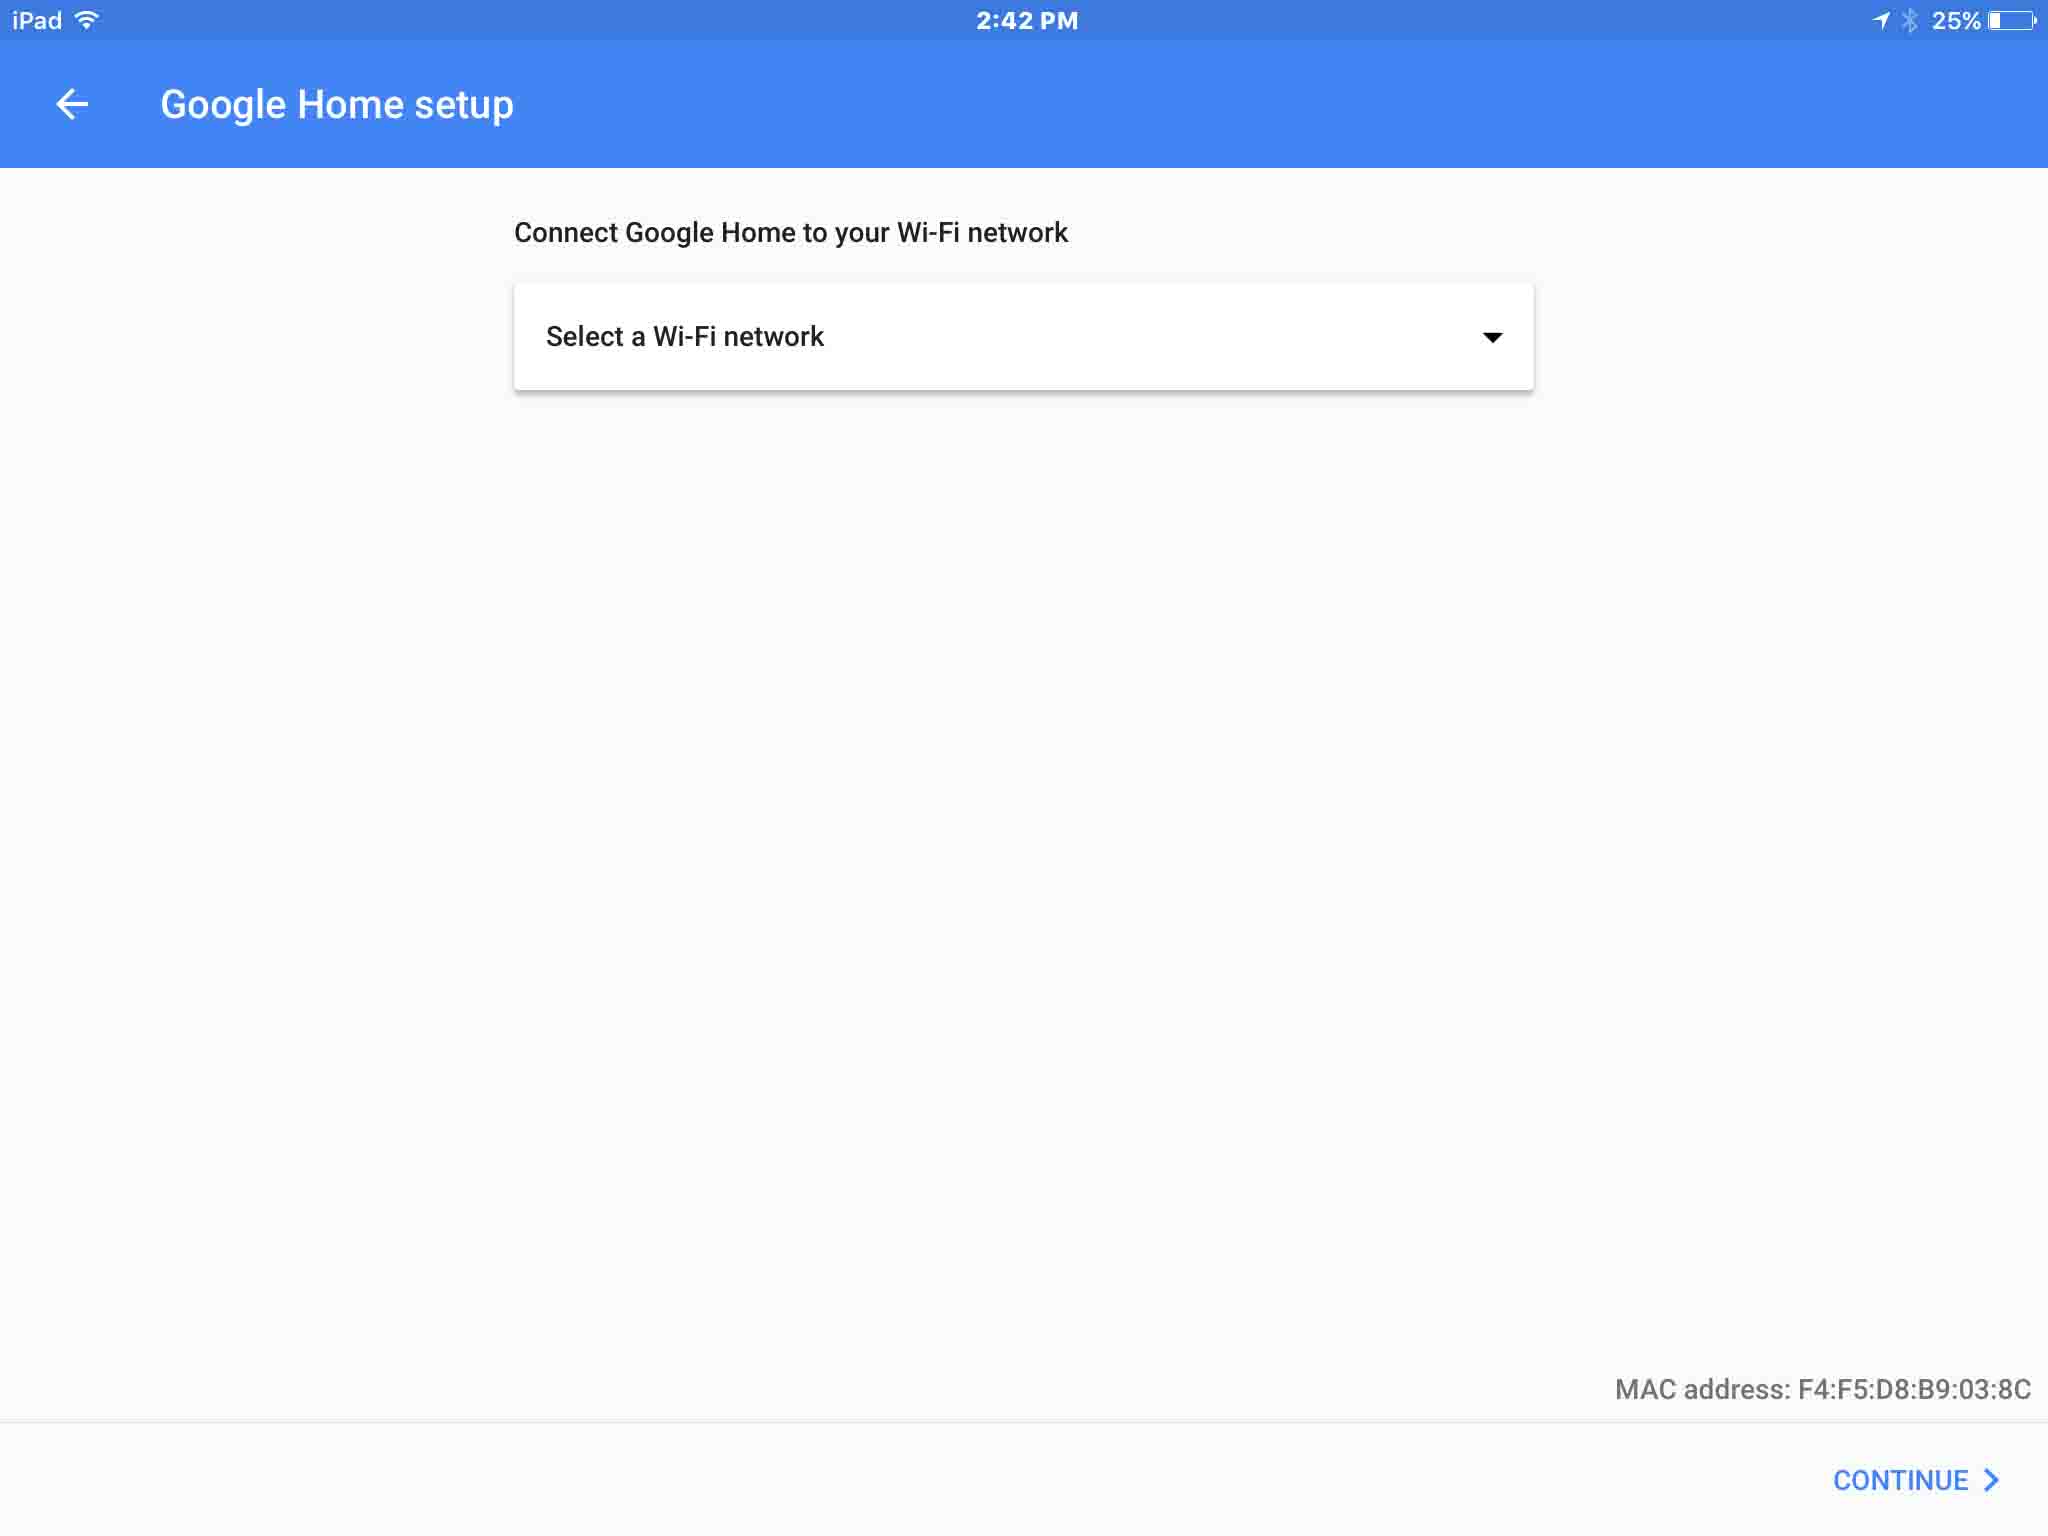
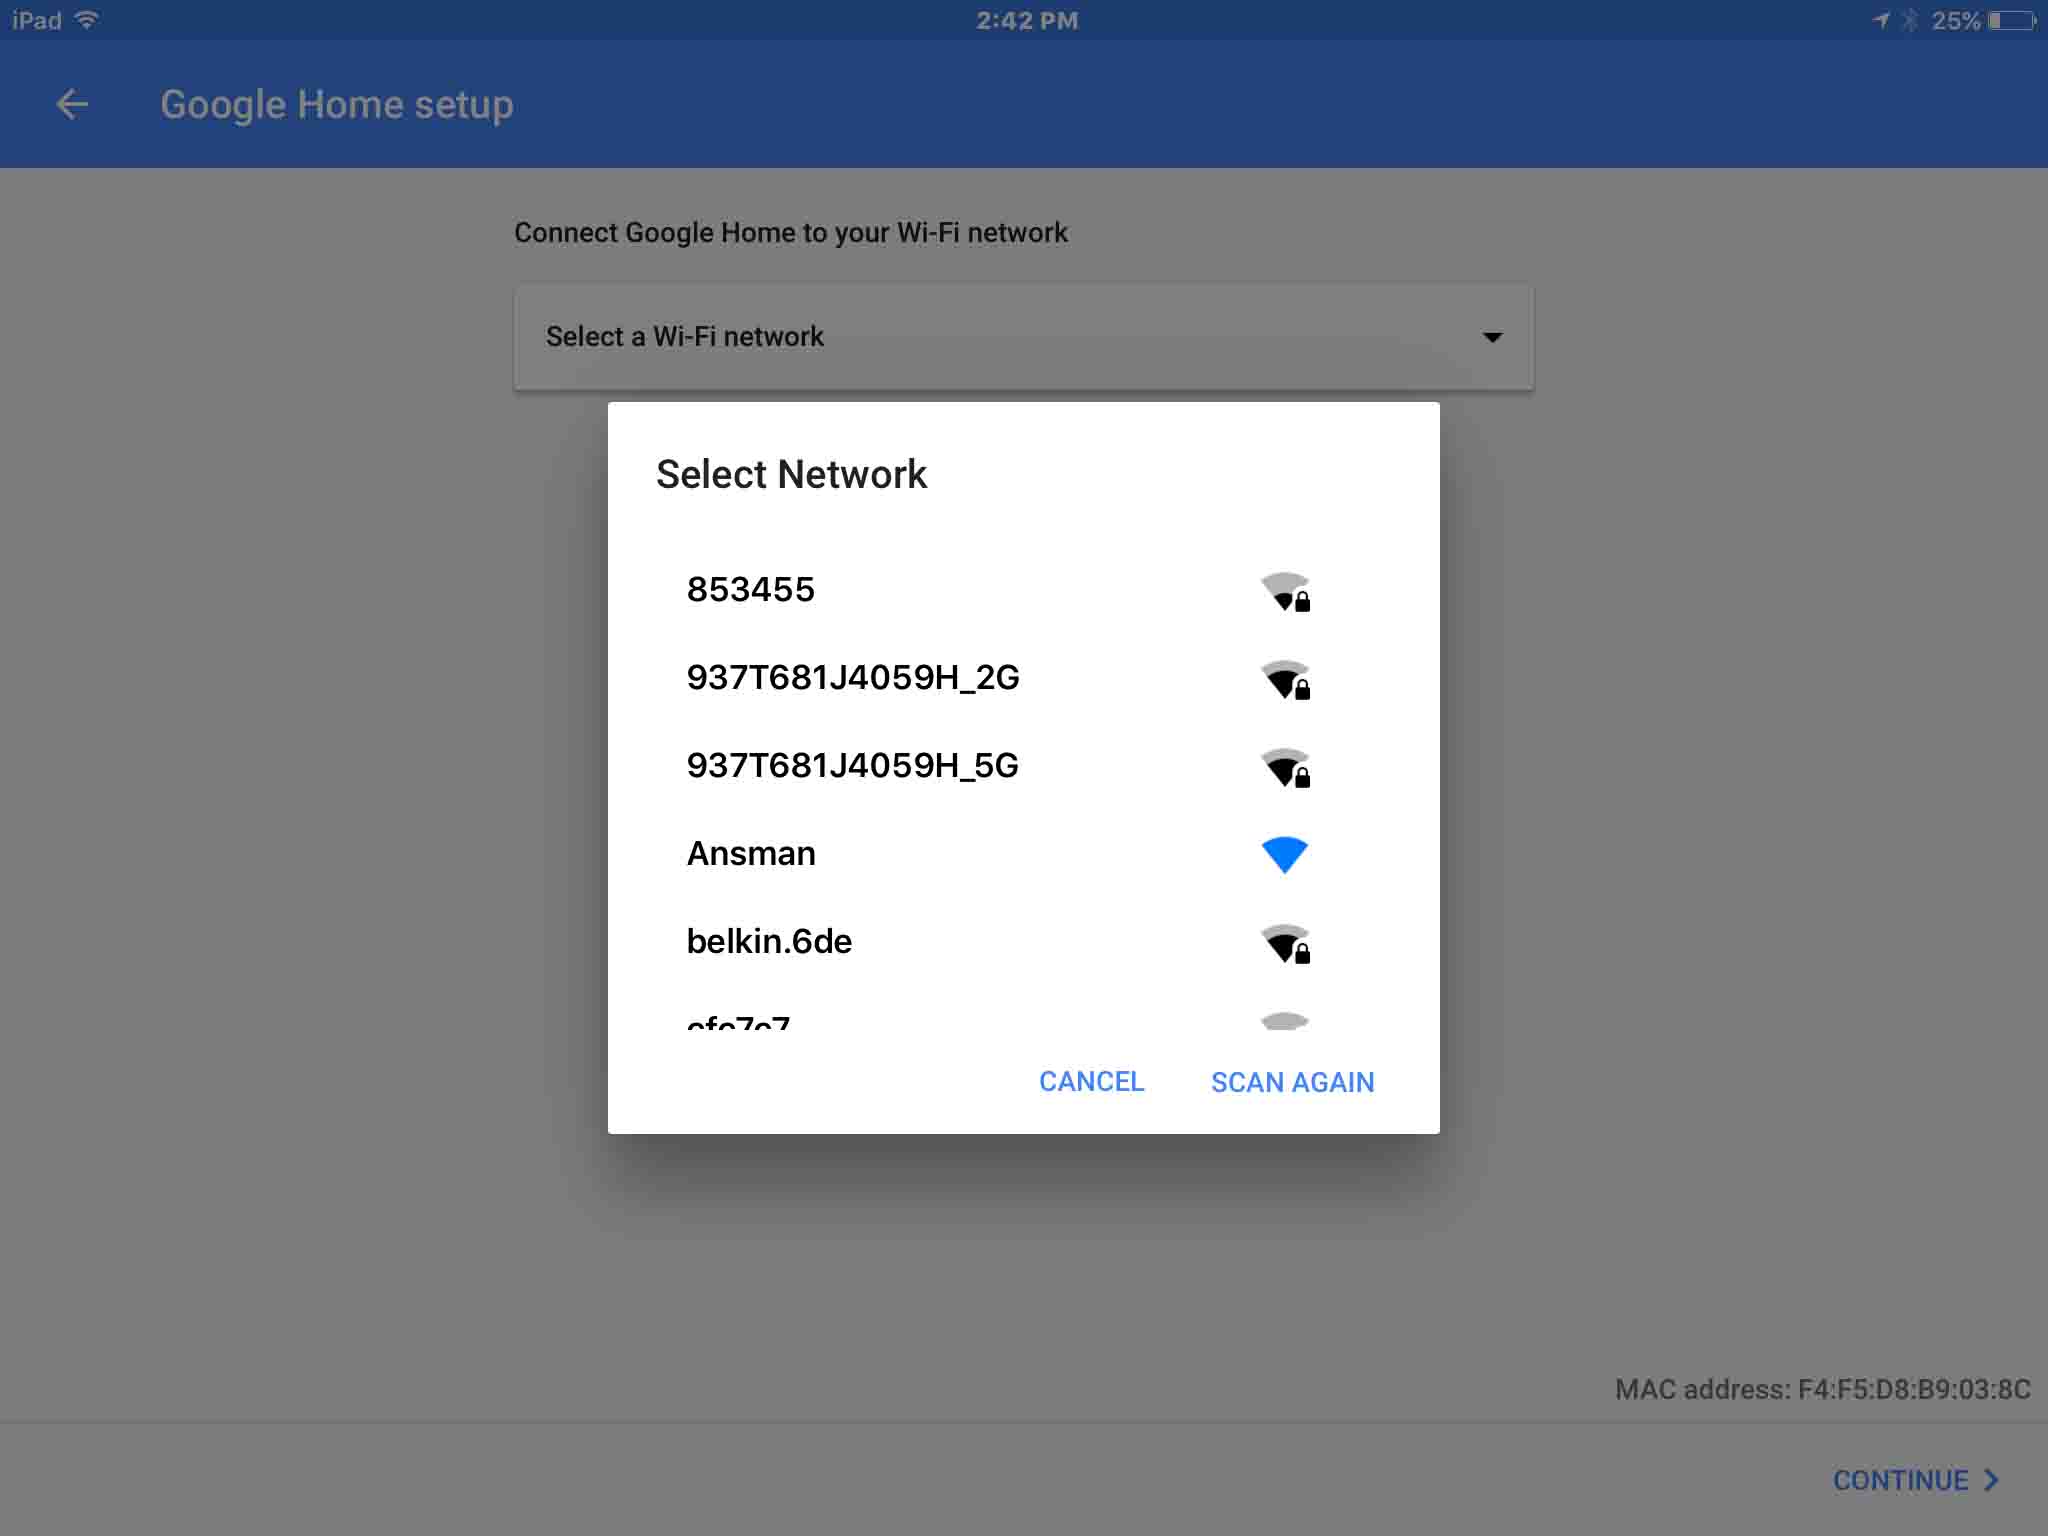
Tap the down-arrow, as shown on the above screenshot, to reveal the list of in-range networks the smart speaker found. The list we got when we ran through this is shown in the next picture.
If your network does not appear in this list, try moving the Google speaker closer to your WiFi access point, and then do a rescan by pressing the Scan Again link at the bottom of the Select Network list window, as shown in the next picture.
17. Choose your Desired WiFi Network
Choose the wireless network to which you’d like your speaker to connect.
Note that this network must have internet access, to enable the smart speaker to communicate with Google servers and processors via the internet. The network should also be secured (requiring a password) to prevent any eavesdroppers from stealing any personal information you might send through your Google speaker.
If you do not see your WiFi network listed, swipe up in the Select Network window, as pictured above, in order to scroll down in the list and bring other networks into view in the window.
In our scenario here, we’re going to connect to the 937T681J4059H_5G network SSID. Your network name will likely be different. So tap on yours in the list, as we’ll do here with ours. A password prompt is then issued if you picked a secured network, as shown in our case in the next picture.
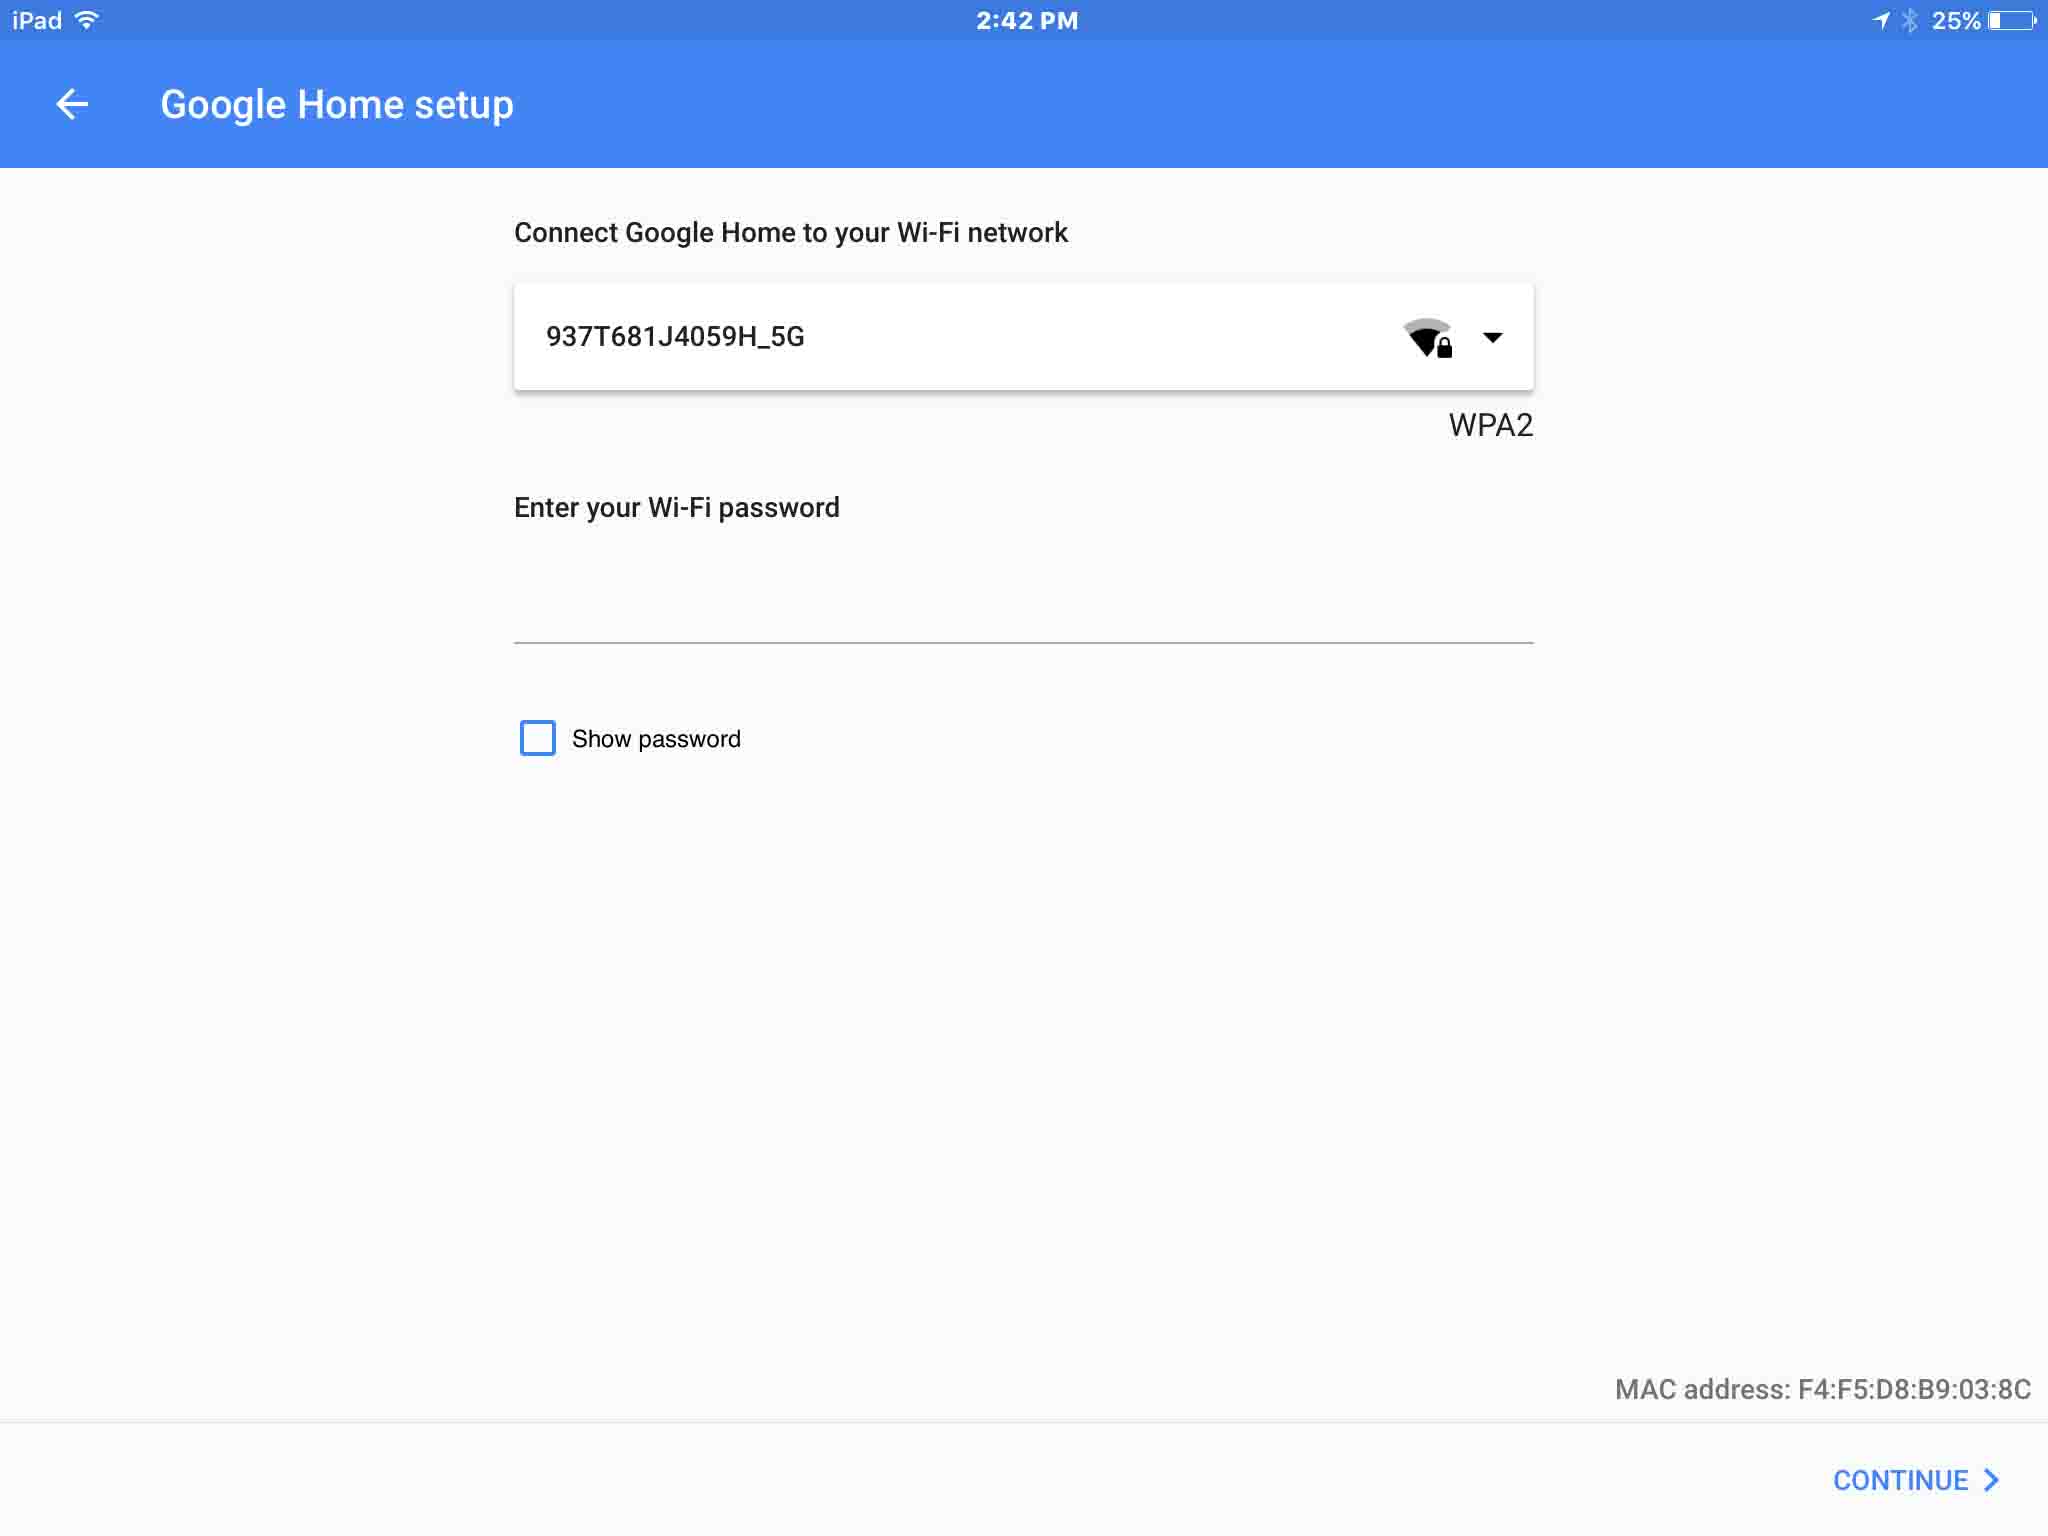
18. Enter Selected WiFi Network Password
We’ve used the iOS virtual keyboard to enter the password for our chosen wireless network, as shown in the next picture.
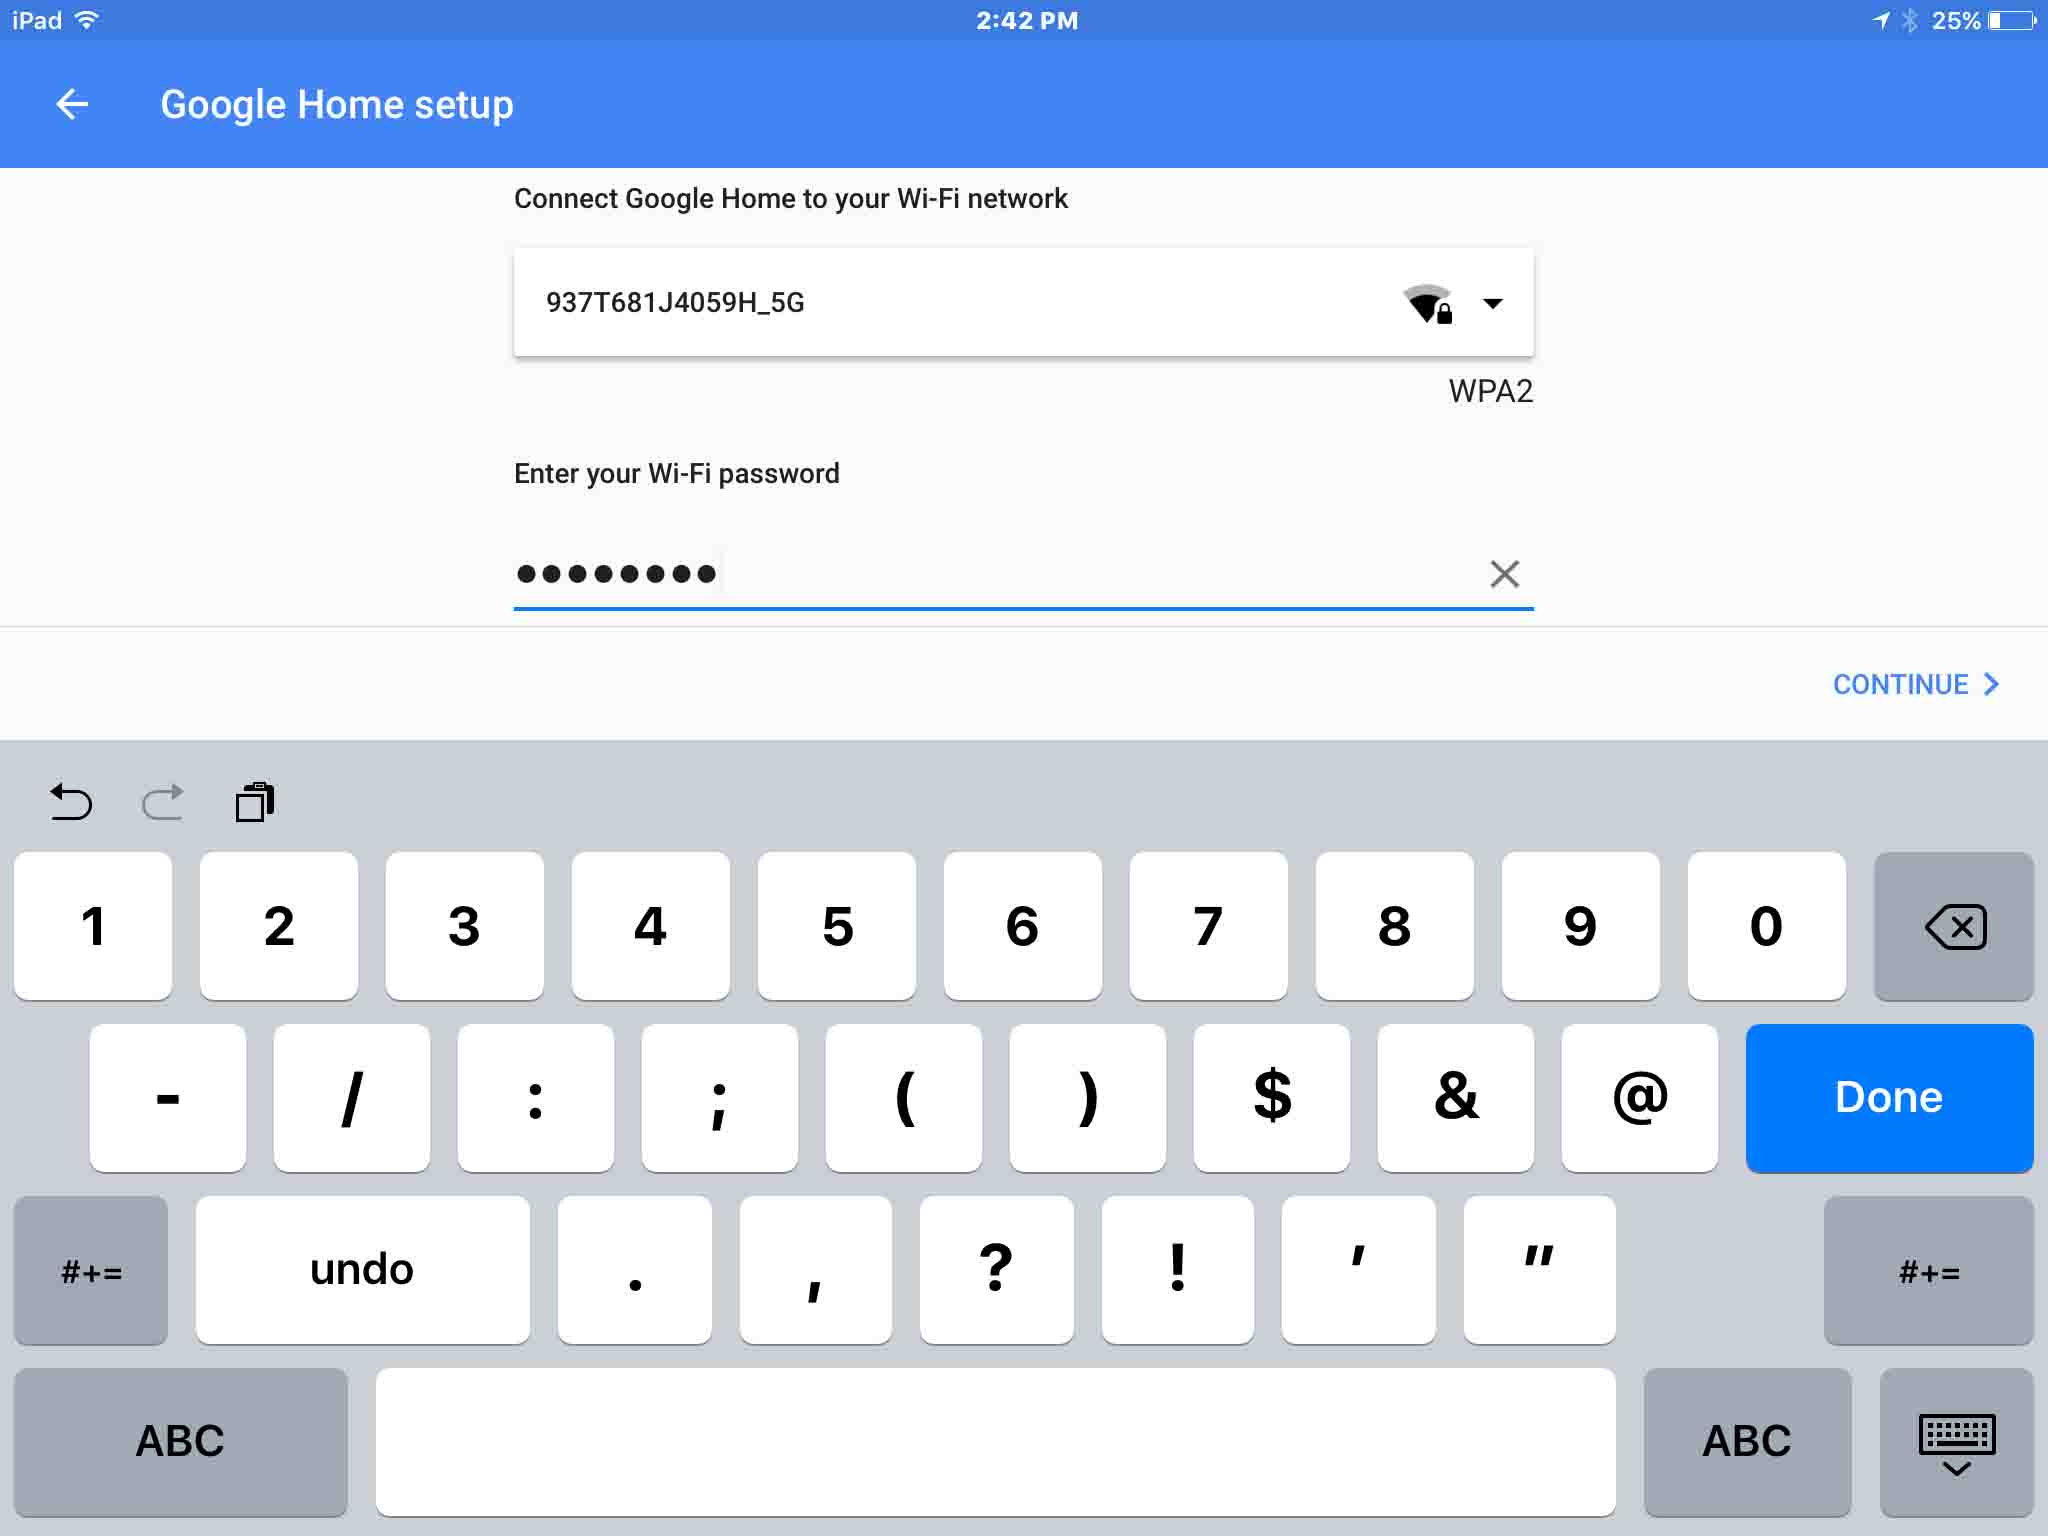
19 . Tap the Continue Button
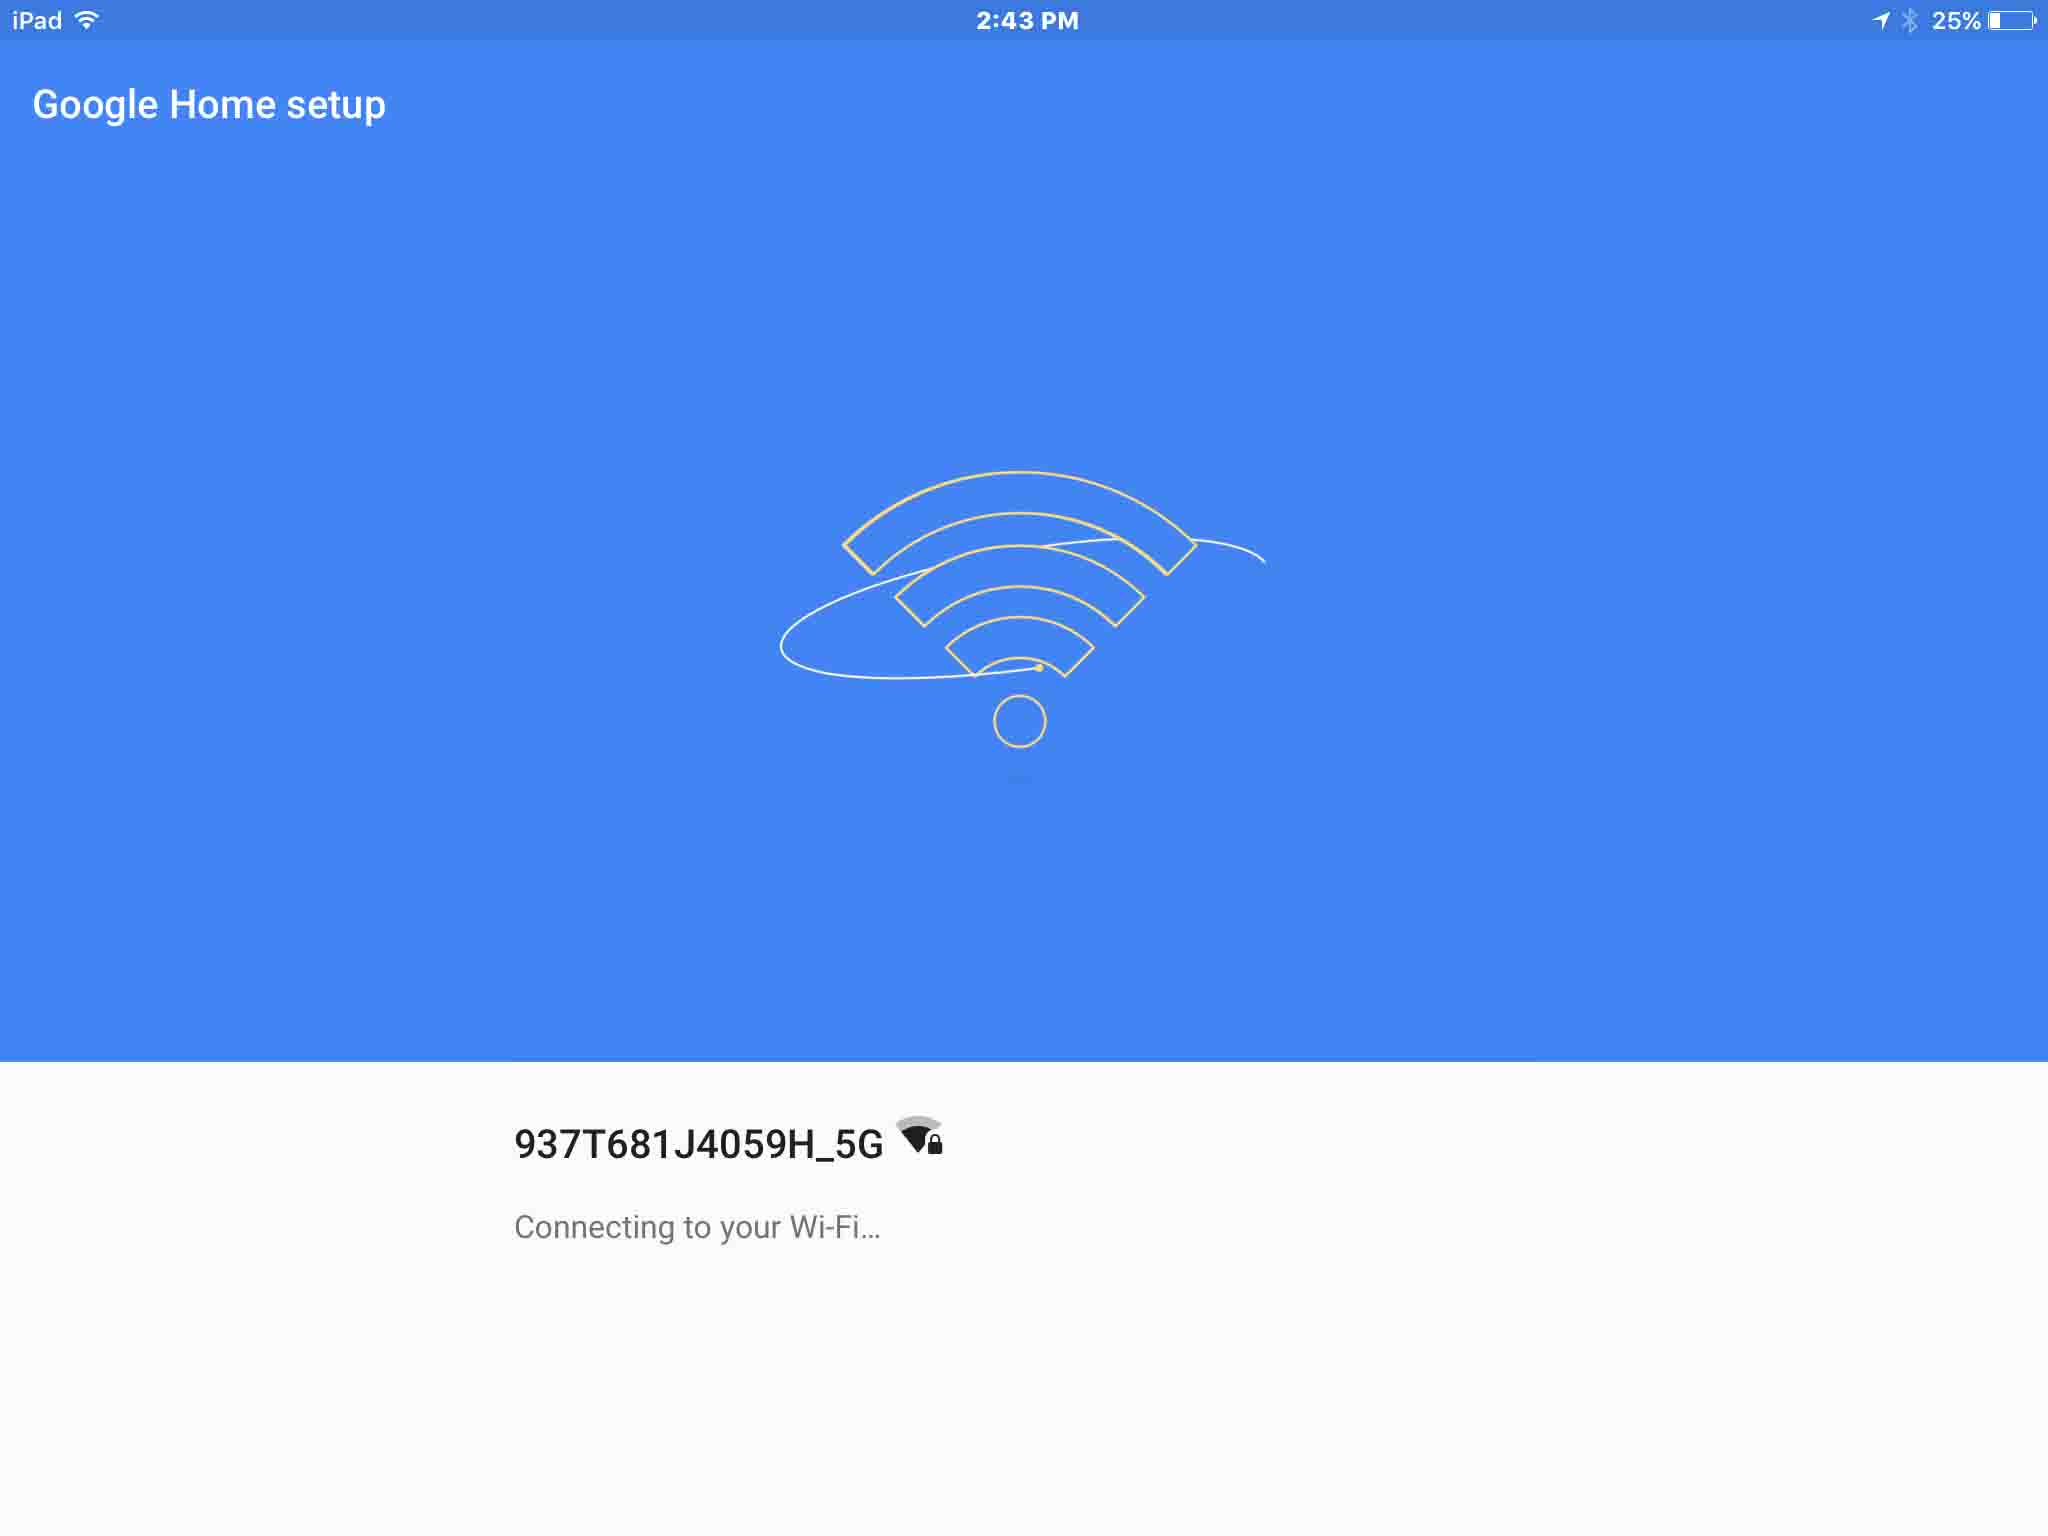
at lower right corner of the Google Home Setup screen. This starts your smart speaker’s attempt to connect to the wireless network you selected with the password you entered. While the speaker tries to connect, the app displays the following, “in progress” screen.
If all goes well, and after several seconds, the Google Home speaker establishes connection successfully with your chosen Wi-Fi network, and then, the app displays the following screen to let you know.
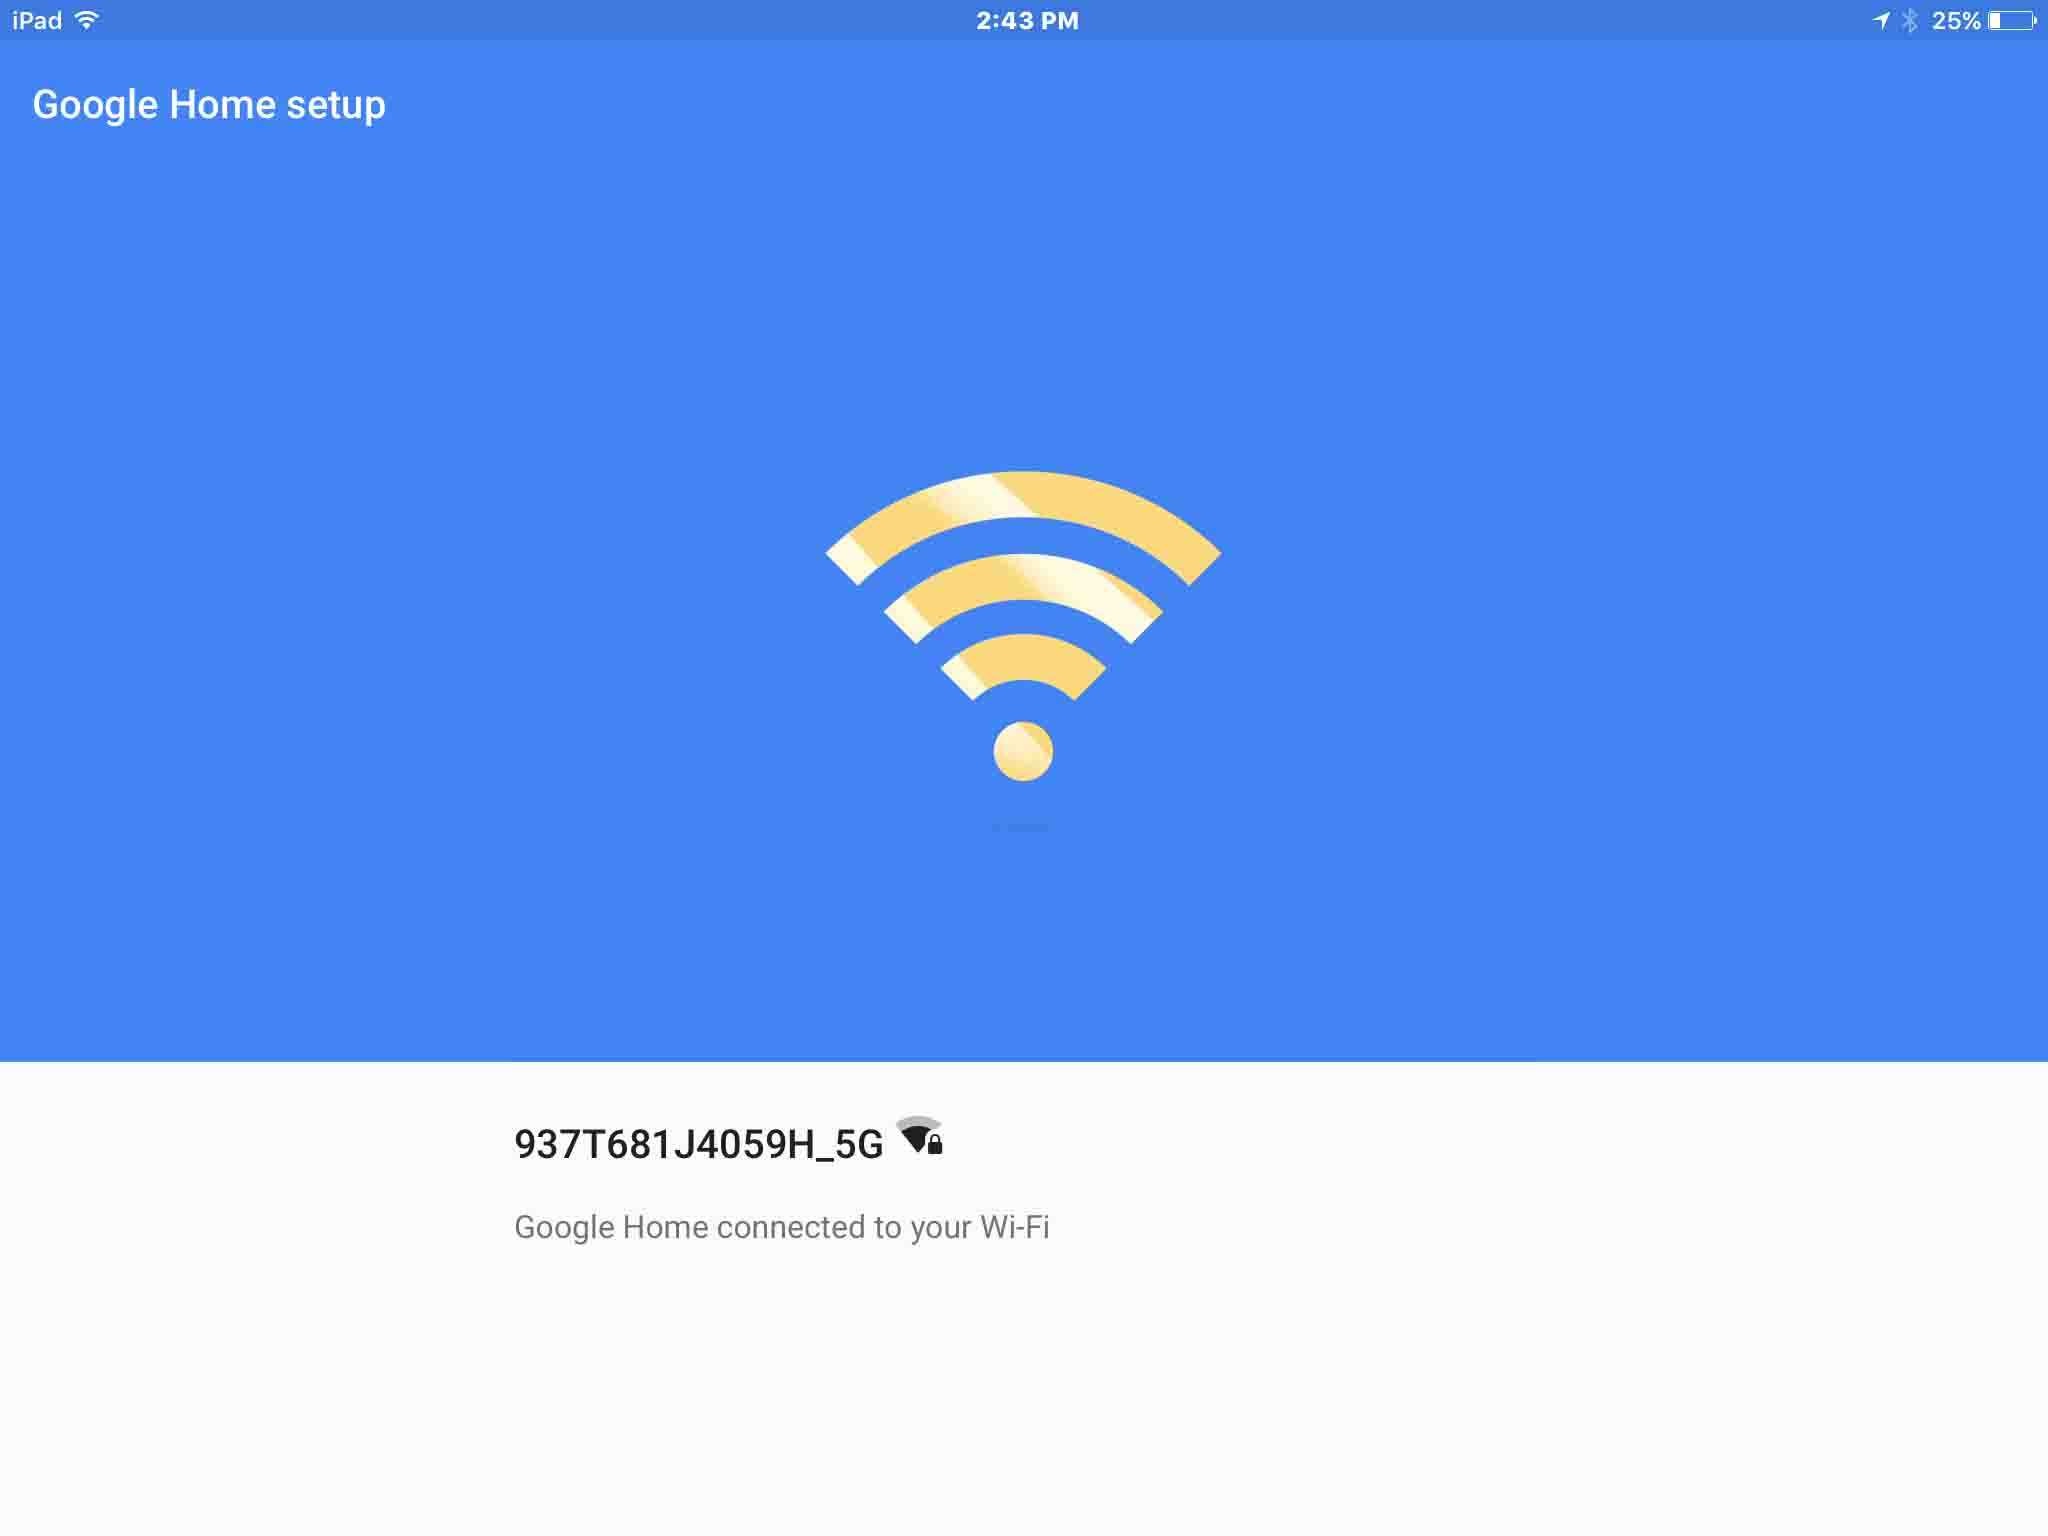
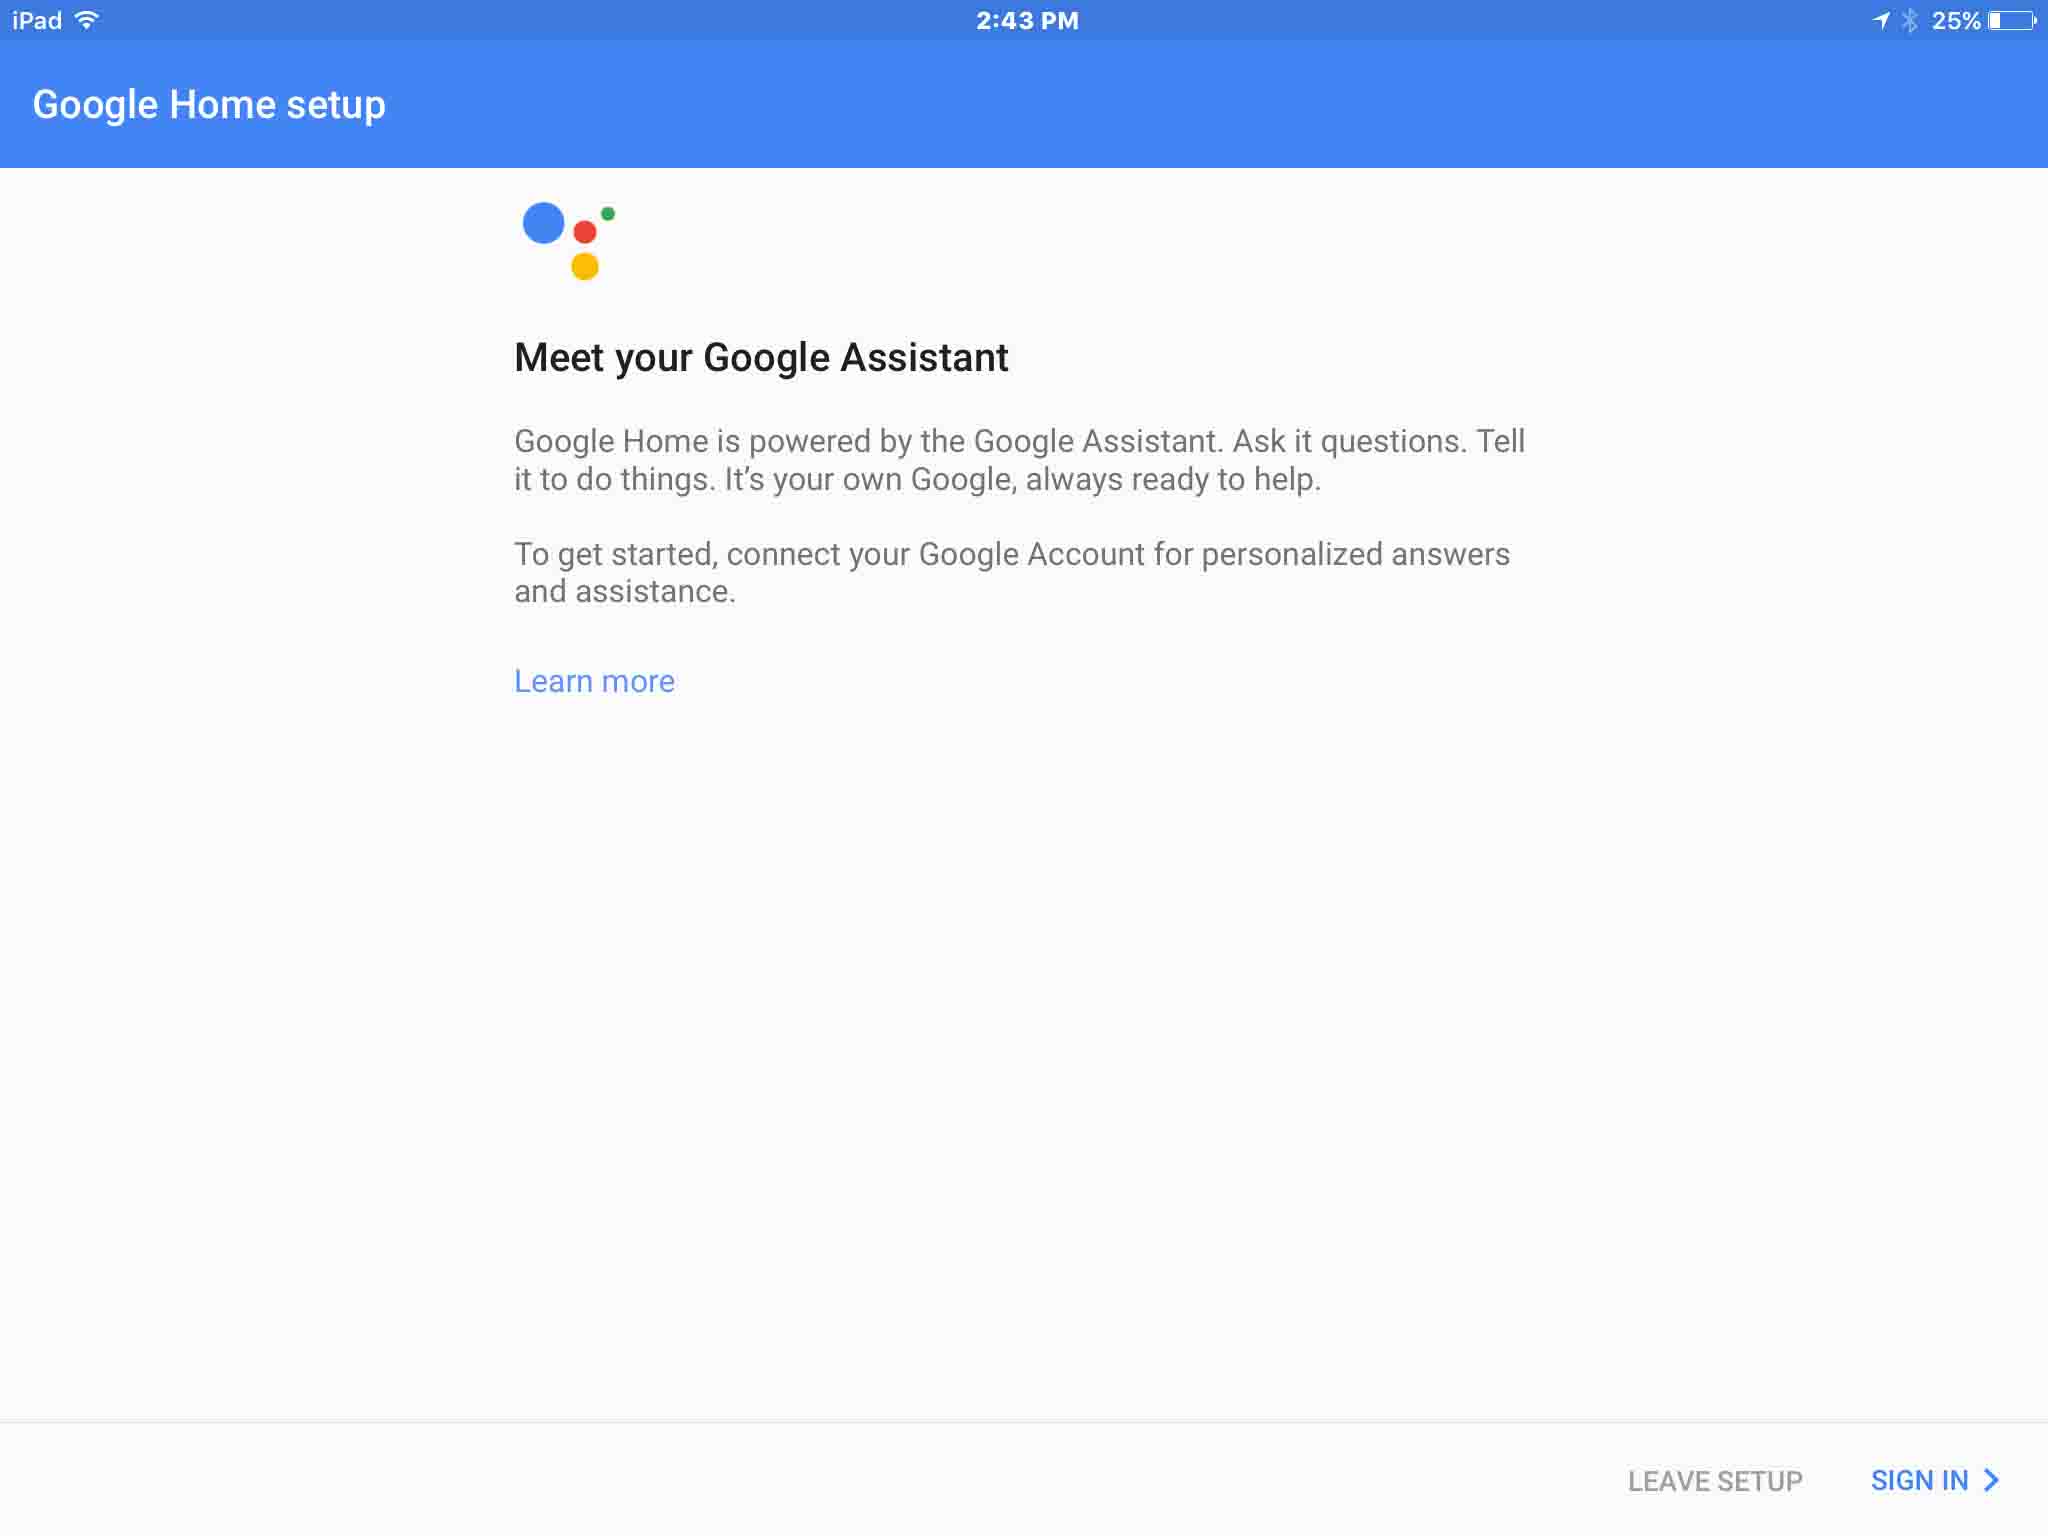
This screen displays long enough for you to see it and understand that you’ve established a successful connection between your speaker and your chosen Wi-Fi network. Then, the screen changes to the Meet your Google Assistant prompt, as shown next.
You may choose here, to either learn more about the assistant (by tapping the Learn More link in the screen center), or you can skip this by tapping the blue Sign In link in the lower right corner of the screen, as shown in the next picture. For this scenario, we’re not going to learn more, but instead, tap the Sign In link.
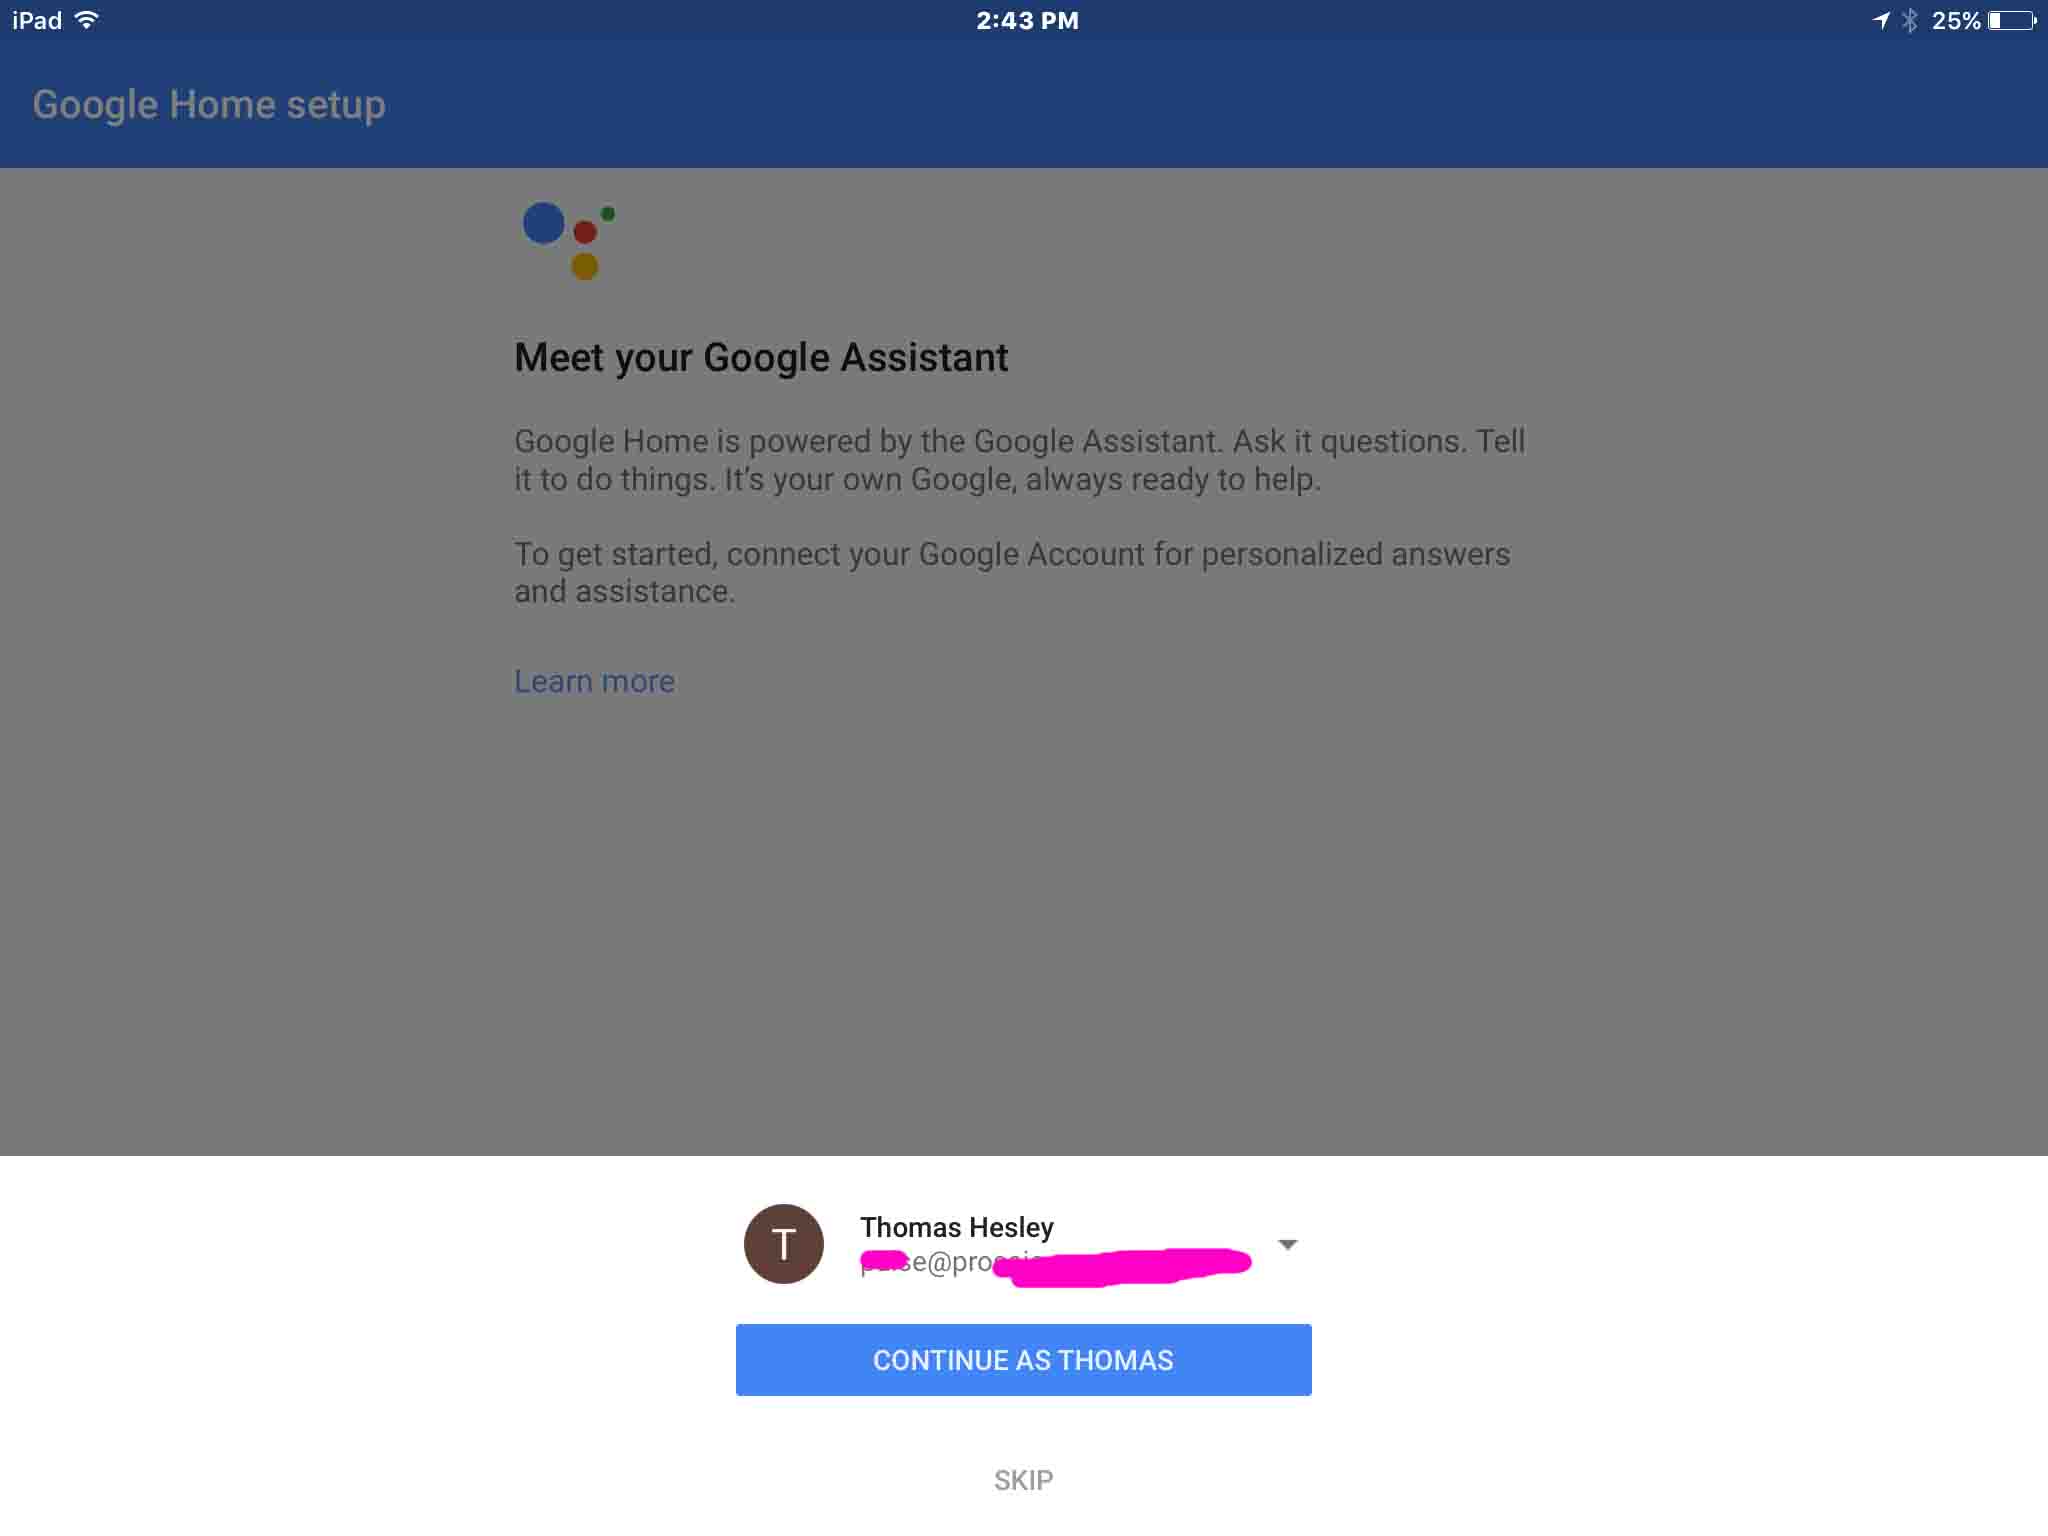
After pressing Sign In, you get the screen displayed next.
20. Sign In to your Google Account to Continue with Google Home Setup
The screen below allows you to select from Google accounts used previously to successfully sign in to the app. You can also choose to enter a new account. In our case here, since we’re already signed into Google on our iPad tablet, we’re just going to press the blue Continue as Thomas button. If we weren’t already signed into Google, we would have been asked to enter the Google account Id and password of our desired account.
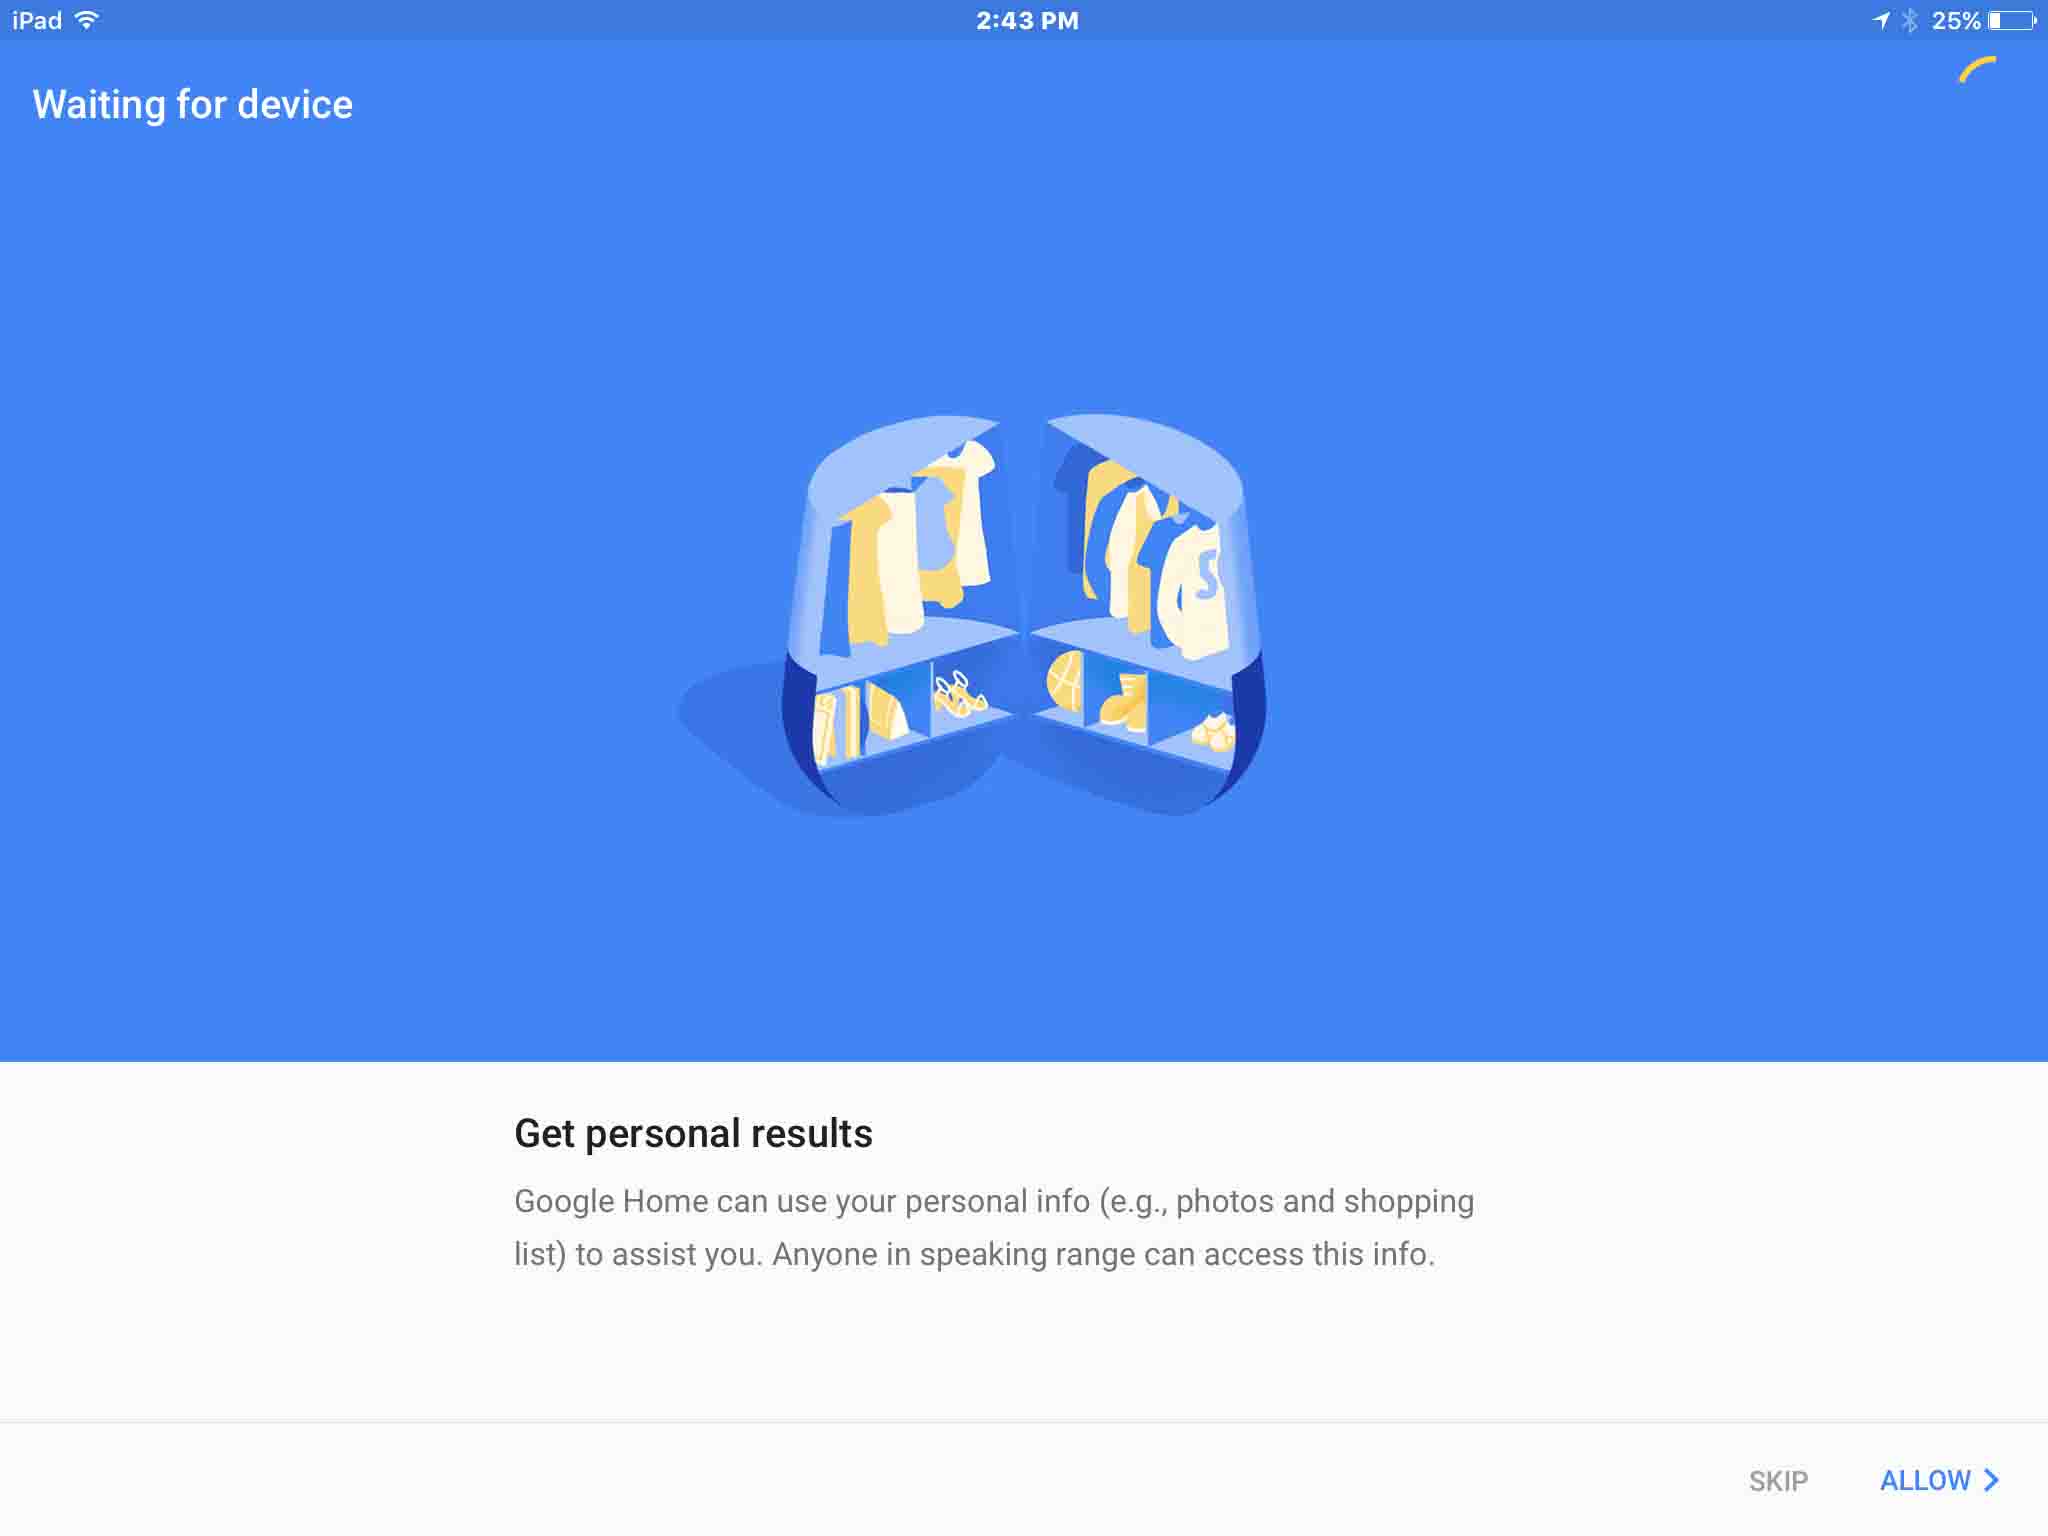
Once you’ve entered your account, either by picking it from the list, or by entering the desired user Id and password explicitly, the Waiting for Device screen appears next, as shown in the next step.
21. Allow for Getting Personalized Answers to your Questions
At this prompt, you can choose to enter the street address of the place for which you’d like to receive personalized information (weather, news, nearby store lists, and such). Press the Allow link in the lower right corner of this screen, and you’ll be prompted for your street address or city location.
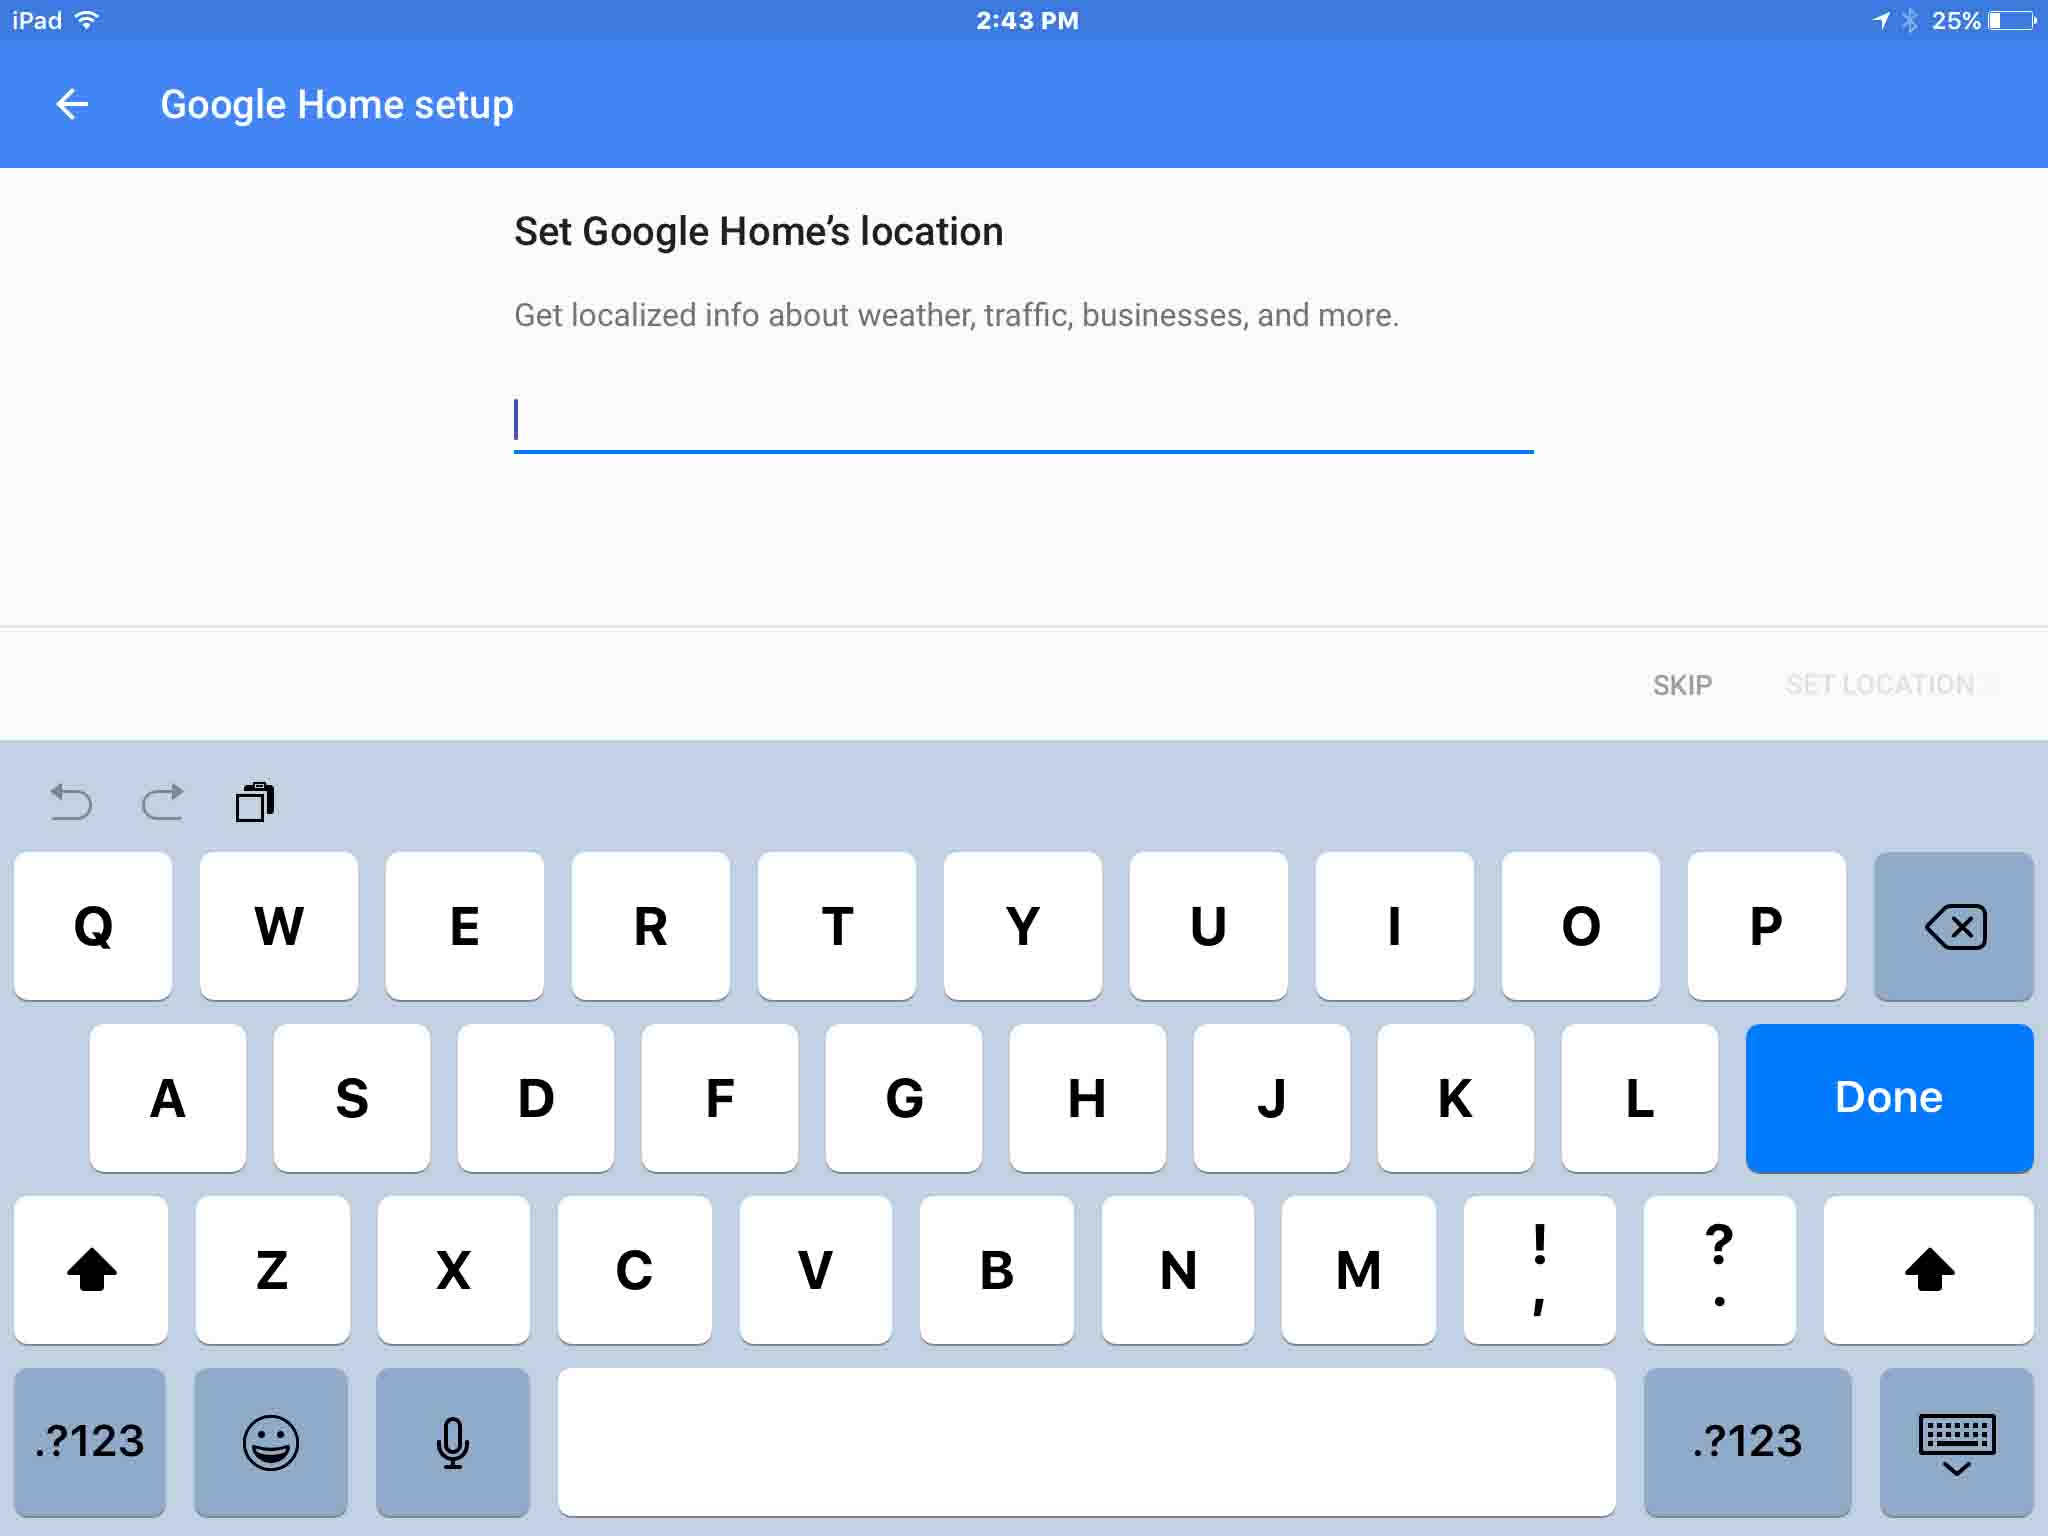
22. Enter Desired Location
On this screen prompt, you can enter a street address, city-state, and / or zip code. Then, you choose from the list of matches that results from your typing, the location you wish to assign to your Google speaker.
23. Choose a Default Music Service
After you’ve entered your location above, the screen pictured next displays, where you can add your login credentials to any music service you might have, that Google Home supports. Currently, they support Google Play Music, YouTube Music, Spotify, and Pandora. For each service you have an account with, click the blue LINK link. Then you’ll be prompted to enter your account information for that service.
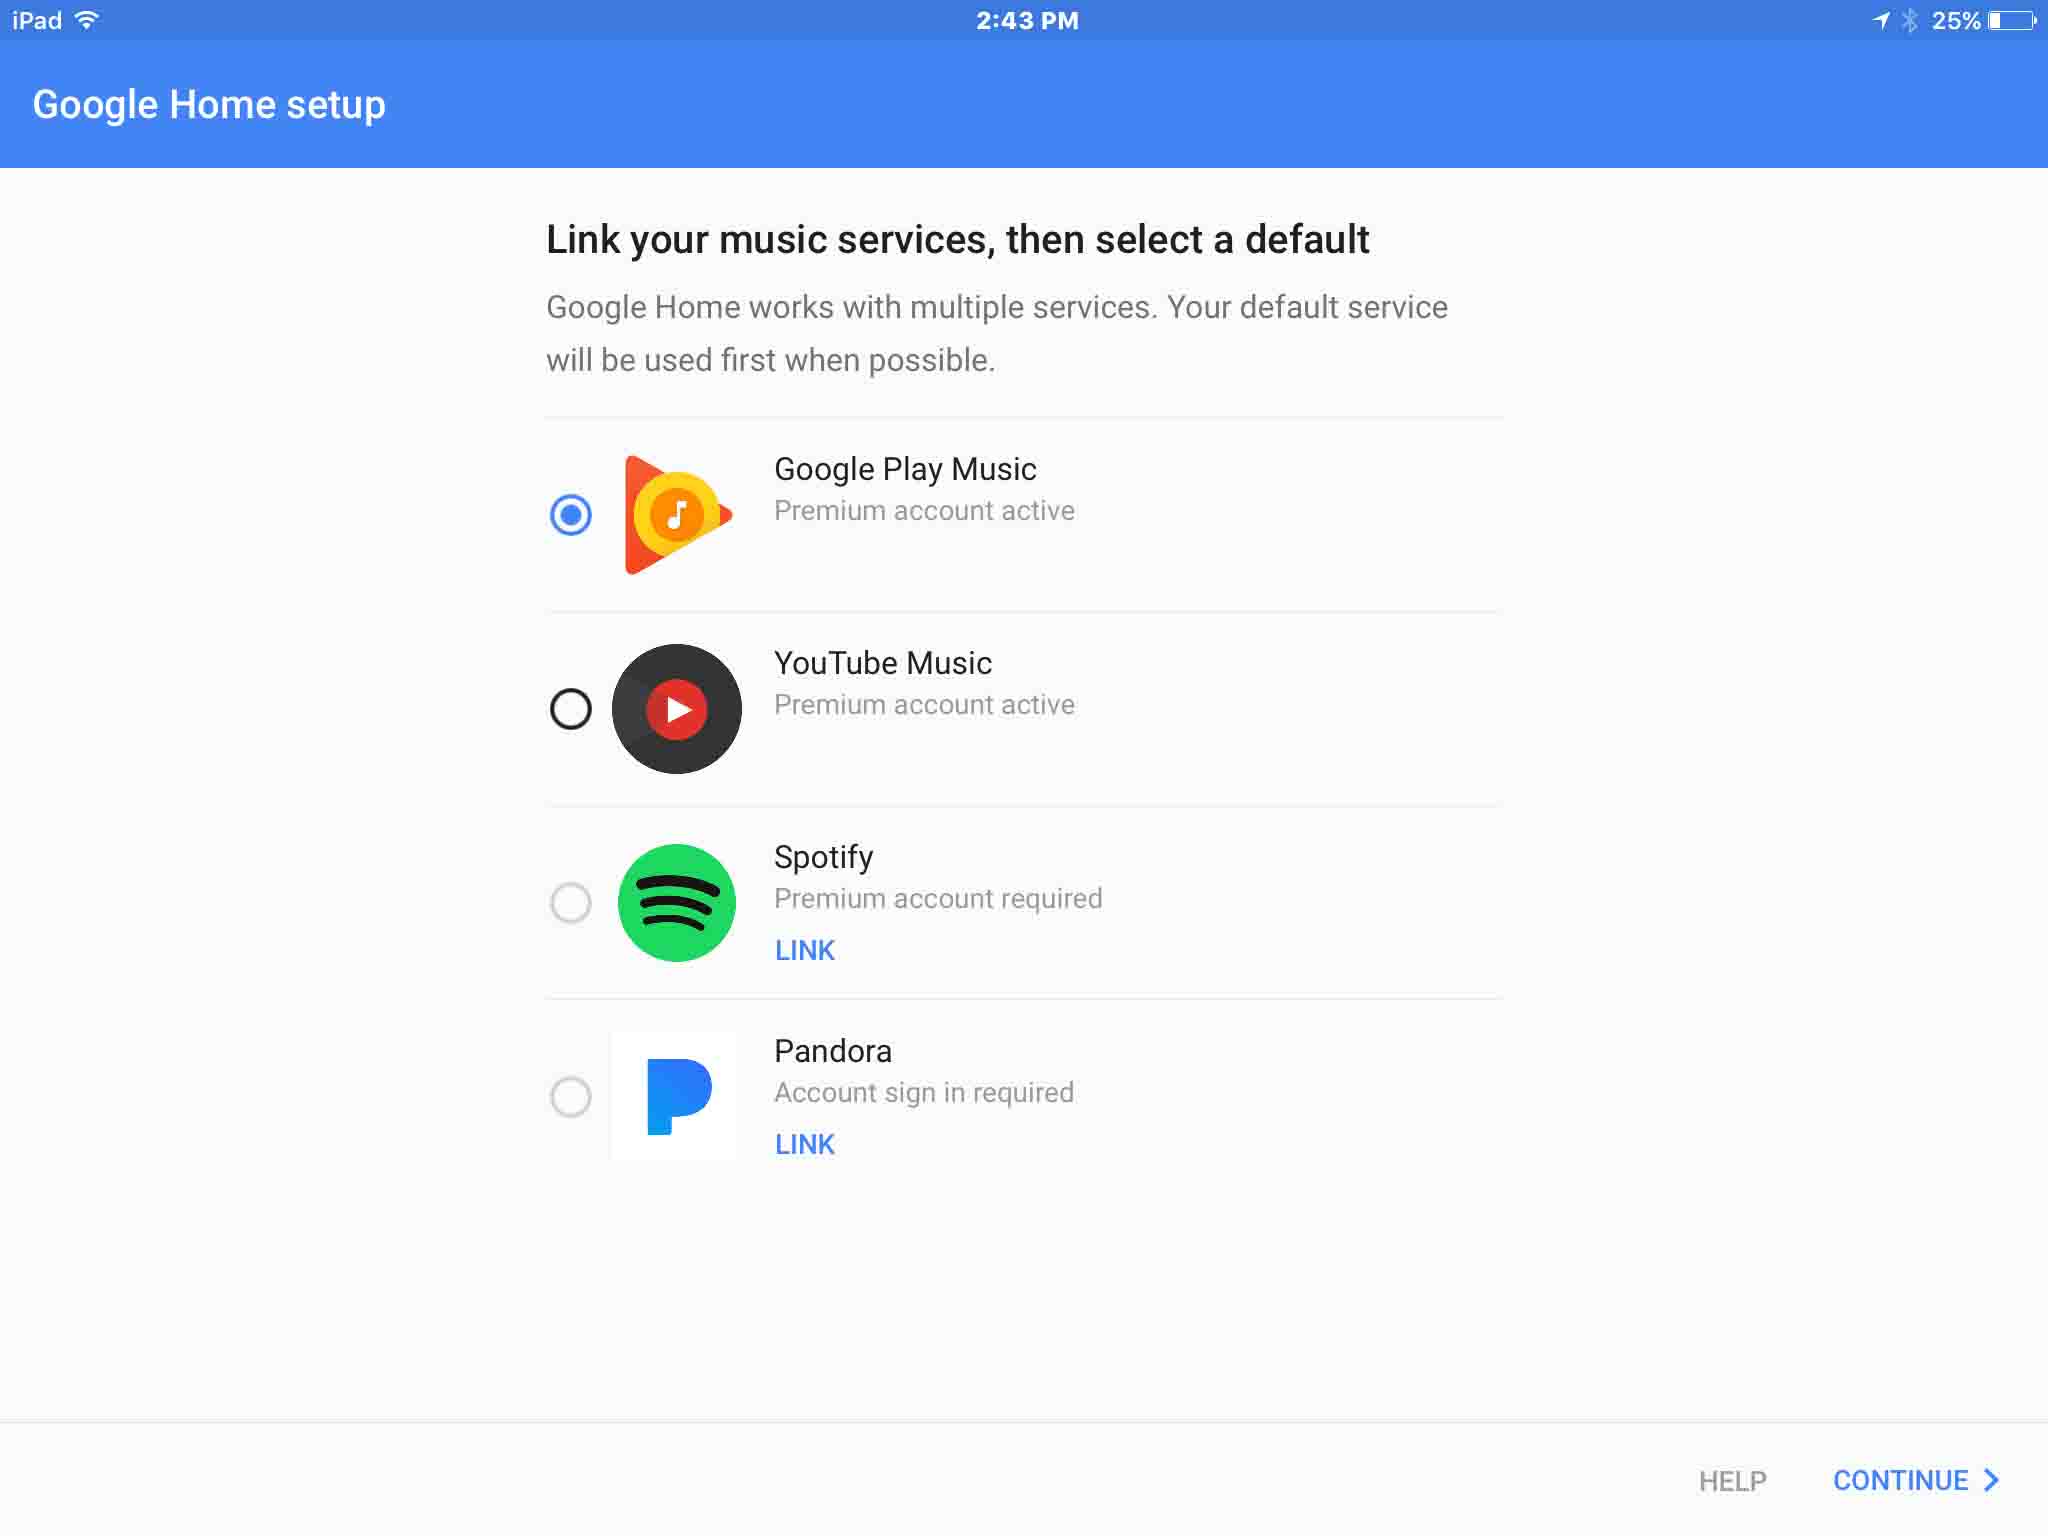
After linking to any music service accounts you desire, tap the radio button circle to the left of the service you wish to be your default music service on your Google Home smart speaker. That button then turns blue. In the picture above, the Google Play music service has been selected as the default.
24. Tap the Continue link to Go Forward with Google Home Setup
on the screen just displayed. The screen displayed in the next picture then appears. It shows that the Google Home Assistant Speaker has been successfully set up. Here, you can choose to move through a brief tutorial that talks about all that Google Home can do for you. However, we’re not including that tutorial in this demo.
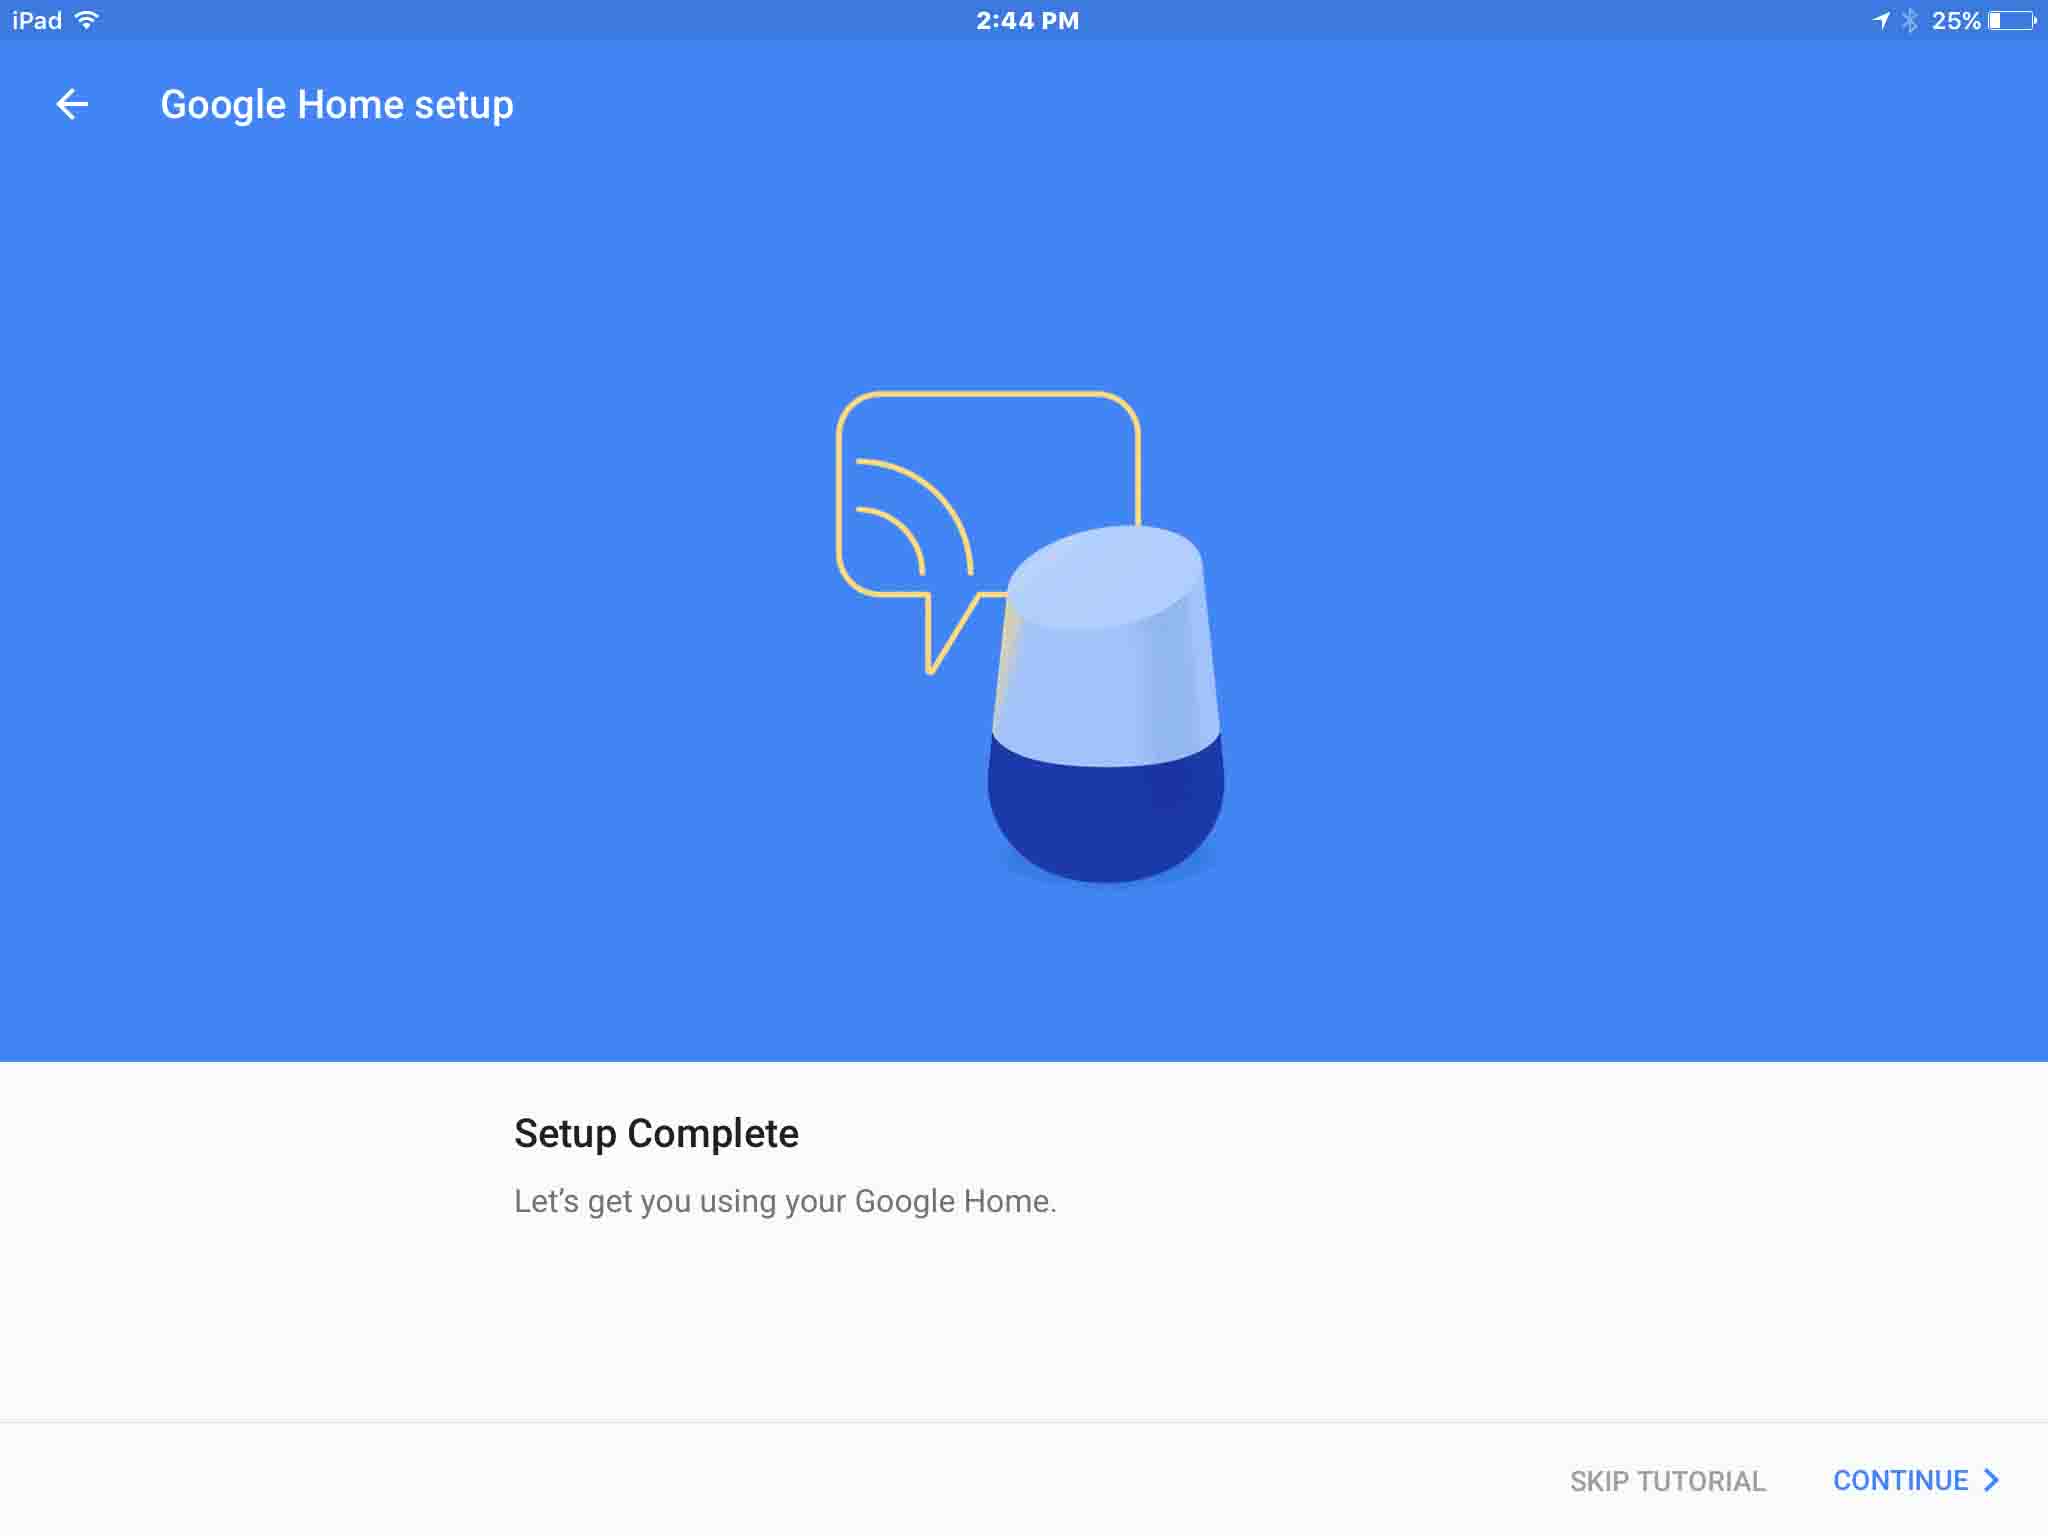
25. Tap the Skip Tutorial Link
Skipping the tutorial takes you back to the app’s home screen. Our home screen is pictured next.
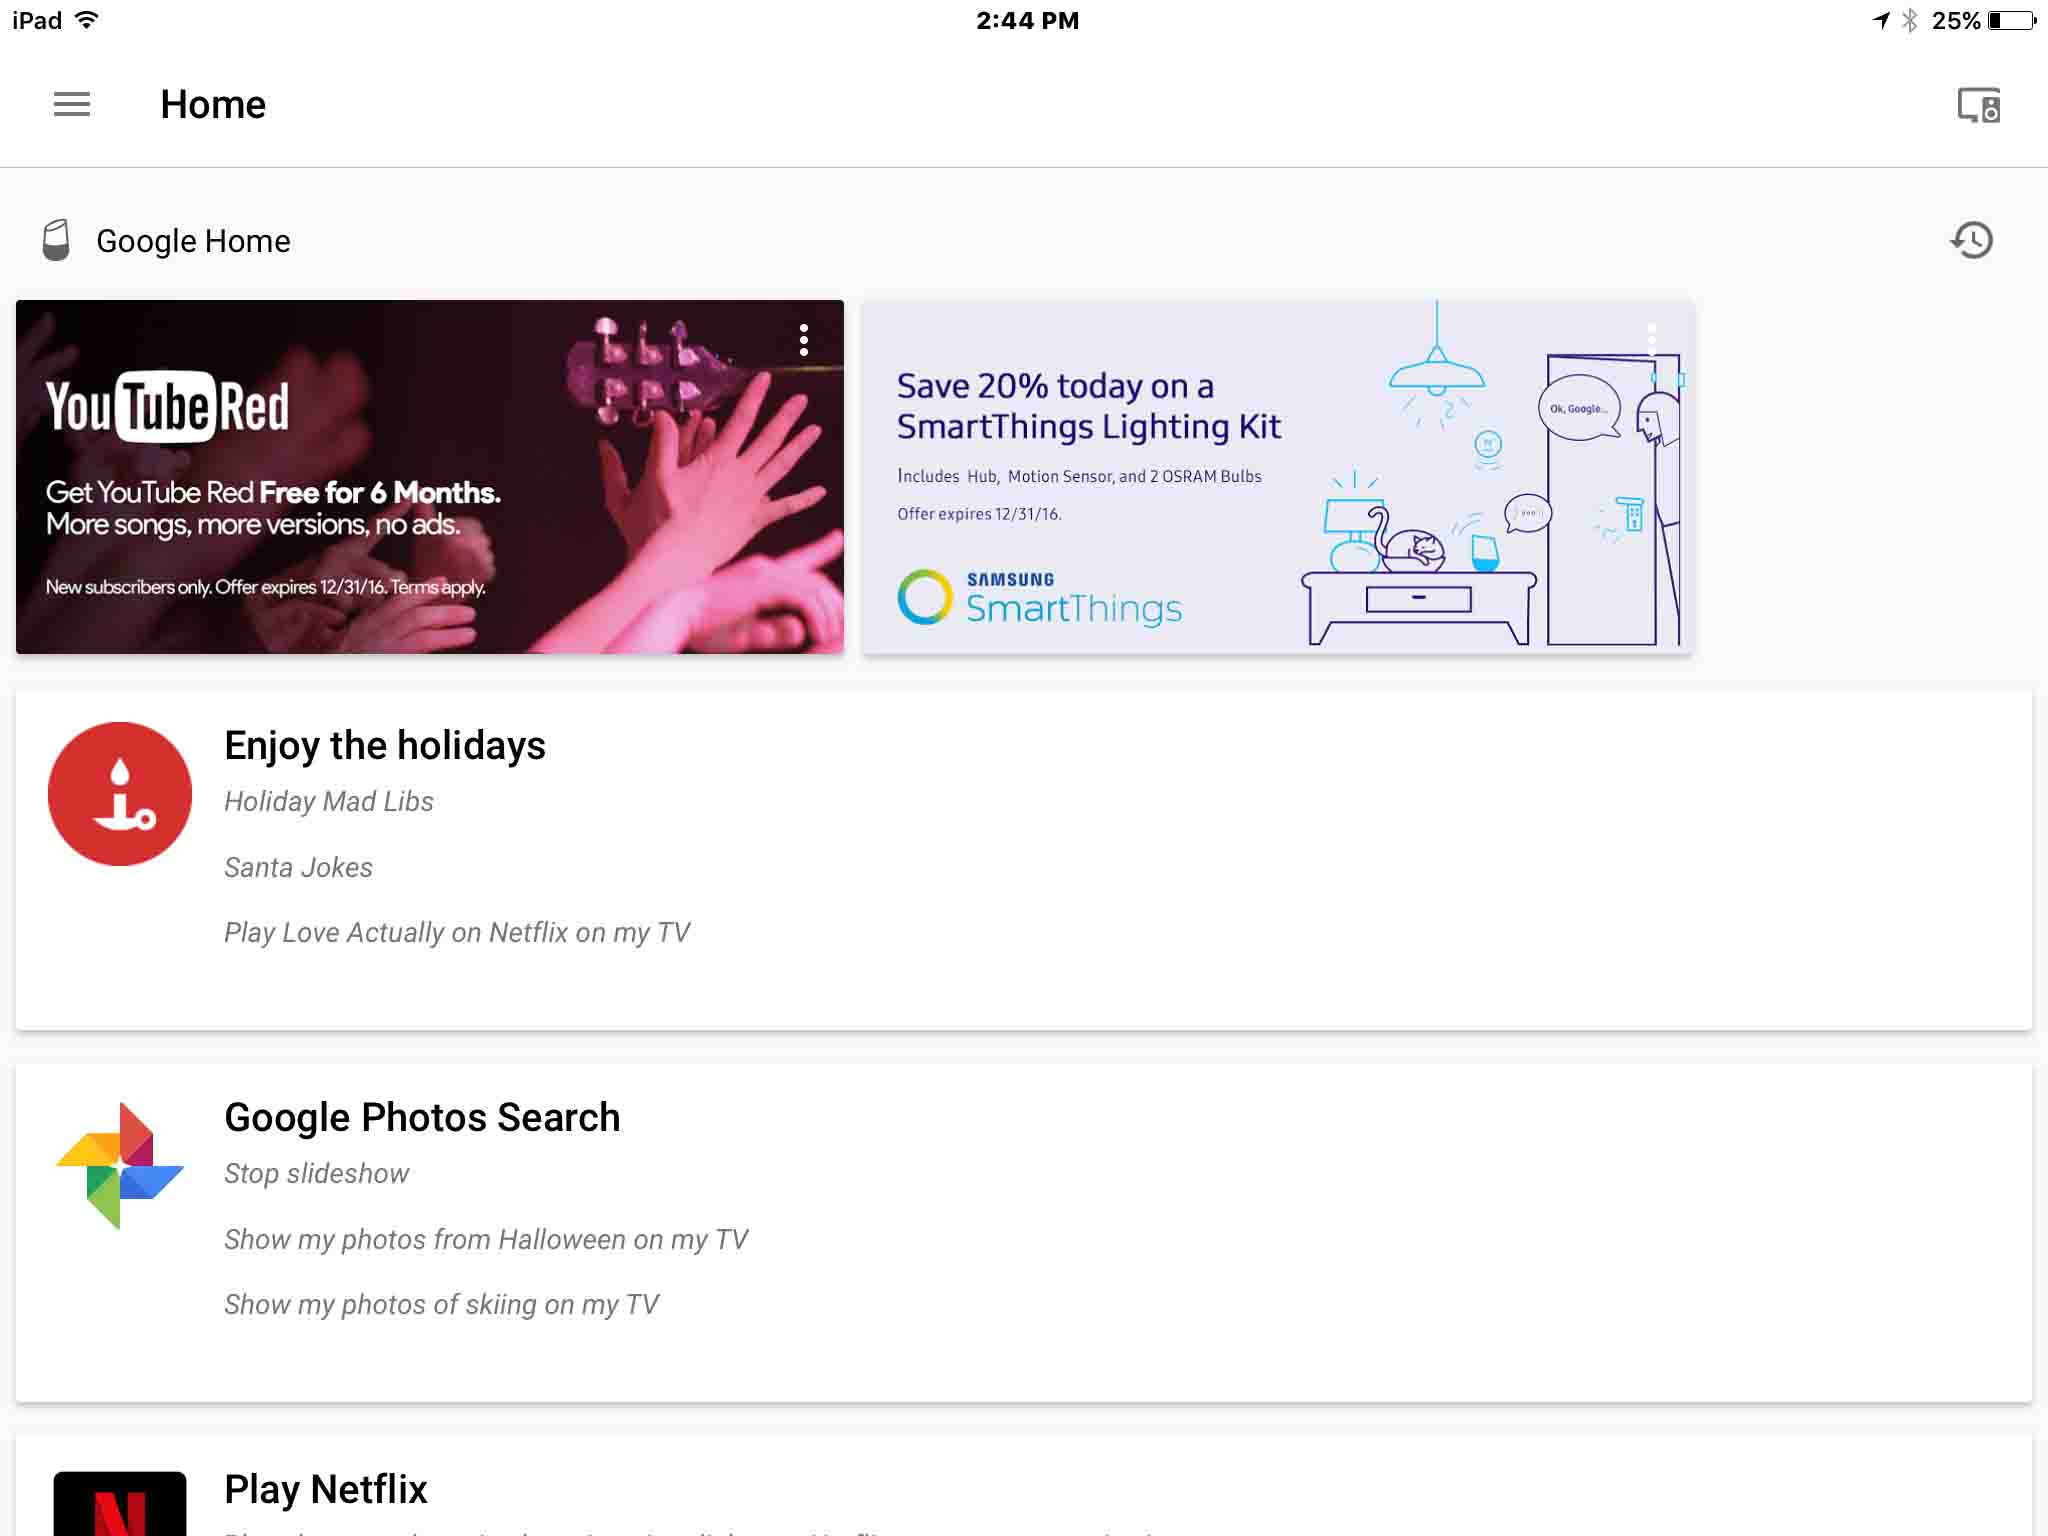
26. Test your New Google Home Speaker
Ask it the time or other questions such as the following:
- Hey Google, how far away is the moon?
- Okay Google, what’s the weather?
- Okay Google, tell me a joke.
- Hey Google, play some music.
If your speaker is connected correctly, you should get answers to all of these commands and questions.
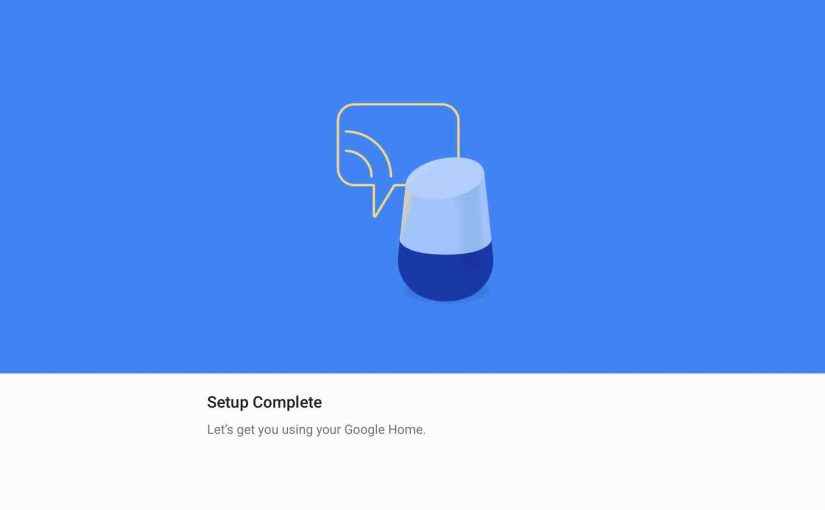
27. You’re Done with Google Home Setup
Good luck, and do enjoy your new smart device.
Related Posts to Google Home Setup
Other Posts About Google Home
References for Google Home Setup
Revision History
-
- 2020-05-15: Added optimization and more tags.
- 2019-05-03: Added key phrase targeting for ‘Google Home Setup’, more tags, and subheadings.
- 2016-12-28: Originally published.