
Why would you need to perform Honeywell RTH8580WF wireless setup for this common thermostat ? Well, you may need to connect it to a different wireless network. Or, perhaps you have changed the name of your home network. Or, maybe you want to connect to a different wireless access point in your home. For all these cases, you can do them by following the procedure below.
Honeywell RTH8580WF Wireless Setup: Overview
This thermostat, during first setup, actually becomes a wireless access point. Furthermore, it has its own web site that you can connect to. So use a mobile device or laptop to administer the unit via this site. Note however, that Ethernet devices do not work for this part of setup. Specifically, you must use a wireless capable computer device.
Now we assume that the thermostat is up and running. We also assume that it has connection to a particular network. Then, all you need is to change its current wireless network name and password. All other non network-related settings need no changes.
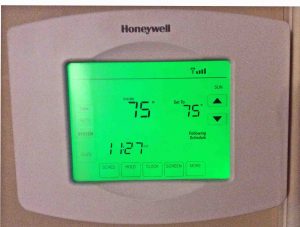
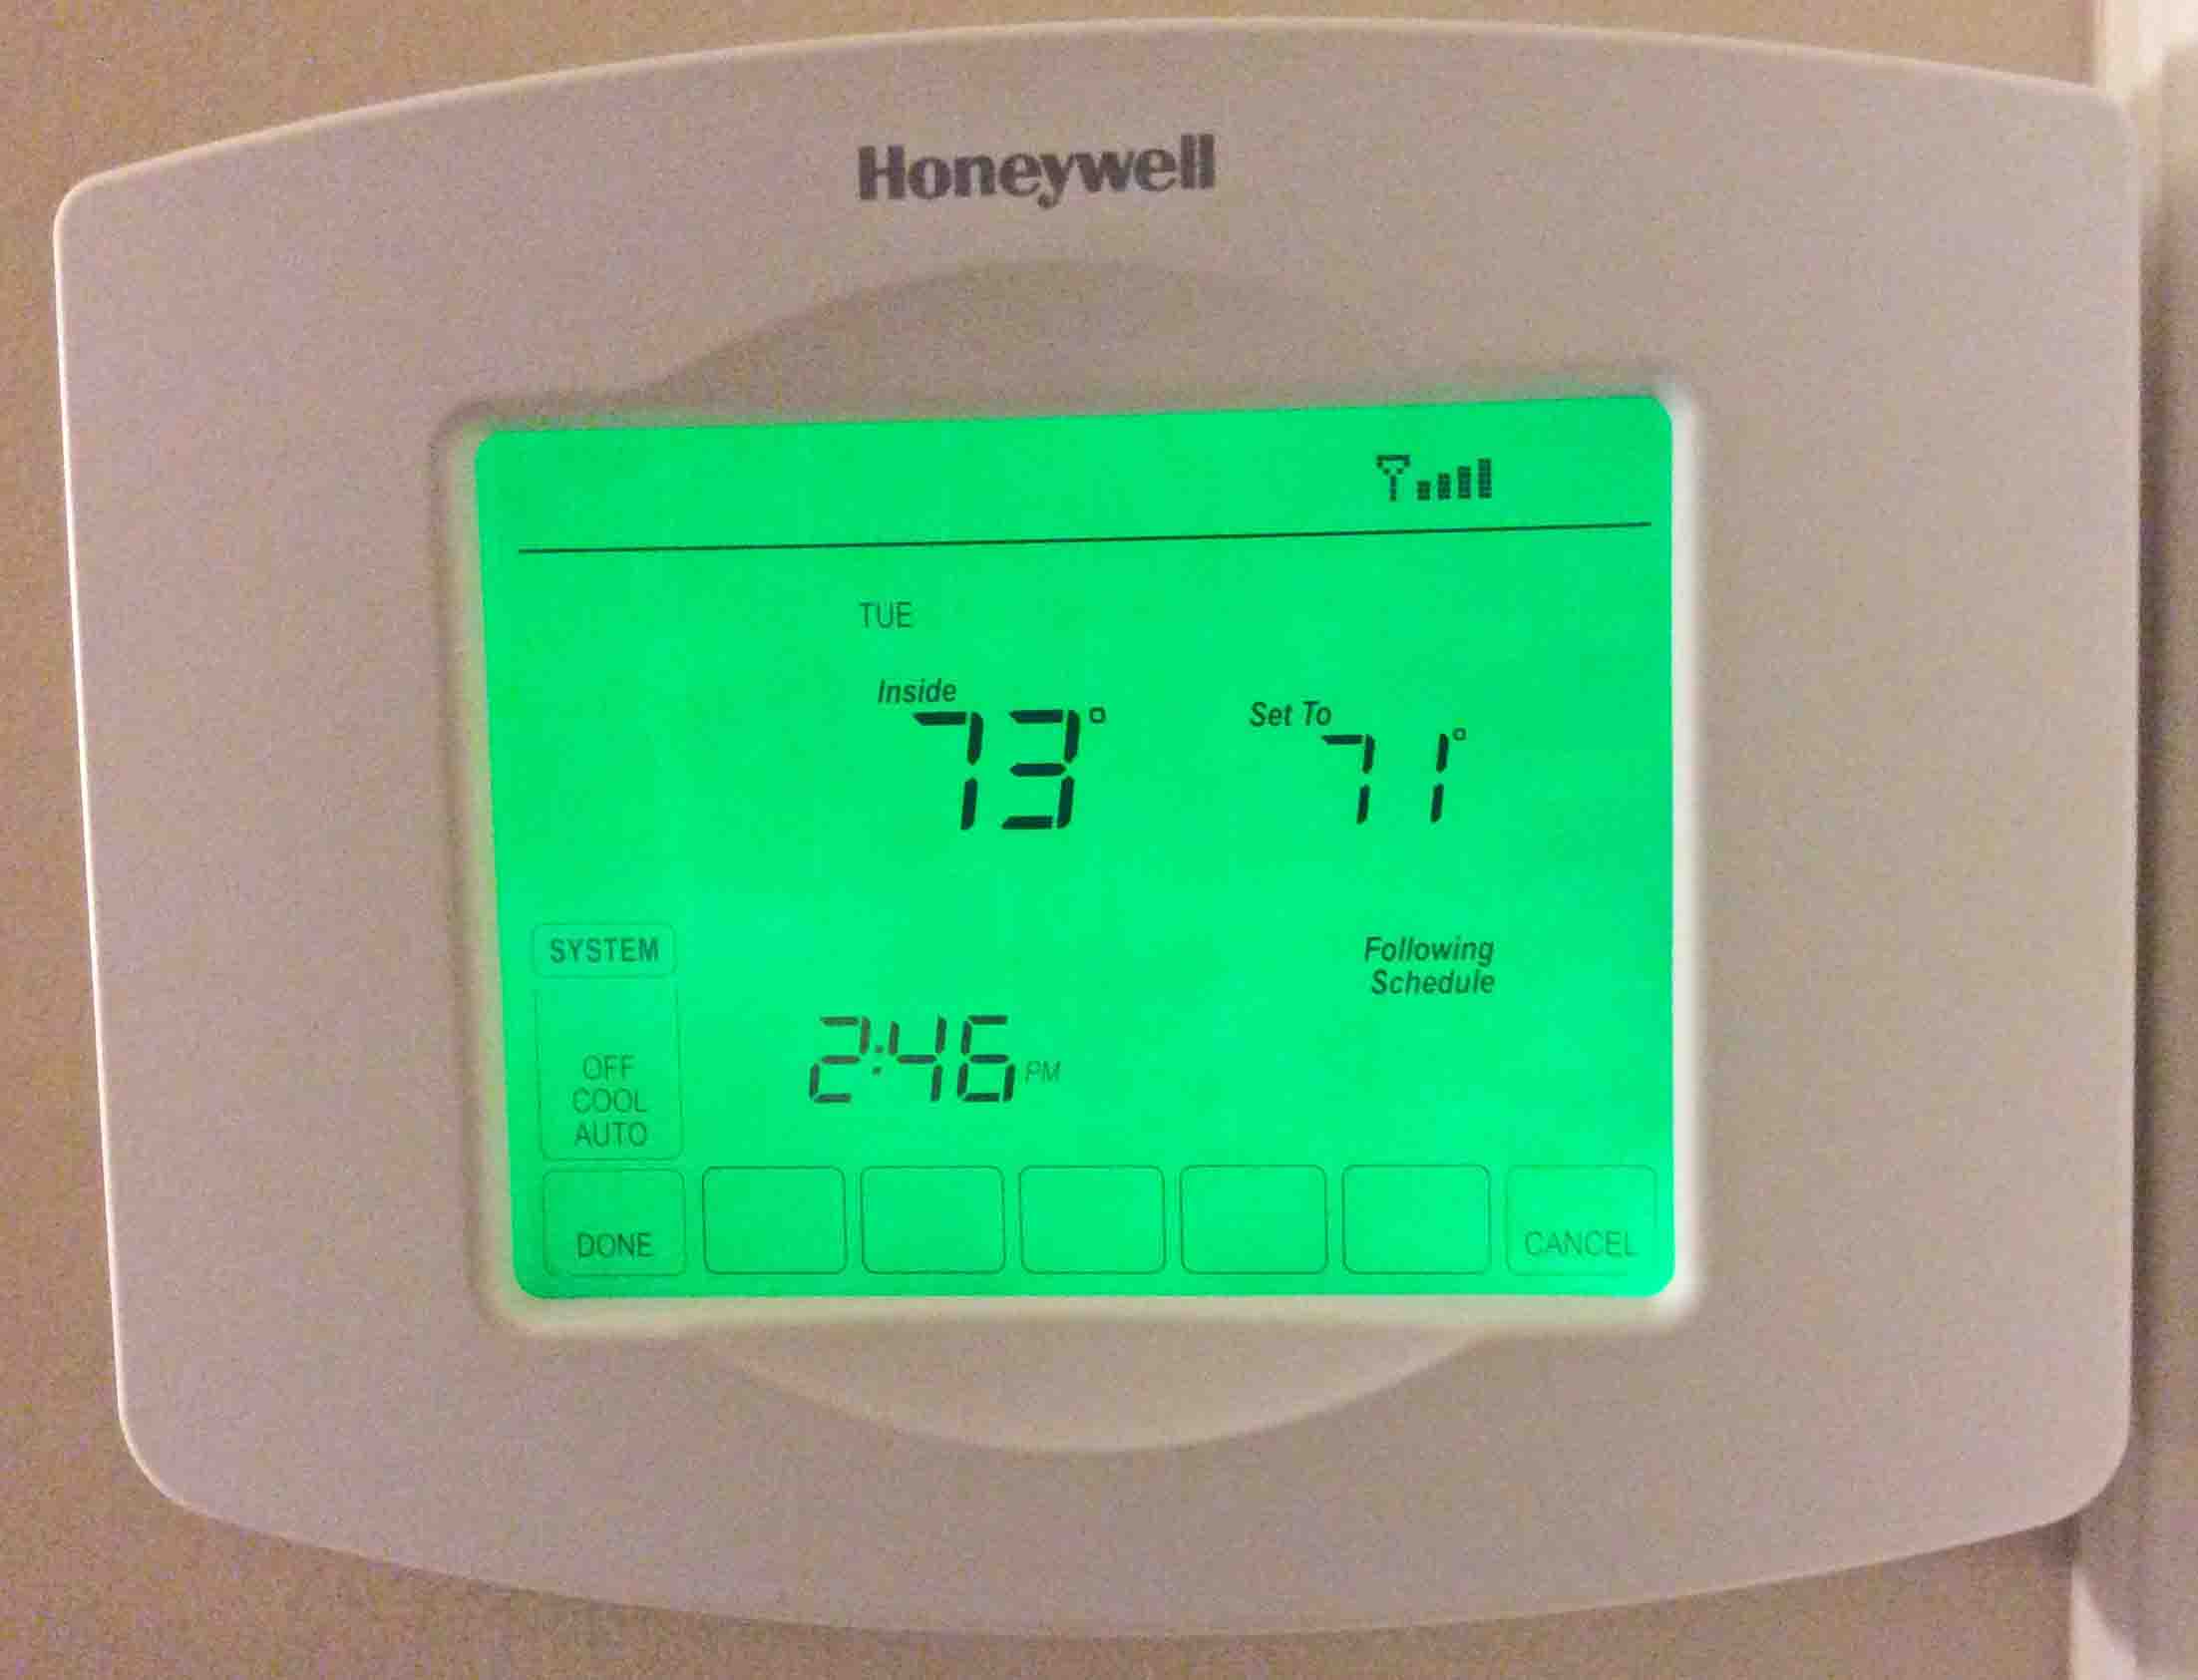
The picture above shows the thermostat, already connected to an in-range wireless network.
Enter Wireless Setup Mode
Switch from normal to setup by changing operating parameter 900 from a 1 to a 0. This forces disconnection from the current wireless network, and starts Wi-Fi Setup. Do this as follows:
Press the System Button
See the screen change to the following:
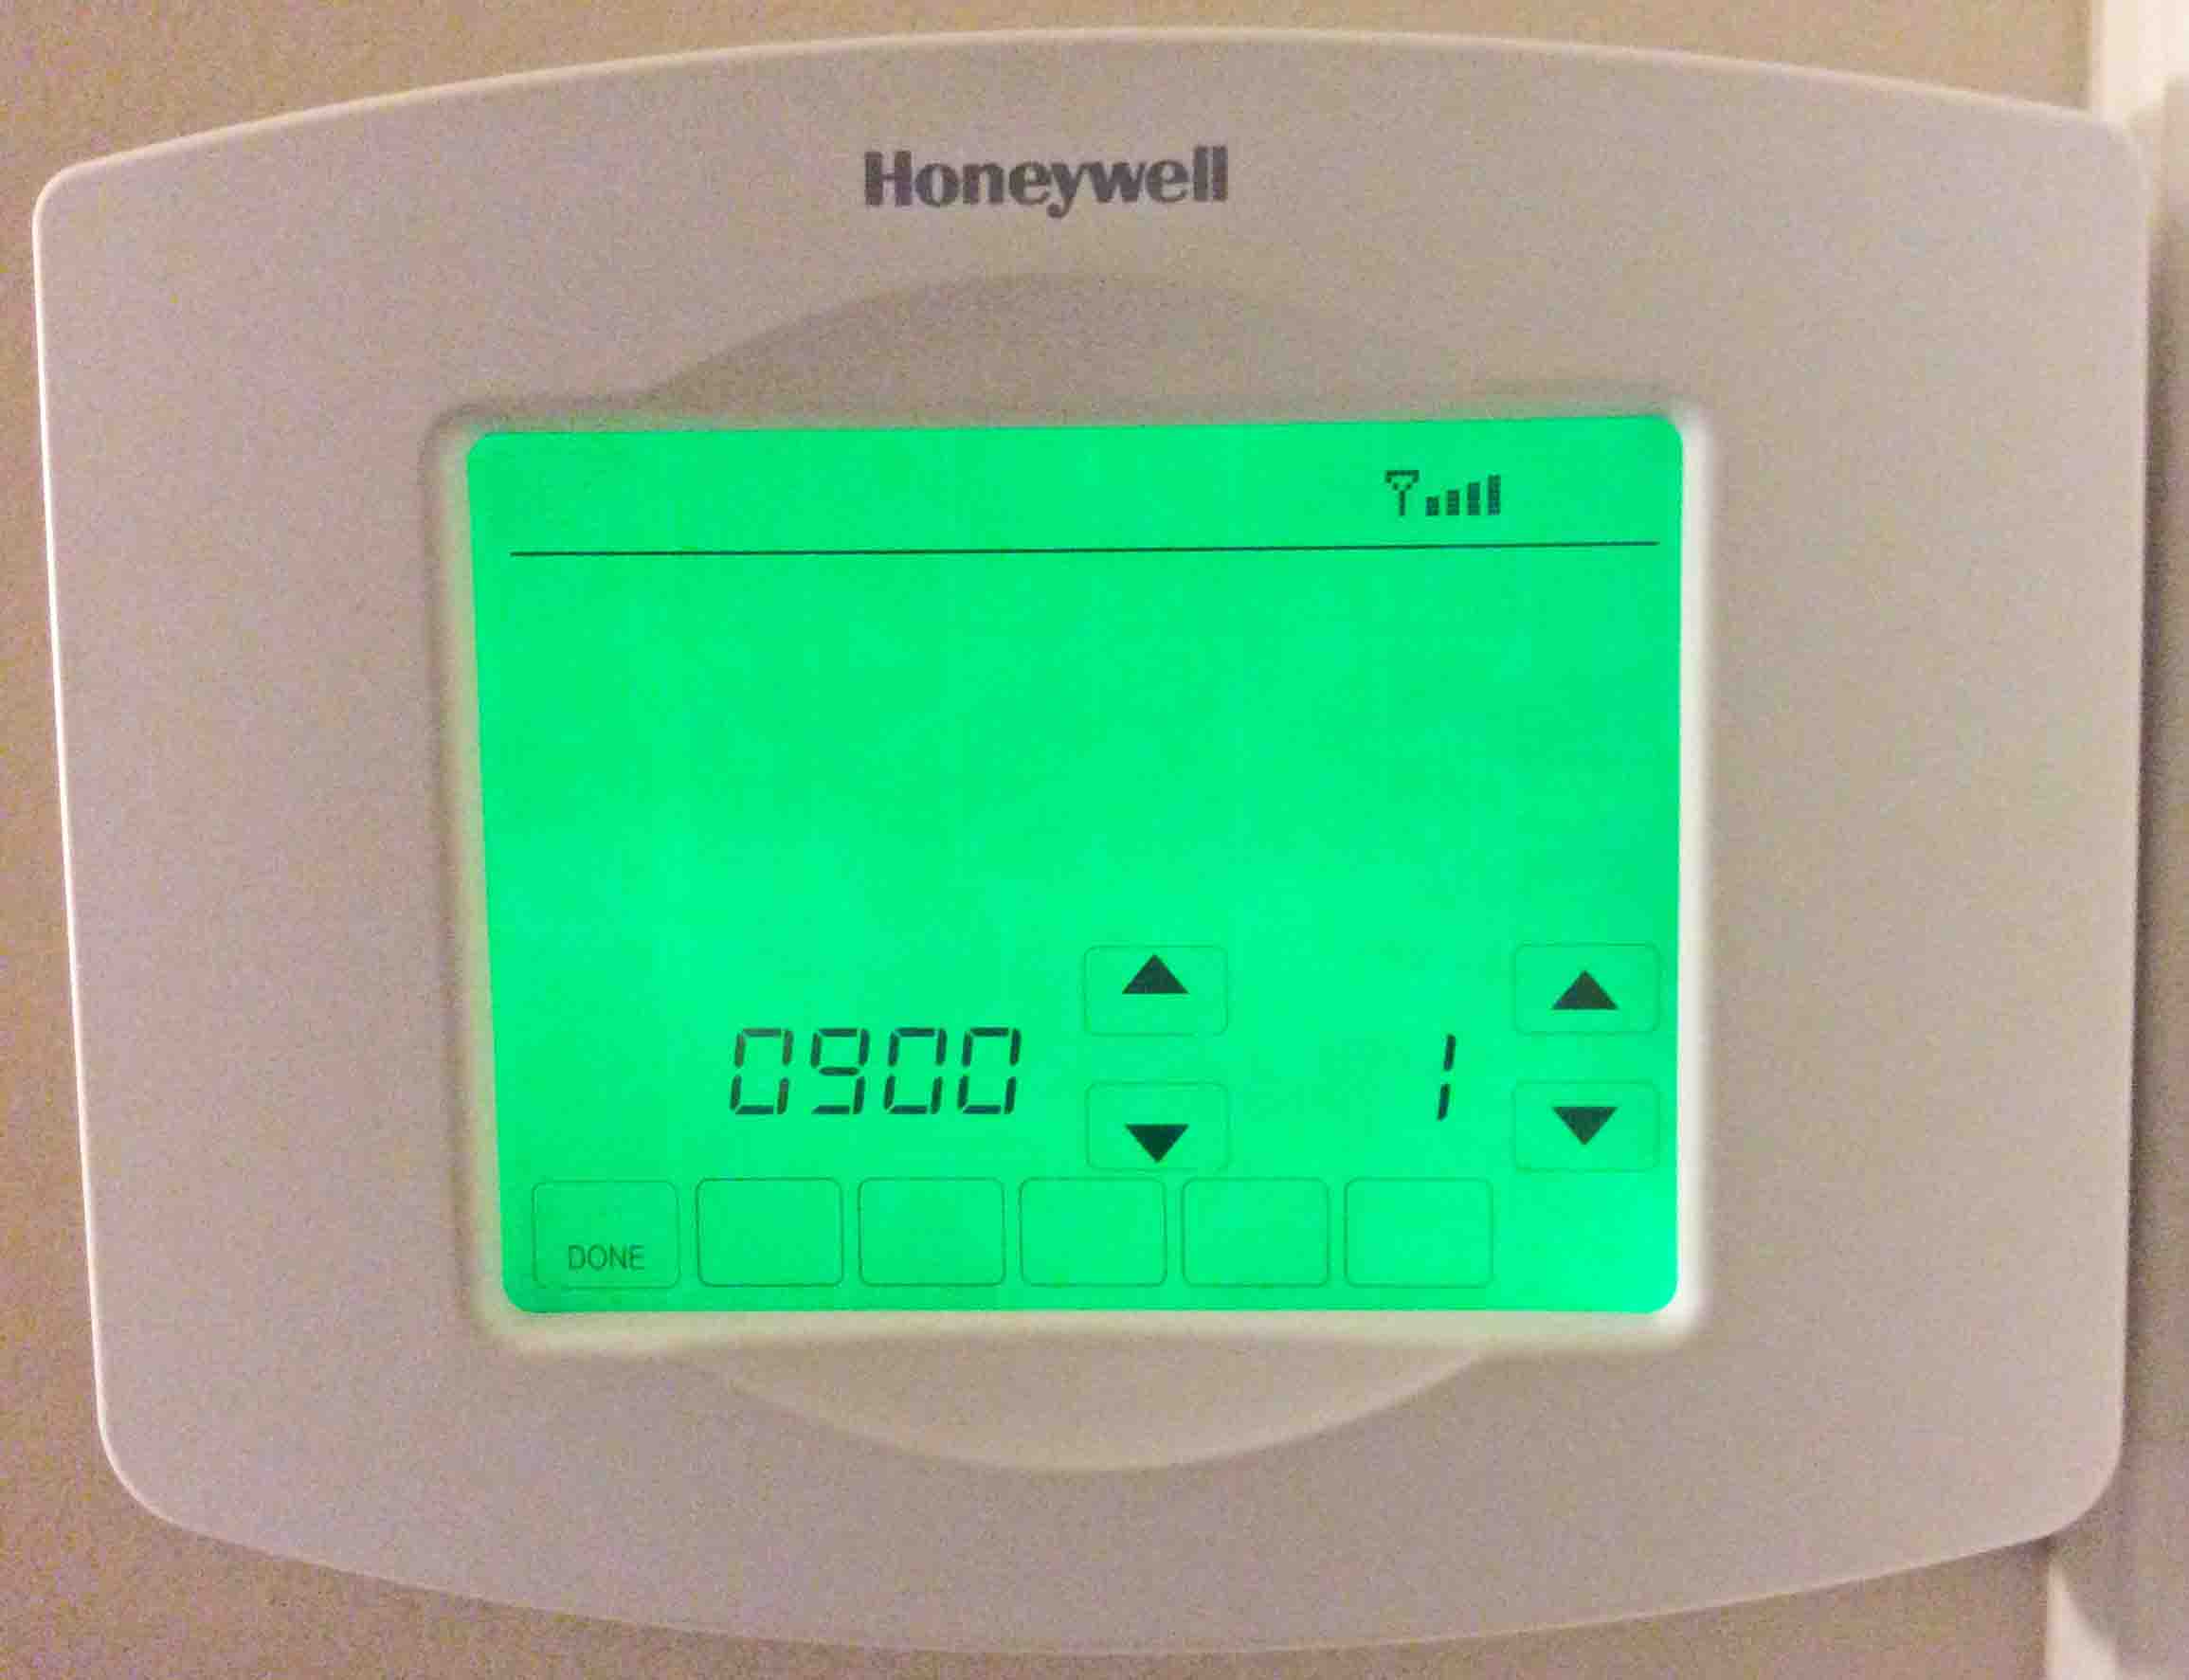
Press and Hold the Blank Square Button to Continue with Honeywell RTH8580WF Wireless Setup
Find this button in the middle on the bottom of the screen, until the screen changes to the following. You may have to keep pressing for up to five seconds.
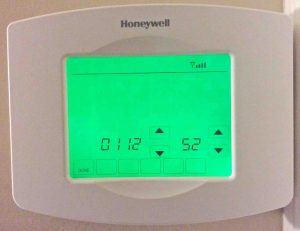
Press the Center UP and DOWN Arrow Keys
Pressing these keys advances through the parameters list. Stop when you find code 900. The touchscreen should then appear as follows:
Set Value of Parameter Number 900 to Zero
Using the value Up / Down arrow keys, change the value of parameter 900 from 1 to 0. This forces wireless disconnect.

Press the DONE Button to Continue with Honeywell RTH8580WF Wireless Setup
Find DONE in the lower left corner of the screen. This applies the new setting, and deactivates the current wireless connection. You should then see a status message across the top of the screen indicating this. Wi-Fi Disconnected, as follows:
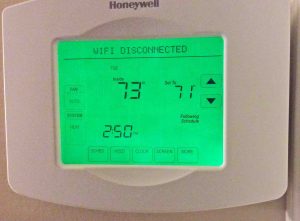
The above message displays for several seconds, and then, the thermostat goes into the wireless setup mode.
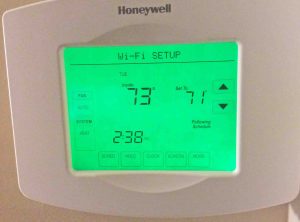
Honeywell RTH8580WF Wireless Setup Part 1 Complete !
You have now accomplished putting the thermostat into wireless setup Mode. So proceed to the next step.
Next, Find the Thermostat Wireless Network on your Mobile Device
In setup mode, the RTH8580WF creates its own little wireless network. In this step, you will connect your tablet or other computer device to this network. Then the system guides you through selecting the desired new wireless network. We used an iPad Air tablet to connect, by going to Settings->Wifi. The screen we saw on the tablet follows.
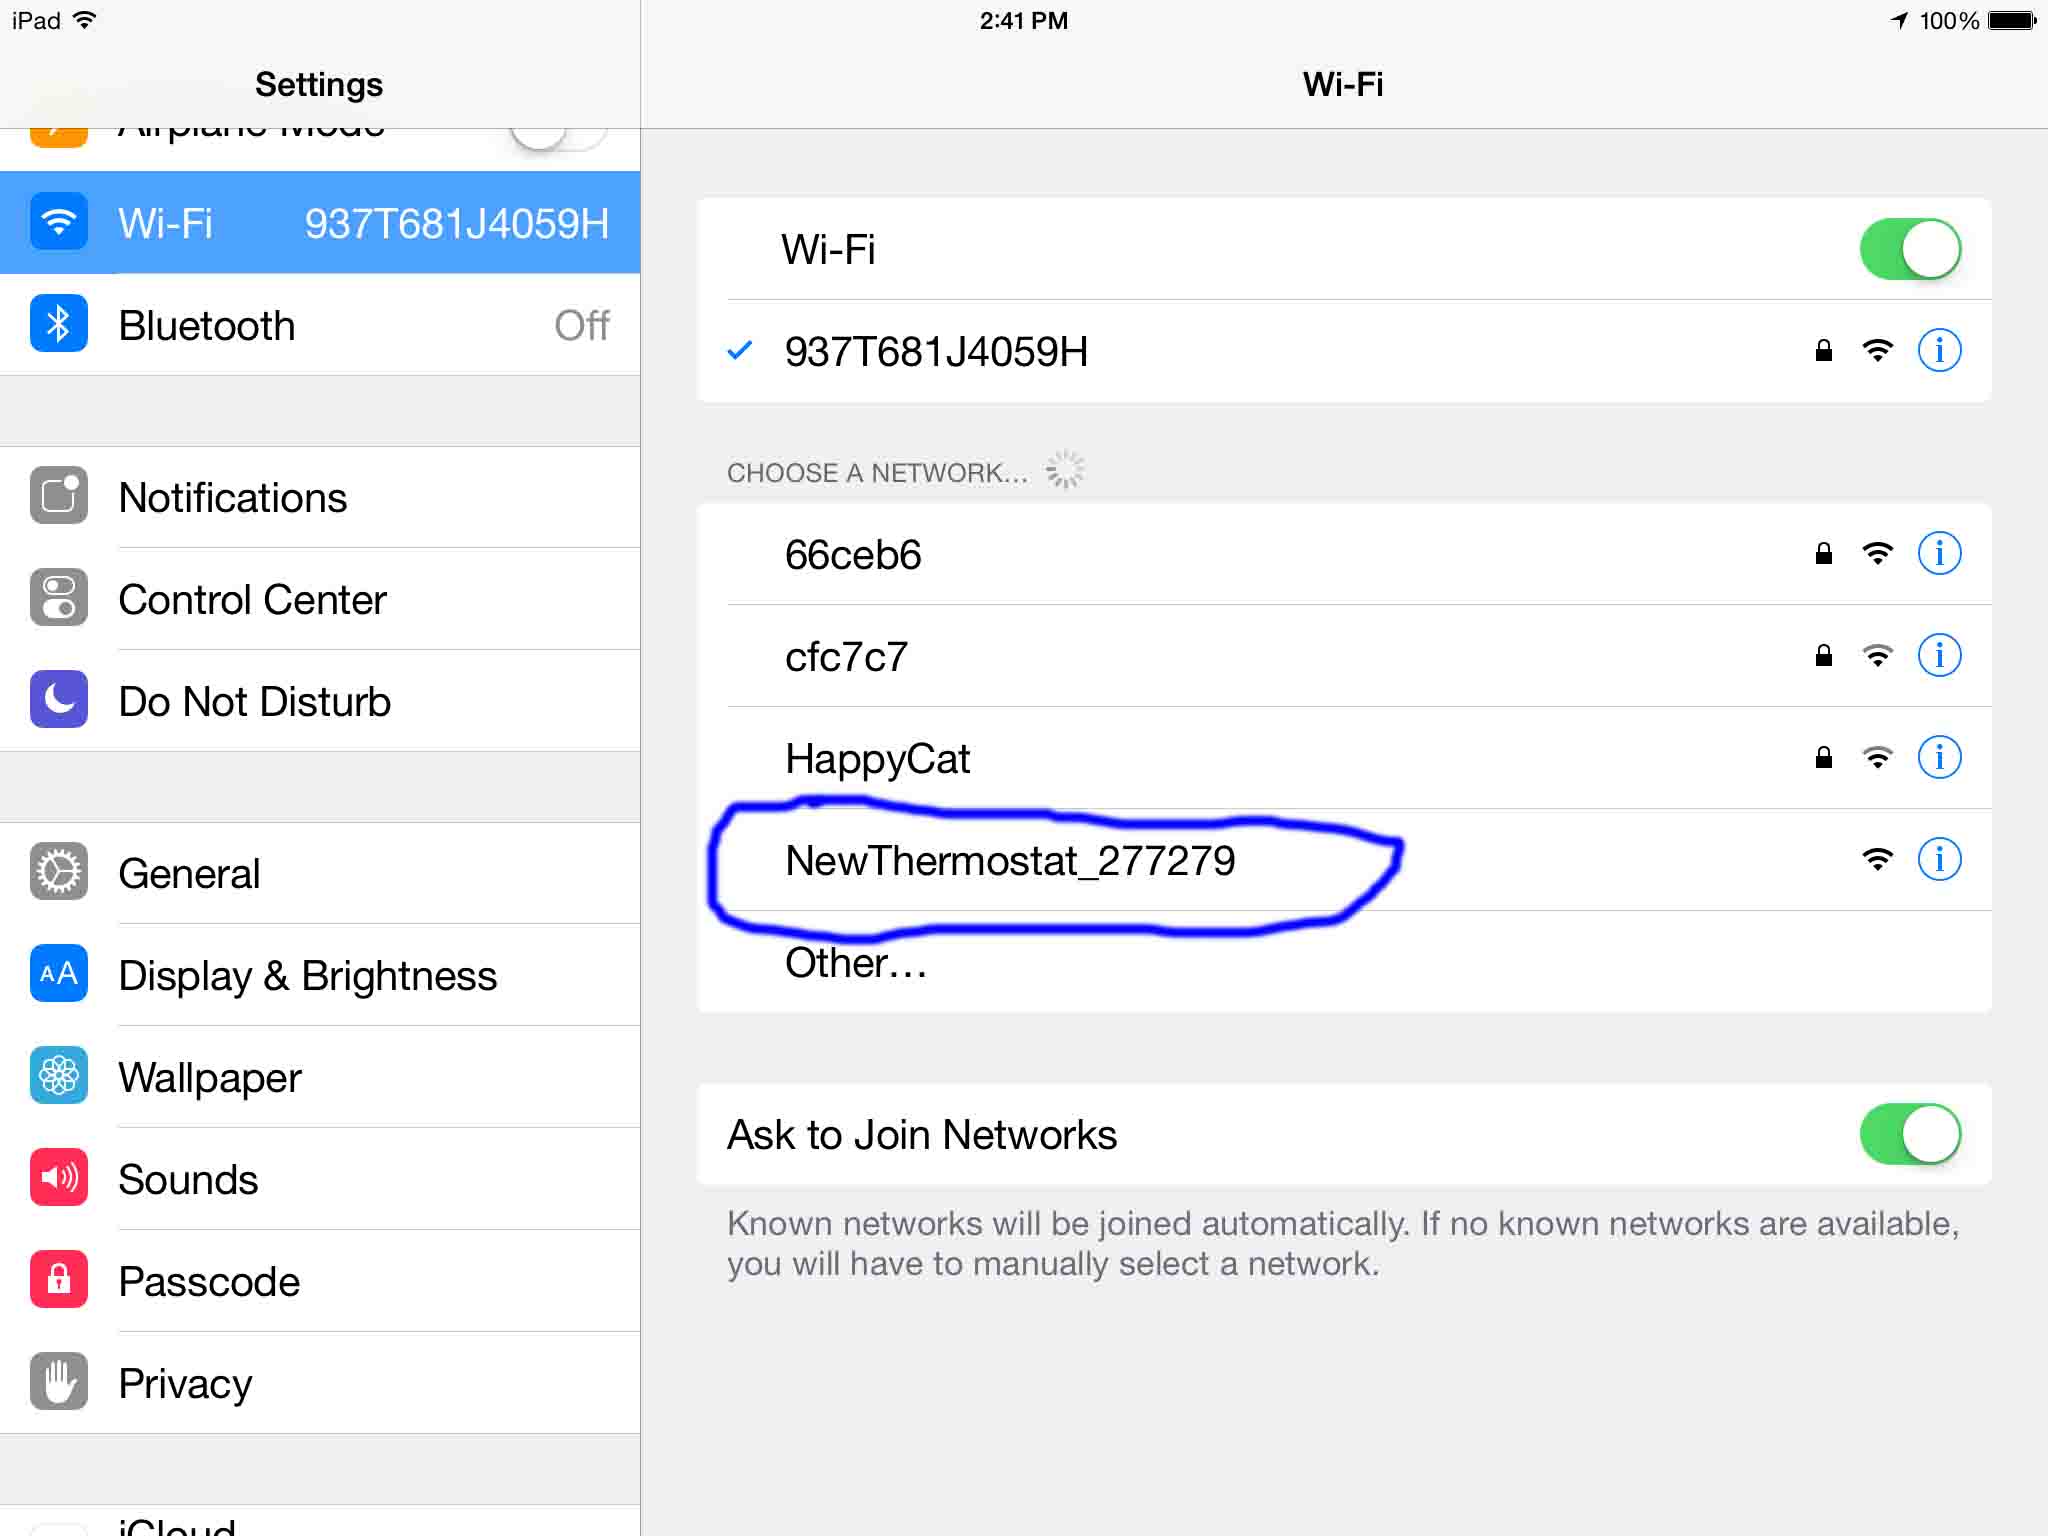
Connect to the Thermostat Wireless Network
Next, use the procedures supported by your computer / tablet / phone to connect to this network. Here, the wireless network has the name NewThermostat 277279. This is an open wireless network, so you need no password. But have no security fears though. Why? Because this thermostat-generated network disappears once you finish Wi-Fi Setup.
Once you connect, your device should automatically display the following network selection page. This is the list of available wireless connections to your thermostat.
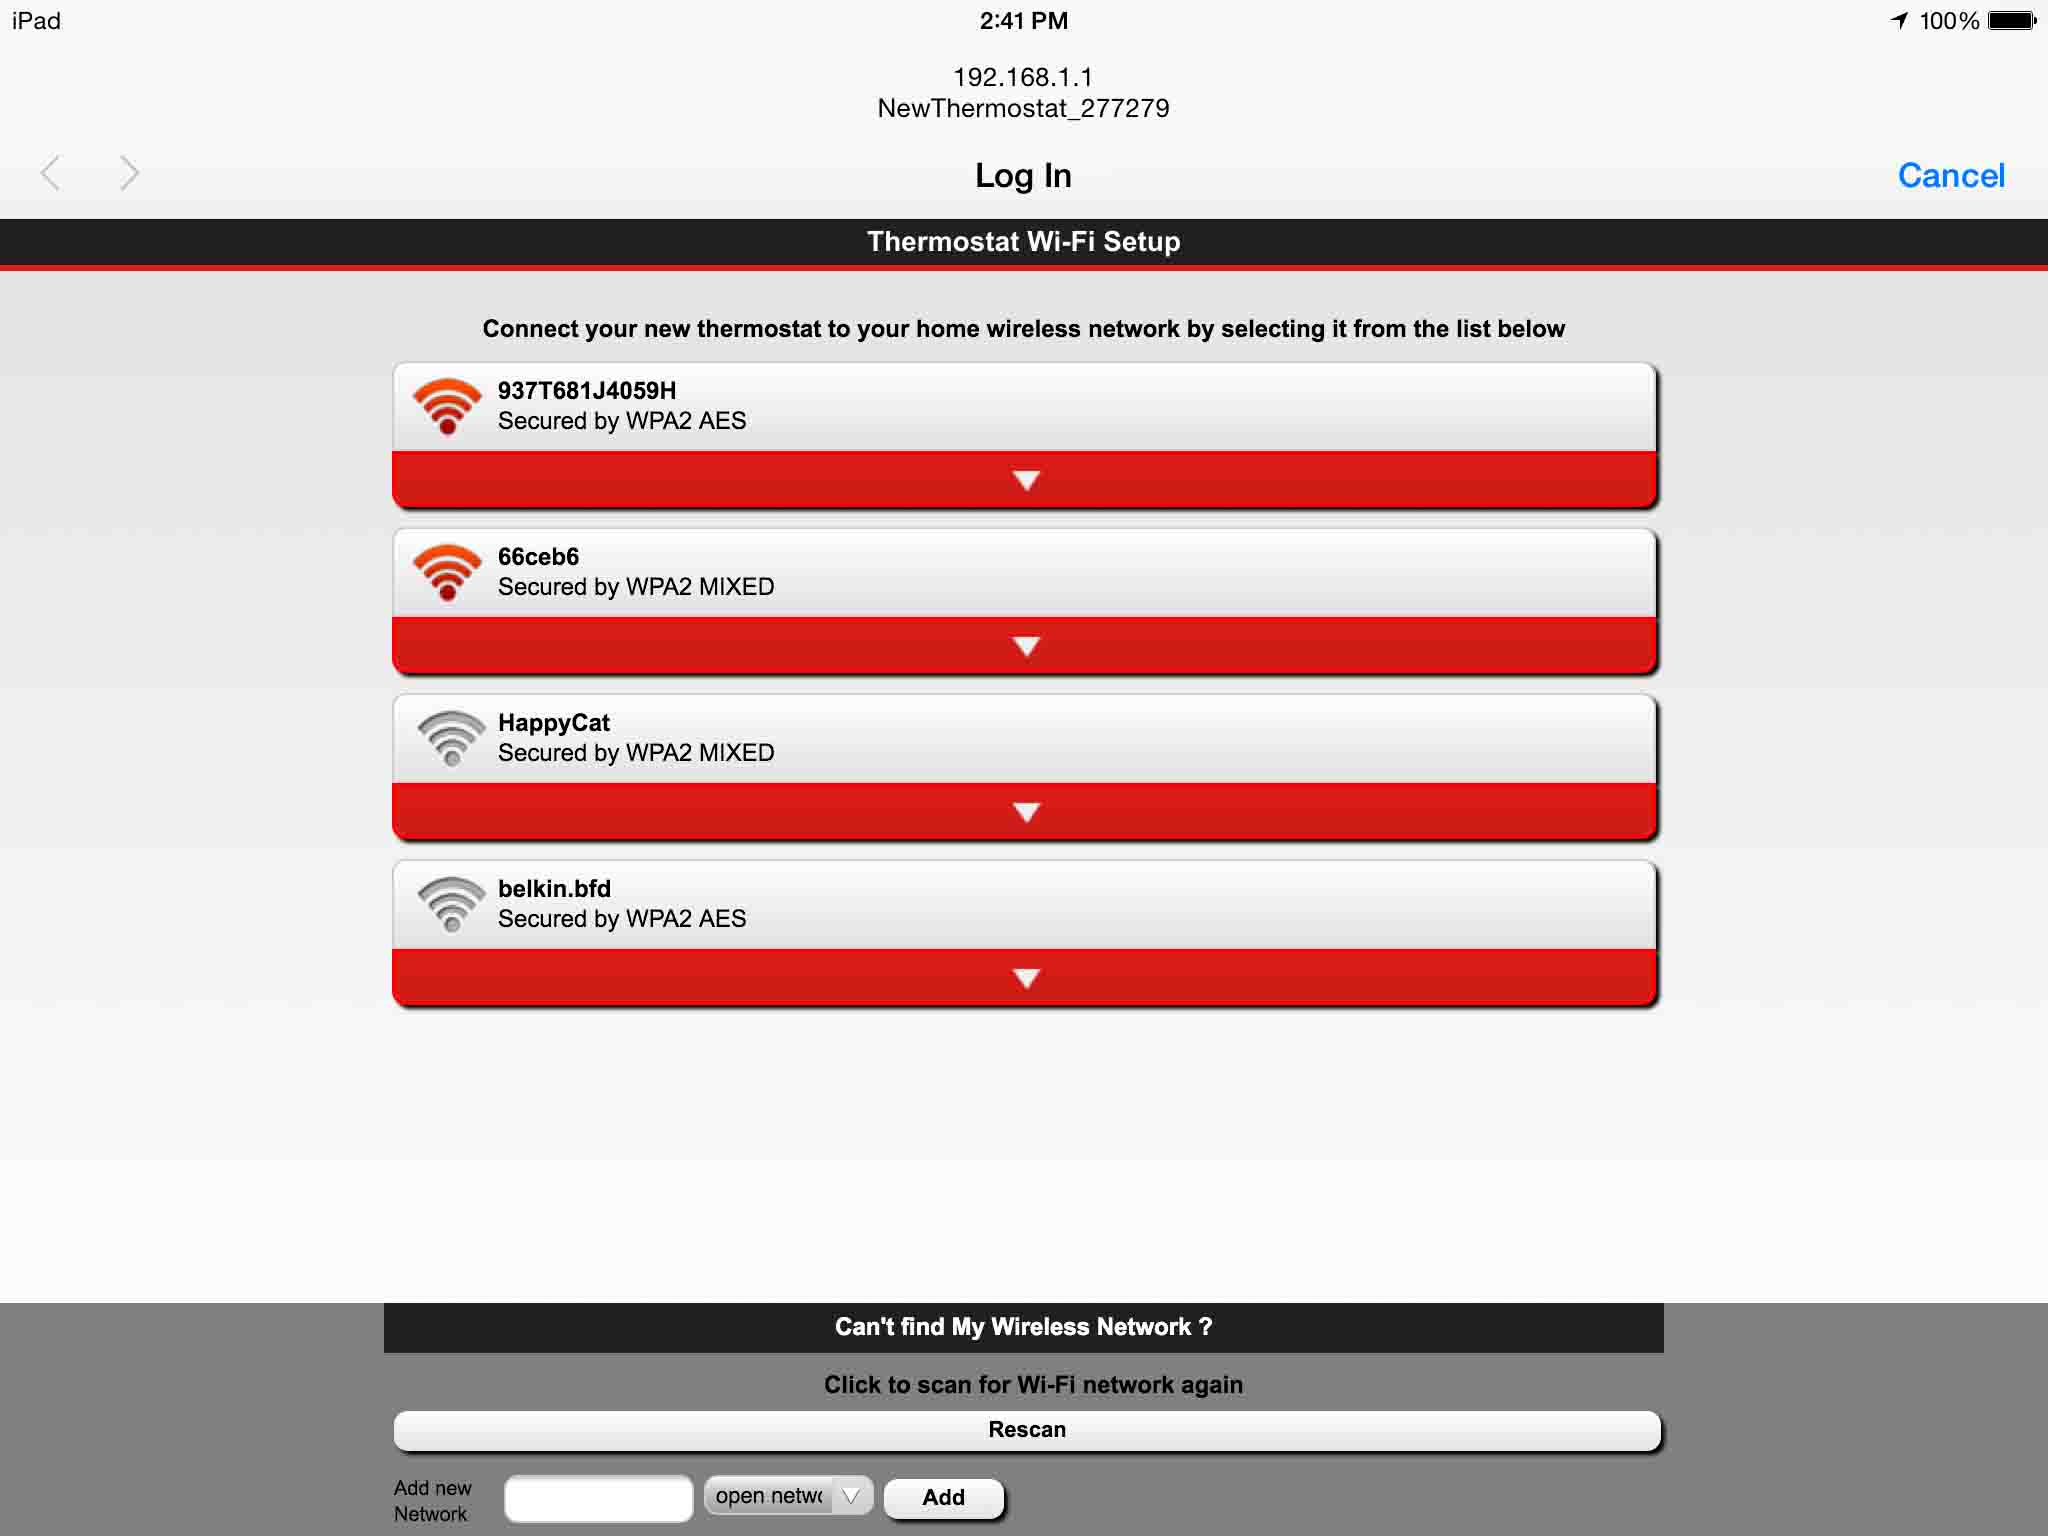
Select the Desired Network
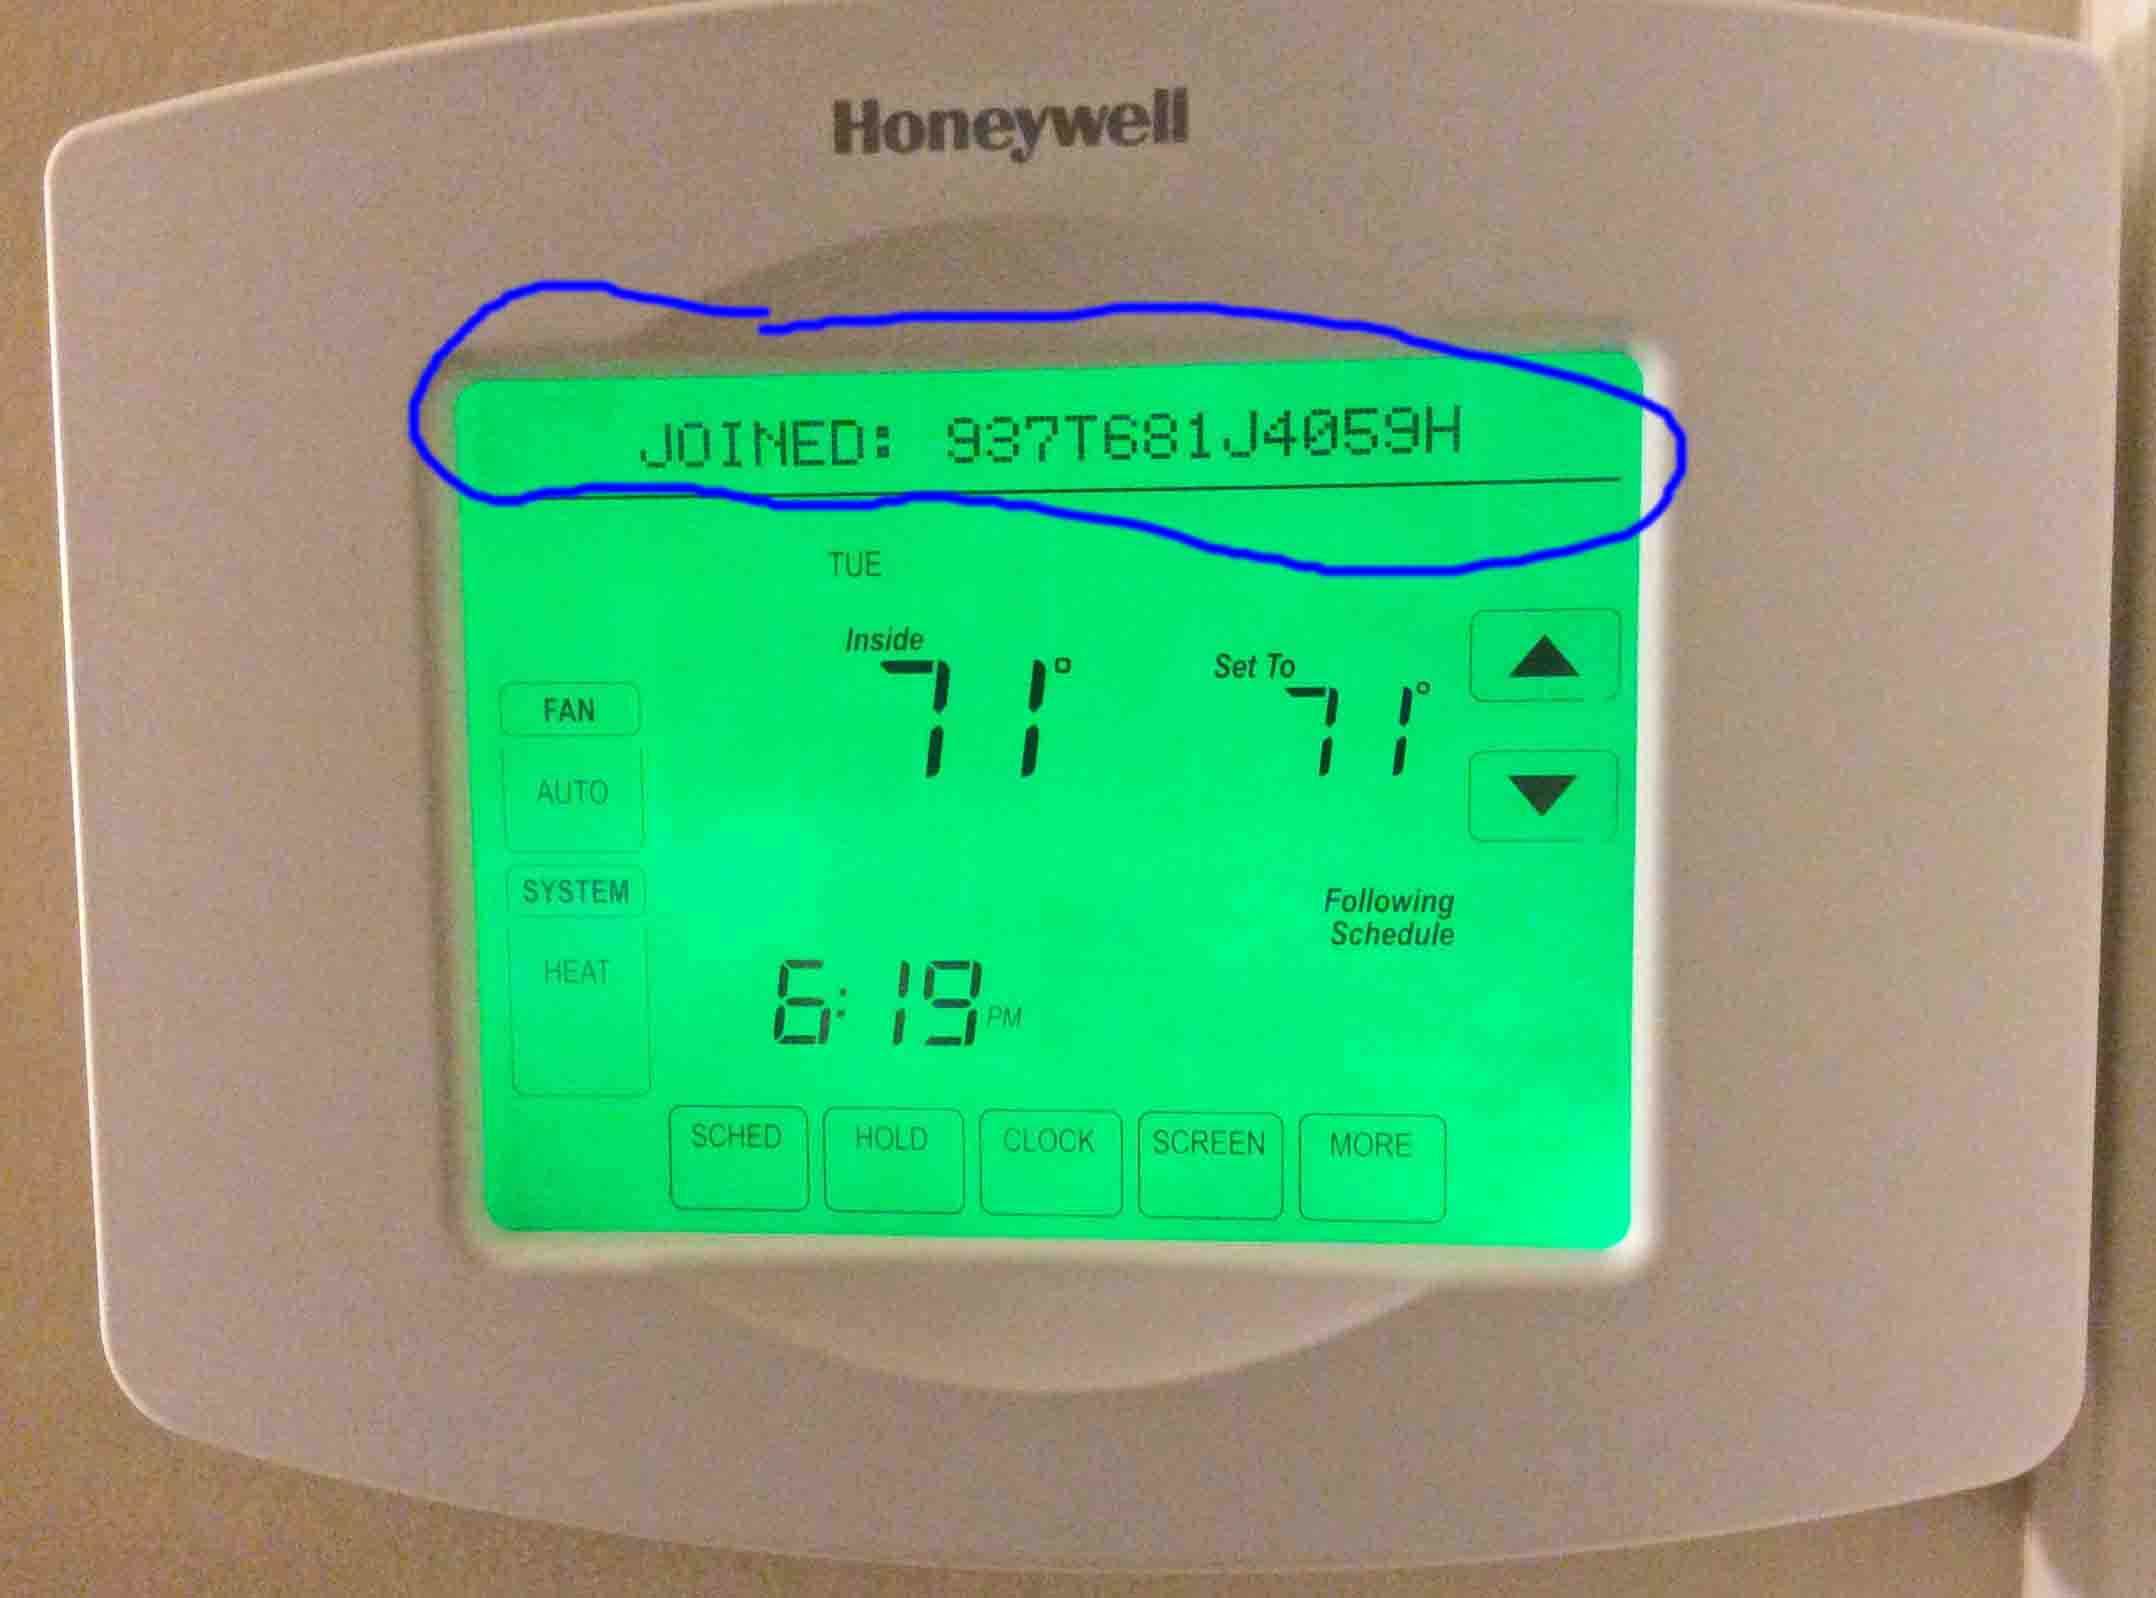
On the above screen, pick the network you want. Then tap the area above it or click it with the mouse. So in our case, we’re choosing the 937T681J4059H SSID to connect with. The system then prompts for the password of that network.

Enter the New Network’s Key / Password
Upon entry of the correct network password, the RTH8580WF turns off its own wireless network. This was the “NewThermostat 277279” network.
It then connects to the network you’ve set. After that, the network selection window on your tablet / computer should go away in a couple seconds. Next, a “Connecting…” message appears as follows:
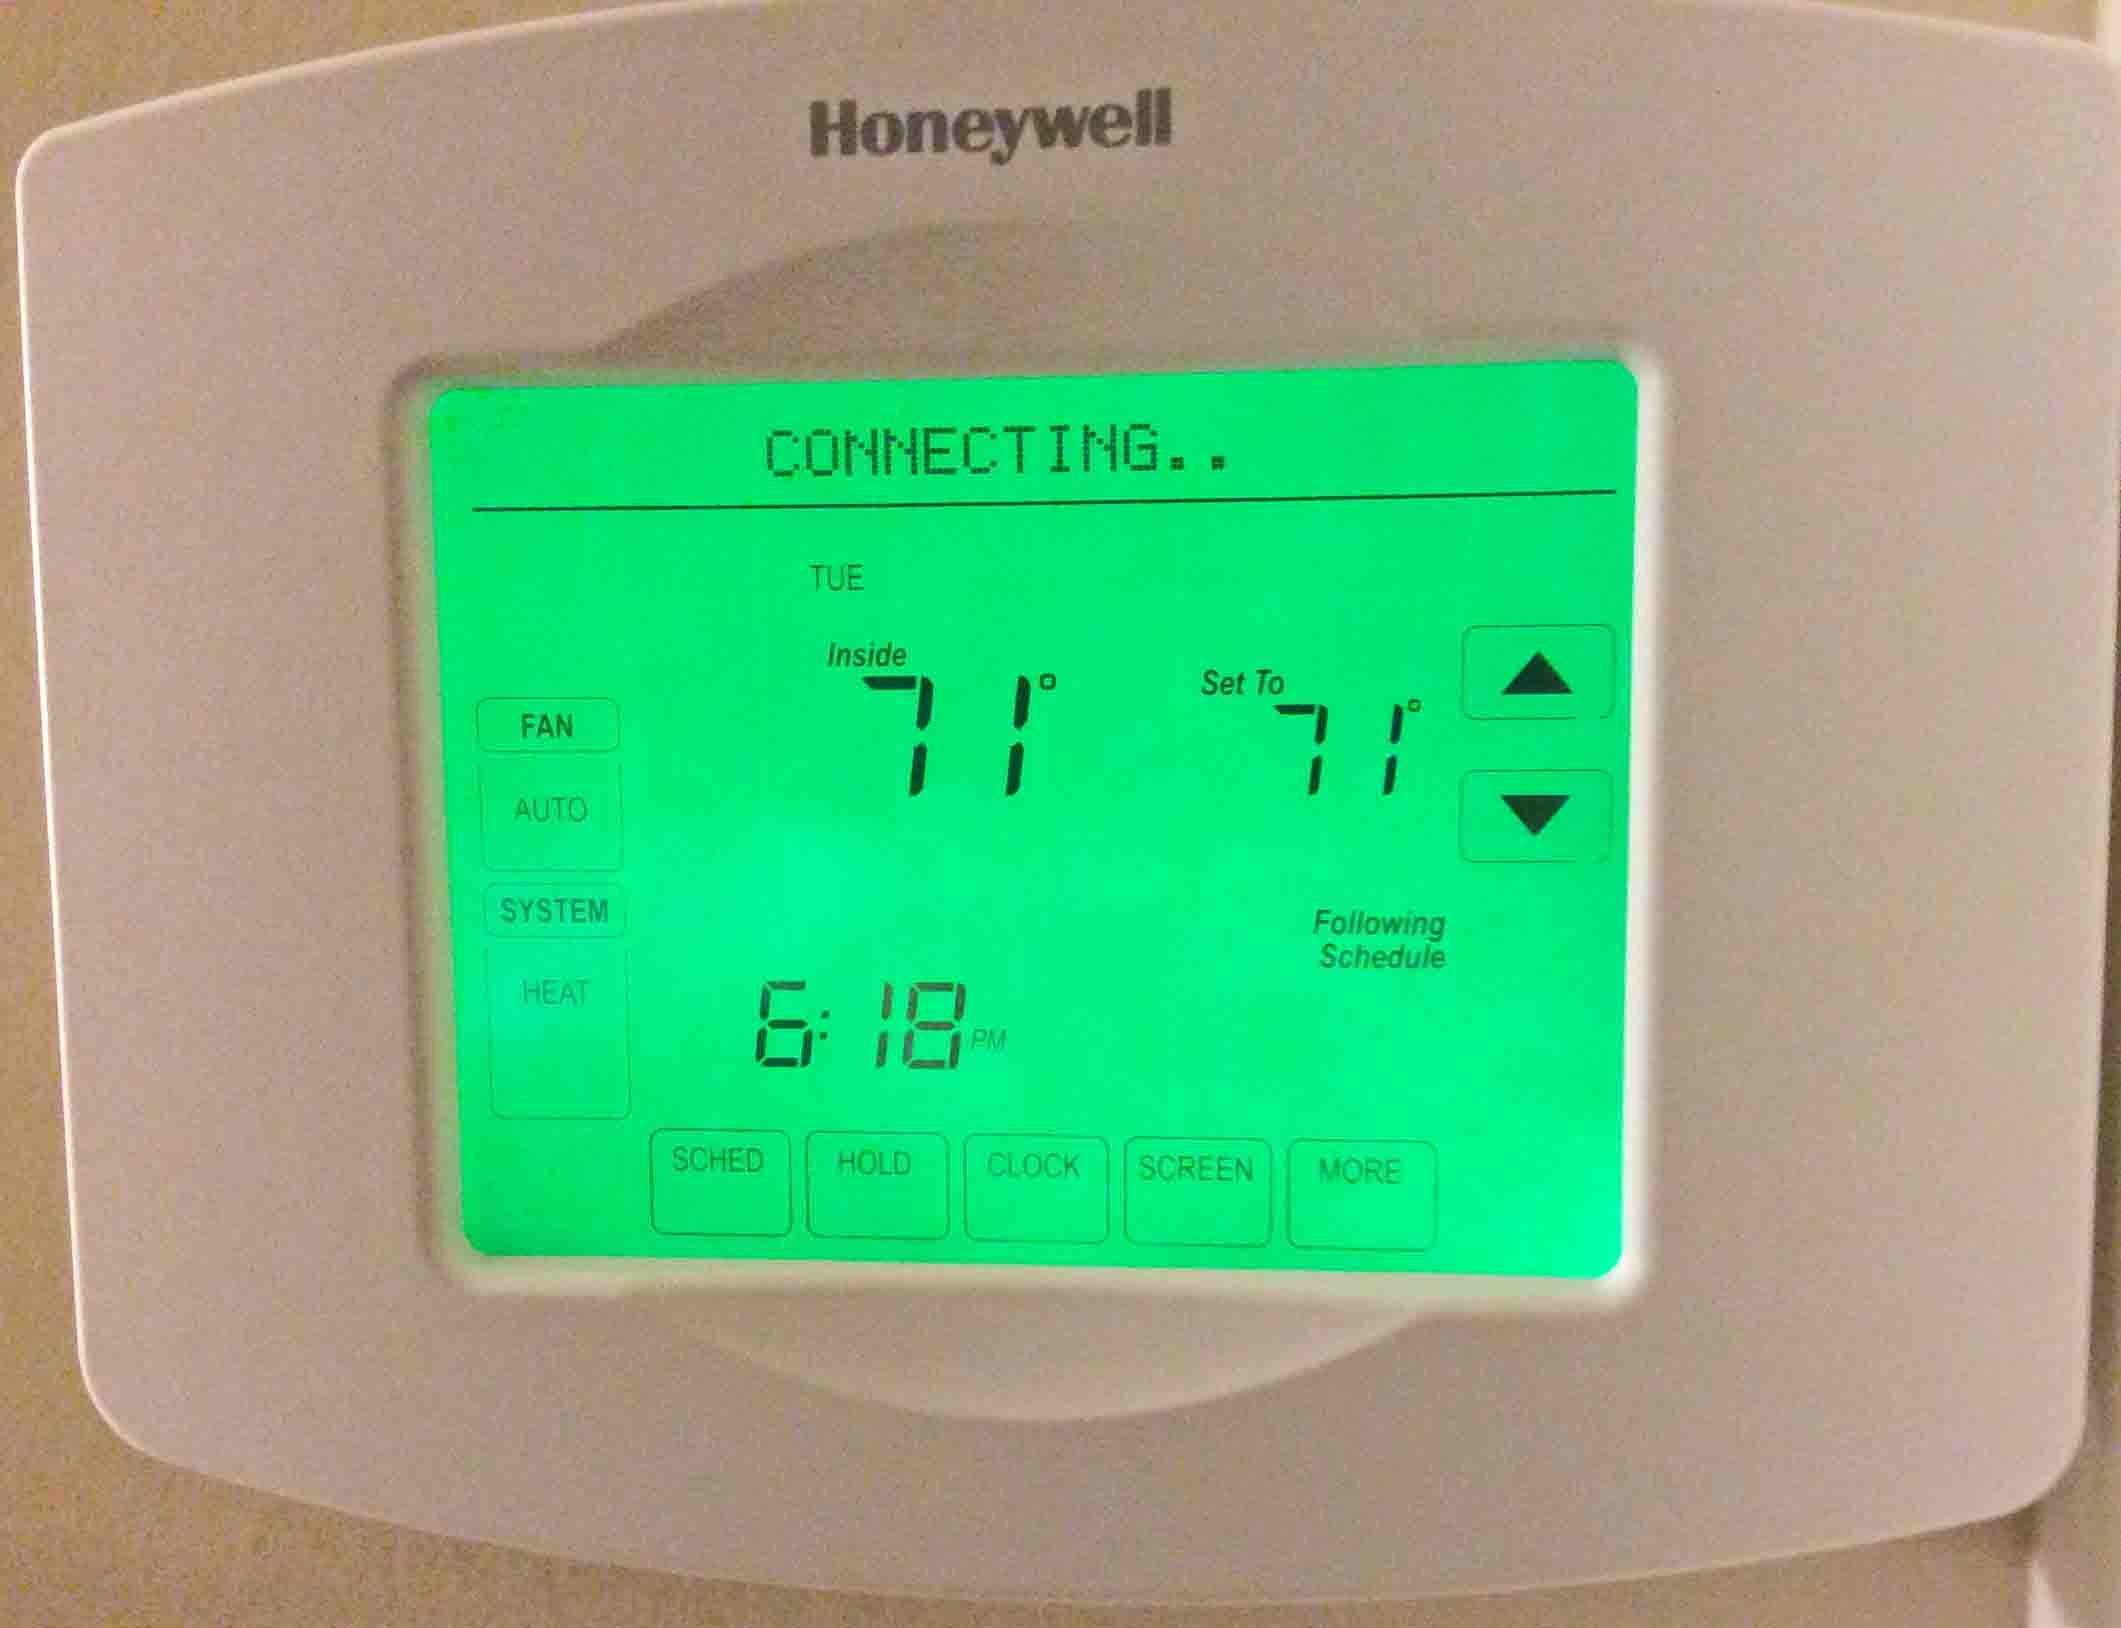
It can take up to thirty seconds for the new connection to form, so be patient.
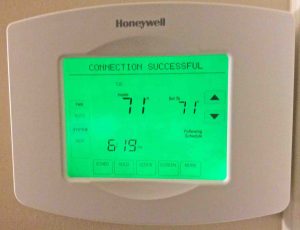
At any rate, once it does, another message displays in the touchscreen status area. Furthermore, it alternates between “Connection successful,” and “Joined network” as follows:
Thermostat Then Exits Wireless Setup Mode
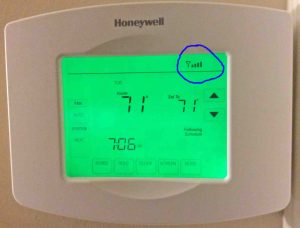
Next, wait one to three minutes. Then, if no errors connecting to the internet happened, the RTH8580WF exits wireless setup mode. It then returns to normal operation mode. Furthermore, the text disappears from the blue-encircled space illustrated in the above picture. Then, the wireless signal strength meter appears.
If you see this, then you’ve done everything right. So the thermostat is now communicating through the internet with the Honeywell smart thermostat management servers. Thus, you’ve successfully changed / updated the thermostat’s network settings.
Check the documentation that came with your thermostat. Look for what to do next. You’ll now be able to access and control your thermostat remotely, via the web. See our Honeywell Programmable WiFi Thermostat Review for more details.