Apple iPod Touch Player, displaying the Reset All Settings confirmation screen.
When restoring the iPod Touch to factory settings, you reset all audio, video, and system settings on this Apple portable media player to factory default values. You can accomplish this even without a computer.
Note that doing so this way, does not erase any music from this player right away. But, restoring does schedule a media file deletion for the next time this iPod is connected to a computer running iTunes.
Press and hold the Power button until you see activity on the screen (usually the Apple logo). At that time, release the button.
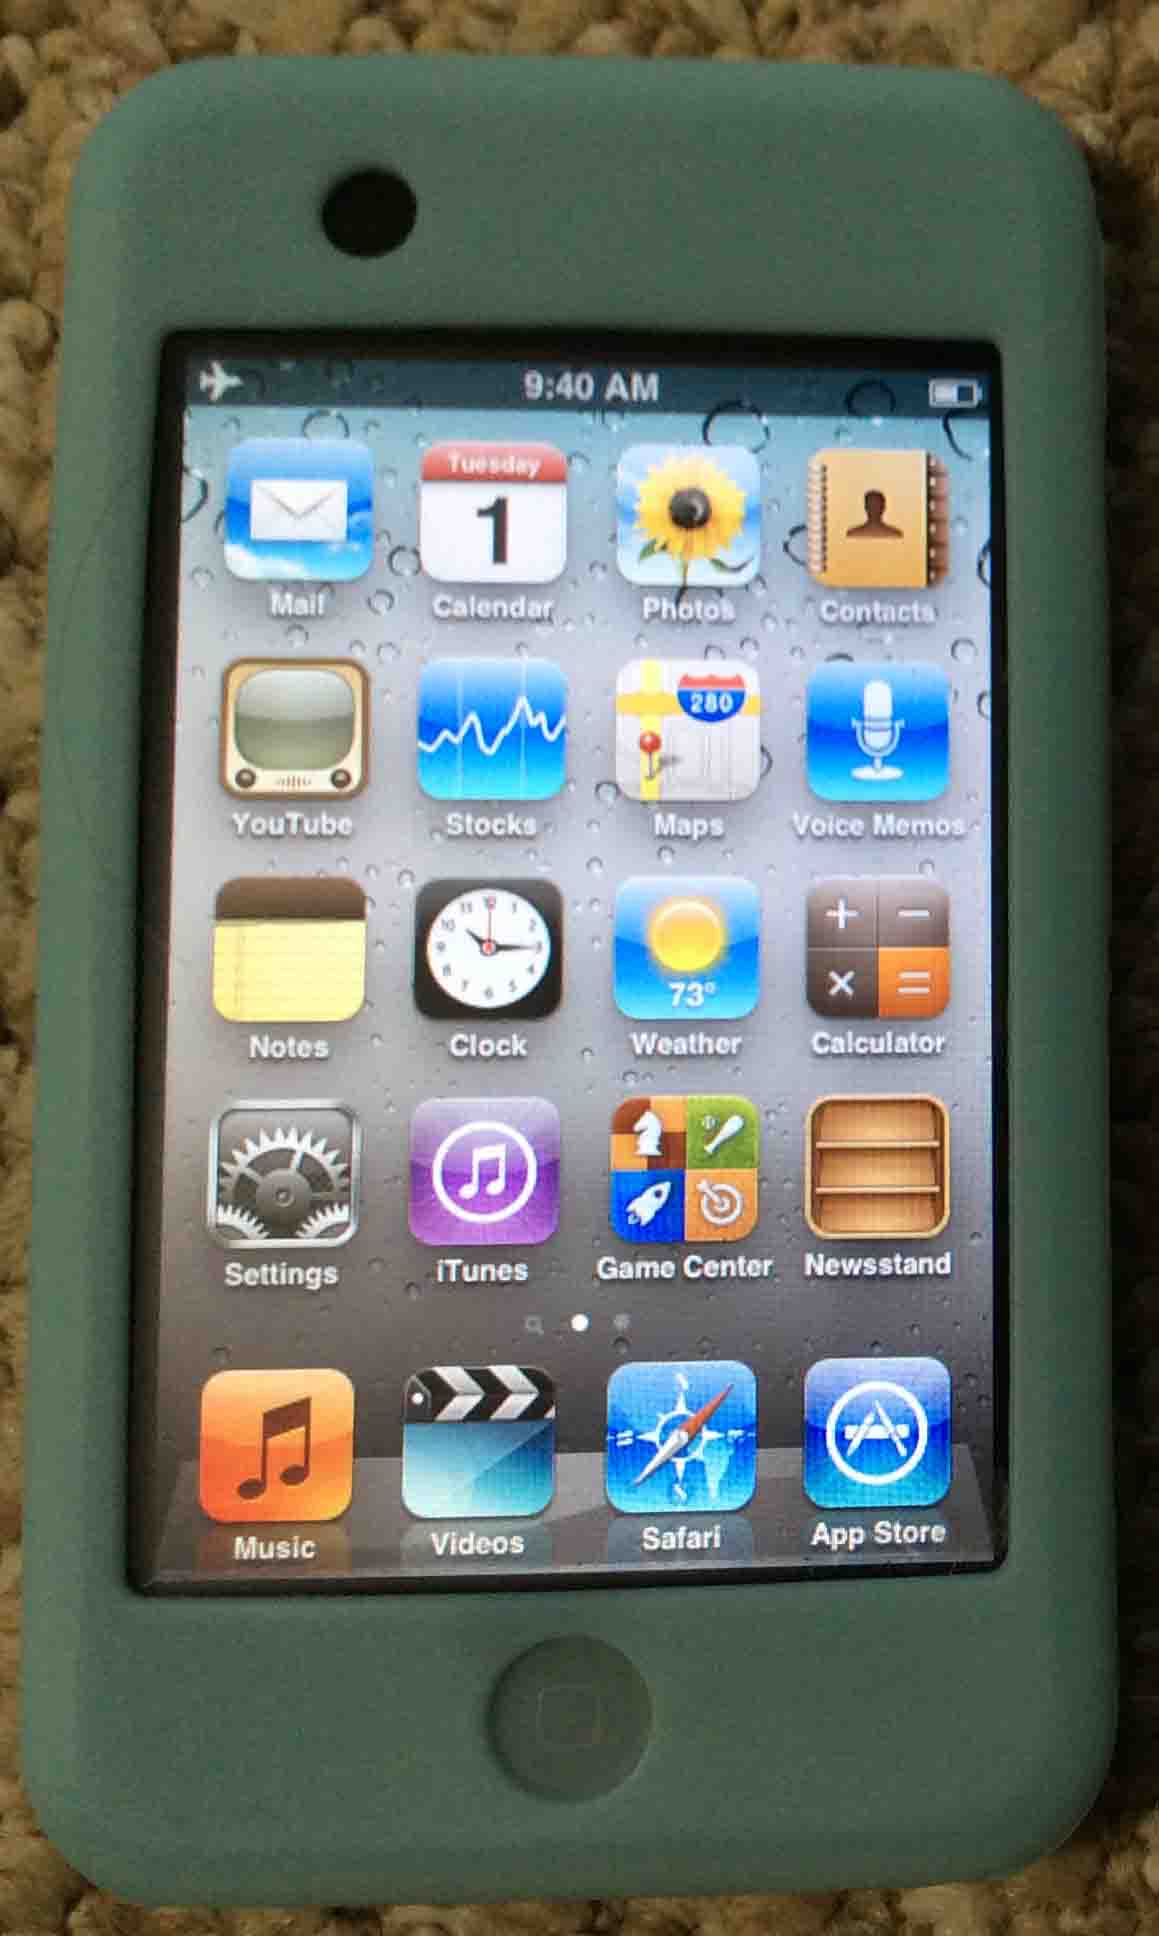
First, press the Home button (button underneath the touch screen).
This brings up the Home screen, as pictured next.
We find the Settings icon on the left edge of screen, second row up from bottom on our iPod.
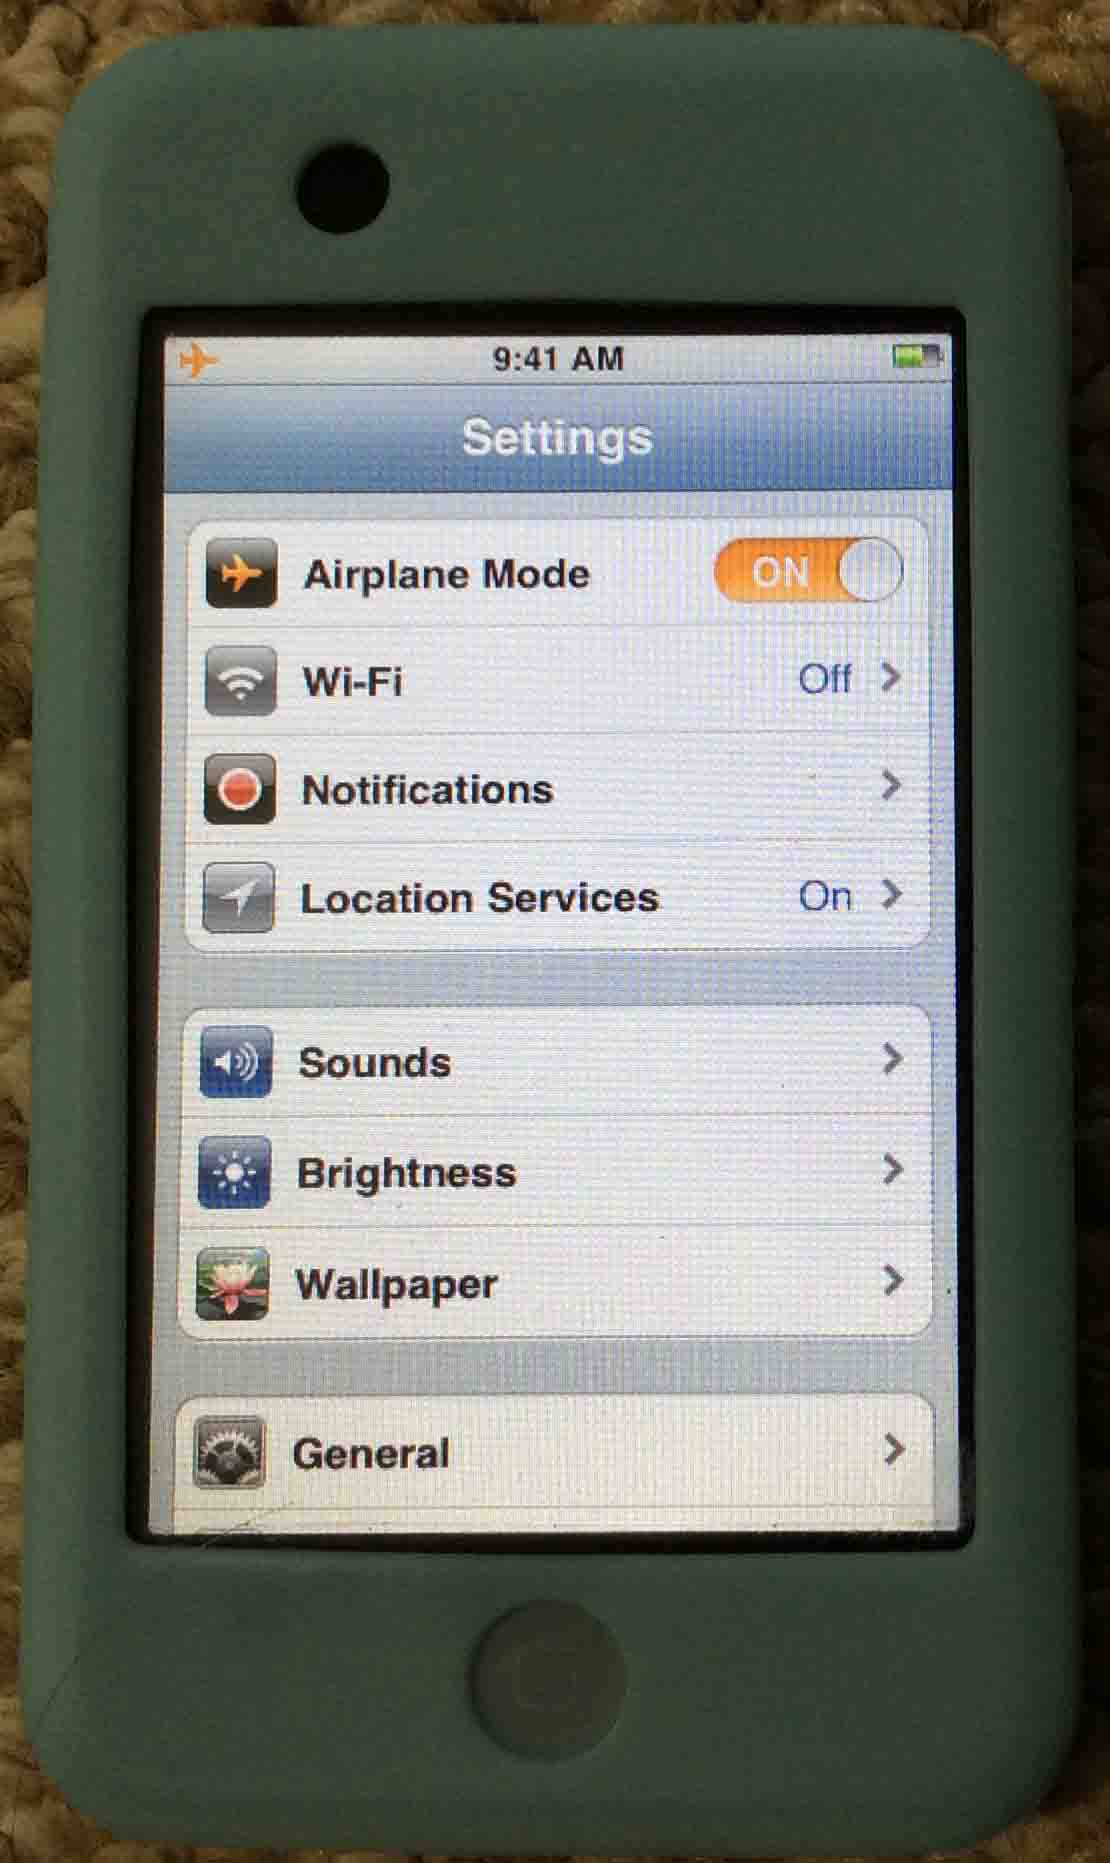
The Settings menu screen then displays, as shown next.
Next, touch the General menu item on the Settings screen. We find it at the top of the third group in the Settings menu.
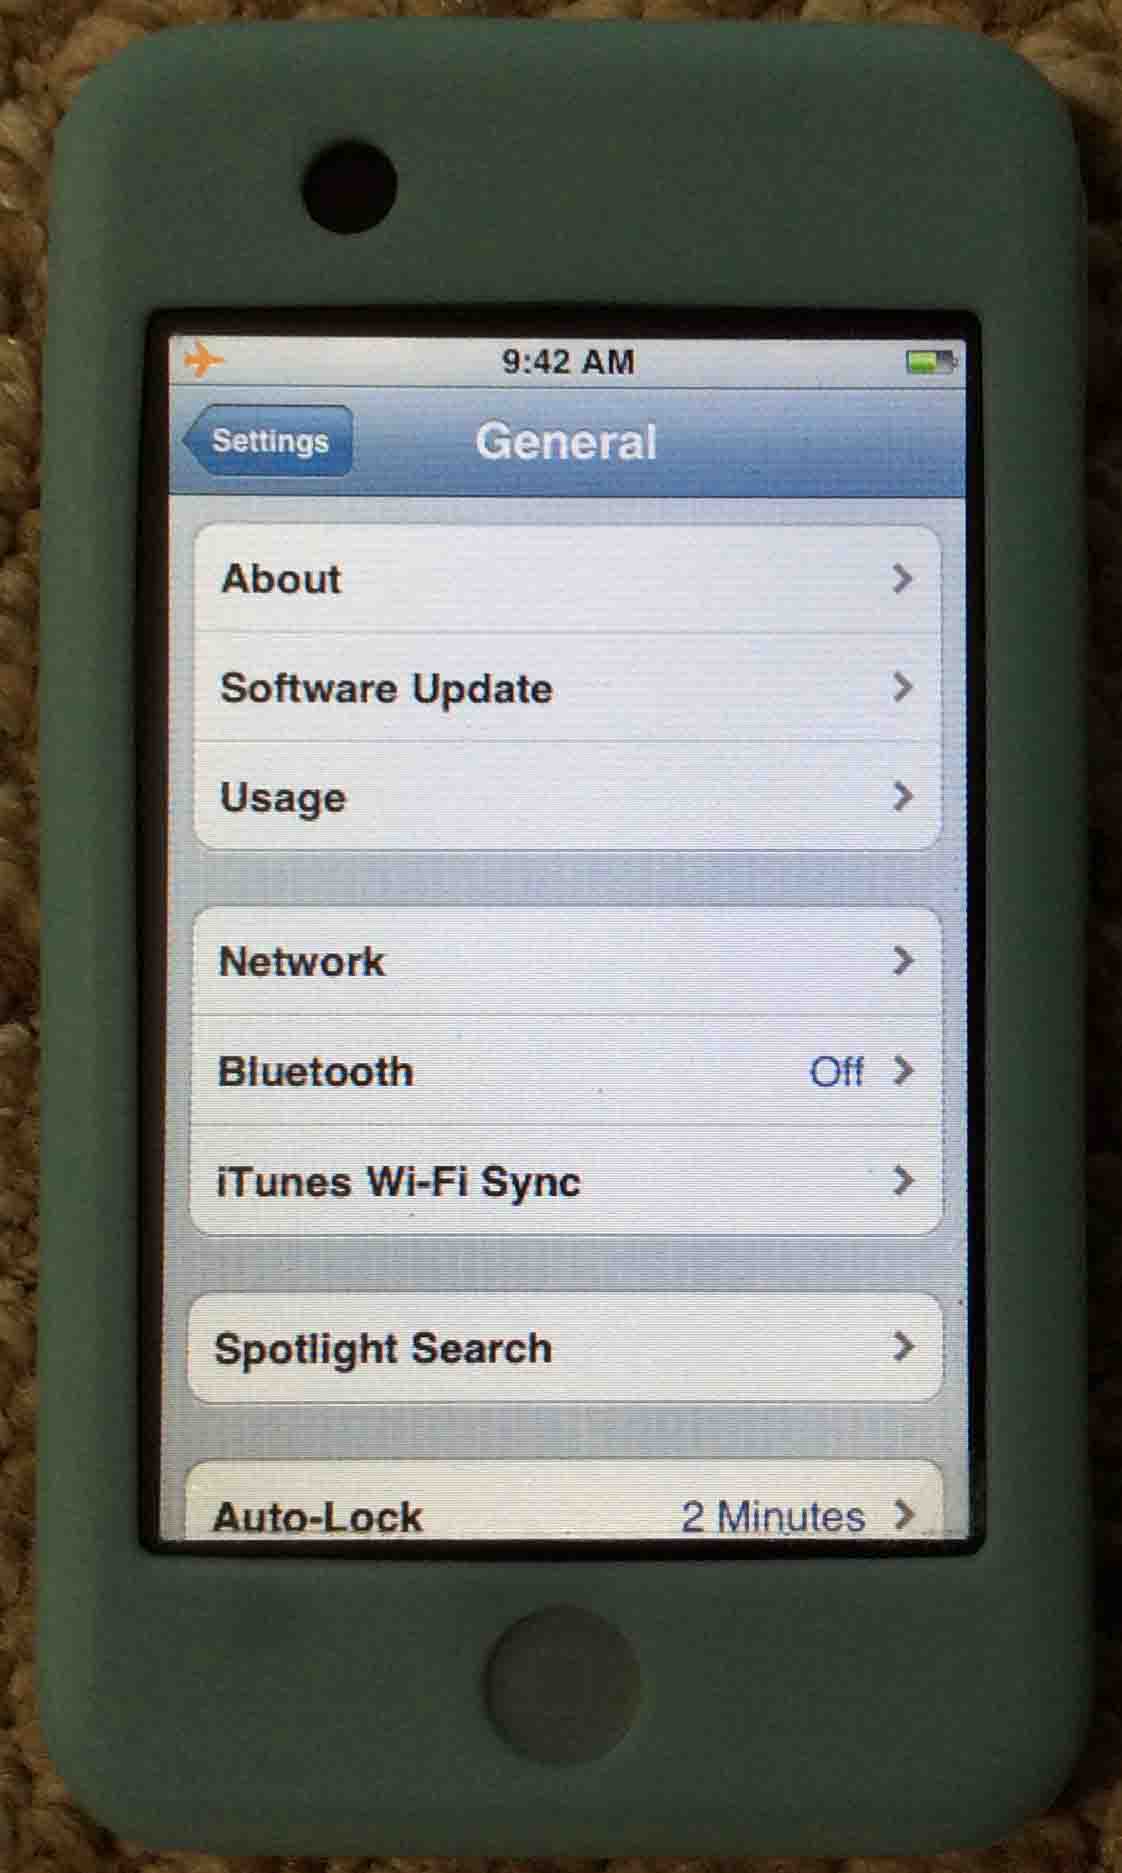
The iPod then shows the General Settings screen, pictured next.
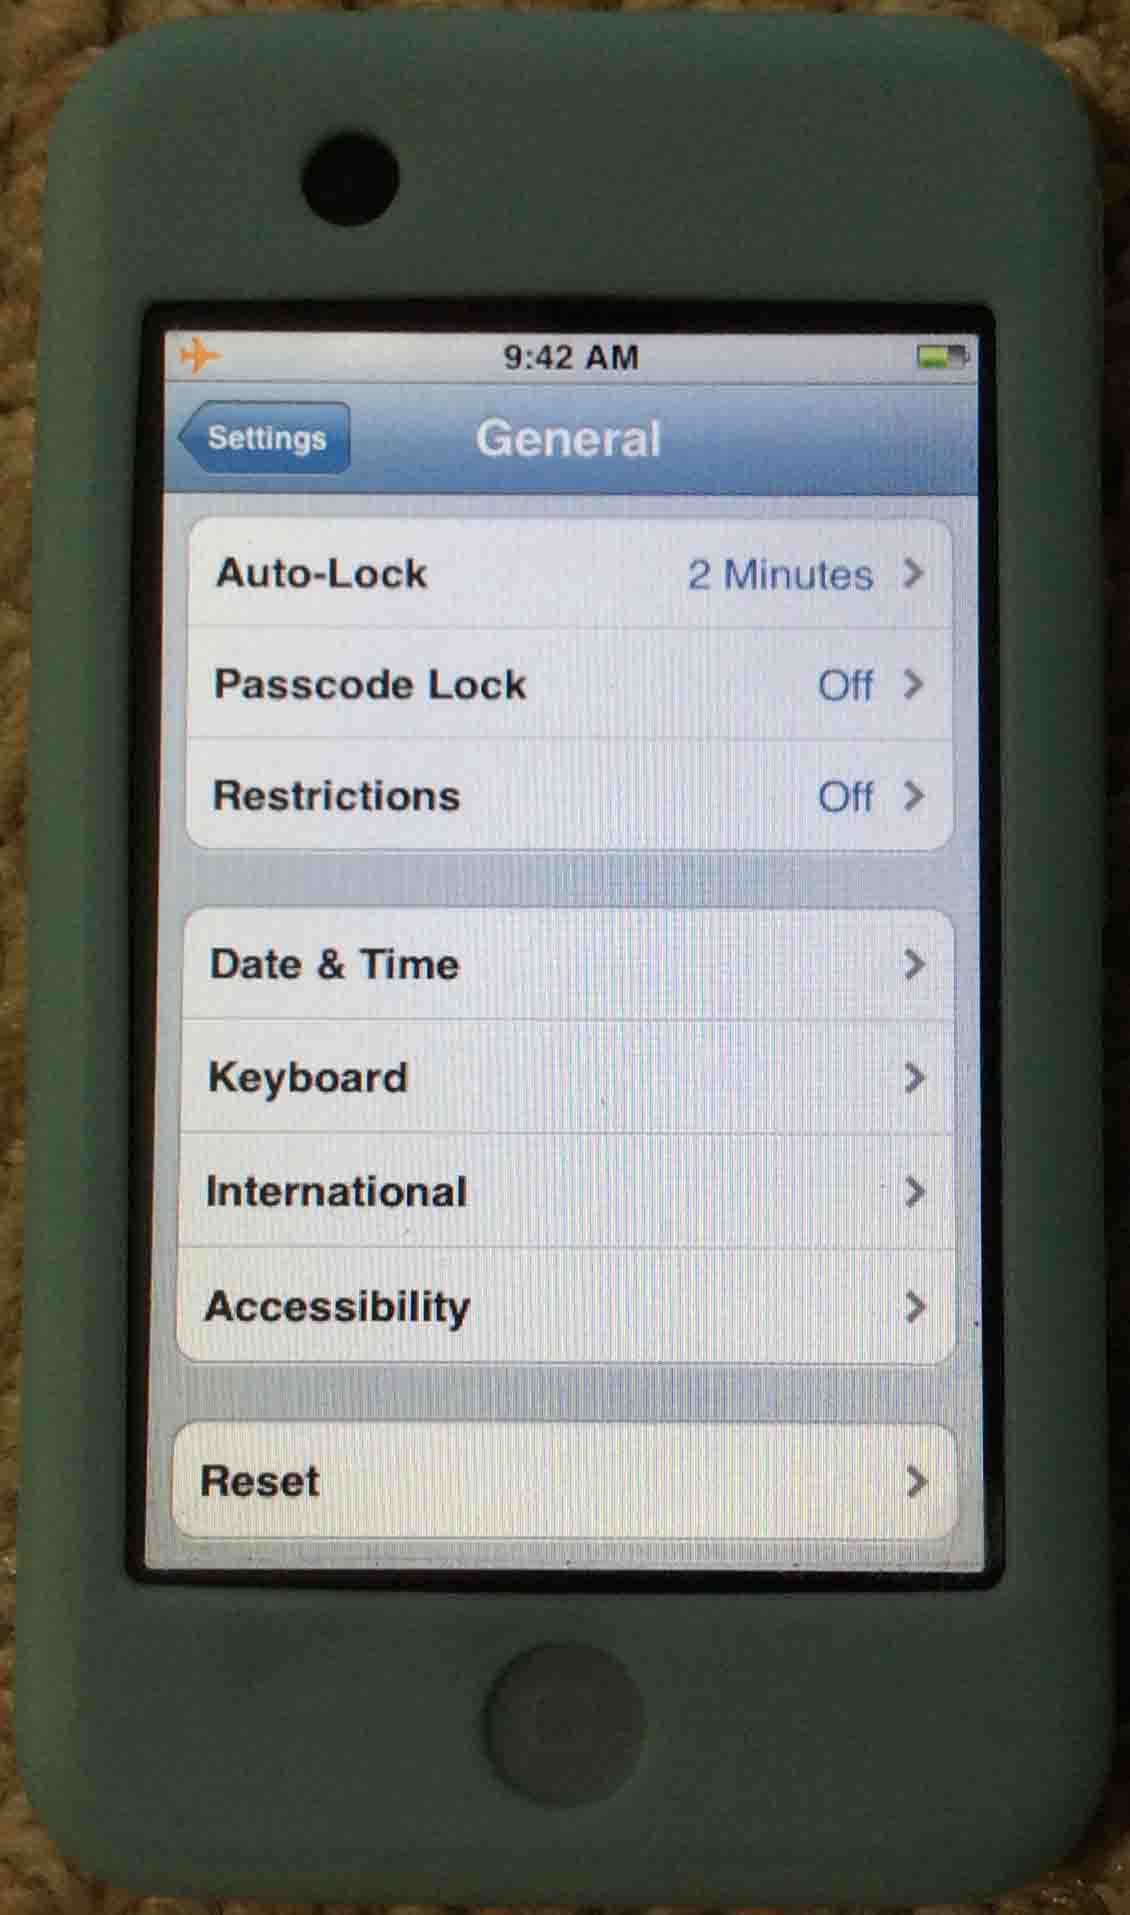
Then, single-flick upward with your index finger on the touch screen, to reveal the Reset menu item, as shown next. We see it on our iPod at the bottom of the General menu.
Then, tap the Reset menu item.
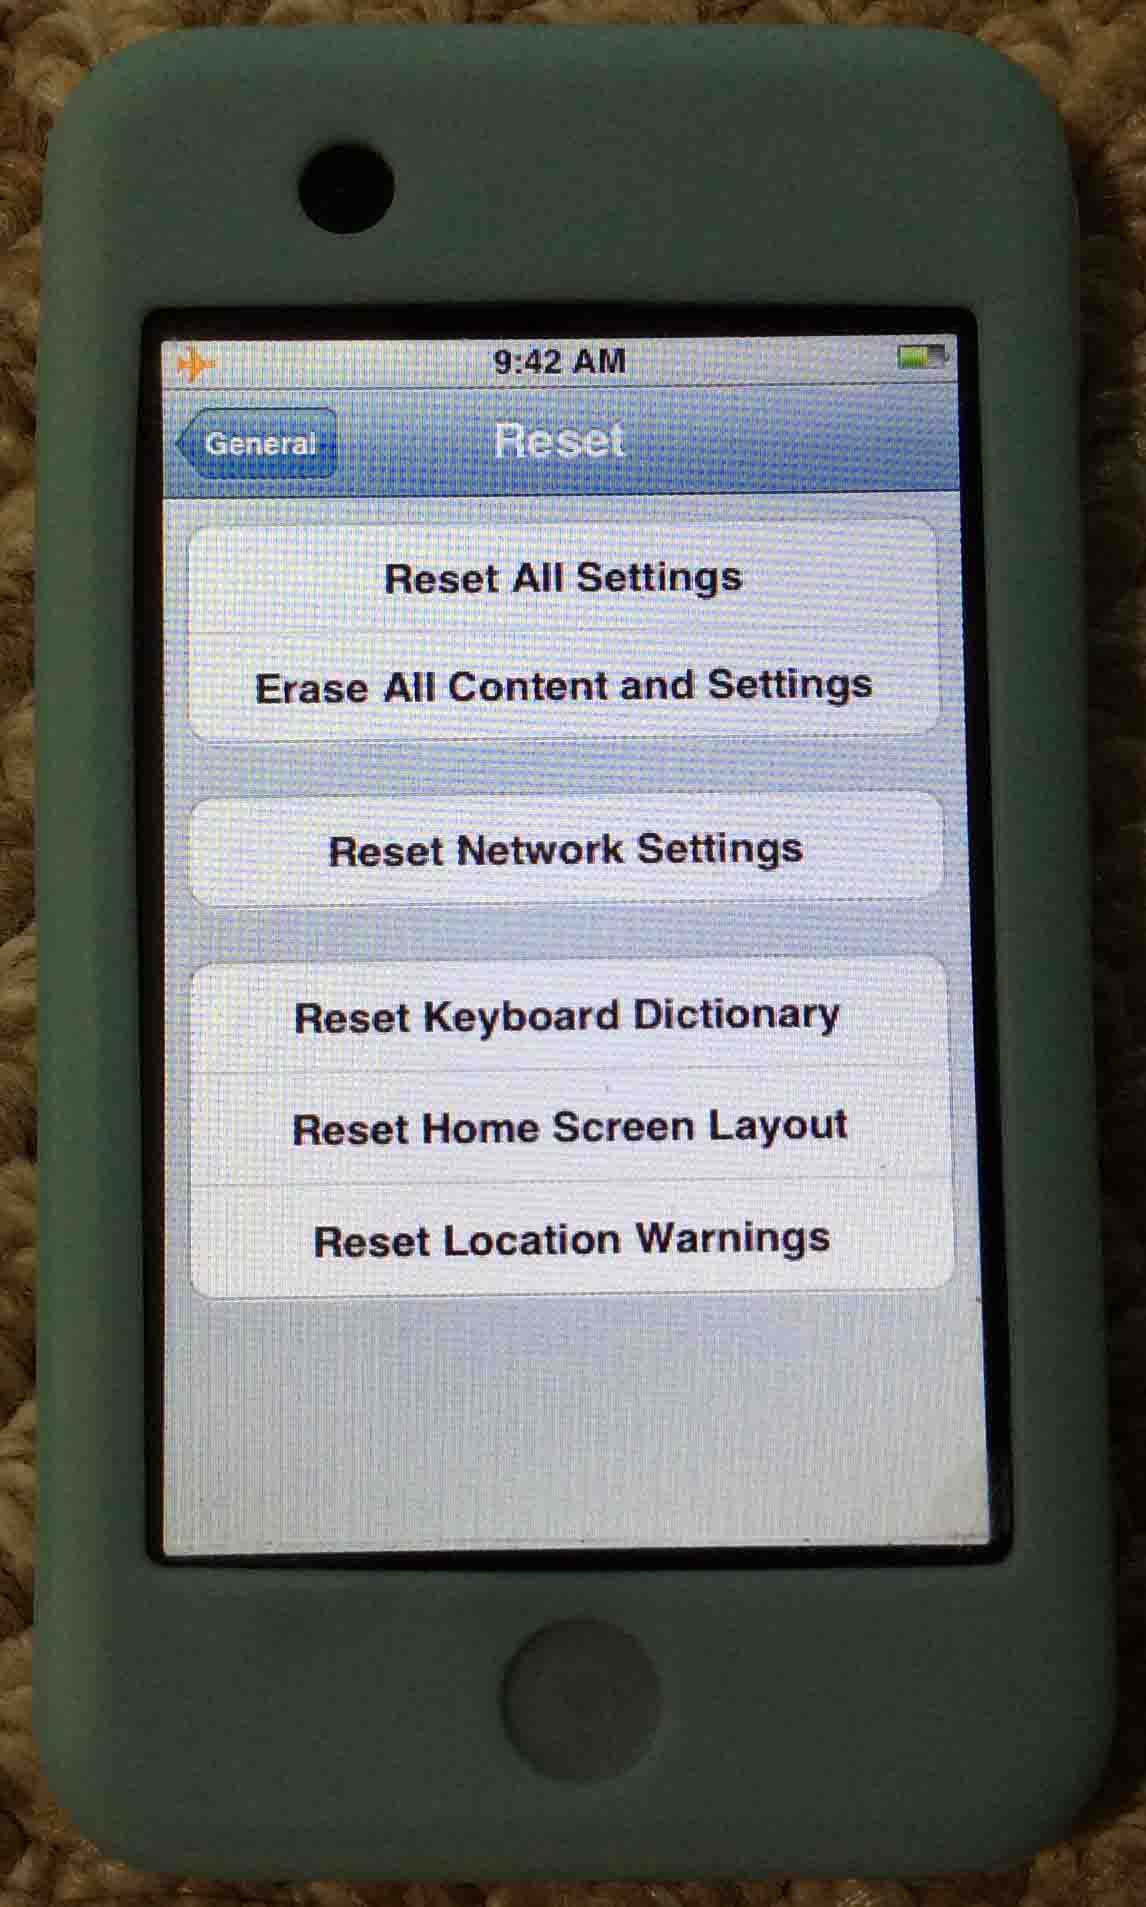
The Reset screen then appears, as pictured next.
On the iPod Touch player, you can choose how extensively the unit resets itself to factory defaults. You may choose either to:
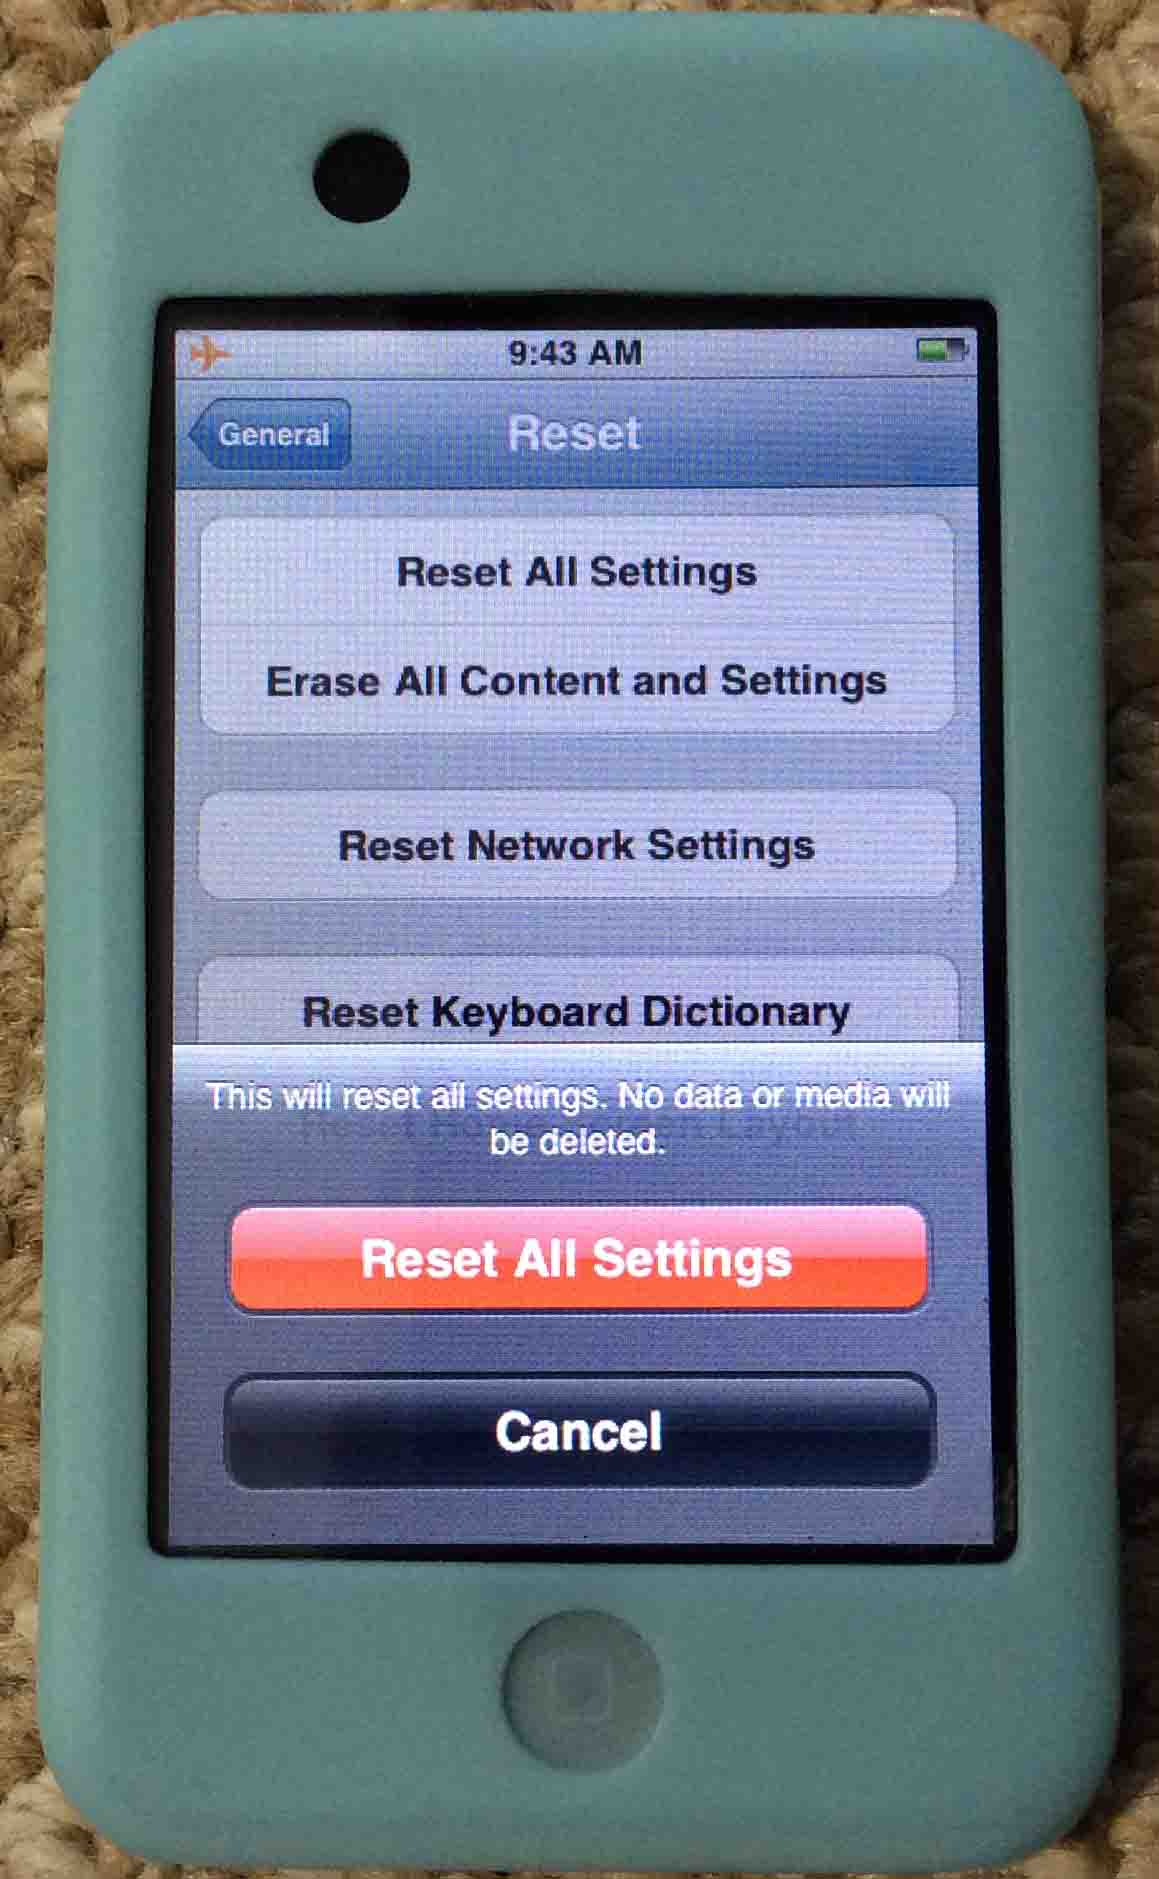
In our case here, we wish to reset all settings on the iPod, but not erase the music. So to do that, we touch the “Reset All Settings” option; the first option on the Reset menu. This displays the Reset All Settings confirmation screen, as pictured next.
If you’re certain that you wish to proceed with the factory default restoration, press the red Reset All Settings button on this screen. If not, touch Cancel.
But assuming you went ahead and chose to perform the restoration, the factory settings restore process begins. Note that this can take several seconds to complete.
The iPod Touch then displays a progress bar showing how far along in the restore process it is, as shown next.
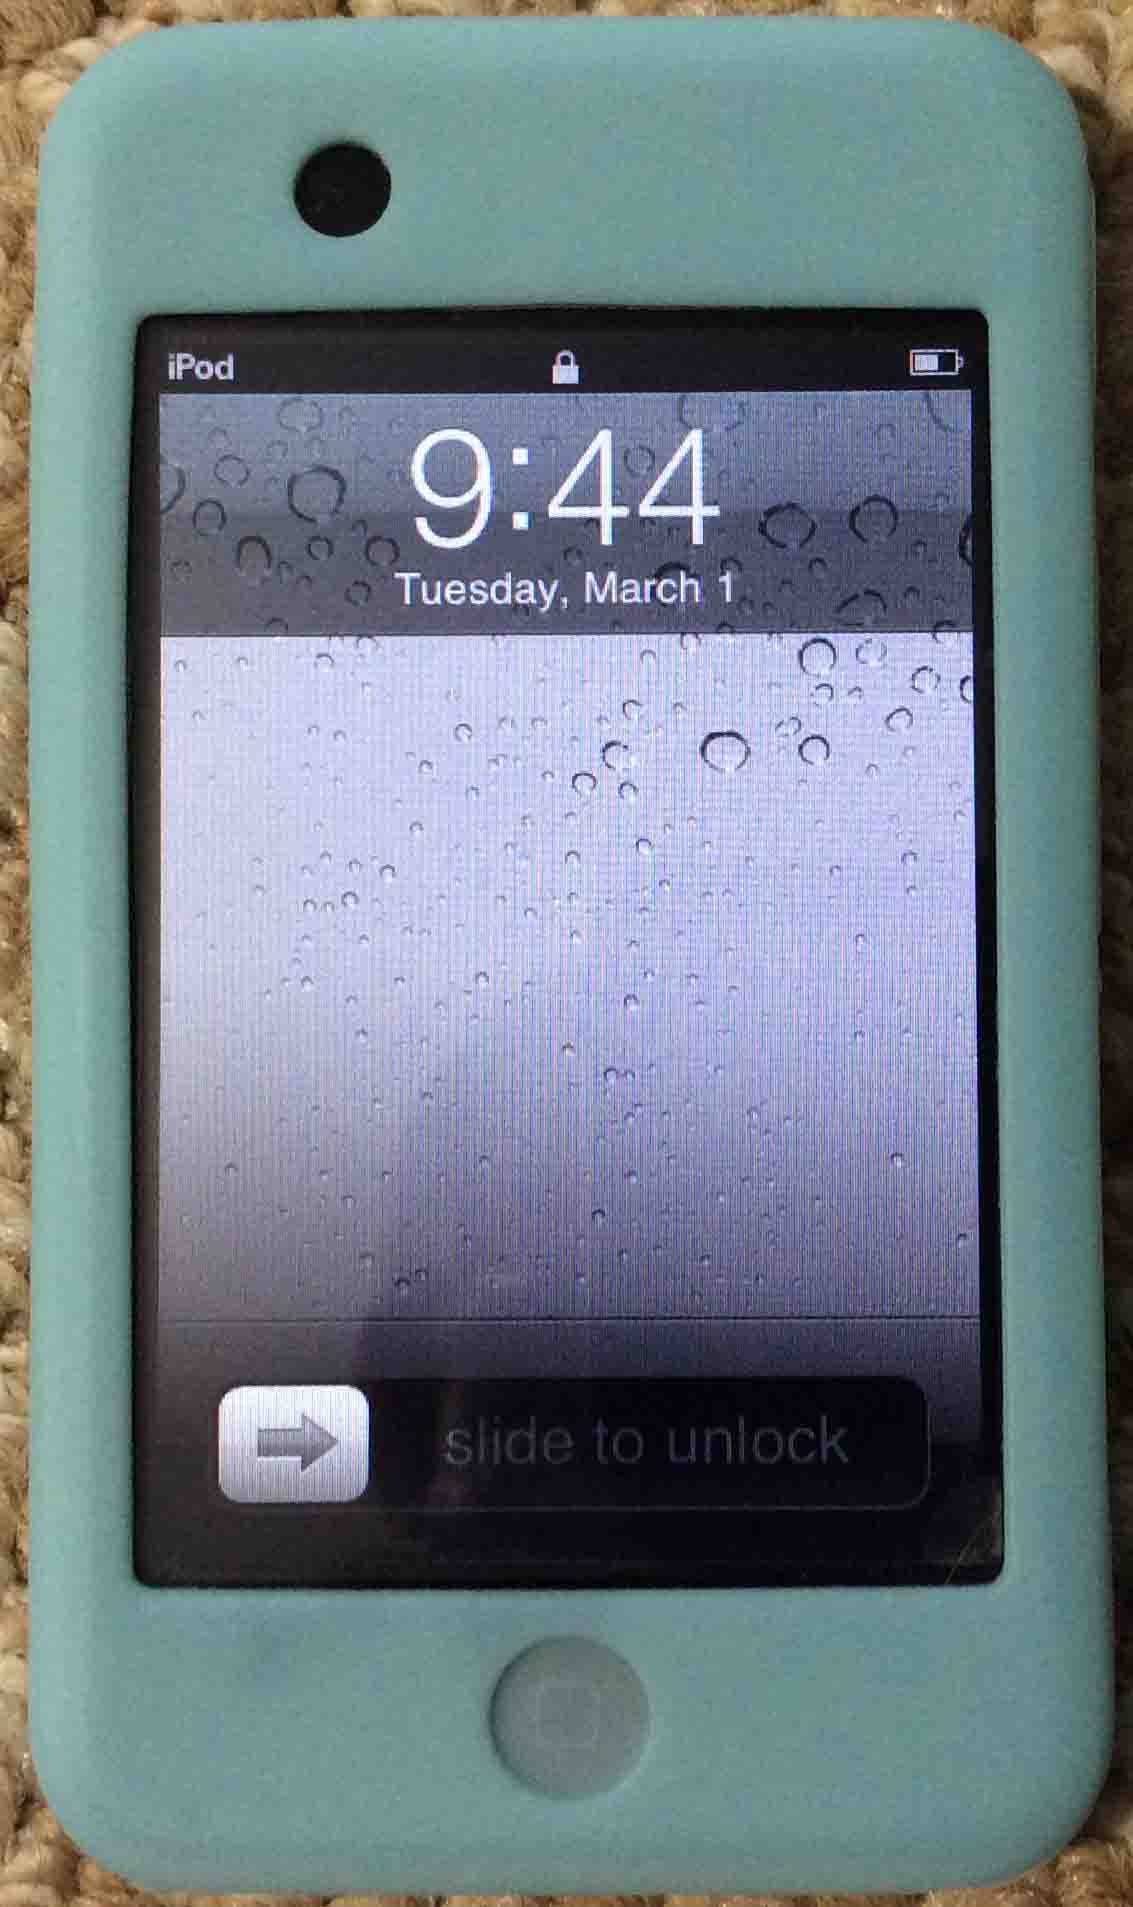
Once done successfully, the Lock screen displays, as shown next.
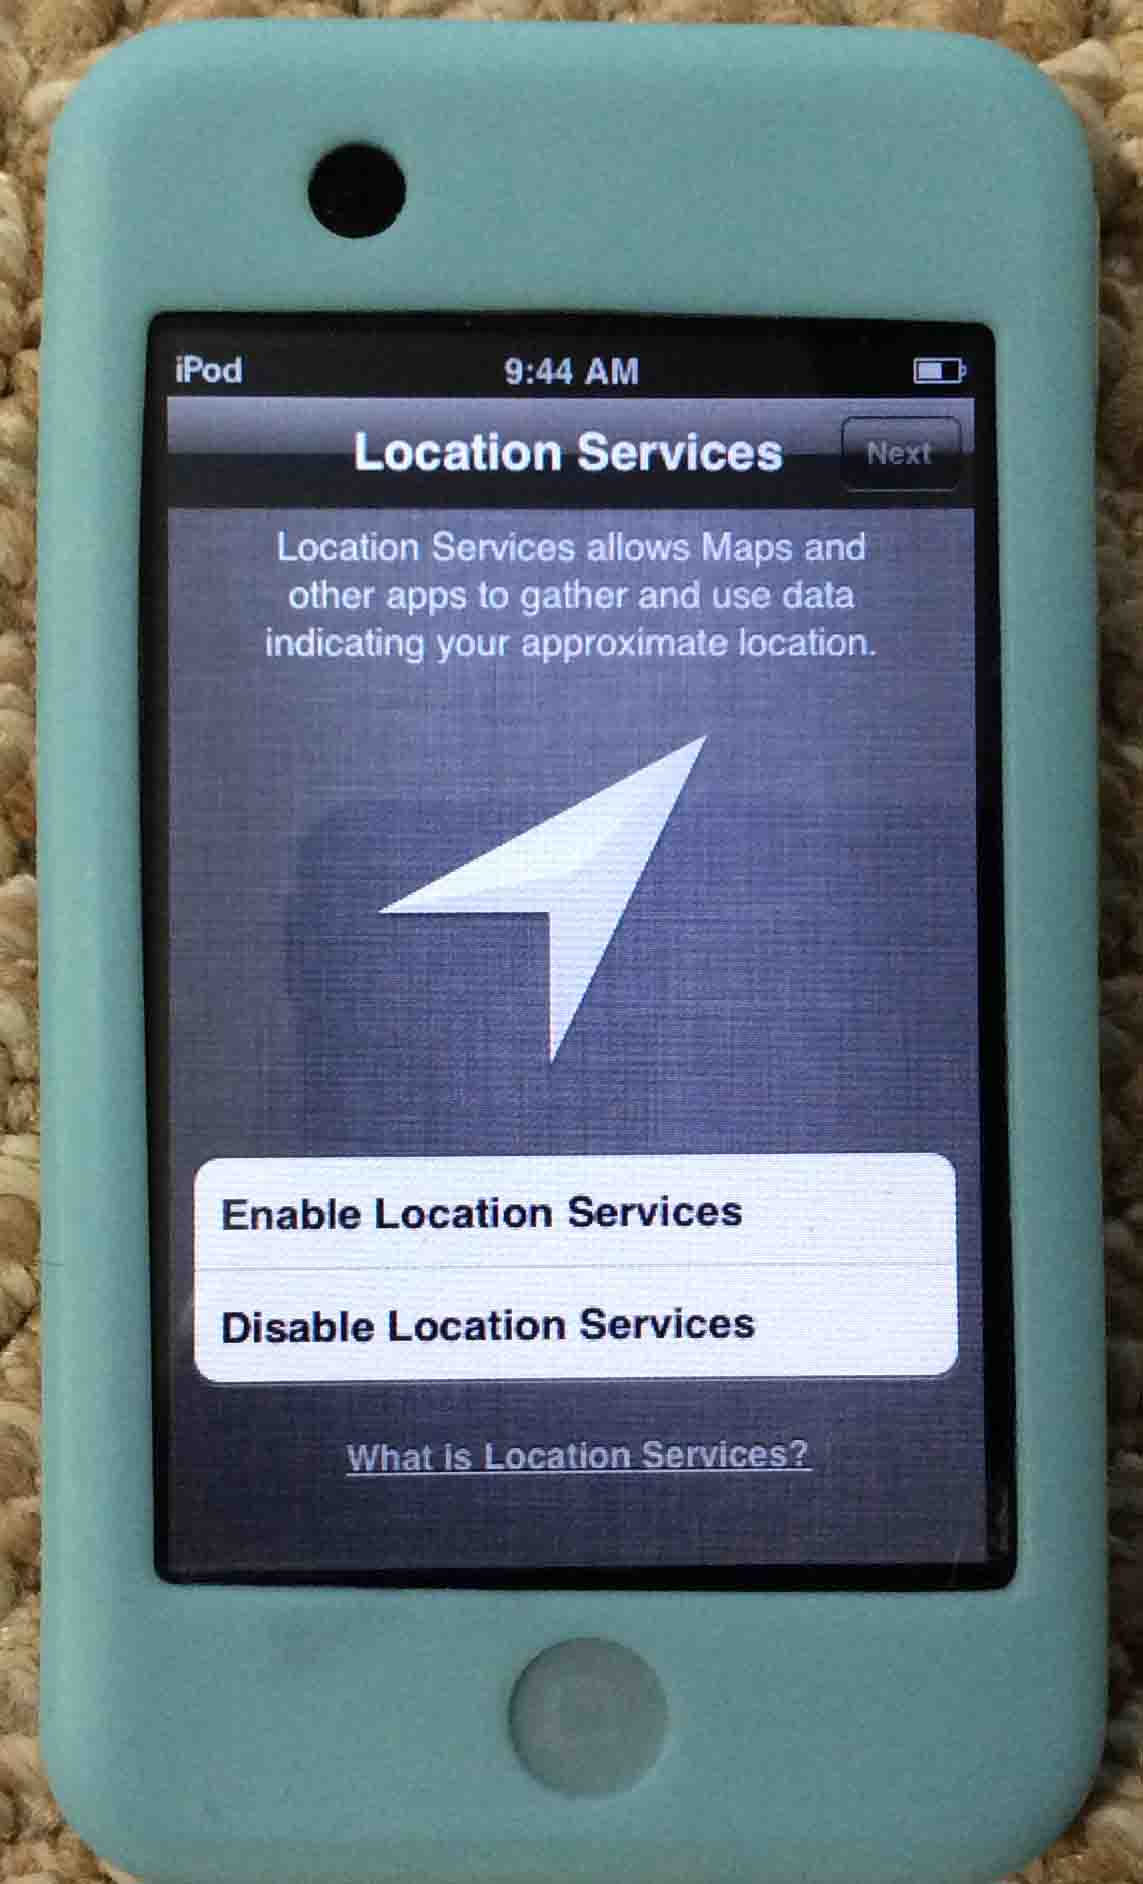
Then, move your finger from left to right, across the bottom of the screen where it says, “Slide to unlock.” The Location Services option screen then appears as follows.
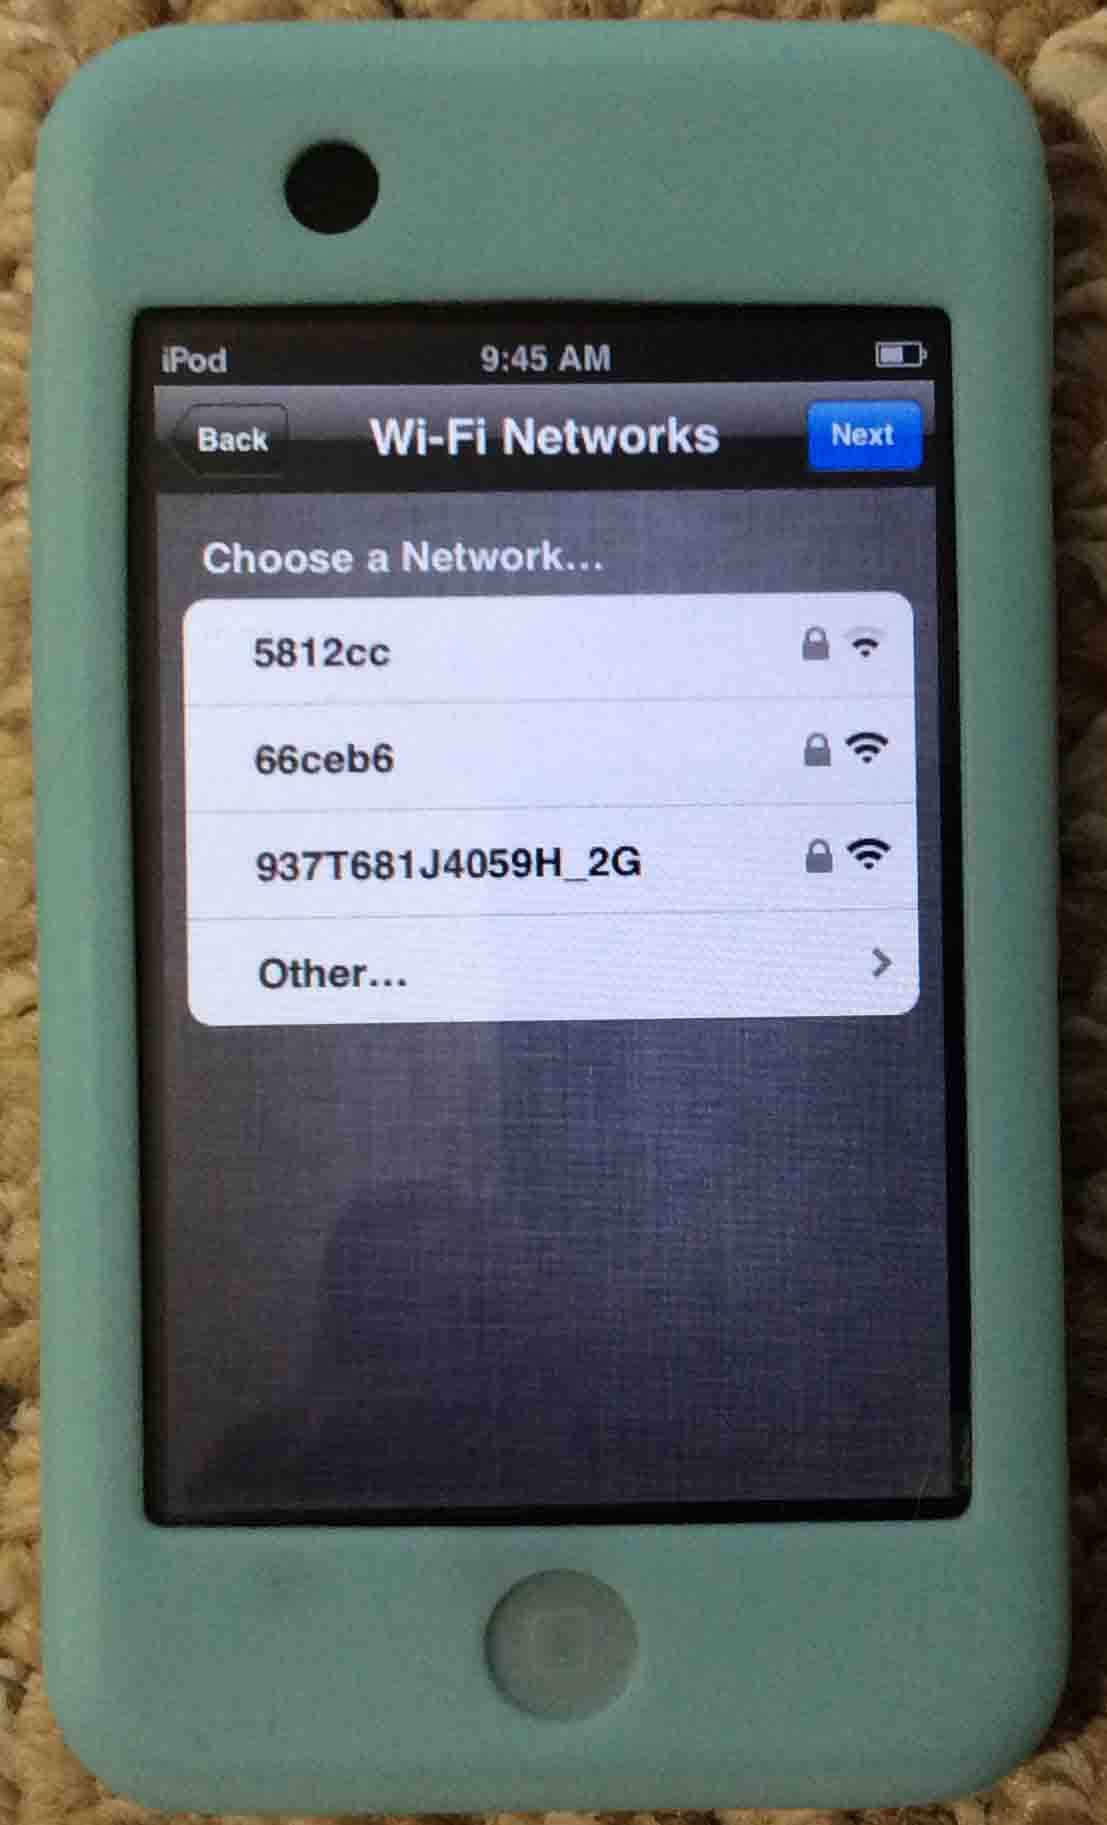
Choose whether or not you want to enable or disable Location Services here, by tapping the appropriate button. When you do, the iPod prompts you to connect to an in-range WiFi network, as shown next.
To connect to a displayed in-range WiFi network, tap on the desired network in the shown list. Otherwise, tap the blue Next button.
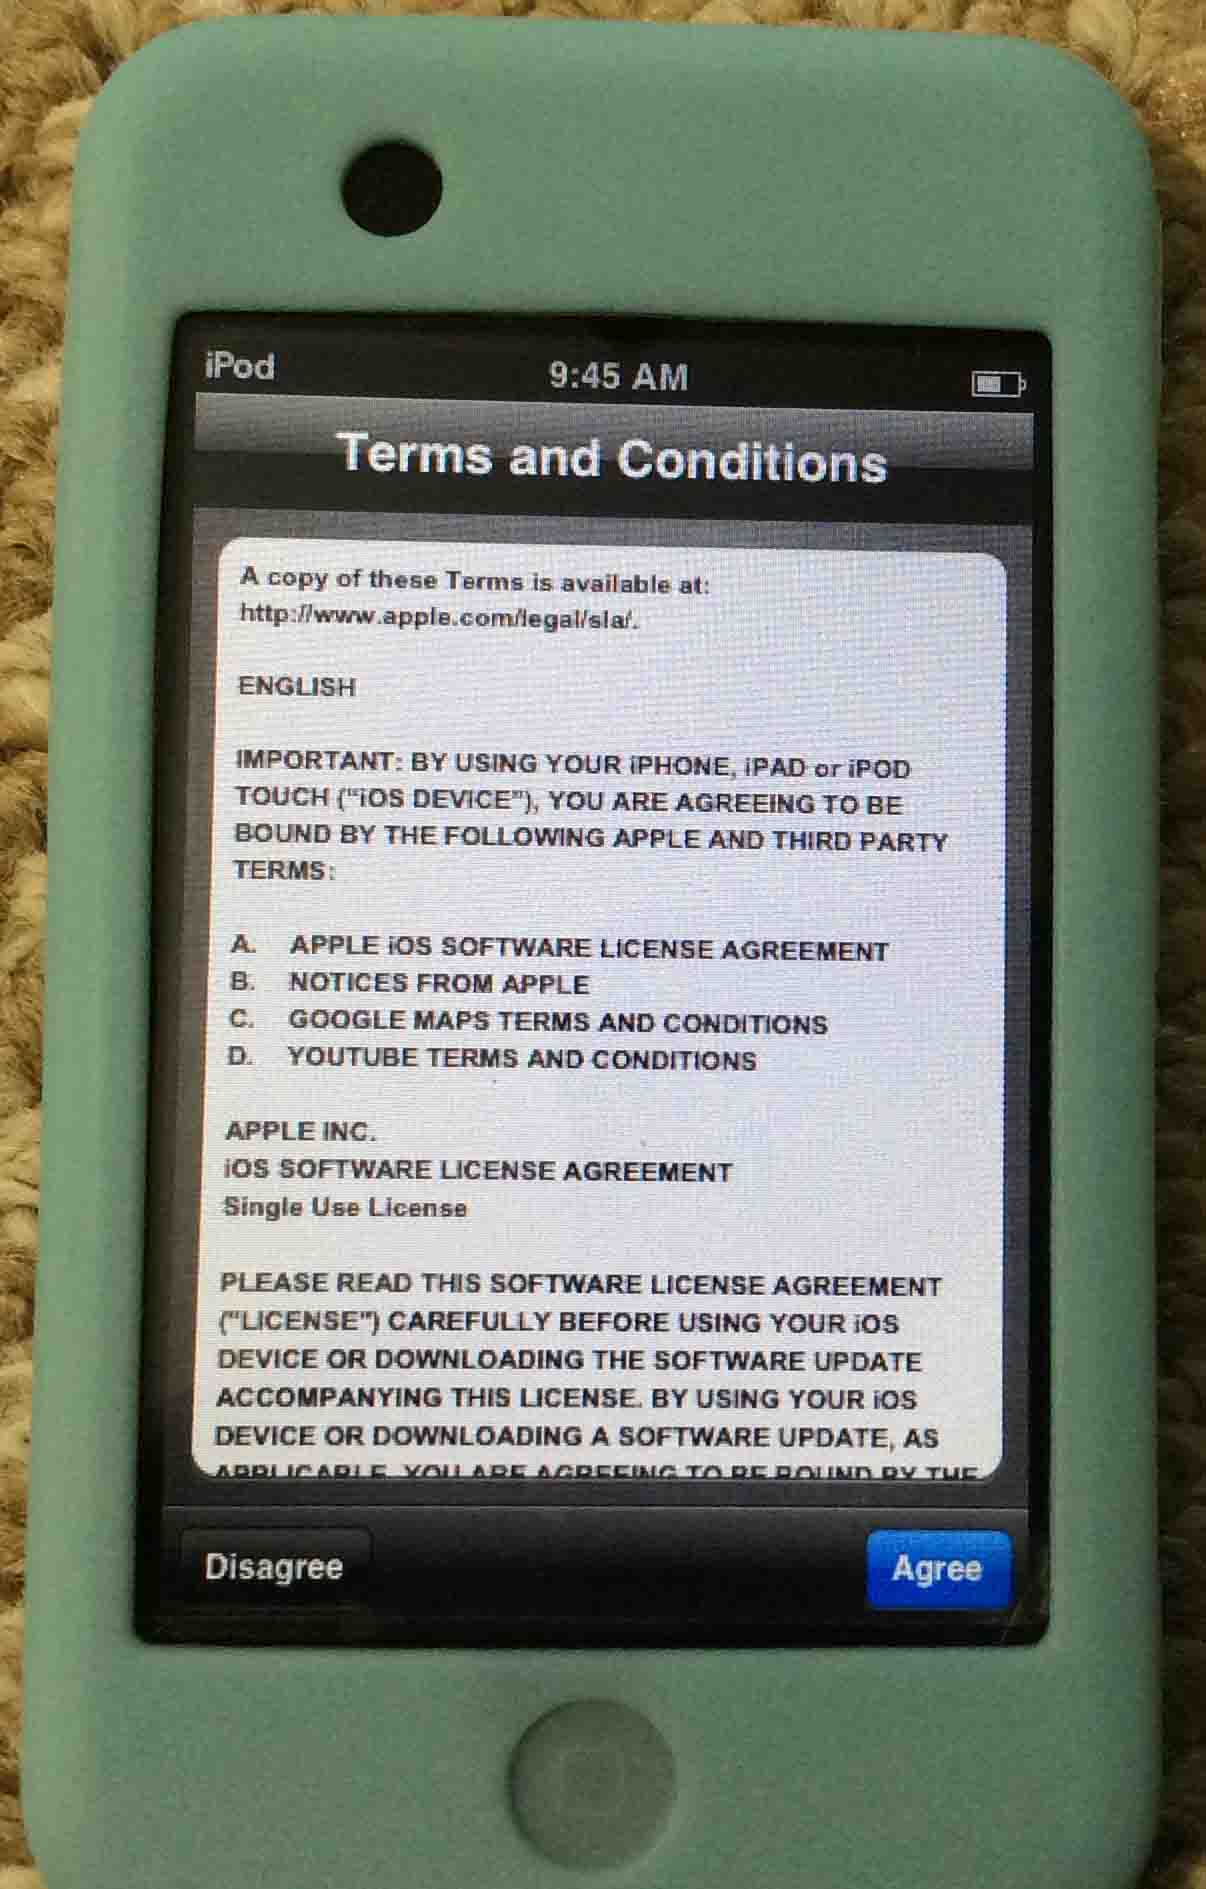
However, we opted not to connect to a WiFi network at this time, and so just pressed Next. The Terms and Conditions acceptance prompt appears next, as follows.
Assuming that you agree with Apple’s terms and conditions of use for this iPod, tap the blue Agree button.
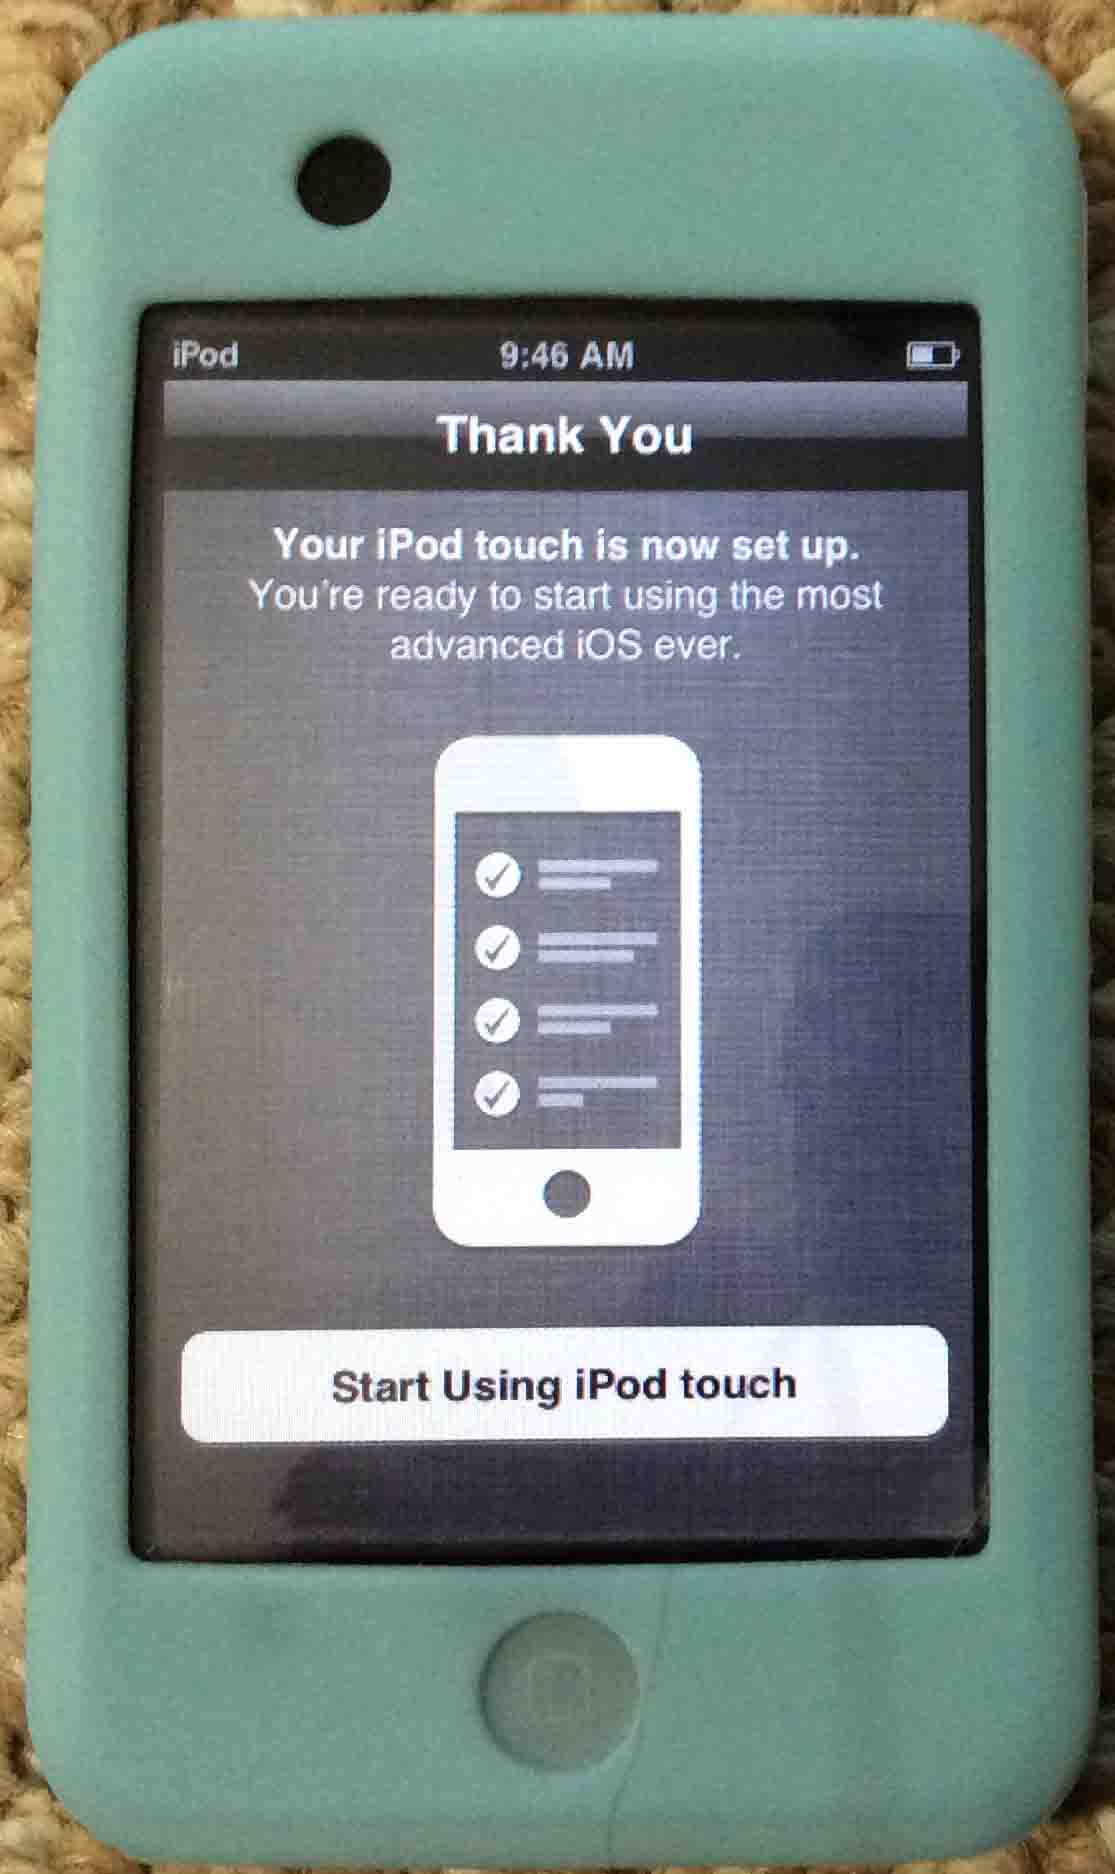
The Touch then prompts for how to handle diagnostics messages, that it sends back to Apple for evaluation and analysis, as follows.
We choose the “Automatically Send” option. Press this button, and you then see the Thank You screen, indicating that Setup was successfully completed.
Finally, touch the “Start Using iPod Touch” button.
Doing so takes you once more to the Home screen, as shown next. Note that this restoration reverts any any customization you have made (if any) back to original factory default values.
You have now successfully restored all the settings in your iPod Touch music player to factory default values, without deleting the media files on it. You may remove those files later if you wish. Delete the music files on the iPod by running through a similar routine to the above. But the one different thing you would do, is when prompted for which type of reset you want to perform on the Reset screen, choose the “Erase all content and settings” option.
Here, we show how to update JBL Charge 3 speaker firmware for this popular Bluetooth…
We received the Waterpik NSP-853 Power Spray Plus massaging shower head for Christmas some years…
All smart speakers in the Google Home family now support Bluetooth. They can act as…
Firstly, the original Google Home speaker has a sleep timer that you can set and…
Follow these JBL Flip 4 speaker charging instructions for longest play using the hidden USB…
Here, we list JBL Flip 4 speaker specs specifications. To summarize, these cover the speaker's…