We recently replaced a bathroom faucet due to the last one bursting apart and spraying water all over the place. In this piece, we show how to change a bathroom sink faucet on our pedestal sink.
How to Change Bathroom Sink Faucet
We bought a self-contained, two handle replacement. However, the installation procedure for the one handle varieties is virtually identical to the outline below. This can be a simple procedure; the hardest part was getting down underneath the sink to loosen and tighten the various nuts and fittings.
Tools Needed
Ratchet Socket Wrench
Buy also a 10-inch extender, fitted with a 1 and 1/16 inch socket. The nuts that held the old faucet in place on our sink are deeply recessed on the underside. Thus the 10-inch socket extender.
An 8-Inch Pipe Wrench
Use the pipe wrench to loosen and tighten the fastening nuts and supply line fittings.
Pliers
A pair of average-sized pliers, for loosening, aligning, and tightening the drain actuator rod.
Screwdriver
A straight-edged screwdriver, to pry up the old faucet once you’ve removed the holding nuts, and it sticks too much.
Supplies Needed for How To Change Bathroom Sink Faucet
New Bathroom Sink Faucet
Teflon tape
for sealing threaded water-carrying fittings.
Hoses
Two water supply hoses (hot and cold). Replace these anytime you change a sink faucet. Ours showed severe signs of rusting; particularly the cold one, due to chronic condensation.
We prefer flexible hoses to rigid supply lines, as they require fewer tools and less time to install. So this procedure focuses on the hoses, and does not speak to the marking, cutting, soldering, and fitting of rigid supply pipe. However, rigid supply pipe may be less prone to bursting over time. So, it’s your choice.
Removing The Old Bathroom Sink Faucet
1. Shut off Hot and Cold Water Supplies
Turn off both the hot and cold water lines to your sink. Usually, this can be done with two shutoff-valves, on the wall somewhere underneath the sink.
2. Replace Shut Off Valves if Needed
Examine these shutoff valves, and replace if you see any of the following:
- Much corrosion or hard water buildup.
- The shutoff knobs are too hard to turn on and off and lubing them does not help
3. Turn on Both Hot and Cold Spigots in Sink
Then, turn on both the hot and cold spigots on the old faucet to relieve the pressure inside and allow any residual water to escape.
4. Remove the Water Supply Hoses from Old Faucet to Continue with How To Change Bathroom Sink Faucet
The older ones have hex nuts holding them, while the newer ones often have a finger-accessible wing nut. You’ll likely need your pipe wrench to initially get them turning counterclockwise as you face them.
5. Remove Old Faucet Wing Nuts
Take off the finger- or wing-nuts holding the old faucet to the sink. These might either be wing nuts or hex nuts. If hex, use your ratchet wrench with the extender with the 1 and 1/16-inch socket installed, to reach up under the sink to get at them.
6. Detach the Drain Plunger Rod
Often, there will be a small finger-nut that, due to corrosion, will not loosen with finger power. Get your pliers after this and loosen (turn counterclockwise). The plunger rod can then be pulled up out of the old faucet body.
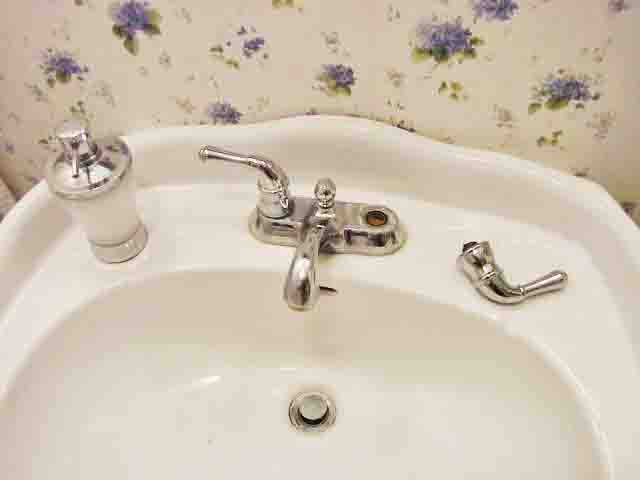
7. Lift Old Faucet Out
Lift the old faucet assembly up away from the sink and remove. You may have to pry a little with the screwdriver. This helps break any seal or plumbers putty that might have been applied. Plumbers put this on to prevent water collecting around the faucet from flowing underneath it, through the supply holes on the sink, and spilling all over the floor.
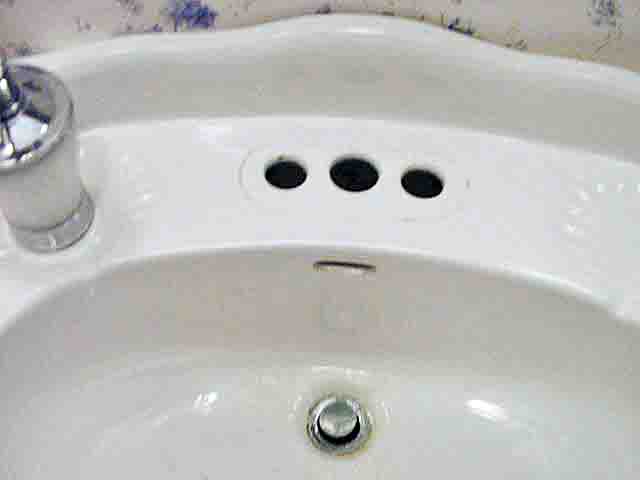
8. Clean Up the Sink to Continue with How To Change Bathroom Sink Faucet
Clean the sink where the old bathroom faucet was. I had used Soft Scrub cleanser to thoroughly remove the gunk and pieces of the old rubber sealant under that faucet.
Preparing the New Sink Faucet For Installation
Unpack the new faucet assembly and verify that all parts described in the accompanying installation guide are present.
Caution: Be careful not to scratch any parts. Lay them out on a soft cloth on the floor.
Our new AquaSource faucet came with a choice of white or chrome-finished handles, and the chrome ones were already screwed on. However, if you wish to change those to the white ones, now would be a great time.
Some faucets have a detachable spout. If that’s the case for you, screw on the spout to the faucet’s base platform. That’s not how this faucet is here however.
Our faucet was pre-assembled. However, some of the more extravagant ones may not be. So do any final assembly work your particular fixture requires by following their instructions manual.
Installing The New Bathroom Sink Faucet
1. Fit the New Faucet into the Holes in the Sink
Position the new faucet exactly where you want it, making sure it’s not crooked or crocked.
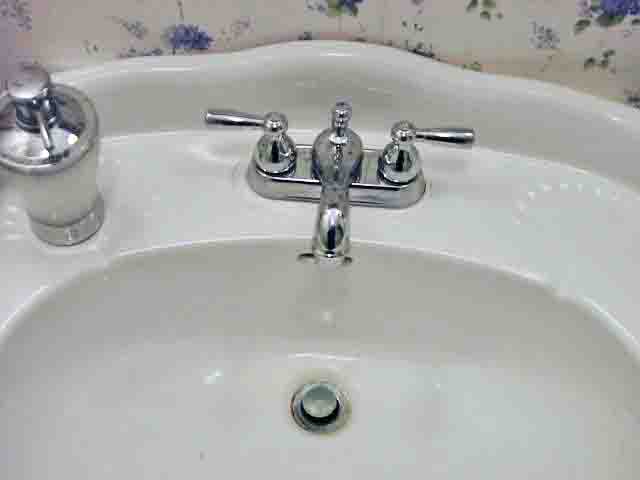
2. Tighten the Faucet Wing Nuts
This locks the faucet into place and prevents it from moving around when you attach the water supply pipes below.
3. Attach Supply Line Hoses
Thread the holding nuts onto the new faucet’s supply line pipes that are now located on the underside of the sink. Make them finger-tight.
For added assurance that your new installation will not leak, apply two or three wraps of Teflon tape to the supply line threads on your new faucet as well as to the supply line shutoff valve threads.
4. Tighten the Supply Line Nuts to Faucet to Continue with How To Change Bathroom Sink Faucet
Tighten the big ends of each of the two water supply hoses to the supply line threads on the new faucet, on the underside of the sink. Hand-tighten these first. Then tighten each nut an additional one-quarter to one-half turn. For this, use either your ratchet or your pliers depending on which type of nuts (hex or wing) your faucet has. Then, once done, you should have two water hoses, dangling from the faucet.
5. Attach Supply Hoses to Wall Pipes
Next, attach the other ends (smaller ends) of the supply hoses to the hot and cold shutoff valves. But don’t reverse the hoses! The left hose as you face the sink, fastens to the hot shutoff valve. The hot line is usually the left one jutting from the wall. The cold hose (right side of faucet) goes to the cold shutoff. The cold is usually the right one on the wall.
Again, hand-tighten each hose nut. Then turn an extra quarter to half-turn with pliers or pipe wrench.
6. Turn on Hot and Cold Water Supplies
Now, turn on both hot and cold shutoff valves under the sink.
7. Work the New Sink Faucet Spigots
Turn on and off several times the faucet handles to check proper operation.
8. Attach the Drain Plunger Rods to Continue with How To Change Bathroom Sink Faucet
Make sure that the drain completely seals when closed. Adjust plunger rod positions to achieve a good seal. Plus, you also want a brisk water flow when you open the drain all the way.
9. Check Around for Leaks
Keep an eye out for leaks for several minutes. If you see none, then this job is complete.
10. Done with How To Change Bathroom Sink Faucet !
Enjoy your new bathroom sink faucet.
Related Posts to How To Change Bathroom Sink Faucet
- AquaSource Bathroom Sink Faucet #0327296 Review
- Installing Hand Held Massaging Shower Heads Tips Advice
- Waterpik Power Spray Plus Shower Head NSP-853 Review
- Danze Brass Interlock Shower Hose D469020 Review
- Gillette Fusion Proglide Shaving System Review
References for How To Change Bathroom Sink Faucet
Revision History
- 2019-03-13: Added keyword targeting, subheadings, a References section, and tags.
- 2015-12-06: Added appropriate tags.
- 2015-10-18: Added appropriate tags.
- 2014-12-26: Moved this piece to the Tom’s Tek Stop blog. Revised content, added white space, added pictures, and adjusted ad positioning.
- 2012-05-11: Originally published.