We’ve found this way for how to deice a freezer quickly works well, is safe, and allows for fast cleanup. Deicing works for frost free as well as manual defrost models, as long as you can safely aim your heat toward the interior of the unit.
We’ve rented many apartments that had manual frost freezer models. Indeed at this very moment, we have an upright Frigidaire commercial freezer here, that needs annual deicing to keep clear the cooling coils built into each of its shelves.
We’ve only tried this deice freezer routine on upright, vertical units (those with a plum door on the front). But this method will deice a chest freezer also (those with a horizontal door on top). In those cases, just find a place above the freezer from which to aim the heat down into the freezer compartment, instead of up from the floor as the routine below shows.
For either chest or upright freezer deicing, heat guns and hair dryers work well. Heat guns work the best because unlike hairdryers, they have a built-in stand that allows you to easily sit them on the floor (or on a nearby shelf or chair for the chest freezer case) and aiming the heat through the open freezer door.
So to de ice our freezer in under two hours, we perform the following procedure every six months:
How to Deice a Freezer: Step by Step
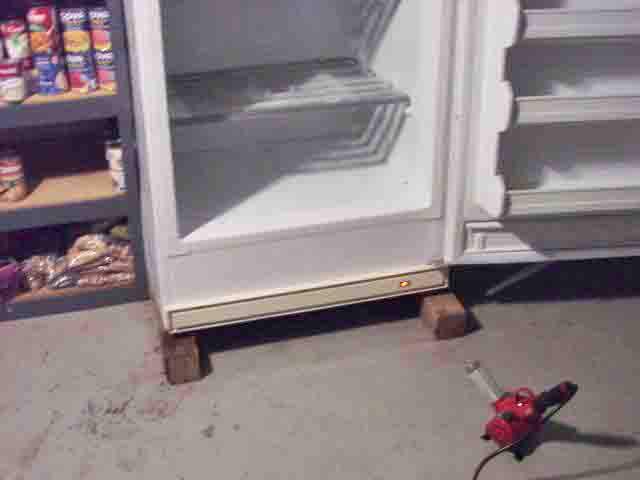
1. Disconnect Freezer from AC Power
Unplug the freezer, without touching its thermostat. Leaving this alone retains its current temperature setting.
2. Prop Freezer Door Open
Then, block open the freezer door with a board. Take care not to force it too far wide, lest you break the hinges, the door, or the freezer case itself.
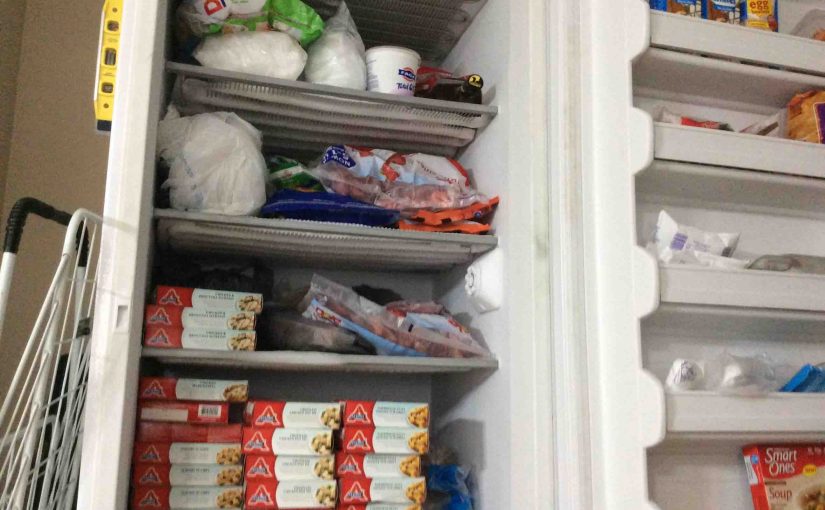
3. Move All Frozen Food to from Freezer to Insulated Containers
Next, remove all food items to a couple of insulated coolers nearby so that frozen meat, vegetables, and bread, remain frozen throughout this routine.
4. Get your Heat Source Ready, to Continue with How to Deice a Freezer
Next, aim the hot air device from the floor up into the inner chamber of the freezer. Next, turn it on, making sure that you turn its intake vent completely open. This gives maximum hot air discharge with the least chance of overheating.
5. Watch that Ice Buildup Quickly Fade
Then, wait until all the ice inside melts; often mopping the floor at the freezer’s front. This can take around an hour for thick ice.
6. Every so Often, Wipe Up Water from Bottom of Freezer Interior
Many freezers have a drain plug that you can open, as well as a drain tube that you can route into a cellar drain or bucket. But if not, or you can’t use that draining facility, wipe up the ice water as it drips down into the bottom of the unit.
7. Done with the Heat
Once all the ice melts, turn off the heat source, and set it in a safe place to cool, away from furniture, drapes, carpets, and other household items that it could burn.
8. Clean Inside of the Unit to Continue with How to Deice a Freezer
Then, wash out the interior of the freezer with a soapy cloth and lukewarm water, and rinse it out with another clean cloth. The area may still be near freezing cold. So taking too much time on this step may numb your hands. So, be fast about it.
9. Thoroughly Dry Inside the Freezer
Then, dry out the inside with a few clean bath towels. You want to leave as little water there as possible, so as to lengthen the time before the next defrosting. You will likely need several towels.
10. Power ON Your Freezer Again
Wipe off and dry the power cord first, especially the AC plug part. Make sure there’s not dirt or corrosion on the prongs. If so, clean it up. Also, inspect the cord for damage at this time, and replace if frayed, nicked, stiff, or it shows any other signs of aging. Then plug it in, and verify that the compressor starts.
11. Put All Food Back
As you replace each food item, wipe off any wetness. To avoid having to deice again for as long as possible, then assure that your food containers are as dry as possible before storing them again in the freezer.
Cautions for How to Deice a Freezer
Do Not Use Flaming Heat Sources !
Avoid using blowtorches, kerosene heaters, candles, and such because these can start a fire or damage your freezer. Simply put, they’re just not safe for this task.
Risk of Severe Burns
Of course, caution is the operative word when deicing a freezer with any heating device. At close range, an 1875-watt heat gun for instance, can generate hotter (and thus, more dangerous) air than a hairdryer. So position the heat stream at least two feet from the open freezer to assure that by the time that hot air reaches the freezer’s inside walls and shelves, that it has cooled enough to not melt any plastic parts therein.
Watch Out for Falling Water and Ice
Also keep in mind that some big pieces of ice and a good bit of water (perhaps a gallon or two in the worst cases) will fall out of a defrosting freezer, and collect on the floor. So be sure to place plenty of towels in front of the unit, and position the heat source close enough for effective deicing, yet far enough away that the water and ice do not spill on it.
Electric Shock Risk
Keep the heat source and cord well away from the dripping liquid, and to limit the risk of electrocution. That appliance should have the third (grounding) prong on its power cable, and you should plug it into a GFI outlet, and avoid using long extension cords.