Occasionally you need to switch your internet devices to a different Wi-Fi network. So in this post, we explain how to change WiFi on Sangean WFR 20 radio.
Either your current router has worn out (stopped broadcasting the Wi-Fi network signals). Or you’ve replaced it with a new and improved model that has a different Wi-Fi name (SSID). In either case, you must reconfigure all your wireless devices to connect with the new network. So in this scenario, we show with pictures, how to update the network on the Sangean WFR-20 internet radio.
Here’s what this radio looks like, in the Standby or OFF position.
How to Change WiFi on Sangean WFR 20 Internet Radio
1. Turn on the Radio
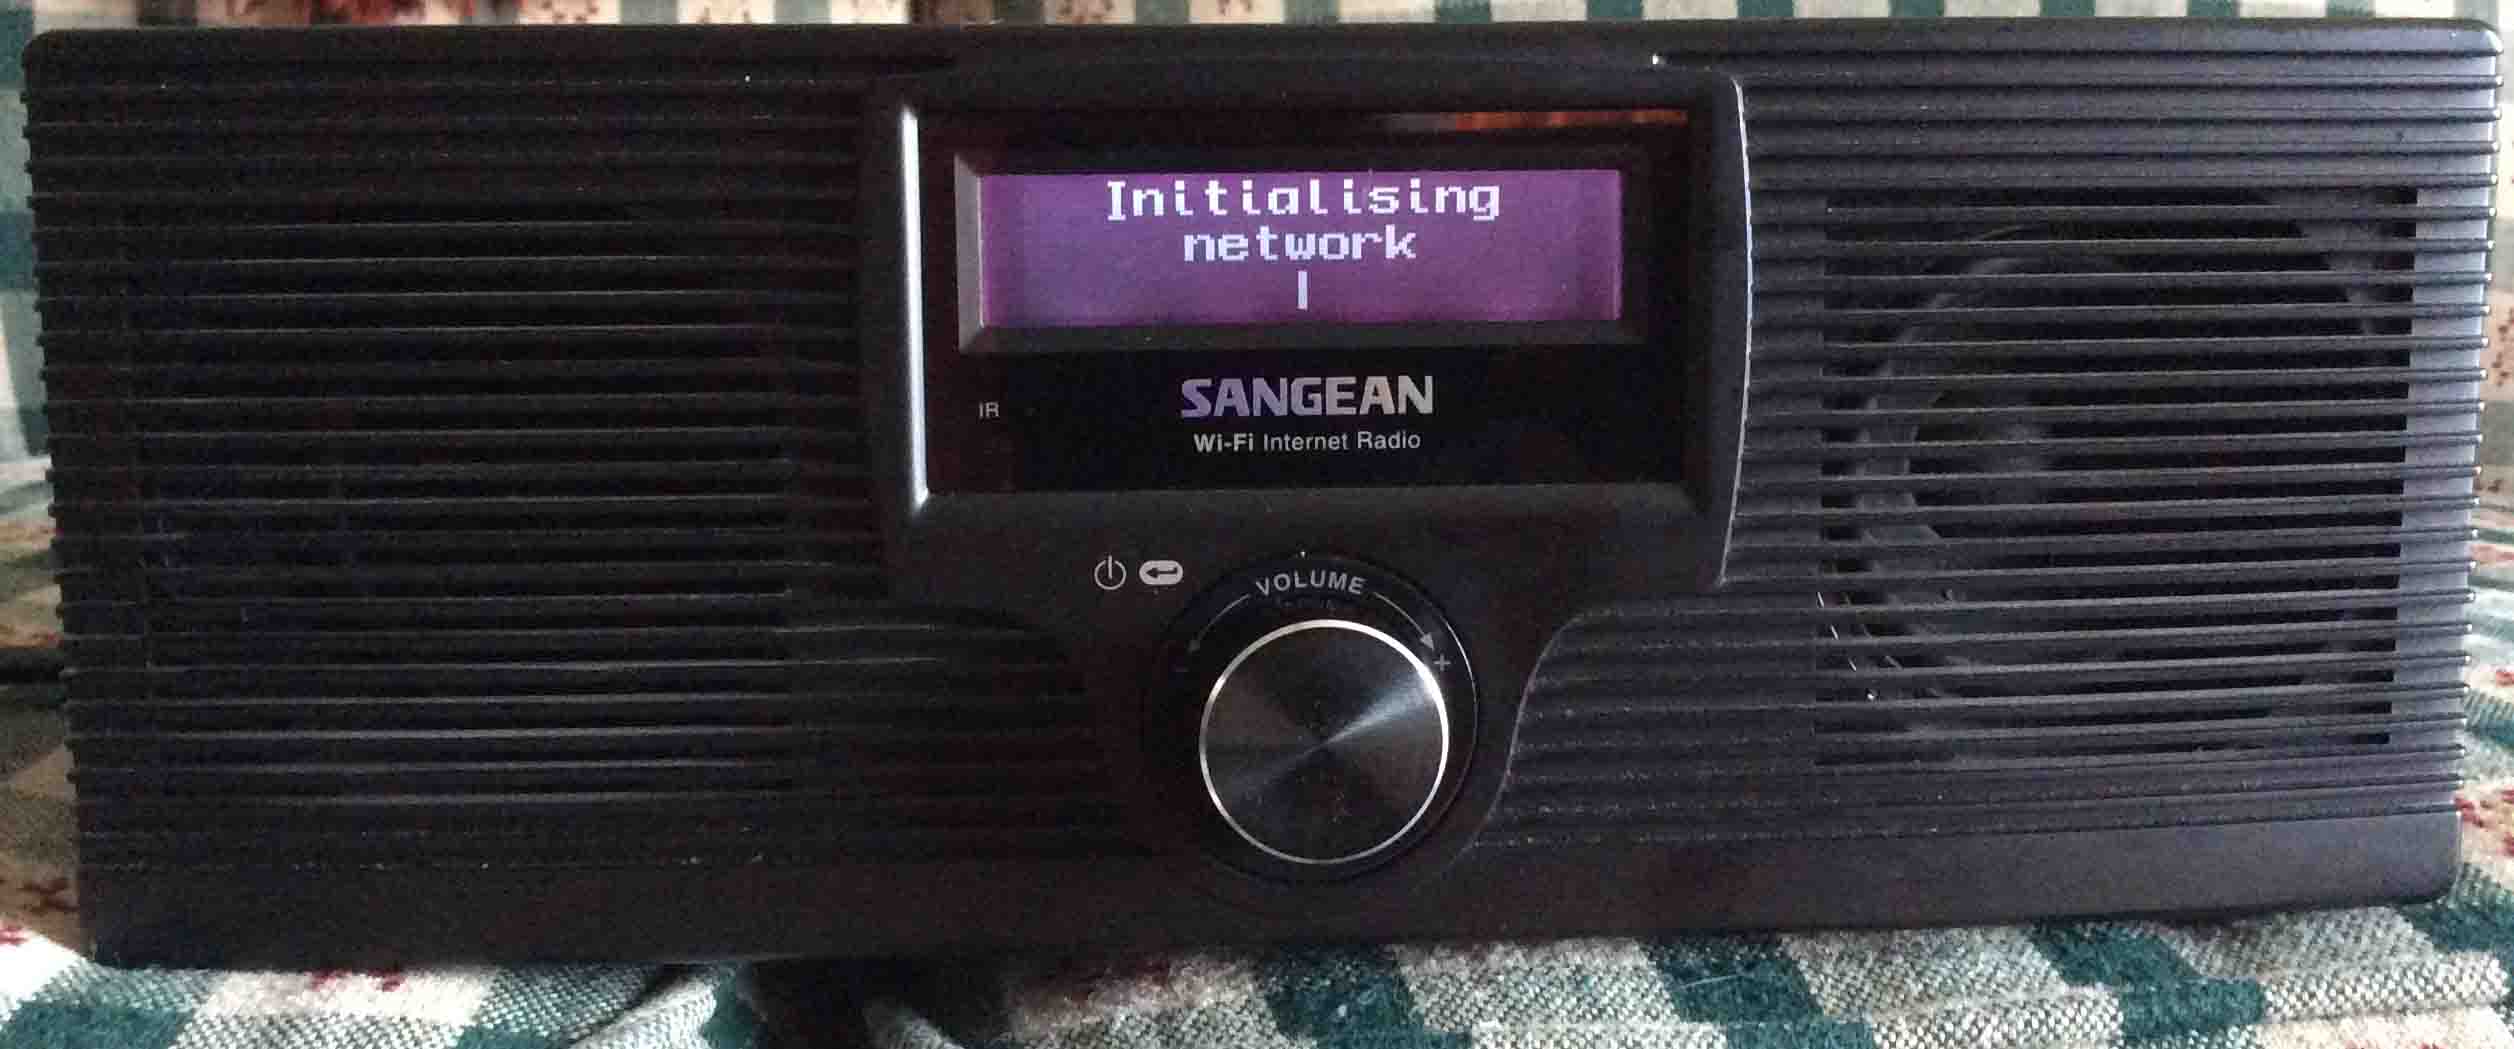
Firstly, turn ON the Sangean by rapidly pressing and releasing the knob. The “Initialising network” message then appears briefly.
2. Wait as the WFR-20 Tries to Connect to the “old” Wifi Network
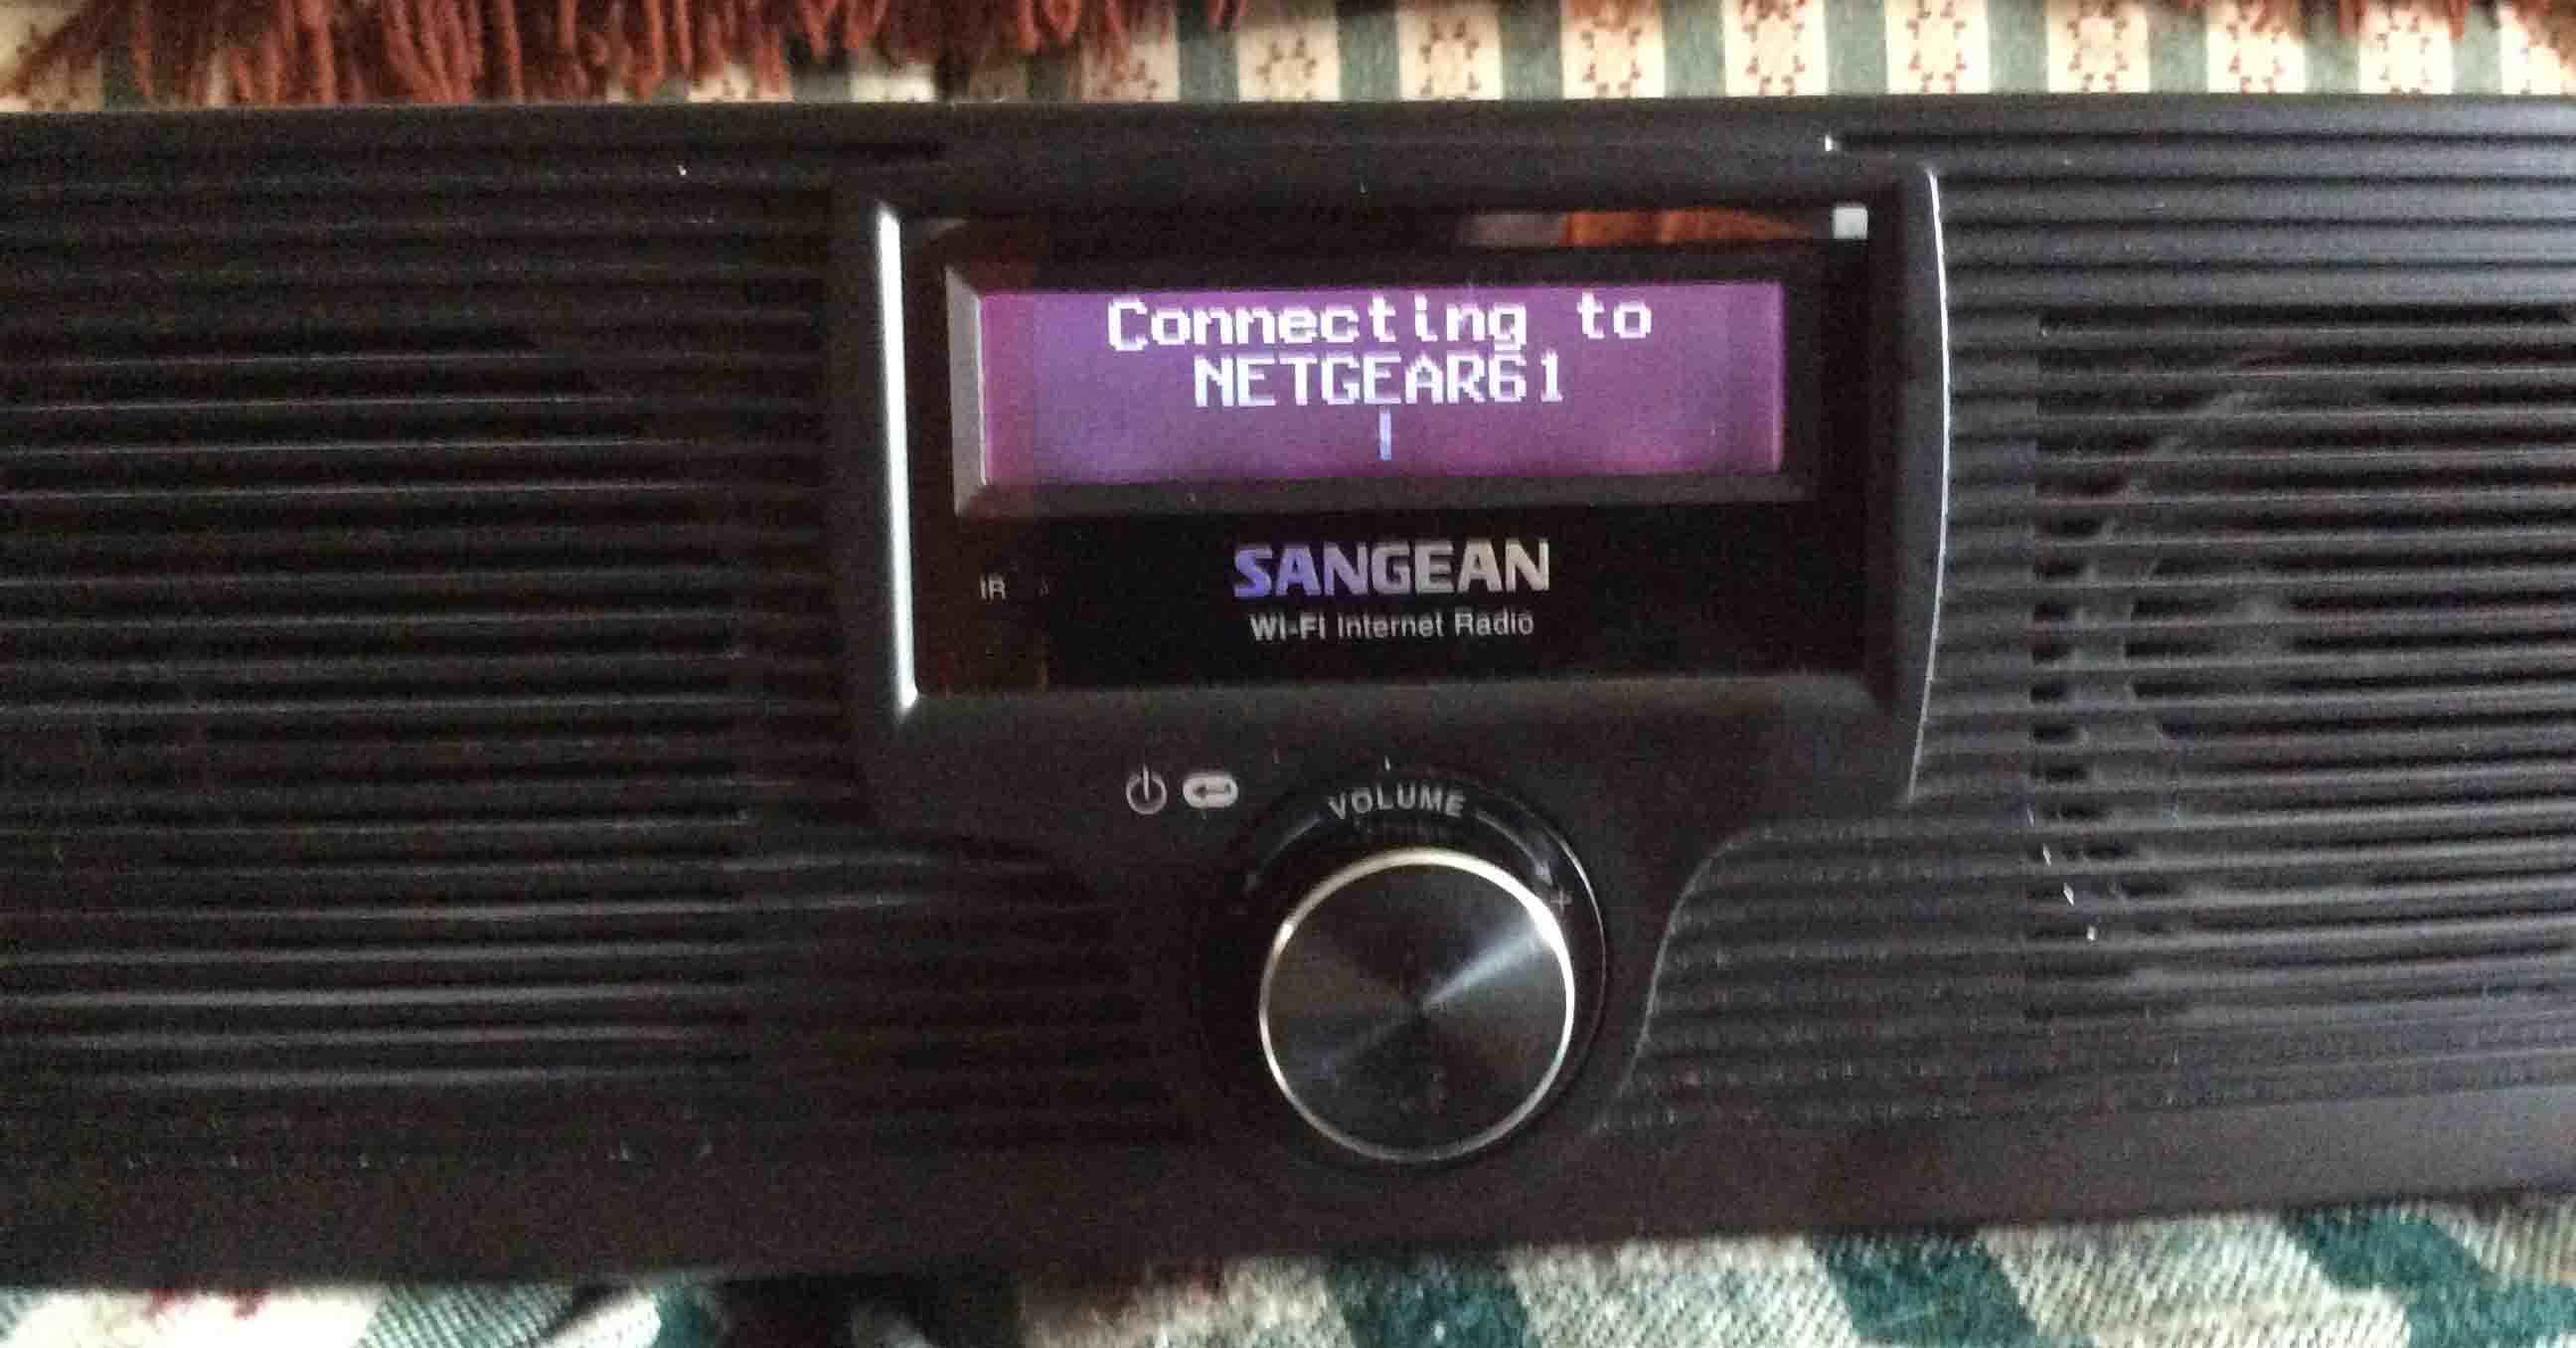
After some seconds, the Sangean attempts to connect to “the old” Wi-Fi network, and the screen changes to show this.
In our case, the originally configured network name is NETGEAR61. The connection attempt we see next. The radio displays the “Connecting to NETGEAR61” message. There’s also the little spinning line at the bottom of the screen to show that this operation is progressing.
3. Look for Signs that the Connection Attempt Failed
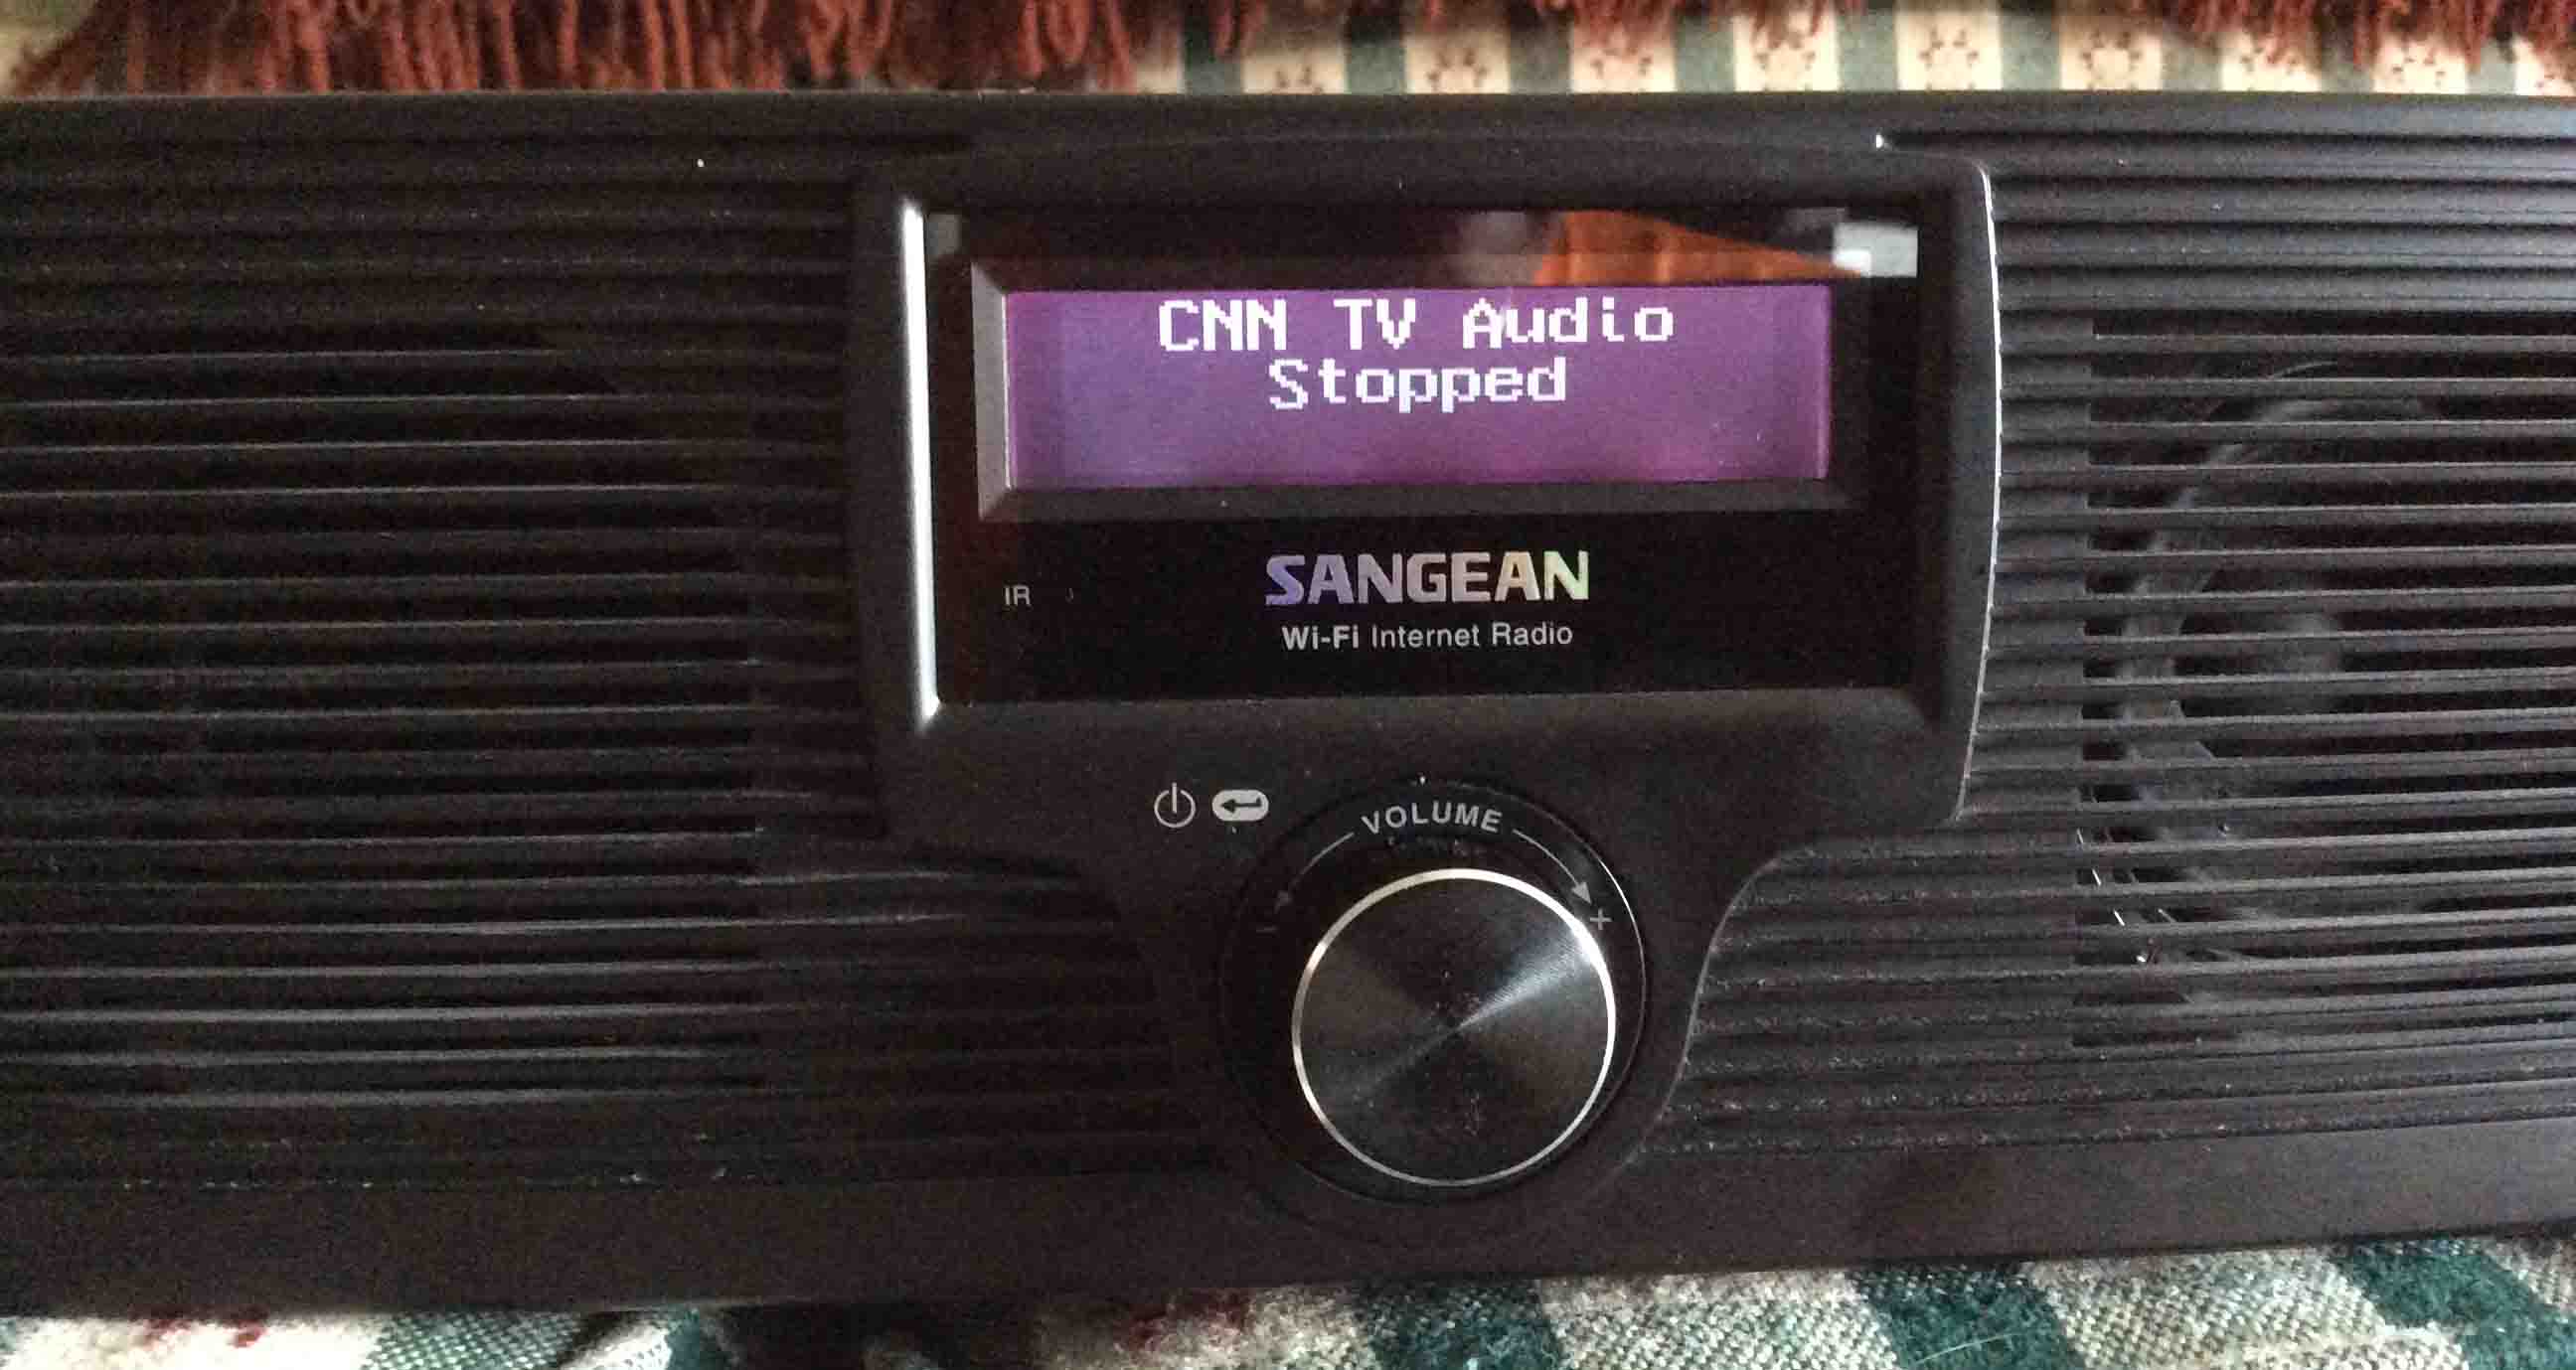
Normally, if the NETGEAR61 network is working, the radio connects successfully to it within several seconds. However, the Sangean does not give a clear message when it fails to connect. So the radio might just display the “Internet Radio” message. Or it might show the last Internet station you successfully played, but with the word, “Stopped.” Or it may also take you directly to the “Scan for networks” menu item.
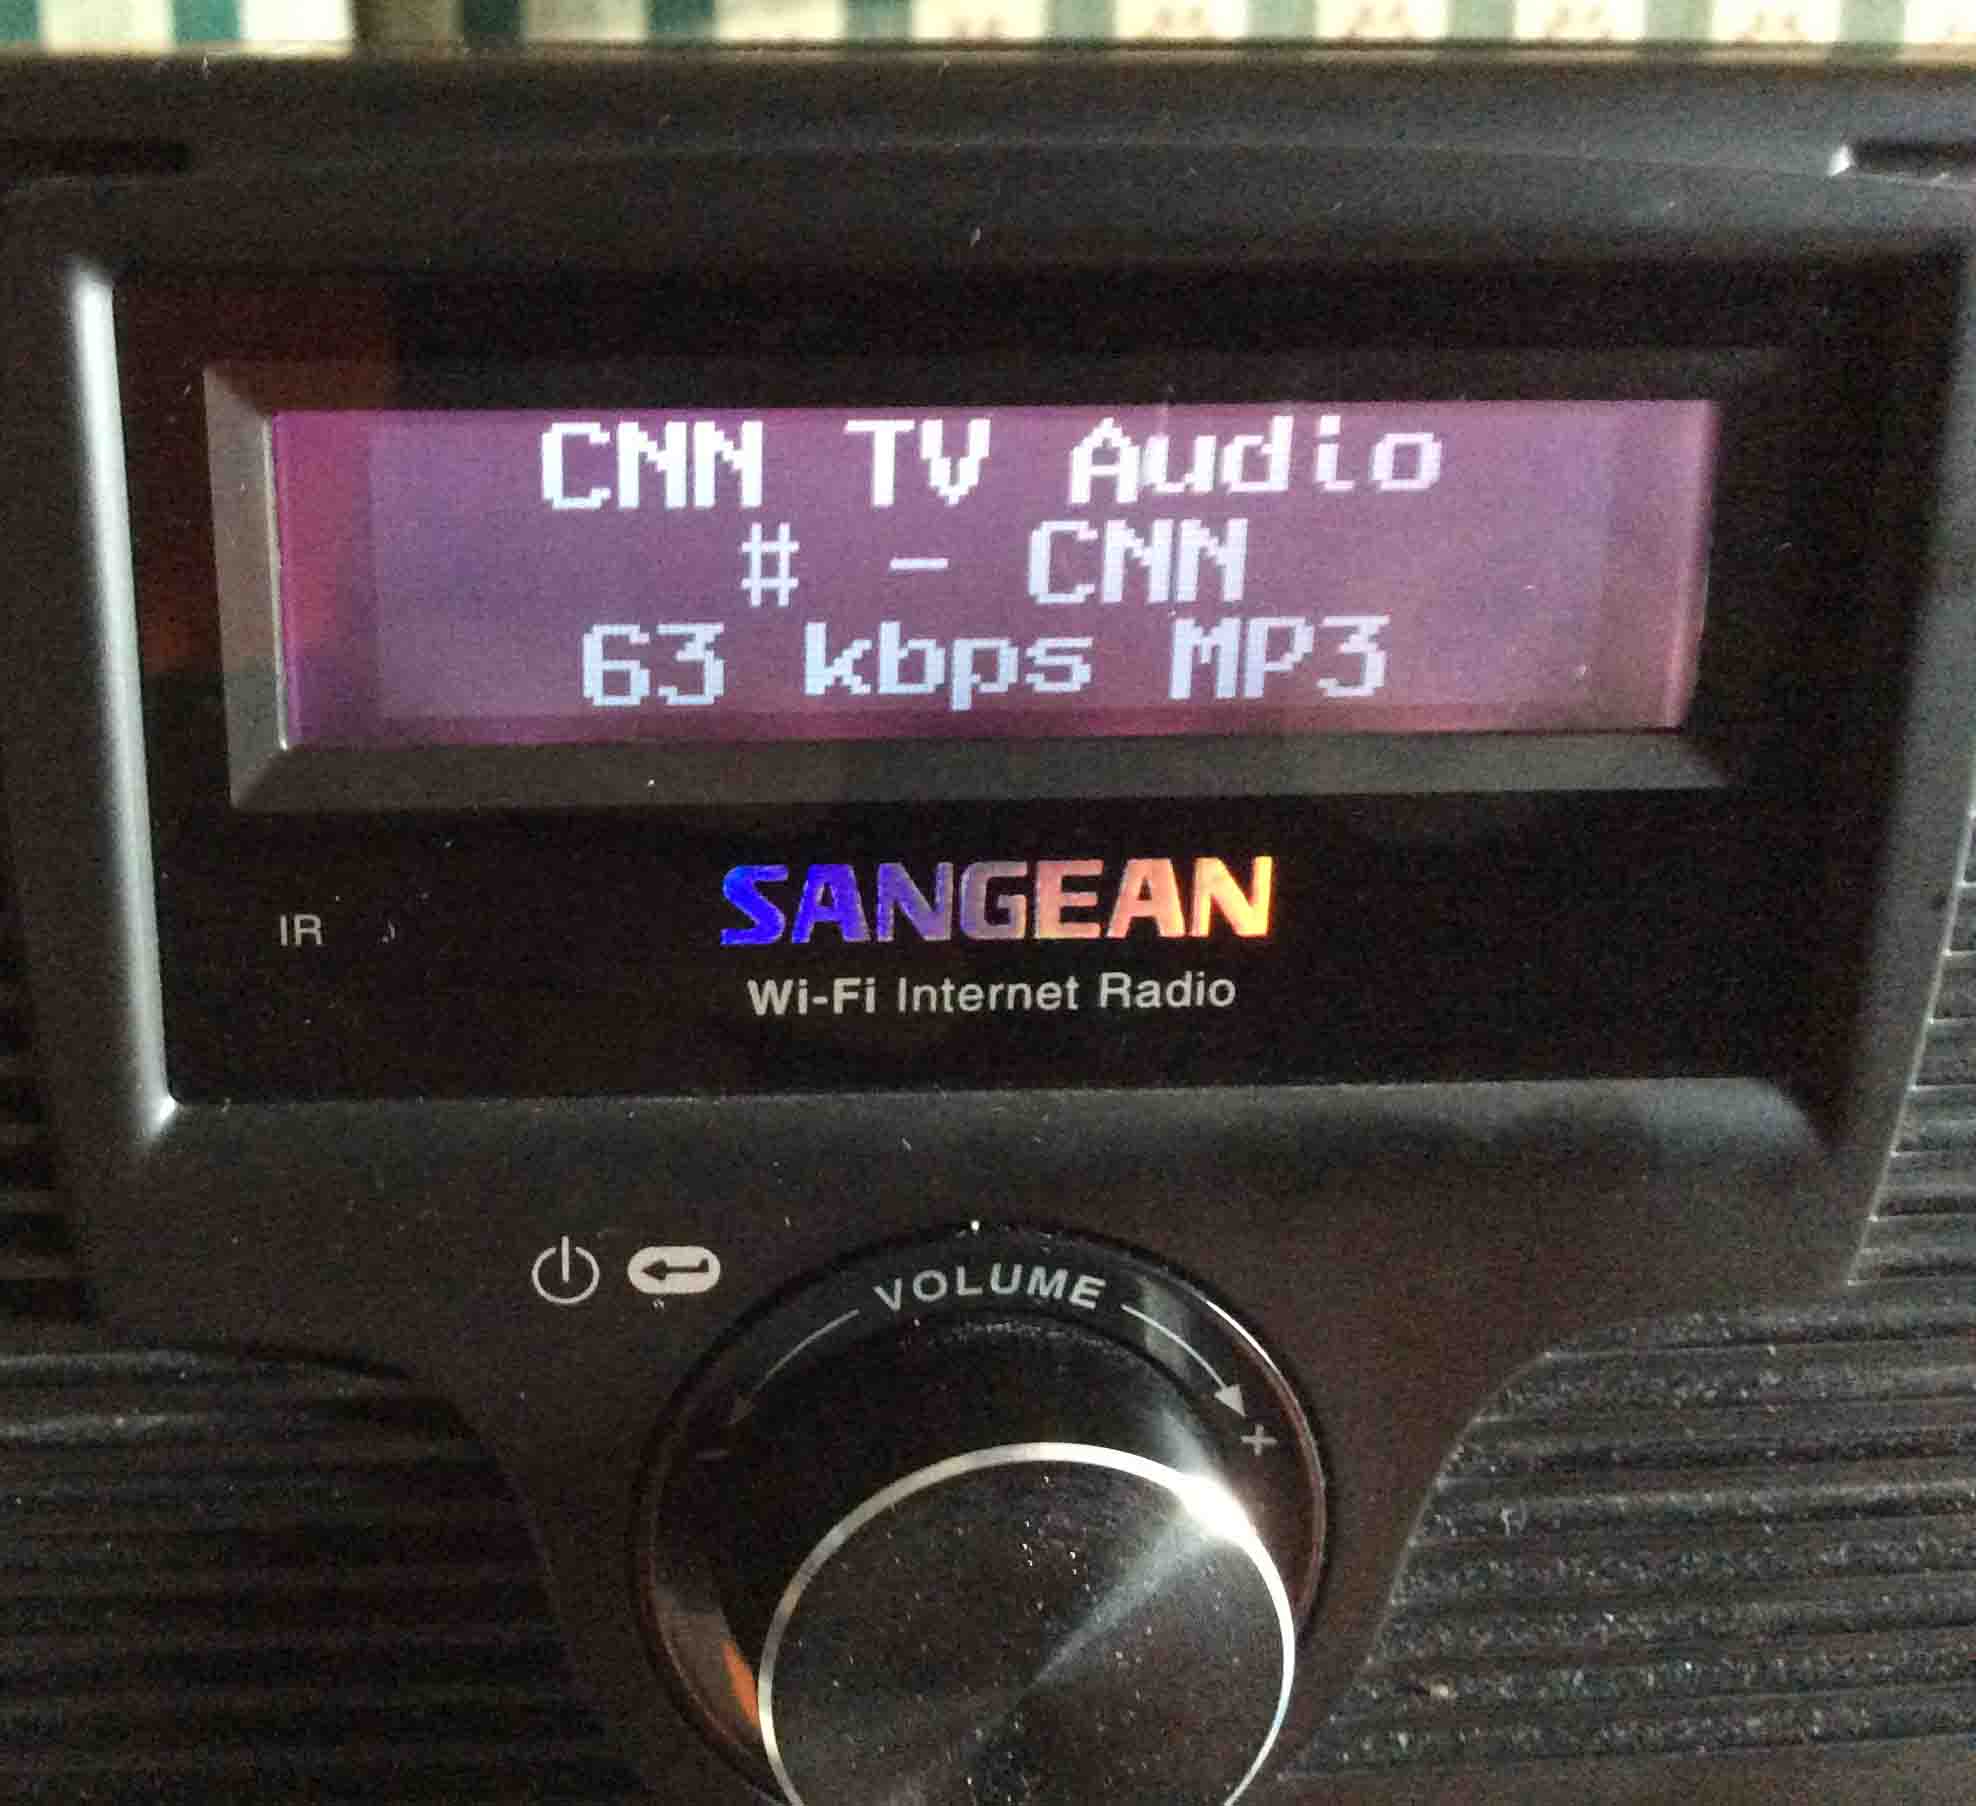
In this scenario, we had been listening to Cable News Network’s “CNN TV Audio” stream. So the radio will automatically pull up CNN again, after we’ve finished entering the updated network information. For that, see step 13 below.
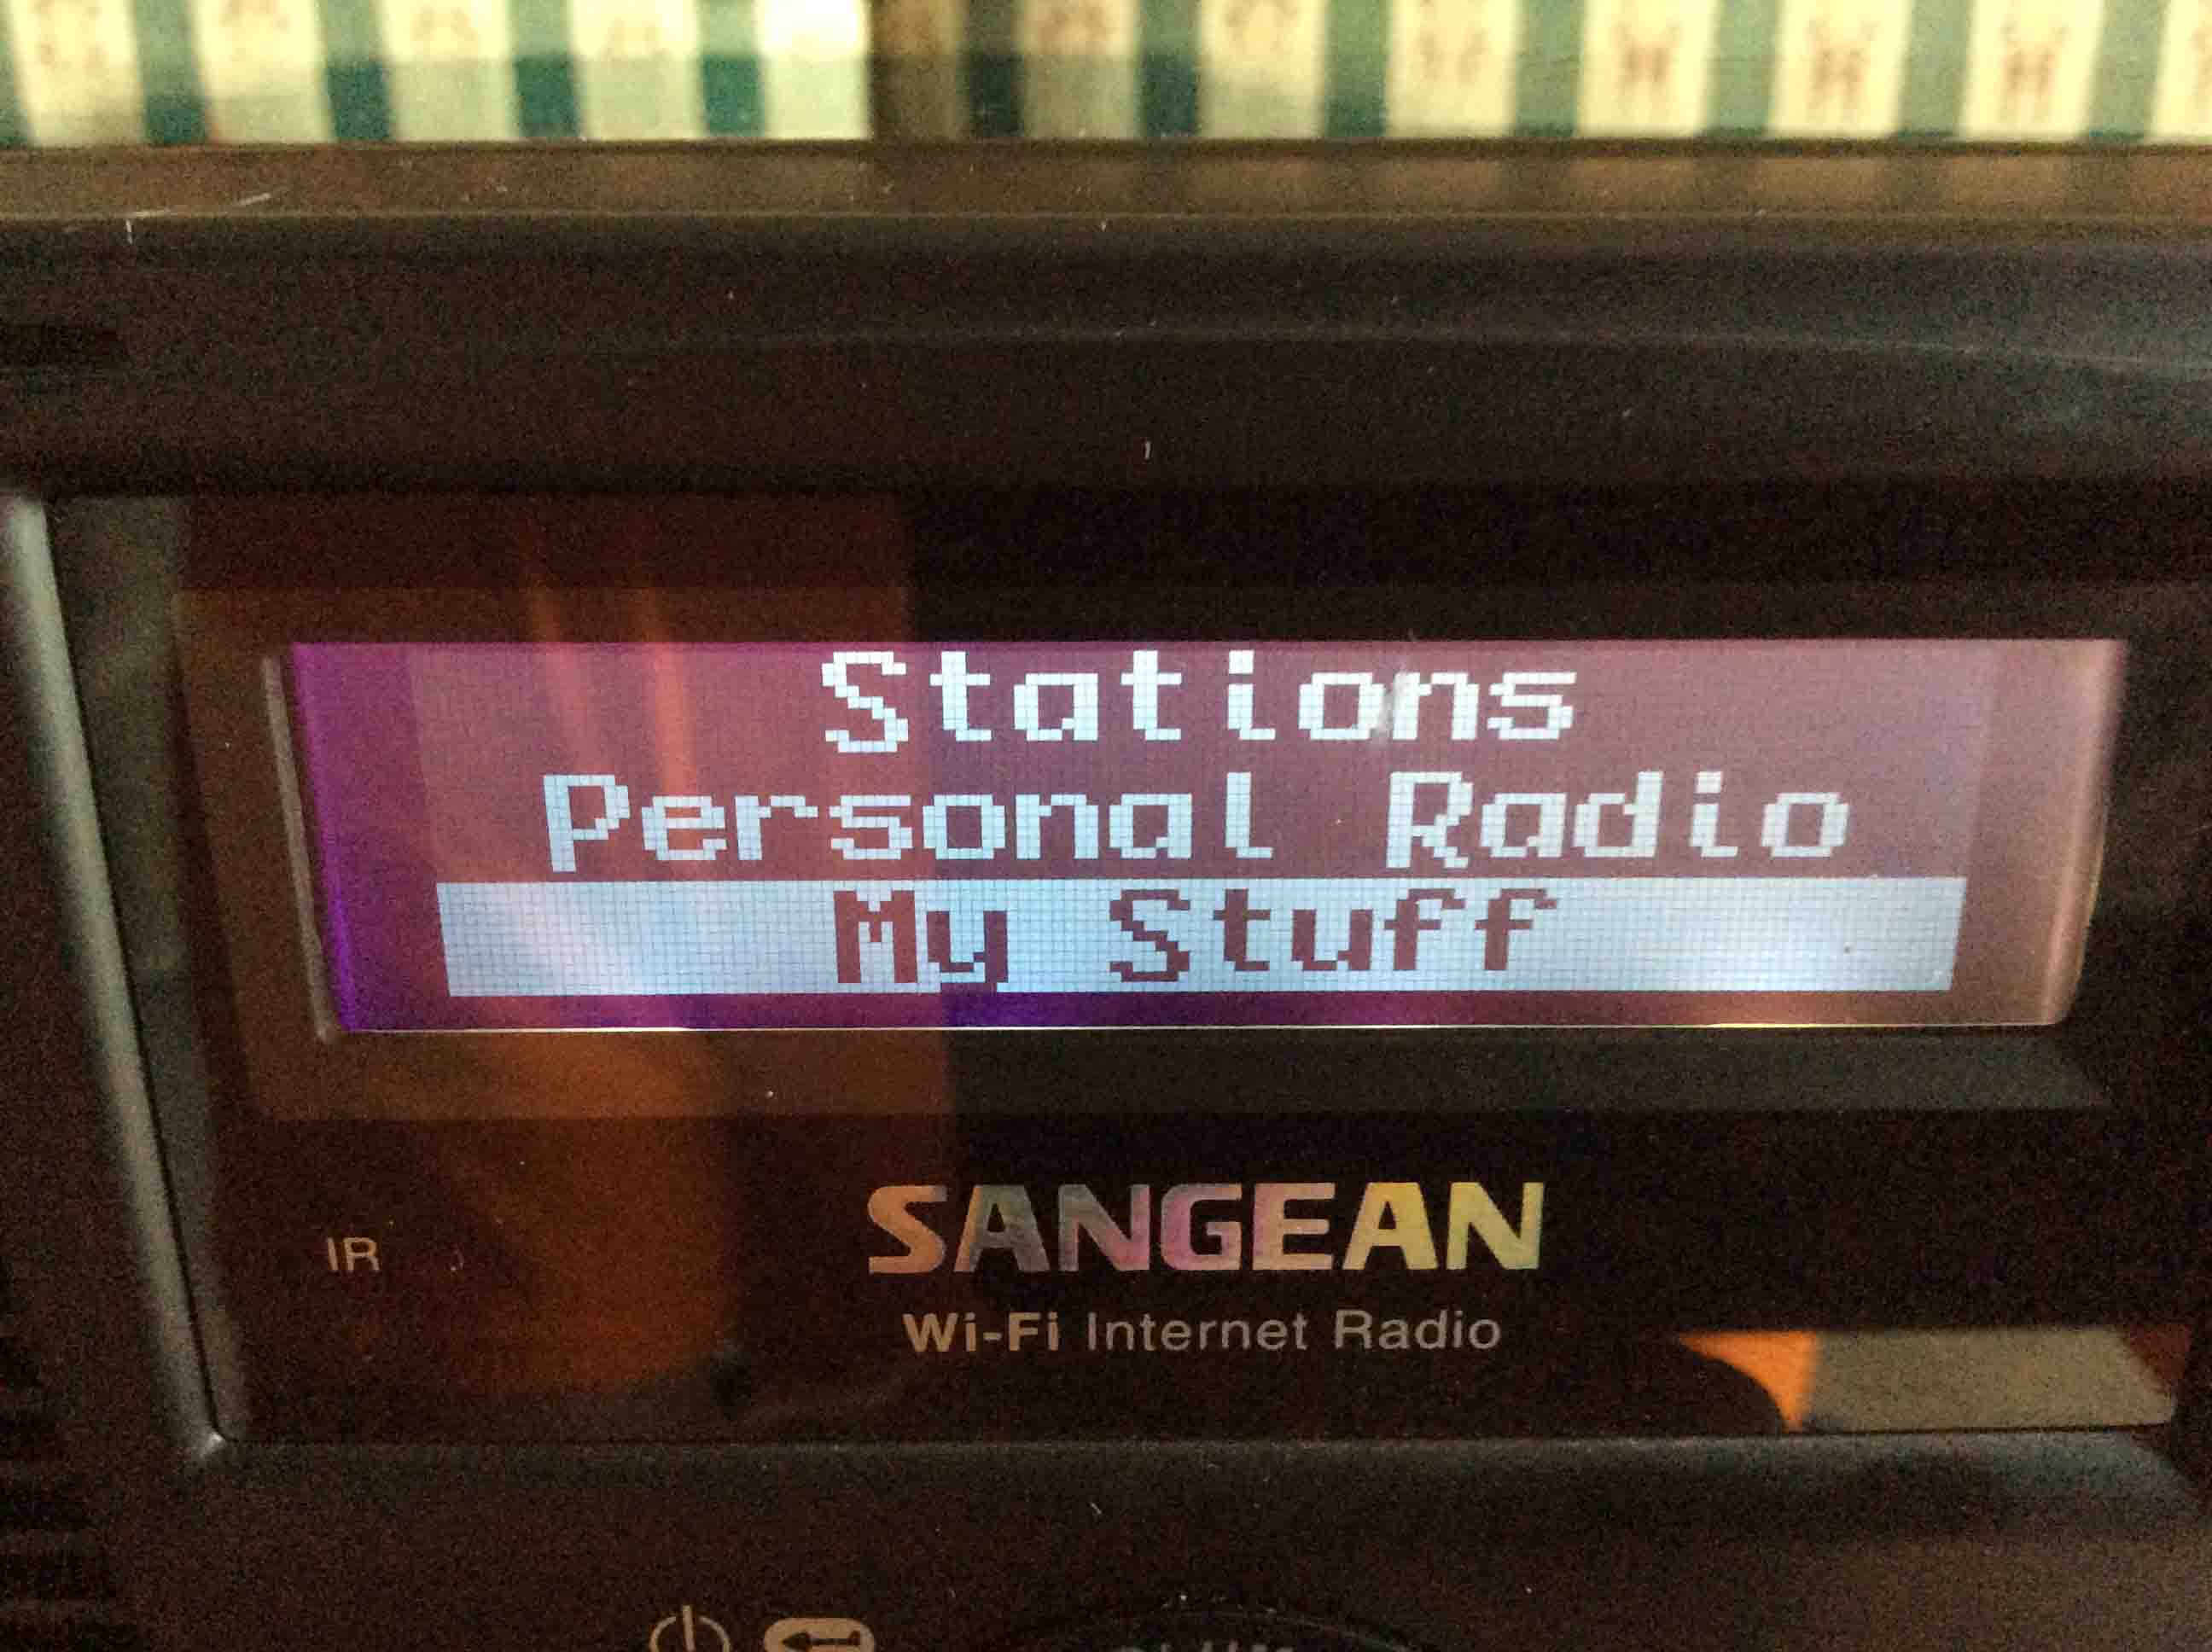
4. Pull up the Mode Menu to Continue with How to Change WiFi on the Sangean WFR 20 Radio
From most every screen on this radio, you can reach the Mode menu by pressing and holding in the knob. After a couple seconds, the first few items on the Mode menu appear. They are: Stations, Personal Radio, and My Stuff.
Note that the currently selected menu item appears in reverse video (black on white) style.
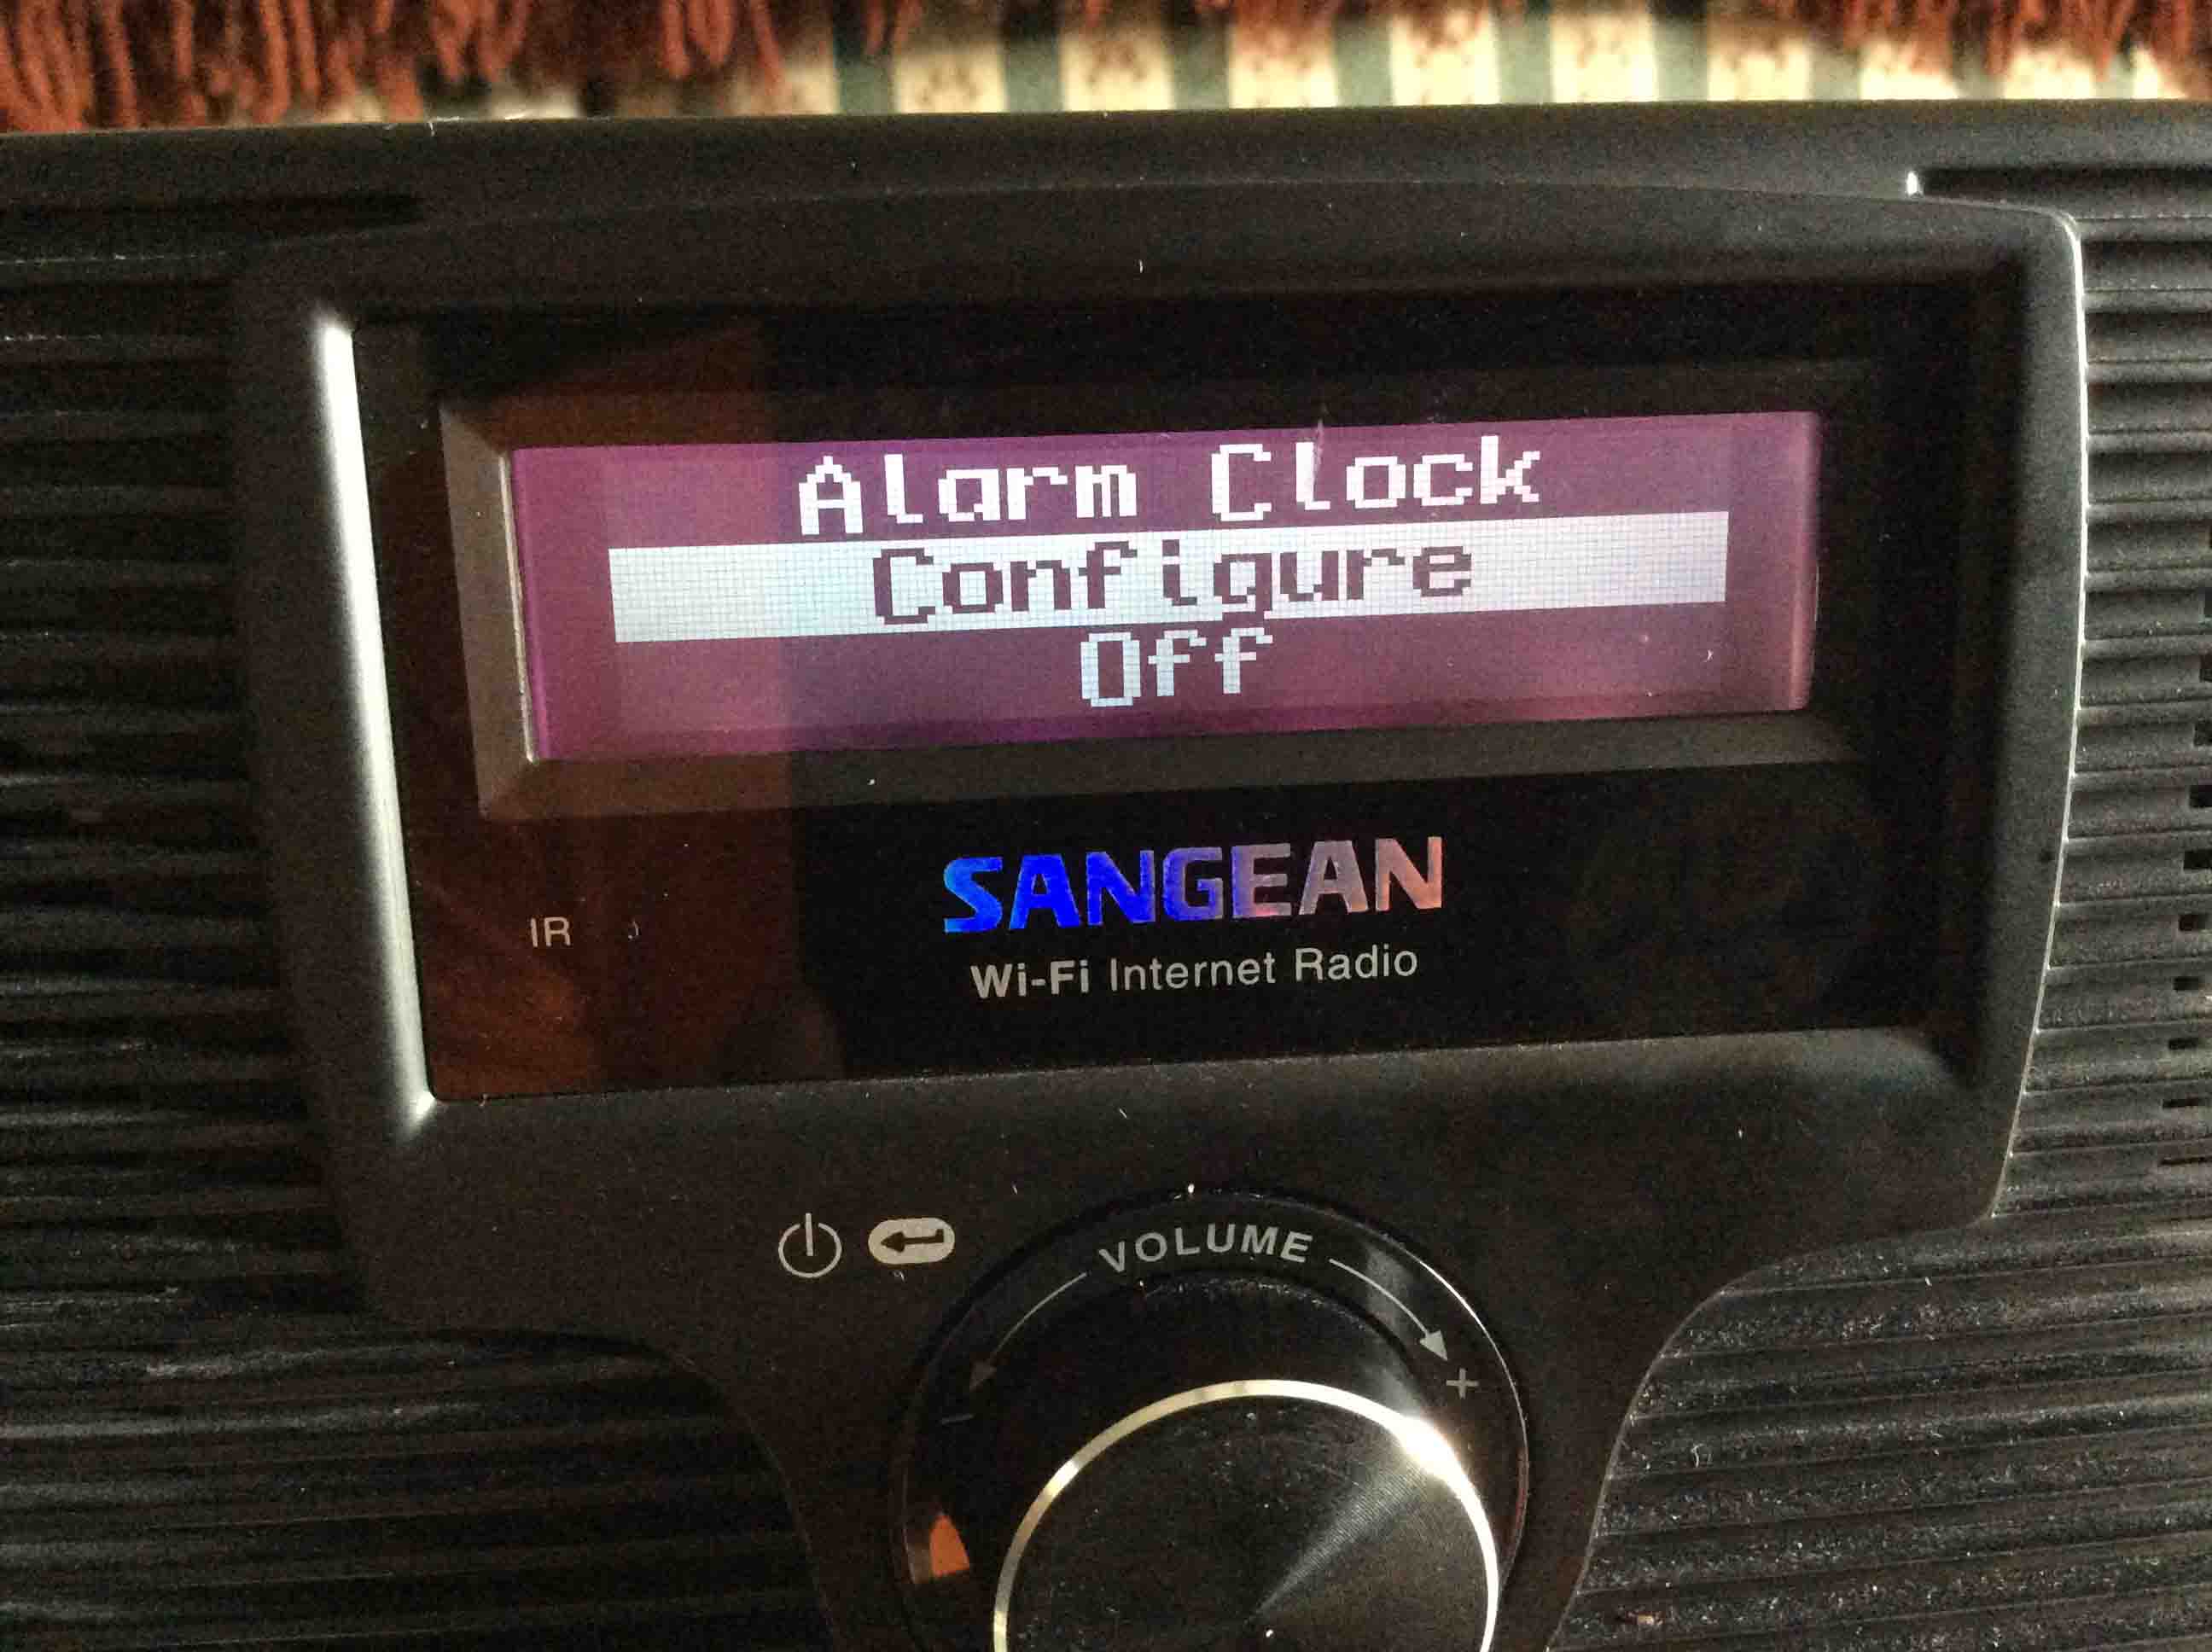
5. Move to the Configure Menu Item
Then on the Mode menu, turn the knob to the right. Look for the Configuration menu item.
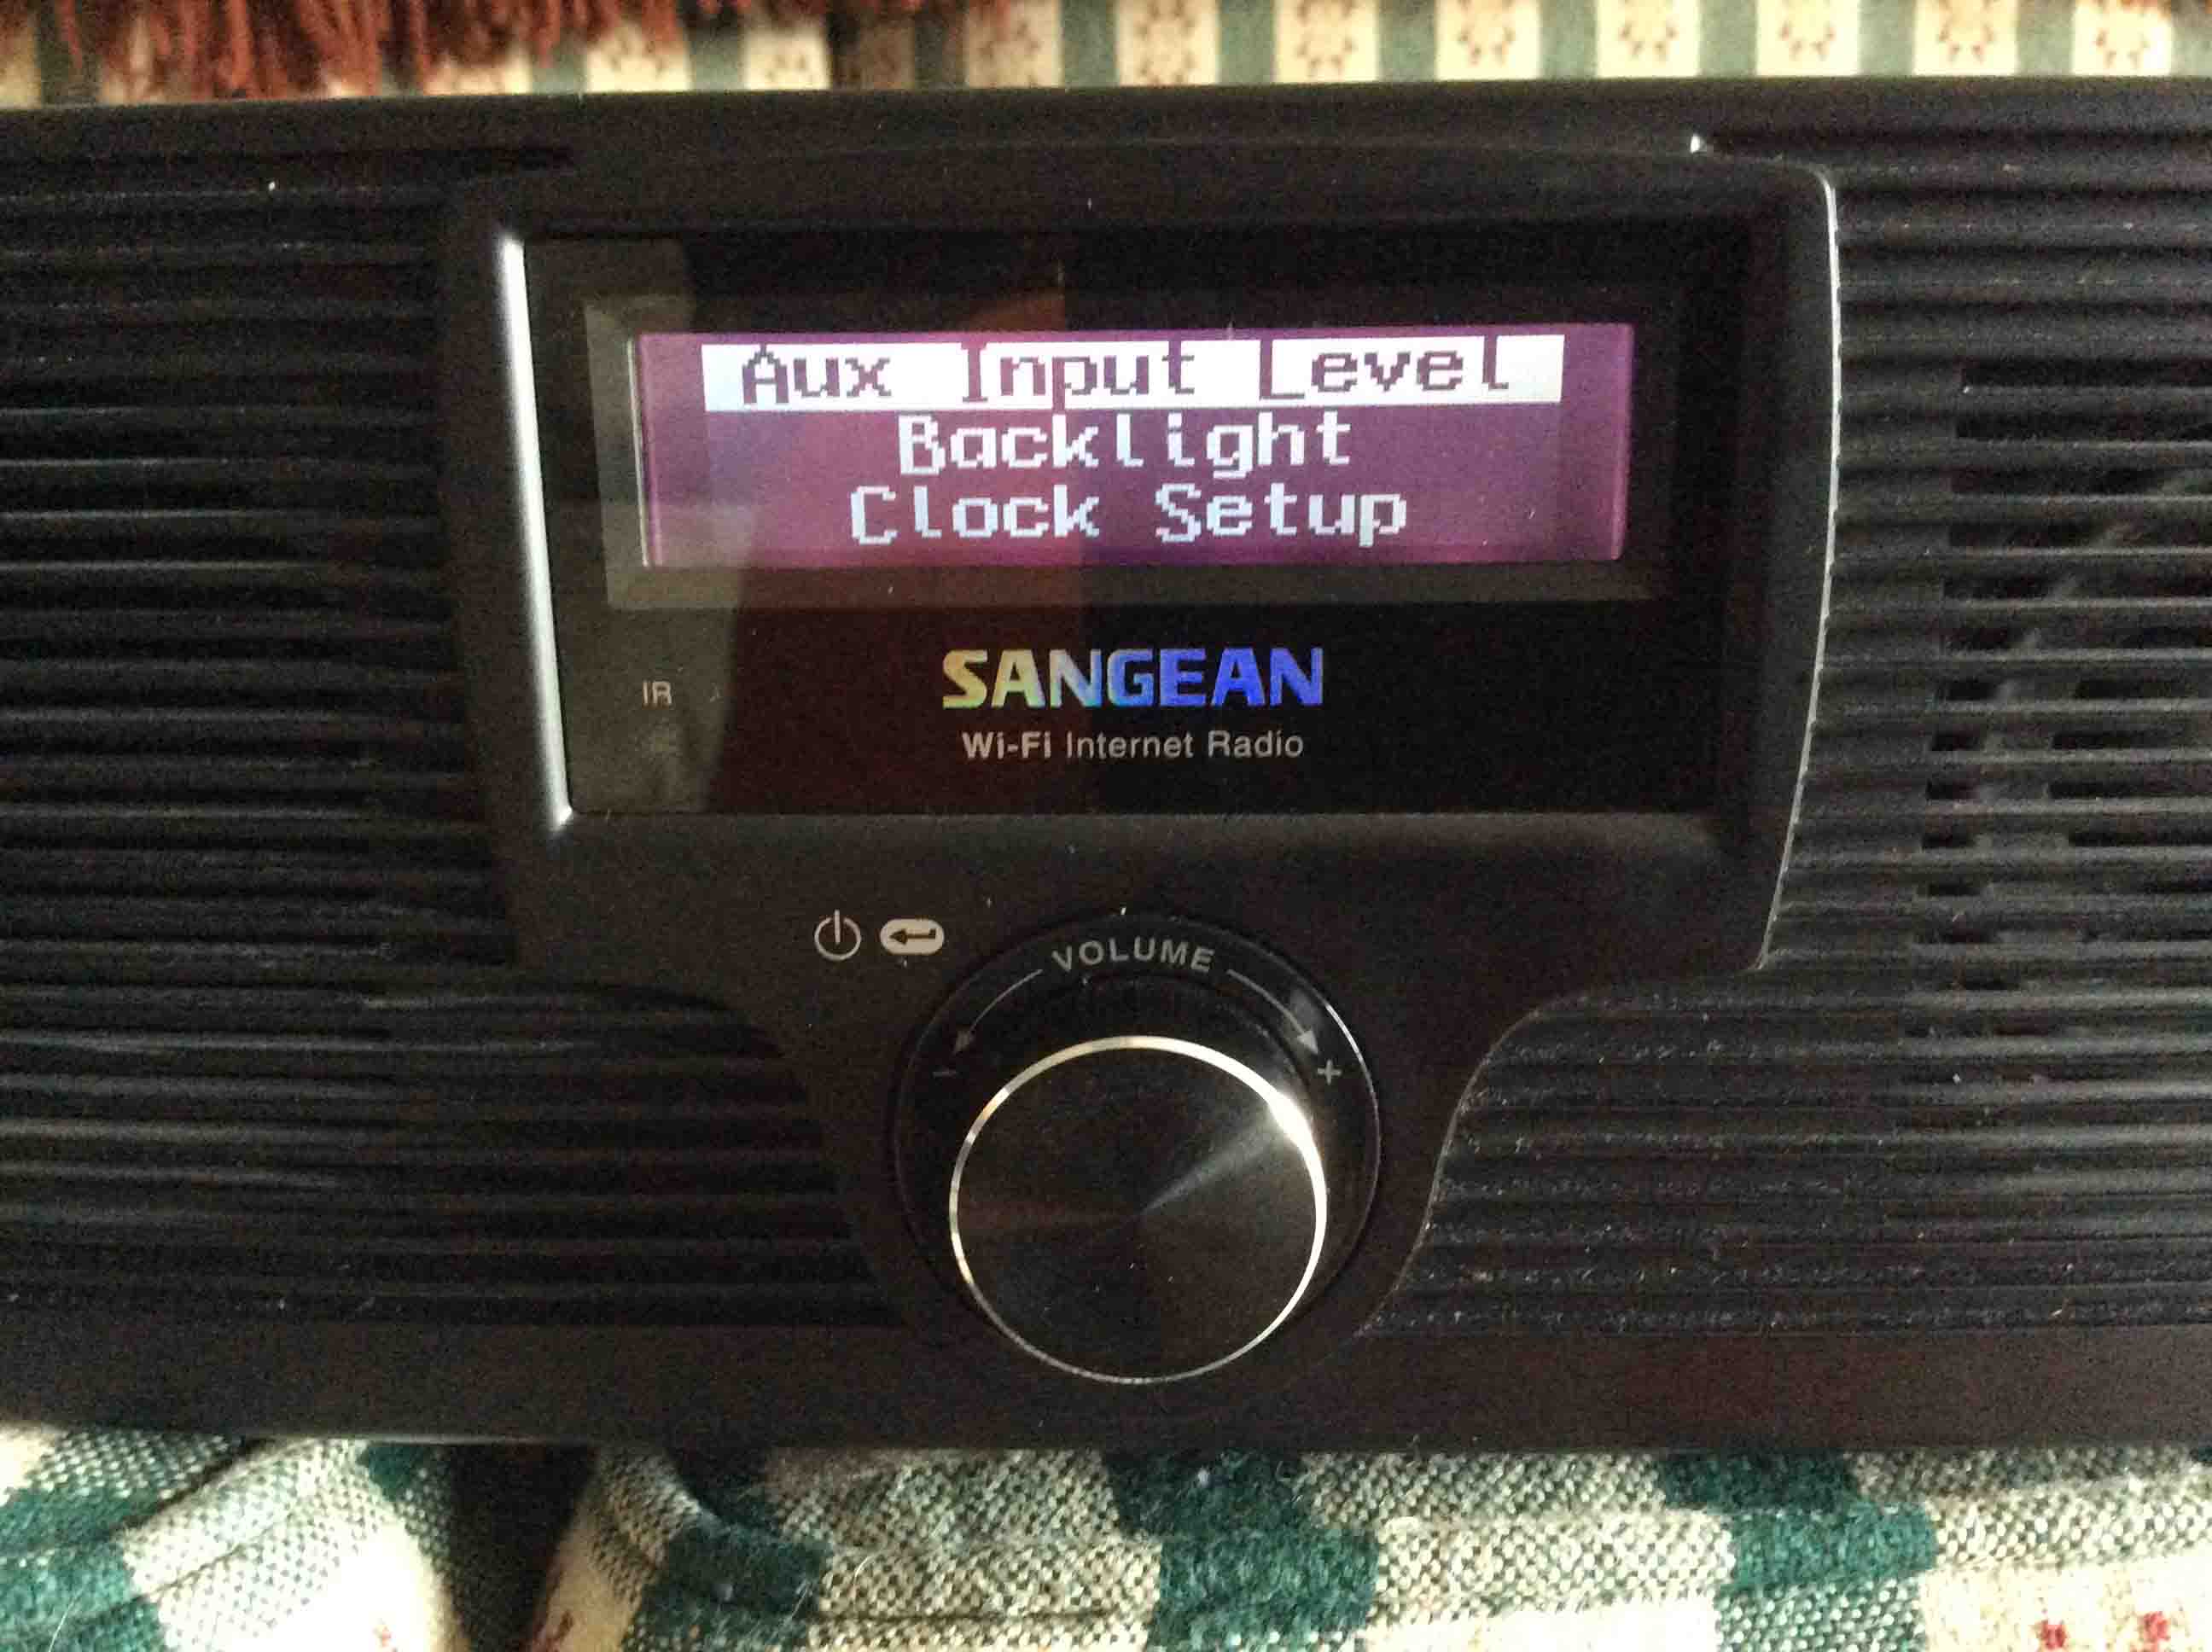
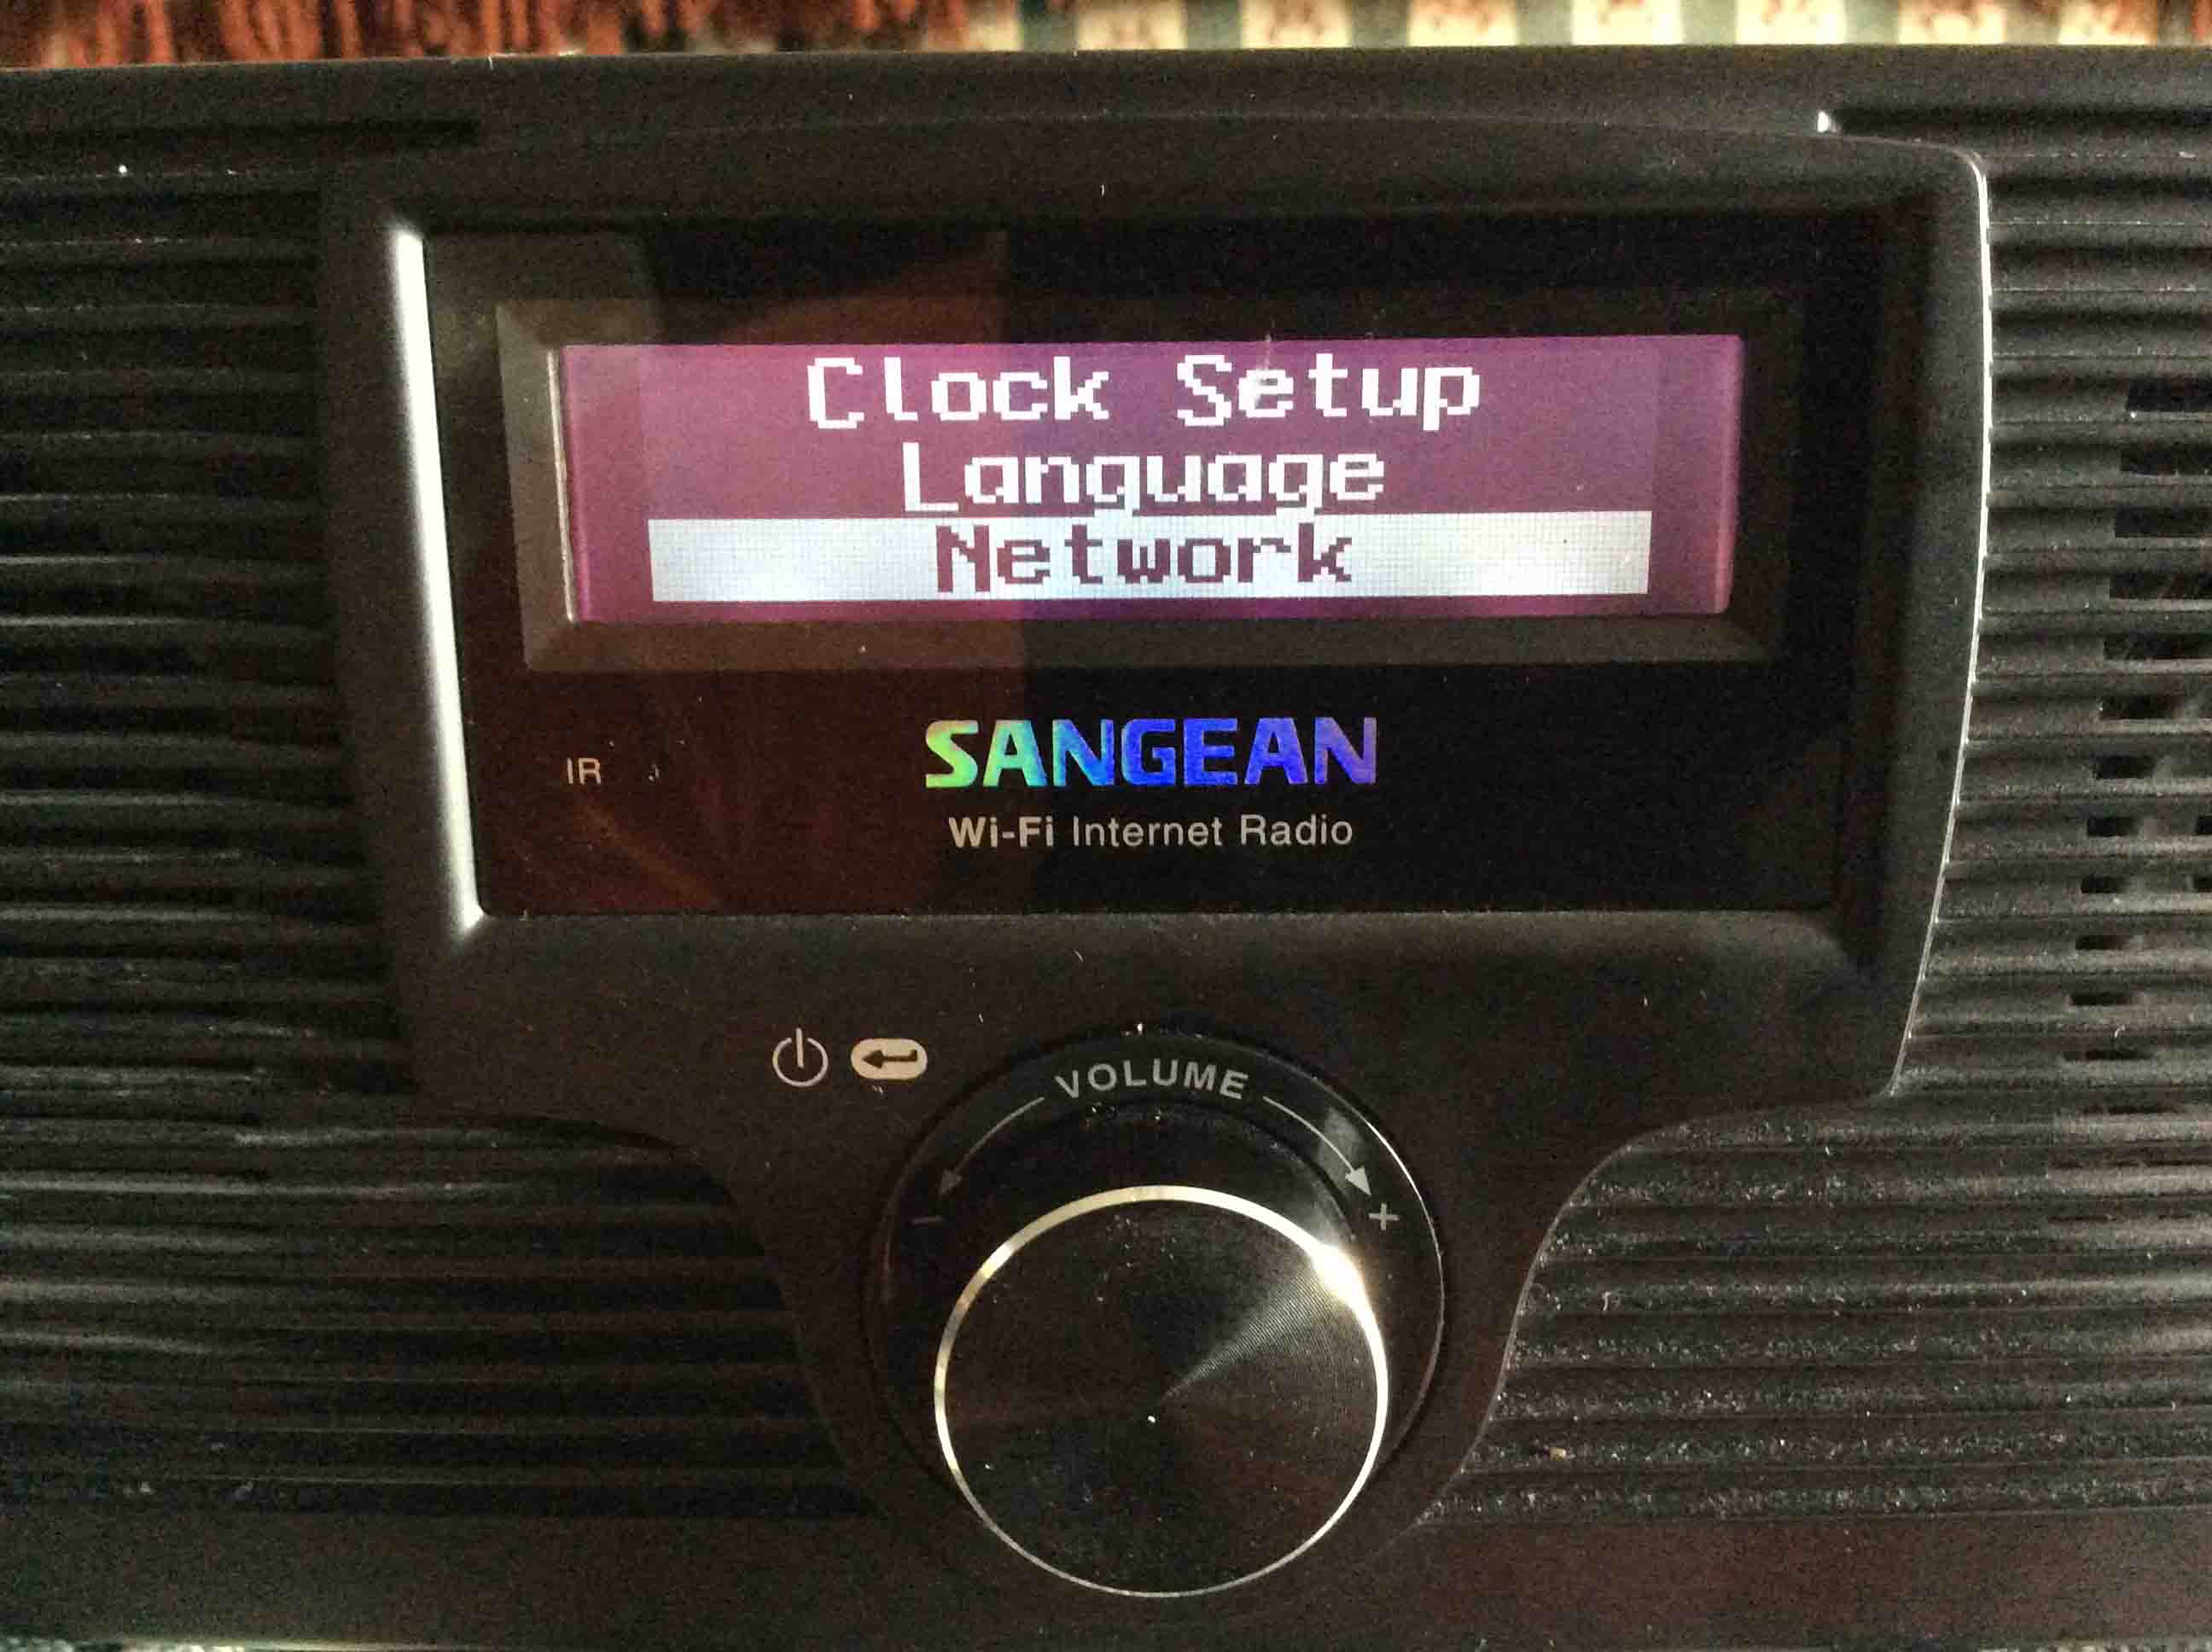
6. Enter the Configure menu
With the Configure menu item highlighted, press the knob. This takes you into the Configure menu proper, as displayed next. The first three items on this menu are: Aux Input Level, Backlight, and Clock Setup.
7. Go to the Network Menu Item to Continue with How to Change WiFi on Sangean WFR 20 Radio
Then turn the knob to the right to scroll down through the Configure menu to the Network item.
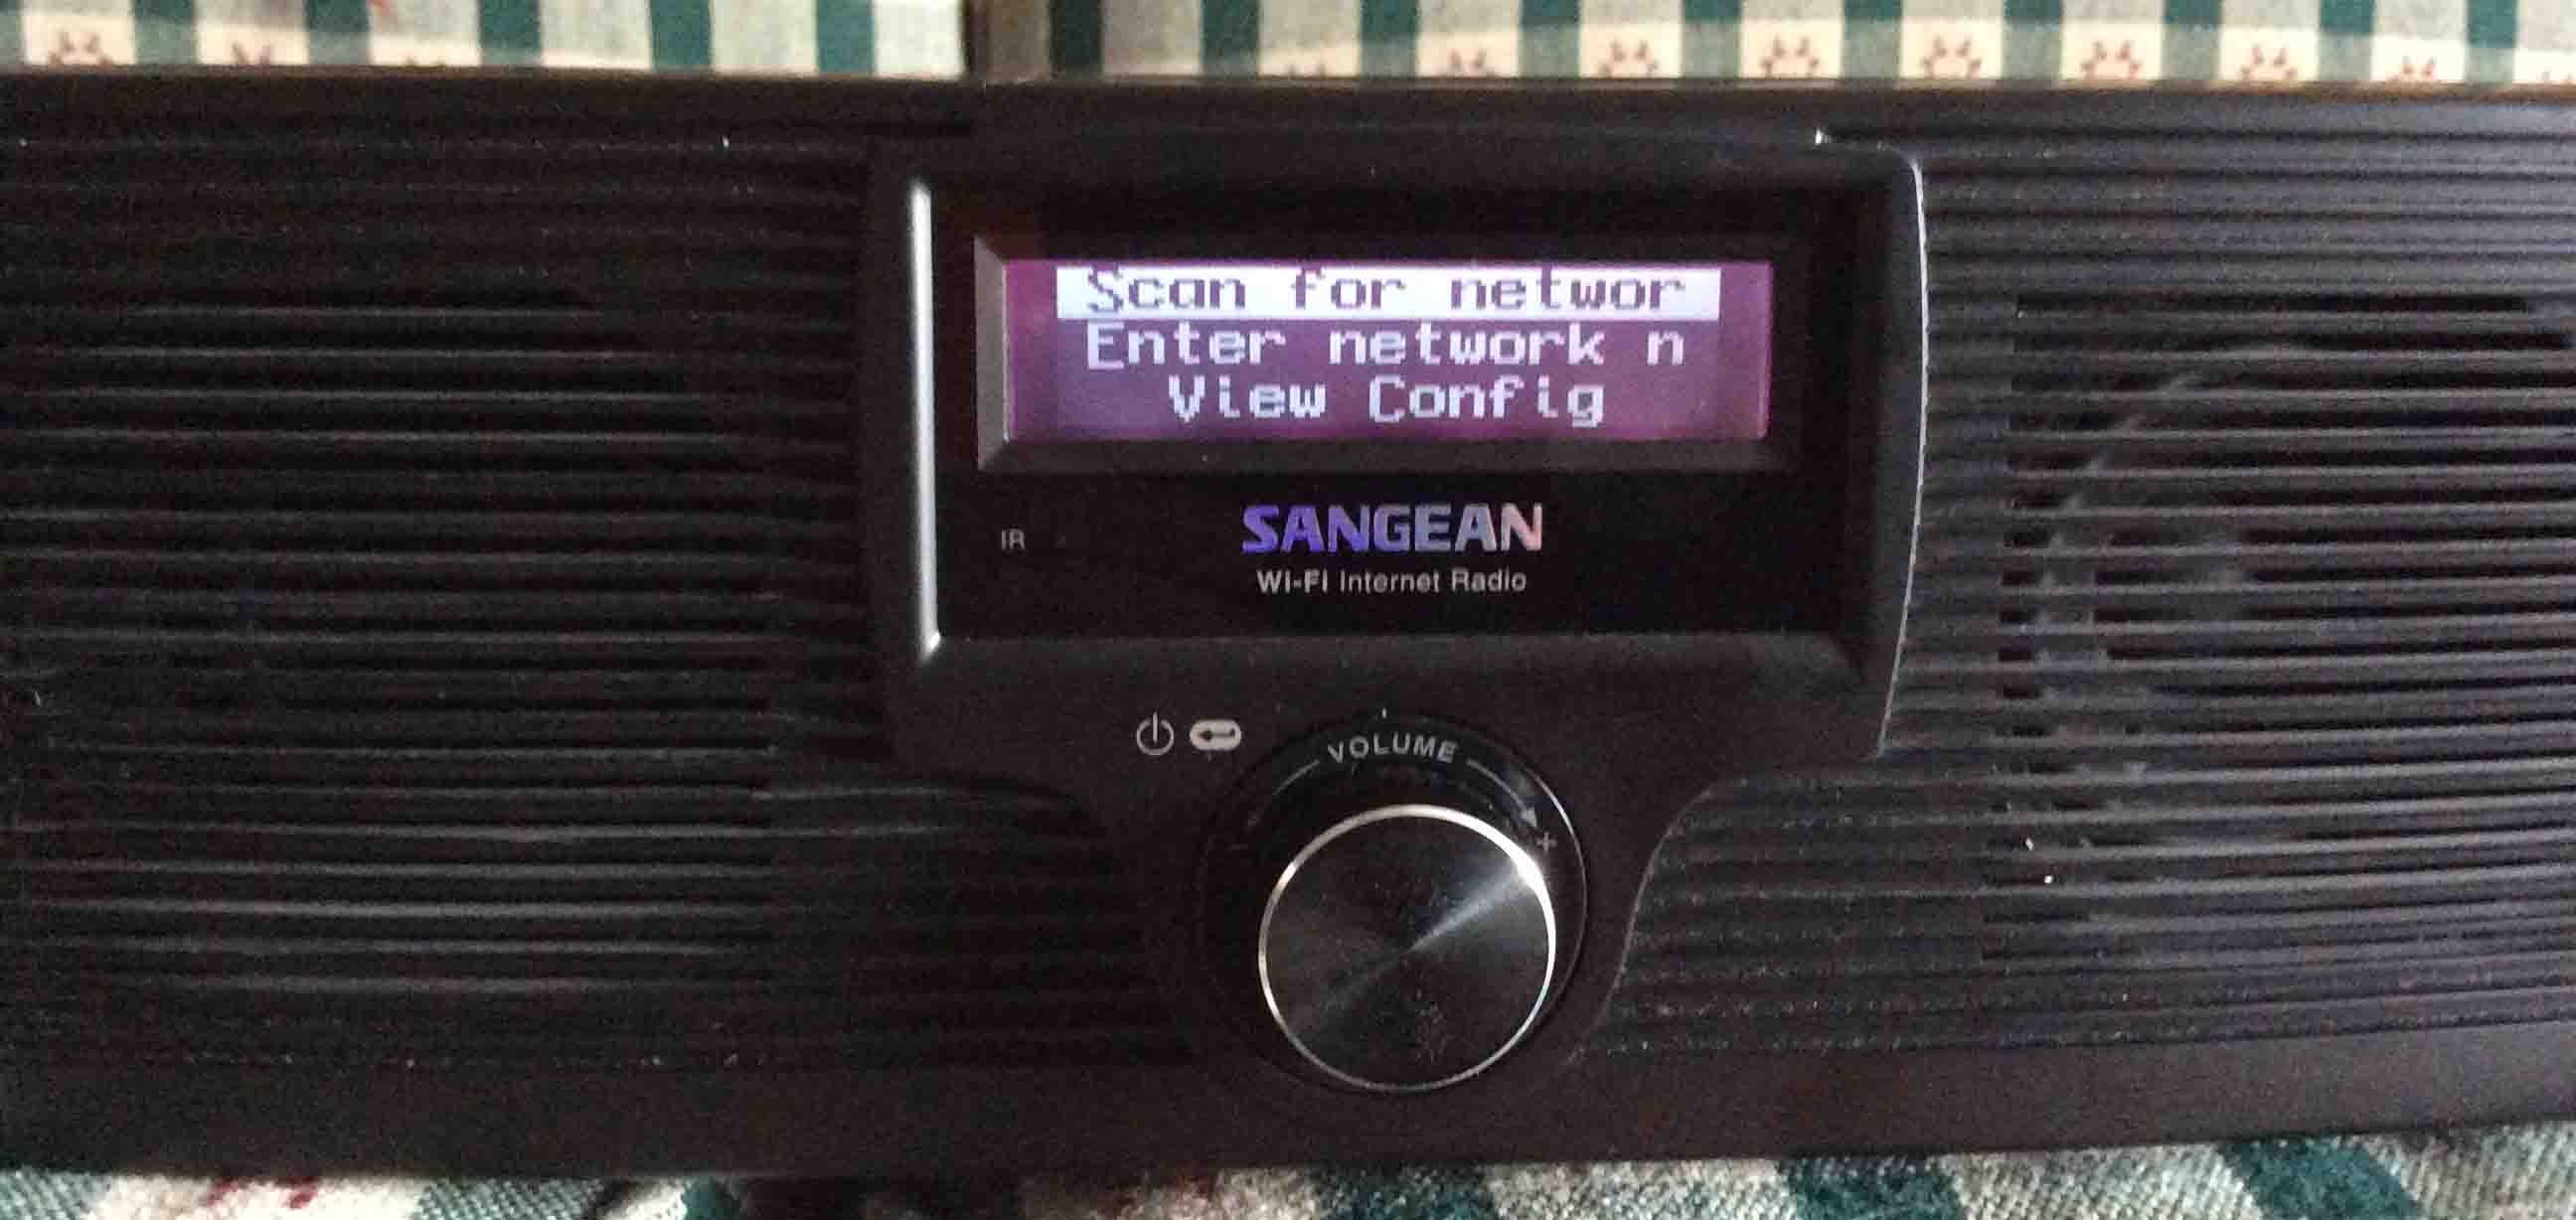
8. Go Into the Network Set Up menu
With the Network menu item selected / highlighted, press and release the knob. The Network setup menu then displays as follows. The first three items in this menu are: Scan for networks, Enter network name, and View Config.
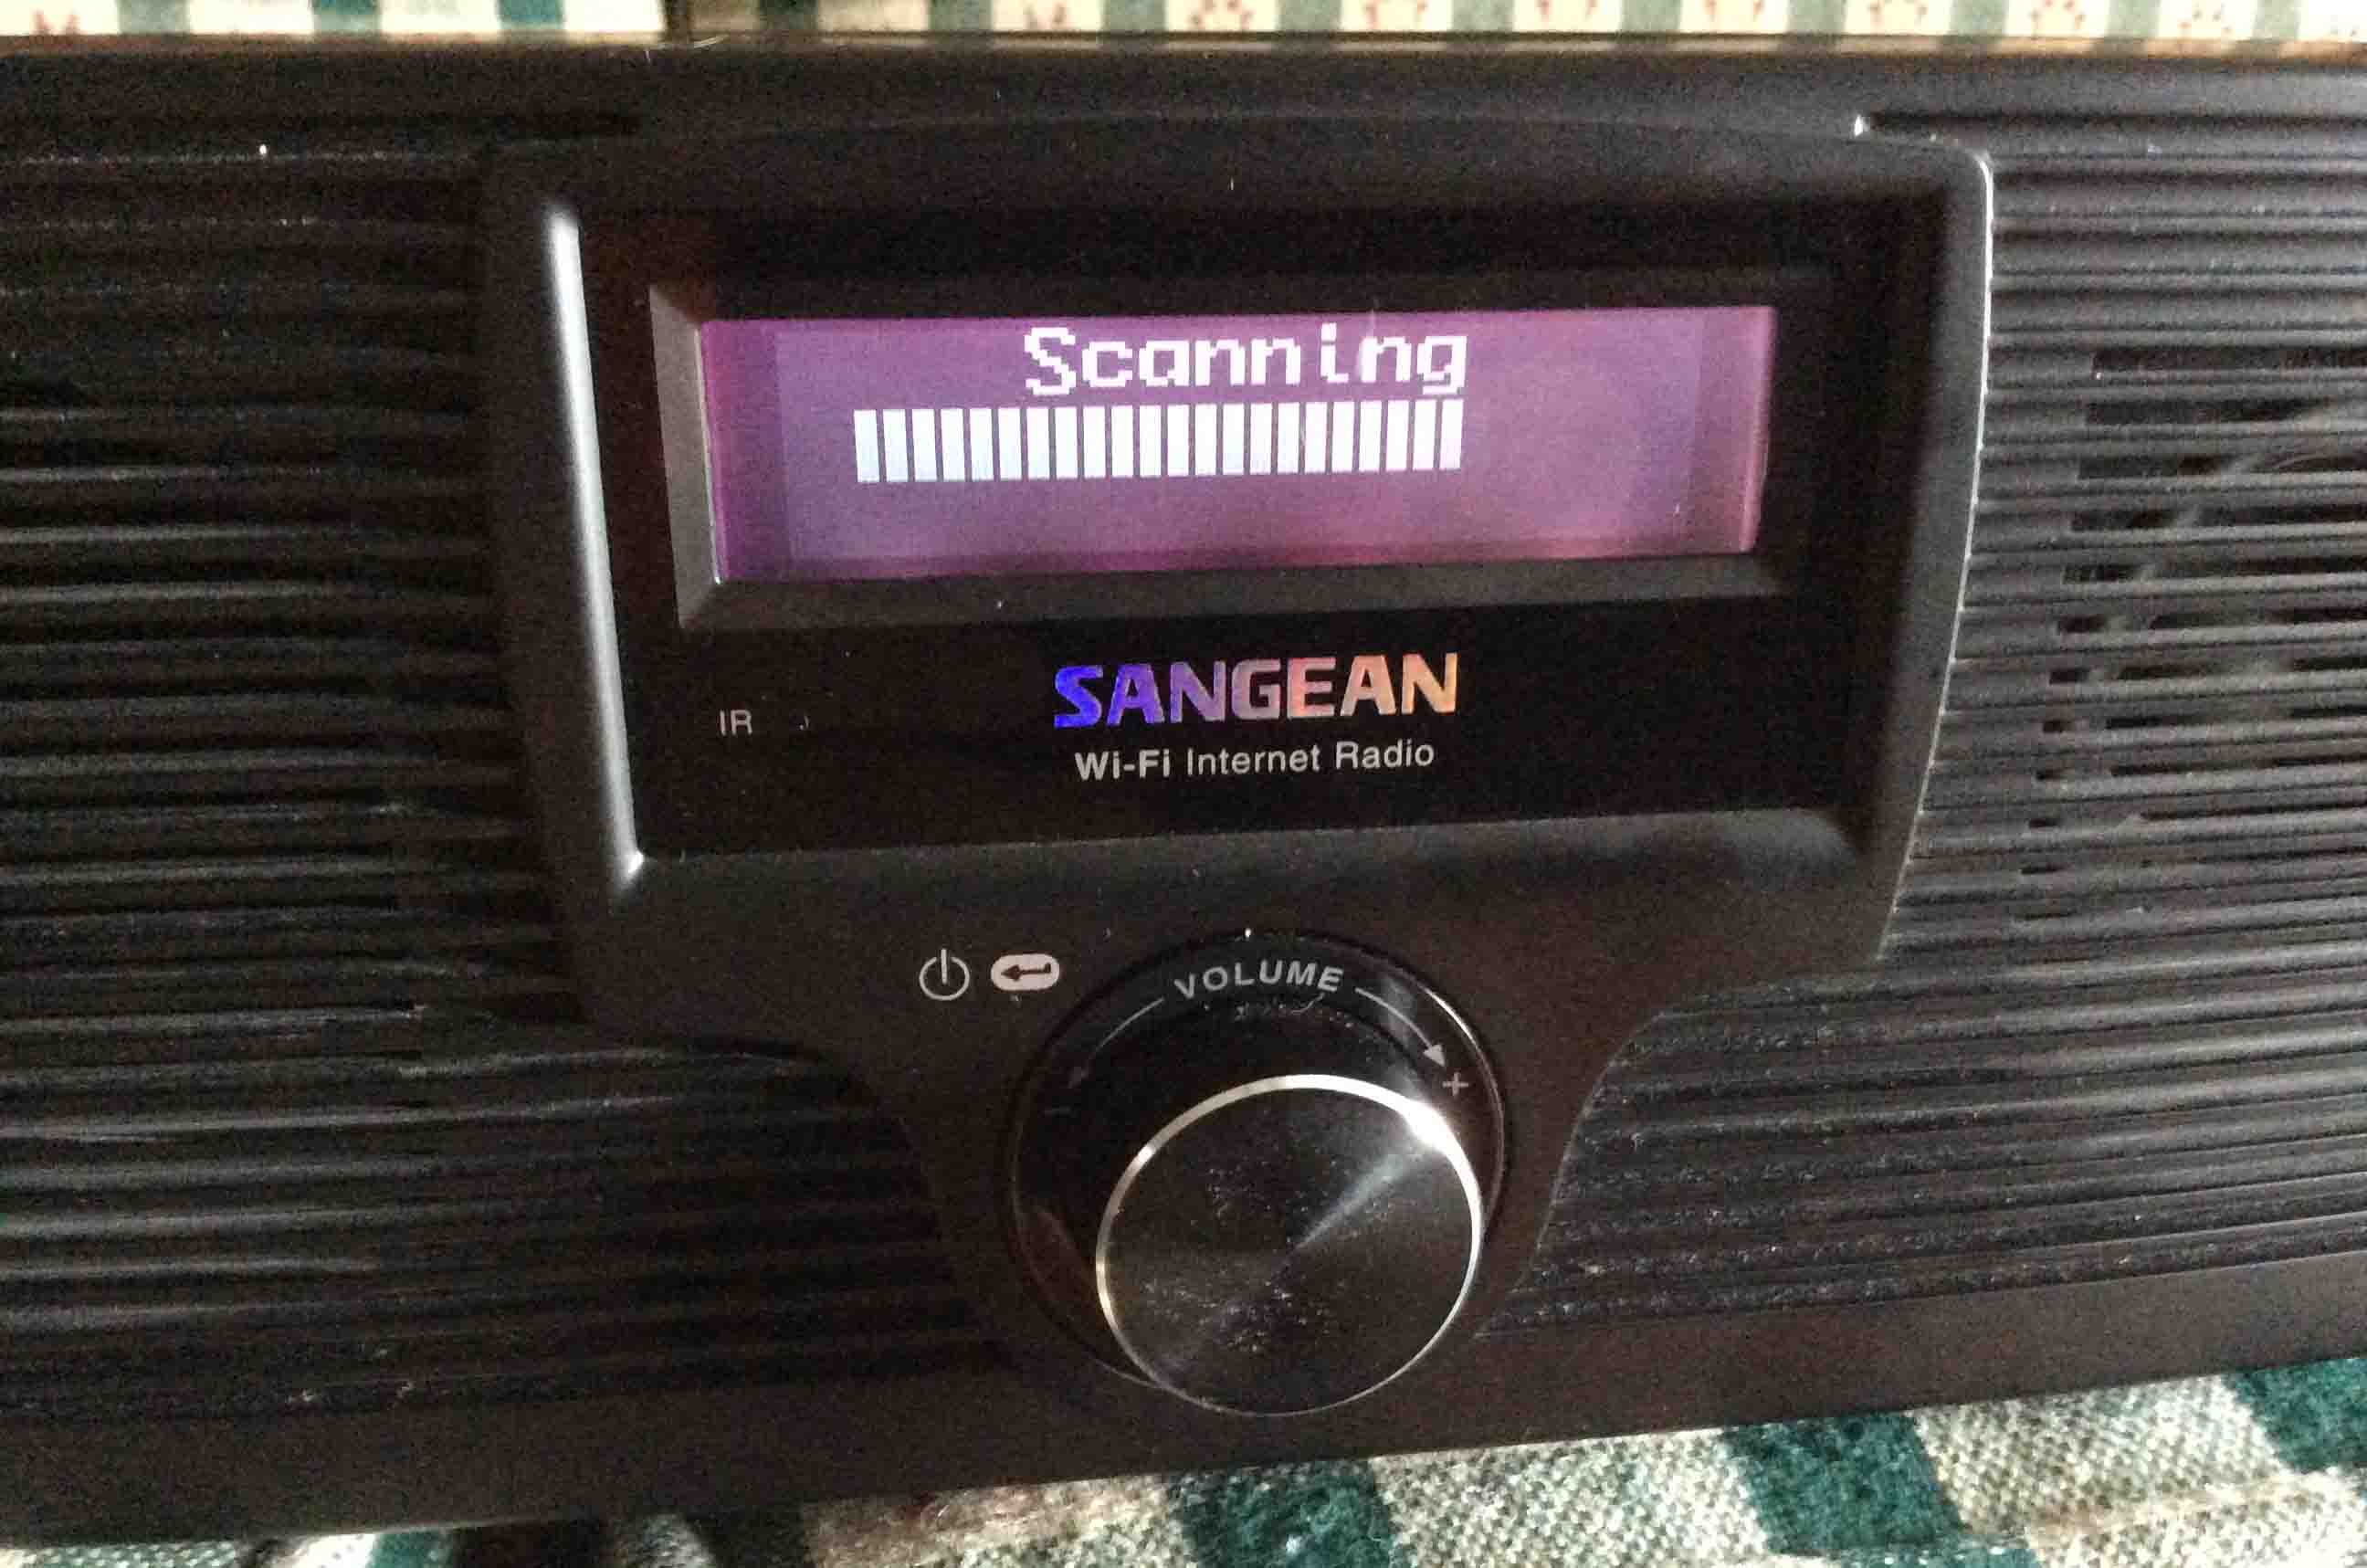
9. Start a Scan for All In-Range Wireless Networks
The radio selects the “Scan for Networks” item by default, as pictured above. So, initiate a scan for all in-range Wi-Fi networks by pressing and releasing the knob quickly. Note that this radio only scans on the 2.4 Ghz. wireless band. So any 5 Ghz. networks you are running will not display on the WFR-20. The screen showing the scan in progress displays, with a progress bar, that slowly fills in from left to right.
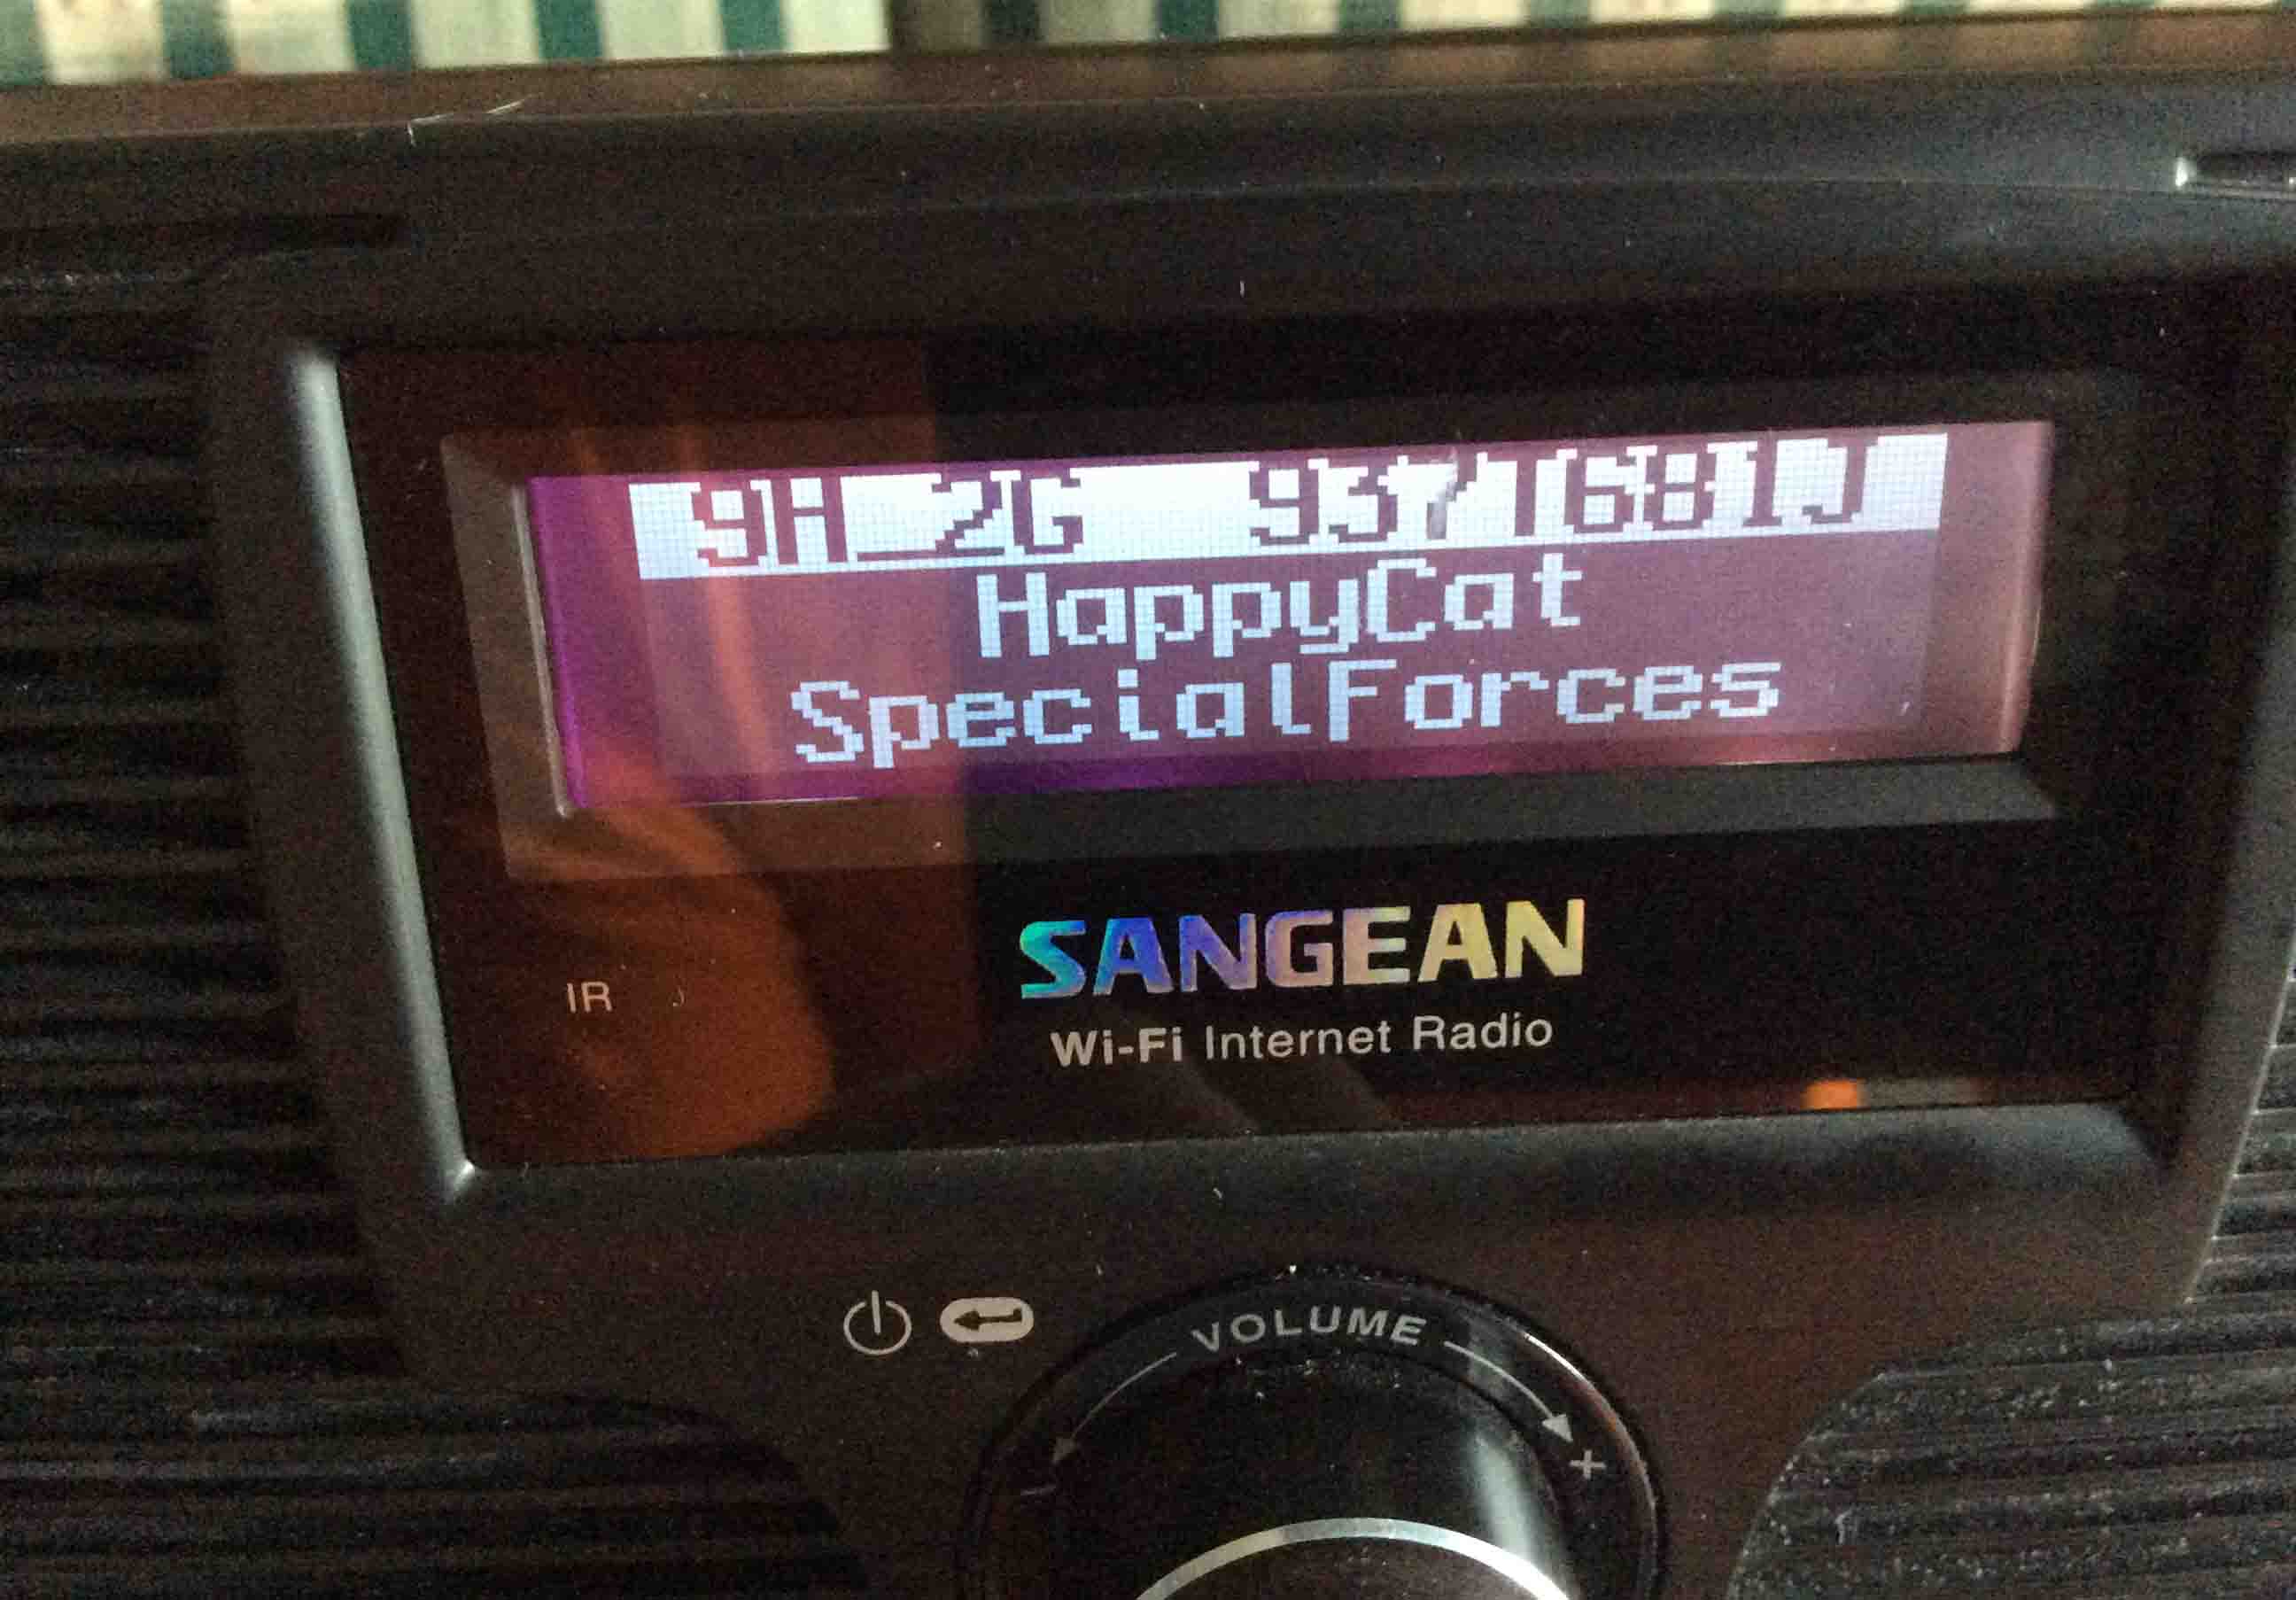
After several seconds, once the progress bar reaches the right edge of the display, the Wi-Fi scan finishes. Then the WFR-20 displays a list of in-range wireless networks that it found.
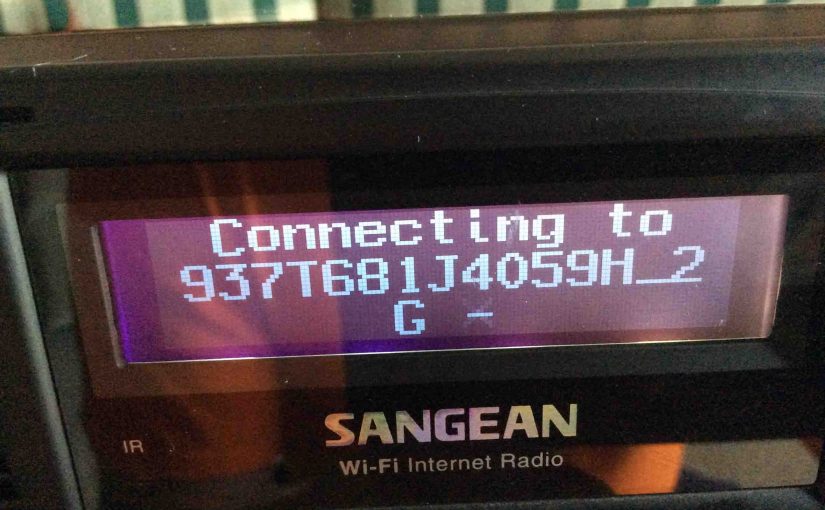
We’re going to connect with the 937T681J4059H_2G network. The radio sorts this list by Wi-Fi strength of each network. So, our network appears at the top of the list. If your network is elsewhere in the list, then turn the knob to select it.
Note that the radio may not always find your network on the first scan. If not, then run the scan a second time. Do this by by scrolling with the knob to the bottom of the network list. Select the “Back” item, and then press and release the knob.
This takes you back to the screen in Step 8. Initiate a new scan by then repeating this step from the top.
10. Choose the Desired Wi-Fi Network to Continue with How to Change WiFi on the Sangean WFR 20 Radio
Once you select the network you want, press and quickly release the knob. If that network is “open,” the radio will immediately connect to it. However, since we’re sure that ALL your networks are secure (hint hint), the radio prompts for a password.
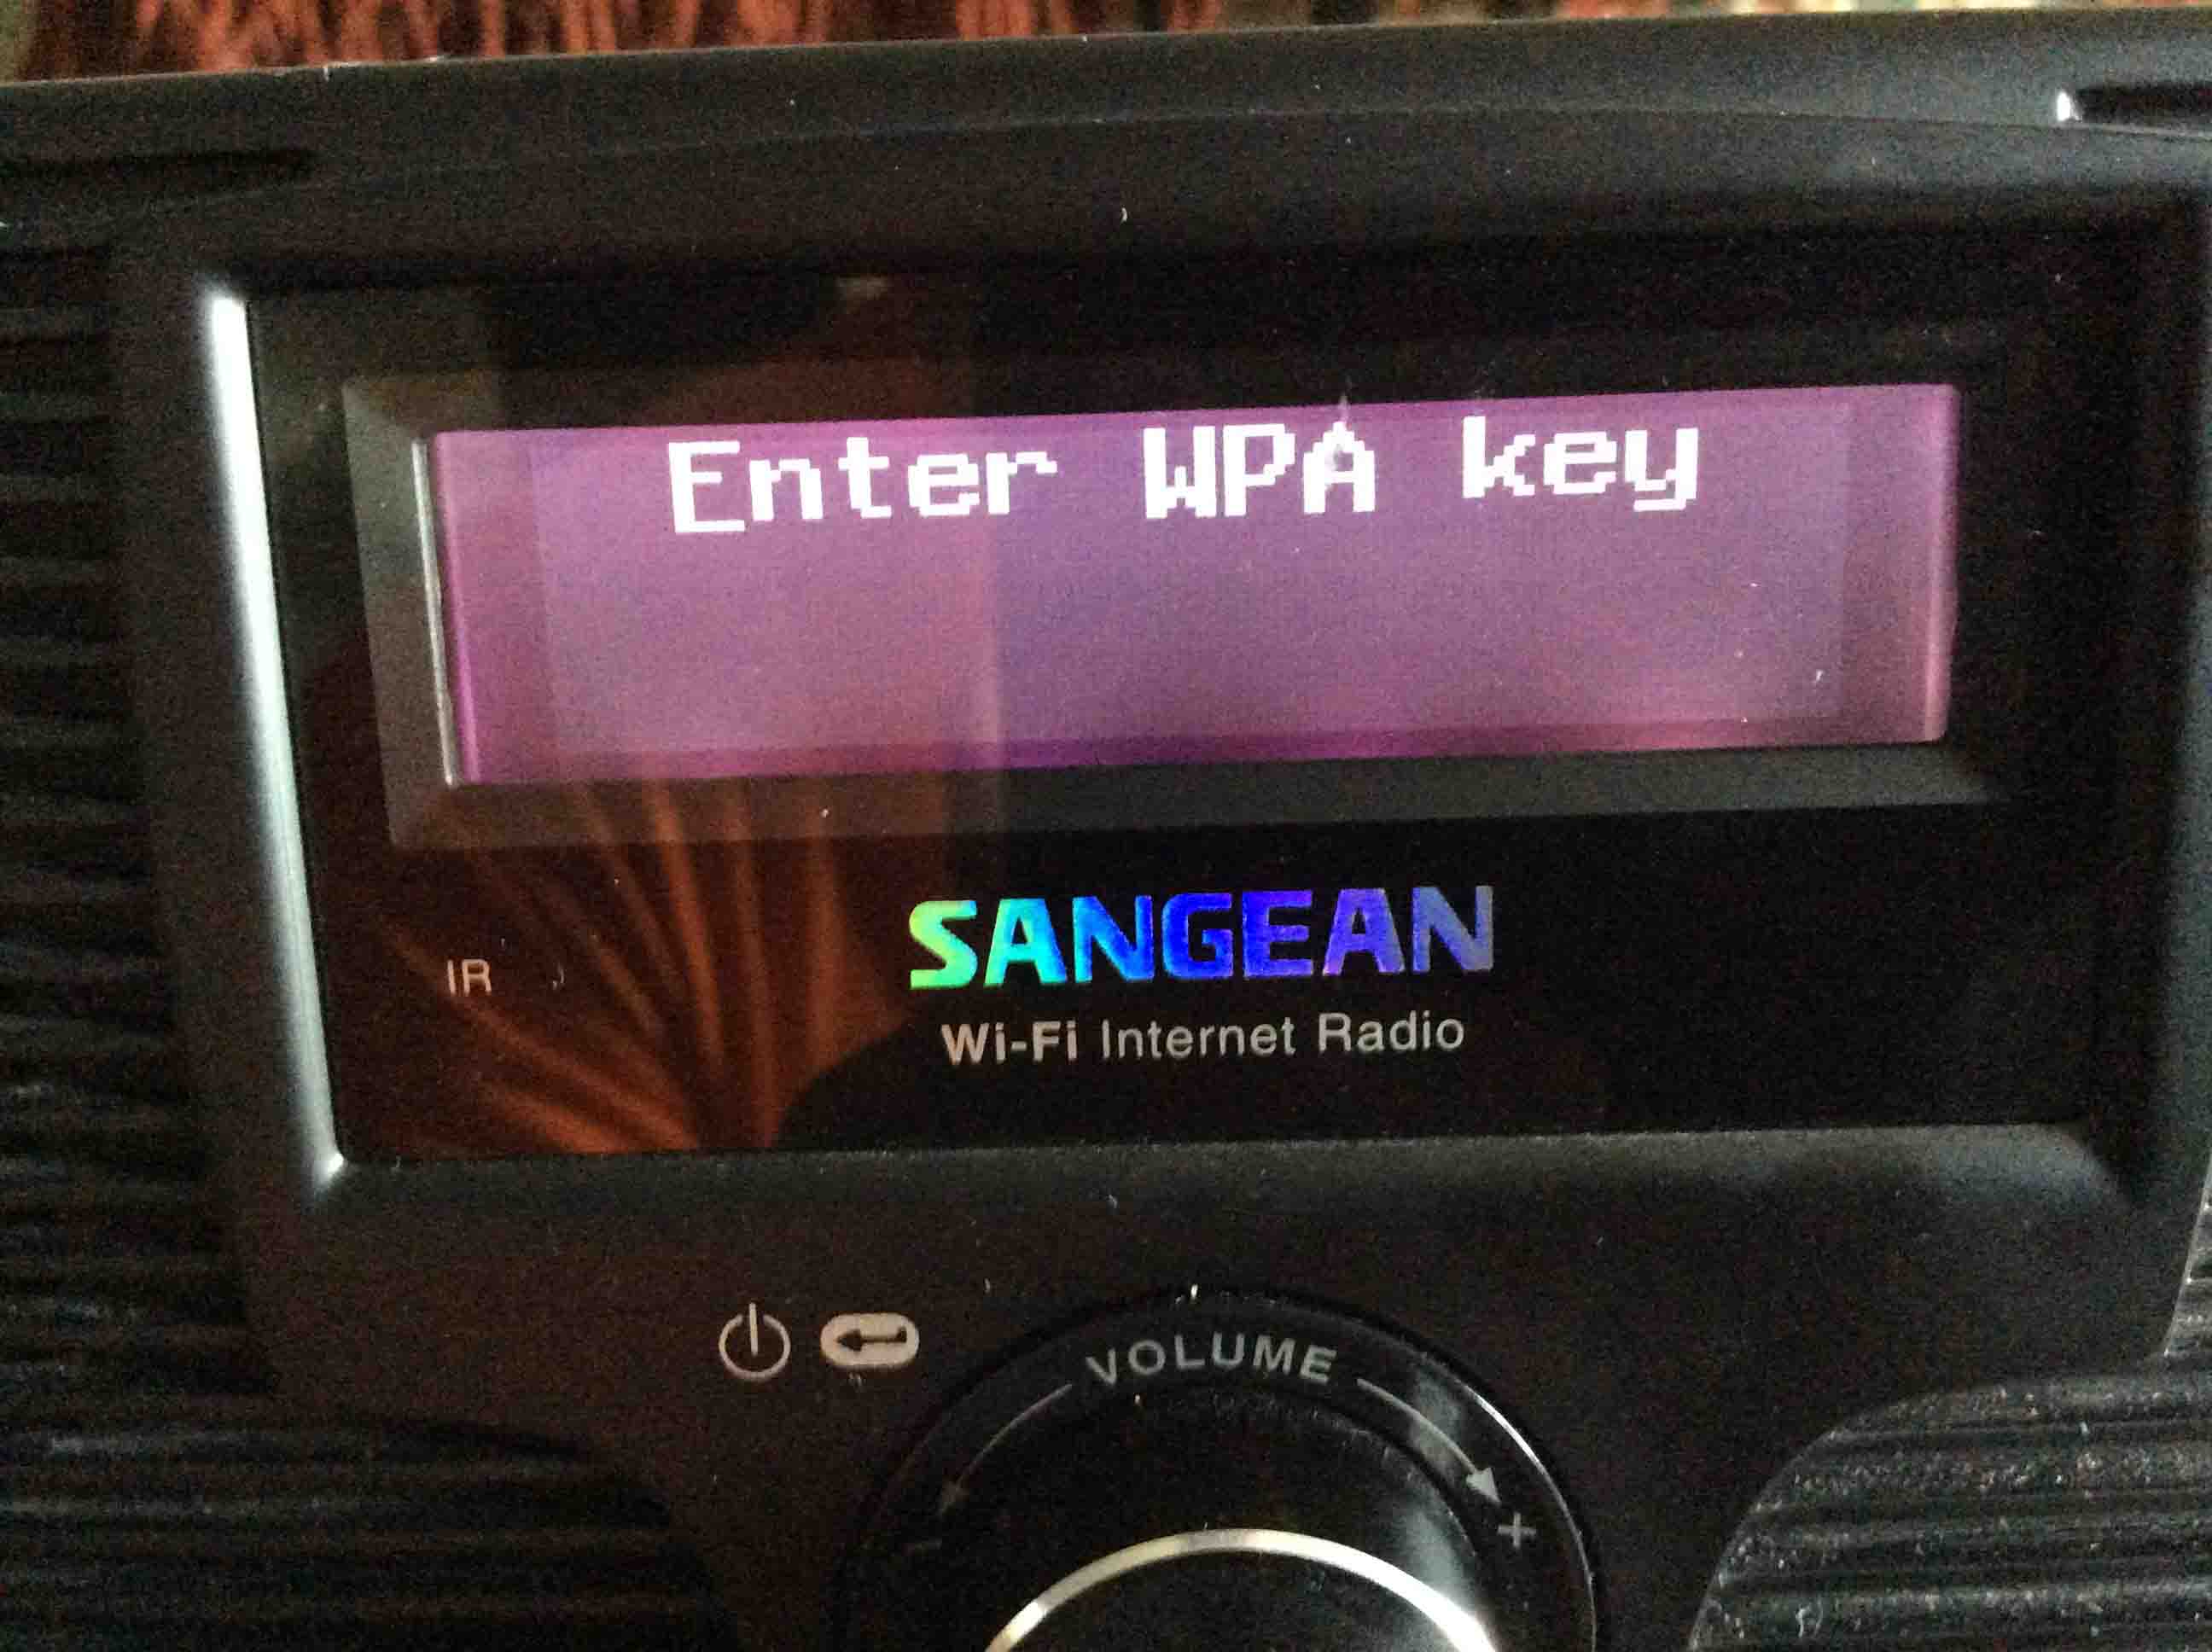
Then after a few seconds, the radio displays the password entry screen, as follows. Now this is a single line field editor. Furthermore, the middle line shows the currently-selected character. Thus in this case, A. And, it shows characters to the left and to the right.
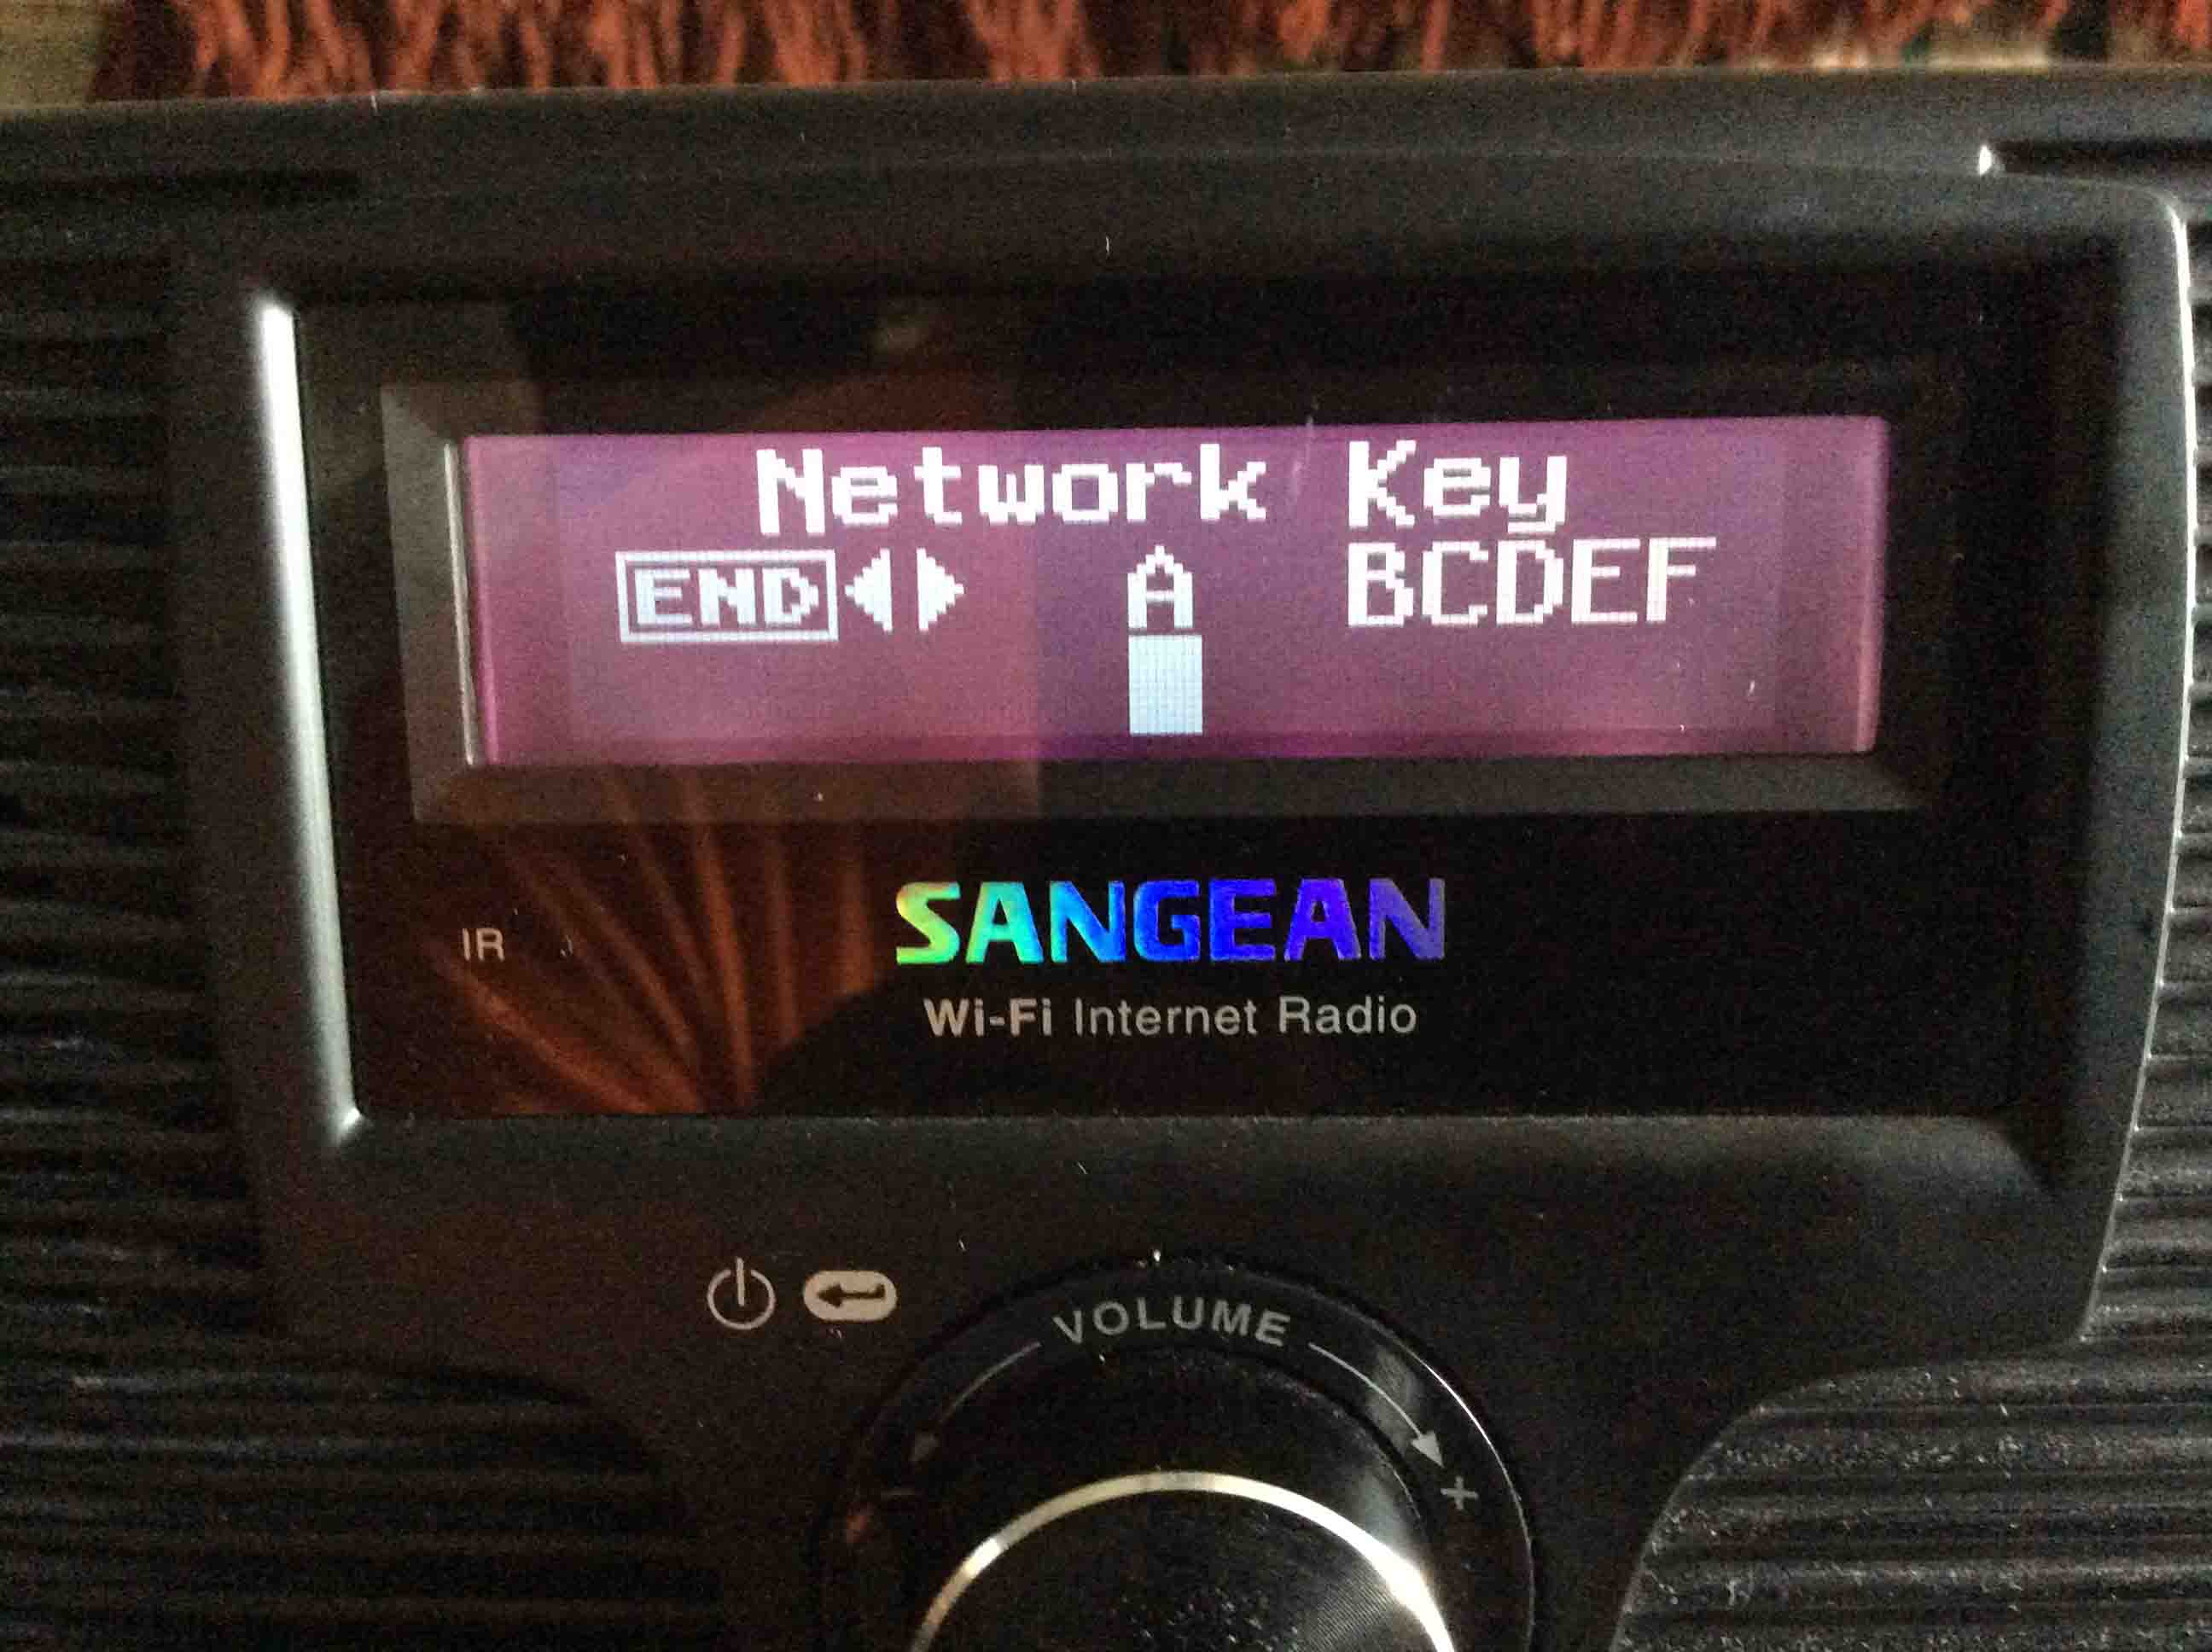
11. Enter the Network Password Characters
On the screen above, the radio prompts for the password of the wireless network you selected in step 9 above. So, for each character, rotate the knob left or right to scroll through the available characters list. When the desired character lines up in the center of the screen, quickly press and release the knob. This enters the character into the password field buffer. The radio displays that buffer on the bottom of the screen. Then, spin the knob to find the next character. Then press it quickly when you do. Repeat this until you enter the complete password, which will look something like the following screen shot.
How to use this simple editor? Pressing and releasing the knob quickly enters the selected character. Then if that character is a left or right pointing arrow, the cursor moves one position left or right. Also, pressing and holding the knob for a second or two, moves the insertion point one position left. Furthermore, this erases the current character. Practice with this admittedly awkward editor a bit until you get good at it.
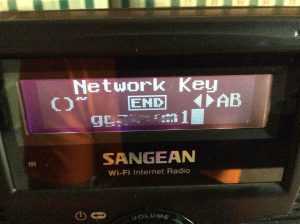
We’ve blurred some of the characters to keep the password secure.
Once you enter all password characters, find the END character. Then position it in the center of the screen. This “character,” is like to the Enter key on a typewriter style keyboard.
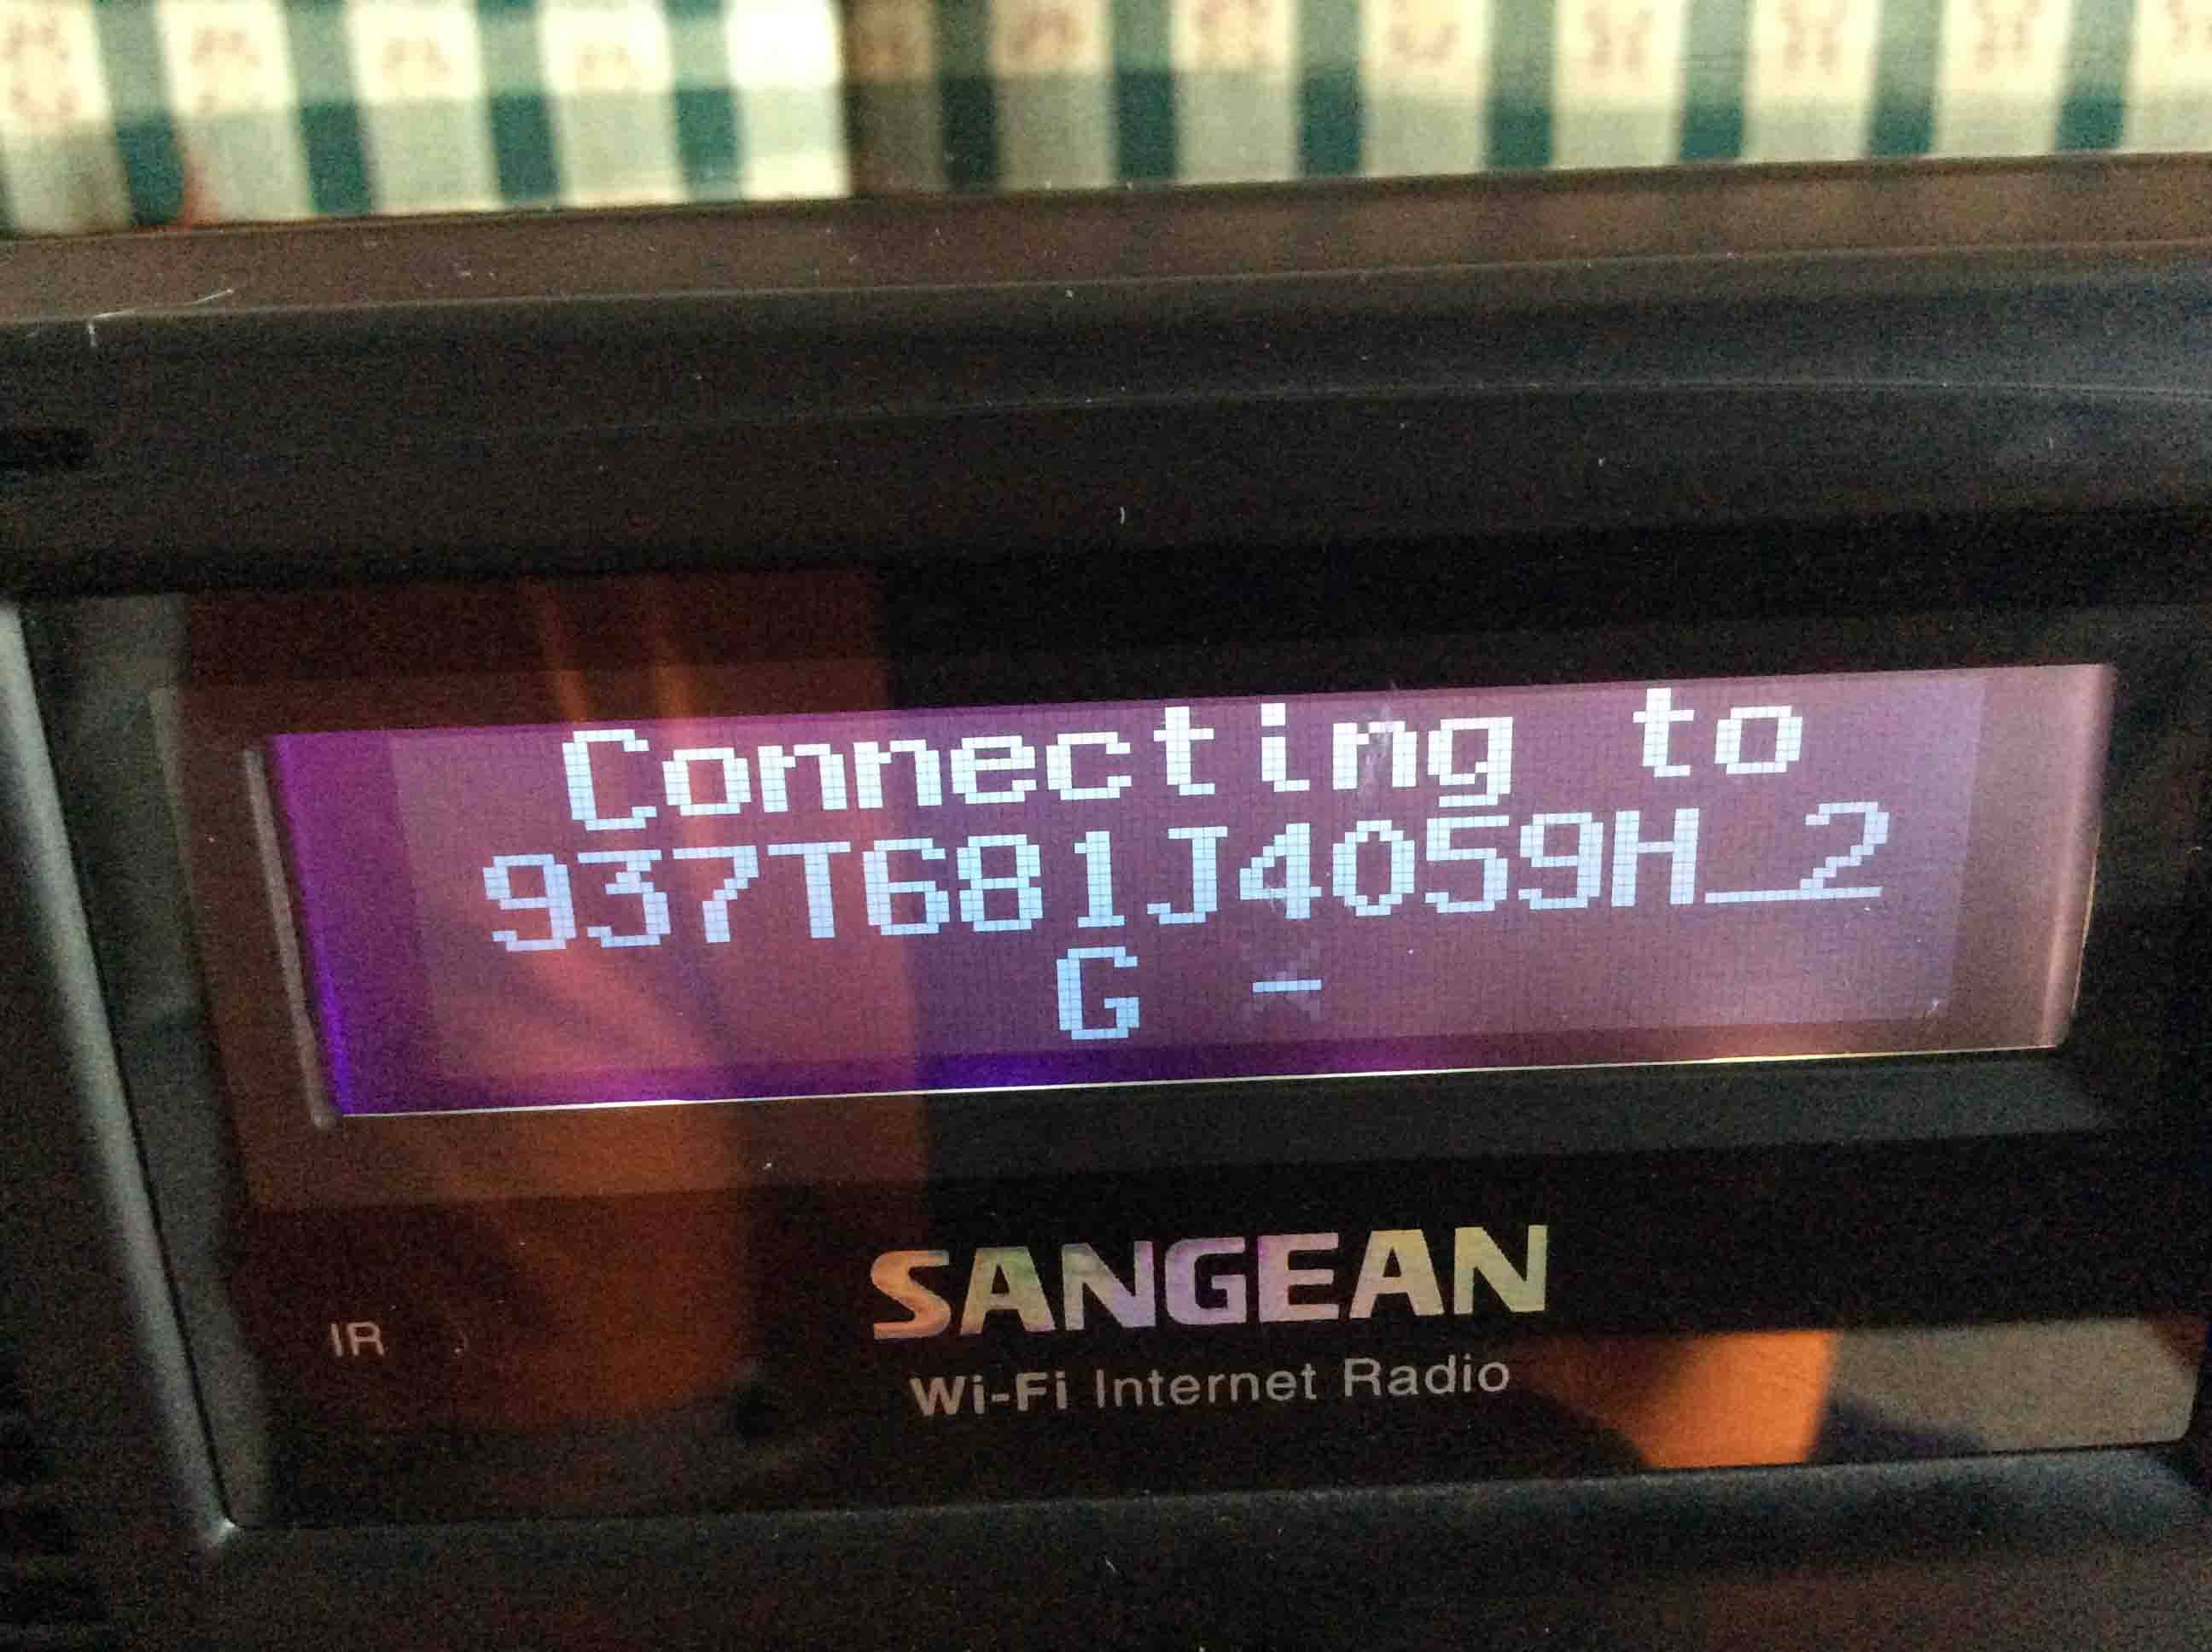
12. Accept the Entered Password Key
Move to the END character when editing is complete. Then Press and quickly release the knob when finished editing.
The following screen then appears, as the radio attempts to connect to the new Wi-Fi network.
13. Play the Radio on the New WiFi Network to Continue with How to Change WiFi on Sangean WFR 20 Radio
If the password is correct, the radio takes you back to either the Mode menu. Or it plays the station you last listened to.
Note that the radio may reboot if this is the first network you connect to after a factory Reset. But fear not. The network just put in is still there. Detail: The radio will connect to it using the info you entered once the reboot completes.
At last, you have now successfully switched your Sangean WFR-20 Wi-Fi Internet Radio over to a new wireless network. Happy listening!
Disclaimers
-
- Firmware version tested. The comments and screen shots in this post apply to the radios running the following firmware units:
- Service Pack: v257-a-865-a-289-a-003
- Serial firmware: 02
- Application: v600-a-311-a-416-003
- Helix: v023
- Kernel: v24090624+01
- Bootloader: v017-c-002
- Firmware version tested. The comments and screen shots in this post apply to the radios running the following firmware units: