Some smart models of the Honeywell thermostats like the RTH9580WF we describe here, have a locking mode. Thus this keeps curious fingers from adjusting t-stat settings without first punching in a password. You create this secret code when locking your thermostat. Then, the thermostat asks you to enter this code to restore access to all its functions. So here we give locking Honeywell thermostat instructions. We do this demo demo on Honeywell’s RTH9580WF WiFi t-stat. Indeed it’s easy to keep your t-stat secure with features like this.
Locking Honeywell Thermostat Instructions: Step by Step
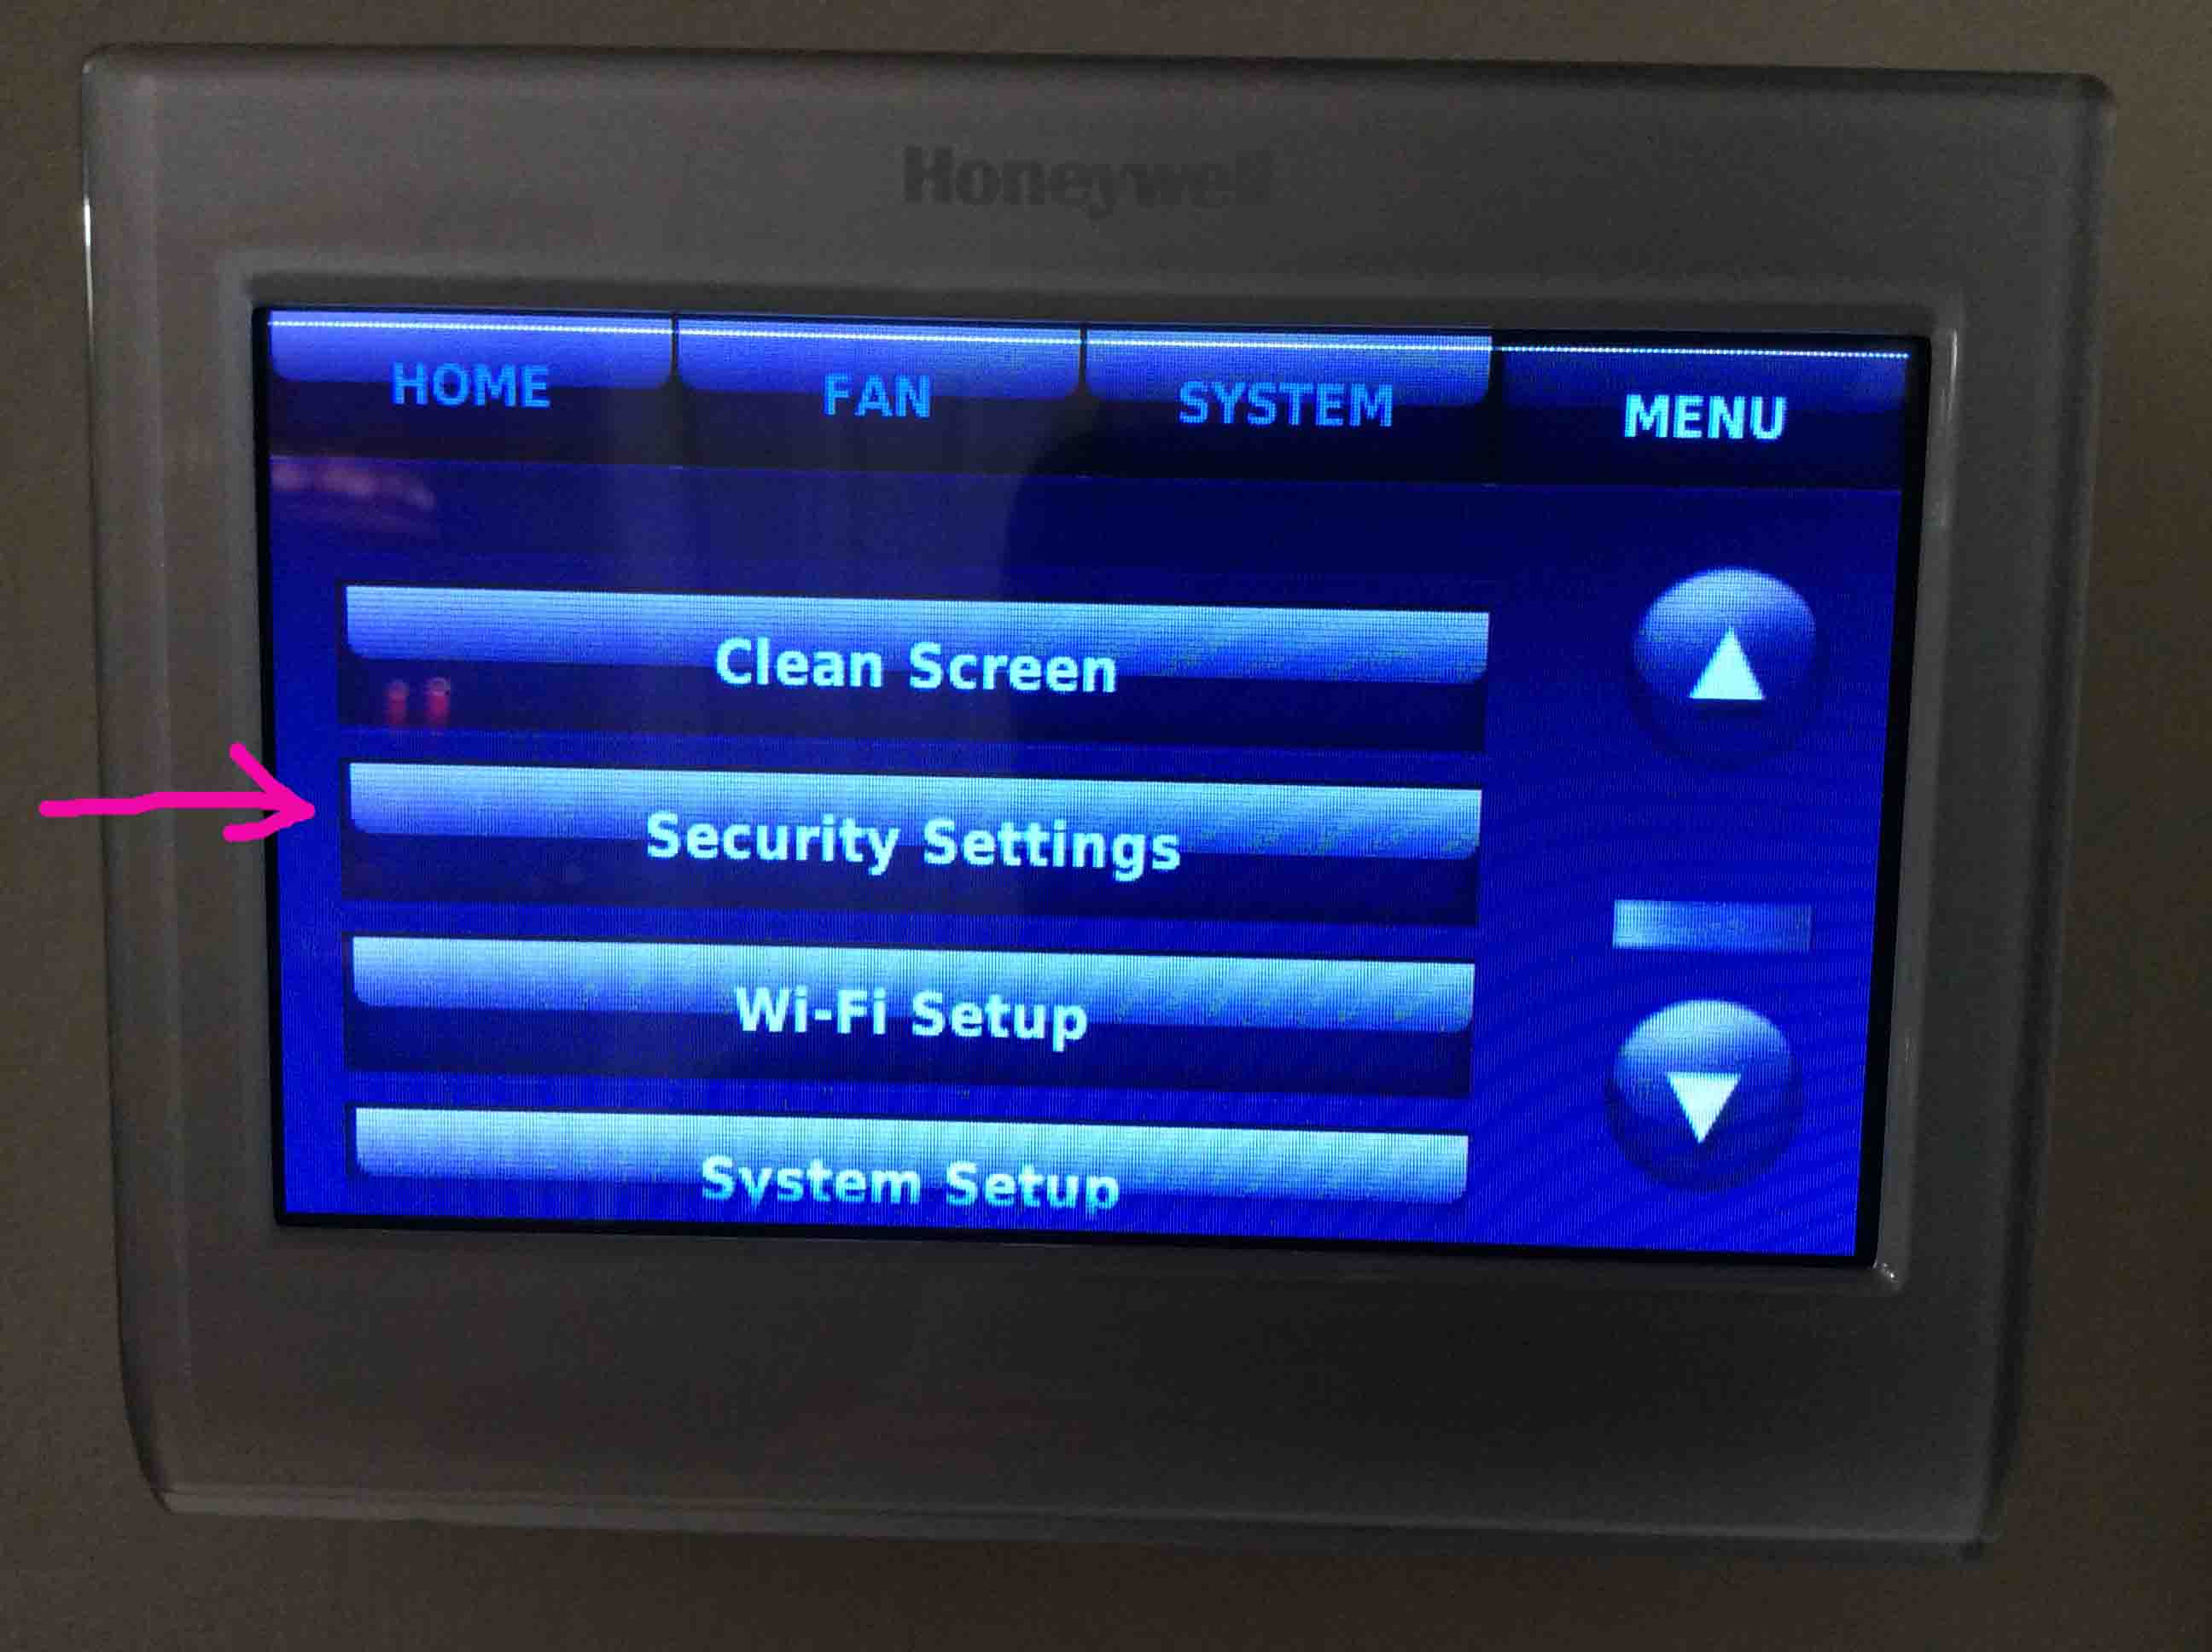
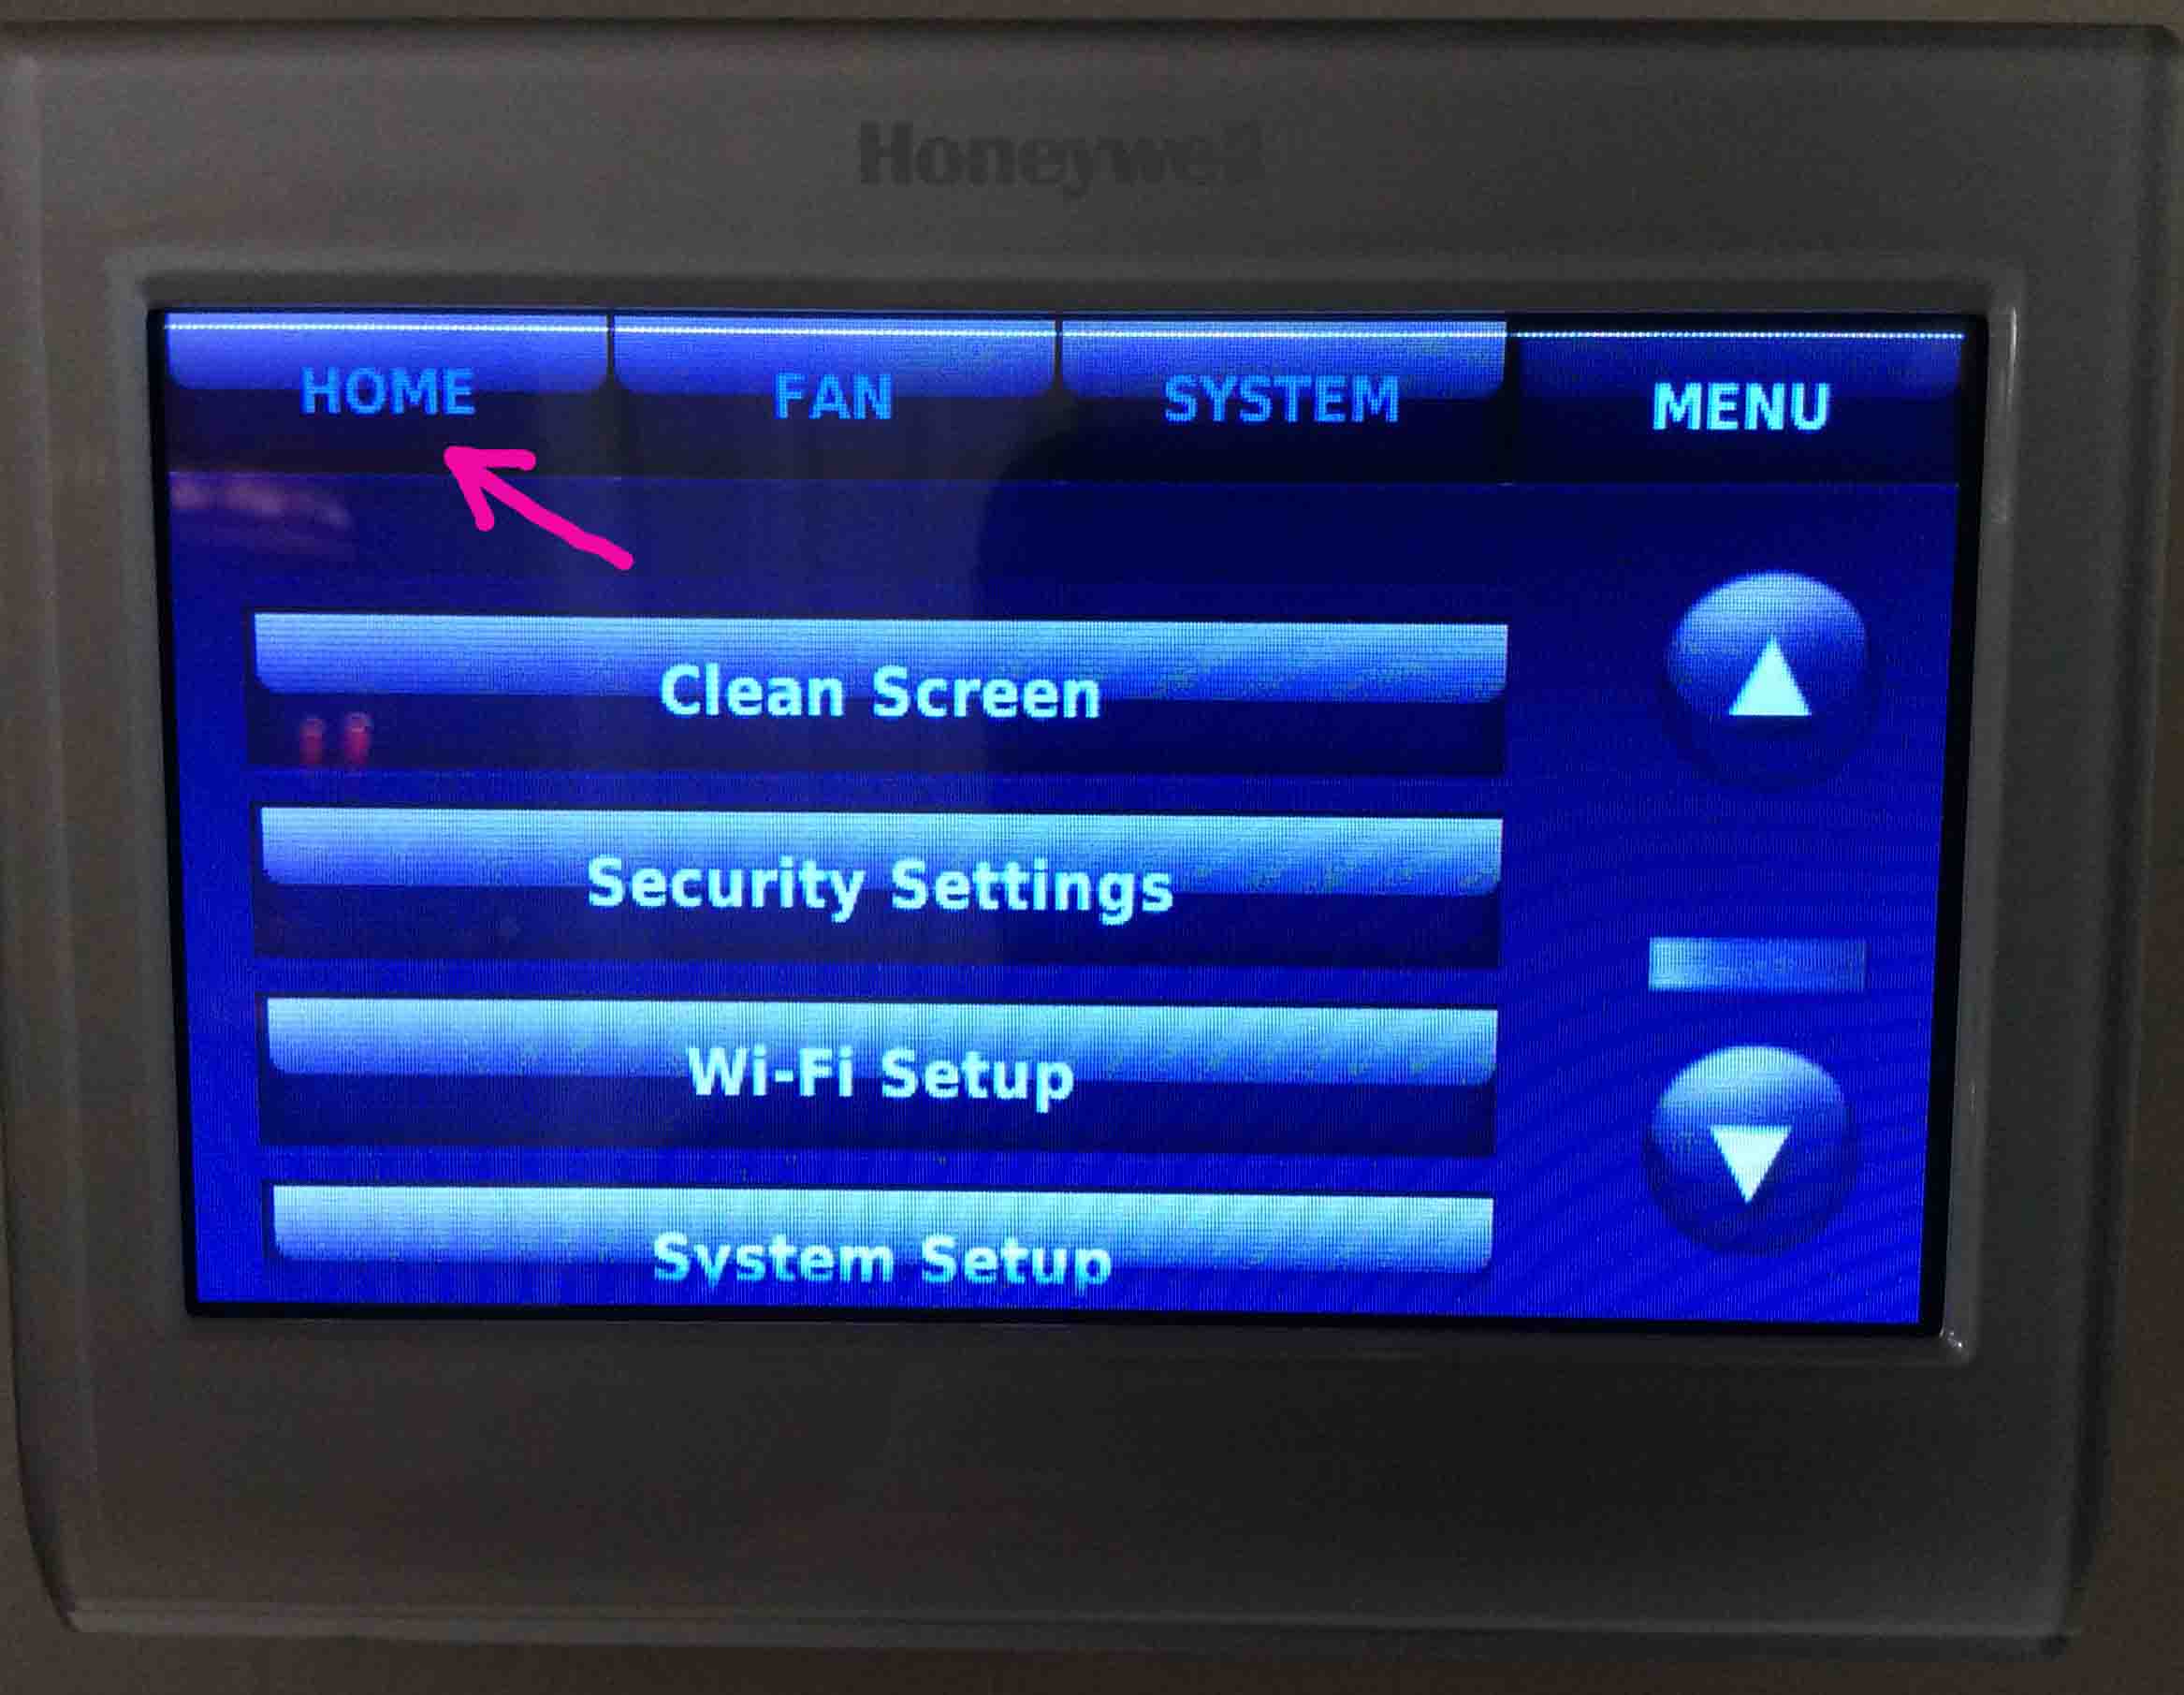
1. Tap the MENU Option
Find the MENU button in top right corner of the screen, which then displays the main menu screen. Once there, you may have to press the down-arrow button a few times to locate the Security Settings item. The next picture shows the main menu, displaying this option.
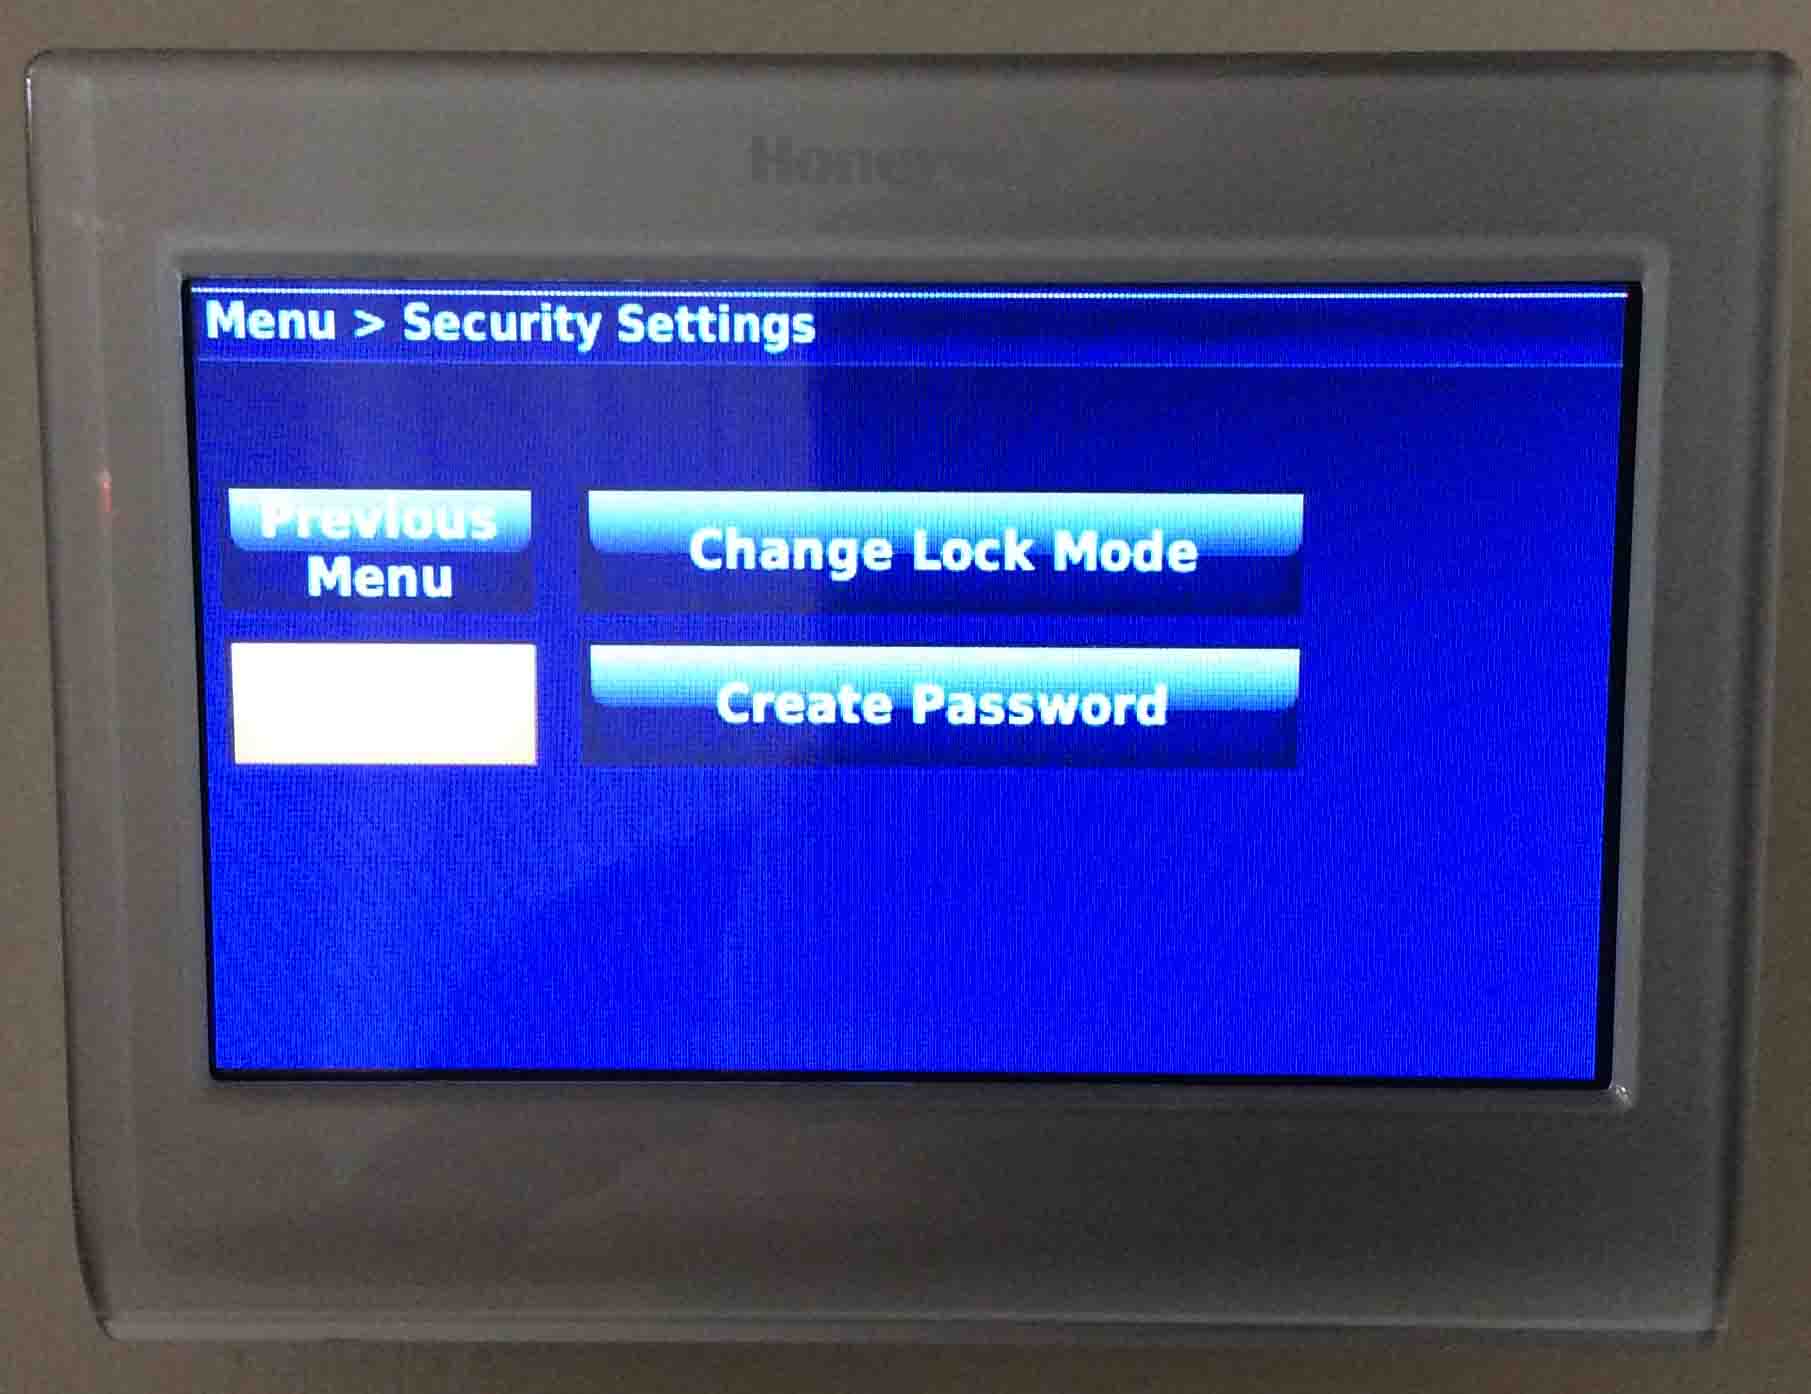
2. Tap the Security Settings Option
The Security Settings screen then displays.
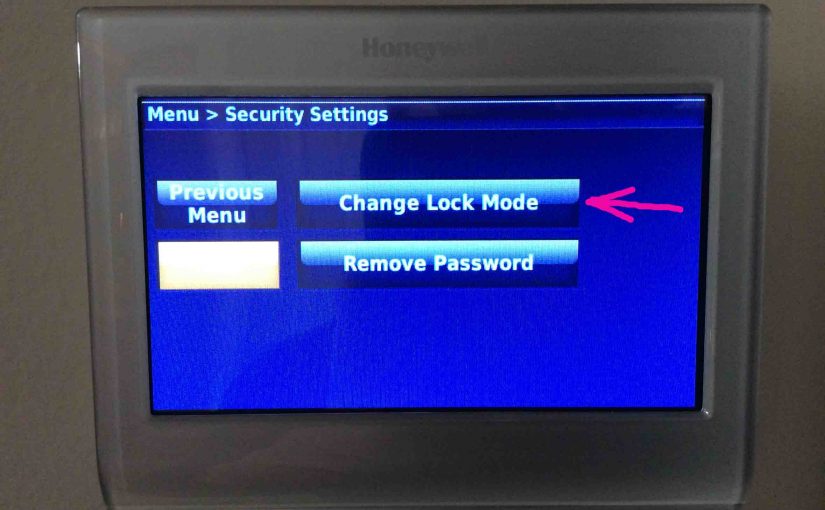
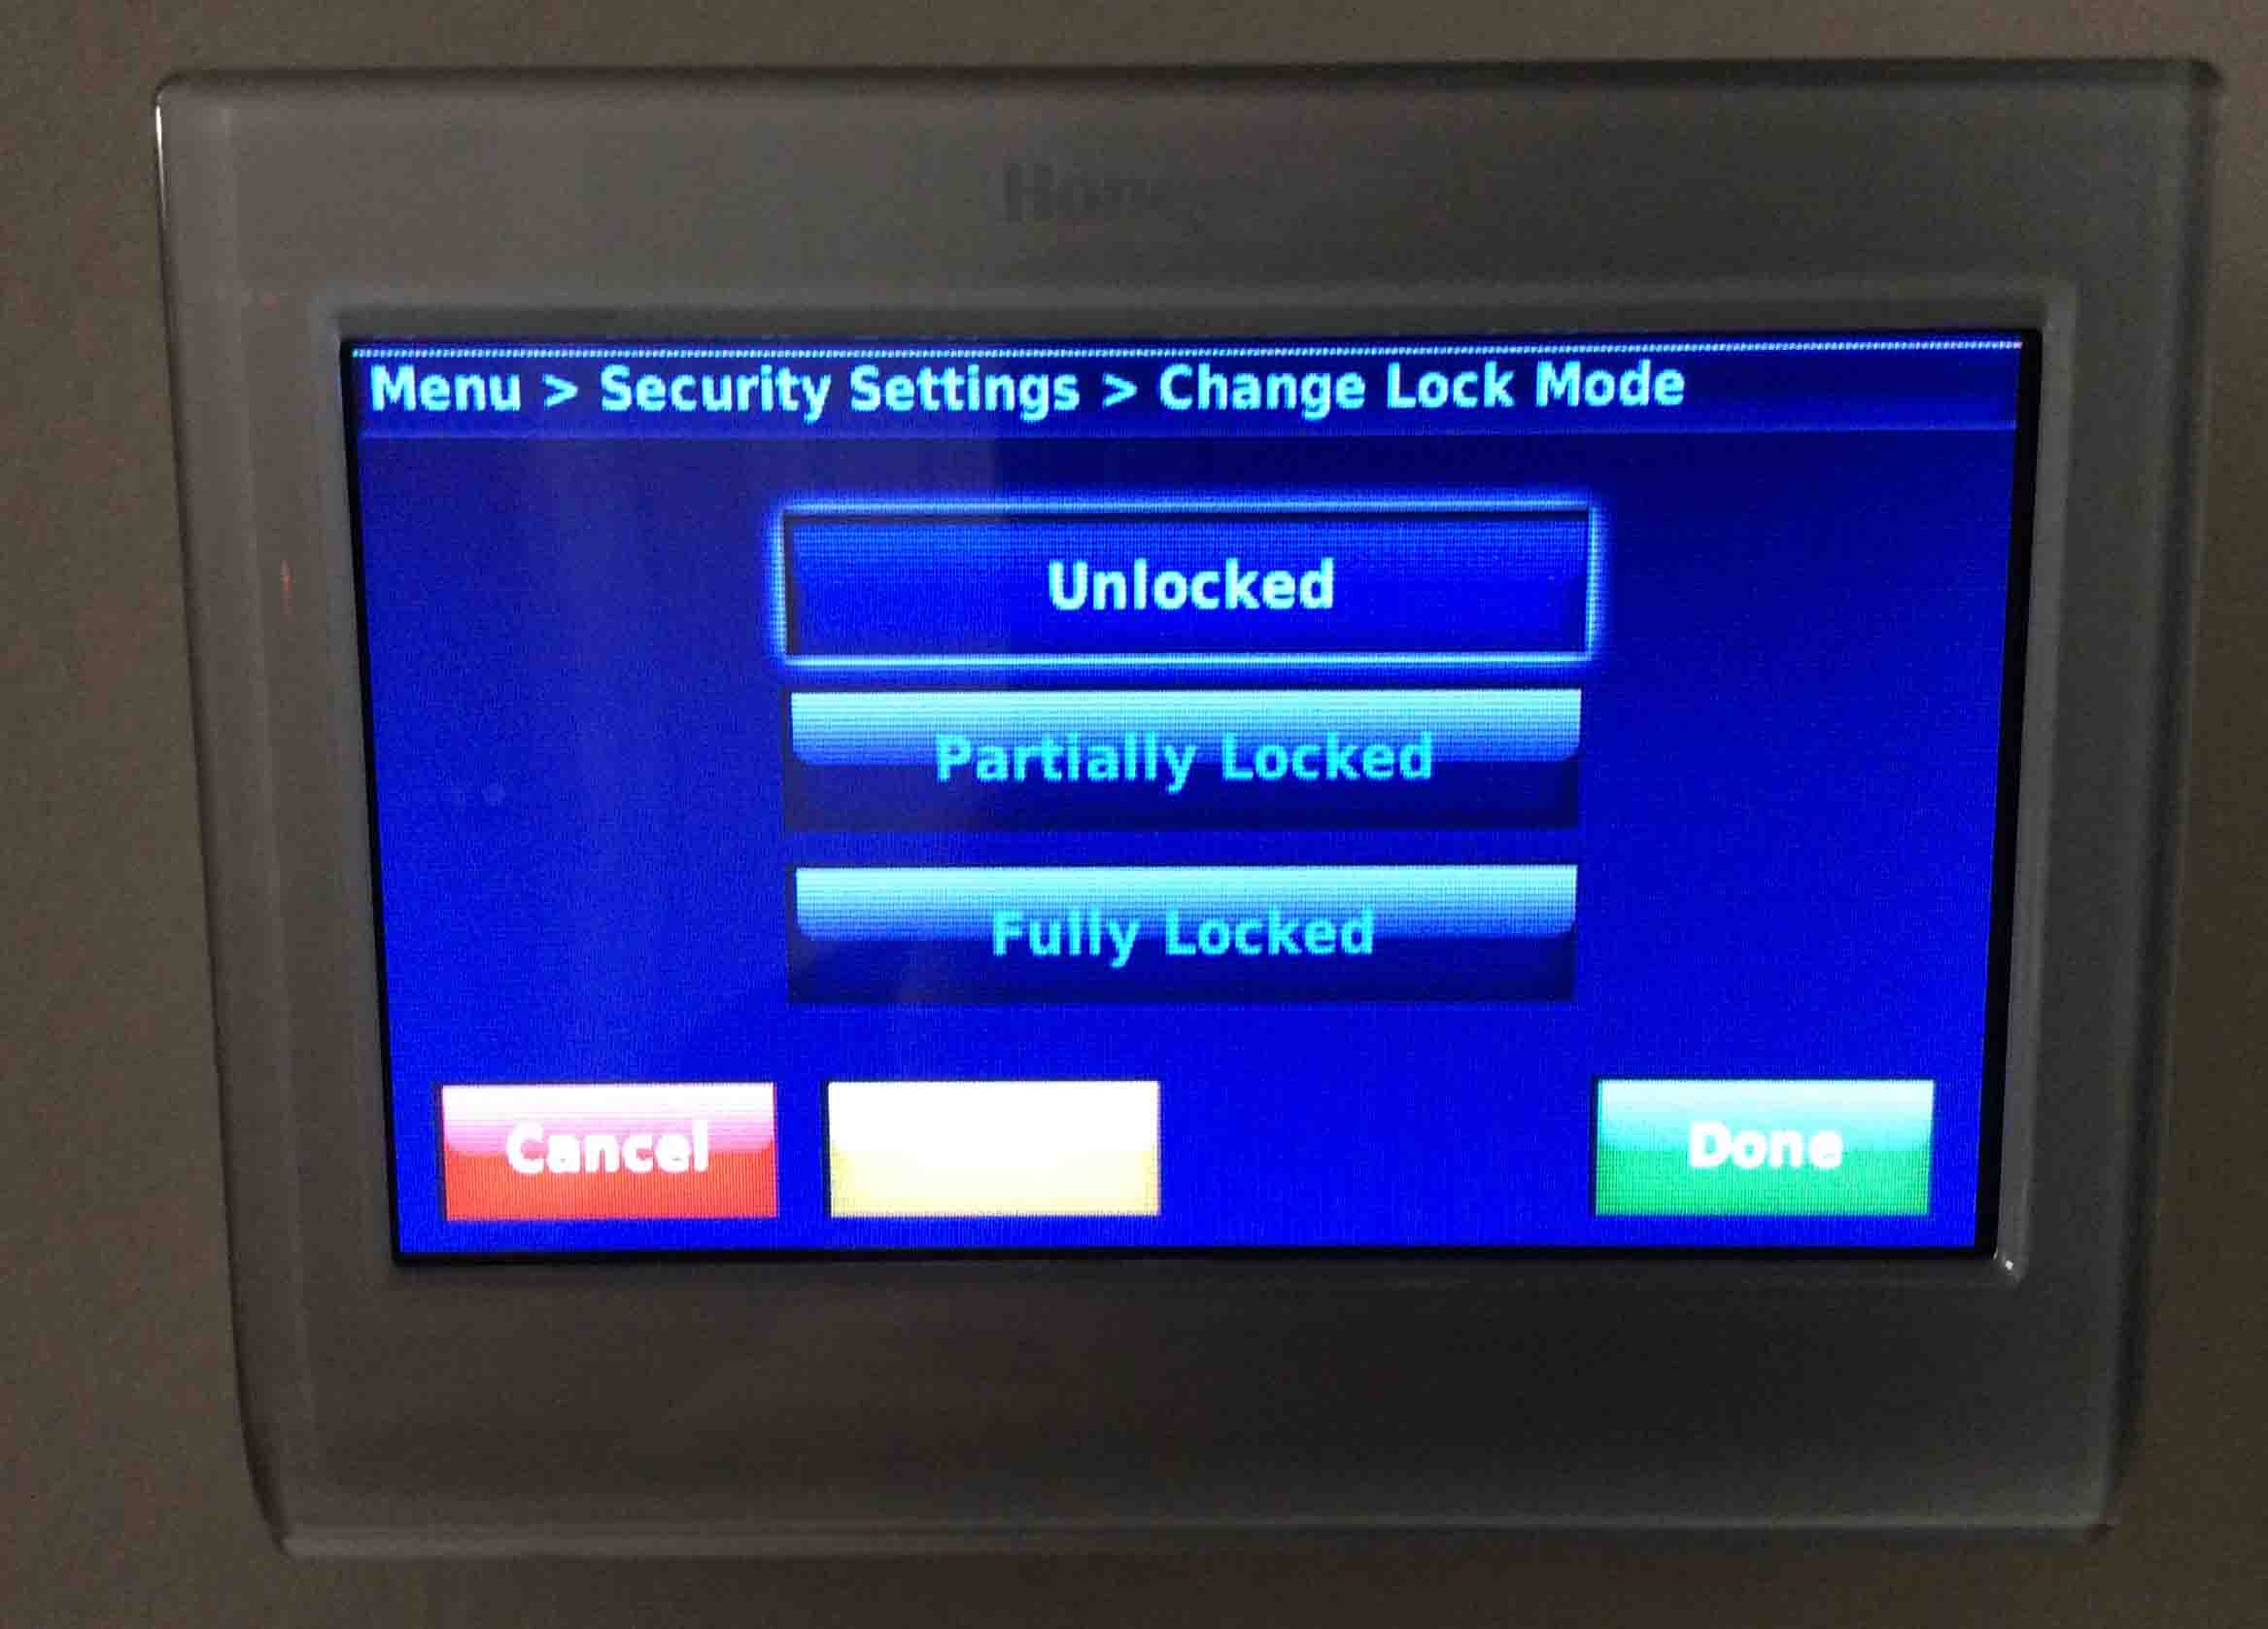
3. Tap the Change Lock Mode Button
So this brings up the Change Lock Mode screen. Note that the Unlocked option appears on that screen in a brighter blue. This means that the thermostat is open. So users can access all settings and schedules. We’re now going to lock it.
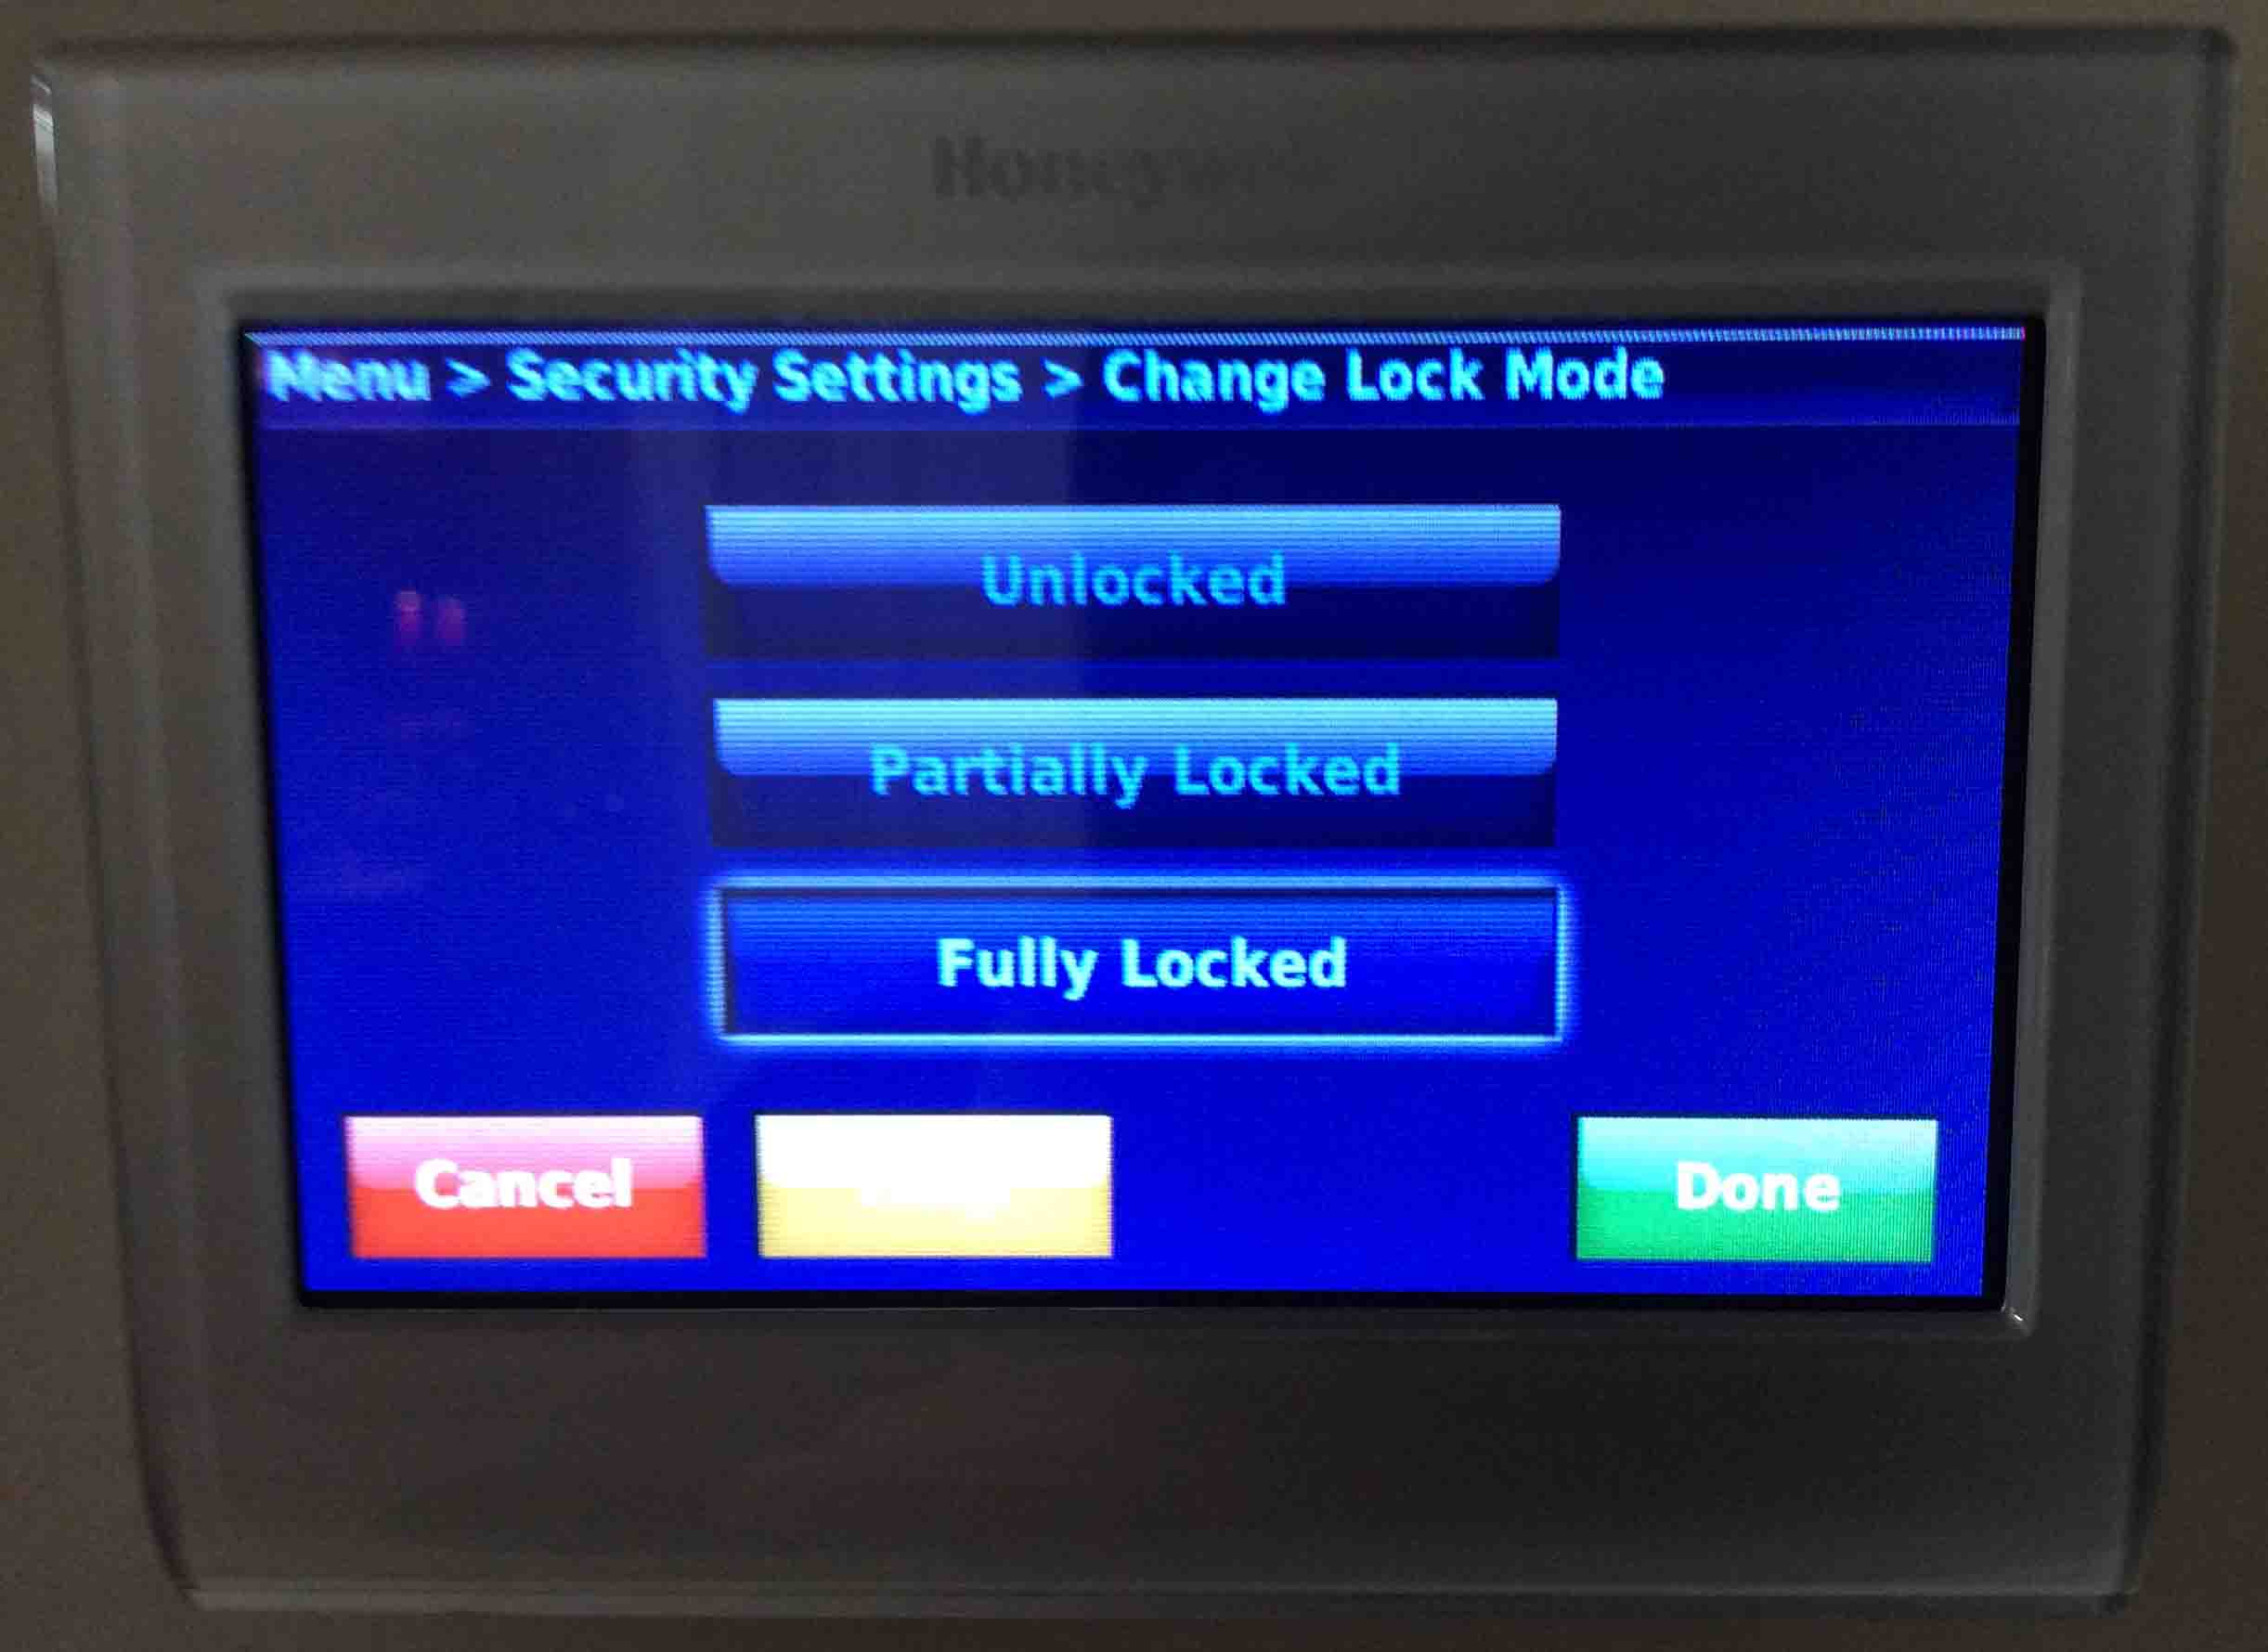
4. Tap the Fully Locked Option to Continue with Locking Honeywell Thermostat
Then the thermostat again displays the Change Lock Mode screen. But now, it shows that Fully Locked option in bright blue. The thermostat will enter fully locked mode once you press the Done button in the next step.
Note that we could tap the Partially Locked button here instead. In this case that option would have a highlight in the next screen shot. But in this demo, we only show what happens with the Fully Locked mode.
However, you create partial locking in the same way as we see below in the Fully Locked case. But the difference is that after locking, you’ll have access to some of the thermostat’s settings. These include the current temperature setting on the Home screen. But with full locking, none of the settings is available. Not without first unlocking the thermostat first.
5. Tap the Done Button
This takes you back to the Security Settings screen, as the next picture shows. Your thermostat is now in full lock mode.
Note that if you wish not to set up a passcode, you can skip ahead to step 9 below. The thermostat will still be in lock, even with no passcode created. So you won’t need a password therefore, to unlock it. However, here we’re going to add one nonetheless, to demonstrate the comprehensiveness of the locking mechanism on Honeywell thermostats.
6. Tap the Create Password Button
The Password Created screen then displays. This shows a four-digit passcode that you’ll need to unlock the thermostat later.
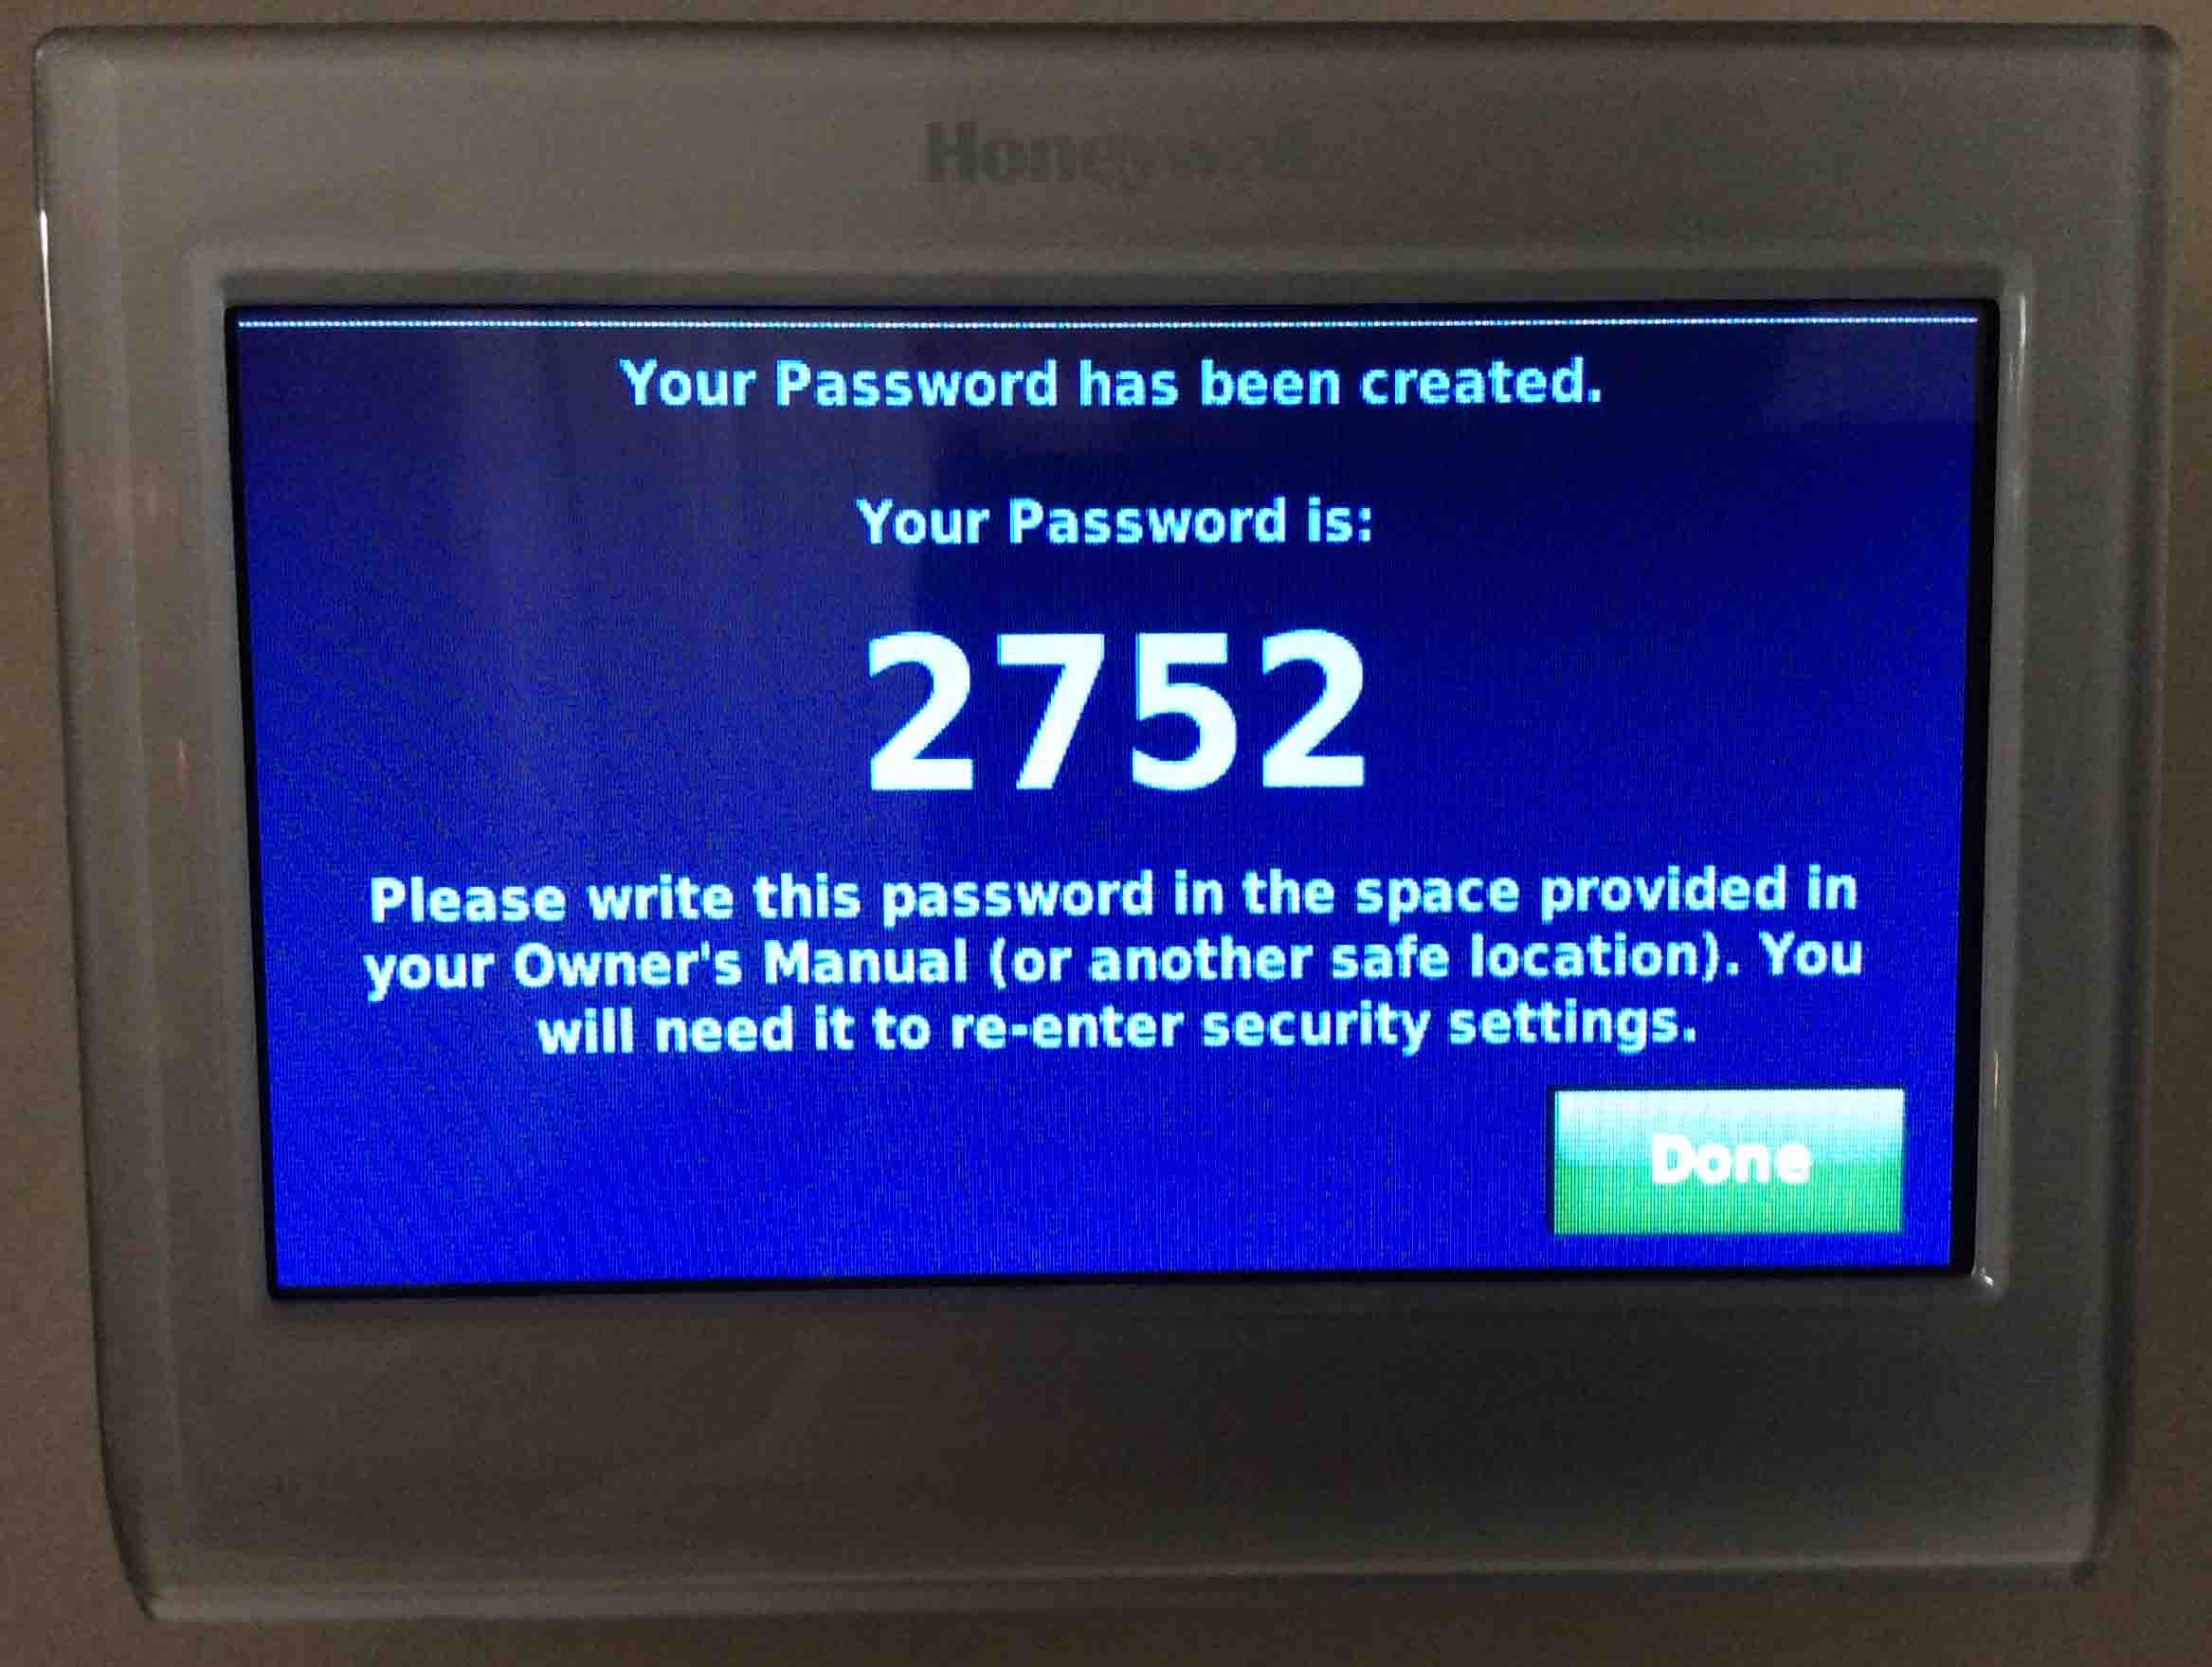
7. Write Down the Provided Password to Continue with Locking Honeywell Thermostat
So be careful not to misplace or forget this passcode. Record it somewhere and keep it safe. Indeed without it, you’ll be unable to gain access to the thermostat controls. Nor will you be able to reset the thermostat to factory defaults without calling Honeywell for help.
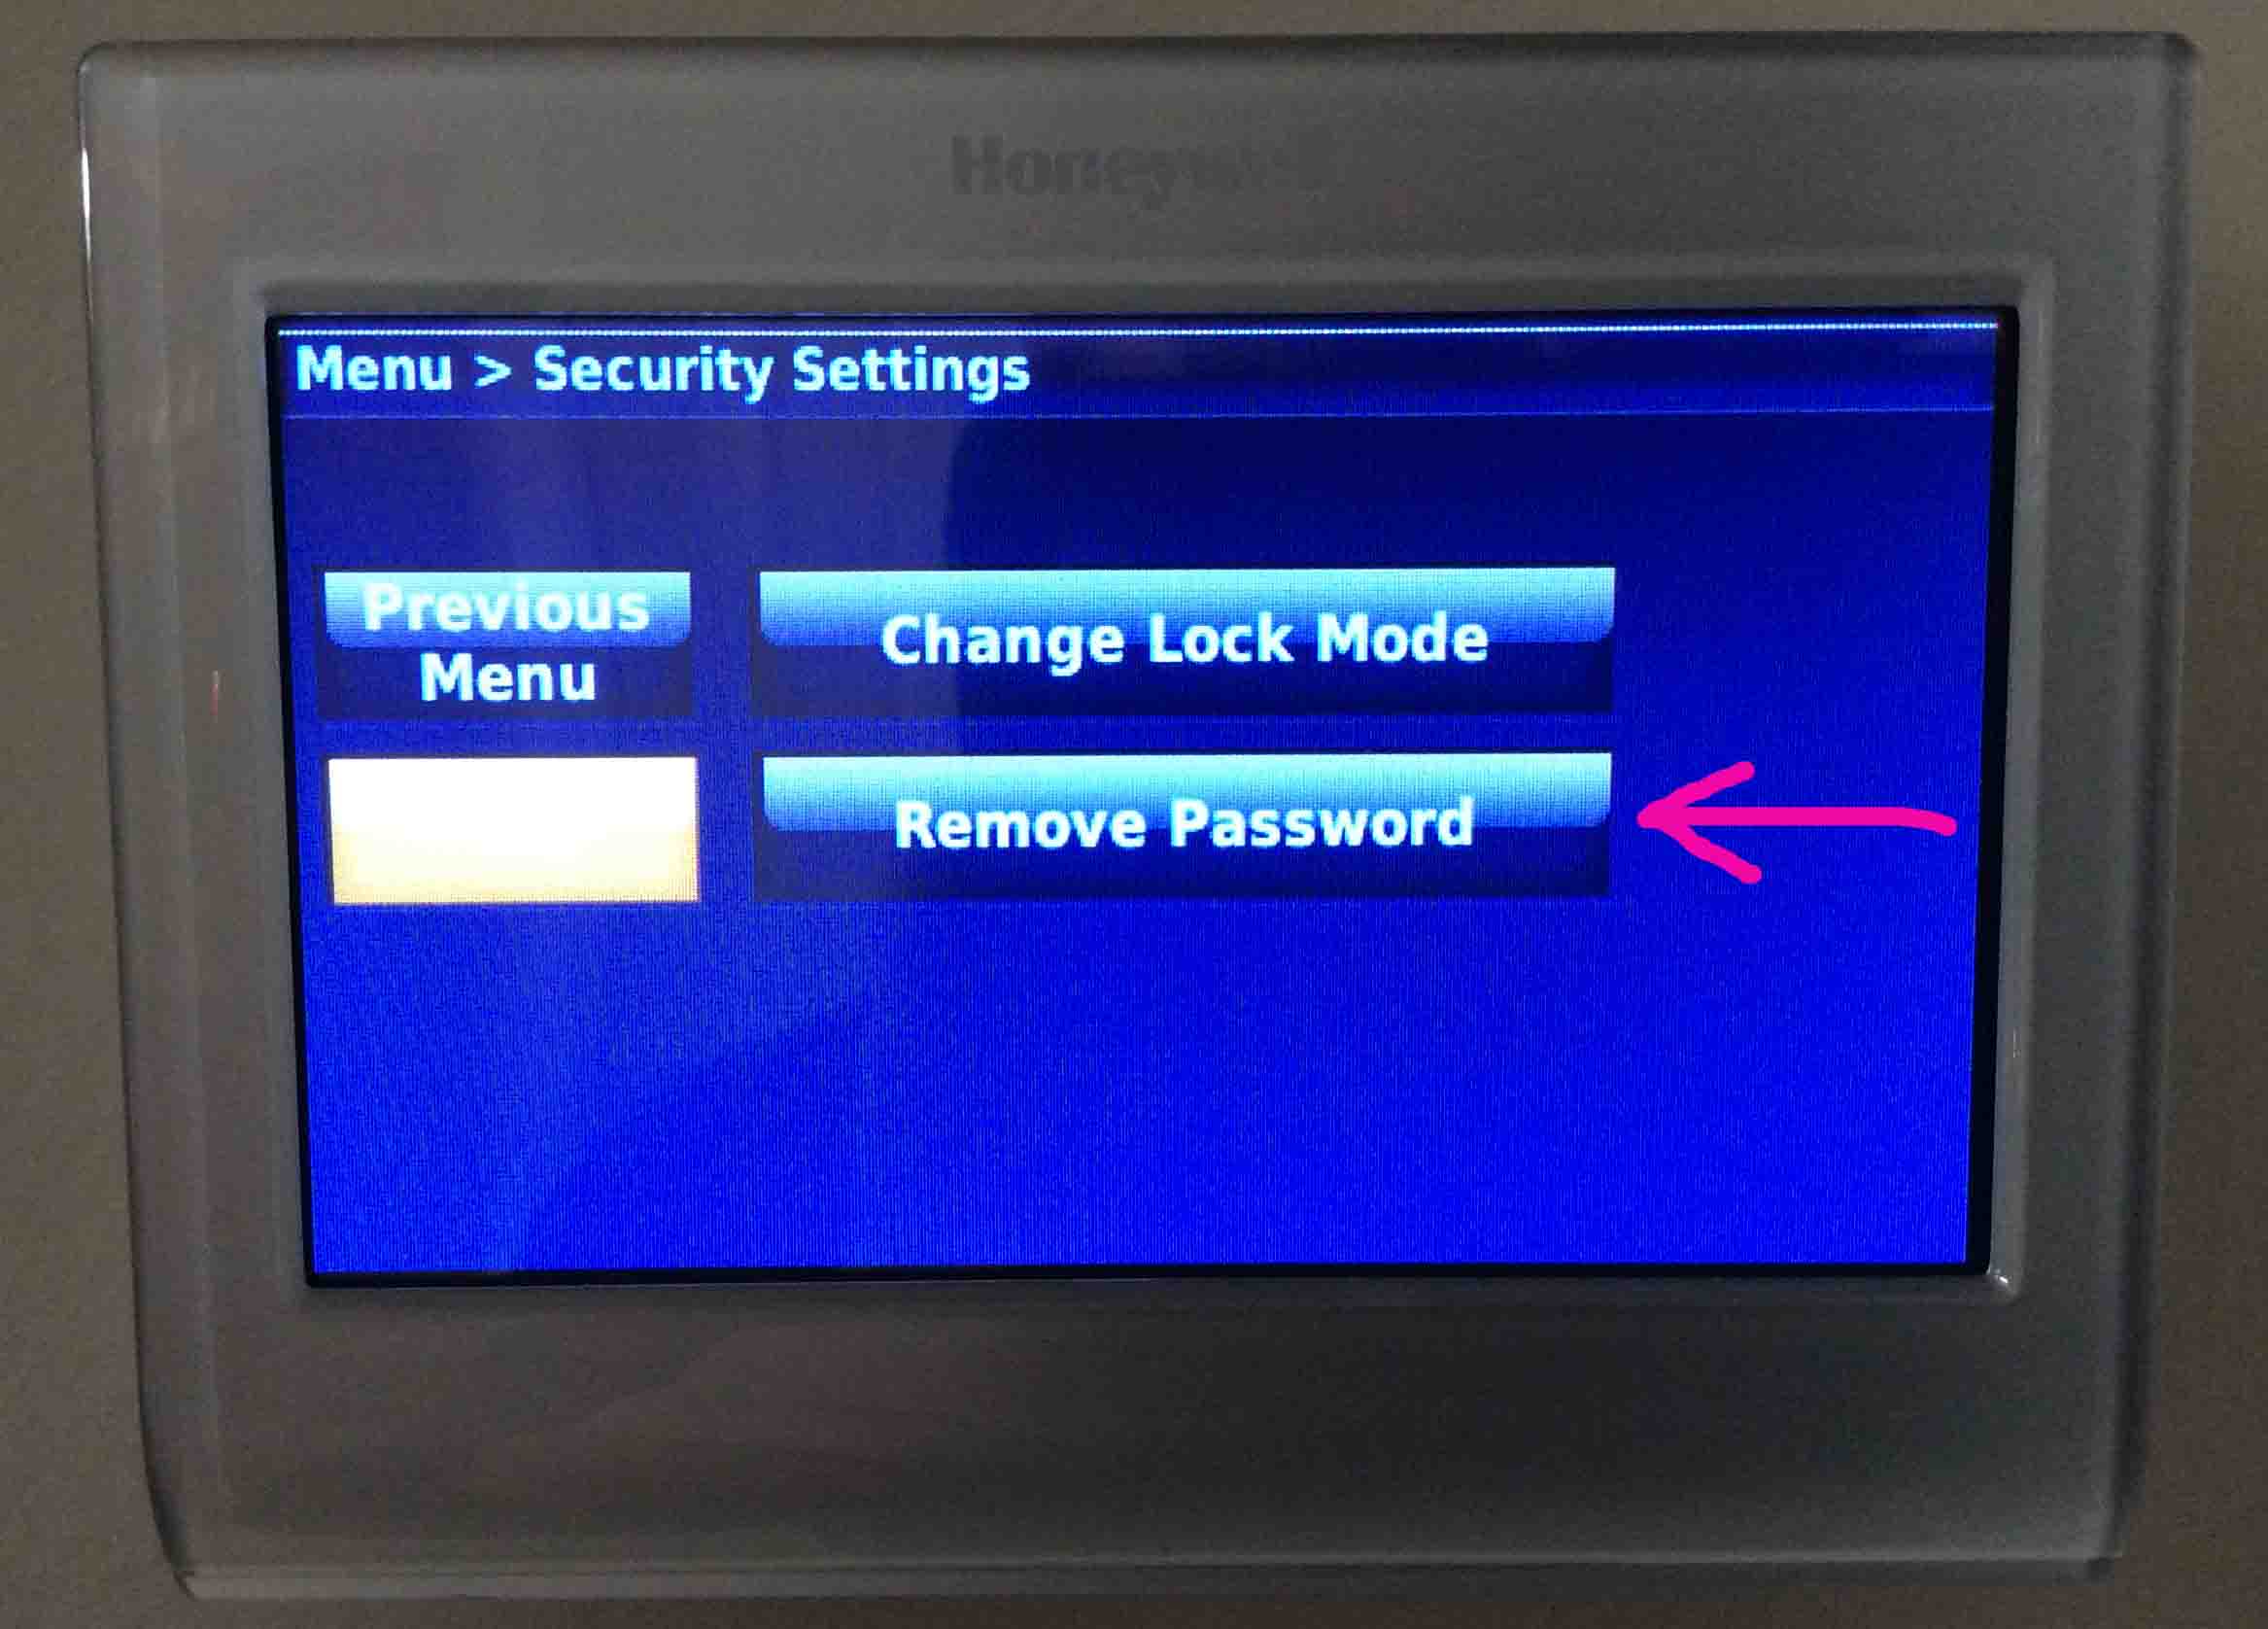
8. Press the Done Button
Tapping Done returns you to the Security Settings screen. That now shows that the Create Password button is now the Remove Password button.
9. Tap the Previous Menu Button
Touching the Previous Menu option then returns you to the main menu.
10. Tap the Home Button to Continue with Locking Honeywell Thermostat
Then find the Home link in the top left corner of the screen. This returns you to the thermostat’s home screen. Thus the thermostat is now in full lock mode.
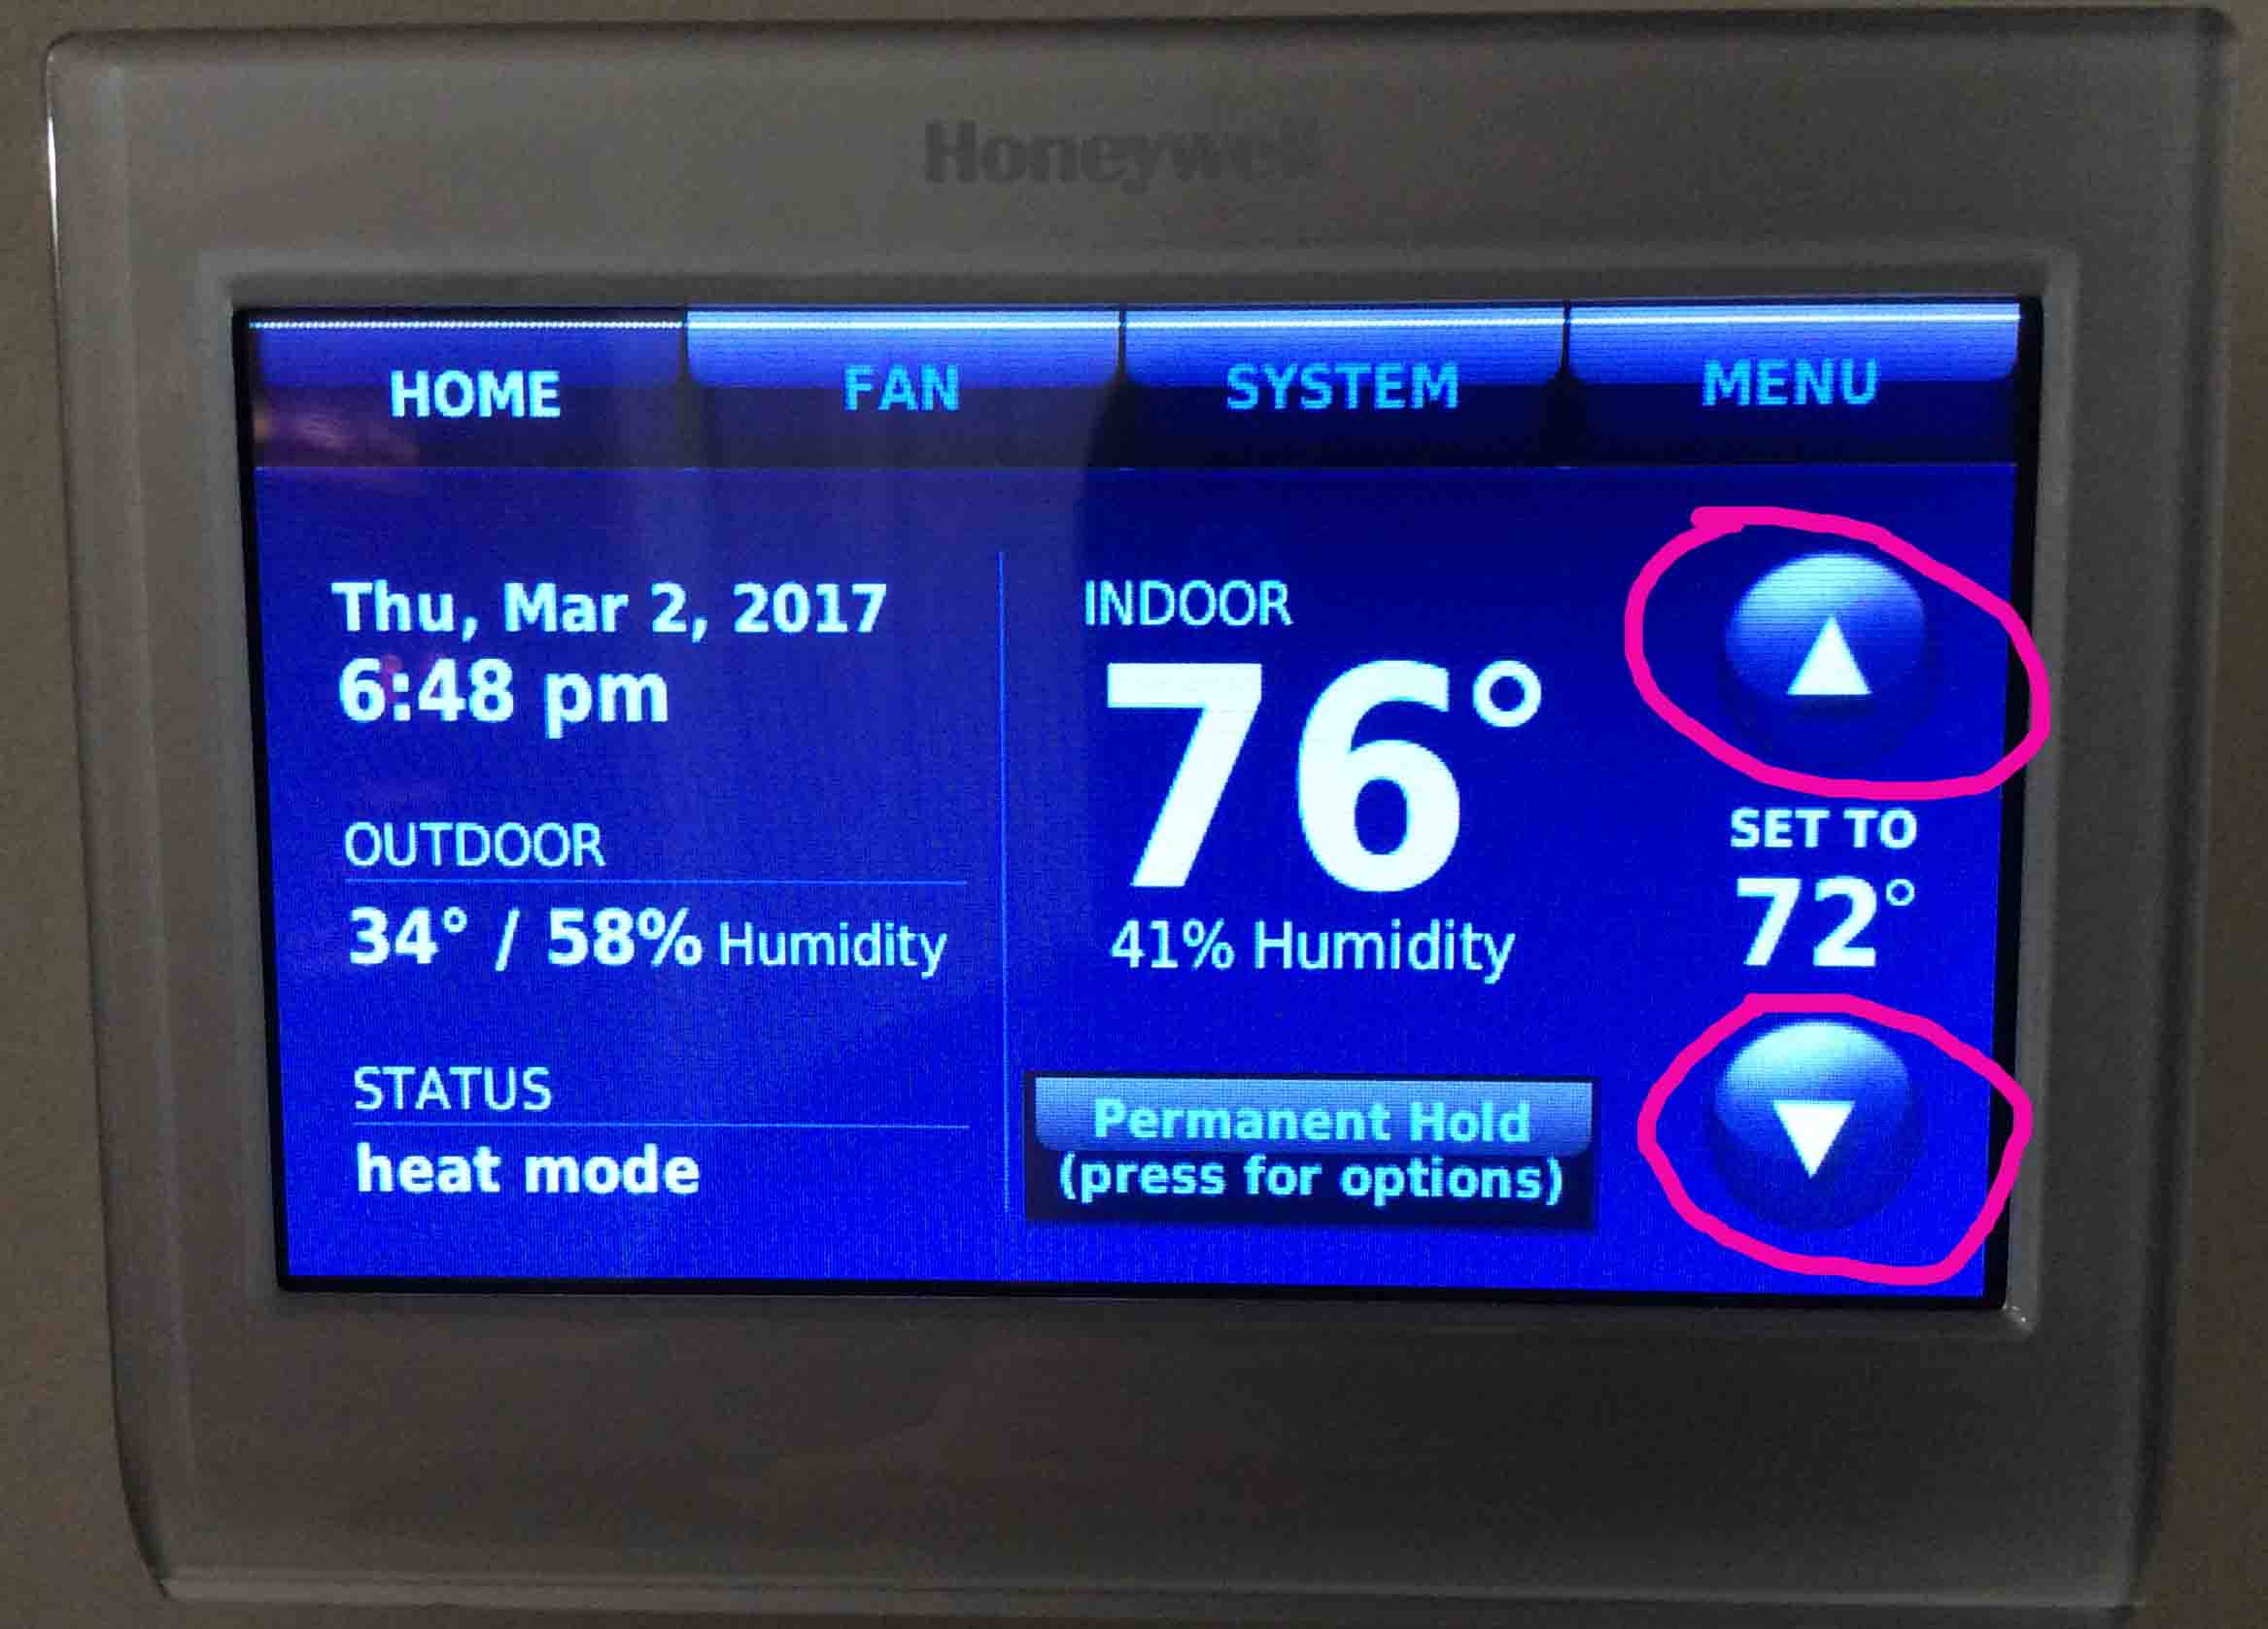
11. Check that the Honeywell Thermostat Screen is Now in Lock Mode
Try tapping the up and down arrows that adjust the current temperature setting. We circle these buttons in pink in the previous picture, at screen right.
When the thermostat is in lock mode, changing the temperature produces the Screen Locked screen. So if you get this page, your RTH9580WF is now in screen lock mode. Thus you cannot adjust it without the passcode. See below for how to unlock.
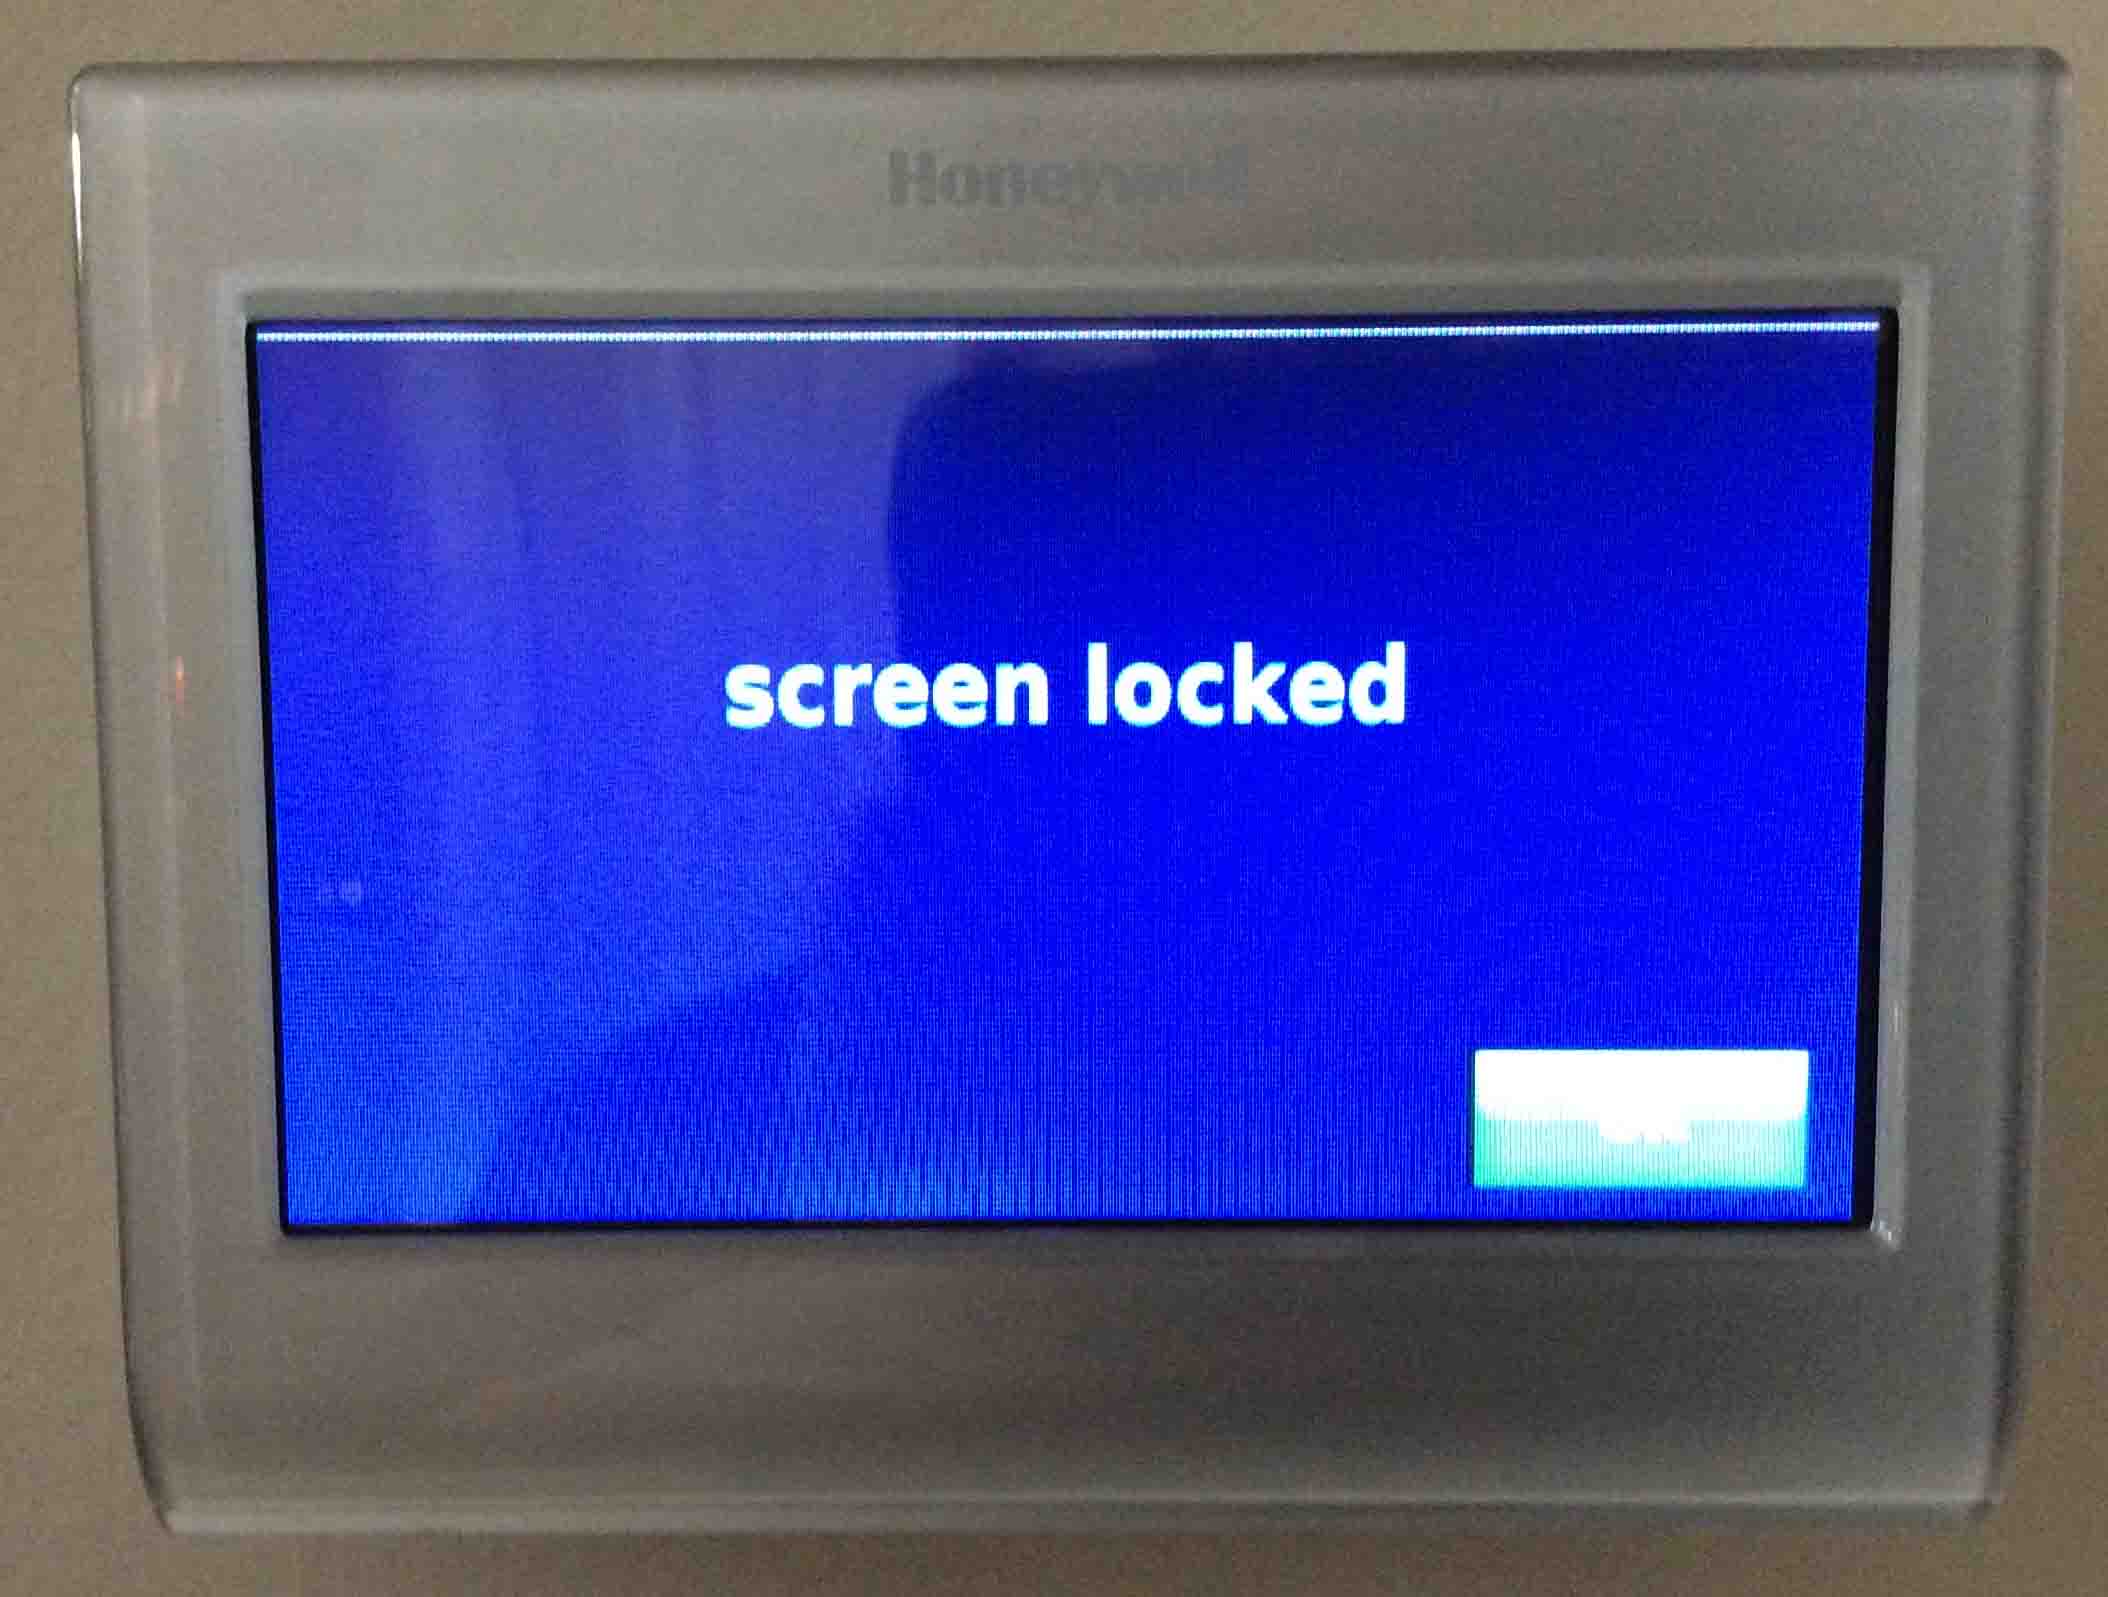
12. Press the OK Button to Go Back to the Home Screen
You may view current thermostat status and settings while locked. But you just can’t change anything.
13. Done with Locking Honeywell Thermostat Instructions !
What the Full Lock Mode Stops on Honeywell Series 9000 Thermostats
Fully locked Honeywell thermostats prevent any changes to settings at all, including the current temperature. Furthermore, all locked modes (full and partial) disallow the following main menu items. When locked, these do not appear when you view the thermostat’s main menu.
-
- Create Schedule
- Color Themes
- Vacation Mode
- Preferences
- Temporary Schedule Changes
- Wi-Fi Setup
- System Setup
Either lock mode permits access to the following status menu items.
-
- View Schedule
- Weather
- Equipment Status
- Clean Screen
- Security Settings
Finally, partially locked mode disallows the same main menu functions as fully locked mode. However unlike fully locked mode, partially locked mode allows you to change the thermostat’s current temperature setting.