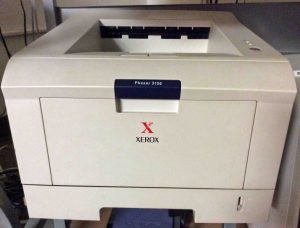
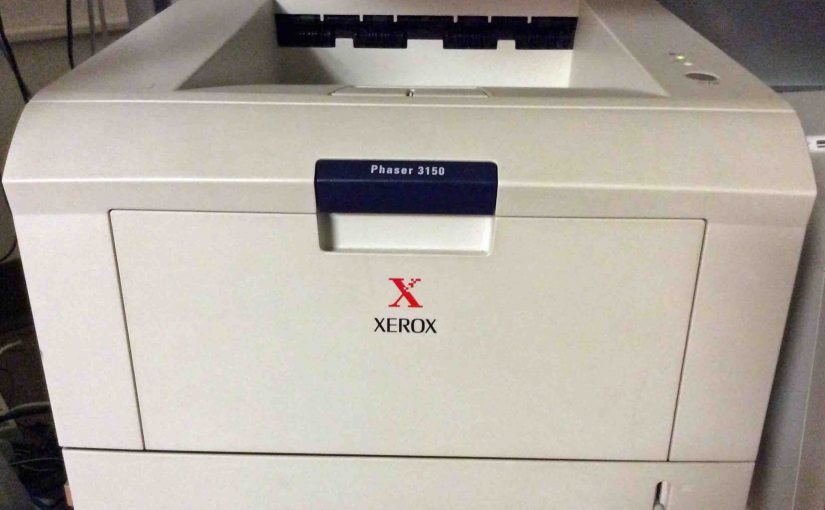
This personal laser printer, the Phaser 3150 resembles a thick and heavy plastic tank. Nice printer, though older. Yet we want to keep using it as long as possible. So we hope that these Xerox Phaser 3150 setup instructions long outlive our printer.
It’s substantial, prints crystal clear pages, as one would expect from a laser printer, and operates quietly. We’ve owned one of these now for over ten years. But each time we buy a new computer, we again face setting up this printer on the new hardware and operating systems.
This post thus, is a chronology of our experiences installing the drivers, making the correct USB connections to the computers, printing test pages, and so on, on the 3150. This piece is mostly for our own use, a permanent record of our experiences with the 3150. But we’d be happy if it helps others keep their Xerox laser printers up and running for the printer’s entire life cycle.

Xerox Phaser 3150 Setup on Windows 7
This procedure installs 3150 driver software from either CD ROM, or from an unzipped folder. You may download the zipped version from the Xerox support web site.
Attach All Cables
Connect the power and printer data cables.
Turn ON the Printer
Turn on the 3150.
Find Printer Driver and Remote Control Panel Software to Continue with Xerox Phaser 3150 Setup
Find the software and documentation CD, packed with the printer. You can also find the latest-published version of this software at the Xerox support website. See below for link.
Insert CD
If installing from disc, put it in your CD / DVD ROM drive.
Run SETUP.EXE
Run this program and answer YES if prompted for permission to execute this file.
Pick Desired Language
Chose the preferred language at the Xerox Welcome screen. Then, the installation choices screen comes up.
Select Software Components to Install
At this screen, you pick what you’d like to install. Choices include the printer driver, remote control panel, and status monitor. They also provide options for viewing the user documentation and browsing the CD.
Choose Printer Driver. This brings up the setup program, specific to this printer’s driver software.
Quit All Other Windows Programs to Continue with Xerox Phaser 3150 Setup
Exit all other Windows programs before proceeding.
Then, hit Next. The License Agreement window pops up.
Accept License Terms and Conditions
Read through the agreement. then if you wish to accept it, do so by pressing the Yes button.
Copying of program files to your computer then starts.
We next got an indication that Windows could not find the printer driver. However, this was apparently inaccurate, because subsequently, we did successfully run the printer tests and print demo pages.
Register the Phaser 3150 Online If you Wish
When that’s done, press the Finish button in the Setup wizard.
The system next promp to register your 3150. We’ve already registered ours several times over the years. So we press the No button at this window.
Install Remote Control Panel and Status Monitor
Following roughly the same procedures, install Remote Control Panel and Status Monitor programs if you want these components. You do not need these however, if all you’re doing is basic printing on the 3150. They’re nice to have though. Why? Because they allow you to configure monitor, and test your printer’s operation.
Read the Users Guides to Continue with Xerox Phaser 3150 Setup
At this point, view the user documentation. This includes a setup guide and users manual. These are in PDF format. So the CD also includes an option to install Adobe reader. We don’t do this however, since we already have the latest reader installed.
Cautions and Warnings
Drivers May Not Work on 64-bit Windows 7 Professional
The Xerox Phaser 3150 is an older laser printer (circa 2004), and the latest drivers we found for it on the website were issued in 2007. We had problems getting Windows 7 64-bit to recognize the 3150 as a printer.
Even though the drivers appeared to install correctly, the printer would show up in the “Unspecified Devices” list as “Xerox Phaser 3150” when turned on. Plus, it never appeared as a properly classified laser printer. That is, it never showed up as an available printer in the Print window of our Microsoft Office applications. So though we could print a test page from the Remote Control Panel software, printing documents from Word, Outlook, Excel, et al, was impossible.
But, we found drivers on Windows Update for the “Zerox 3140 and 3155” that work reasonably well with the 3150.
3140 and 3155 Phaser Drivers May Not Be 100% Compatible
If you must use the Phaser 3140 and 3155 drivers, know that some documents may print incorrectly. This problem shows up as…
- Graphics not properly displayed.
- Text too big or small.
- Gibberish characters, et al.
This is a risk when using nearly-but-not-completely-compatible printer drivers. But we want to avoid throwing out a perfectly functioning 3150. Just because we can’t find an EXACT driver for it is no excuse.
Xerox Phaser 3150 Setup from Windows Update
This routine installs just the driver software from Windows update. This ensures that you have the latest drivers that Microsoft provides.
1. Attach Cables
Connect the power and printer data cables.
2. Power ON the Printer
Turn on the Xerox Phaser.
3. Run the Devices and Printers Applet
Do that by opening the Windows Control Panel, and locating the Devices and Printers program. The window opens and displays a list of the devices currently attached to the PC and turned on.
4. Click the Add a Printer Link to Continue with Xerox Phaser 3150 Setup
The Add a Printer window then appears.
5. Click the Add a Local Printer Link
Find this in the Add a Printer window.
Then, the Add Printer window appears.
6. Choose a Printer Port
Since we’re using the USB option with our Phaser, we clicked the Use Existing Port radio button, and then chose “USB001 (Virtual printer port for USB)” in the drop-down list box. Then, we pressed the Next button and got the “Install Printer Driver” window.
7. Chose the Printer Manufacturer
Choose Xerox in the Manufacturer list box.
8. Look for the 3150 in the Printers List to Continue with Xerox Phaser 3150 Setup
It probably won’t be there. But if it is, pick it and skip to the next step. If it is not, look for the Xerox Phaser 3140 and 3155 driver.
9. Refresh the Printers List from Windows Update
Just below the Printers list box is the Windows Update button. Pressing this downloads a complete list of Xerox printer drivers that Microsoft has on file, that work with Wndows 7. When you press the button, the message displays that Windows is updating list of printers. This might take a few minutes.
Eventually though, the printer manufacturers and printers lists update on your screen.
10. Again Choose Xerox as the Printer Manufacturer
Look for the Xeros manufacturer and click it.
11. Click the Xerox 3140 and 3155 Printers Driver Entry
The driver then installs, and the system then asks if you want to share this printer.
Answer appropriately.
12. Print a Test Page
The resulting window displays a test page printing option. Pick this to test correct printing with this non-exact driver for the 3150.
In our case, the page printed well.
13. Press the Finish Button
The 3140 and 3155 driver has now been installed. So end this driver update session by clicking the Finish button.
14. Try Printing from your Favorite Programs
Check that the printer you just added appears in the available printers list in these apps. Then try printing to it. If all prints well here, then you’re done.
15. Done with Xerox Phaser 3150 Setup
Related Posts to Xerox Phaser 3150 Laser Printer Setup Instructions
- Belkin F9K1106v1 WiFi Booster Setup Instructions
- Honeywell Thermostat WiFi Setup RTH8580WF
- Echo Dot 3 Setup Instructions for Amazon Alexa 3rd Generation Dot
- Belkin F9K1122v1 N600 Plug In WiFi Range Extender Setup Instructions
- Ultimate Ears Wonderboom Setup Instructions
Other Posts About Printers
- How to Reset HP Deskjet 3632 Printer
- HP MFP M477 Color Laserjet Pro Printer Pictures
- How to Install HP DeskJet 3630 Series Wireless Printer
- HP Deskjet 3630 Ink Cartridge Details
- How to Replace Empty Ink Cartridges in HP 3630 Series DeskJet Printer
References for Xerox Phaser 3150 Setup
- Official Xerox Phaser 3150 Product Page Features documentation, drivers, and software for this printer.
Revision History for Xerox Phaser 3150 Setup
- 2019-03-19: Added subheadings, key phrase targeting, and tags.
- 2015-10-16: Added appropriate tags.
- 2015-01-10: Added difficulty in getting drivers for the 3150 to work on 64-bit Windows 7.
- 2014-10-07: Originally published.
