This post details how to set up a Google Mini speaker, to account for new WiFi routers or other WiFi changes. This also works for new speakers that you wish to add to an existing Google account.
With your iOS or Android based mobile device and the Google Home app, how to set up your speaker is simple. Do this as follows.
We assume here that you have installed the Google Home App and linked it to your Google account, as ours has in the following demo. All screen faces came from the Google Home app on iOS. But similar screens appear on the Google Home app for Android. Get that from the Google Play store.
Now, to the routine.
How to Set Up Google Mini Speaker, Step by Step
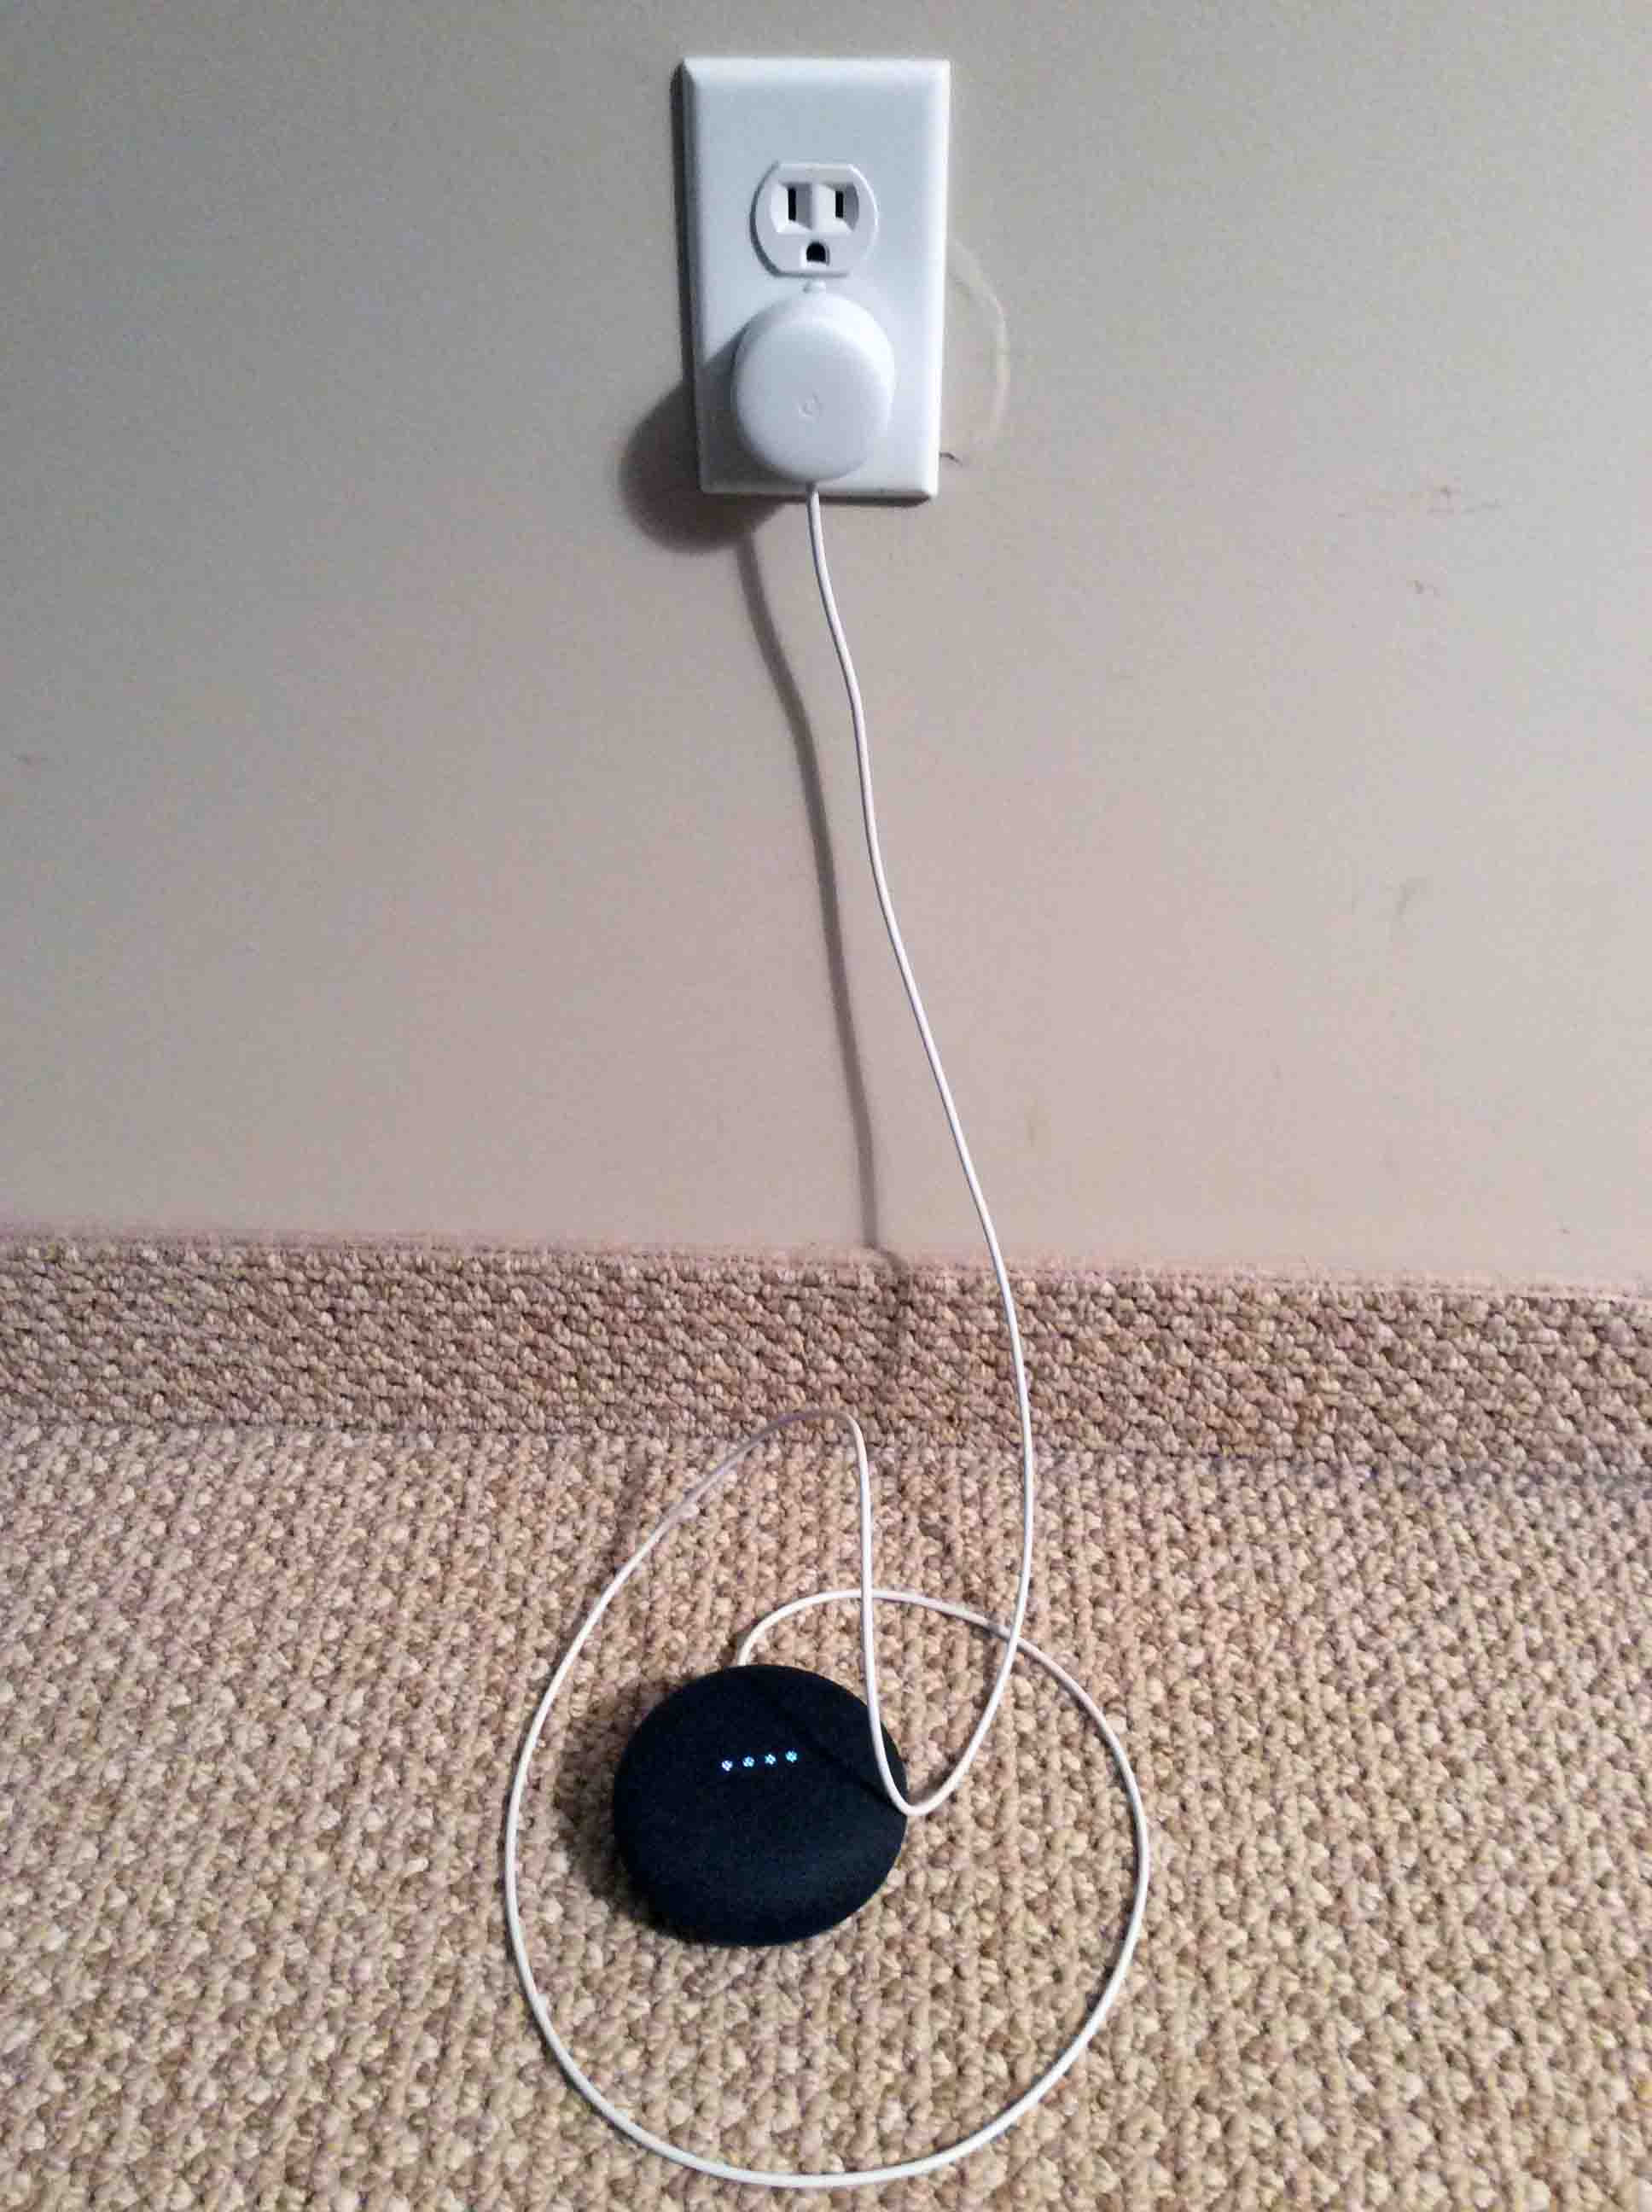
1. Connect the Speaker to AC Power
If not already powered up, plug your Mini into a power source. You change these settings without AC power, as the system keeps many of them in the speaker itself, and it needs power to make these settings available.
The next picture shows the Google Mini speaker plugged into AC power via its adapter.
Wait until your speaker finishes booting before proceeding to the next step.
2. Turn On Bluetooth
The app and your speaker need Bluetooth on your mobile device be enabled. With Bluetooth, the settings that you choose in the app prior to when the speaker connects to WiFi are sent to the speaker. It is through Bluetooth that the speaker learns which WiFi network it should connect with after setup.
Also, stay within fifteen to twenty feet of the speaker for fastest set up speed and fewest errors.
3. Connect your Mobile Device to the Same WiFi Network that you’re Connecting your Google Mini Speaker To
Follow the instructions for your mobile device to connect. This is necessary for the Google Home app to connect your Mini to the WiFi network you enter. For example, if you’re planning to connect your speaker to the AABBCC WiFi network, then you should connect your mobile device to that same WiFi network (AABBCC).
4. Run the Google Home App on your Mobile Device
This app gives you access to your current Google devices and settings. and allows you to set up a new Home Mini speaker too.
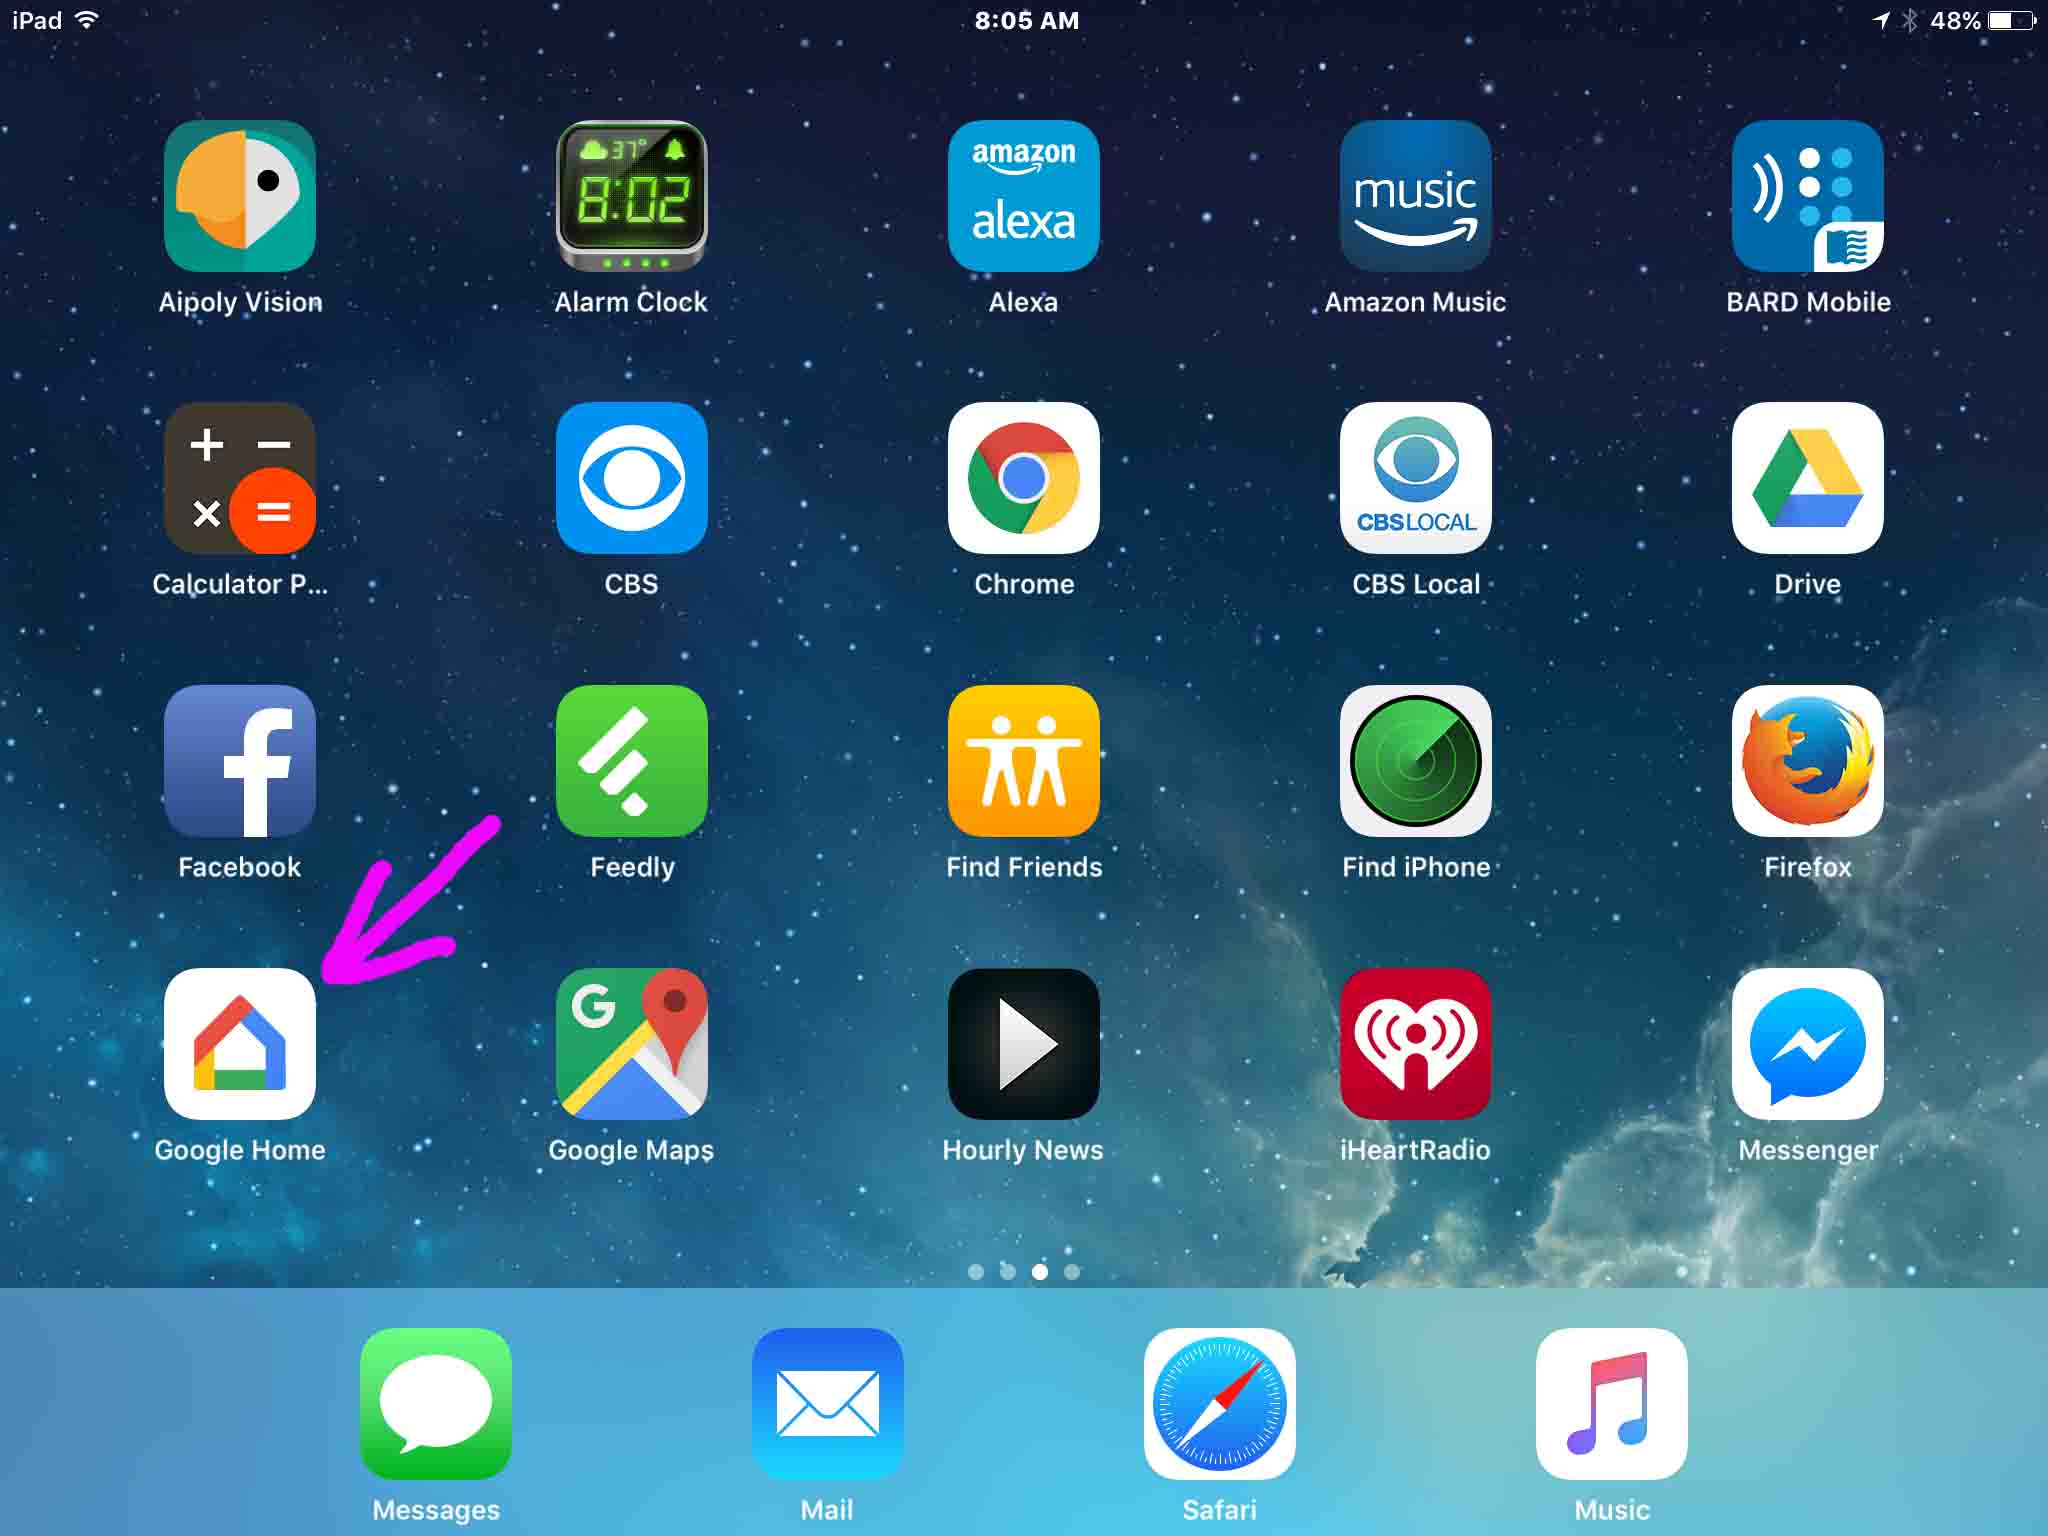
Find the app somewhere on the Home screen pages, depending on where you put it. On an iPad Air, the app is on home page three, as shown next, pointed at by the purple arrow.
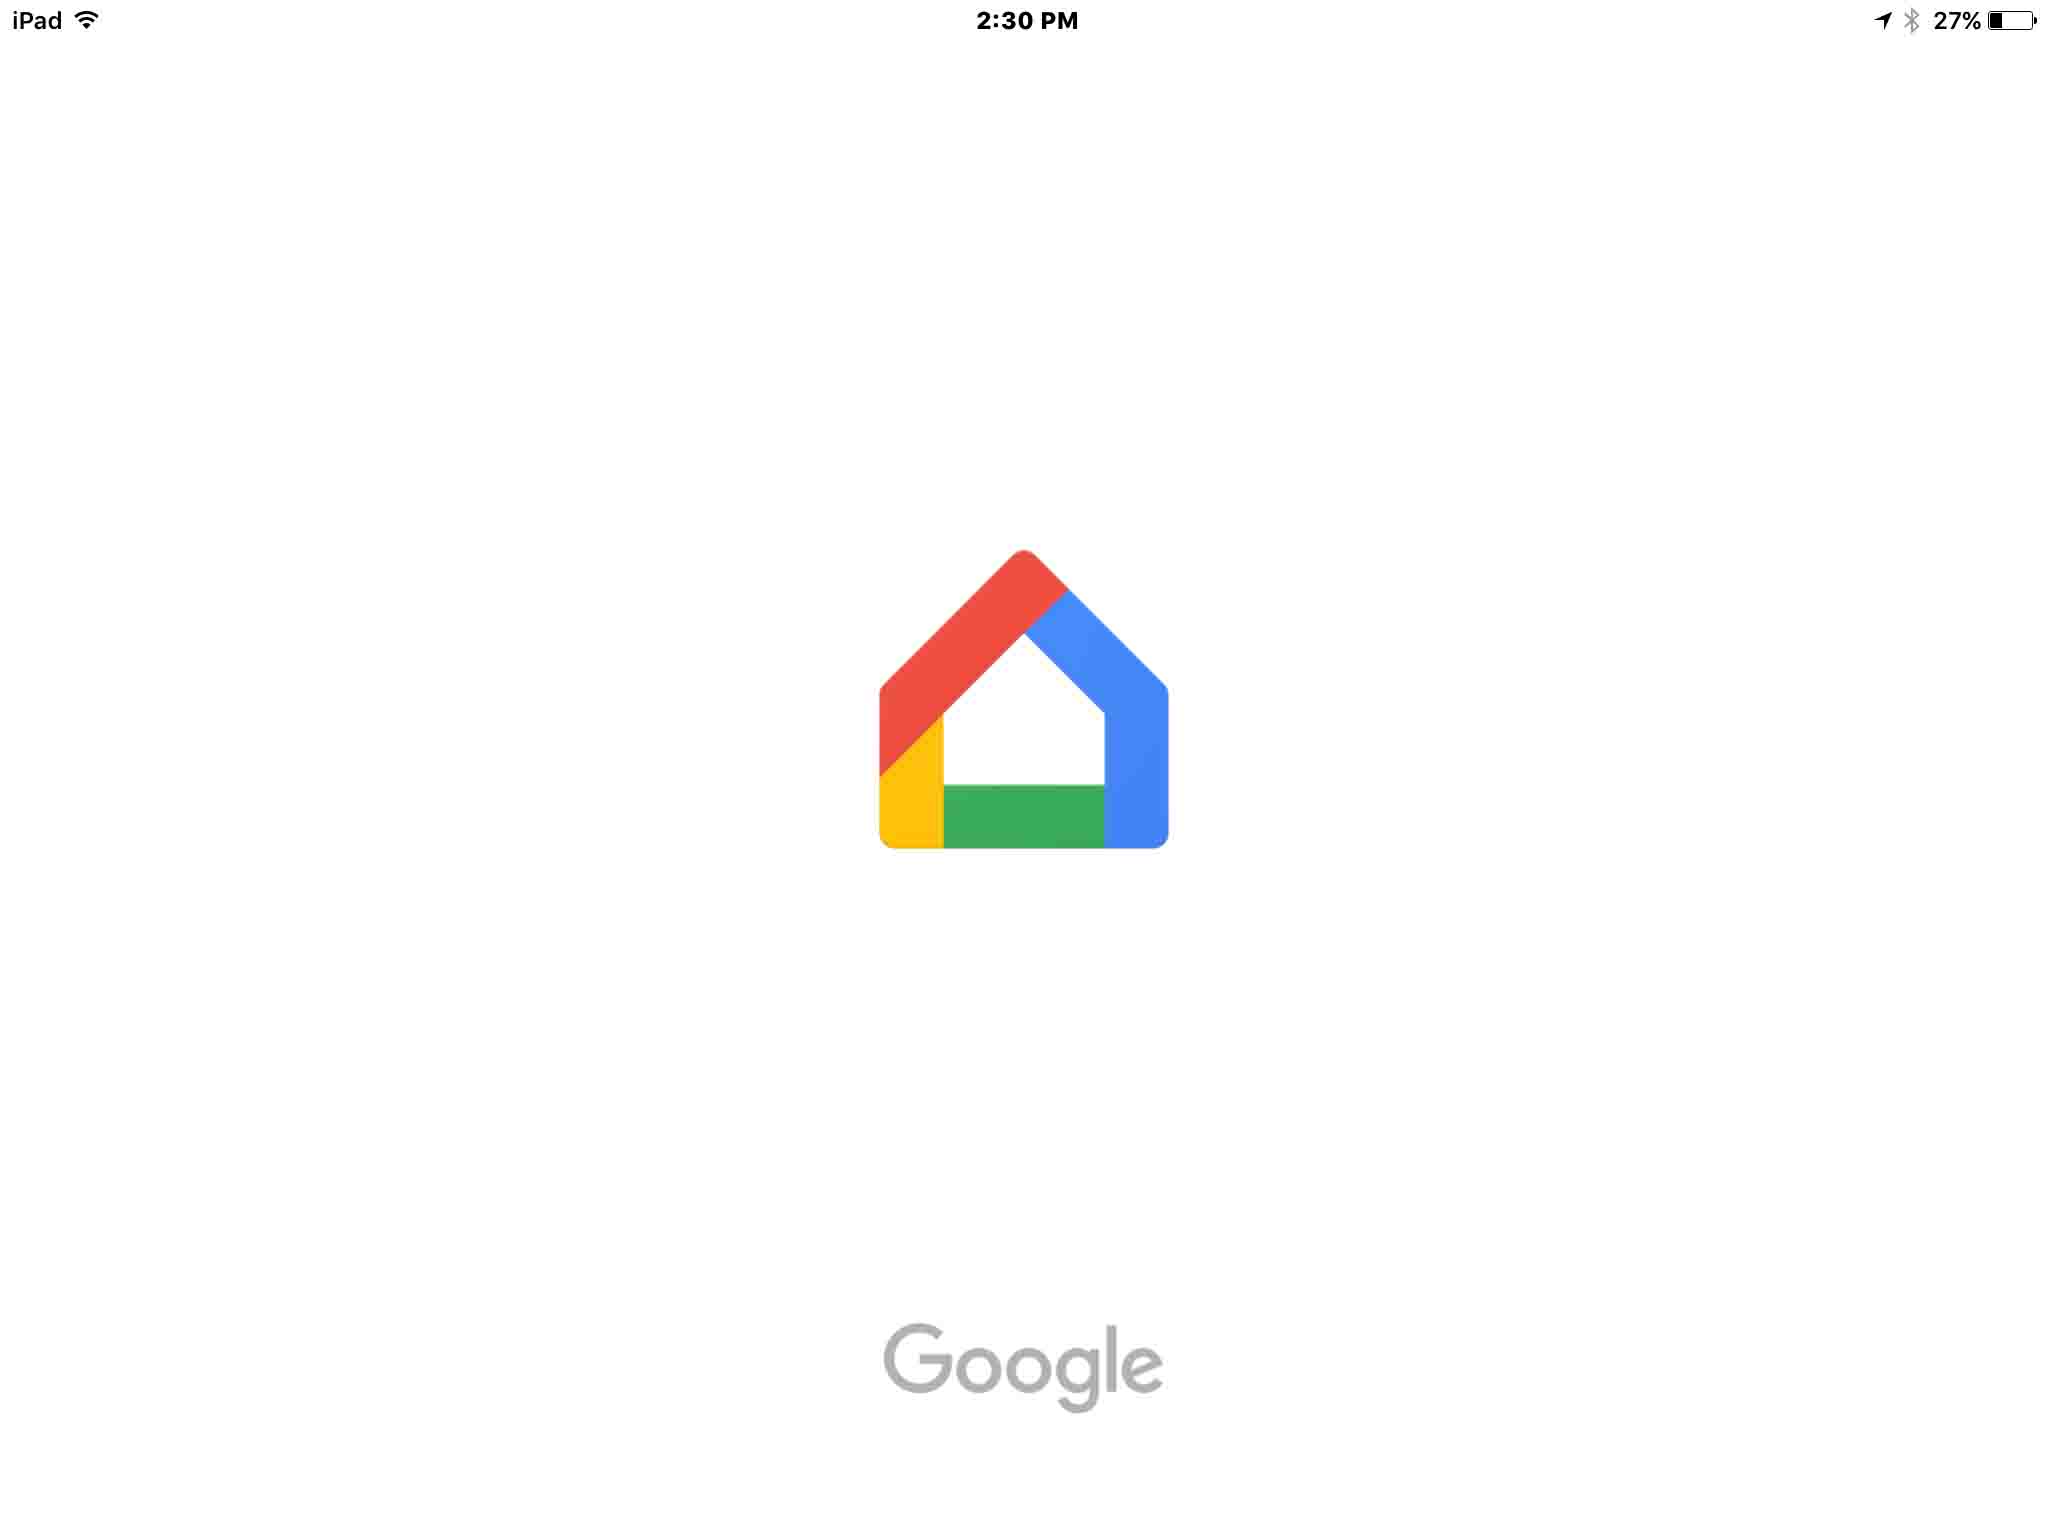
We got the following screen at Google Home app startup.
After a short period, the app takes you to its Home screen. Ours displayed as follows.
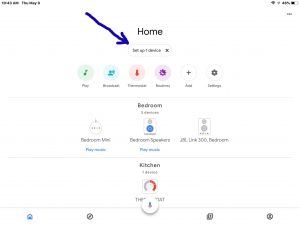
5. Tap the Set Up 1 Device Button
Find this button just beneath the screen title, near the top of the page. It only appears when the app detects a new device requesting setup. If you don’t see this button, make sure your new Google Mini speaker is in setup mode and that you properly turned on Bluetooth on your mobile device.
Tapping the Set Up 1 Device button brings up the Choose a Home page, as shown next.
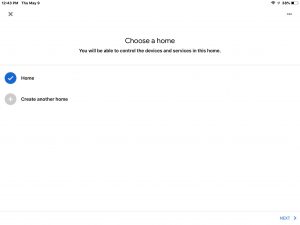
6. Tap the Home Location for the New Speaker
If you only have one home location for your speakers, then that location shows as checked. You also can set up another home from this page. E.g. You have two or three places where you have Google Home devices. But we’re just using the default Home location here. In this demo, since we only have one location, the app sets it for the speaker by default. Note the blue check mark next to it in the last screenshot above.
At any rate, touching a location for the speaker brings up the Looking for Devices screen, as shown next. This screen shows a moving pattern of bouncing shapes while the app scans for devices ready for setup.

After a short time, the app lists the devices it found that are waiting to be set up. Shown next.
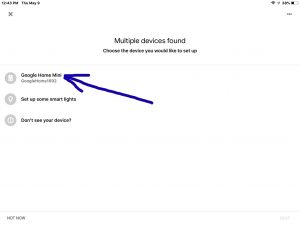
The app found our speaker, labeled here as Google Mini Speaker, GoogleHome1692.
7. Tap the Listed Google Mini Speaker that you Wish to Set Up
Touch the speaker in the list on this page set up.
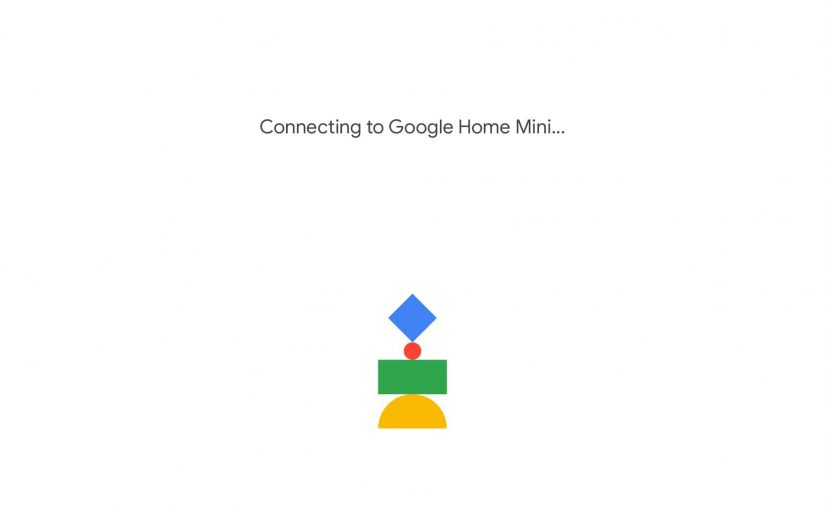
The app then tries to connect to that speaker. While it does so, it displays the Connecting to Google Mini Speaker page, as shown next.
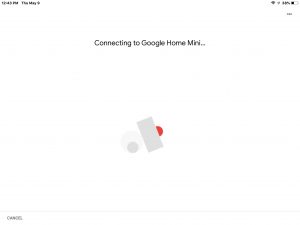
When the app connects to your speaker, it then plays a short chord sound on that Mini. Then it displays the following screen.
The lights on the Google Mini speaker then turn blue, as shown next.
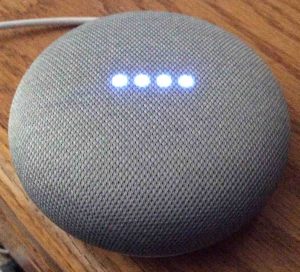
Thus, you get an audio and visual signal that the speaker you picked above is indeed the one that you will set up in the following steps.
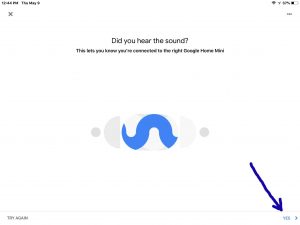
8. Tap the Yes Button to Continue with How to Set Up the Google Mini Speaker
Find the Yes link in the lower right corner of the Did You Hear the Sound page.
If you hear the sound and see the blue lights on the speaker you’re setting up, then tap the Yes button. If not, then you may have to reset the speaker and start over from the top. This time, make sure your speaker is close to your mobile device, well within Bluetooth and WiFi range of your mobile device.
At any rate, once you touch Yes, the app brings up the Help Improve Google Mini Speaker page, as shown next.
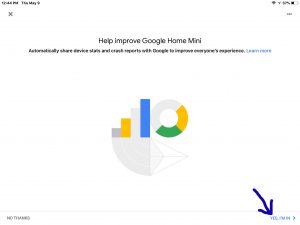
9. Tap the Yes, I’m In Link
Find the Yes, I’m In link in the lower right corner of the Help Improve Google Mini Speaker page, as pointed at by the blue arrow in the last screenshot.
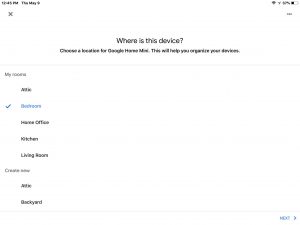
Touching the Yes, I’m In link brings up the Where is this Device screen, as shown next. Here, you choose from a list of room names where you plan on putting your new Mini. The screen lists rooms you’ve already put speakers in, and it lets you pick from other rooms. You can also define custom named rooms.
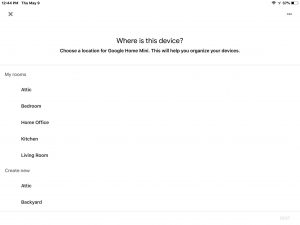
10. Touch the Room You Want
Tap the room name you want to assign the speaker. Here, we touch Bedroom.
After you touch the room name, a blue check mark appears beside it, as shown next.
11. Touch the Blue Next> Link
Find this link near the lower right corner of the Where is the Device page, shown in the last picture.
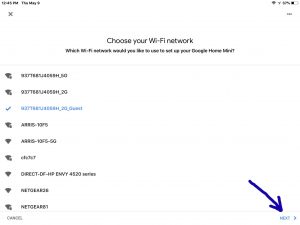
The Choose Your WiFi Network screen then appears, like the shot shown next.
12. Tap the WiFi Network to Set Up your Google Mini Speaker On
This is how this screen appears after we tapped the network we want for our speaker. That is the 937T681J4059H_2G_Guest network.
13. Tap the Next> Link
Find the Next> link near the lower right corner of the Choose Your Wi-Fi Network page, shown in the last picture.
Tapping the Next> link may or may not bring up the password prompt screen. It will not if you have other Google Home speakers already set up on this network. It will ask you for a password, if you have not. If it asks, enter the password and hit Next or Connect.
The new speaker then tries to join to the WiFi network you set above. The following screen displays in the app as it does so.
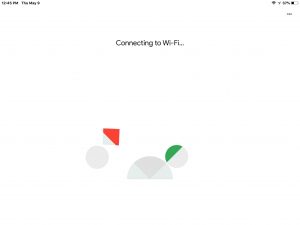
14. Wait for the Speaker to Join the WiFi
It may take tens of seconds for your Mini to connect. While it does, the colored shapes move around on the page.
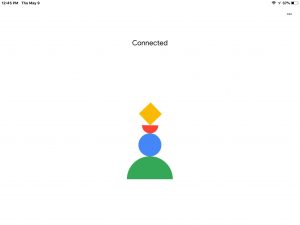
But once it does join, you get the Connected screen, as shown next.
Then, after a short pause, the Set Up Google Assistant page comes up, as shown next.
Now if you want to further explore getting the assistant to understand you better, then press the Learn More link and read all about it. But we won’t do that here. Keeping things simple, just move on to the next step.
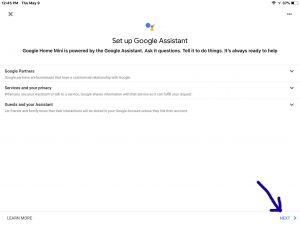
15. Touch the Blue Next> Link to Continue with How to Set Up Google Mini Speaker
Find the Next> link near the lower right corner of the Set Up Google Assistant page, shown in the last picture.
You then see the Activate Voice Match on this Device page, as shown next.
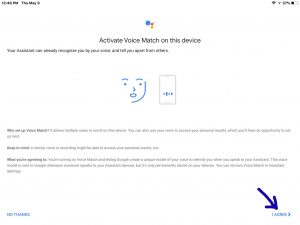
16. Touch the I Agree Link
Find the I Agree> link near the lower right corner of the Activate Voice Match on this Device page, shown in the last picture.
Since we already set up voice recognition on our other speakers, the system tells us in the next screenshot that it can recognize us on this speaker as well.
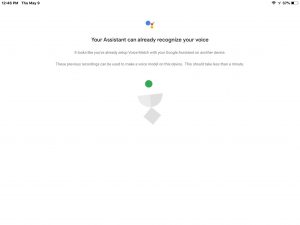
17. Wait While the System Builds a Voice Model for your Speaker
Once it finishes building the voice model, you get the Get Personal Results with your Voice page, shown next.
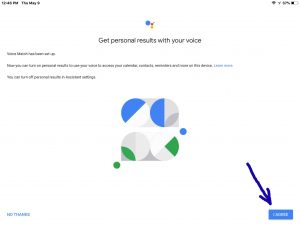
18. Tap the I Agree Link to Continue with How to Set Up Google Mini Speaker
Find the I Agree> link near the lower right corner of the Get Personal Results with your Voice page, shown in the last picture.
You then get the Enter Your Address prompt screen, as shown next.
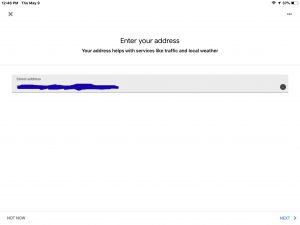
Note that we didn’t have to enter an address, since ours was already on file from other speakers we set up in this Google account.
You may choose to either put in the street address where your new speaker will be or not. If you do not, you won’t get the most accurate traffic, weather, and trip data for your street address on that speaker.
19. Tap Either the Next or the No Thanks Link
Read over the above screen and tap the I Agree link if you do. If you do not, tap the No Thanks link. If you do not though, you won’t get full assistant function on your speaker.
You then get the Add Media Services page, as shown next. From here you can set up YouTube Music, Google Play Music, Spotify, Pandora, and Deezer services. In our demo here, we already have Spotify and Pandora set up.
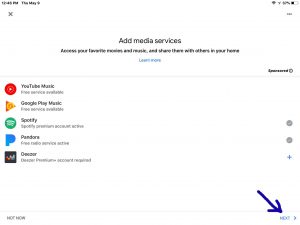
We will not run through setting up any media services here, as this post is already getting quite long. But in short, to add one of the listed services, just tap it on this page, and then follow the instructions that come up for that service. They all ask you to set up and enter an account Id and password.
20. Touch the Next> Link
Find the Next> link near the lower right corner of the Add Media Services page, shown in the last screenshot.
You then get the Default Music Service screen, where you can choose which of the available music services on your Google account you wish as the default. The default service is the one that plays when you ask your speaker to play a song or station, but do not say which service you want that content to come from.
Tap the music service you want, and a check mark appears next to it, as shown next.
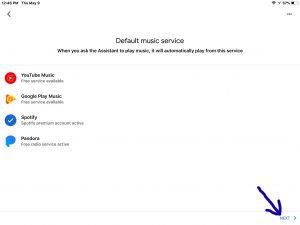
21. Touch the Next> Link to Move Forward with How to Set Up Google Mini Speaker
Find the Next> link near the lower right corner of the Default Music Service page, shown in the last screenshot.
You get next the Almost Done screen. Here, you get a summary of the info you entered during set up. You also may add a payment method, change caller Id, link more music services, and so on.
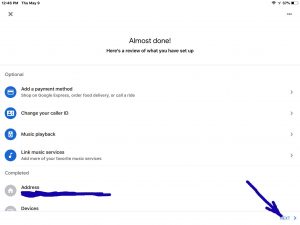
22. Touch the Next> Link
Find the Next> link near the lower right corner of the Almost Done page, shown in the last screenshot, pointed at by the dark blue arrow.
The app then tells you that your speaker is ready. It names it at the top of the page. We called our new Google Mini Speaker Bedroom Speaker. So that’s the name that appears on this screen, as shown next.
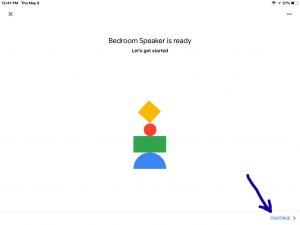
23. Tap the Continue> Link
Find Continue> in the lower right corner of the Speaker Ready page, pointed at by the blue arrow in the last picture.
The app then puts up the Just Start with ‘Hey Google’ page, as pictured next.
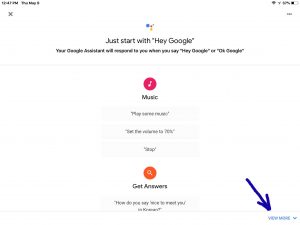
This gives a brief overview of what you can do with your new speaker.
24. Touch the View More Link to Continue with How to Set Up Google Mini Speaker
Find the View More button in the lower right corner of the Just Start with ‘Hey Google’ page, as pointed at by the blue arrow in the last screenshot.
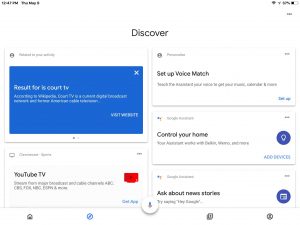
This brings up the Get Stuff Done screen, as shown next.

25. Tap the Finish Setup Link
Find the Finish Setup button in the lower right corner of the Get Stuff Done page, as pointed at by the blue arrow in the last screenshot.
26 Done with How to Set Up the Google Mini Speaker Speaker
Setting up Google Mini Speaker is now complete. Note that in the next picture, the top lights on the Mini are now OFF. When the speaker is running, no lights means that all is well with the setup, and that it now waits for voice requests.
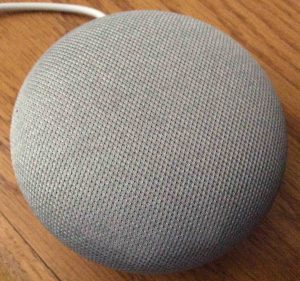
Test it out by asking the time, weather, or for some news.
Other Posts About the Google Mini Speaker Smart Speaker
Related Posts to How to Set Up Google Mini Speaker
References for How to Set Up Google Mini Speaker
Revision History
-
- 2020-06-20: First posted.