Product Reviews, Experiences, and Technical Insights from Thomas J. Hesley
Honeywell Thermostat Picture Gallery
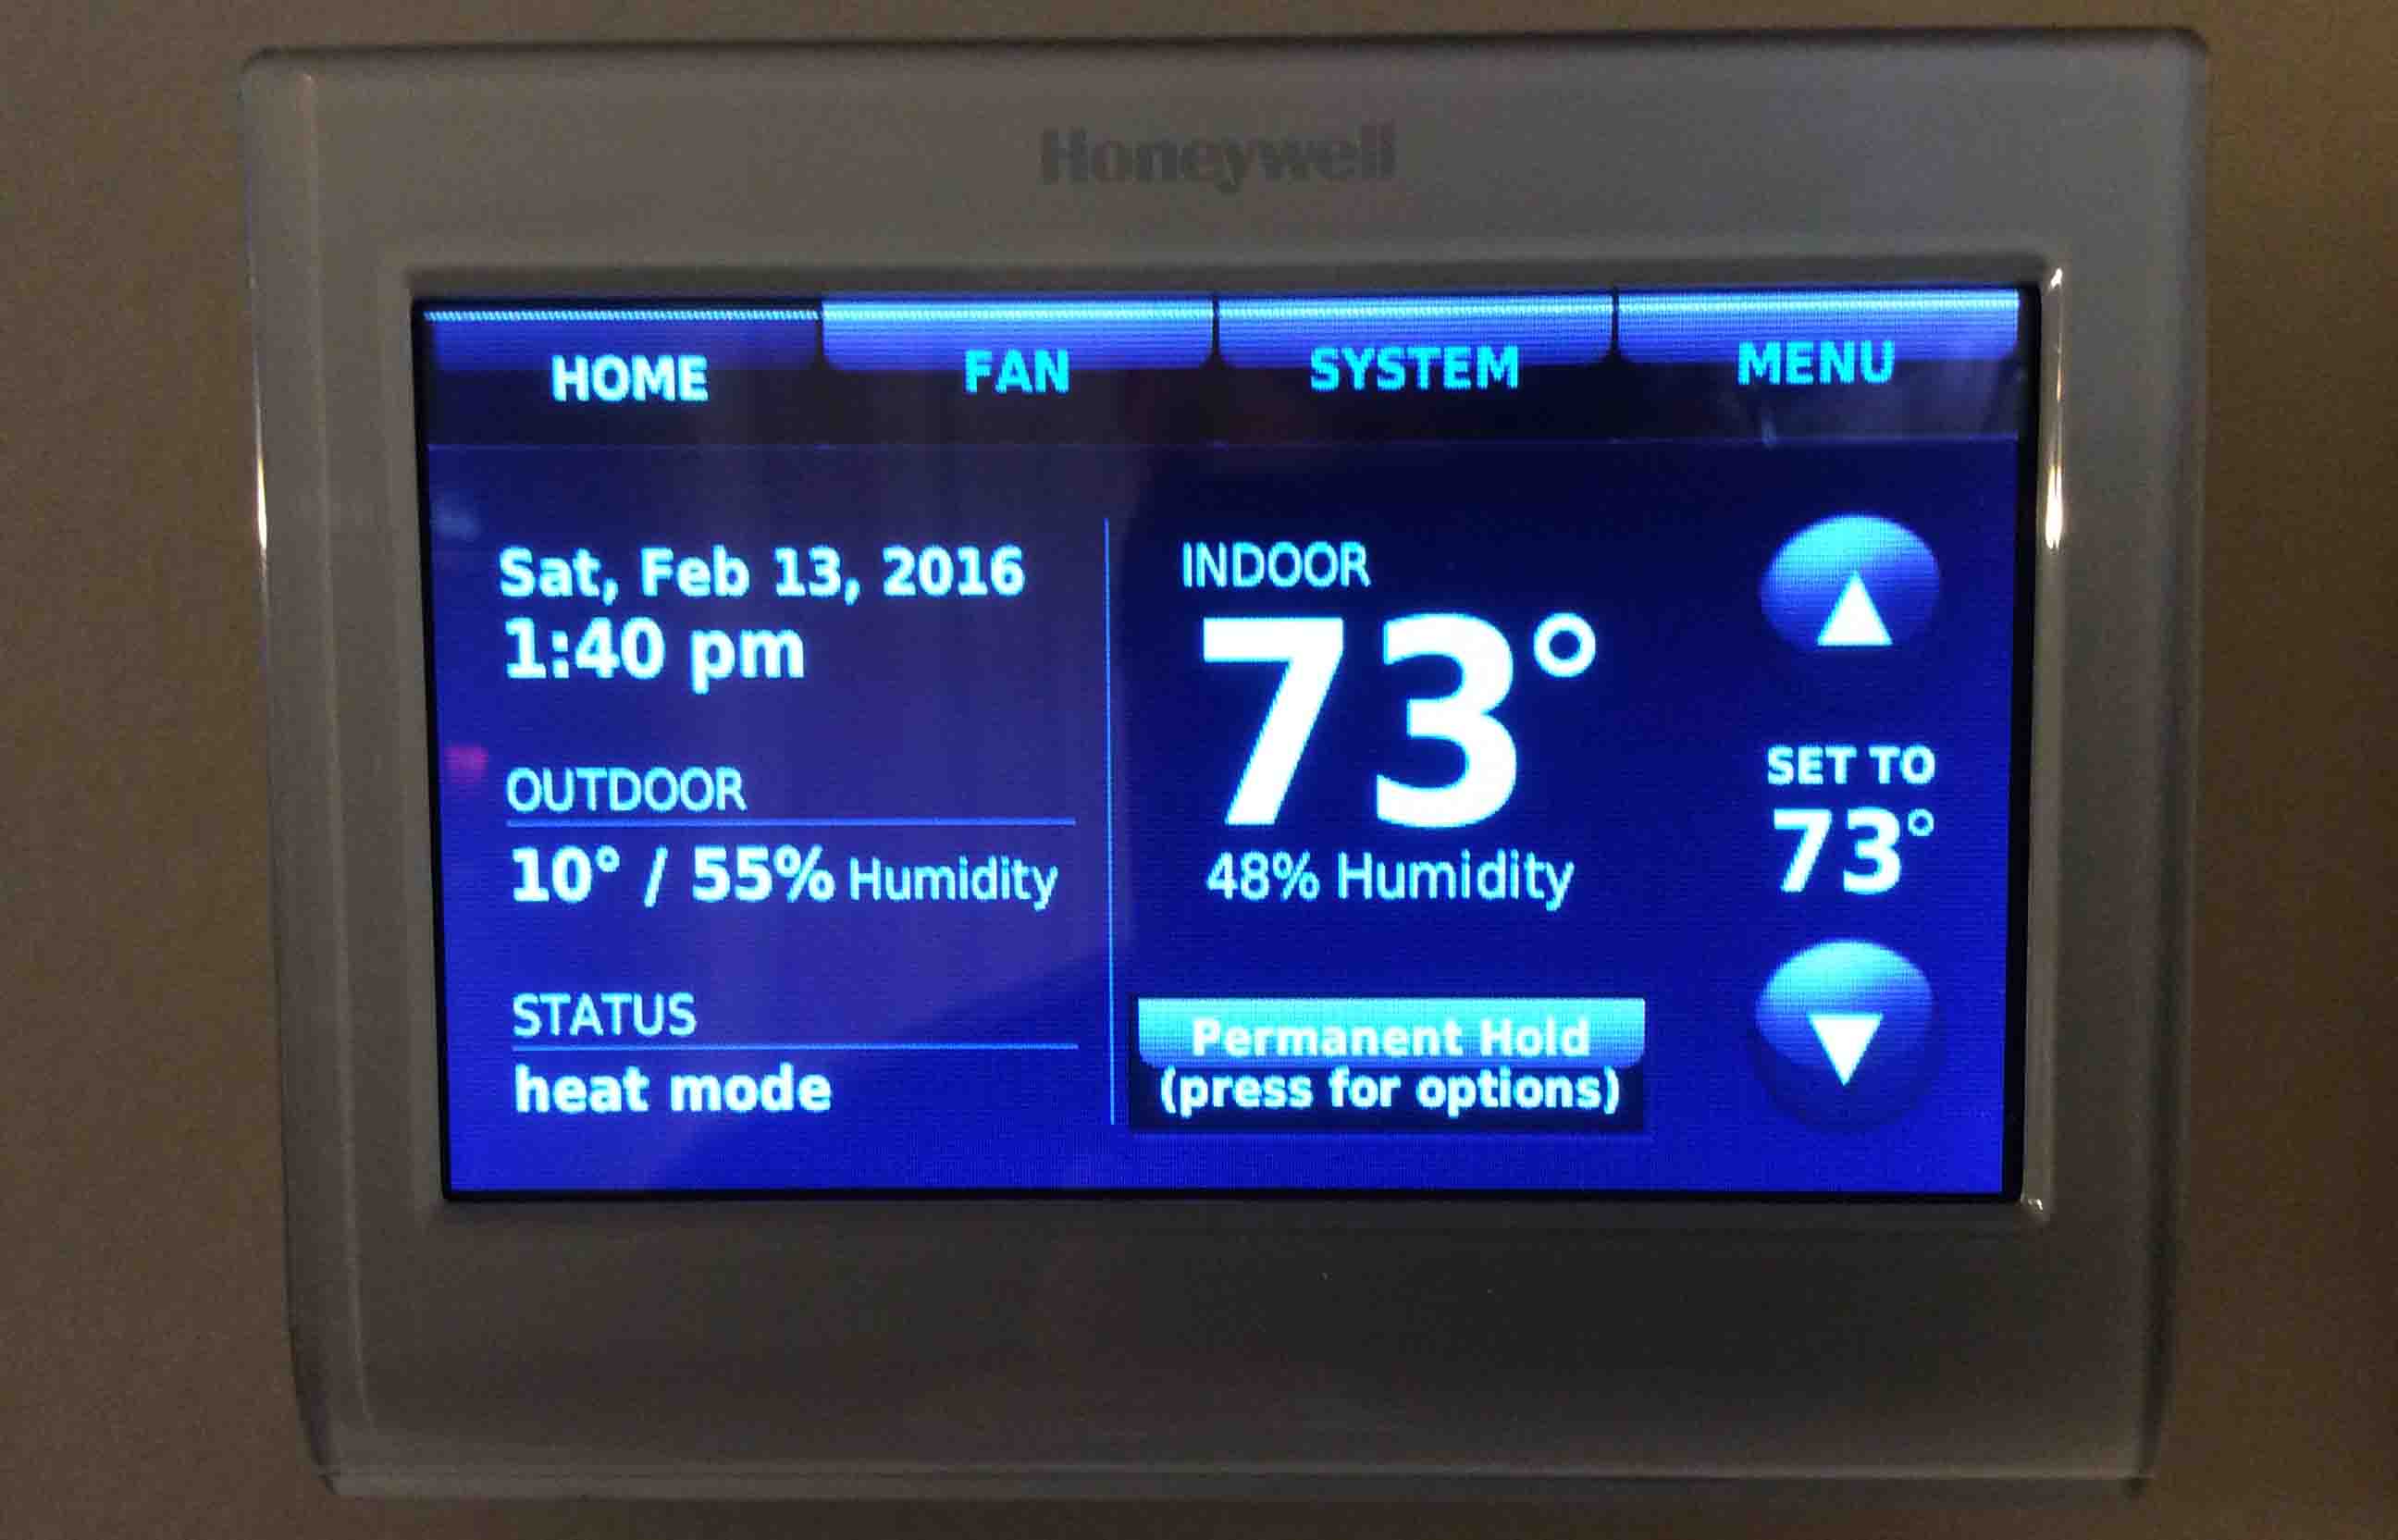
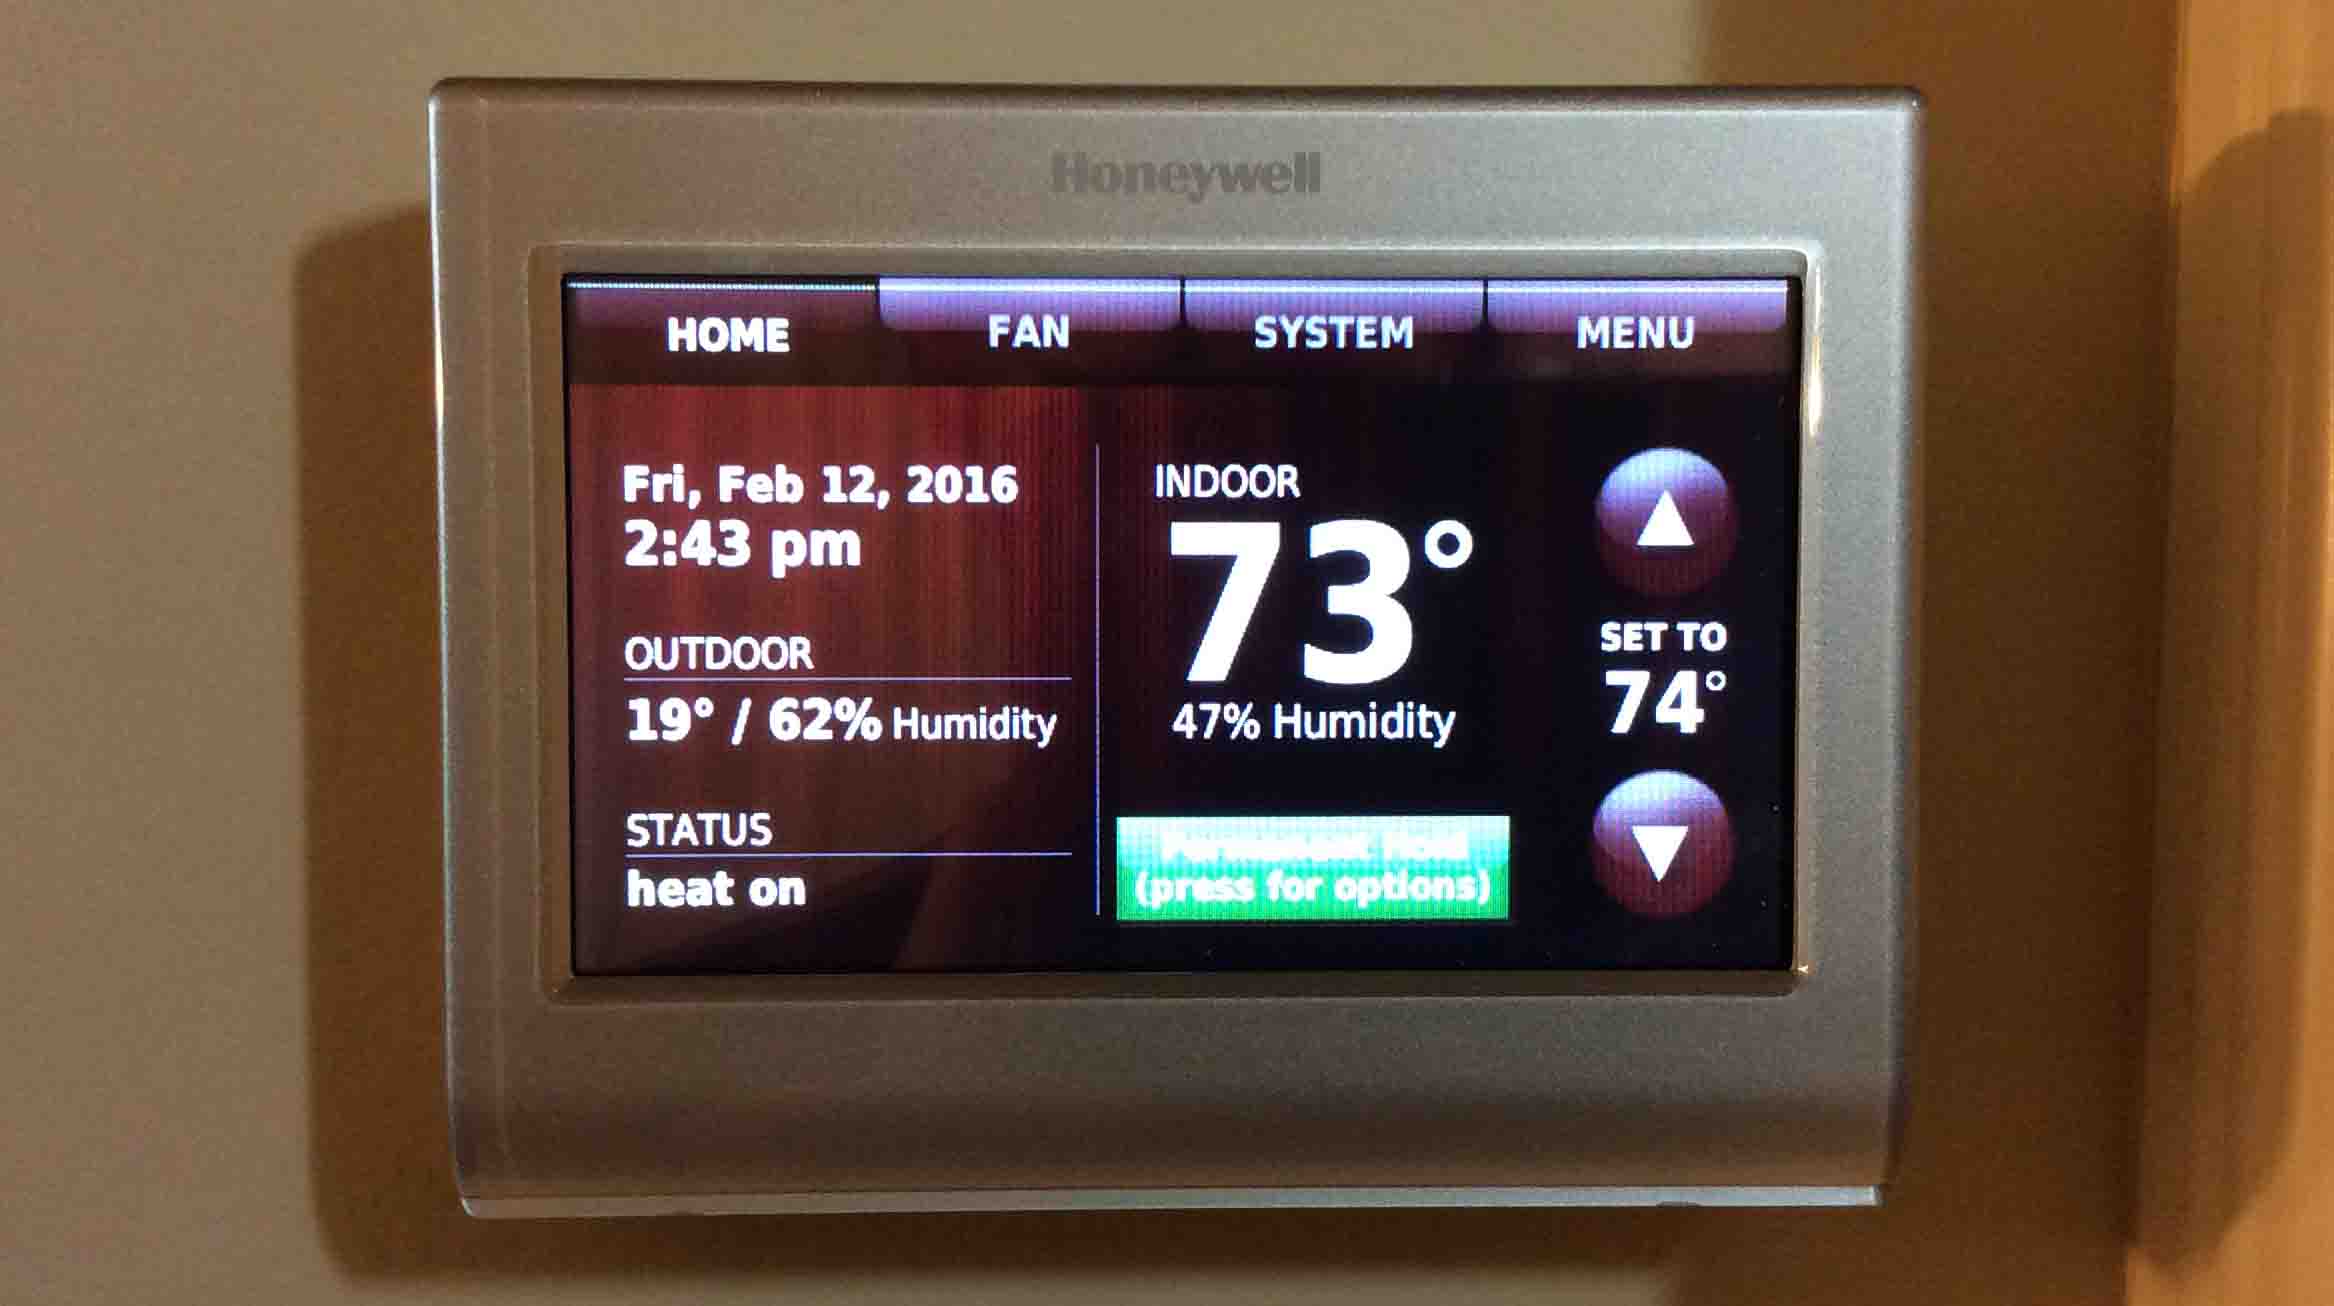
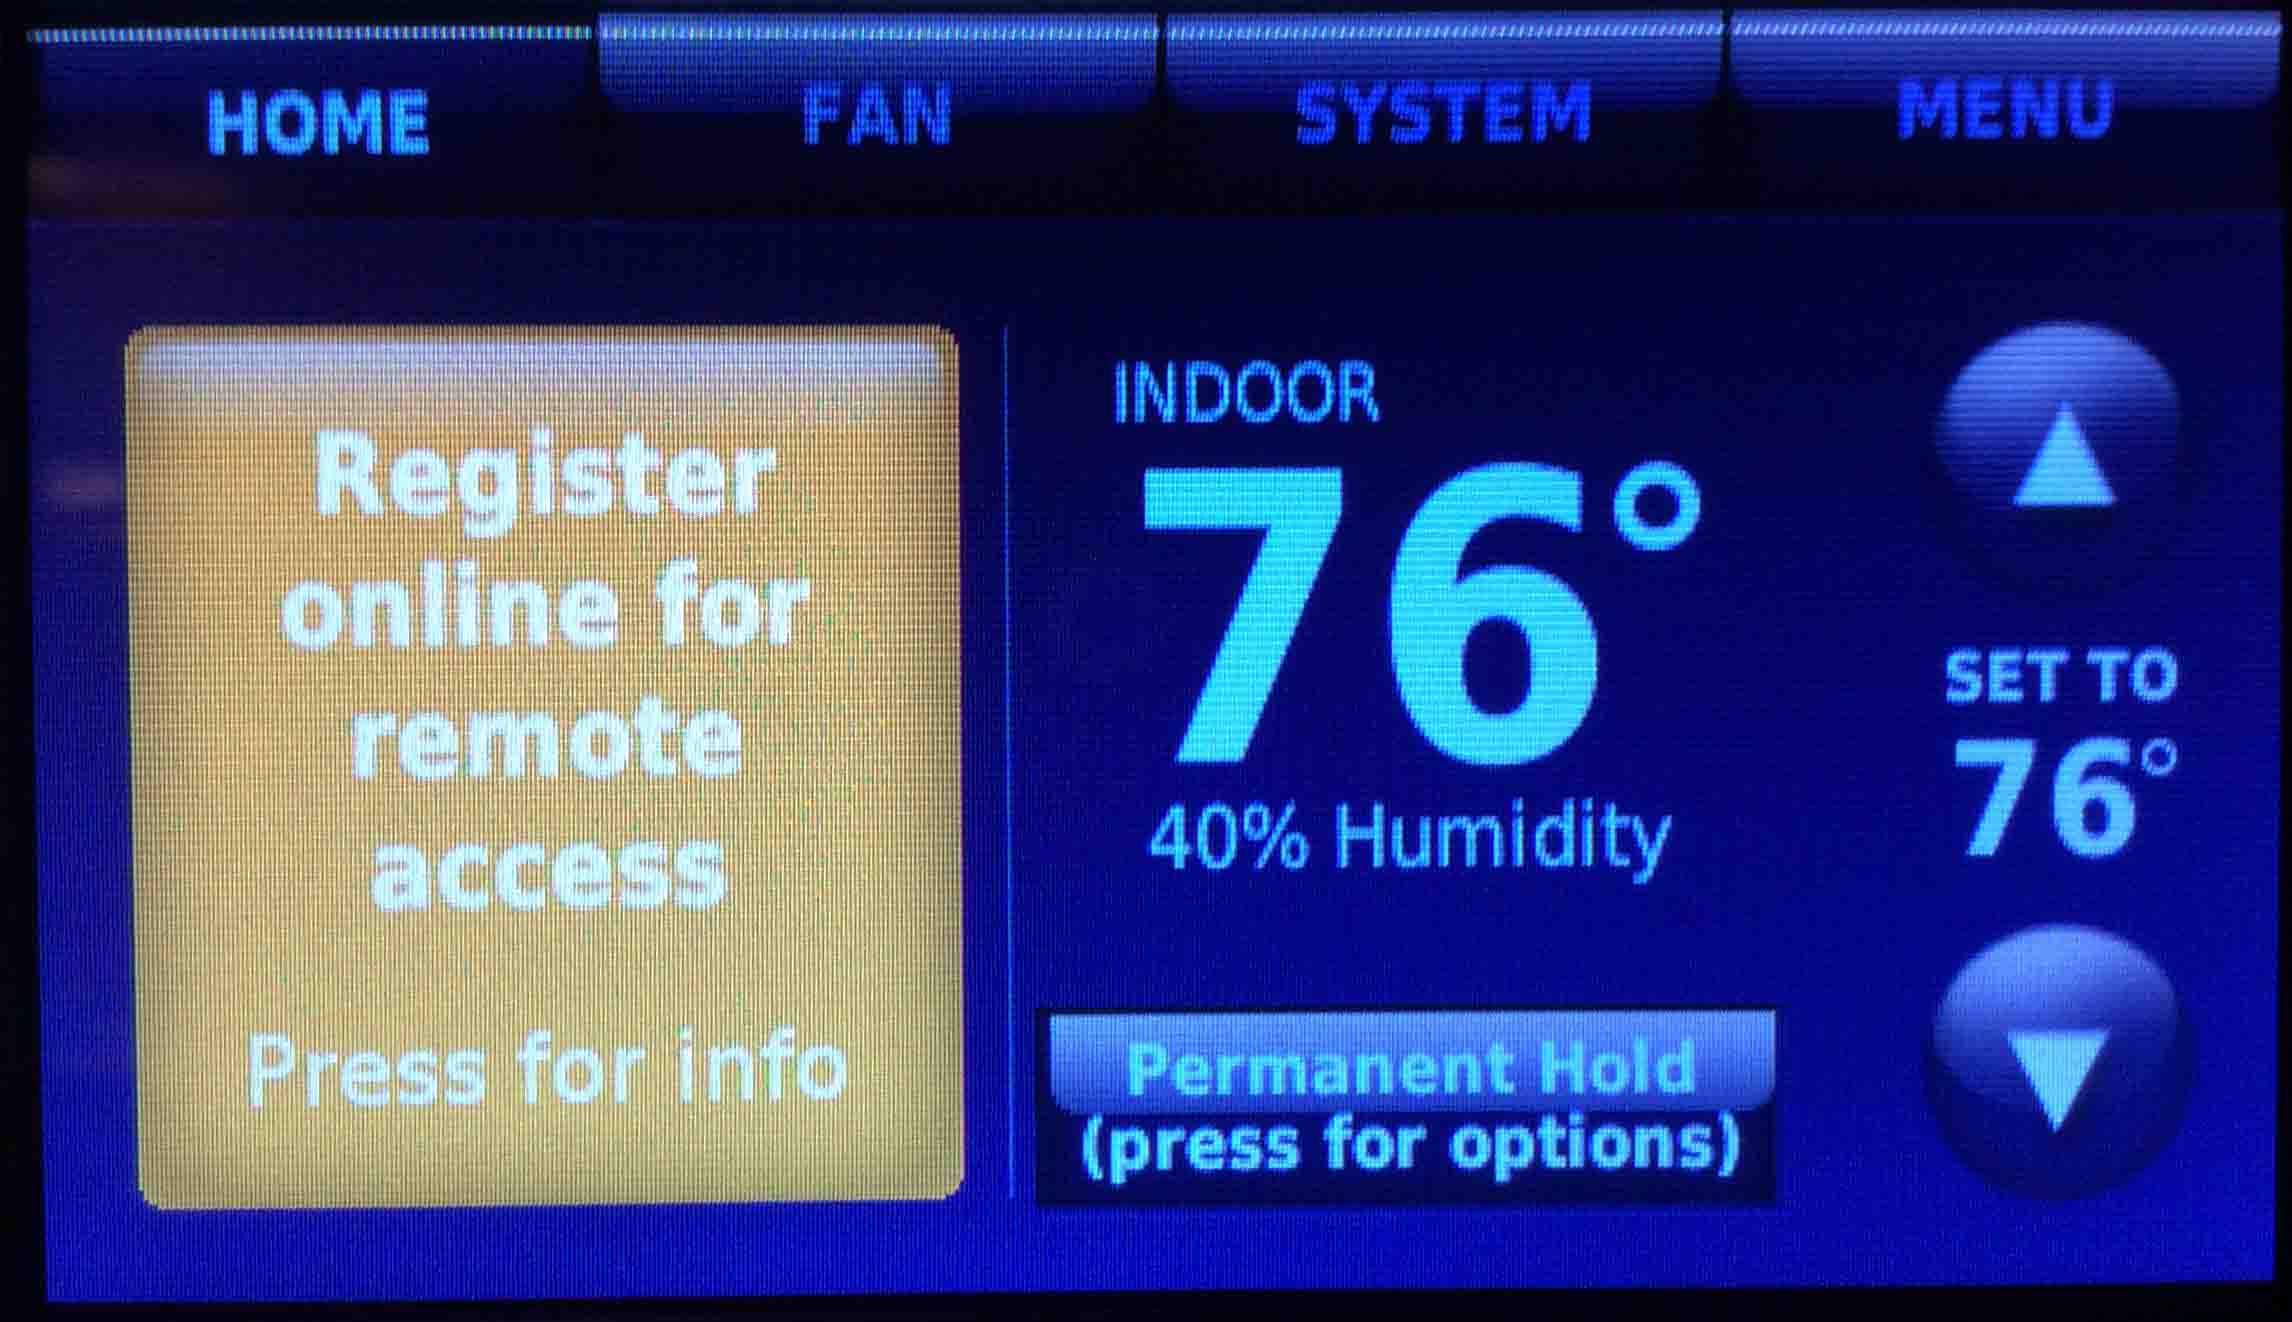
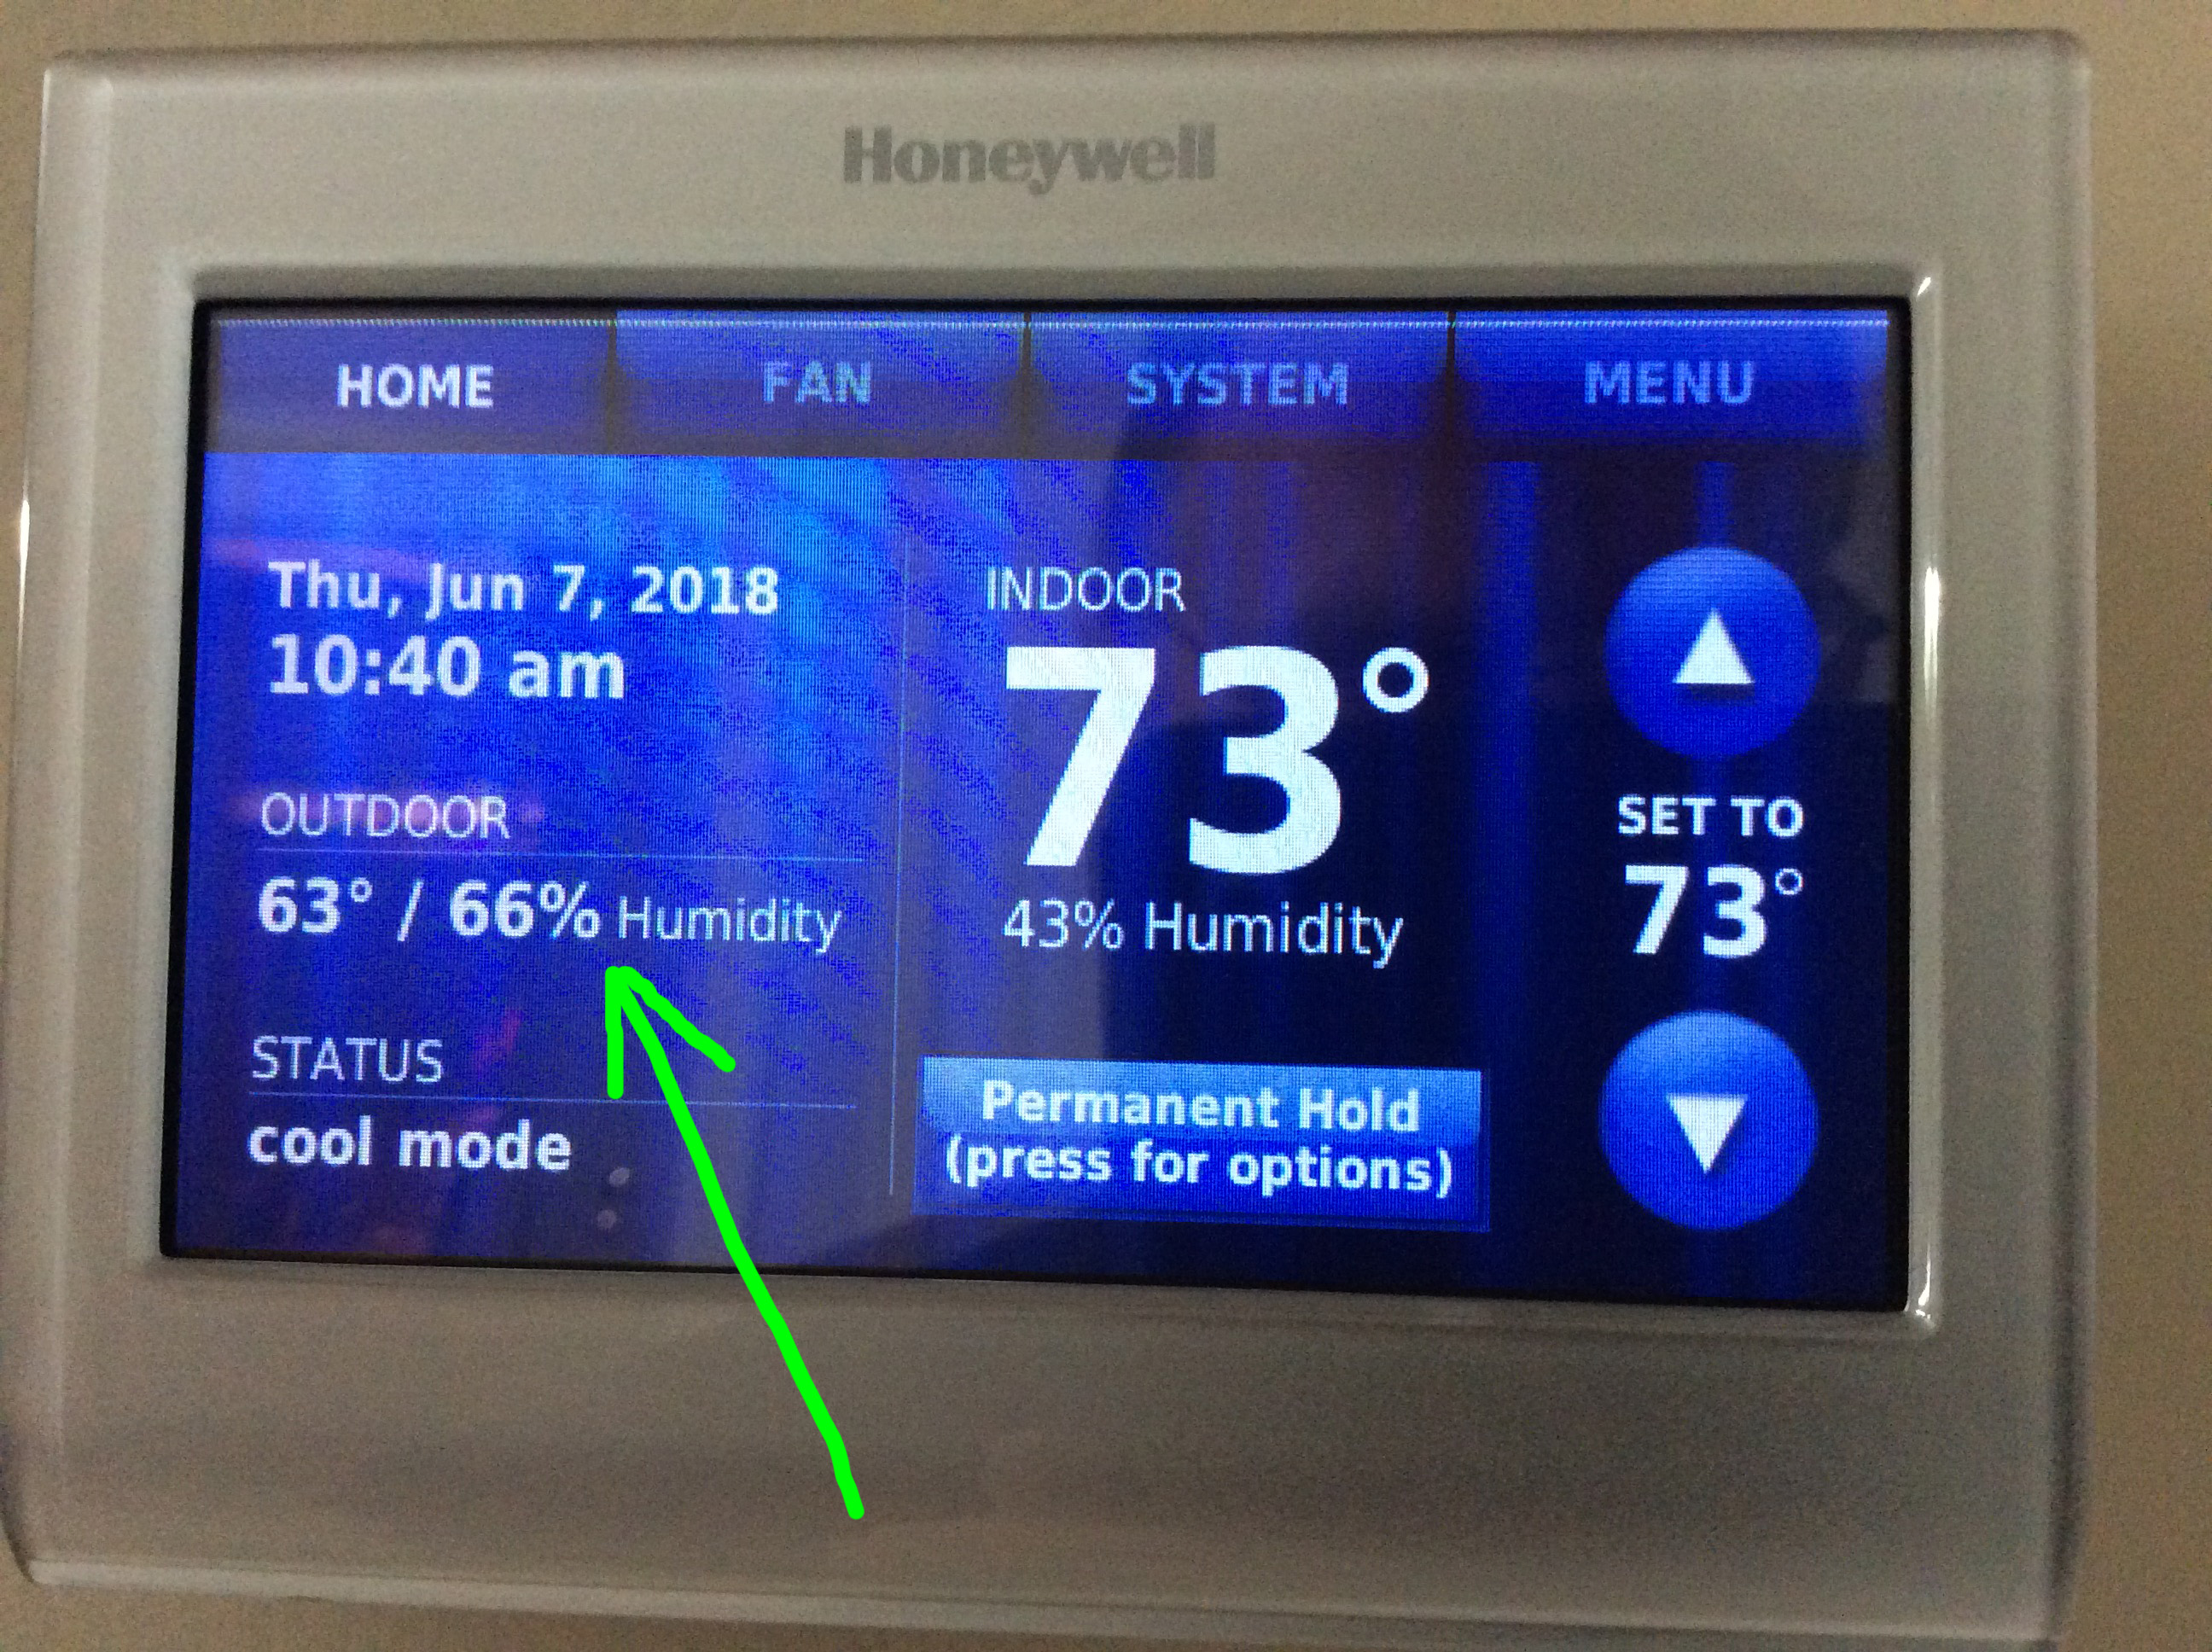
Honeywell RTH9580WF WiFi smart thermostat, displaying the -Home- screen.
Various Thermostat Settings
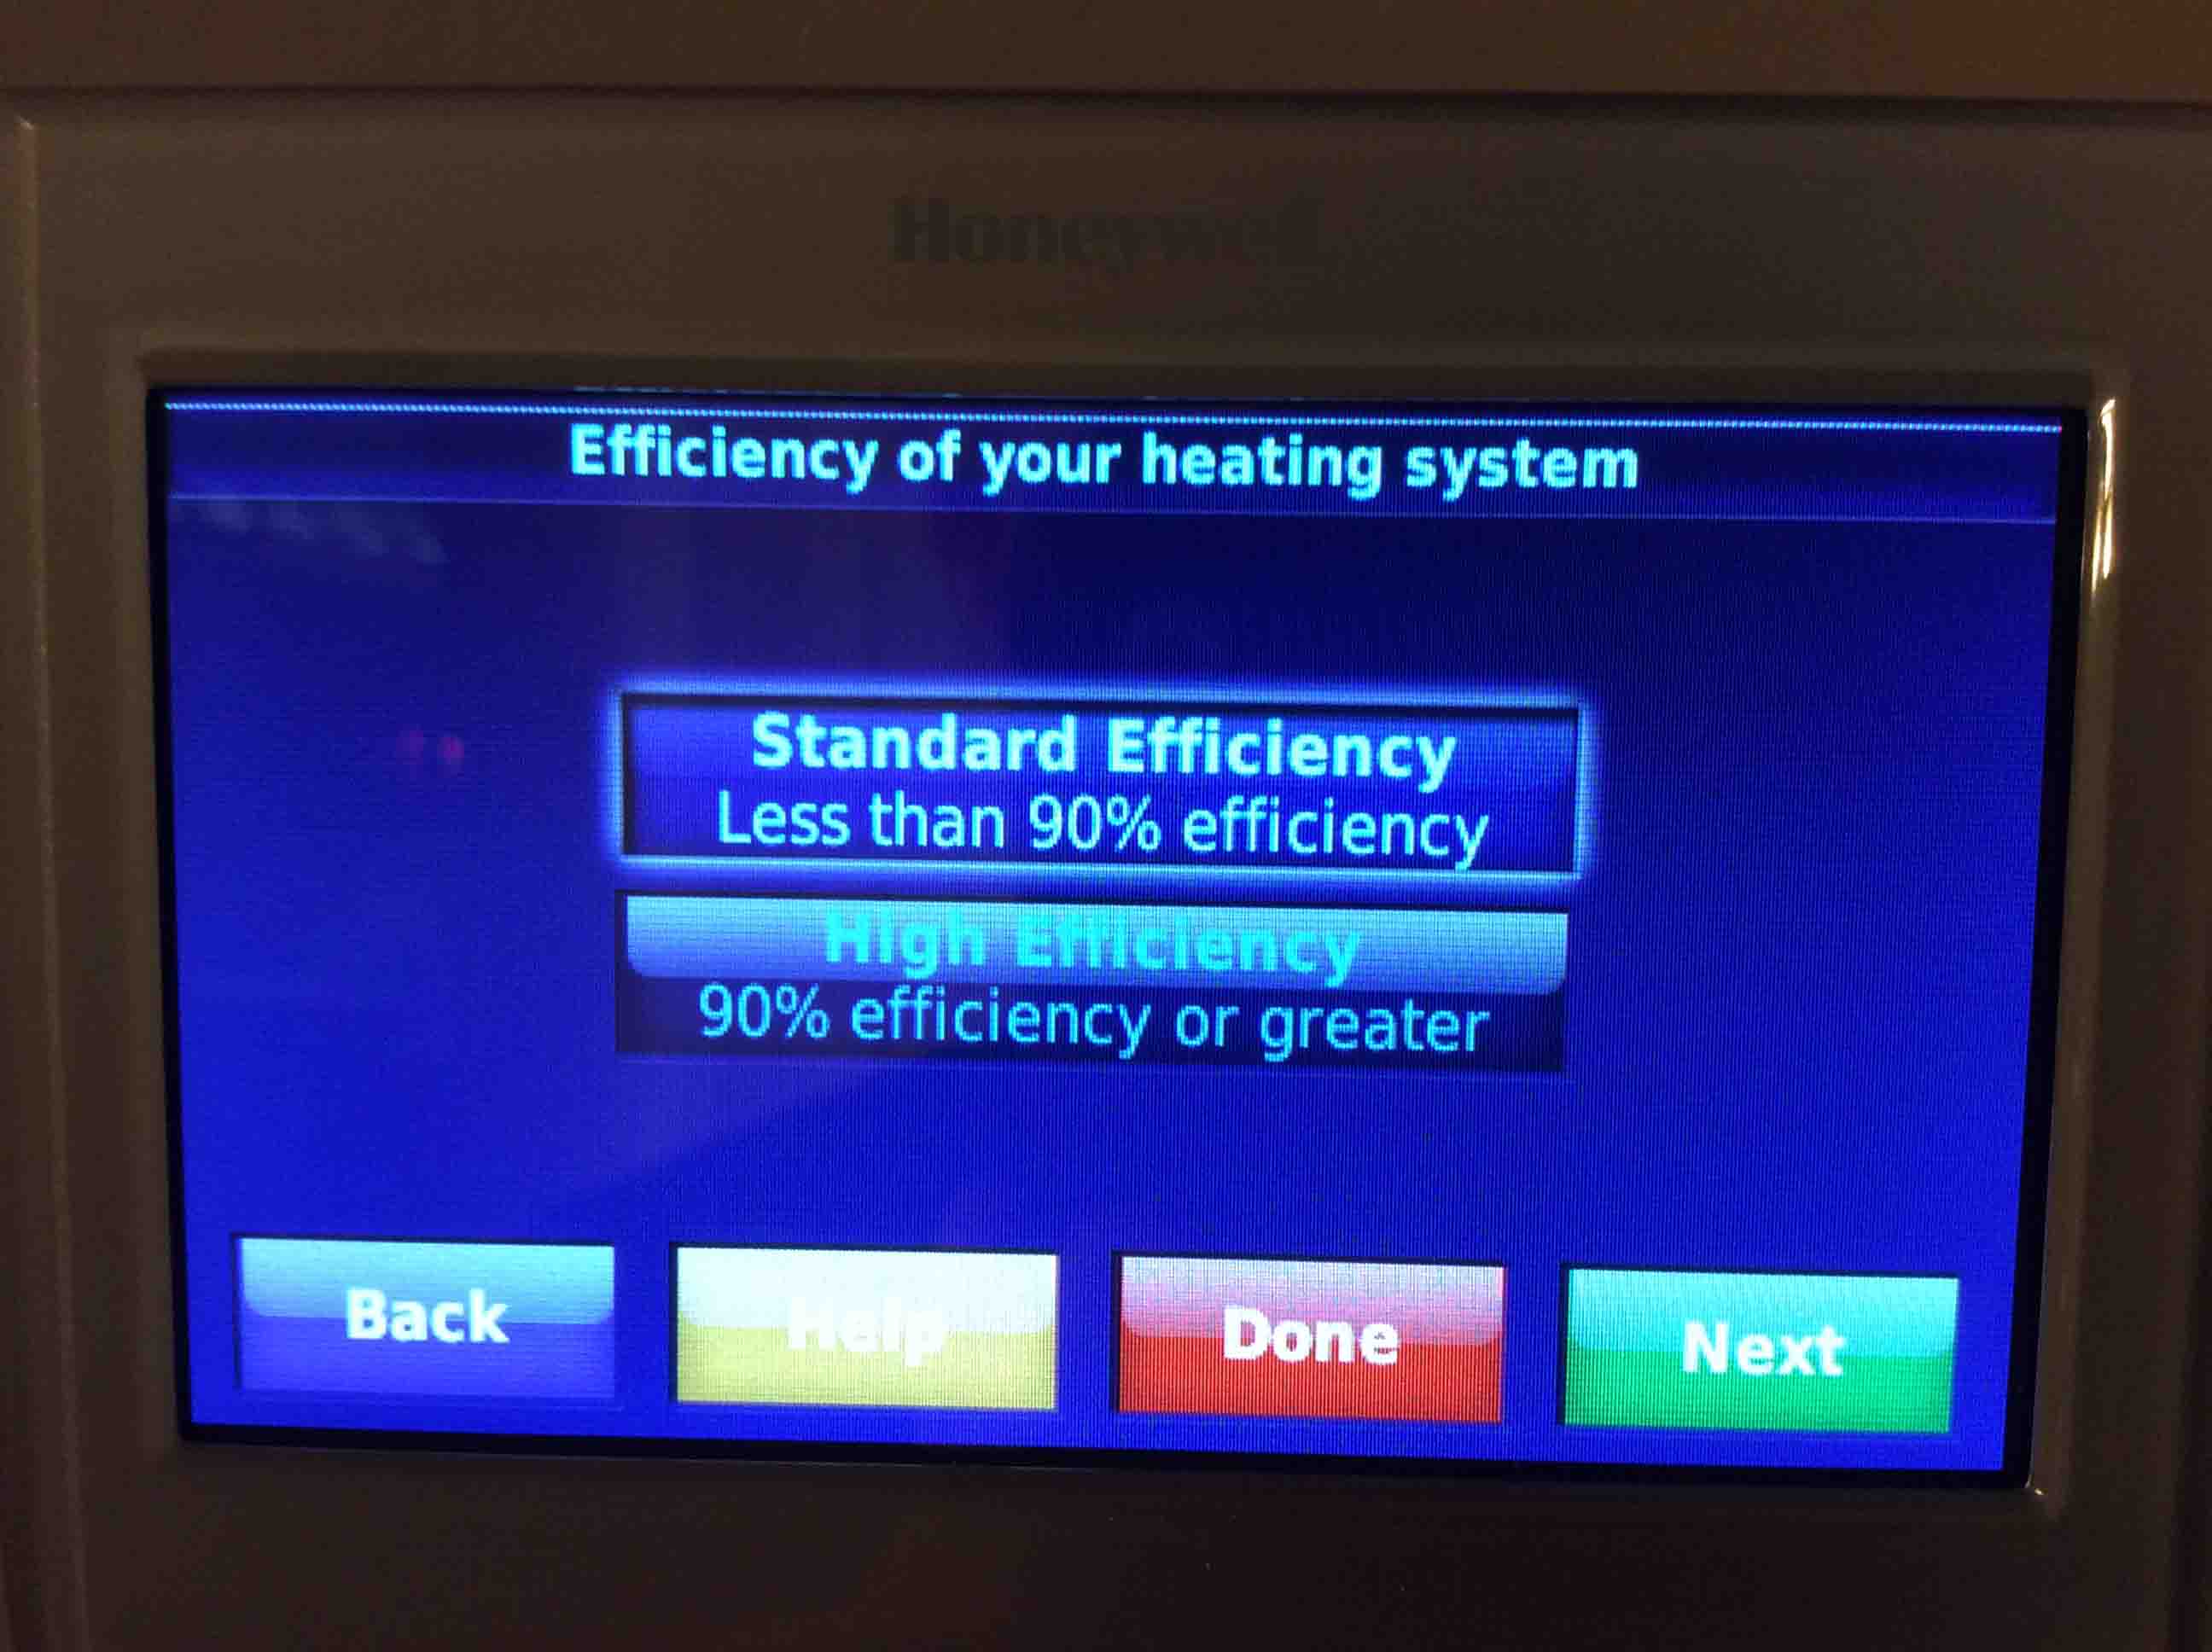
Honeywell RTH9580WF WiFi smart thermostat, displaying the -Efficiency of your Heating System- screen.
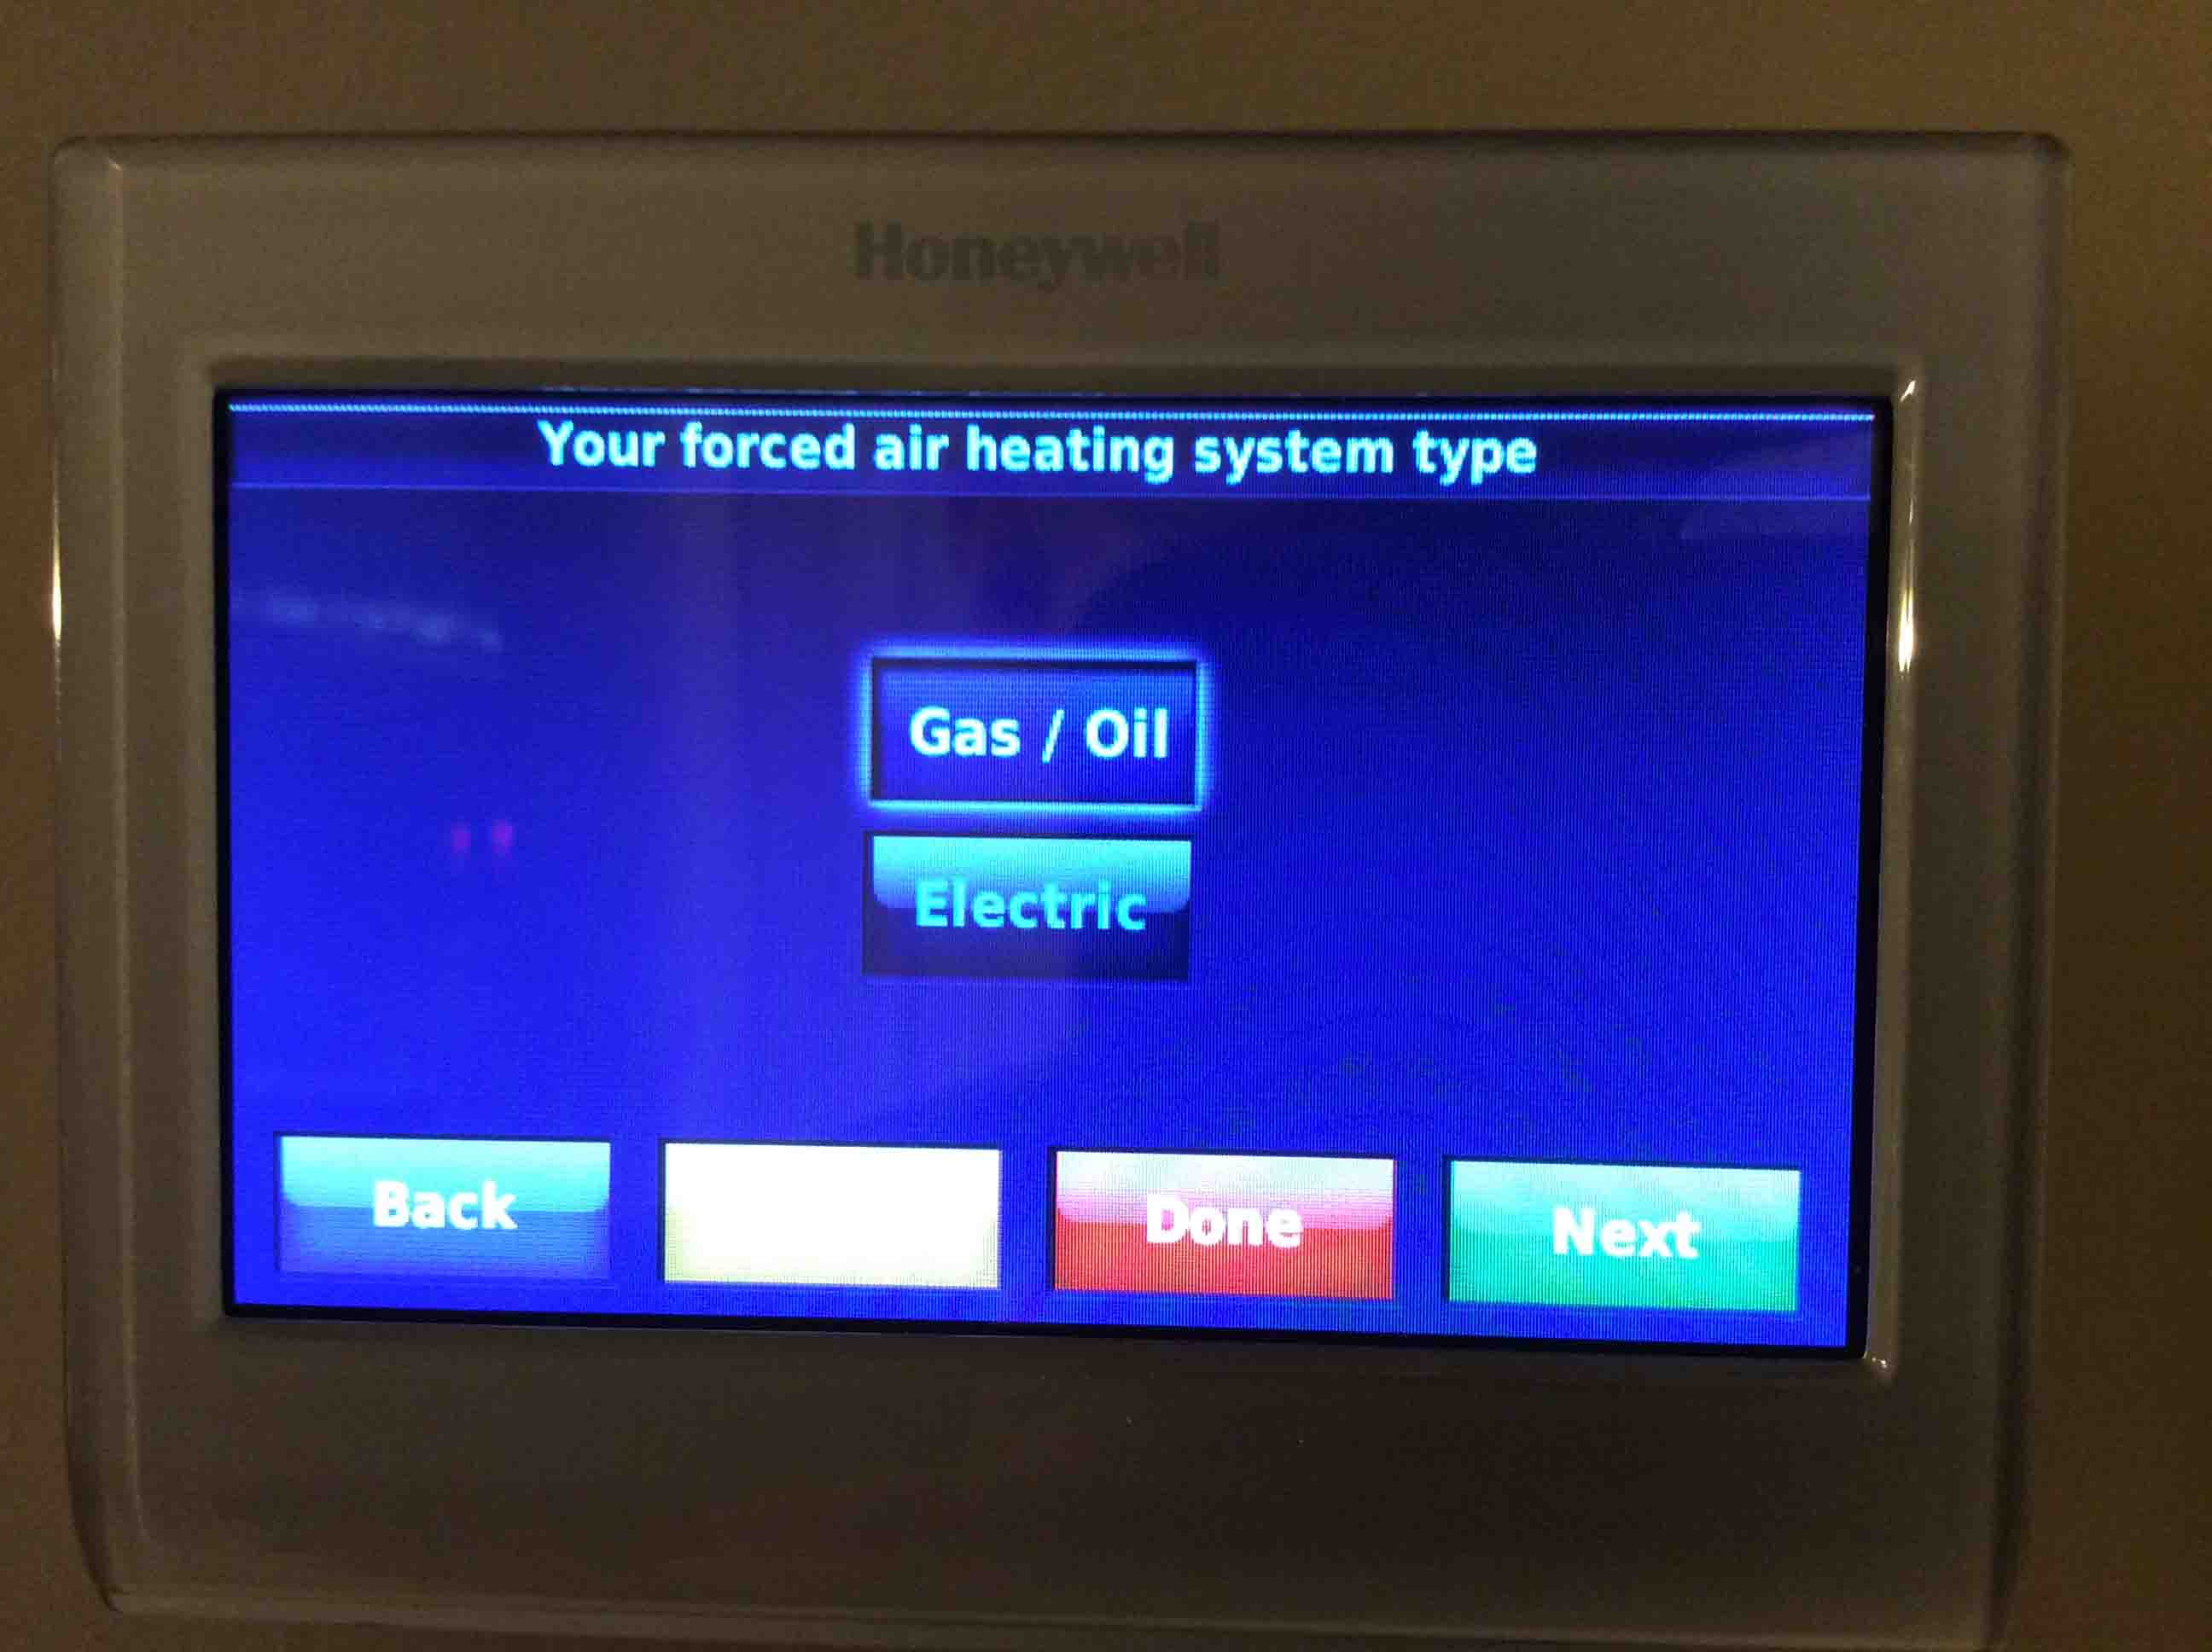
The RTH9580WF smart WiFi thermostat, displaying the -Your forced air heating system type- screen.
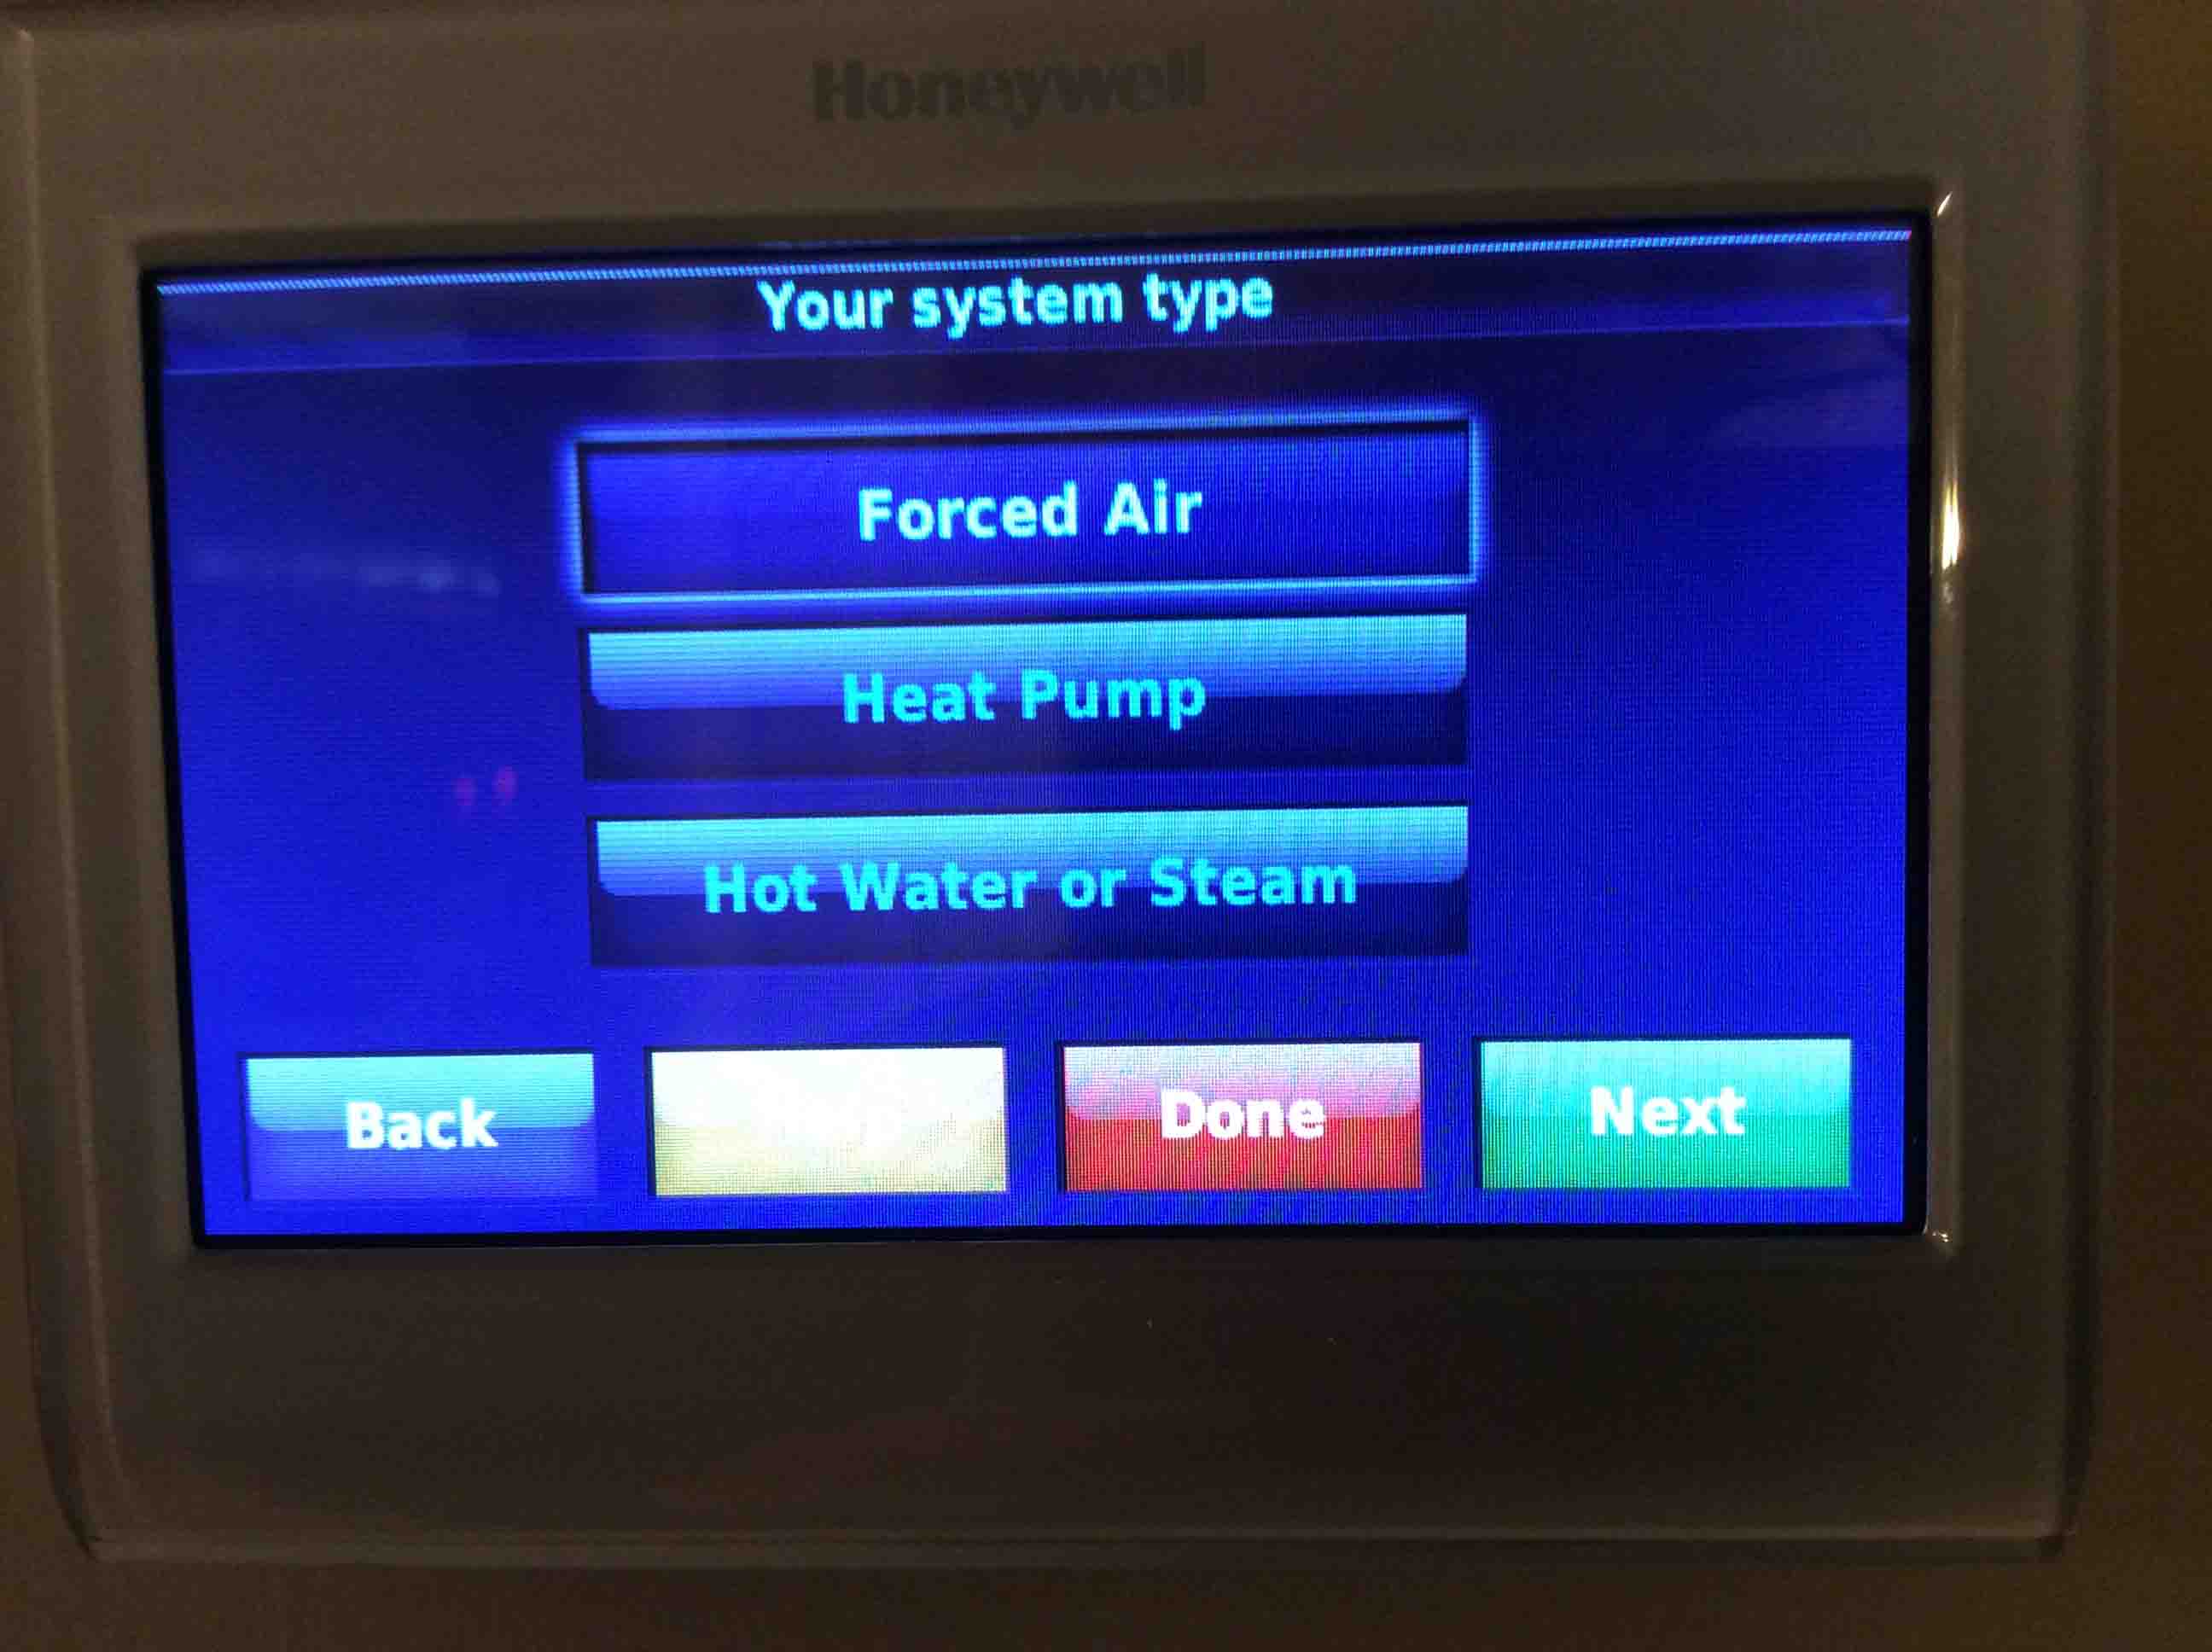
Honeywell RTH9580WF WiFi smart thermostat, displaying the -Your system type- screen.
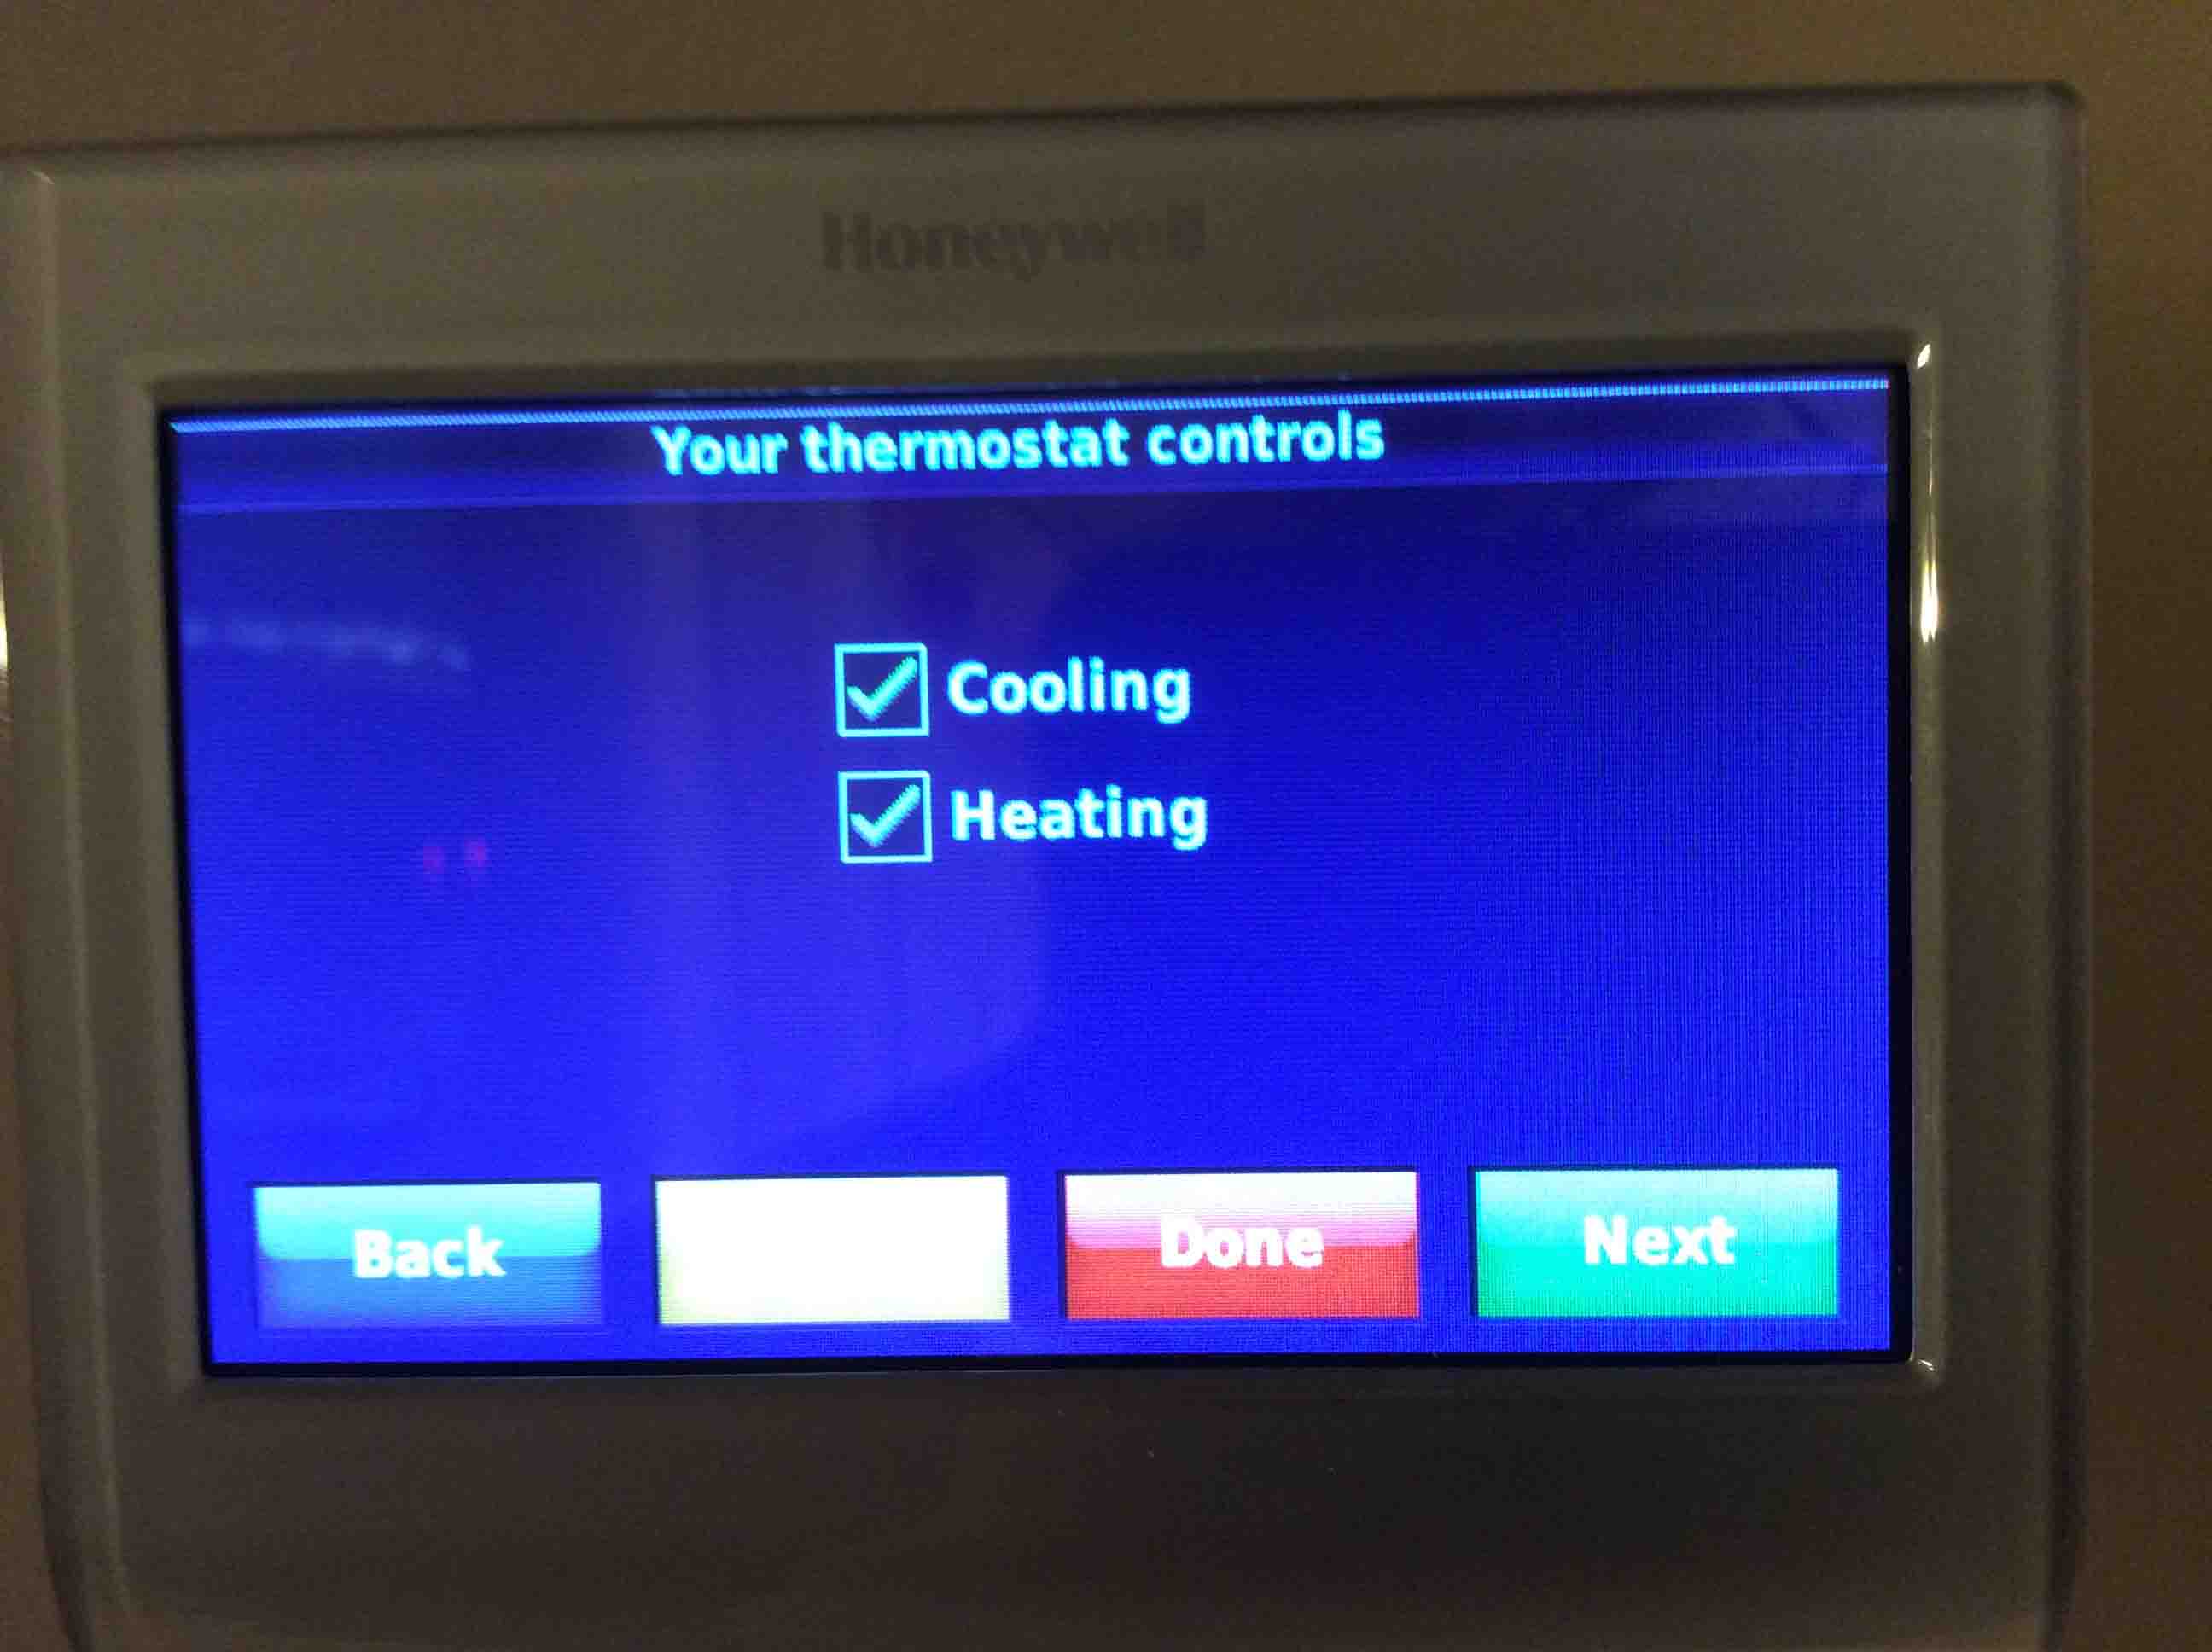
The Honeywell RTH9580WF smart WiFi thermostat, displaying the -Your thermostat controls- screen.
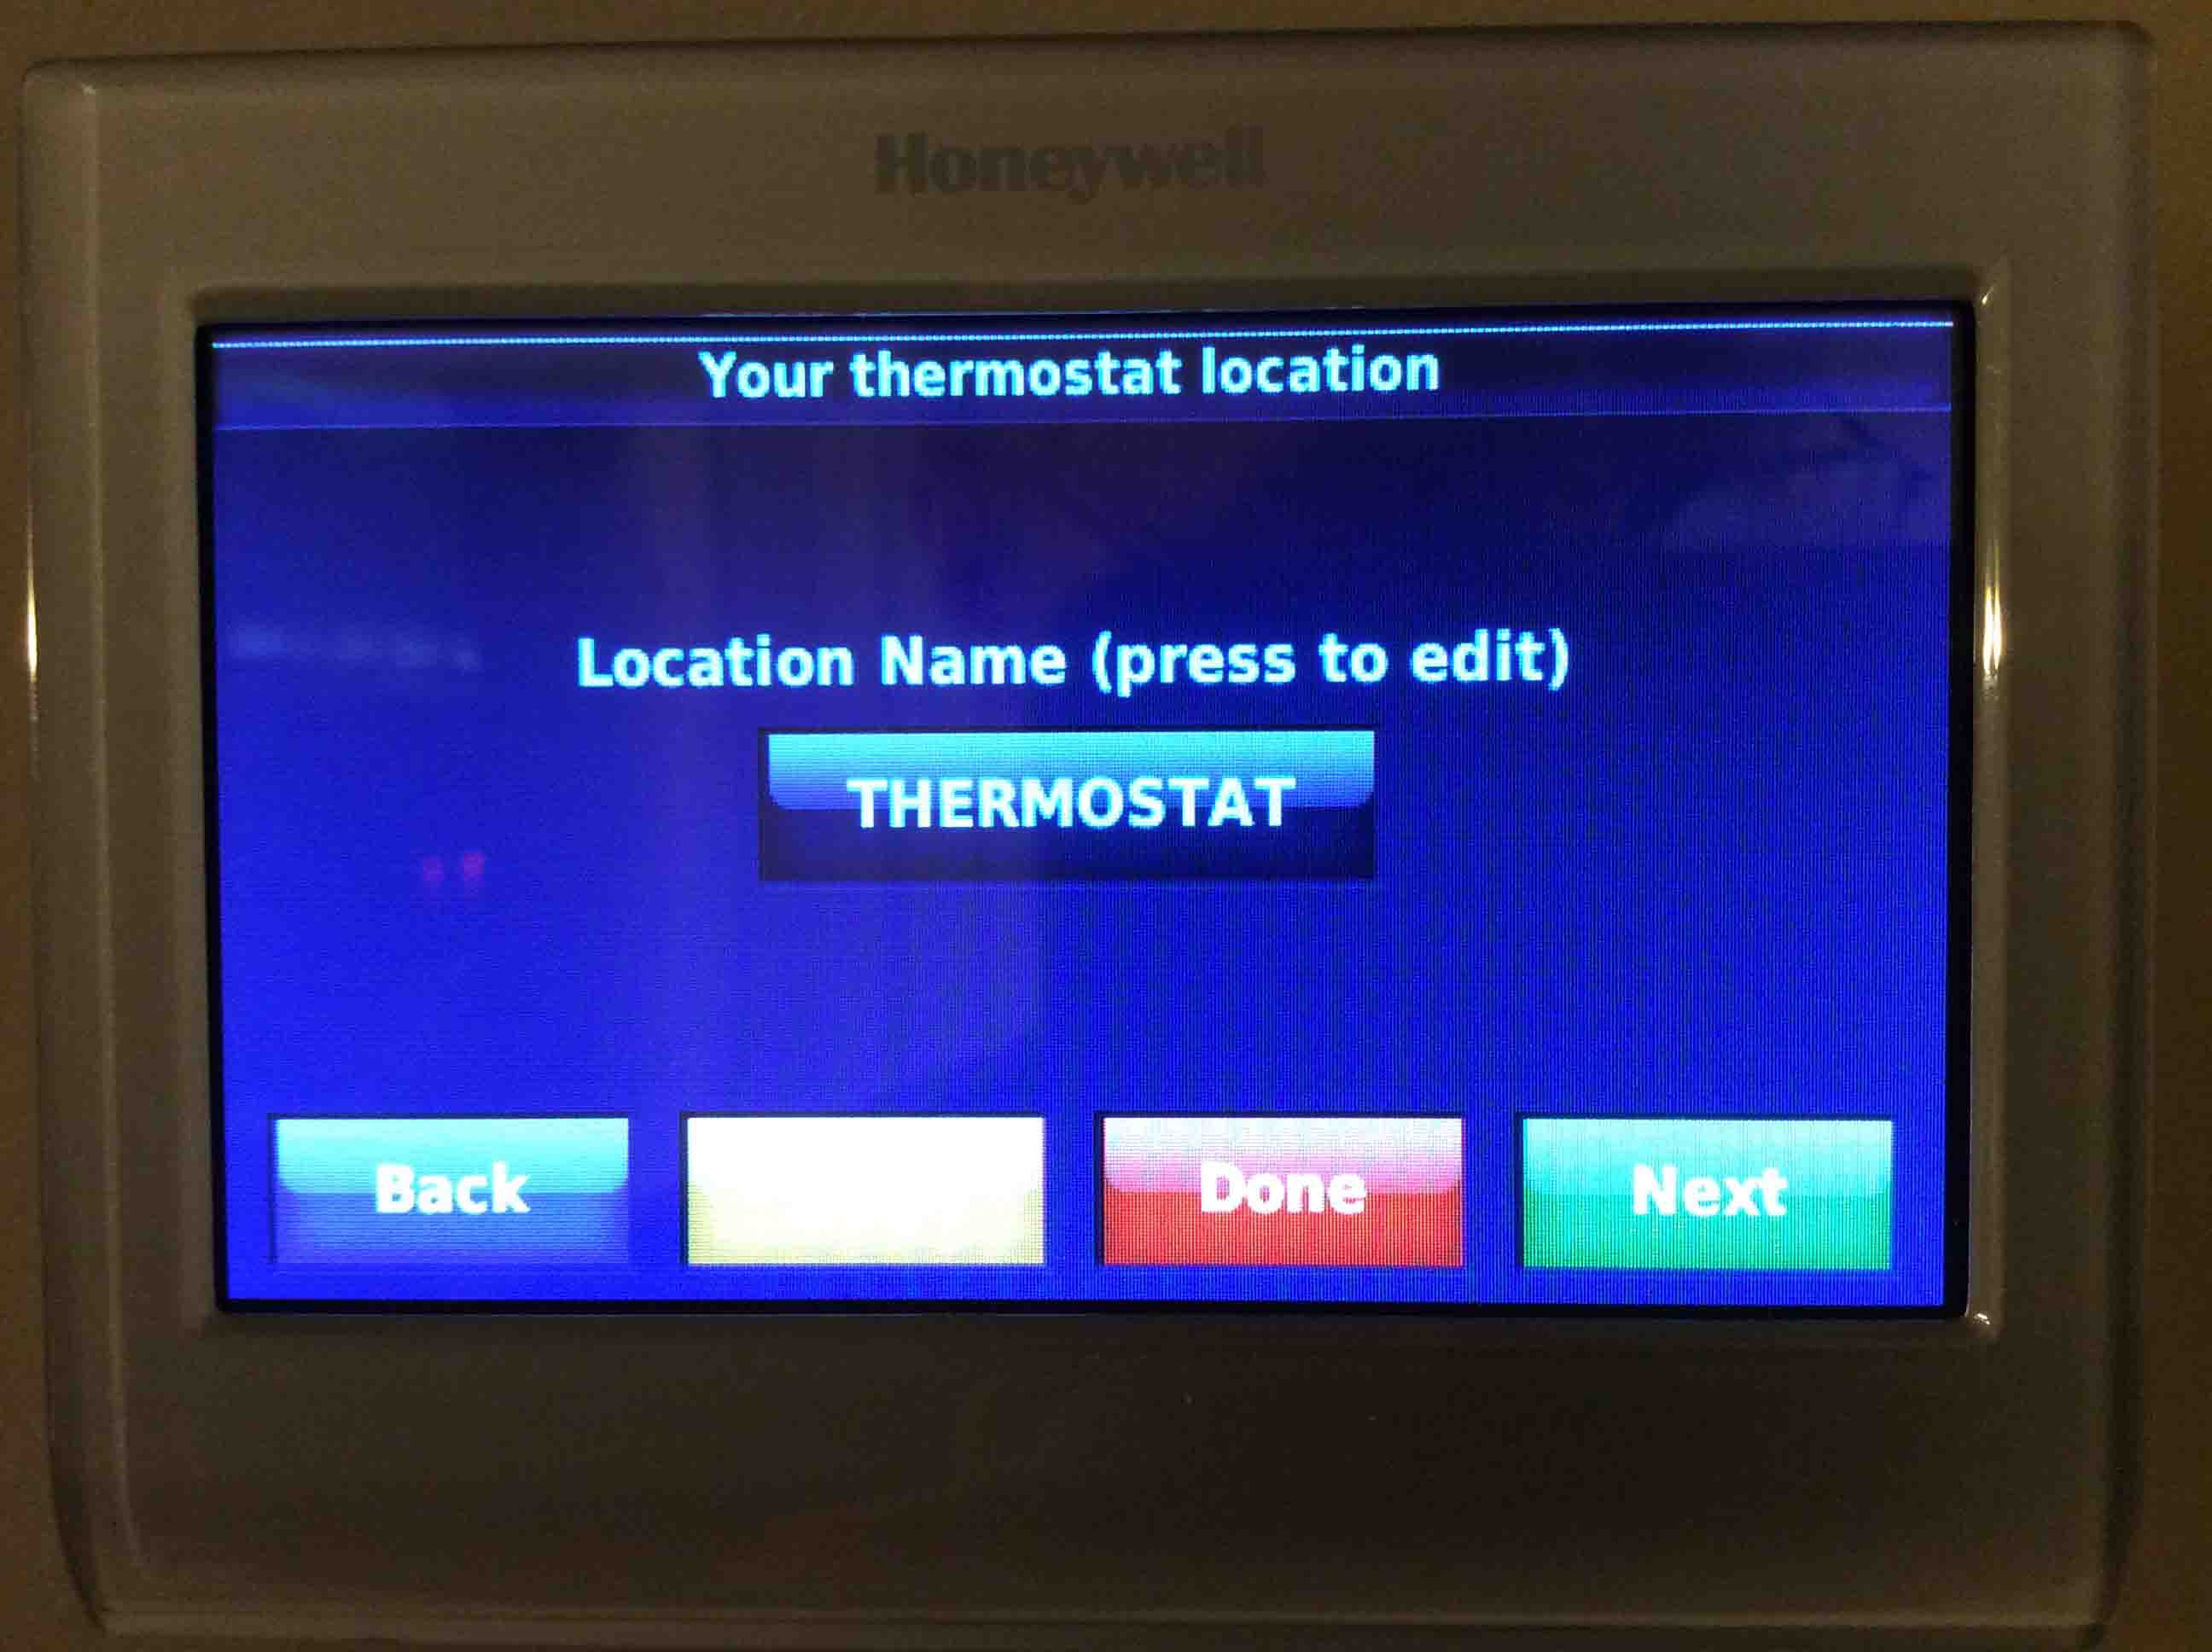
Honeywell RTH9580WF smart thermostat, displaying the -Your thermostat location- screen.
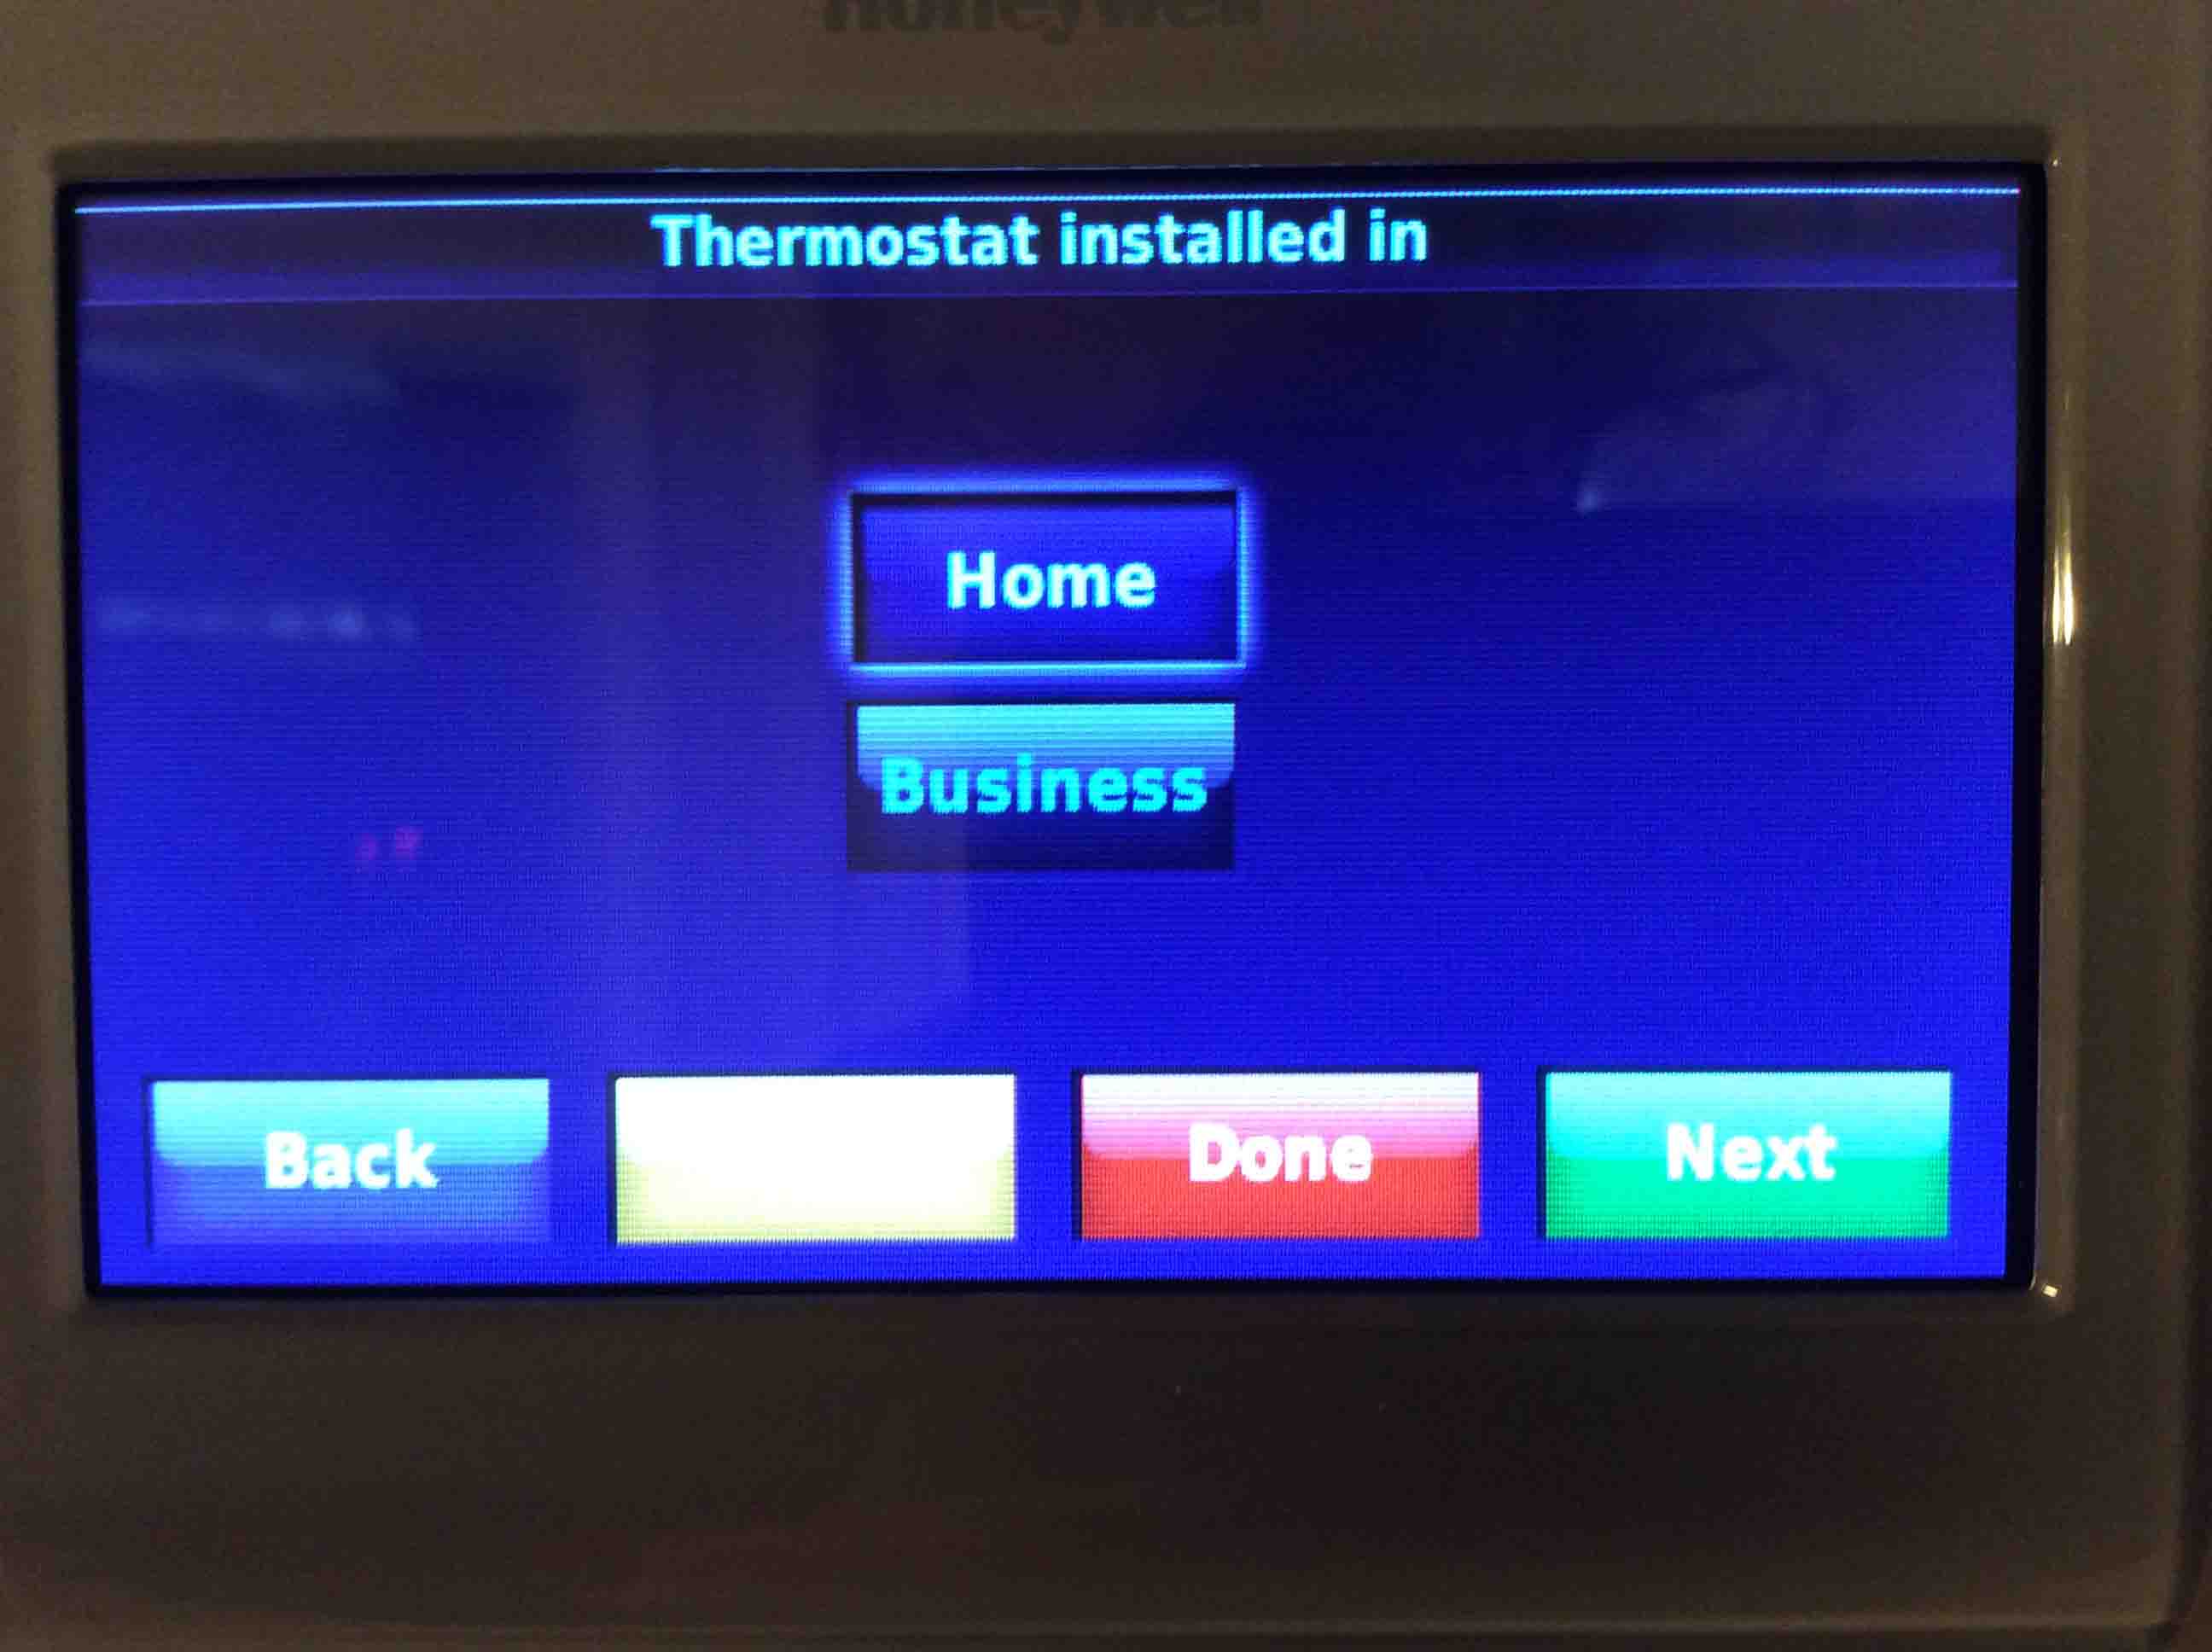
Honeywell RTH9580WF smart thermostat, displaying the -Thermostat installed in- screen.
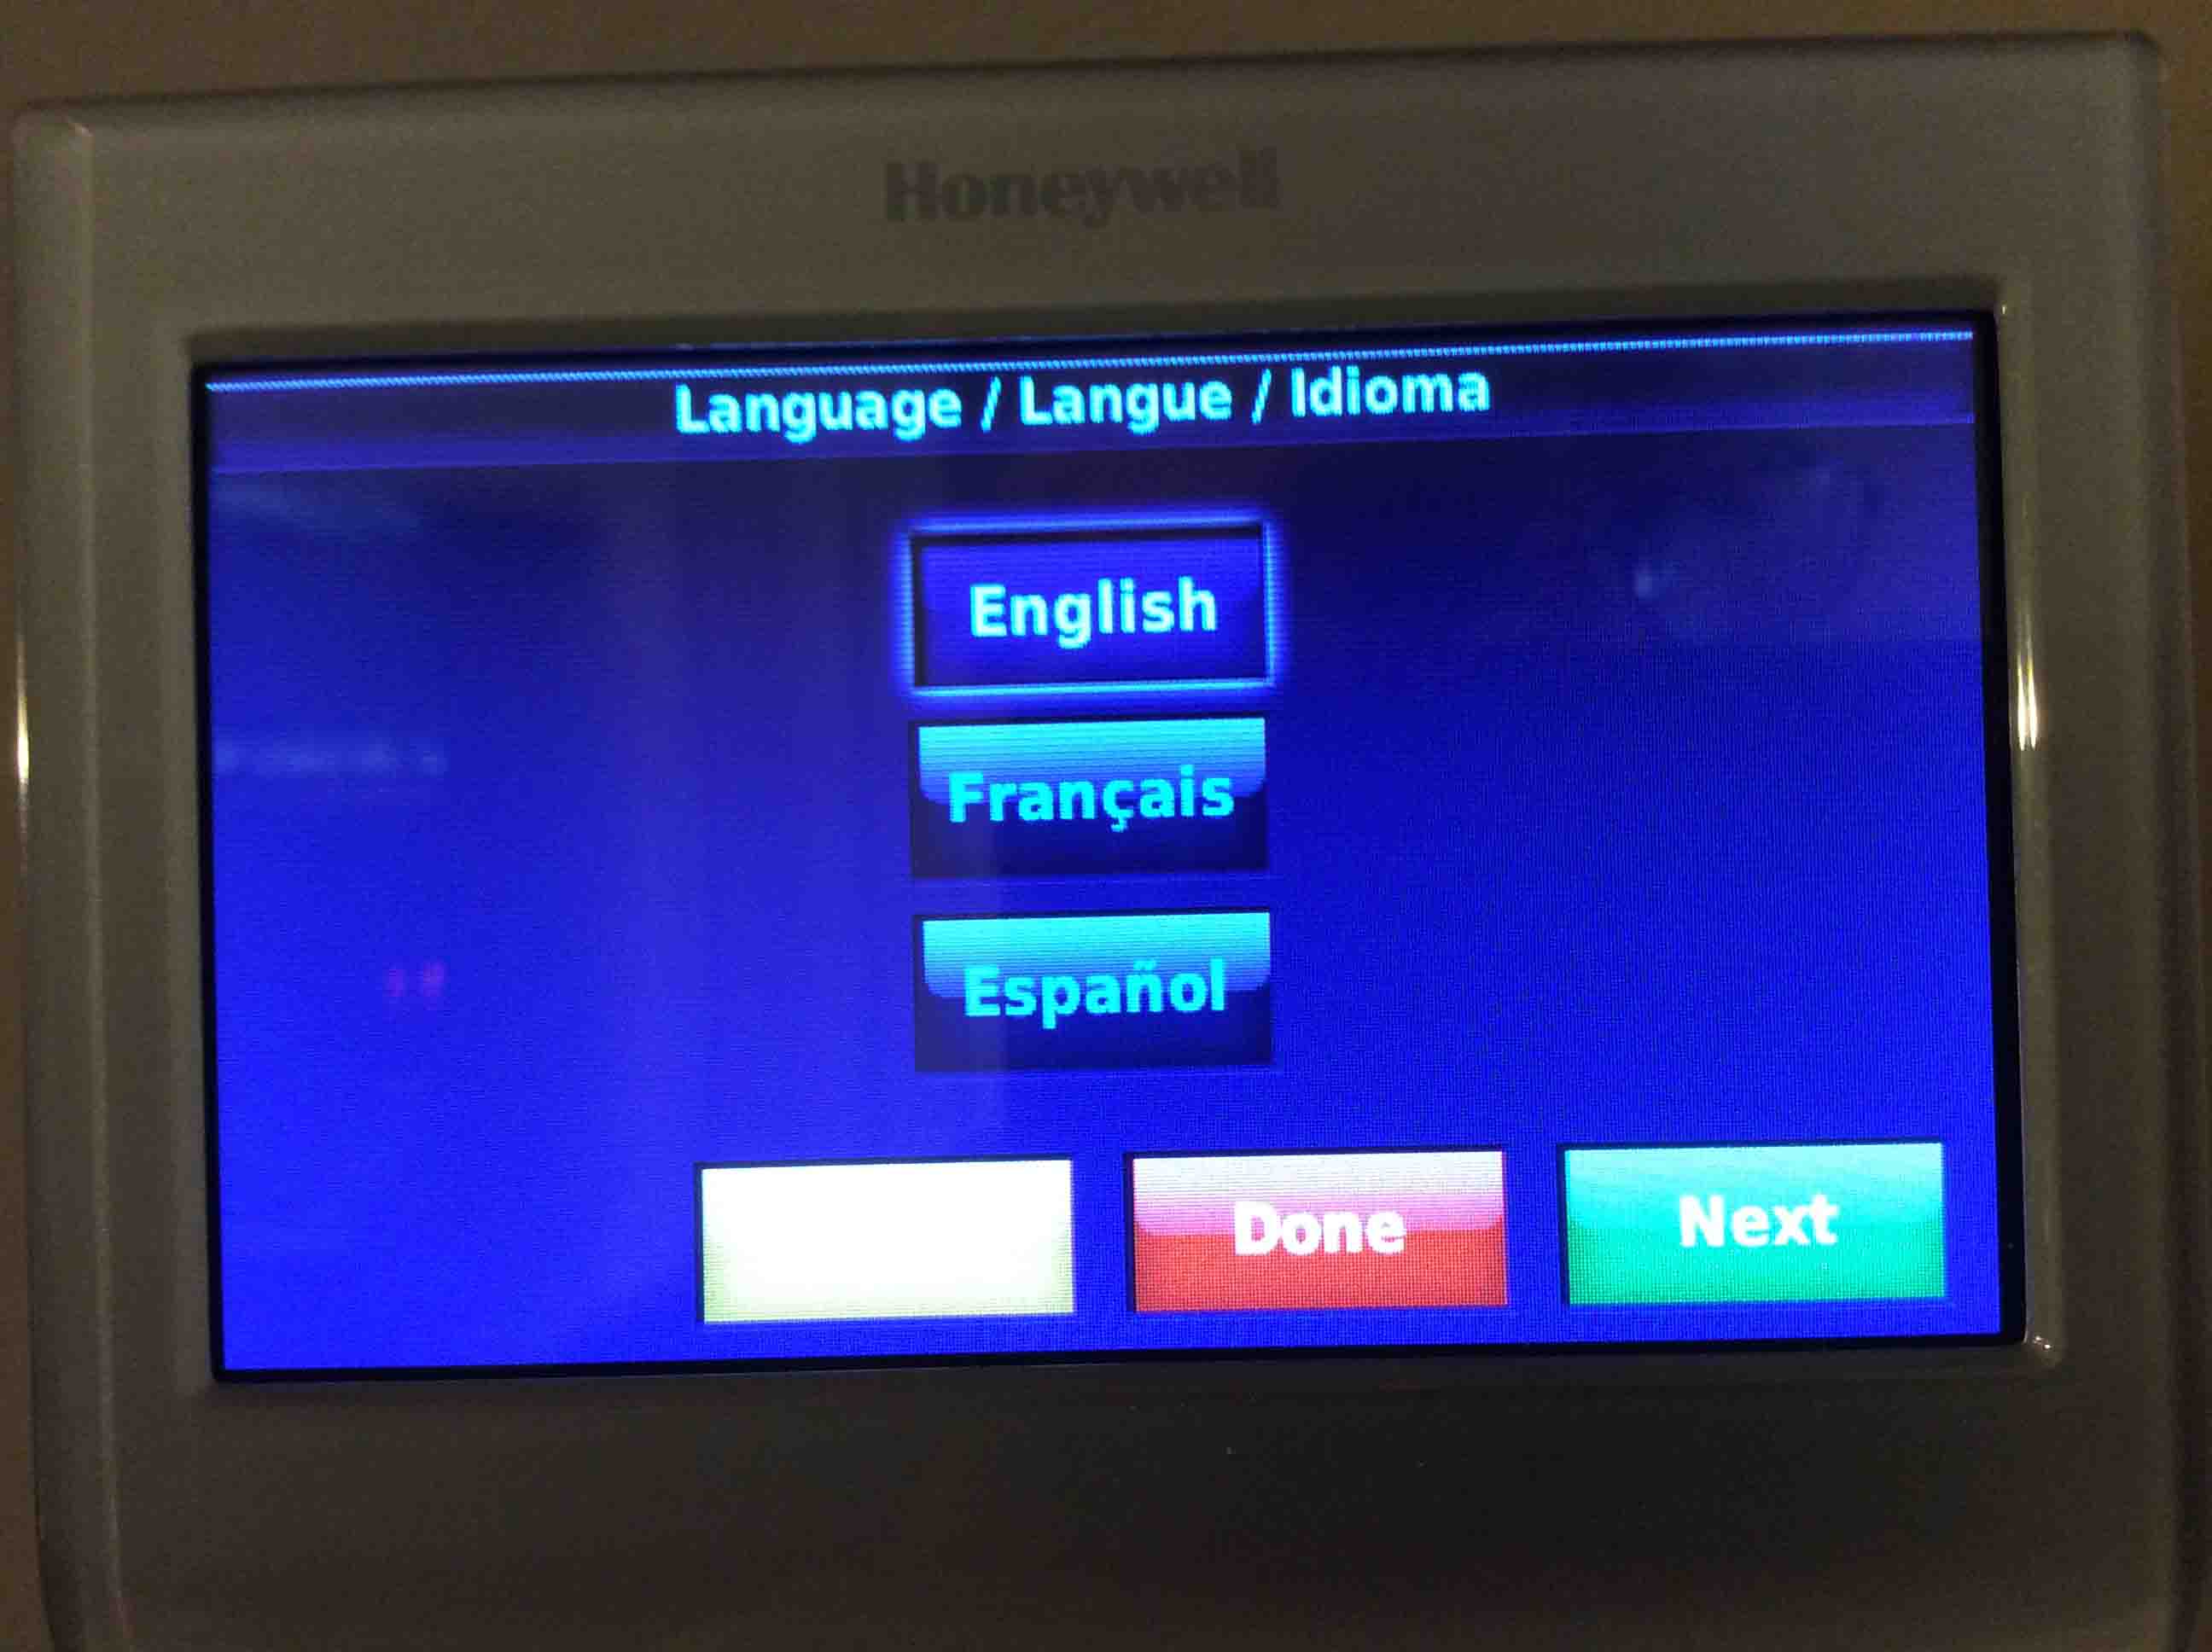
The RTH9580WF smart thermostat, displaying its -Language Selection- screen.
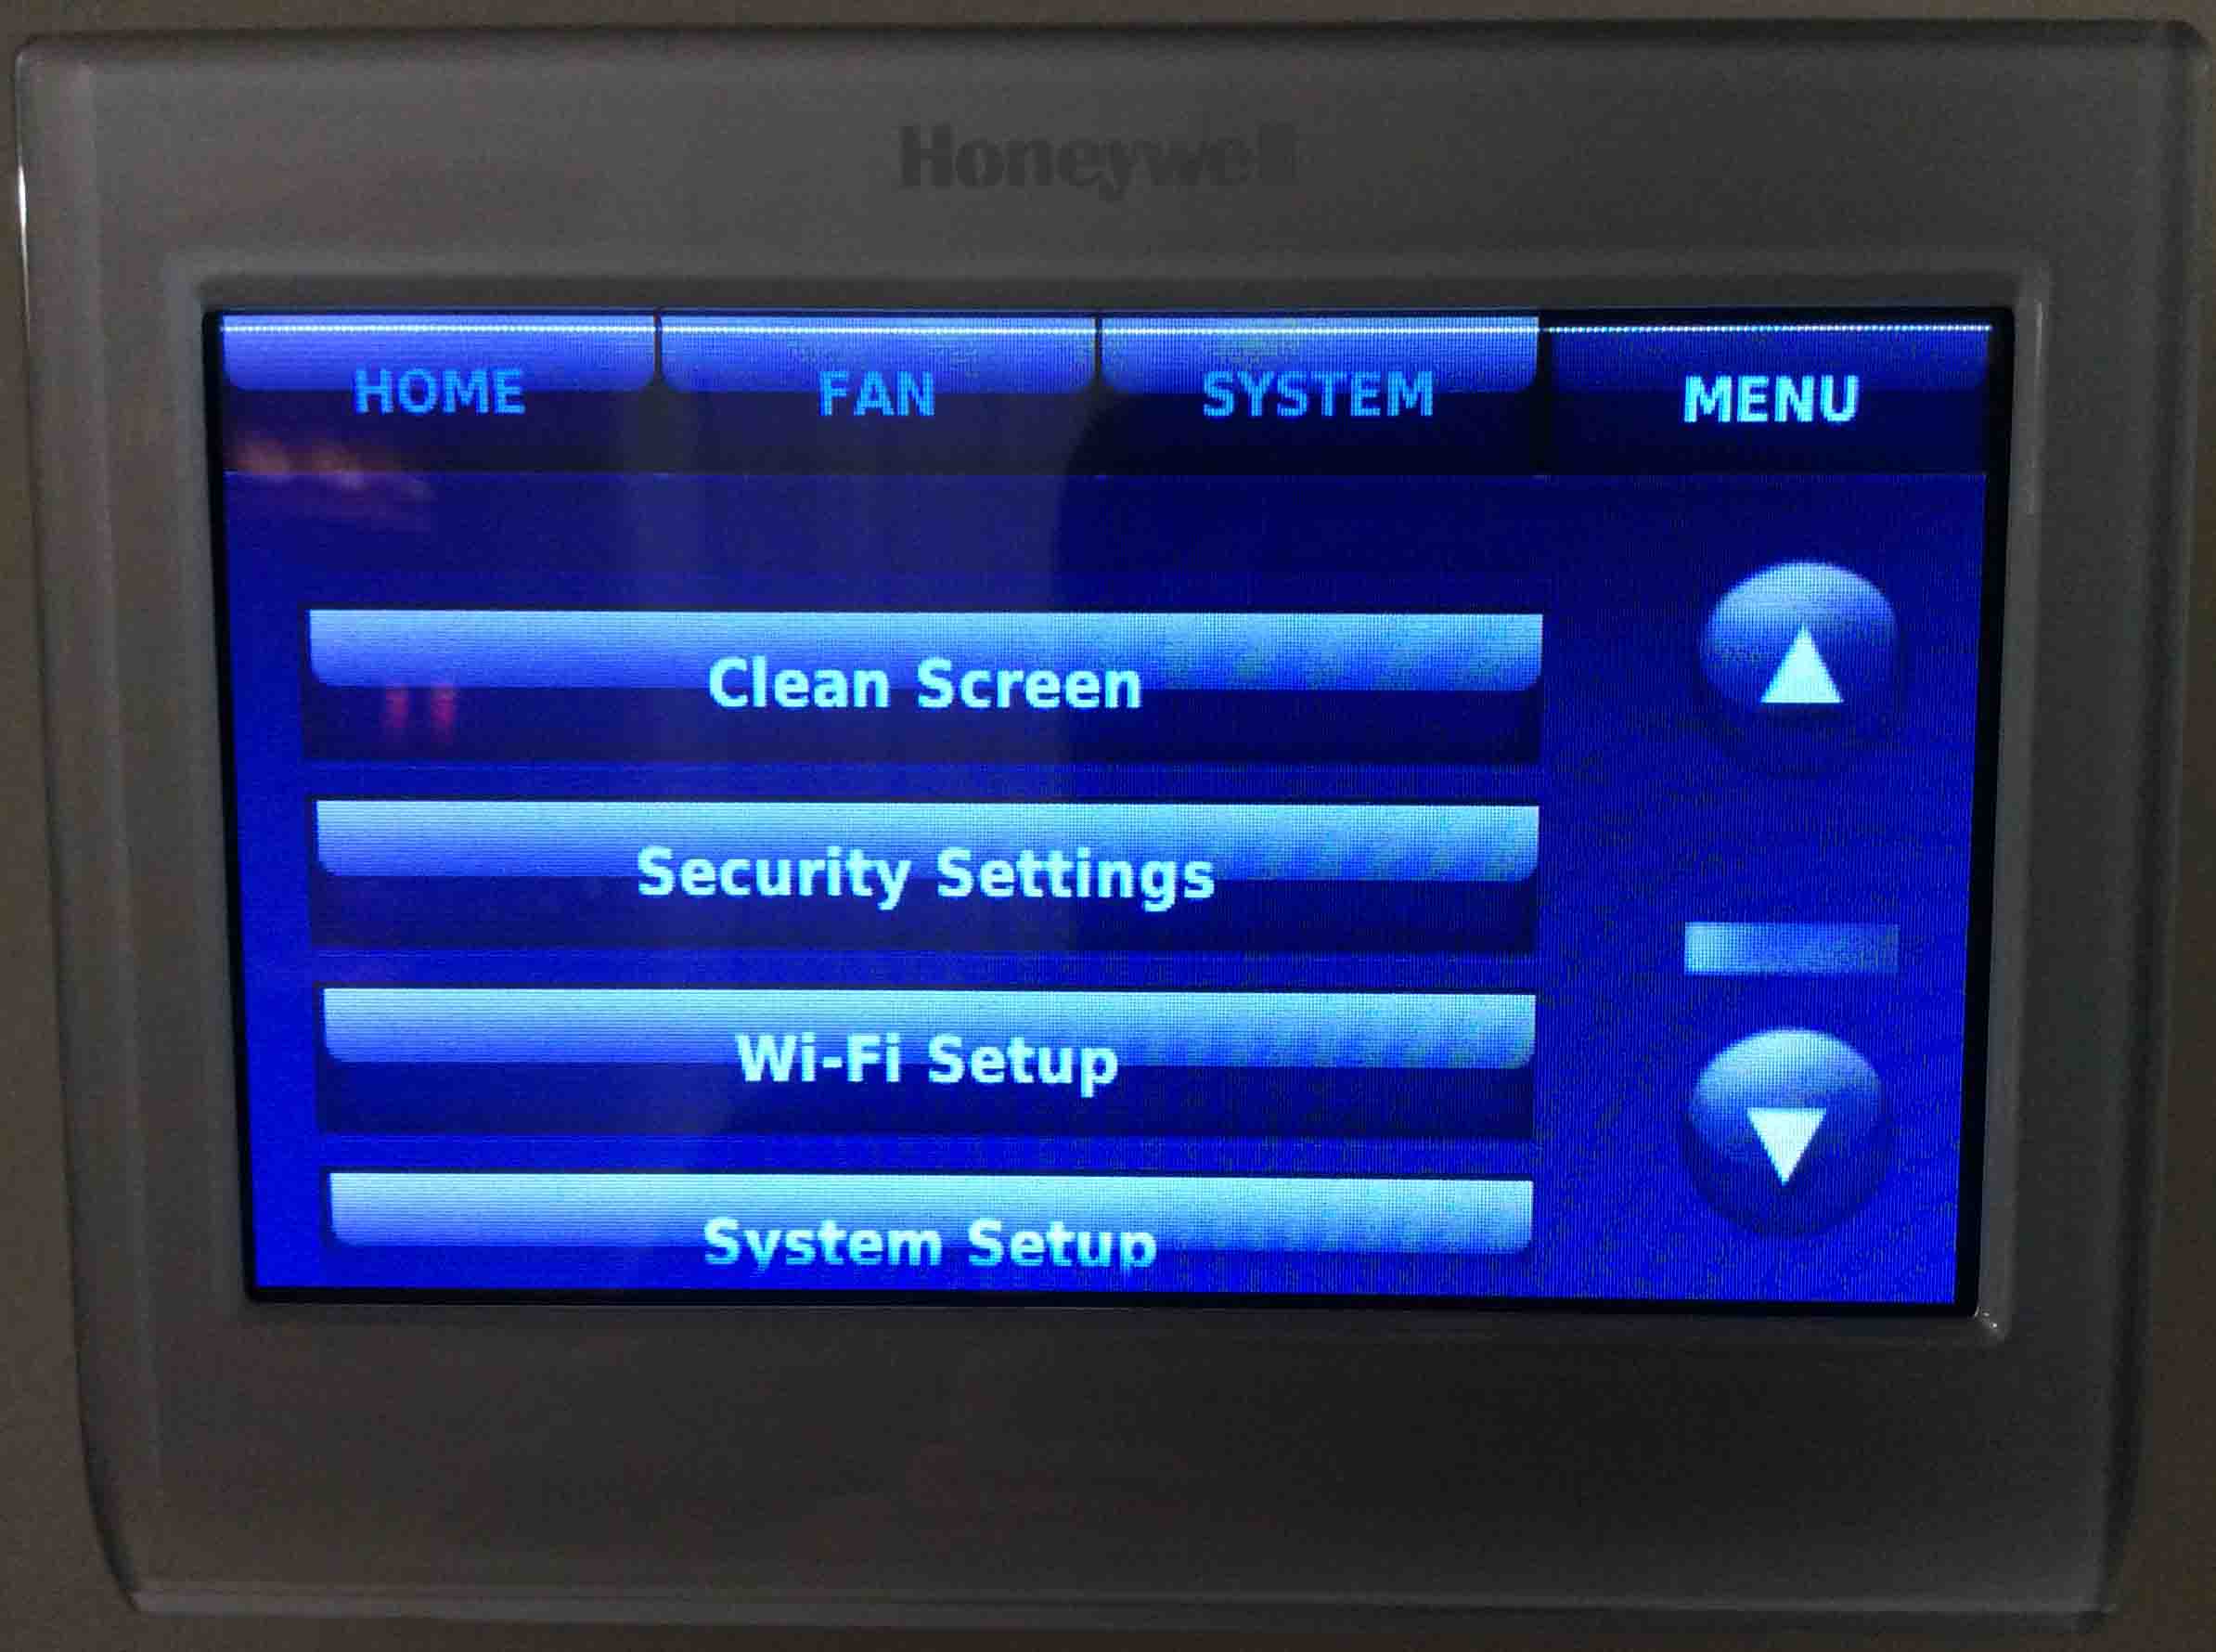
Honeywell RTH9580WF smart WiFi thermostat, showing the -Menu- screen, with the -System Setup- button highlighted.
Honeywell WiFi smart thermostat RTH9580WF, home screen view.
Locking and Unlocking the Thermostat
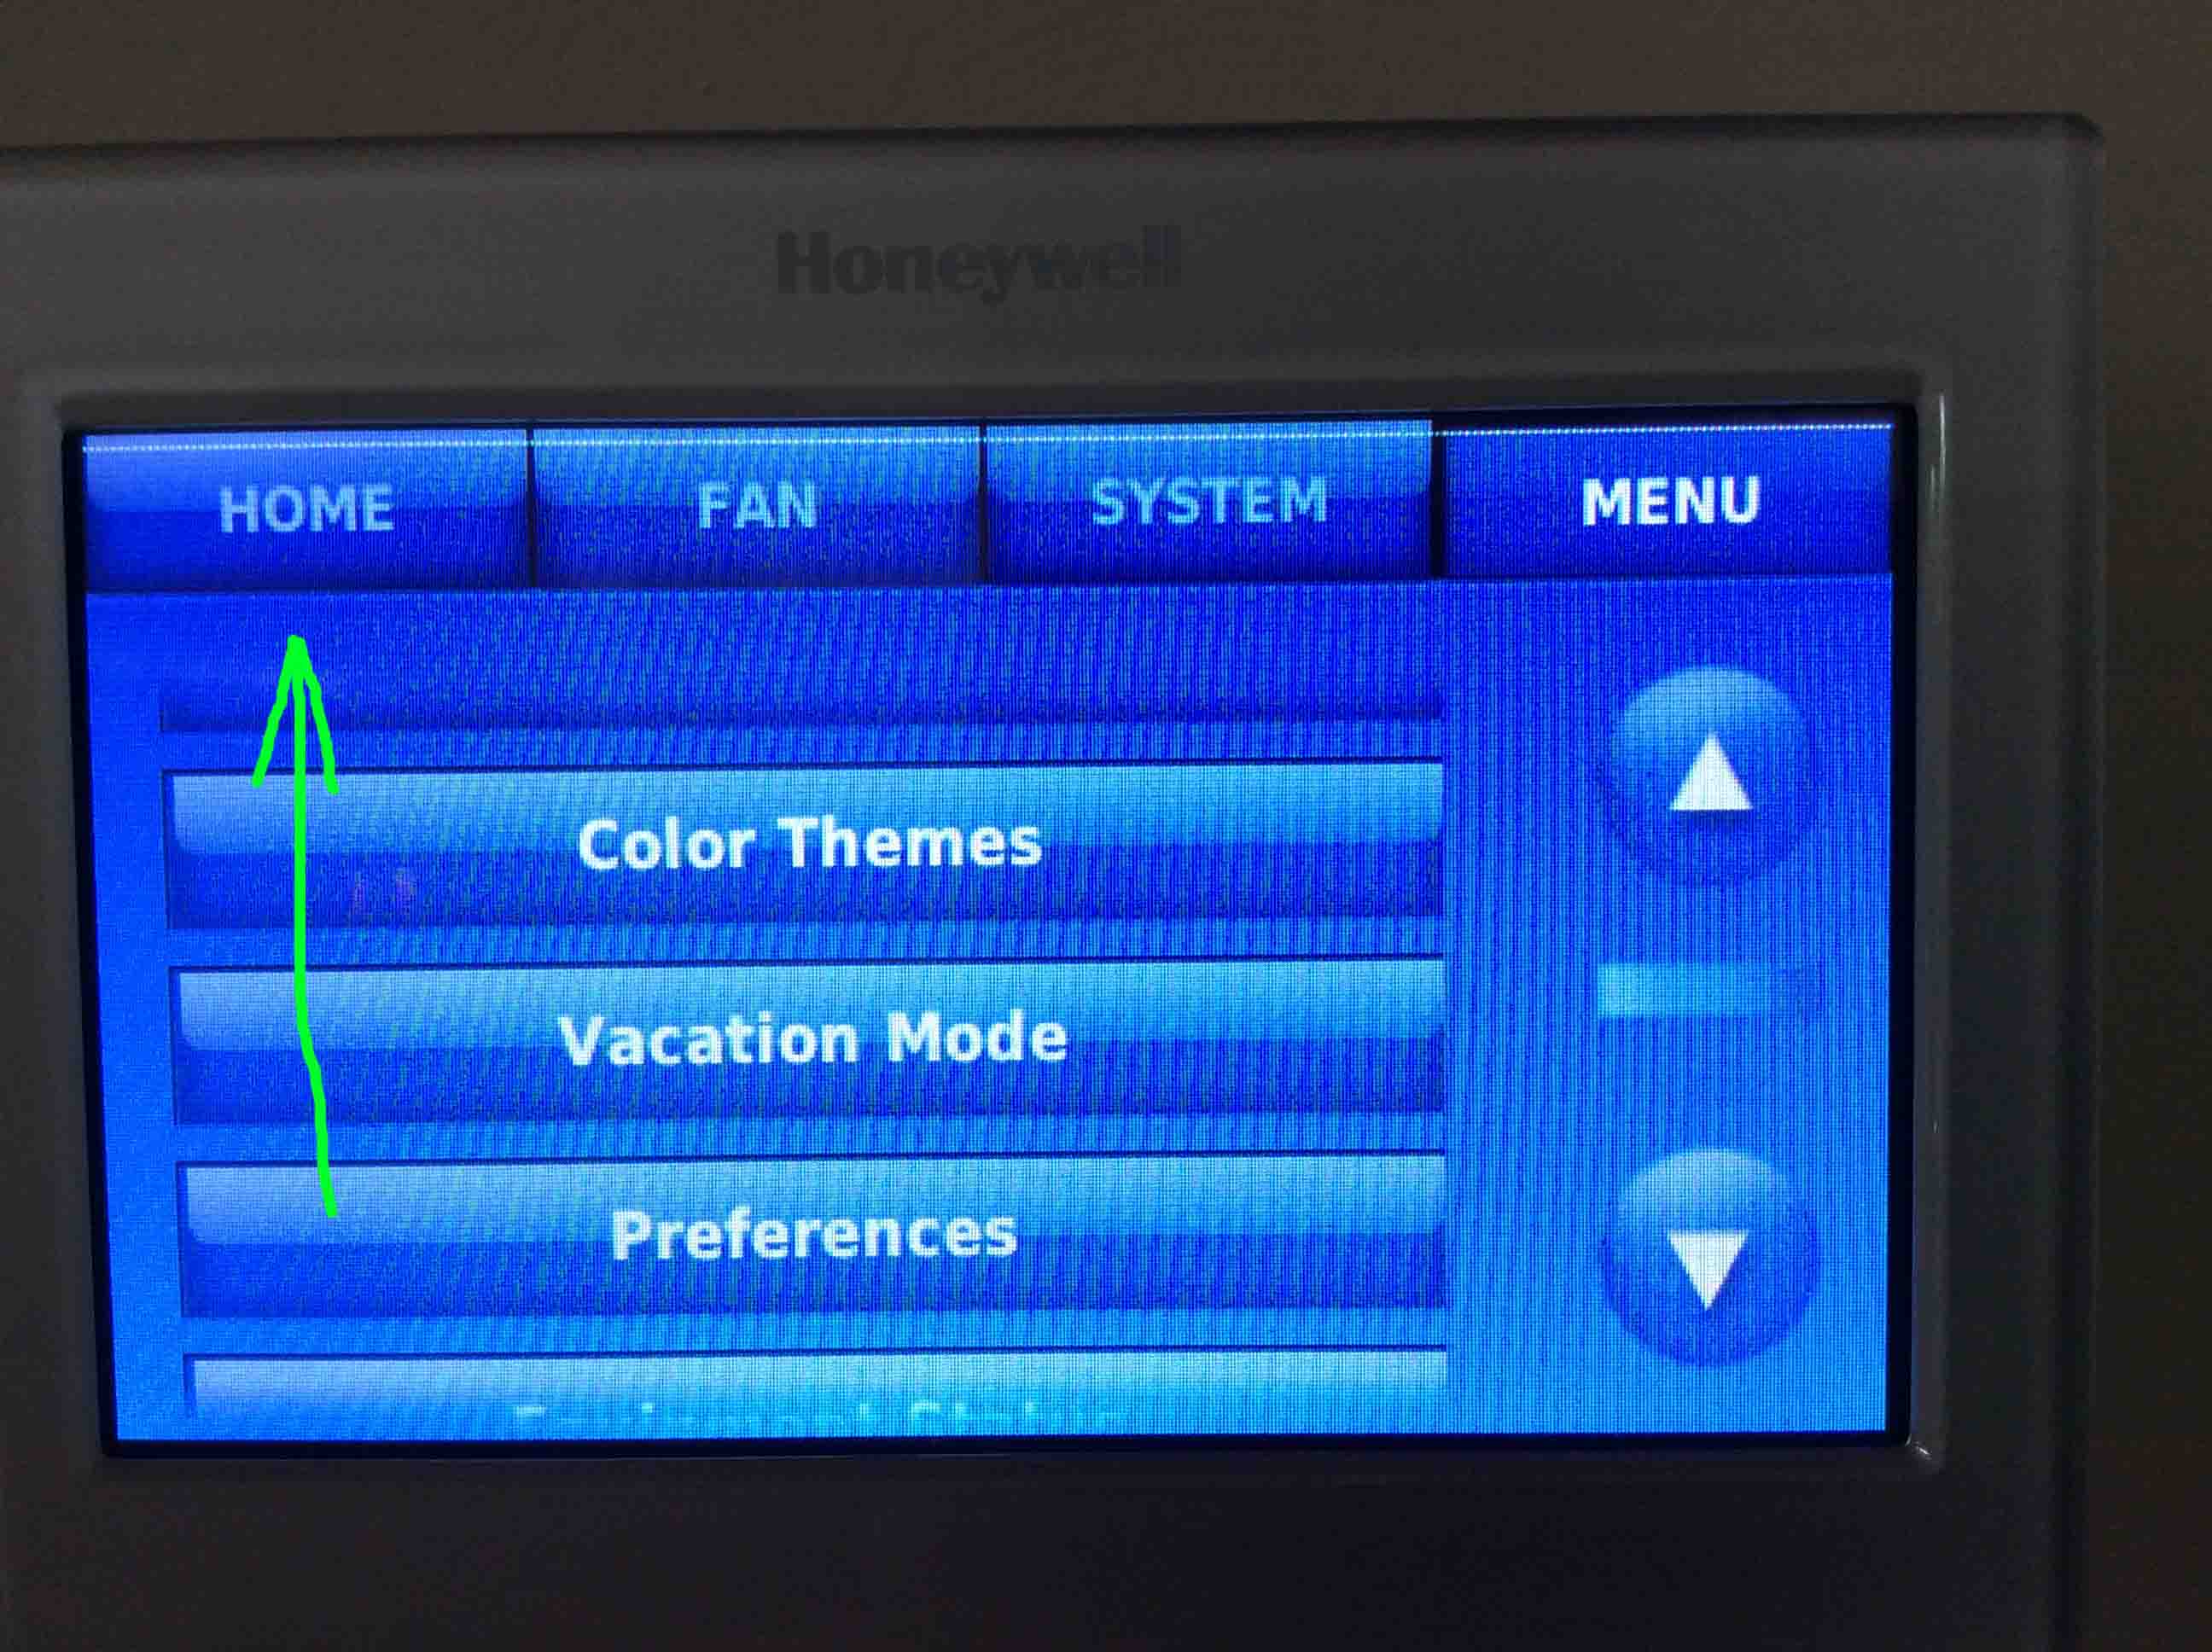
Honeywell RTH9580WF smart thermostat, displaying the unlocked form of its -Main Menu- screen, scrolled down to show unlocked options.
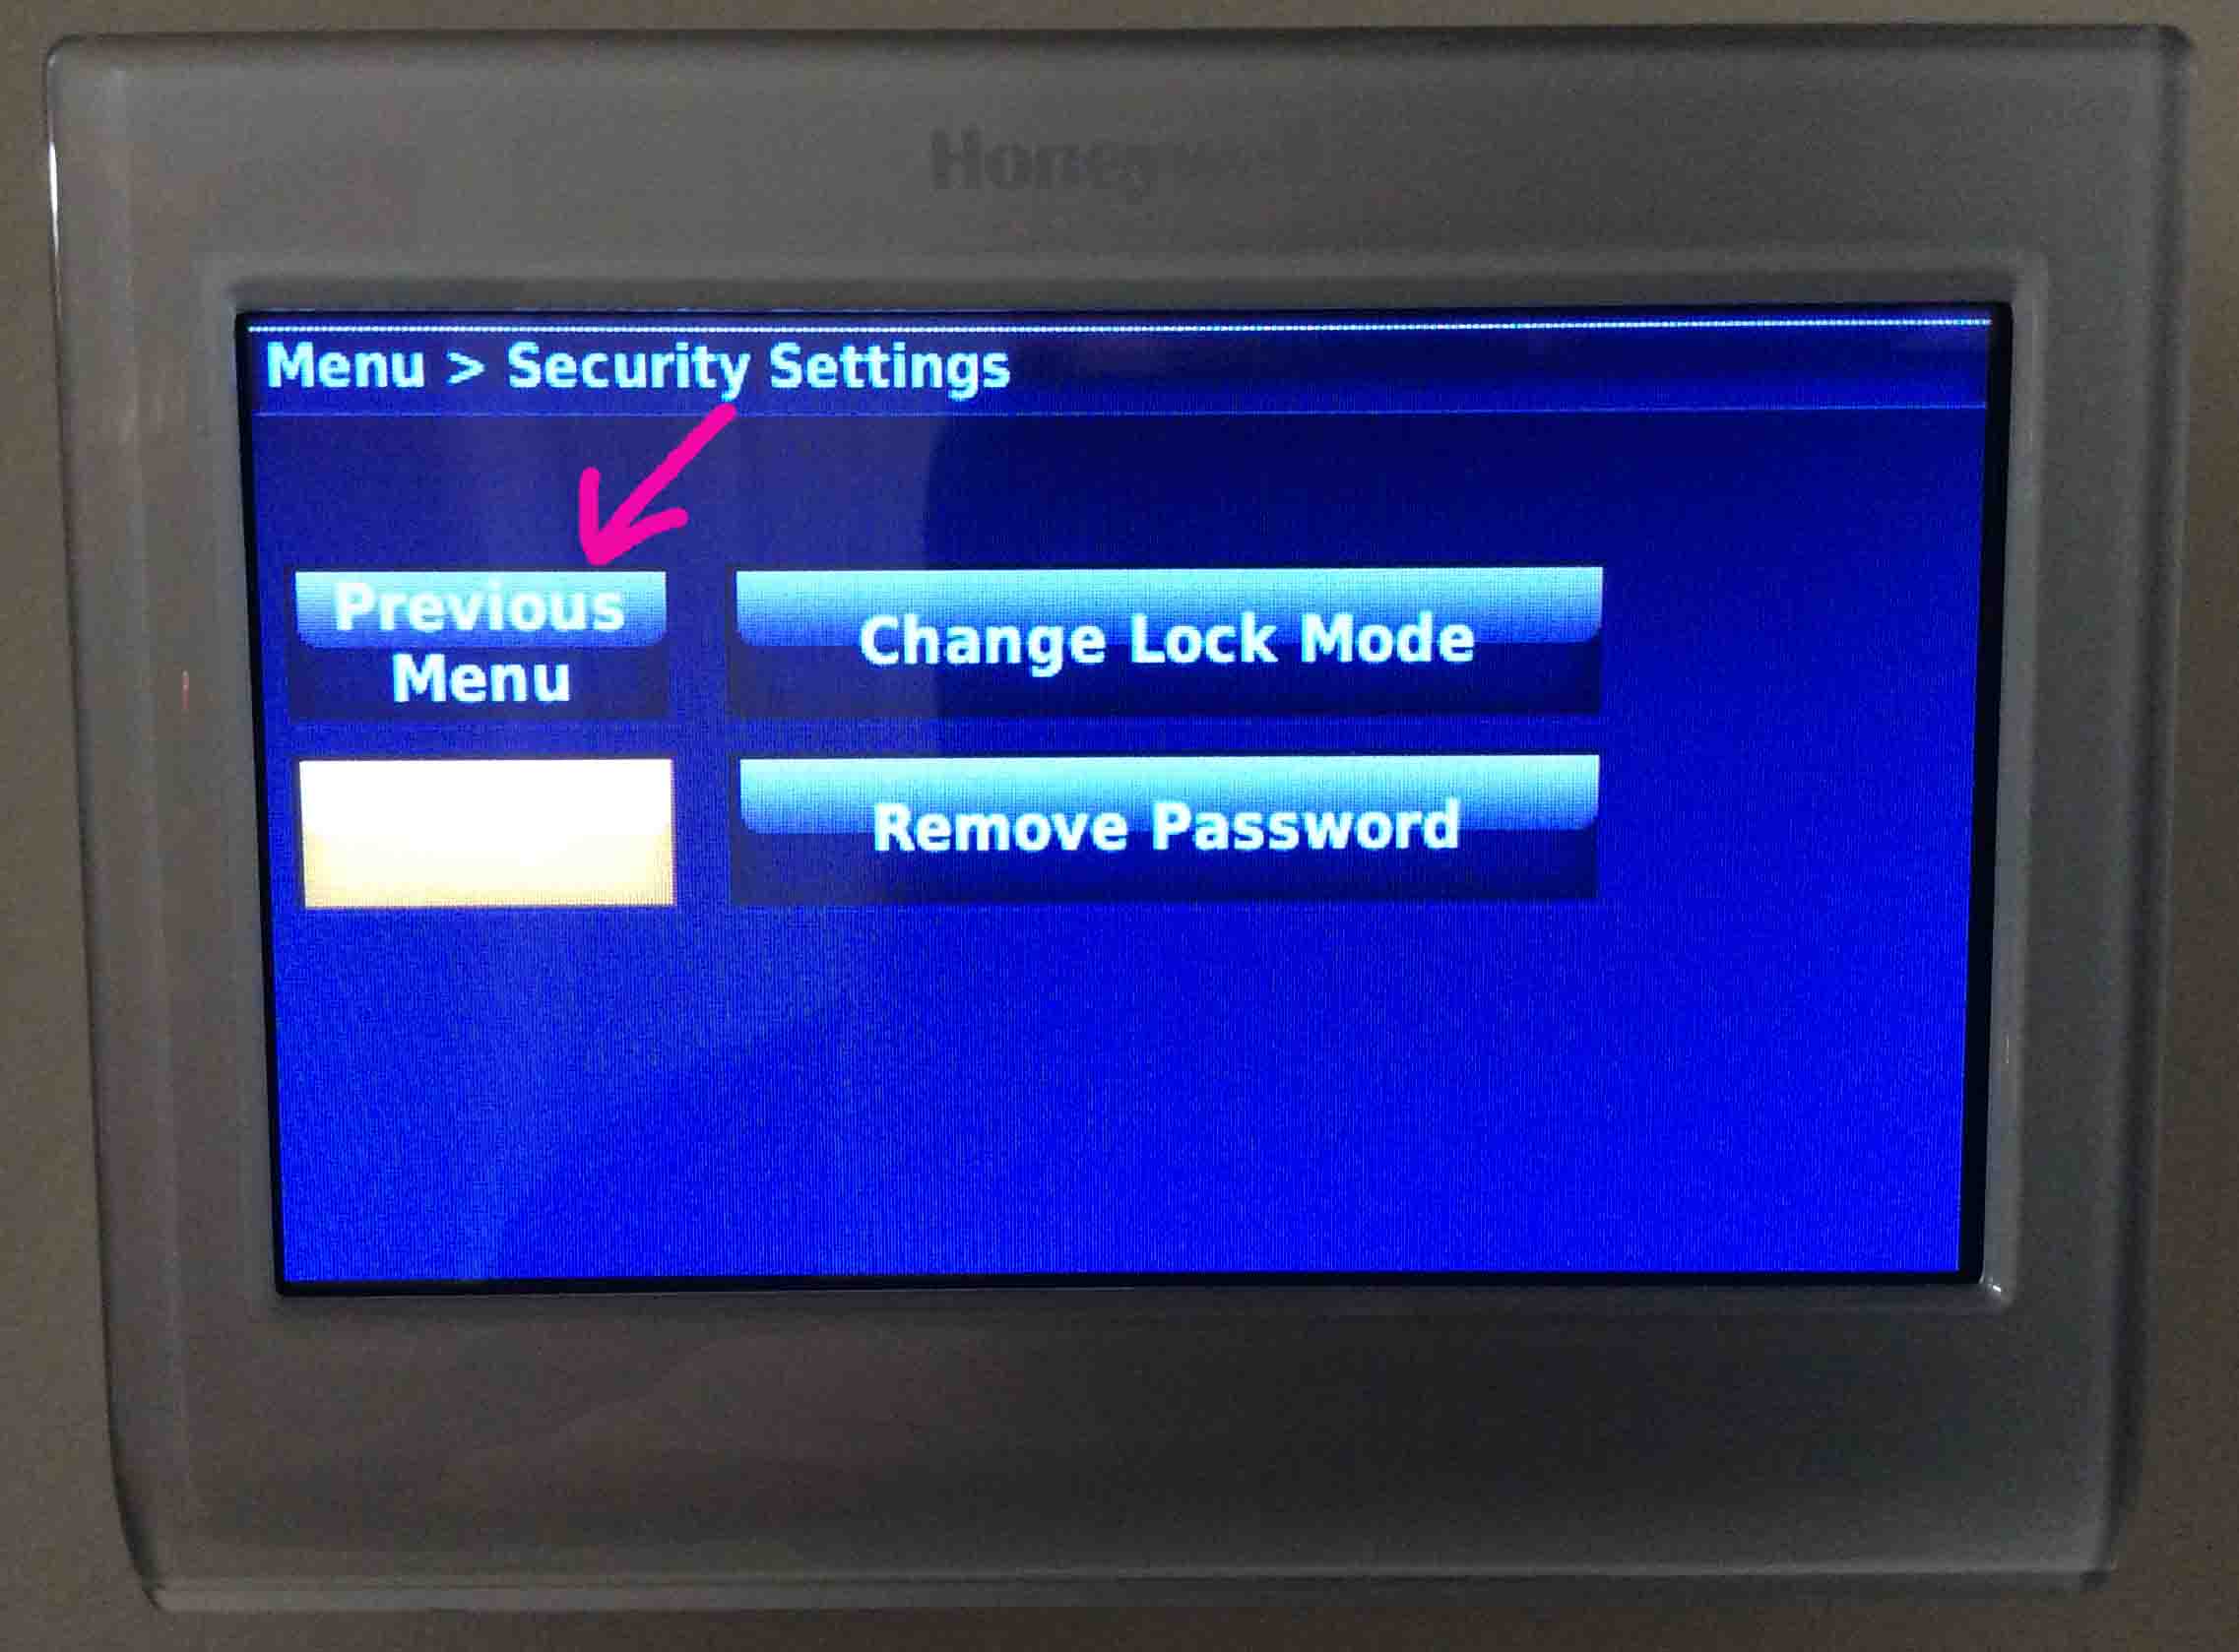
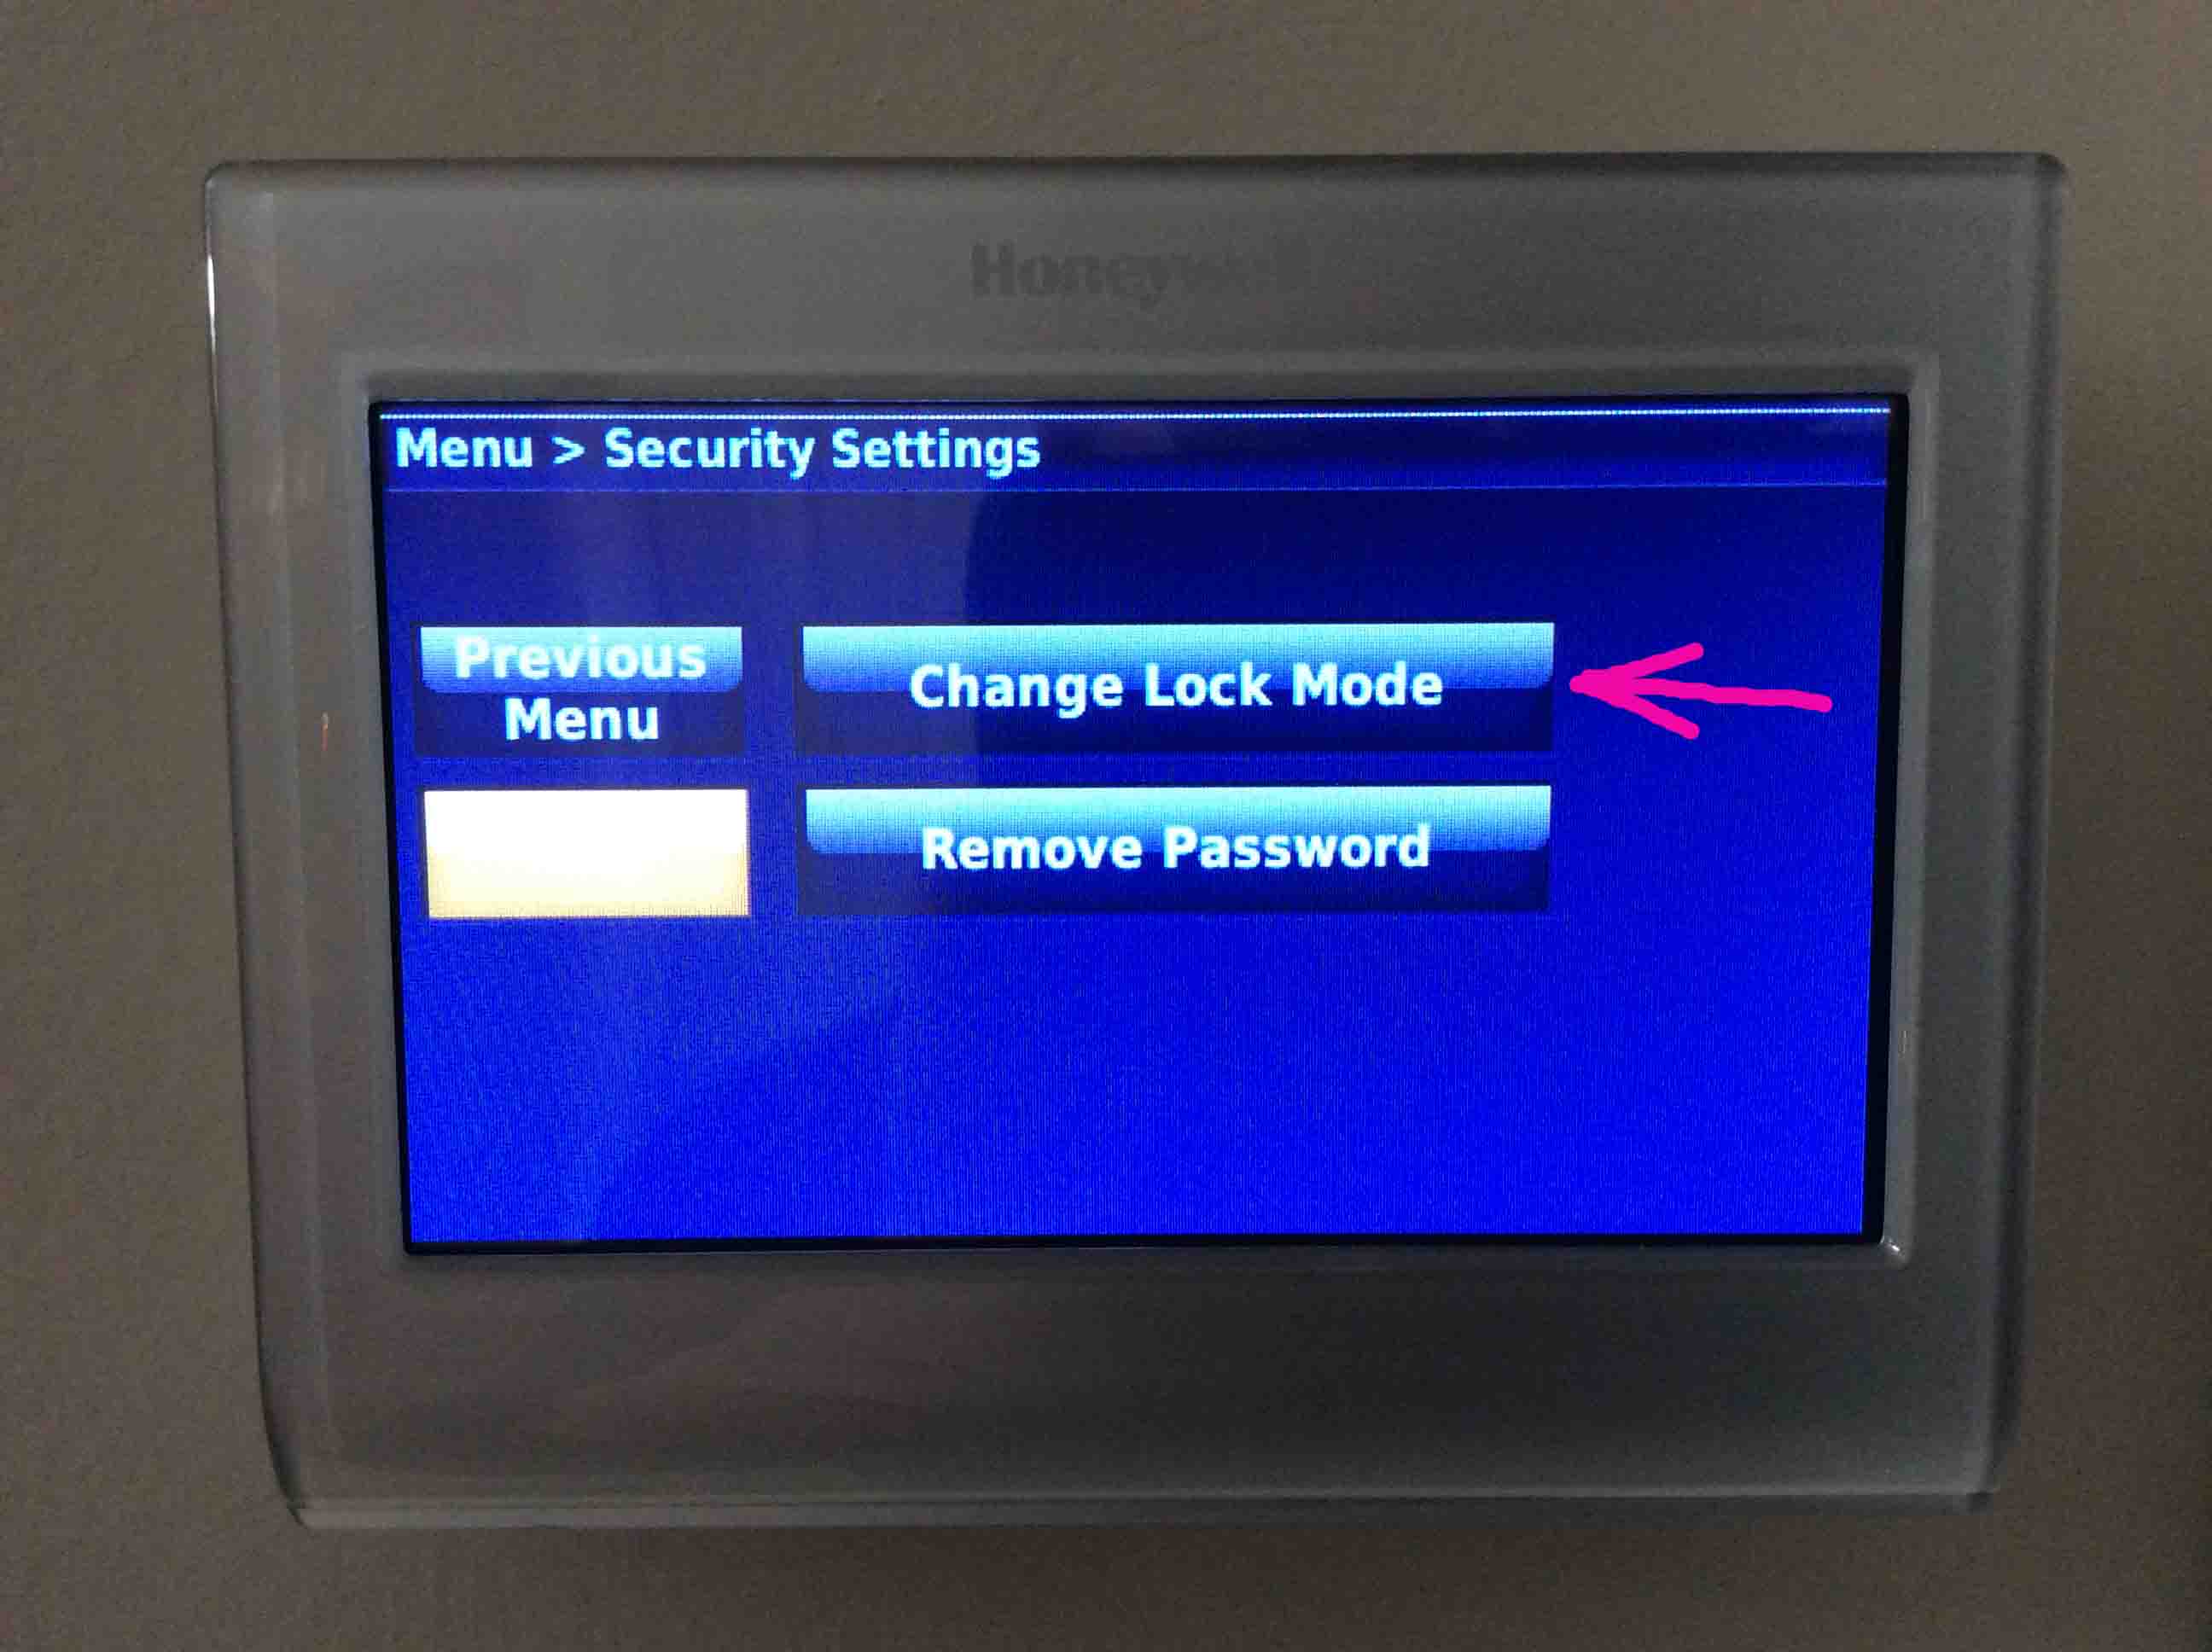
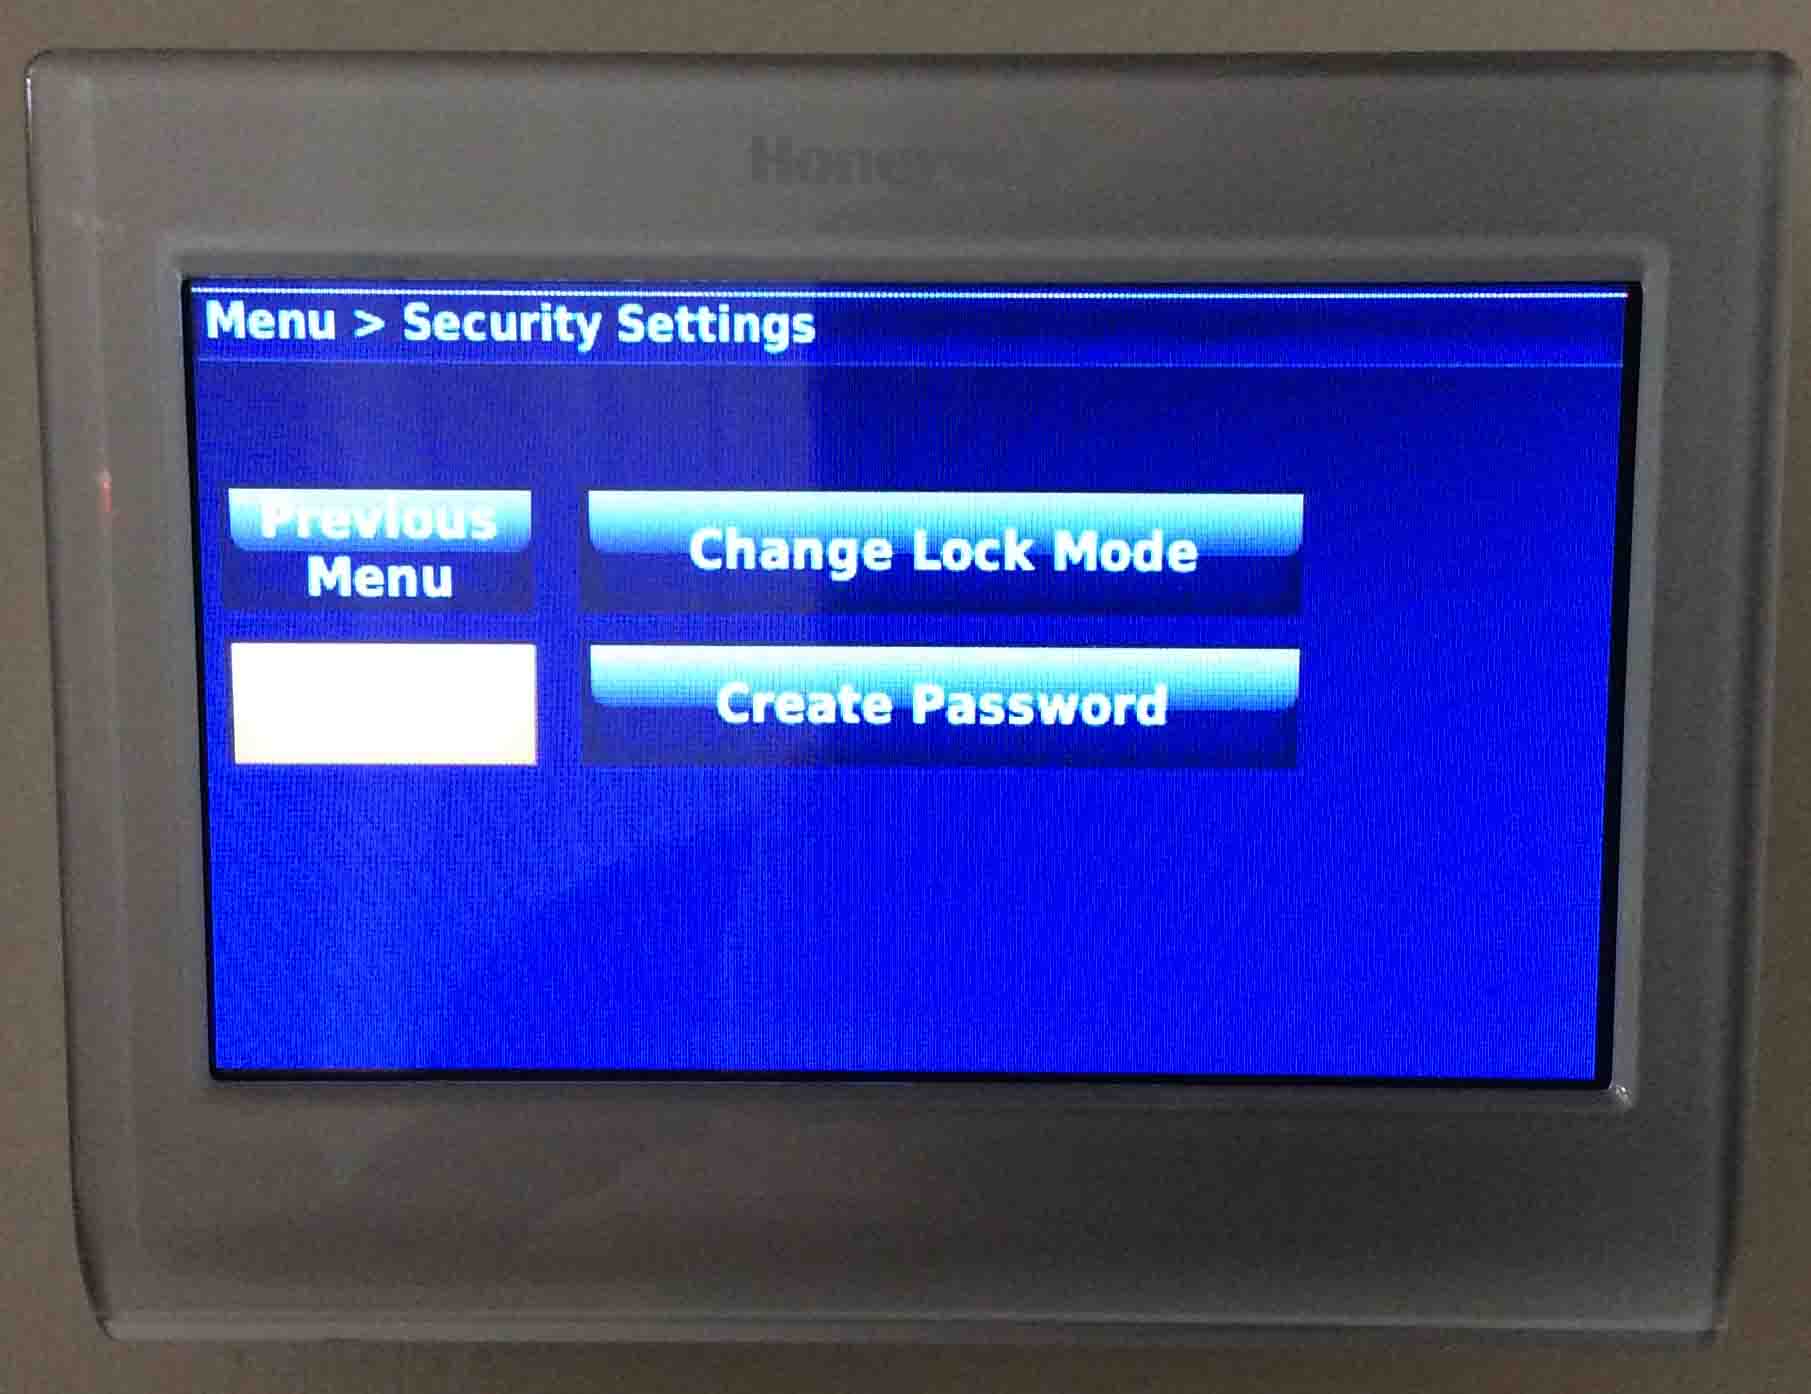
Control how the t-stat locks and unlocks on the Security Settings screen, shown next.
The RTH9580WF smart thermostat, displaying its -Security Settings- screen, with the -Previous Menu- button highlighted.
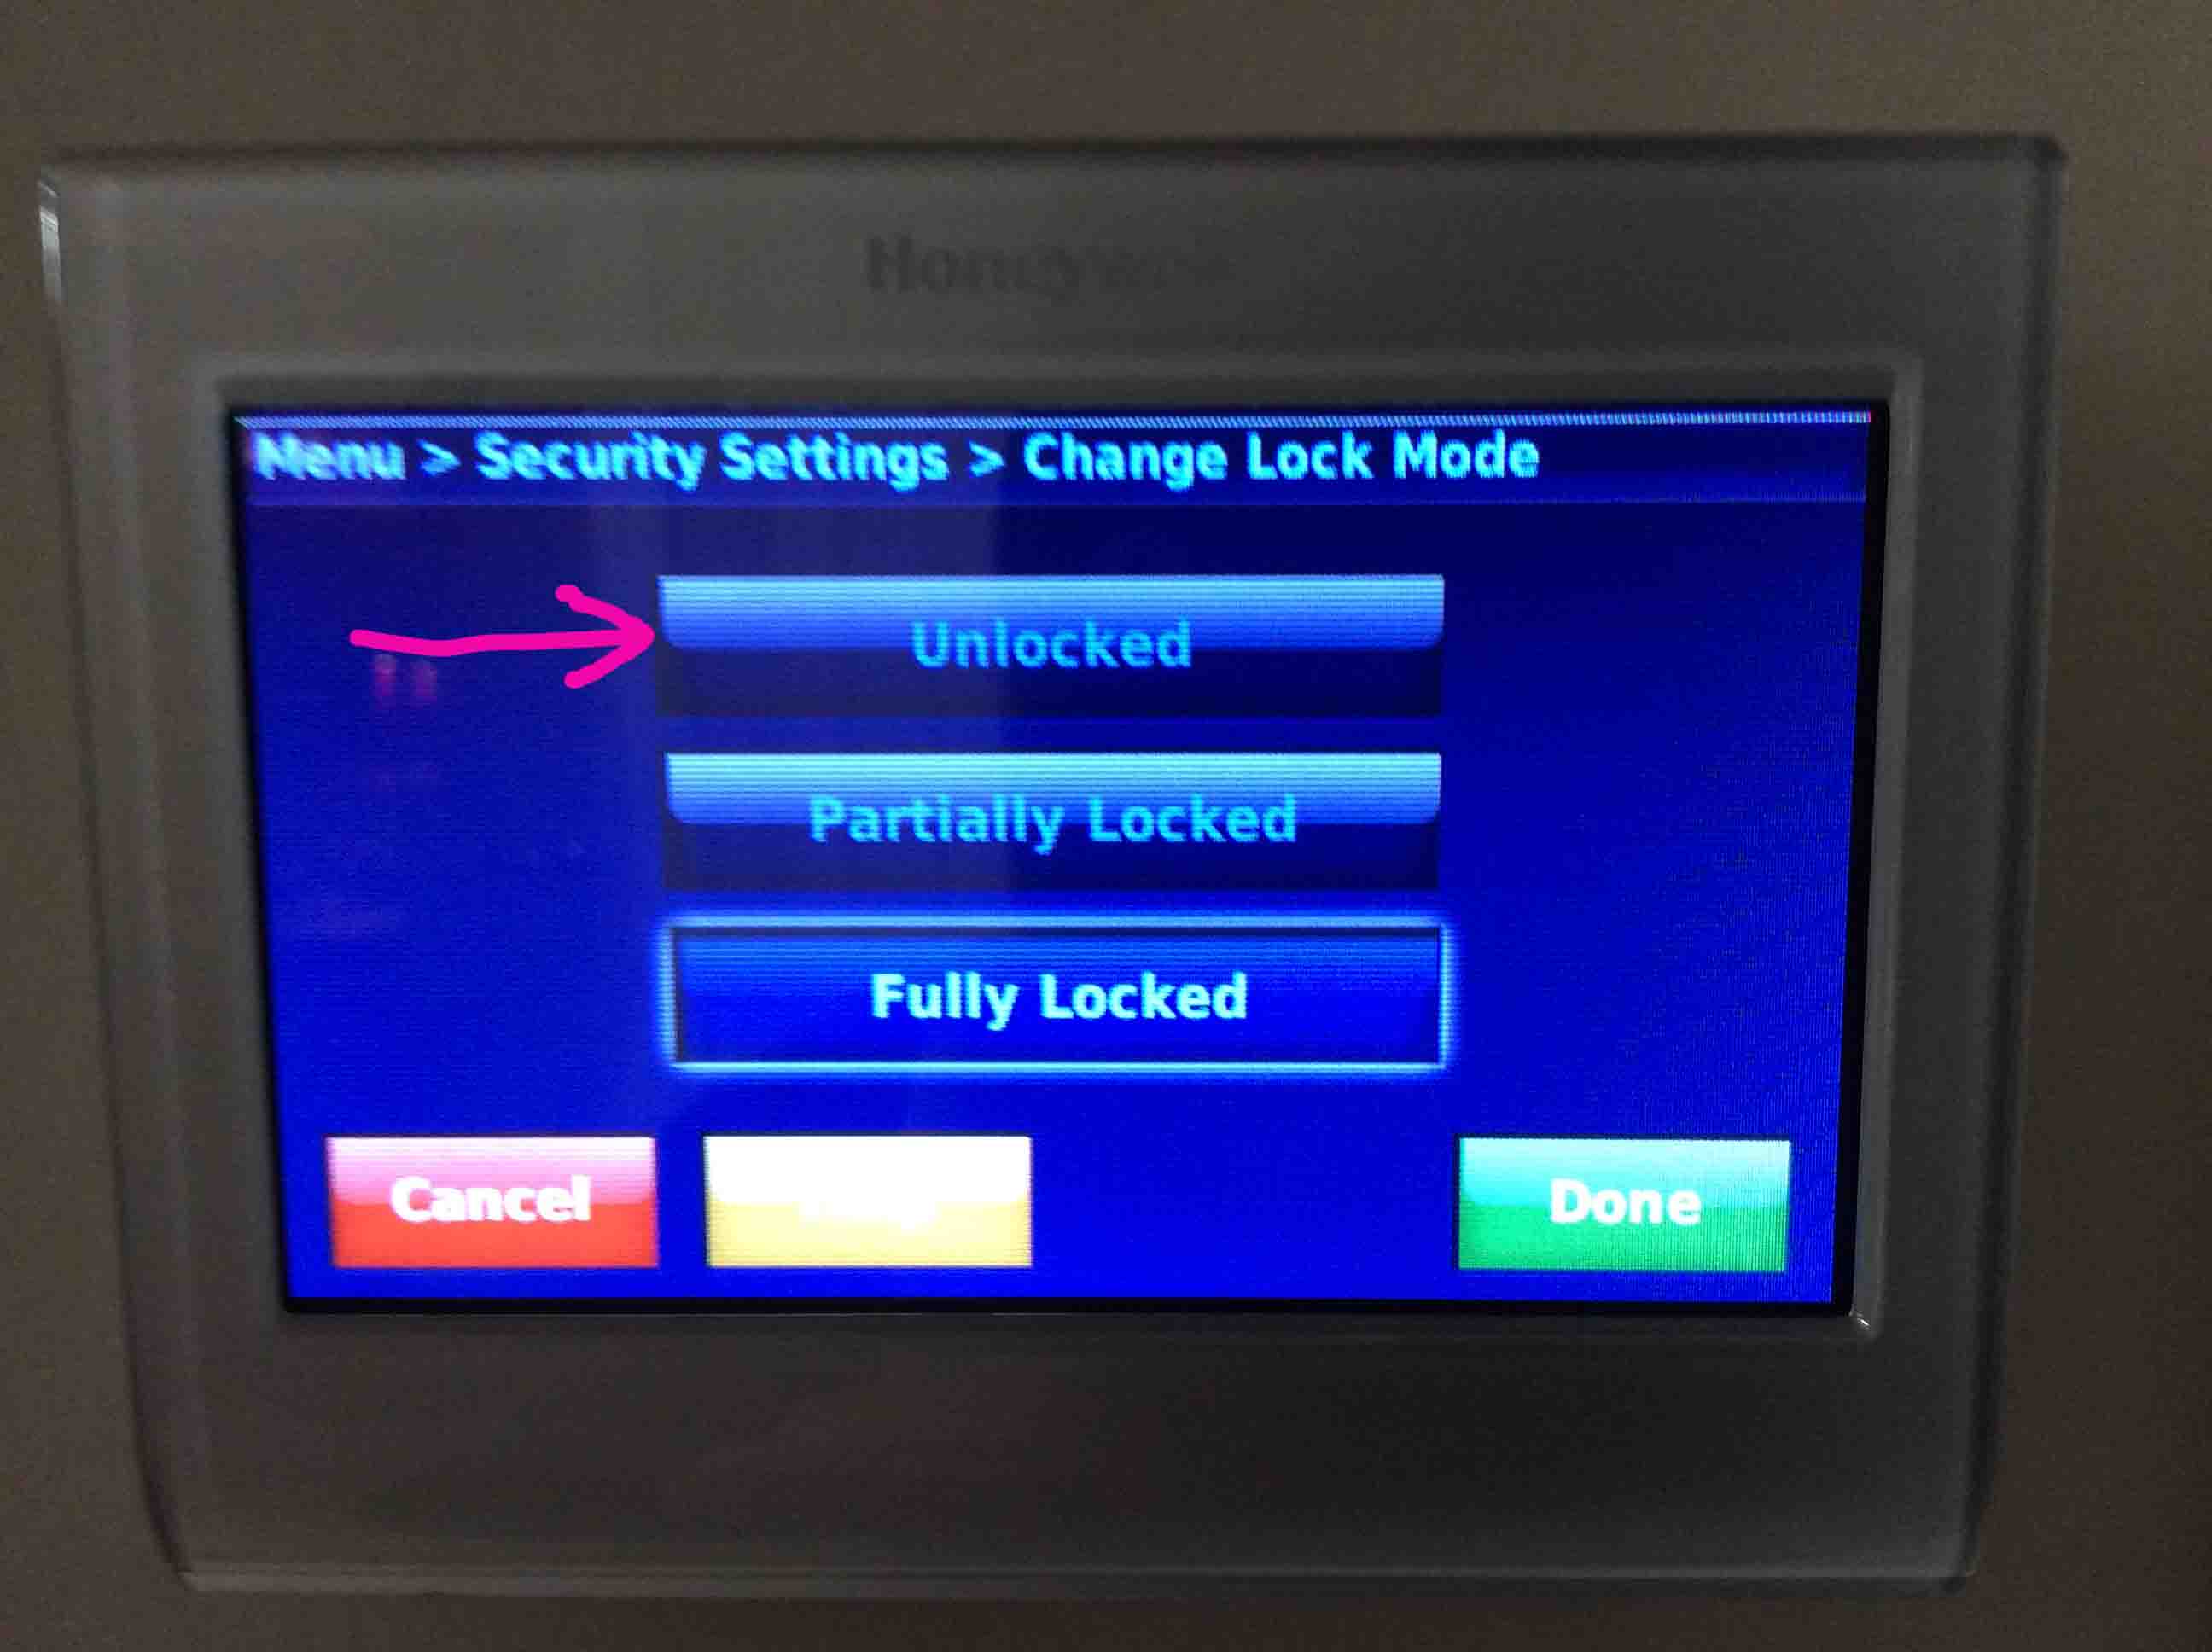
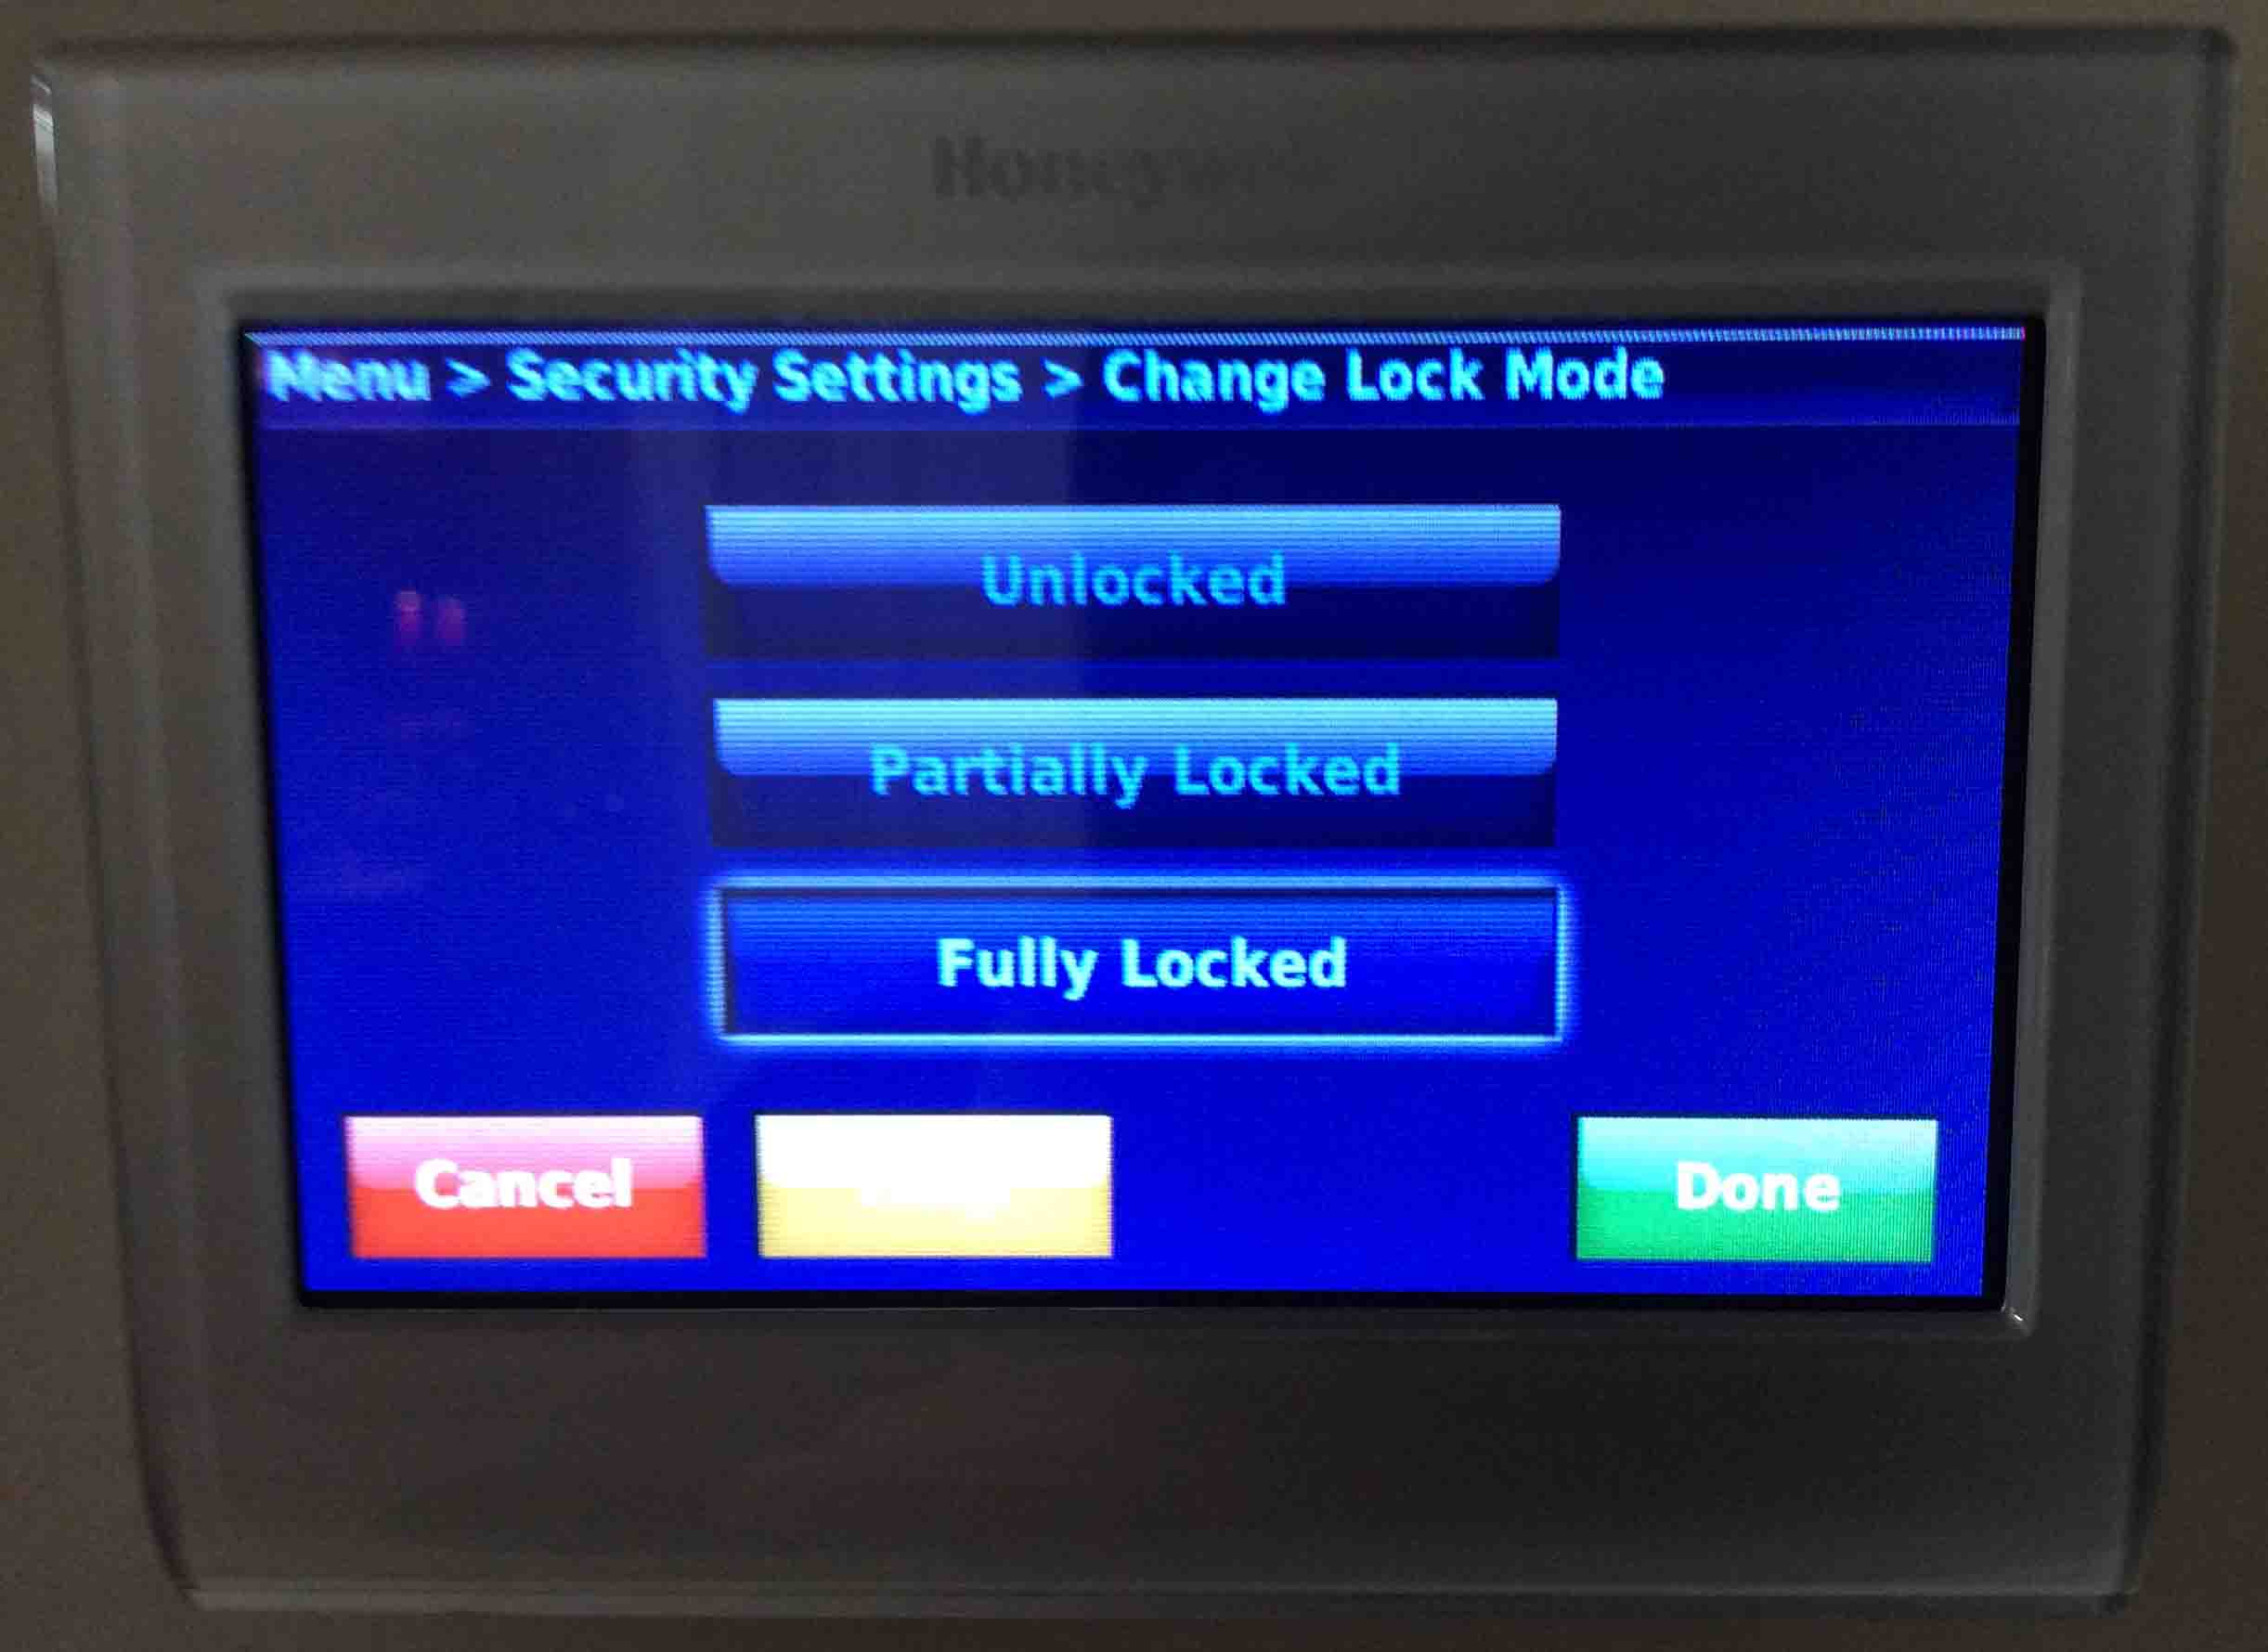
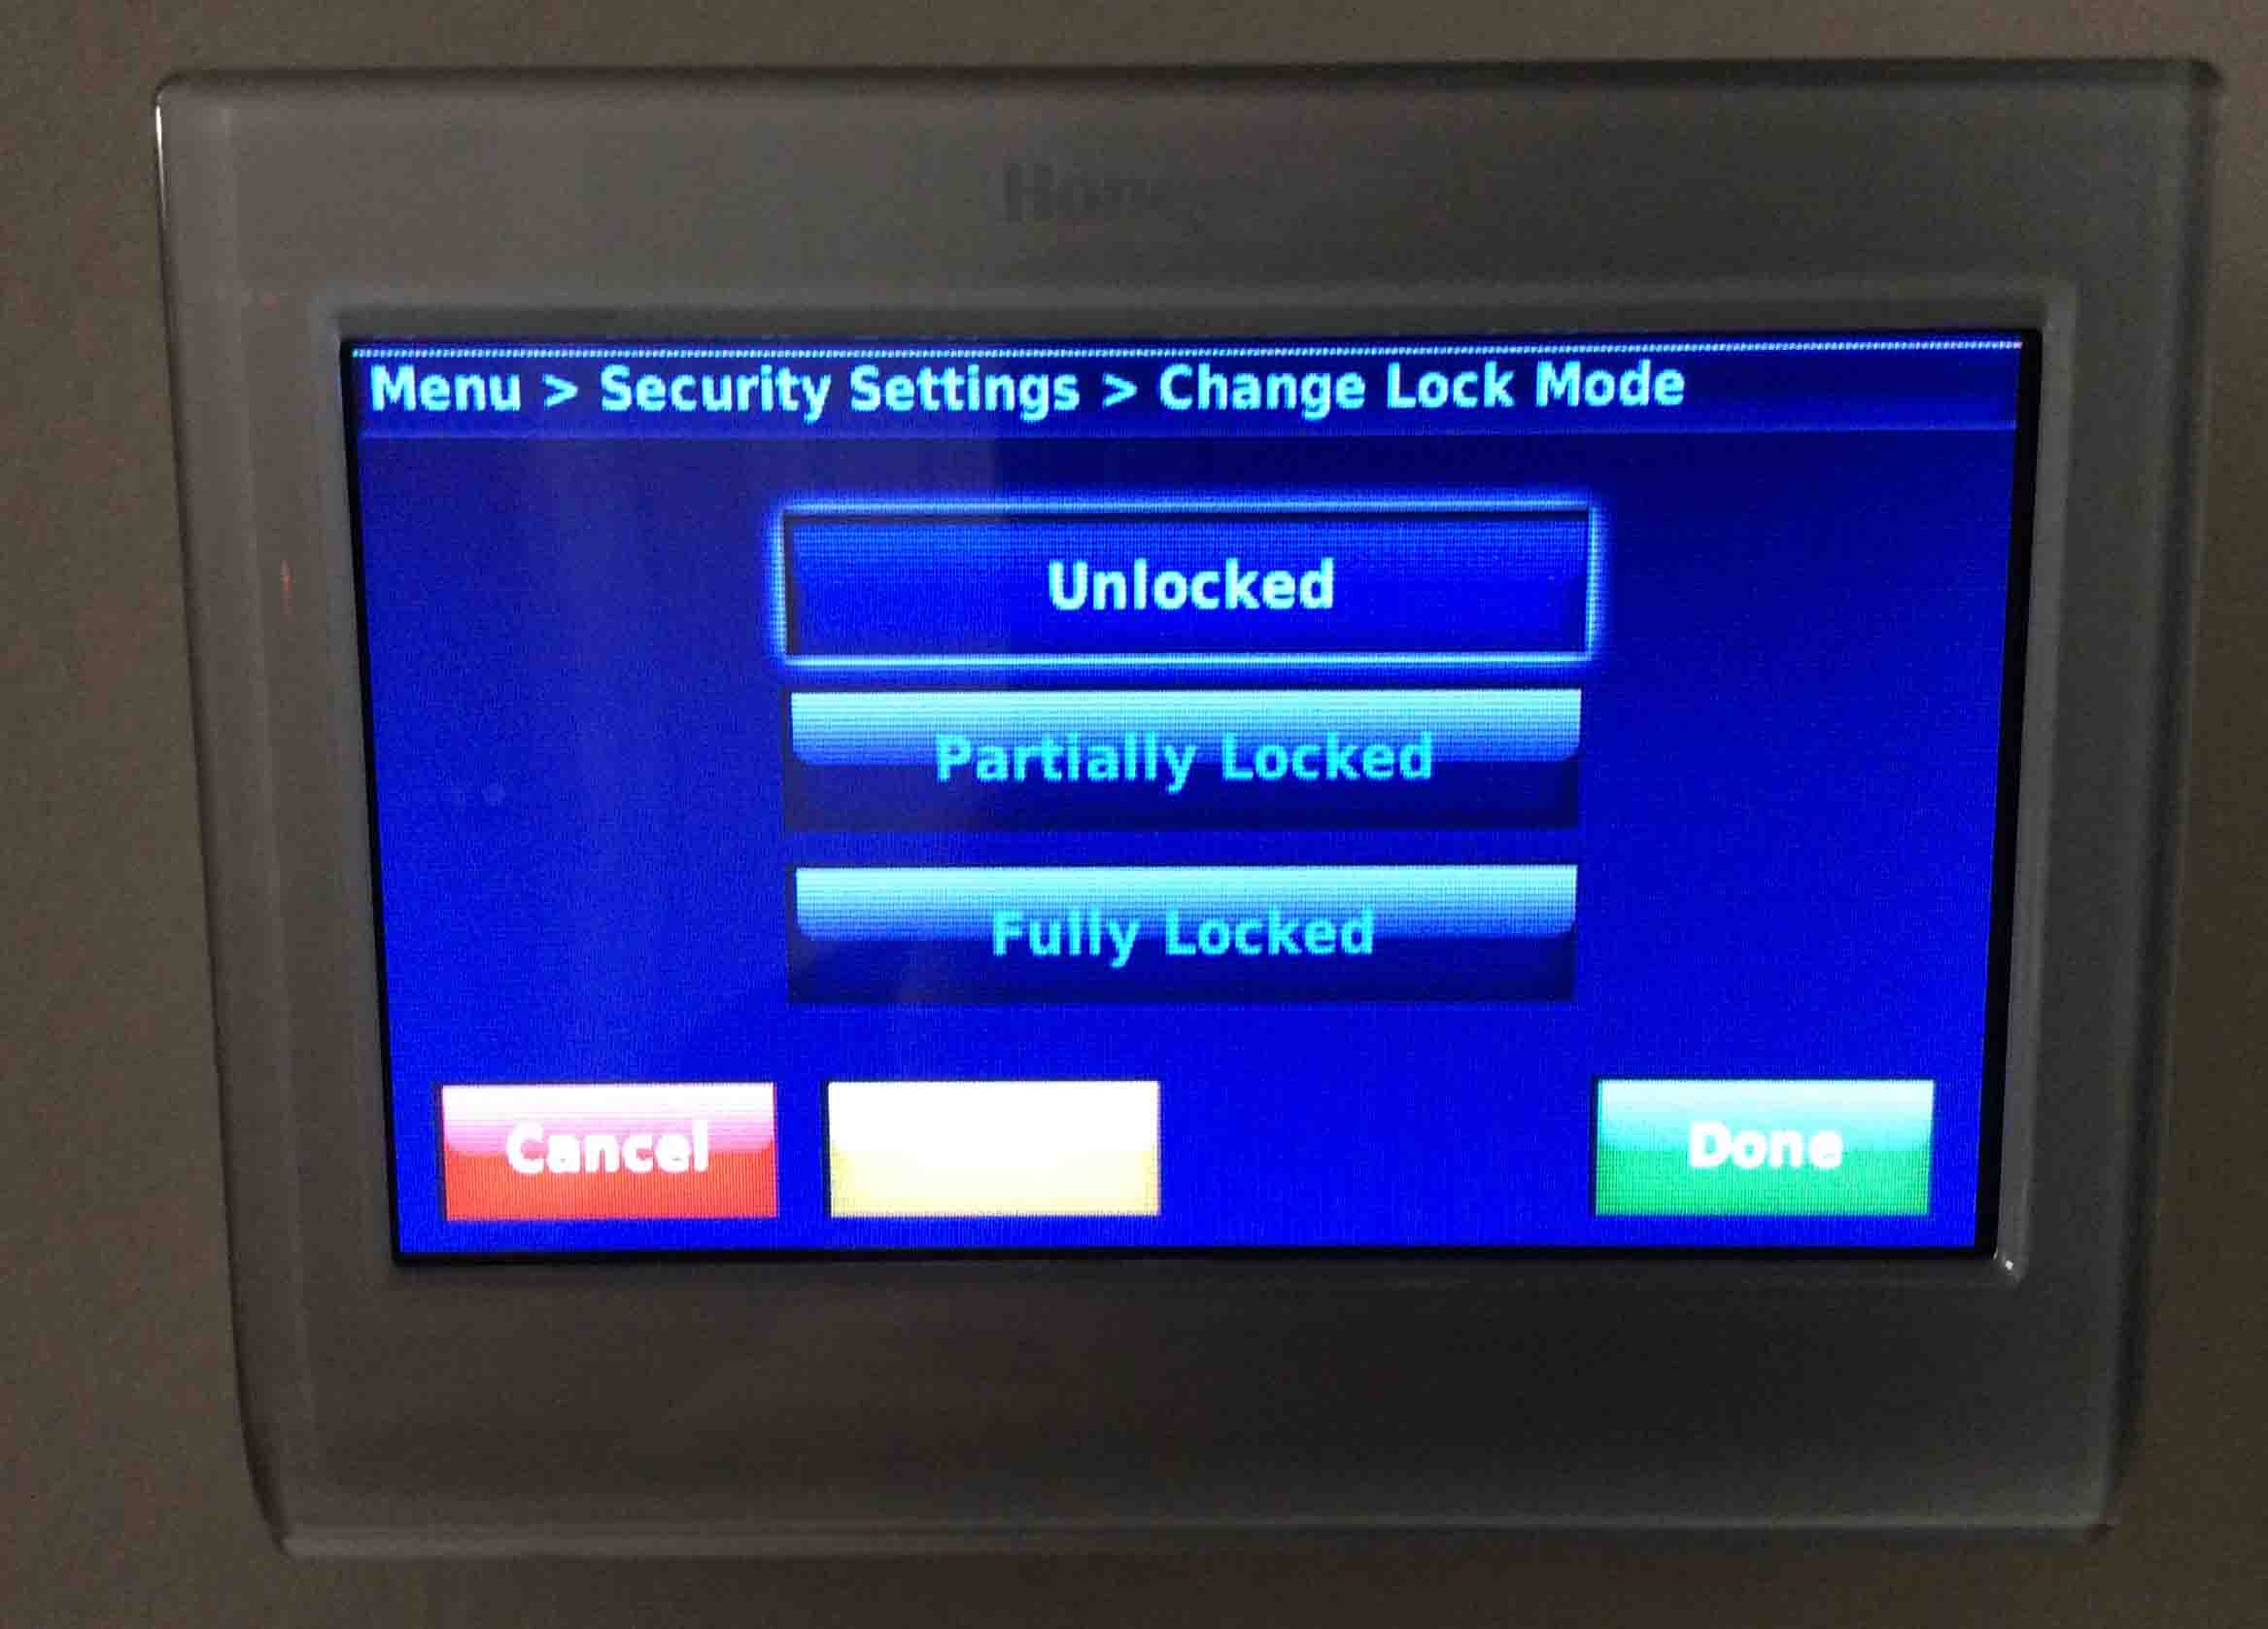
The Change Lock Mode page gives options for unlocking and locking the t-stat.
Honeywell RTH9580WF smart thermostat, displaying its -Security Settings- screen, with the -Unlocked- button highlighted.
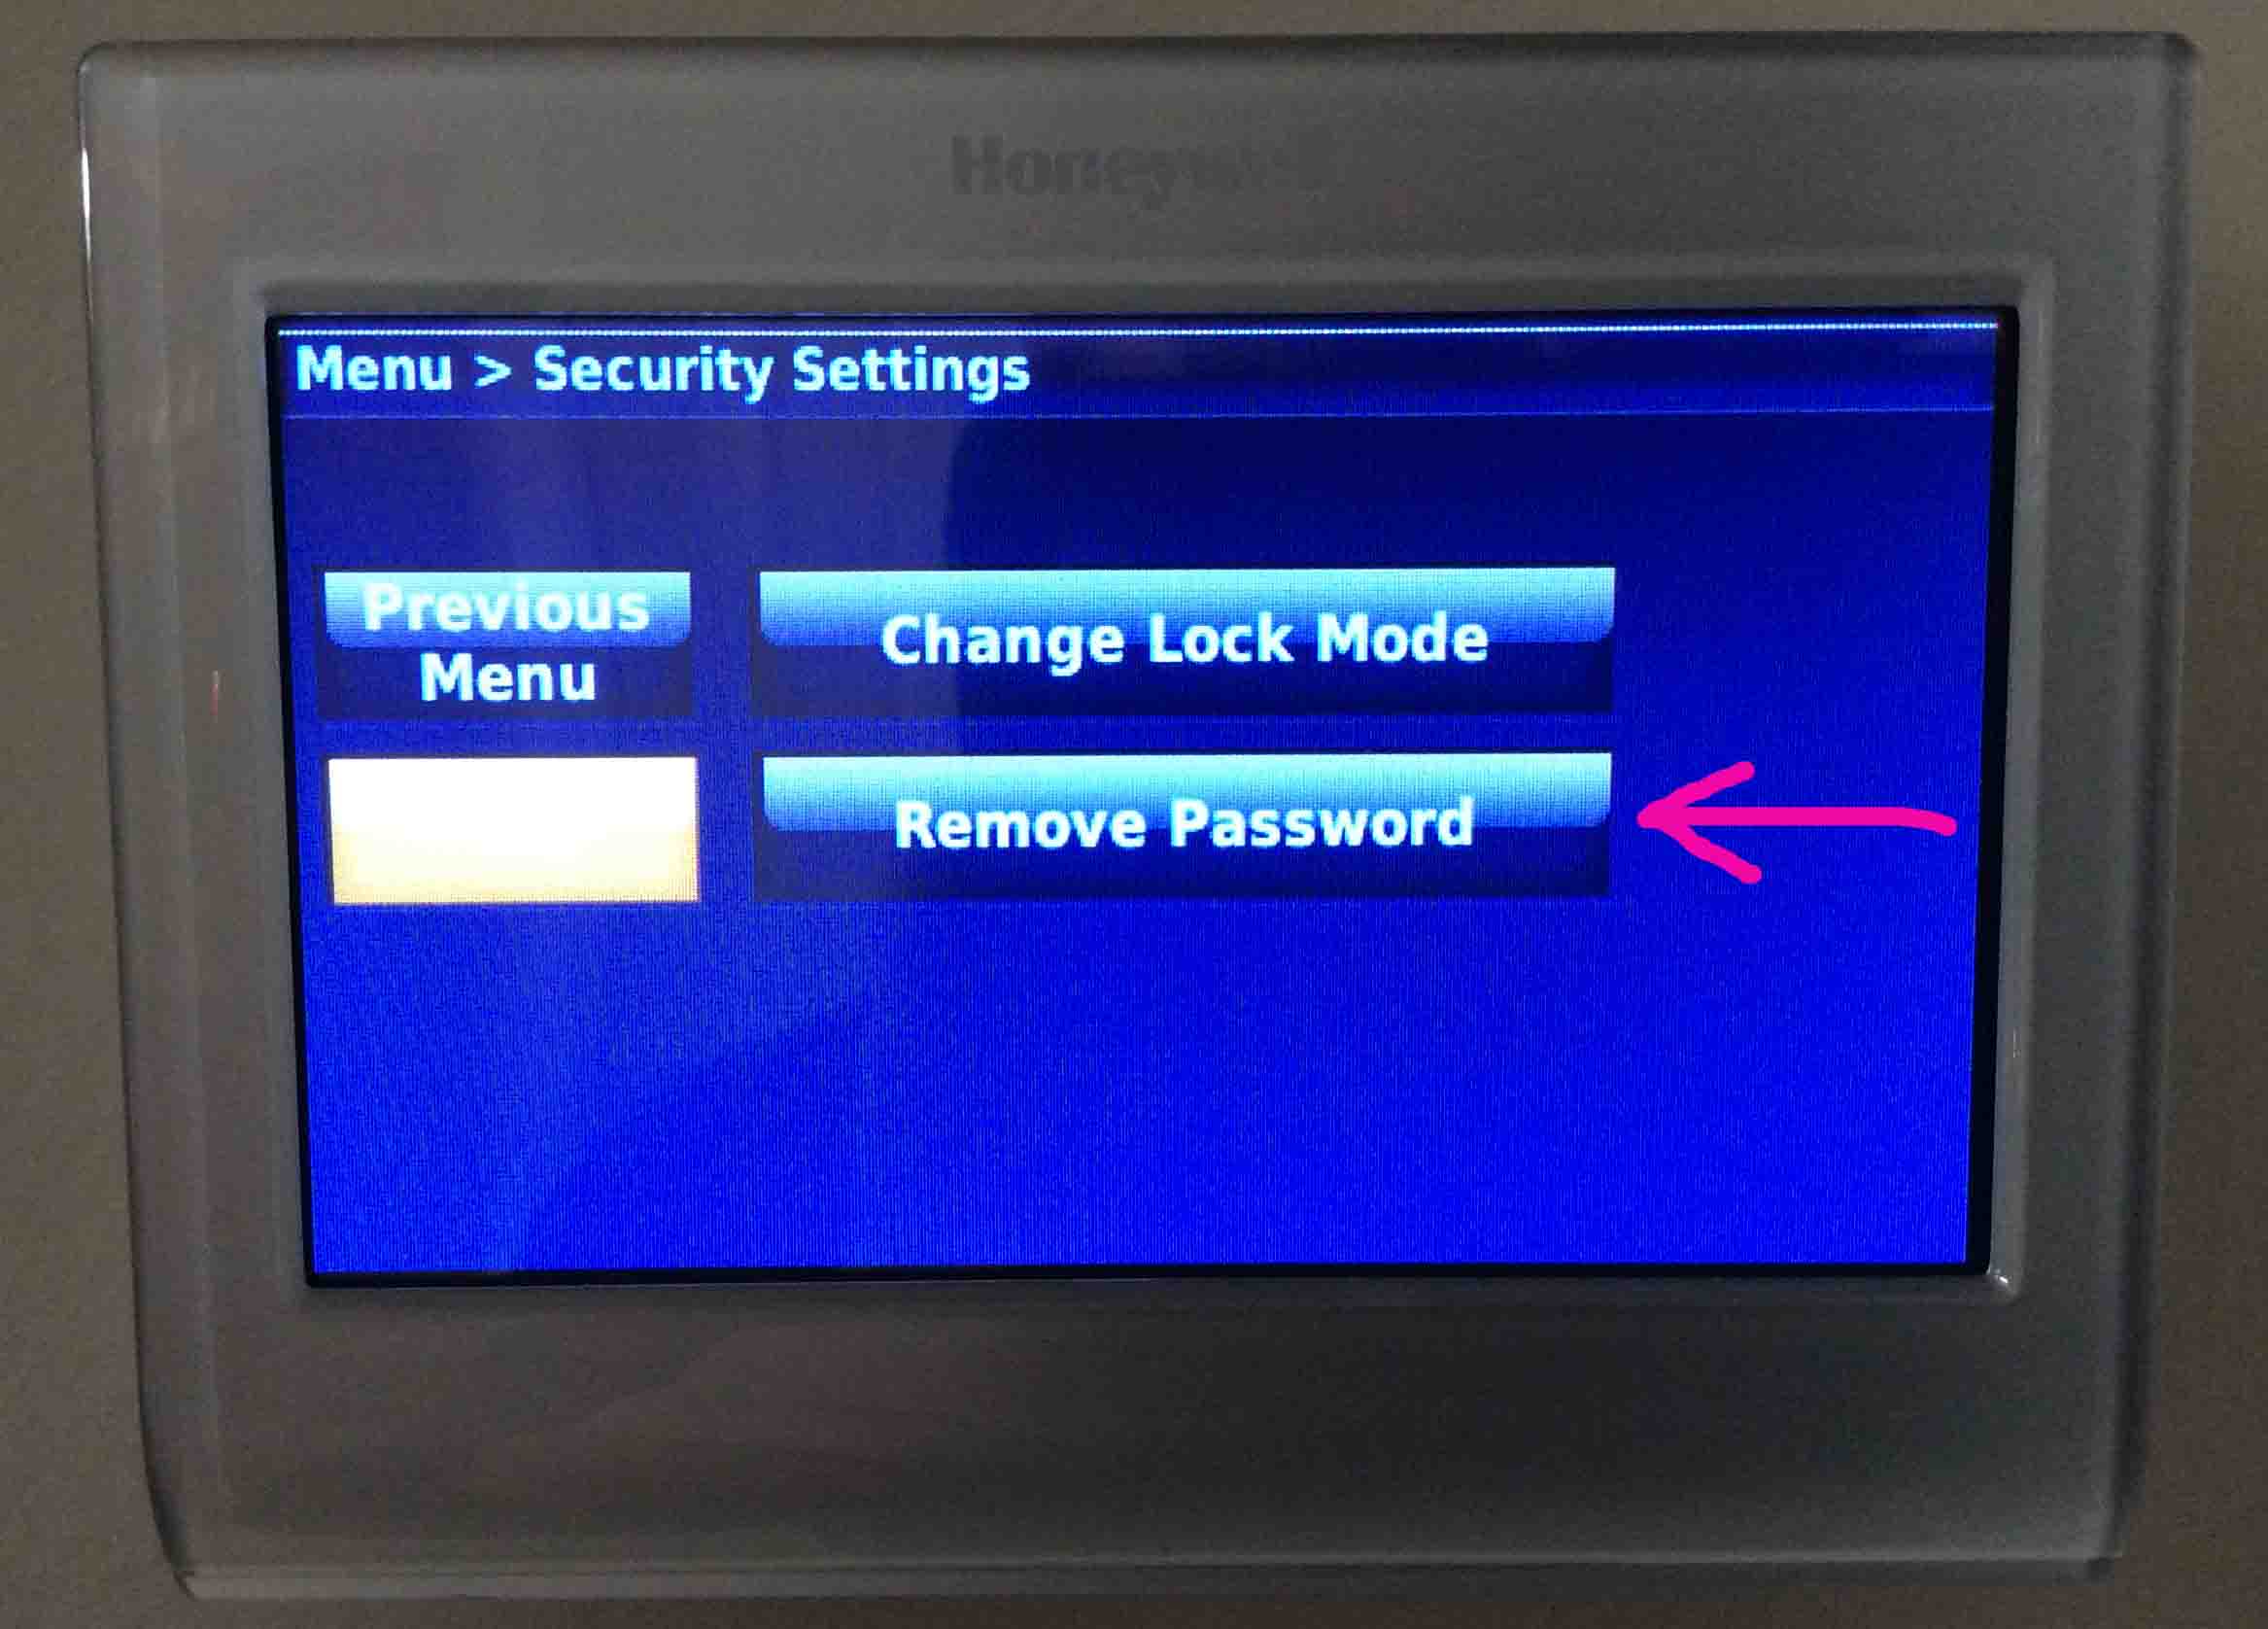
The Honeywell RTH9580WF smart thermostat, displaying its -Security Settings- screen, showing the -Remove Password- button with the -Change Lock Mode- button highlighted.
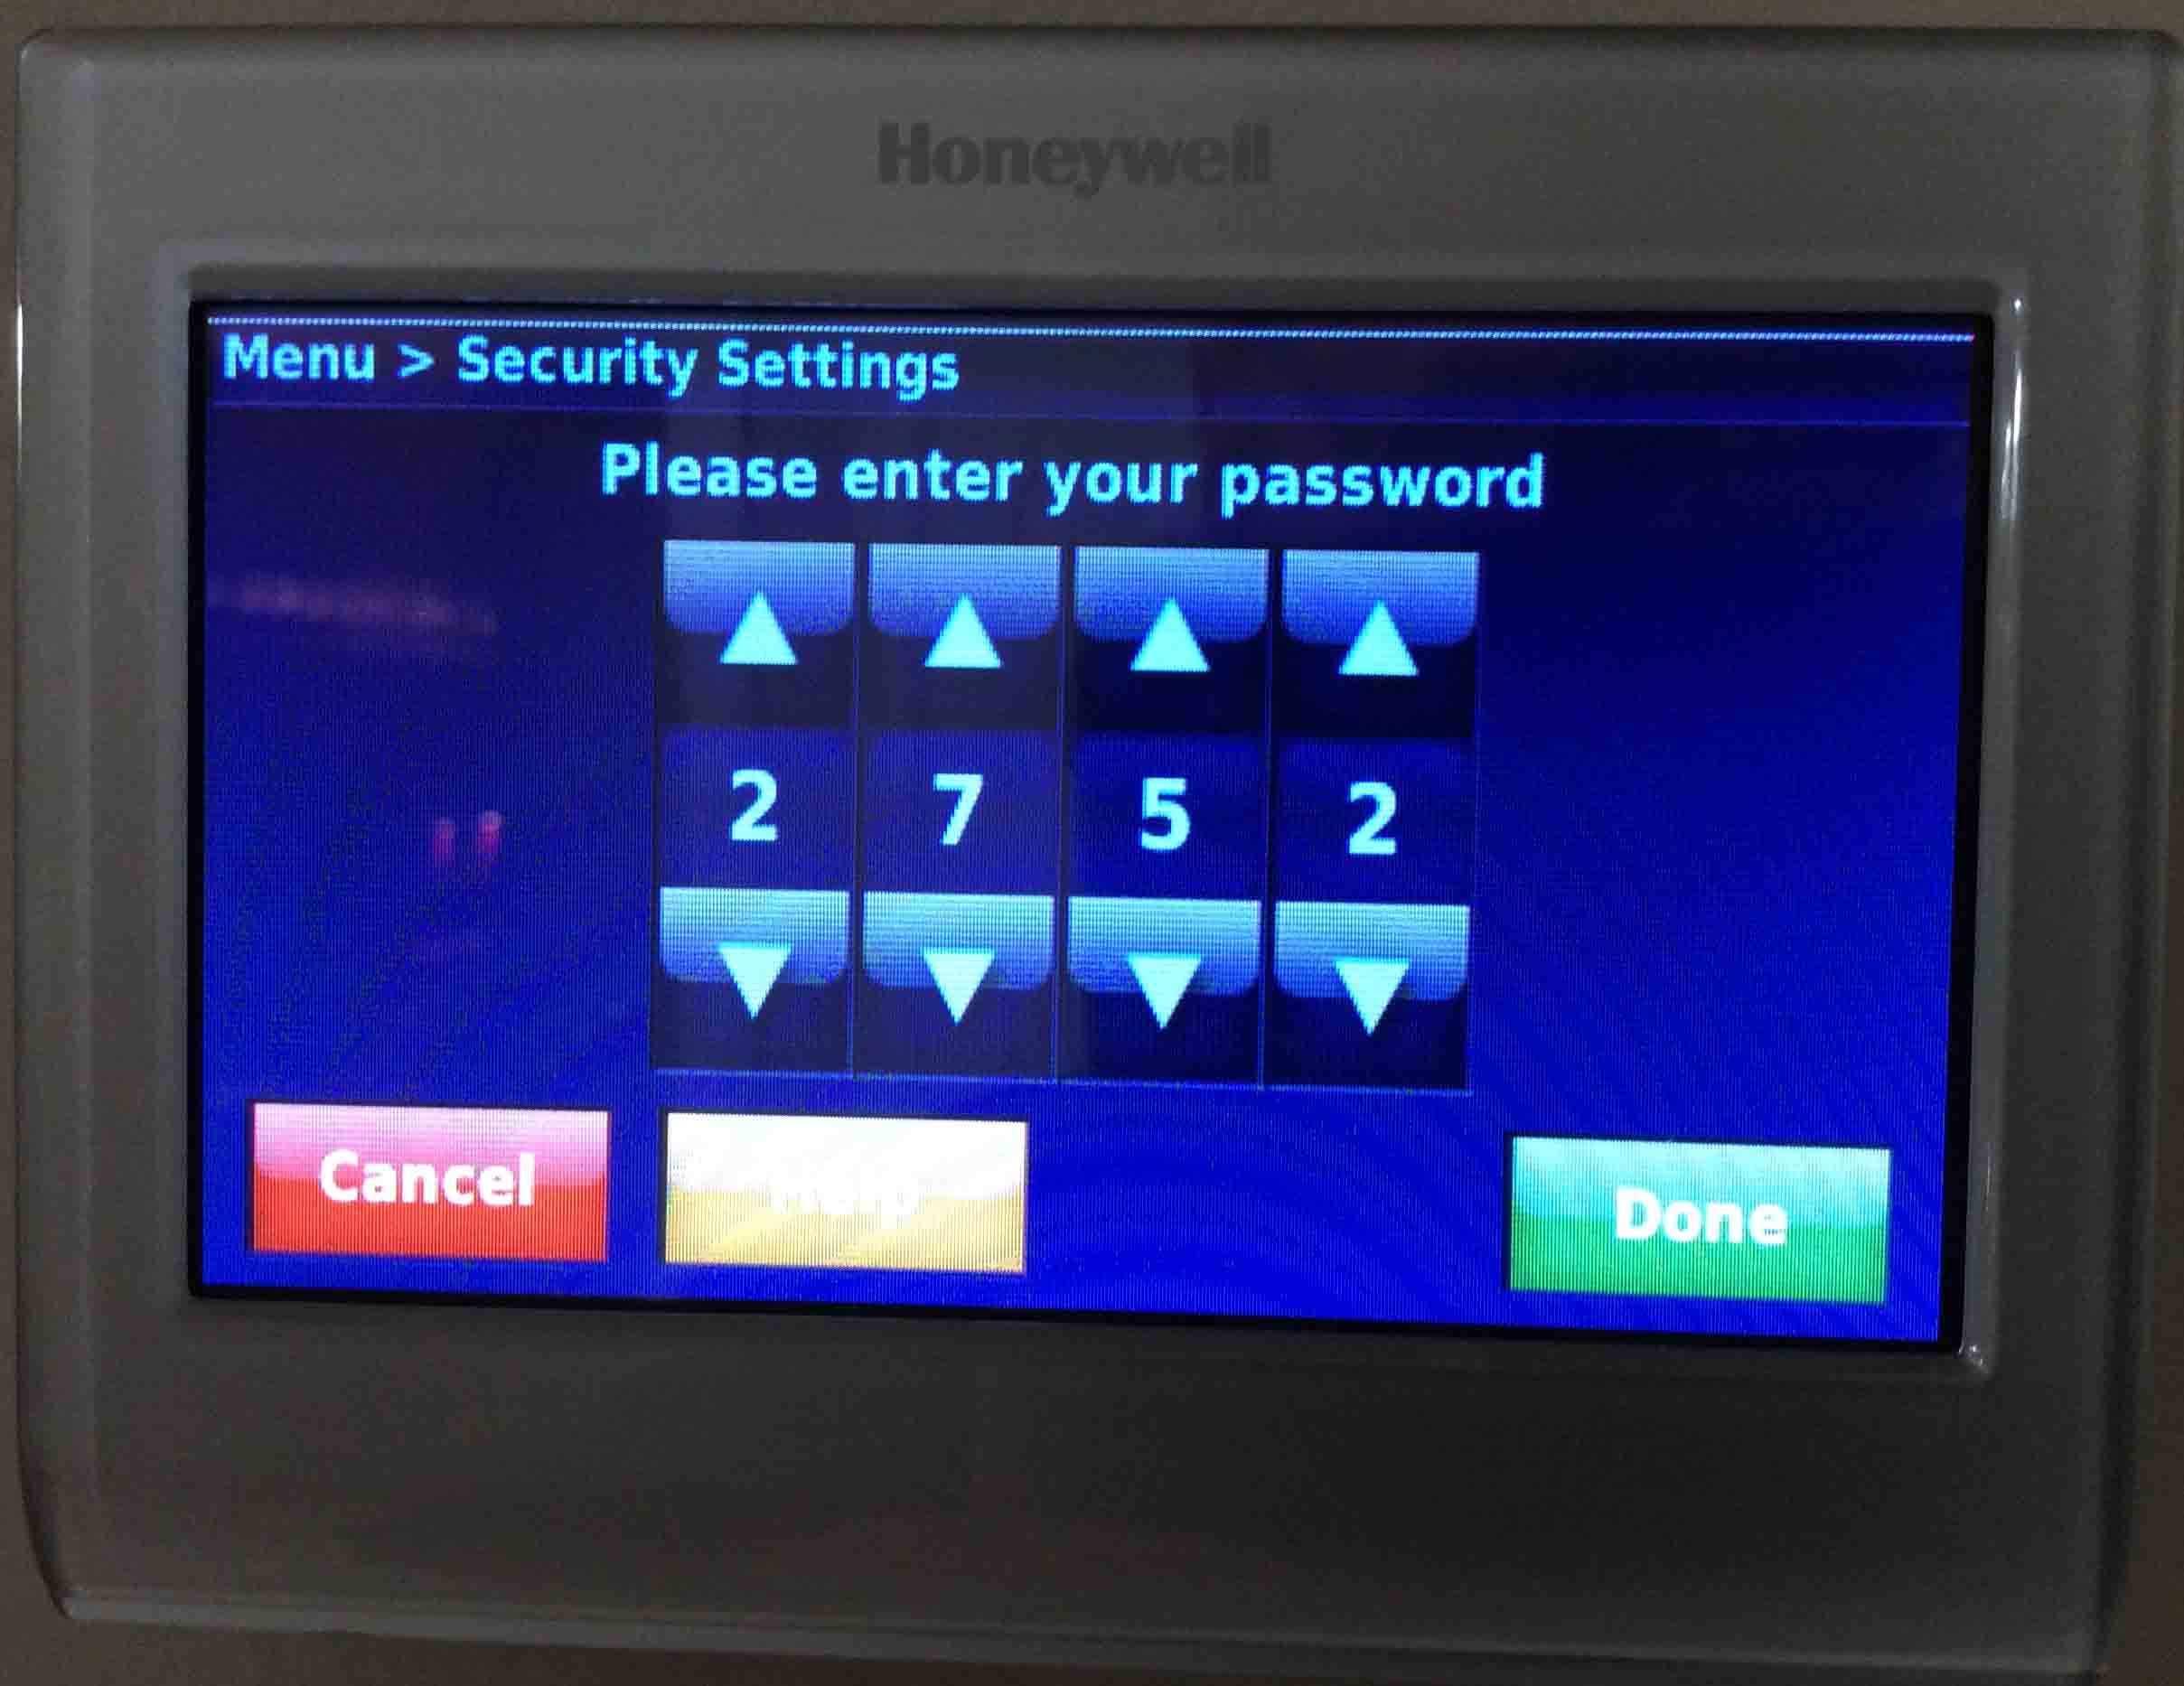
Next, you can set a PIN that you later use to unlock a locked t-stat.
Honeywell RTH9580WF smart thermostat, displaying its -Please Enter Your Password- screen, with passcode 2752 entered.
The Honeywell RTH9580WF smart thermostat, displaying its -Please Enter Your Password- screen, with no passcode entered yet.
Honeywell RTH9580WF smart thermostat, displaying the -Main Menu- screen, with the -Home- button highlighted.
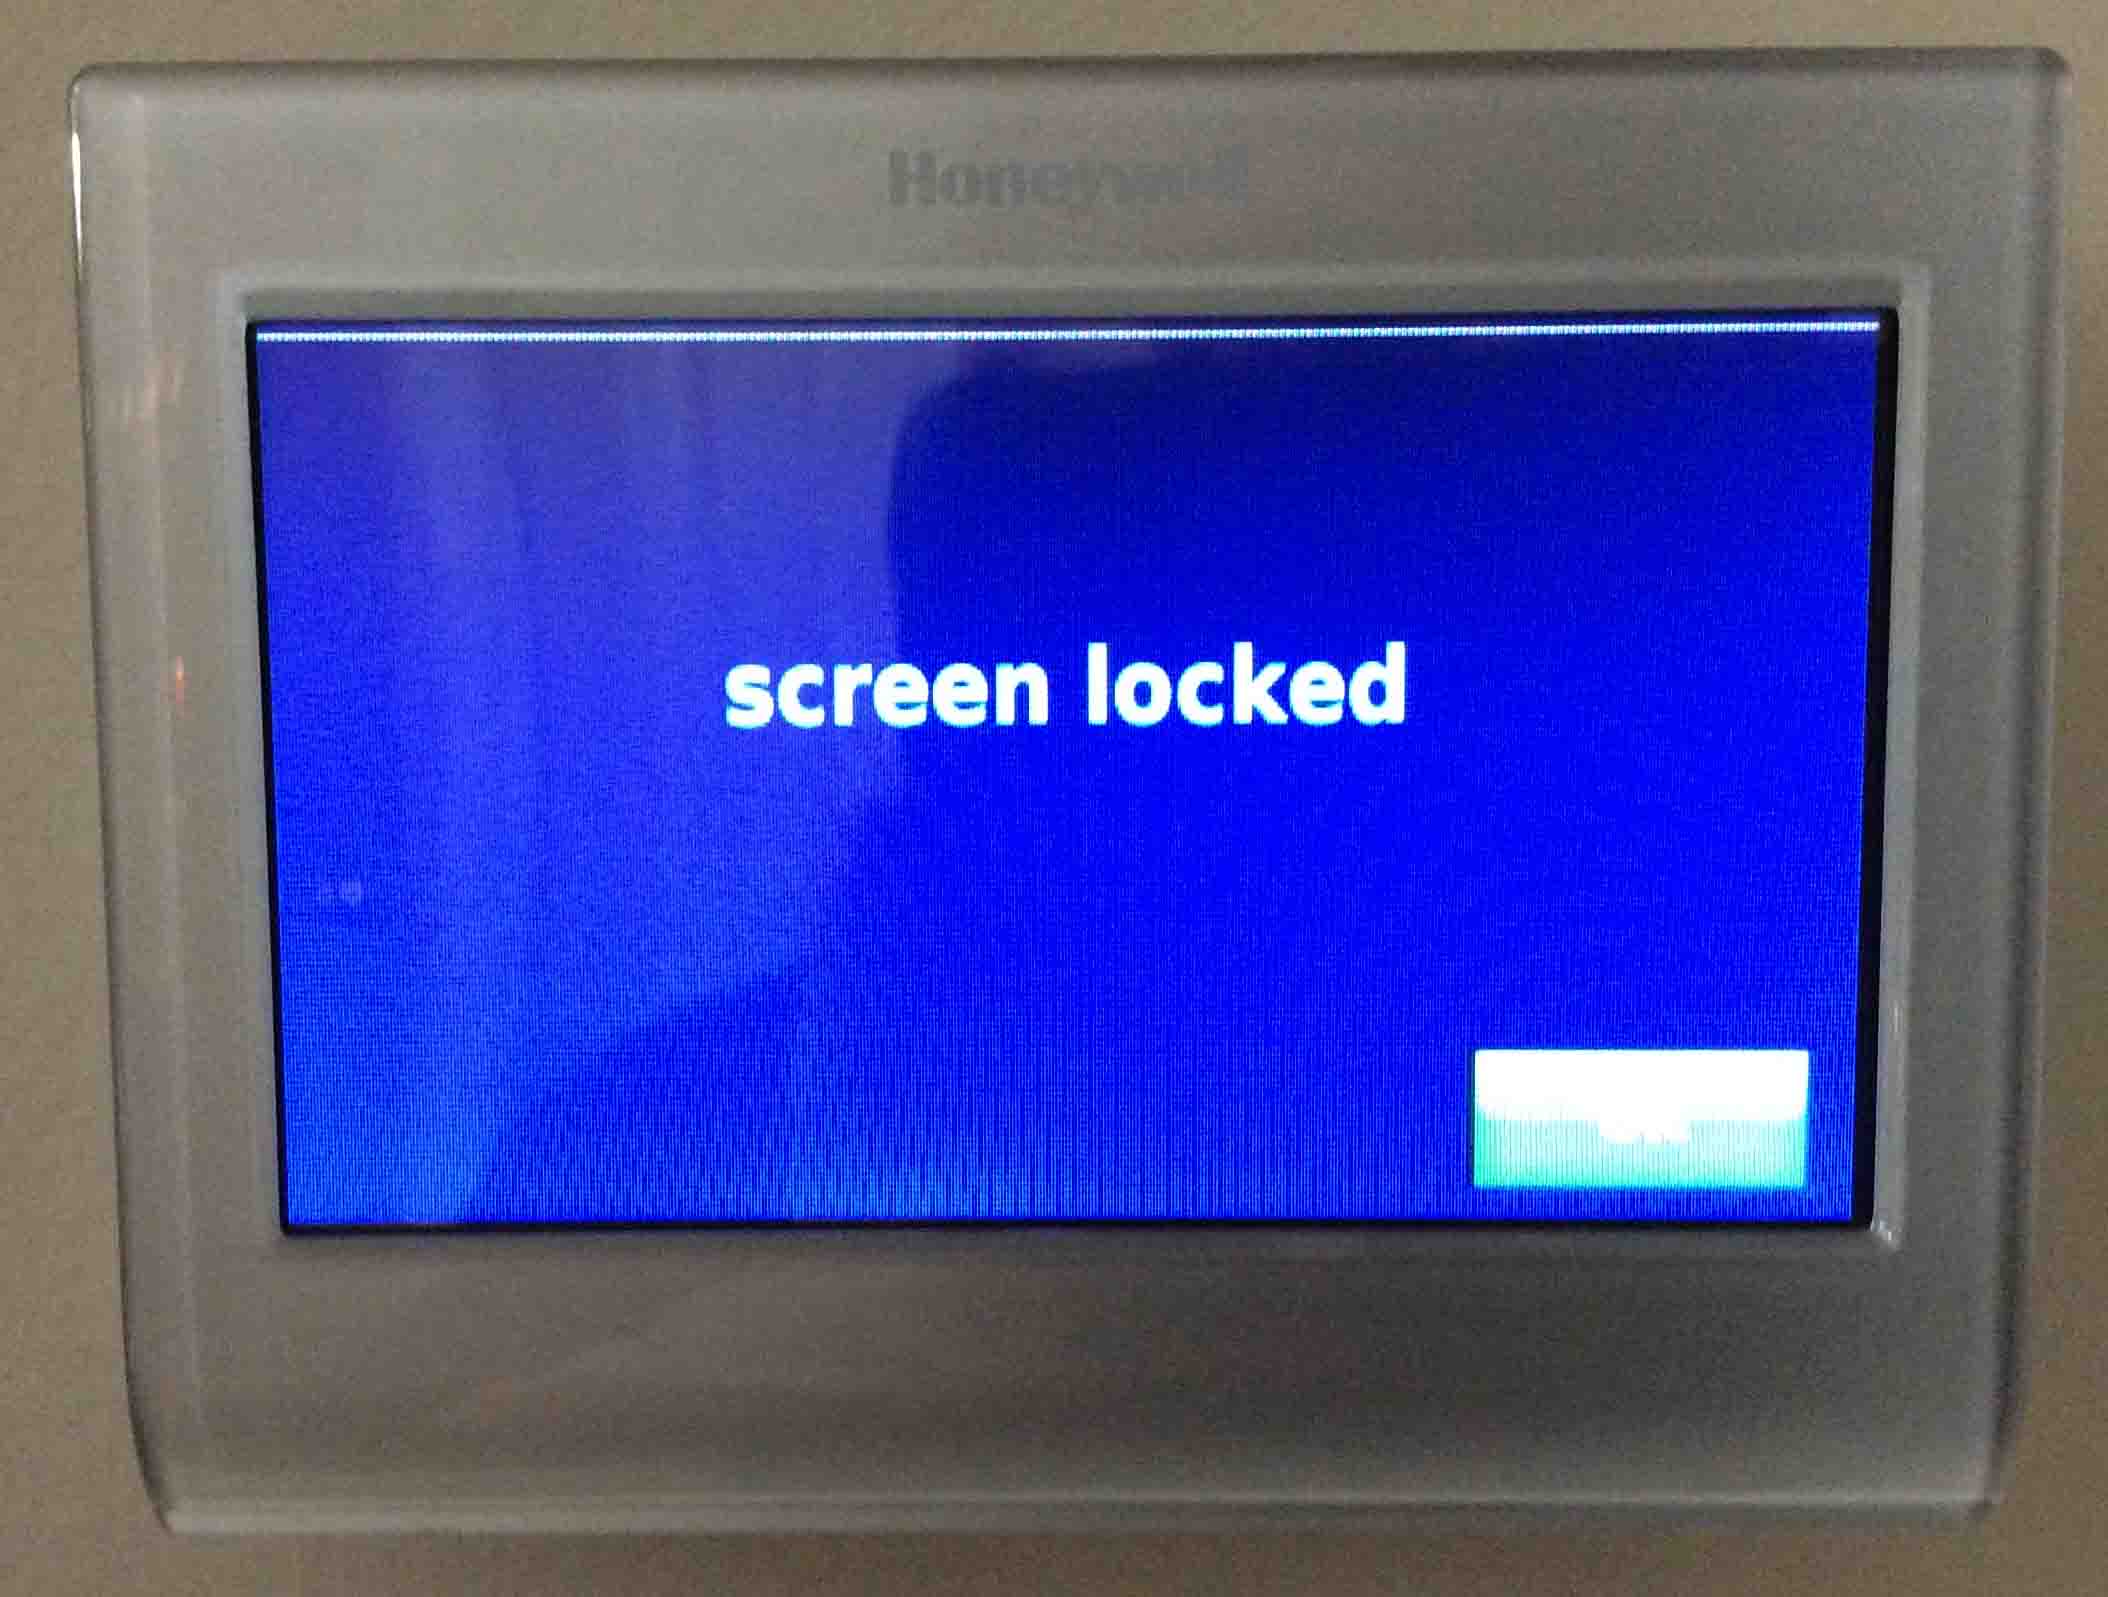
The Honeywell RTH9580WF smart thermostat, displaying its -Screen Locked- message.
Honeywell RTH9580WF smart thermostat, now locked, displaying Its -Home- screen.
The Honeywell RTH9580WF smart thermostat, displaying its -Security Settings- screen, with the -Remove Password- option highlighted.
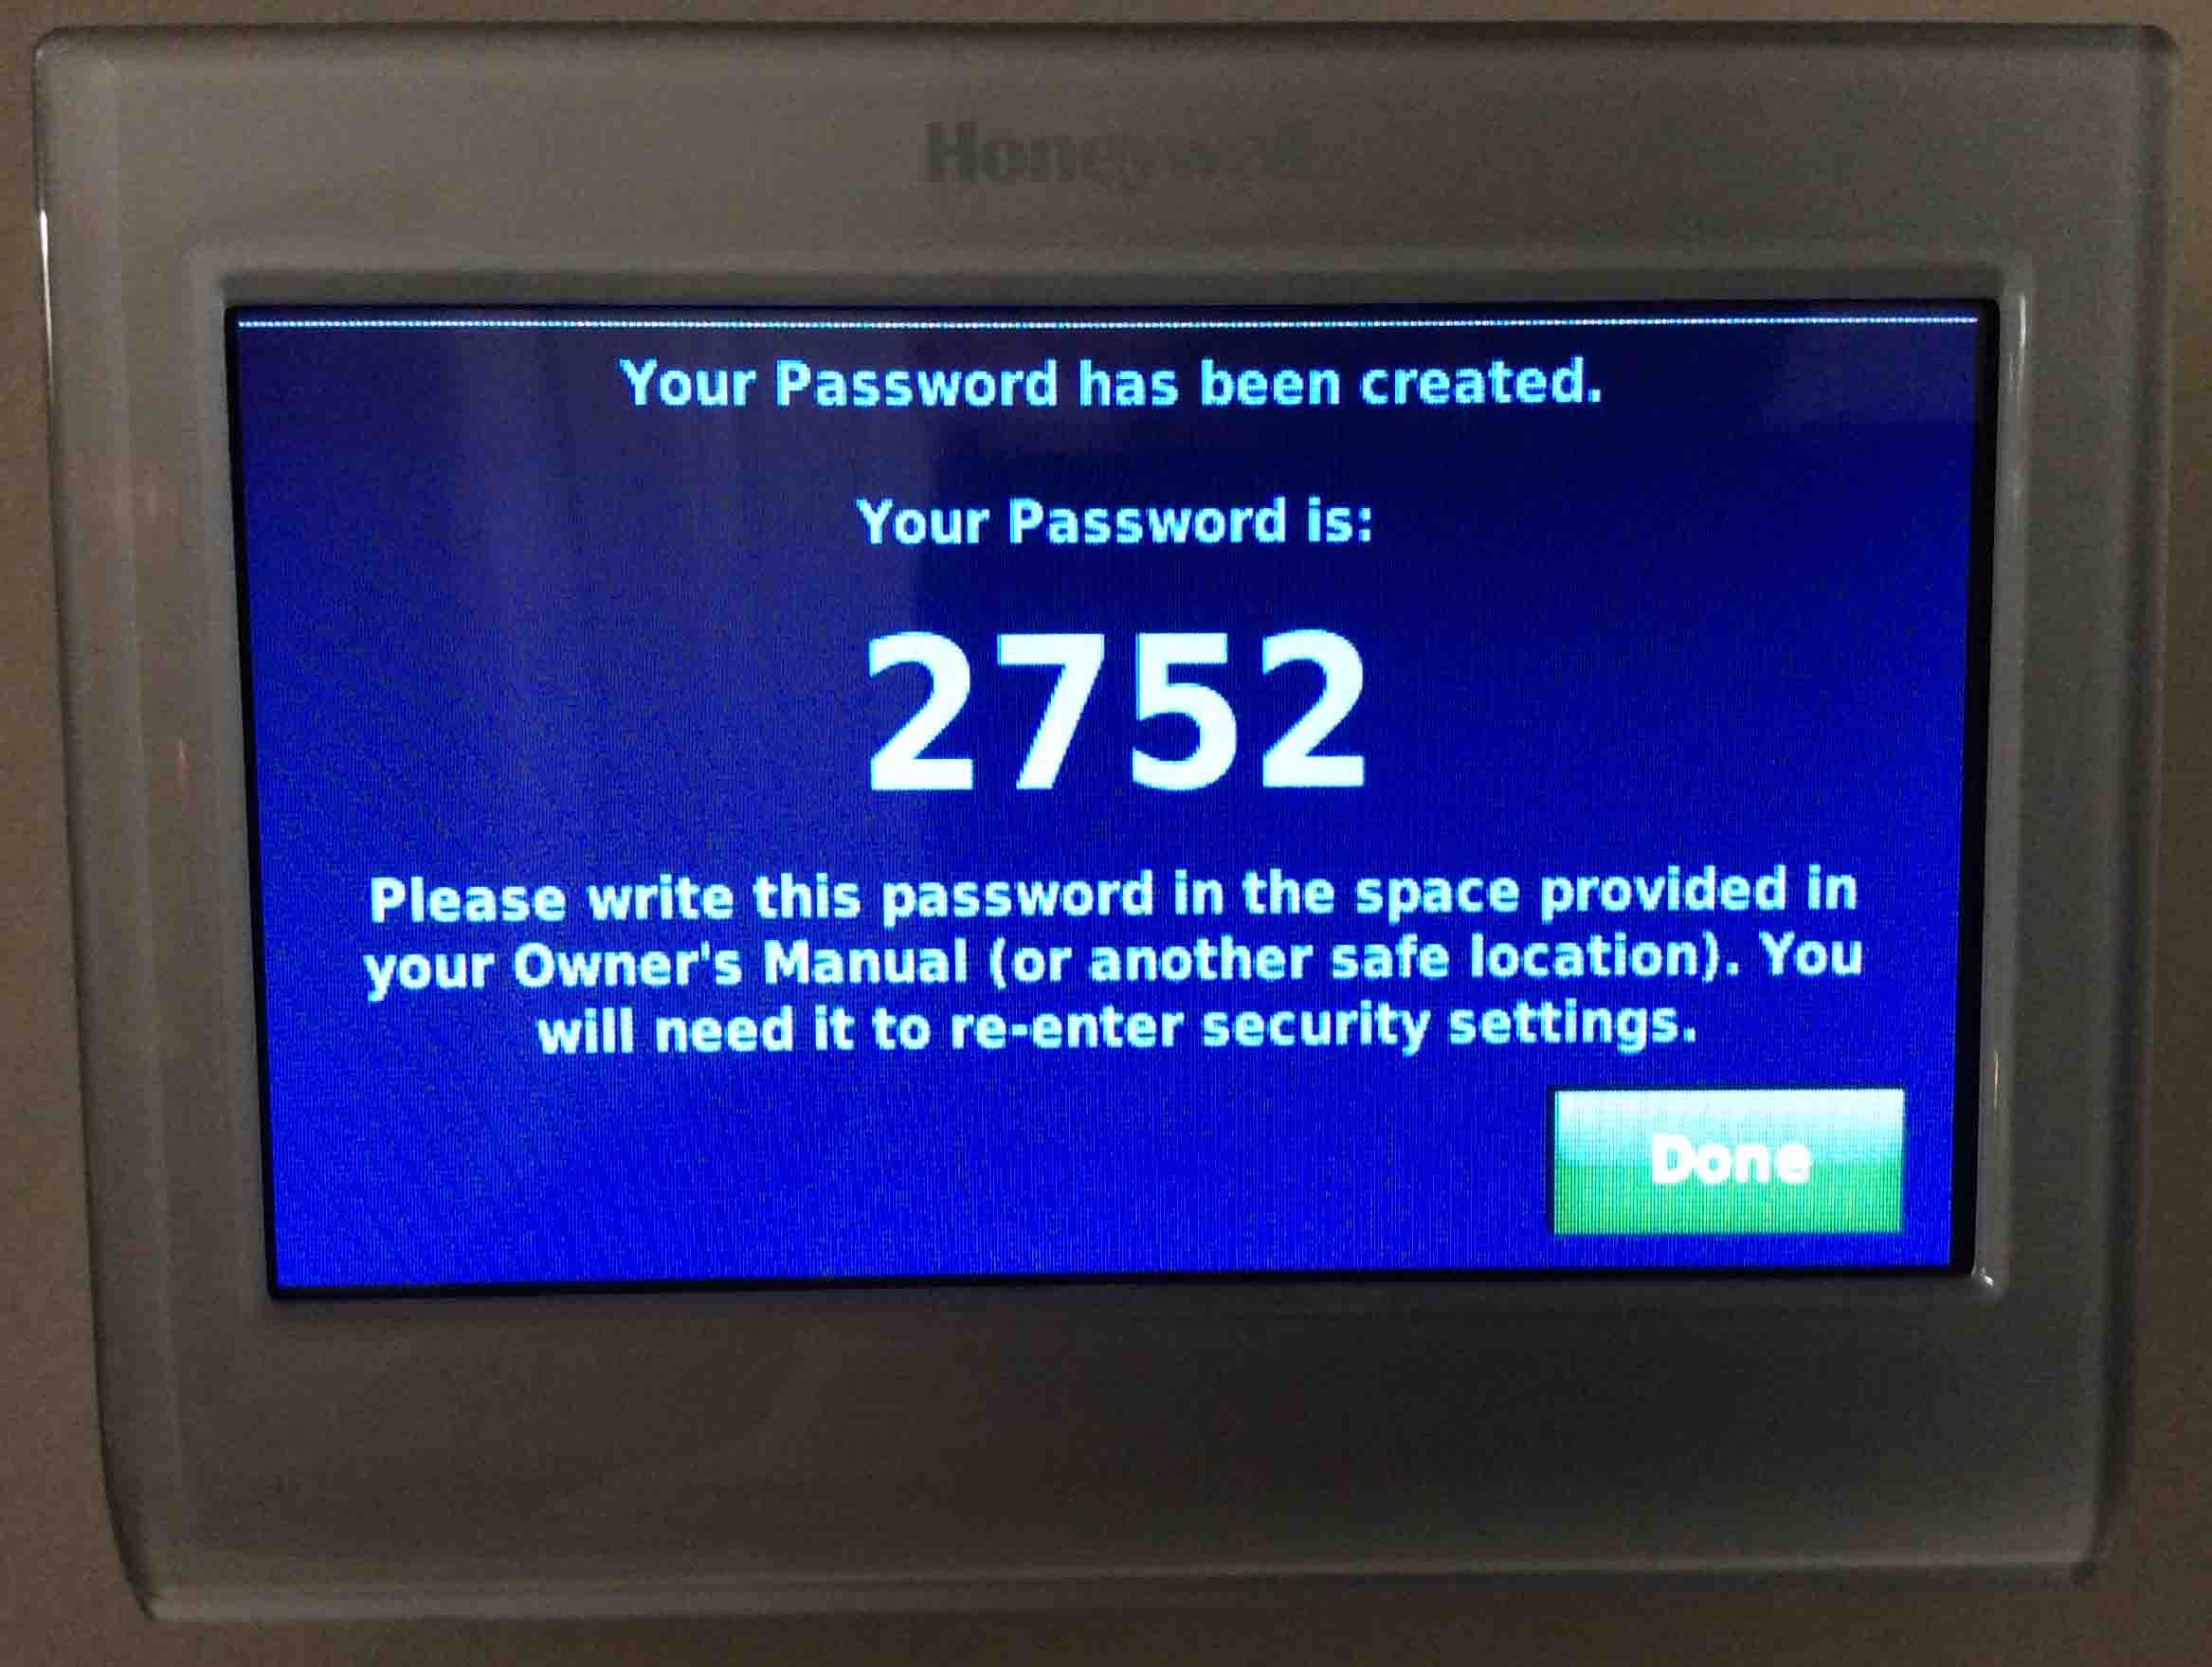
Next, you see the next screen when you’ve successfully set up a new passcode on the t-stat.
Honeywell RTH9580WF smart thermostat, displaying its -Your Password has been Created- screen.
The Honeywell RTH9580WF smart thermostat, displaying its -Change Lock Mode- screen, with the -Fully Locked- option selected.
Moreover, the Change Lock Mode screen shows that the t-stat is UNlocked.
Honeywell RTH9580WF smart thermostat, displaying the -Change Lock Mode- screen.
The Honeywell RTH9580WF smart thermostat, displaying its -Security Settings- screen.
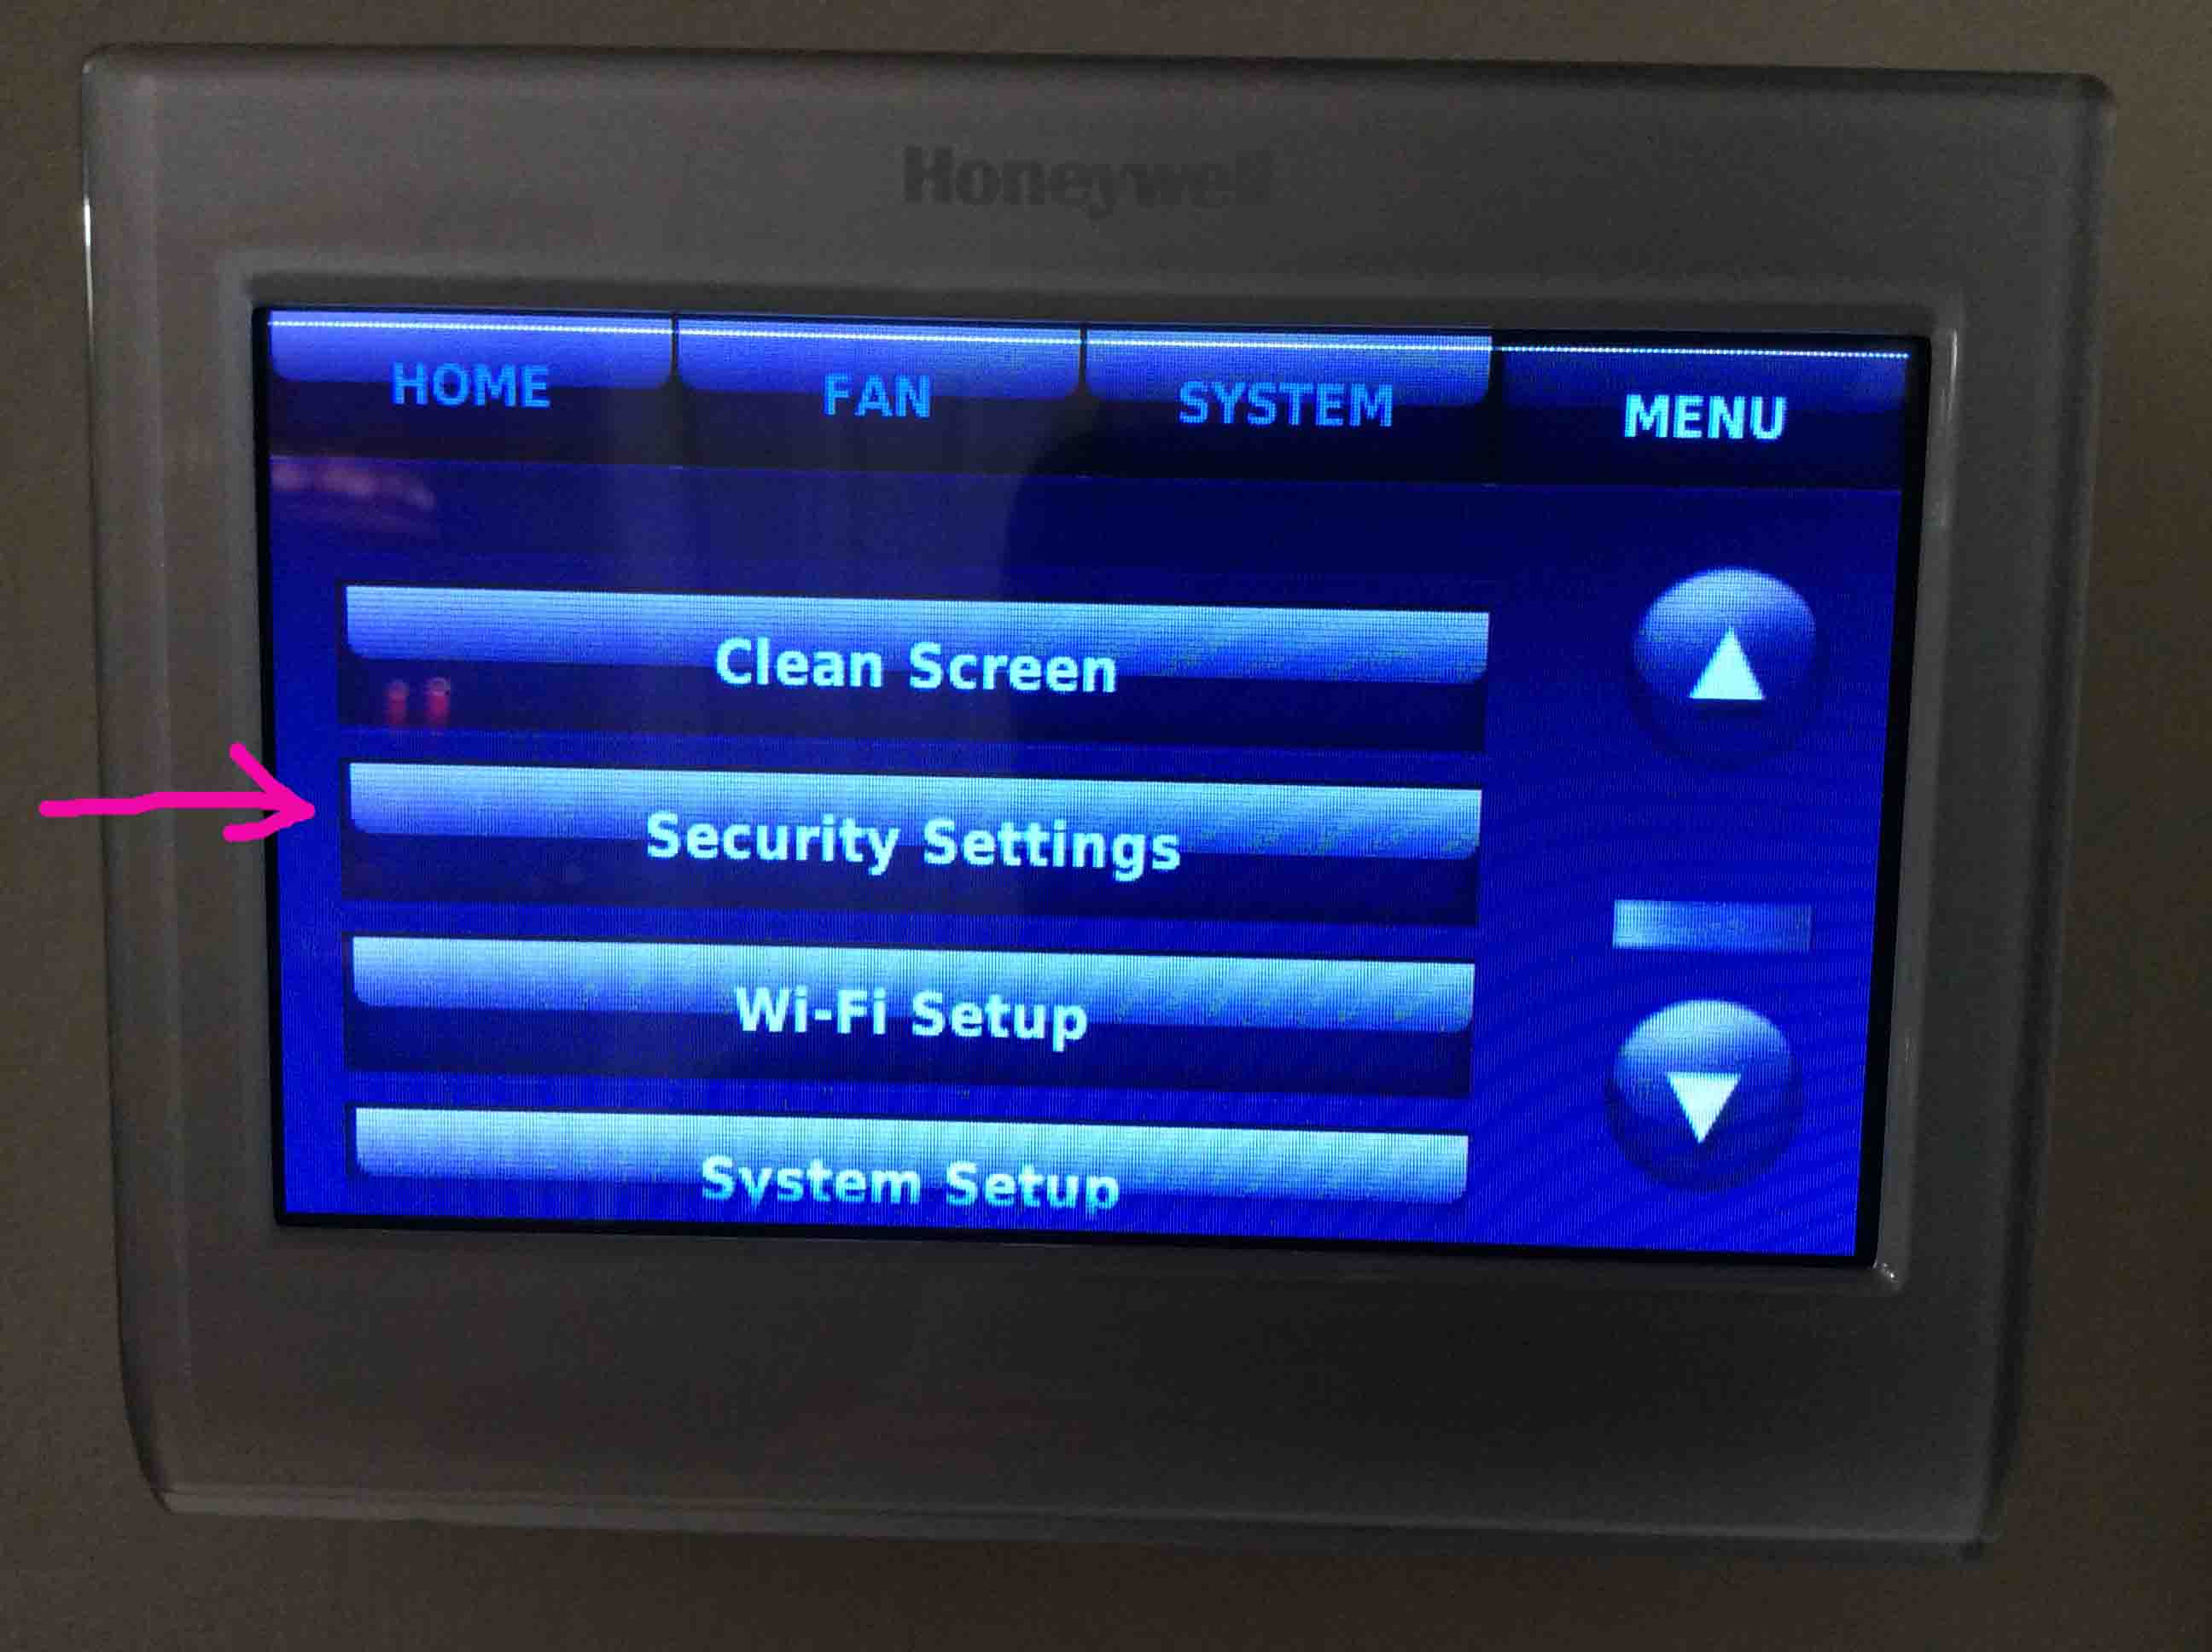
Honeywell RTH9580WF smart thermostat, displaying its main menu, with the -Security Settings- option highlighted.
Setting Time and Date
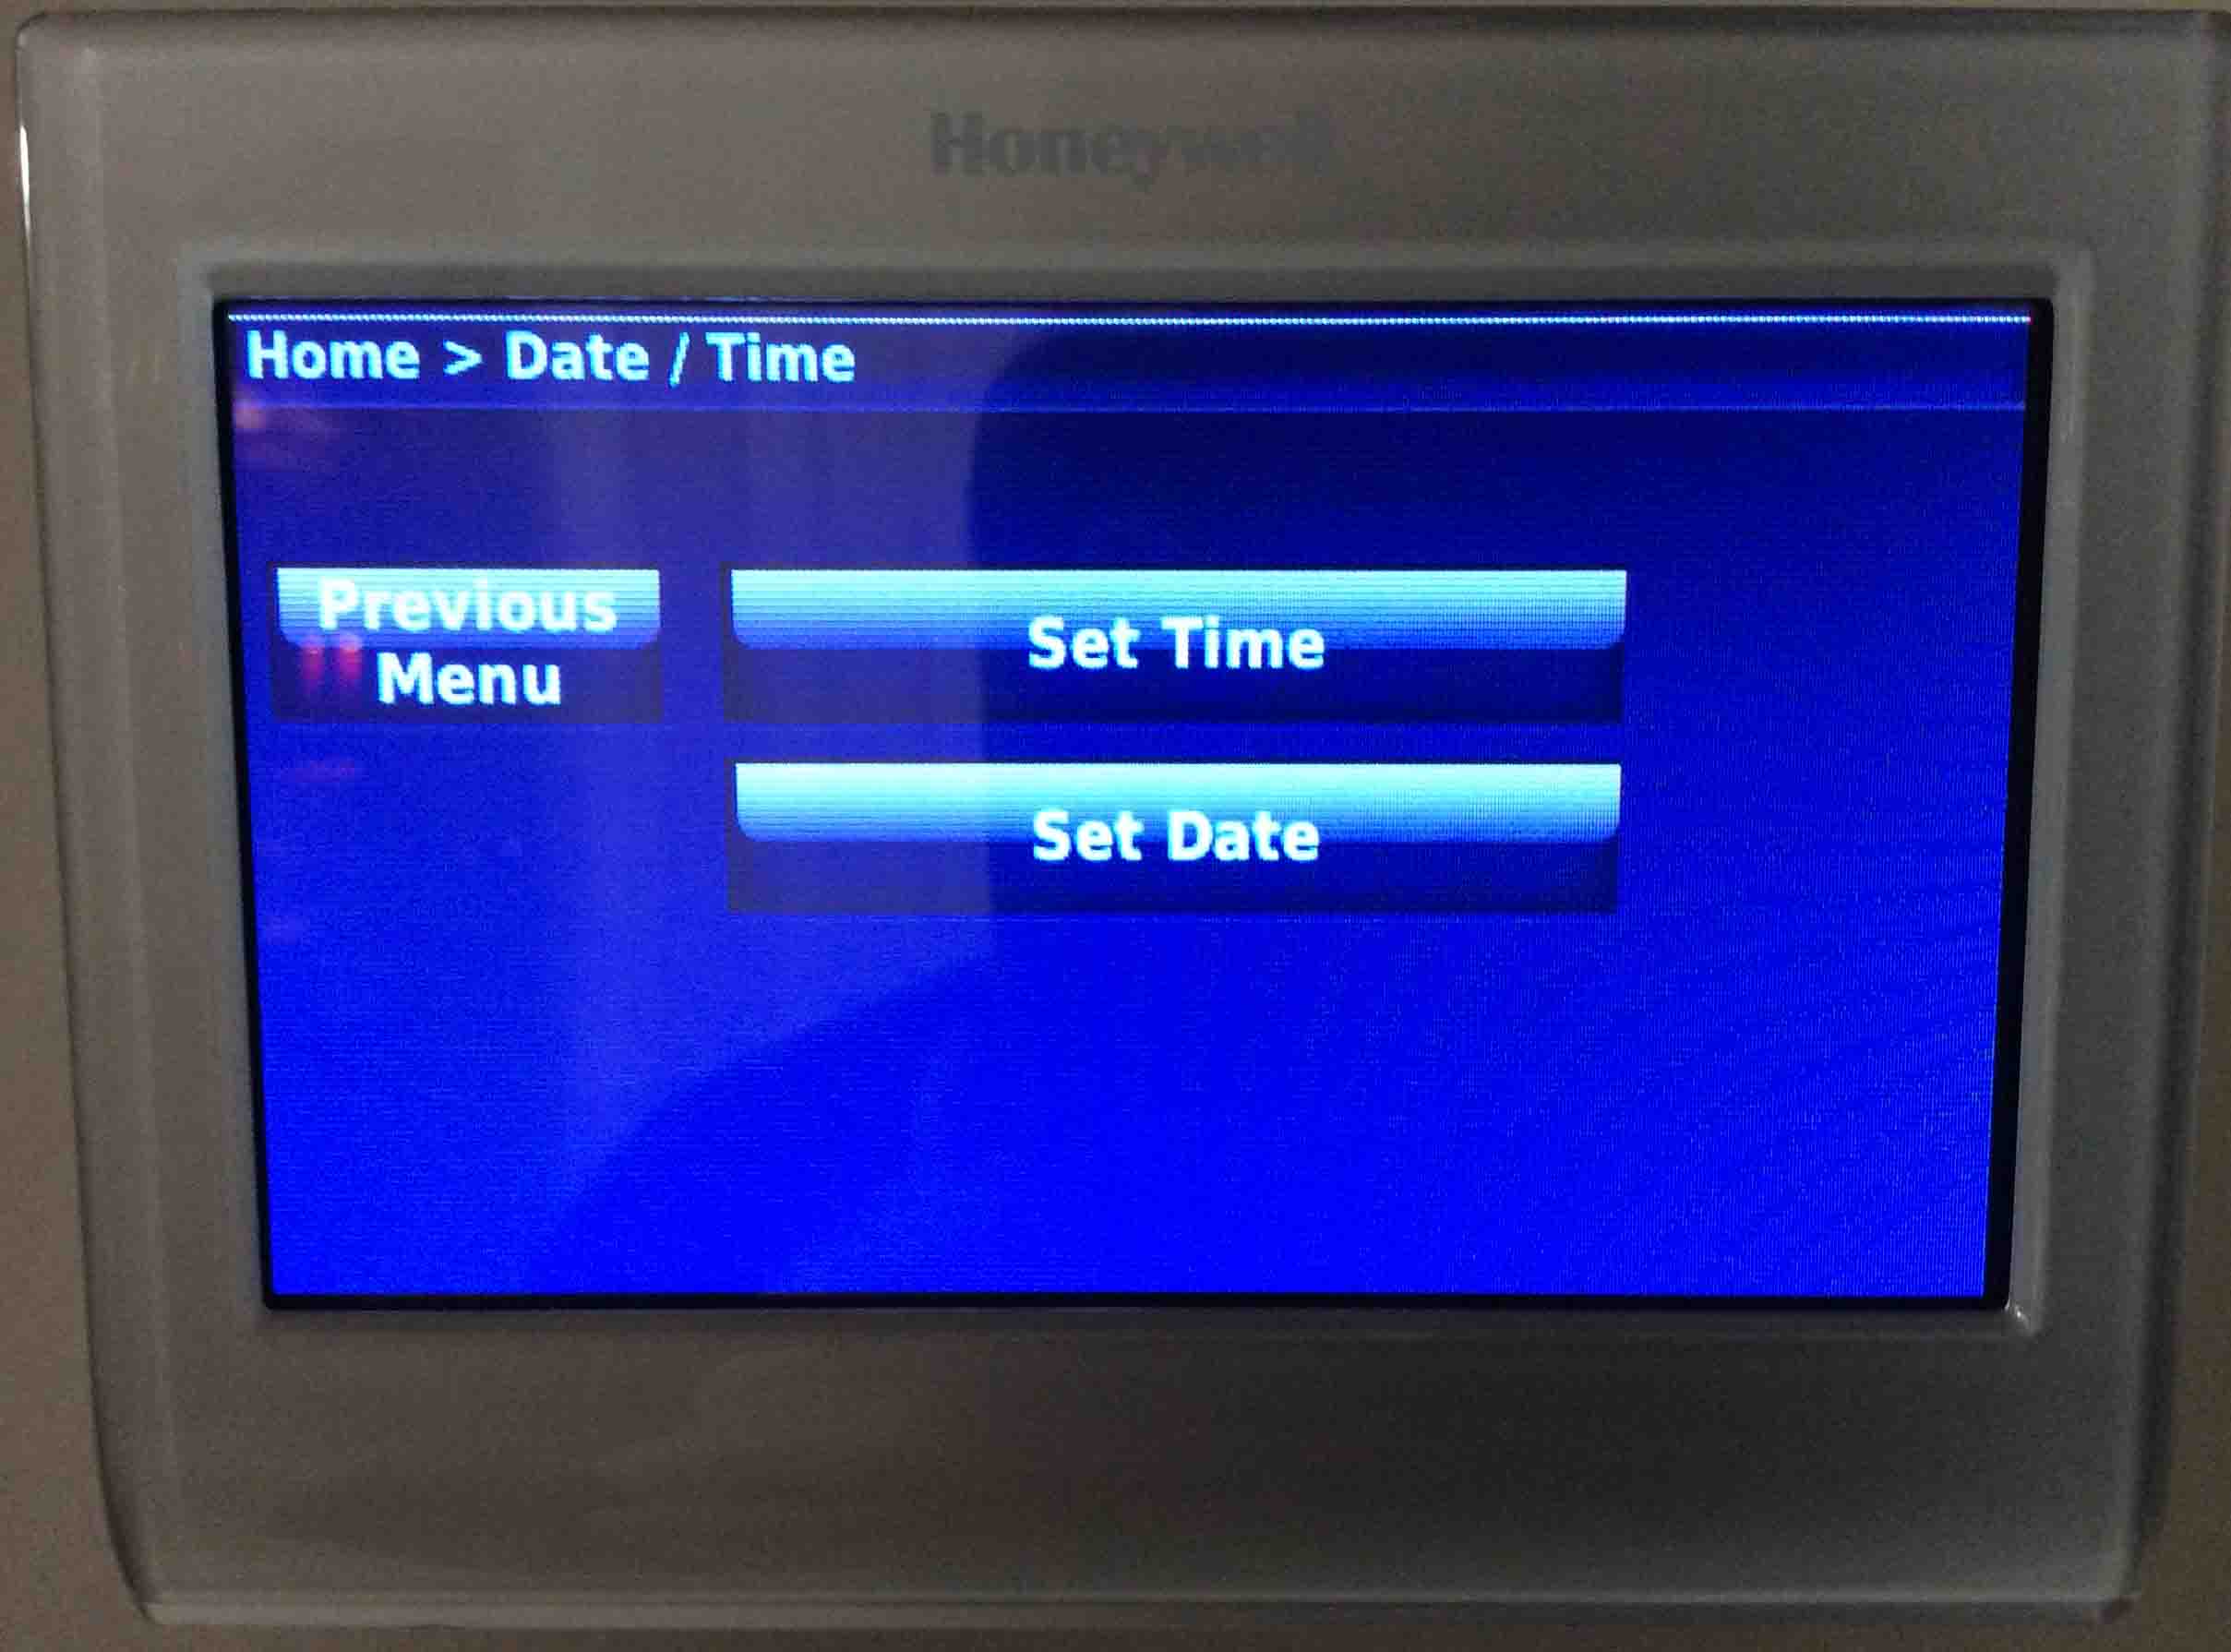
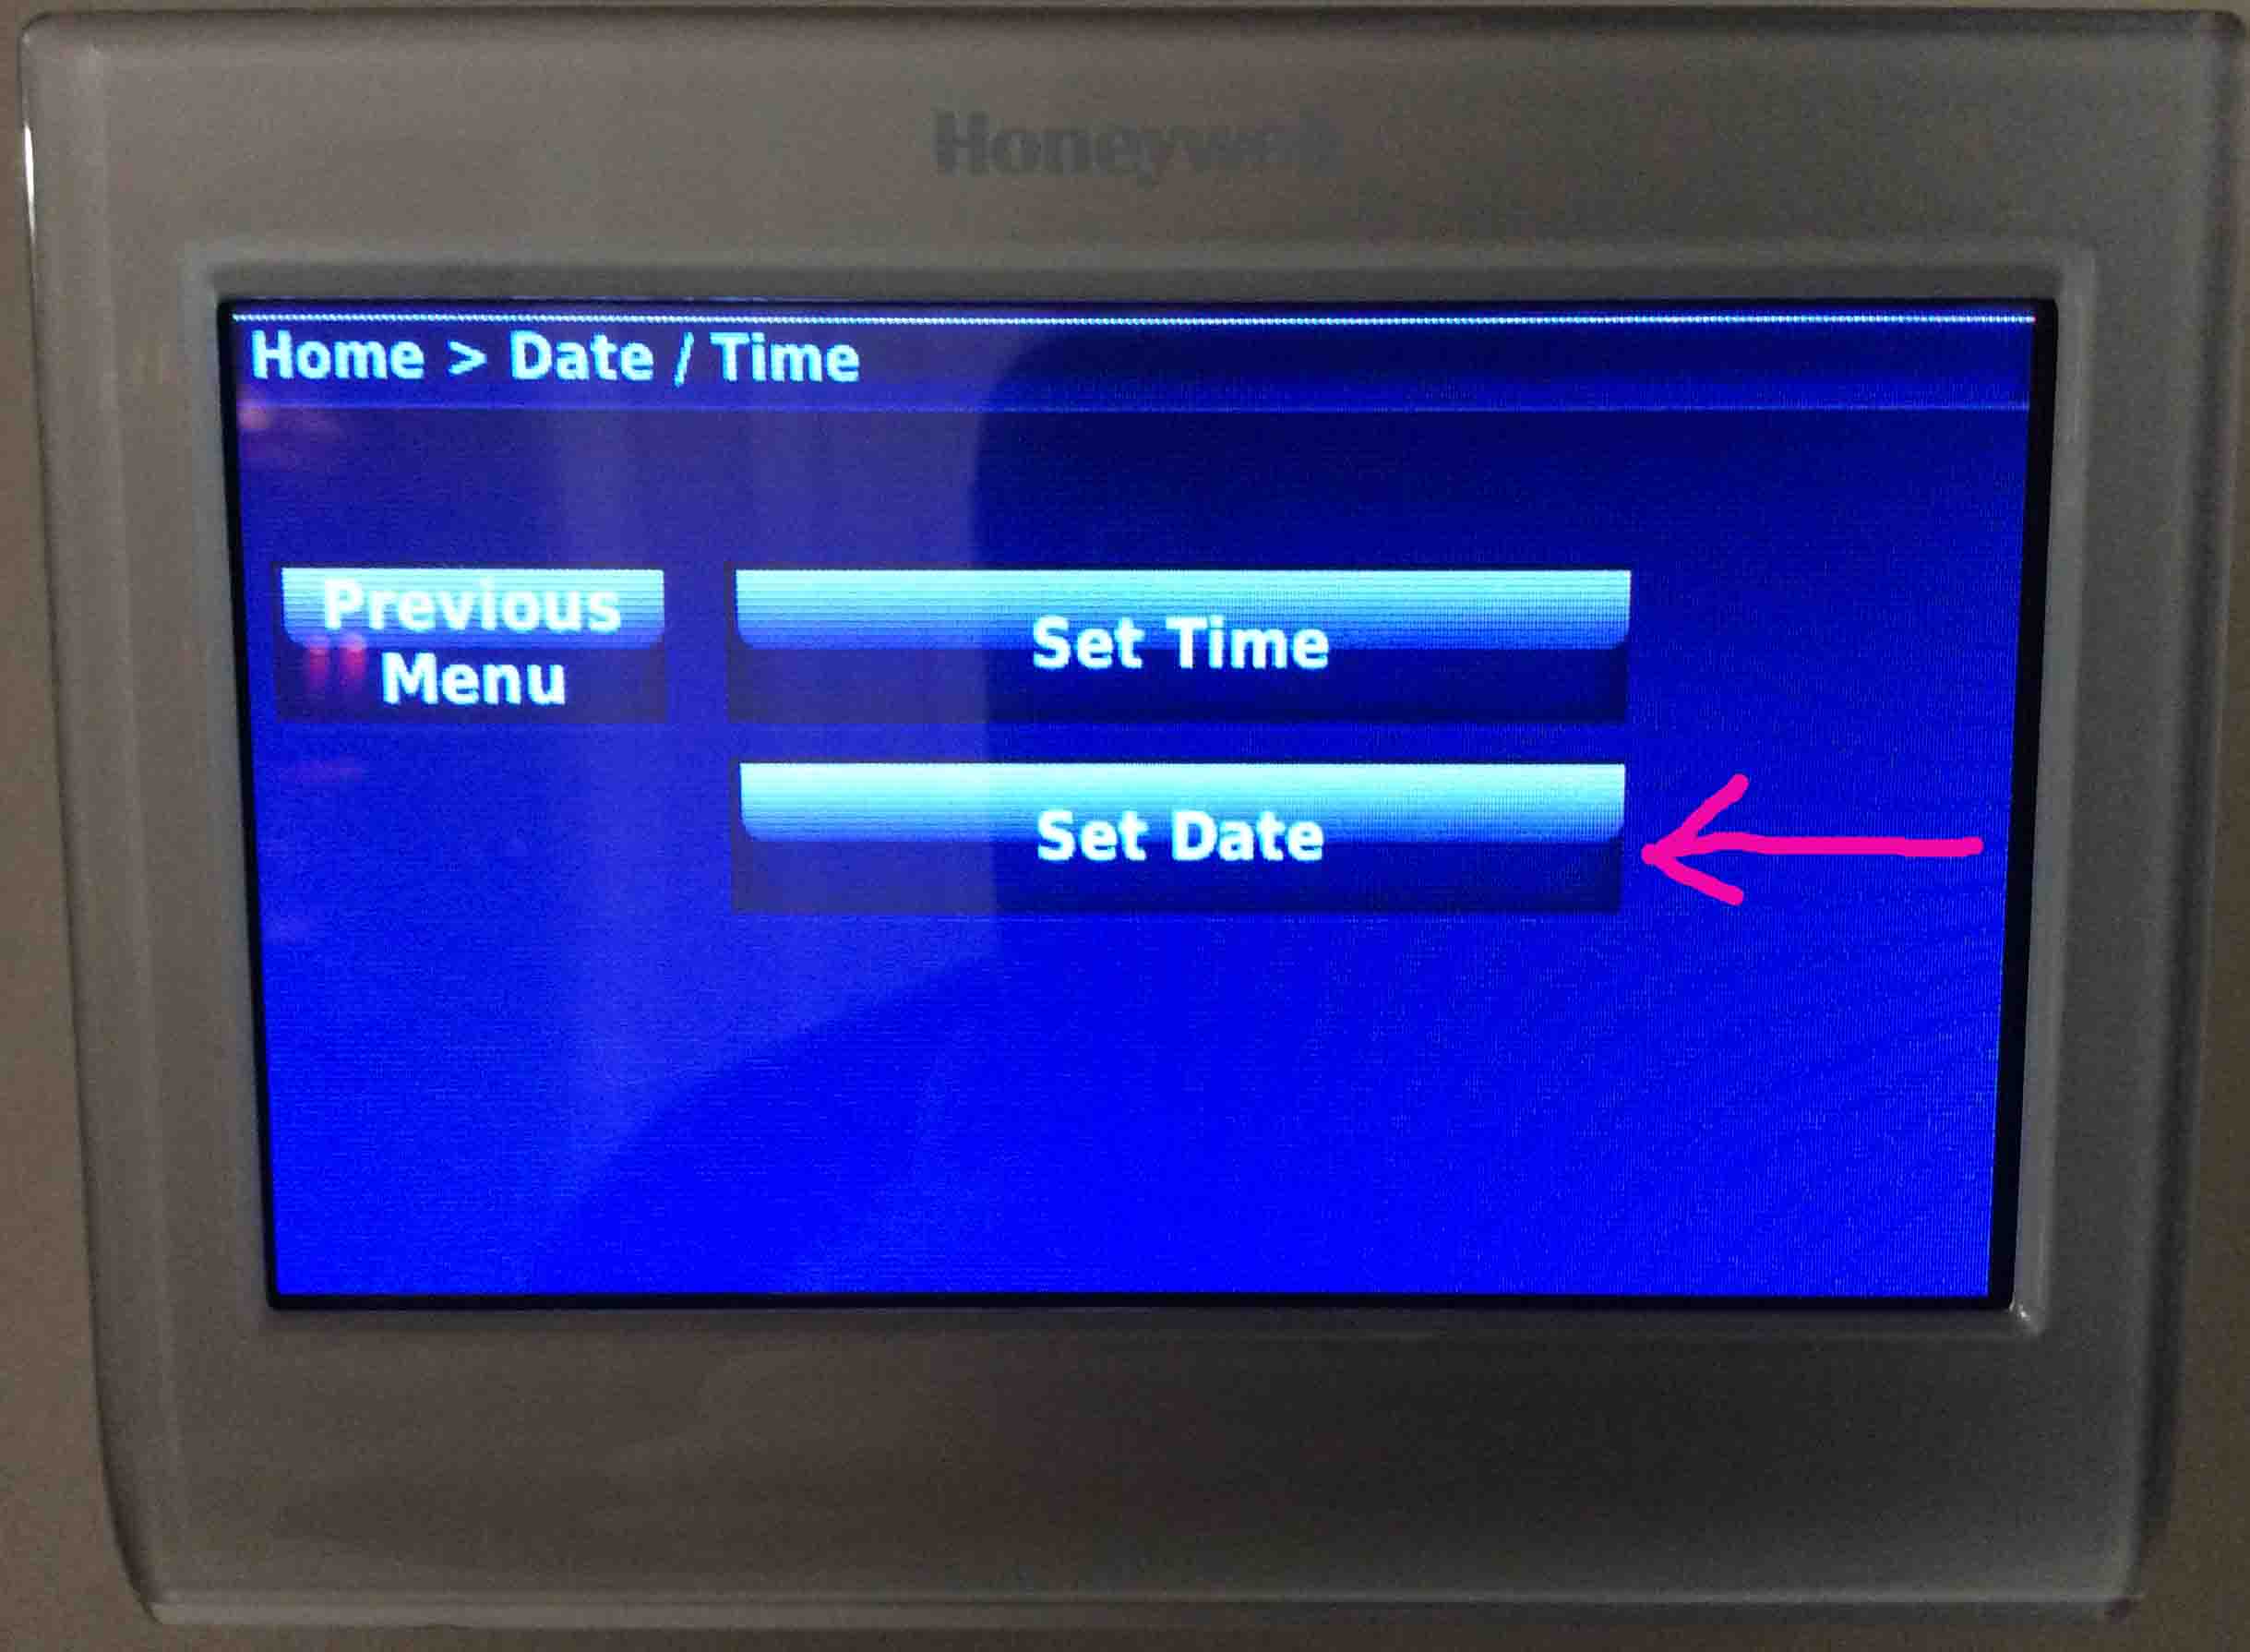
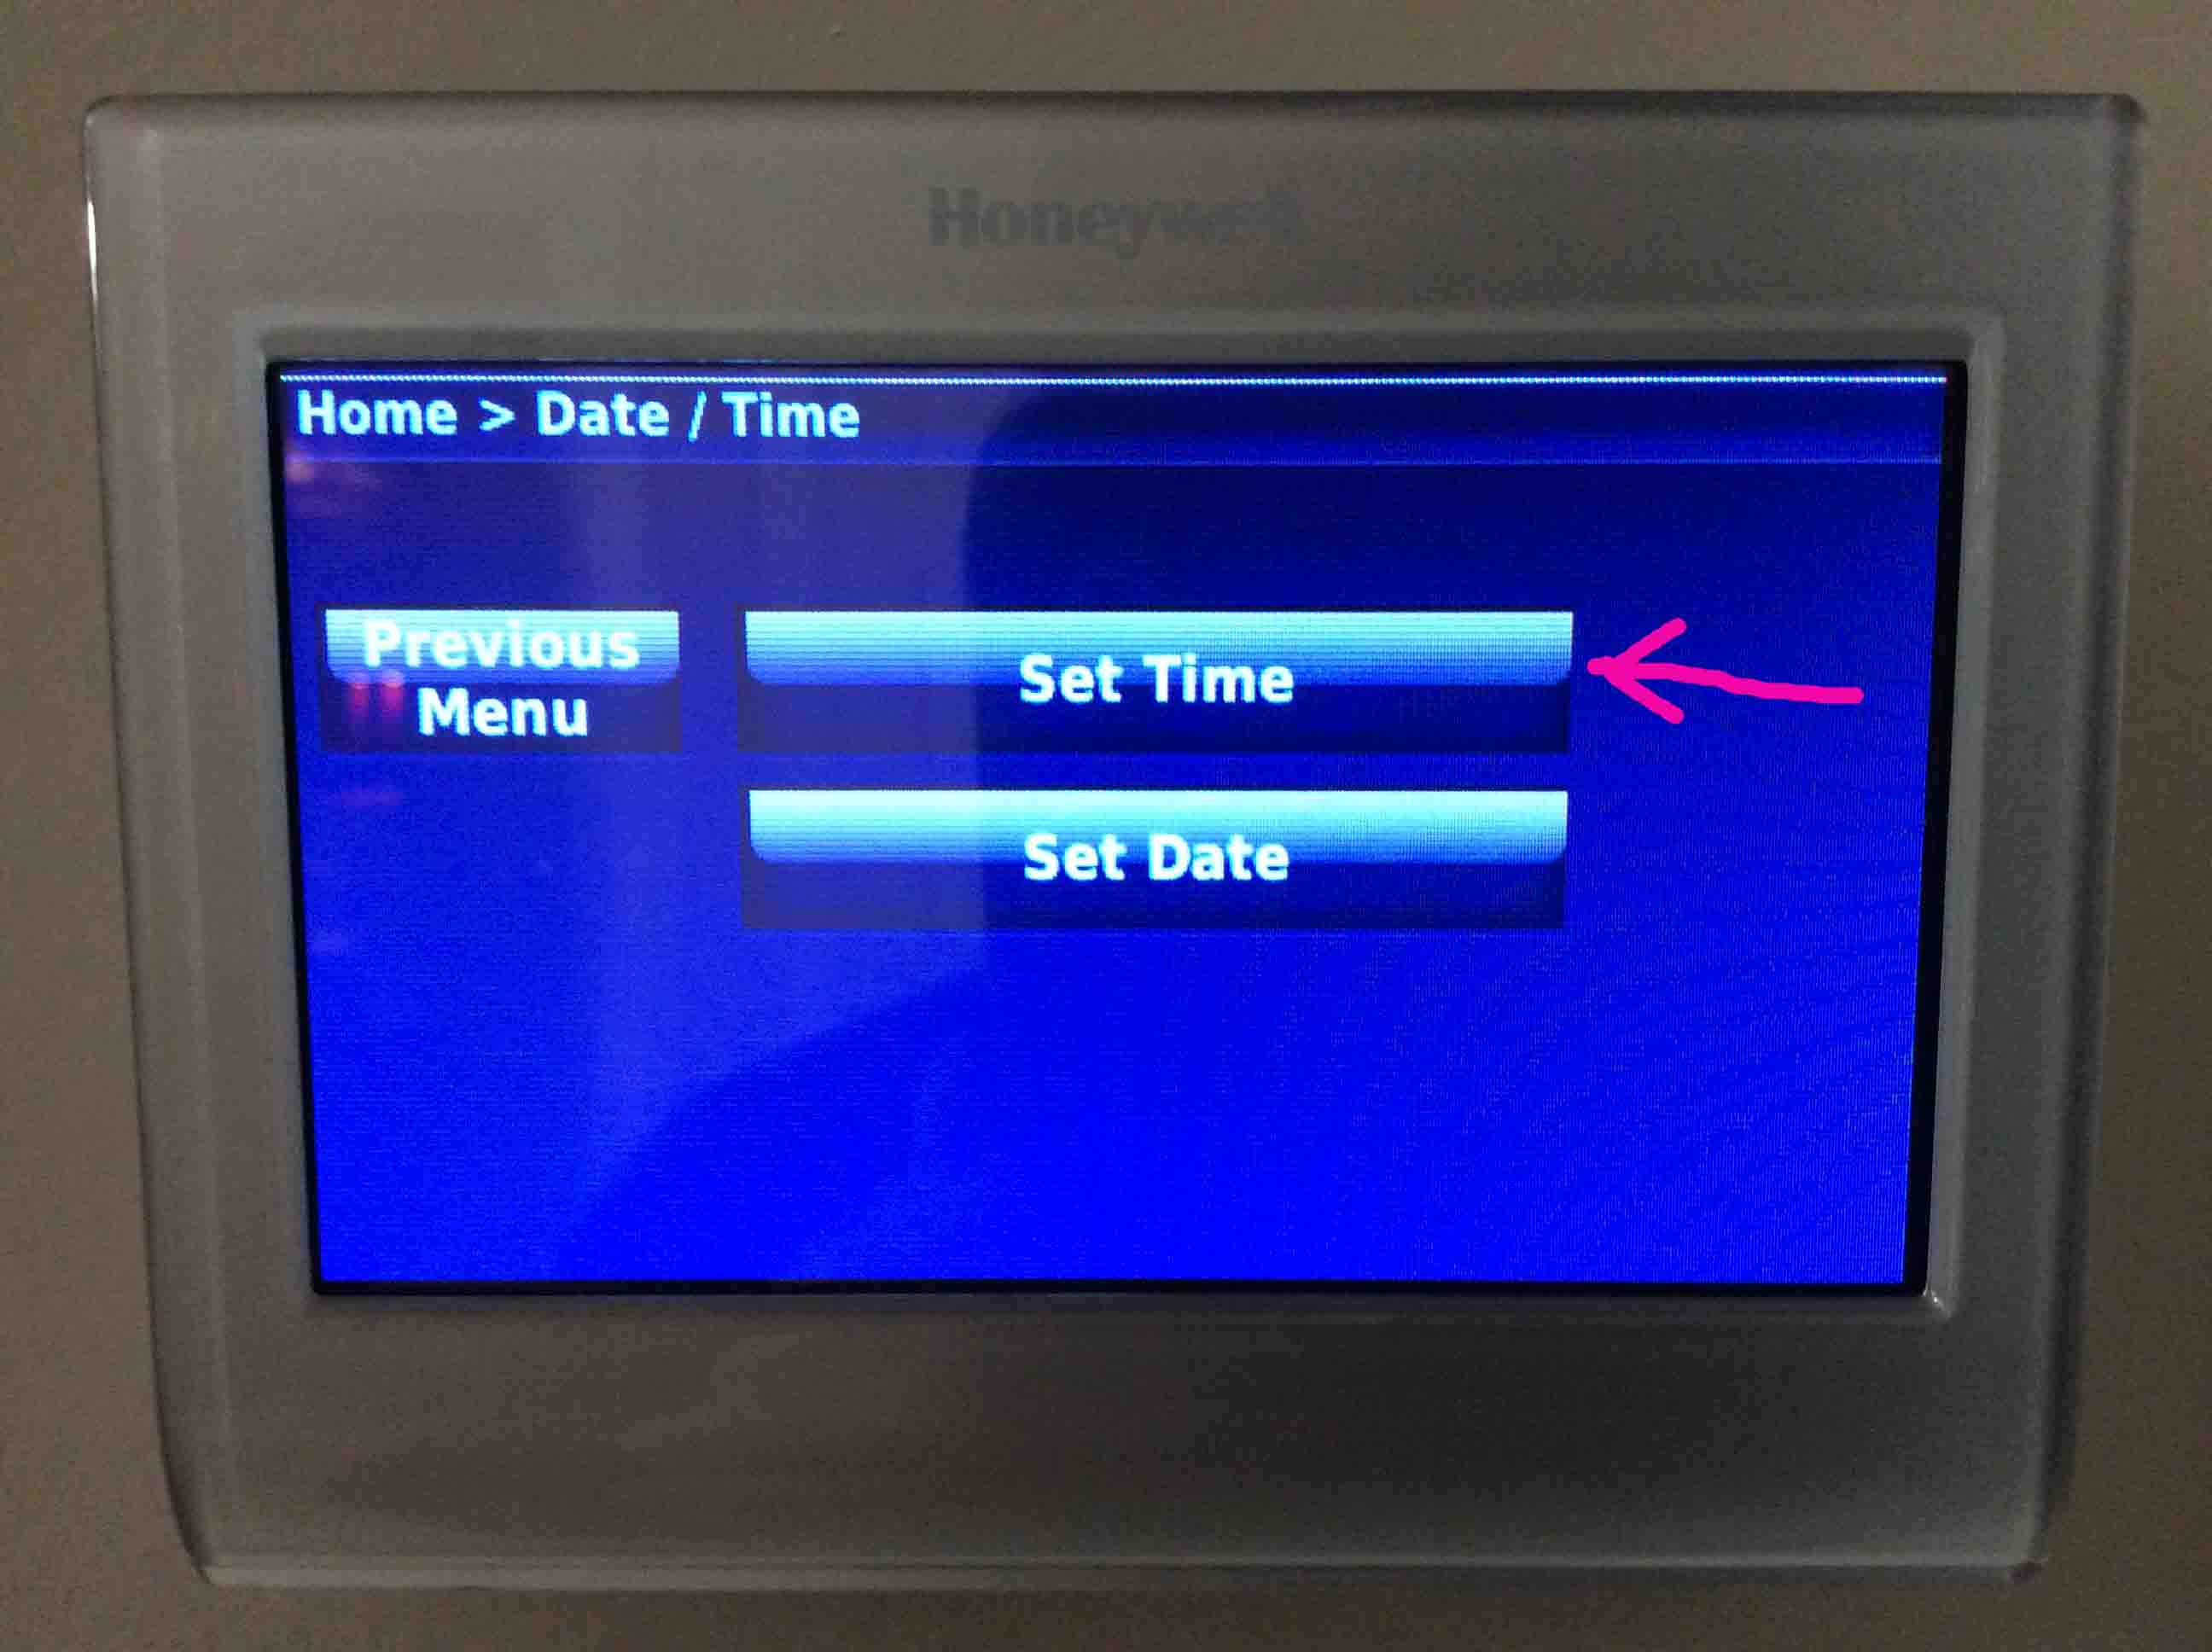
Now on the next screen you have three options: Set Time, Set Date, and Previous Menu.
Honeywell RTH9580WF Wi-Fi thermostat, displaying its -Date/Time- screen.
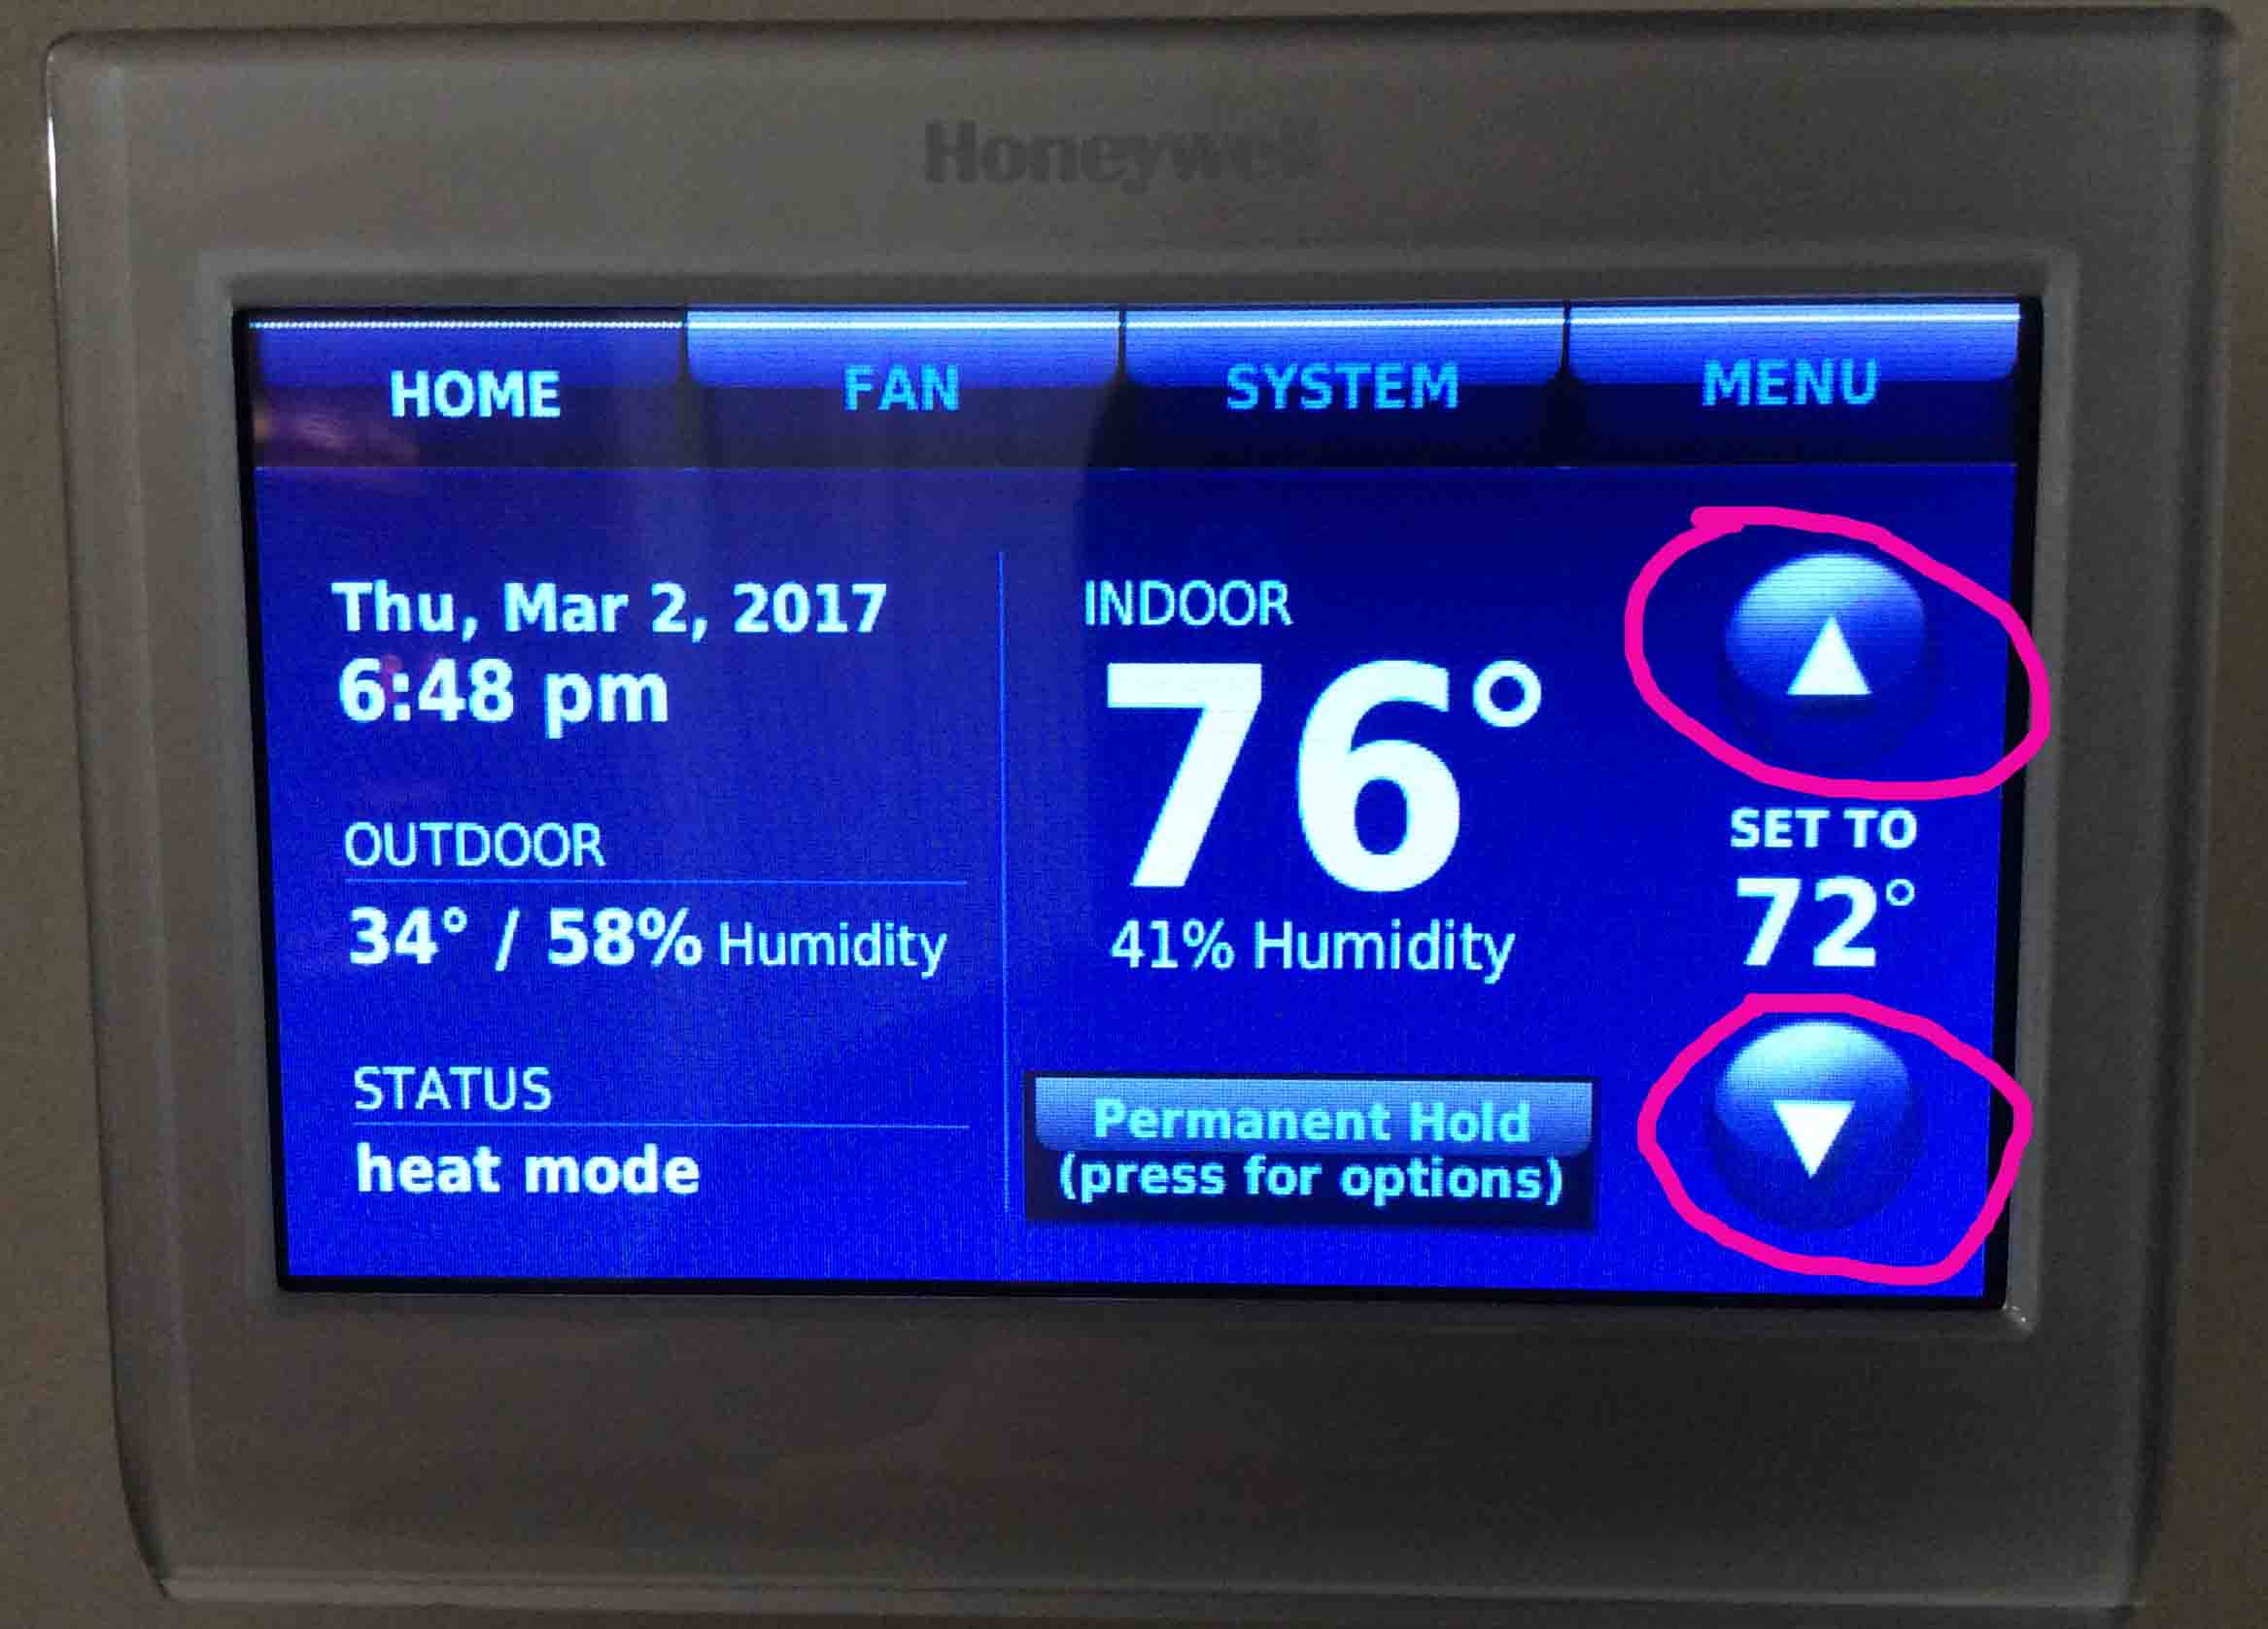
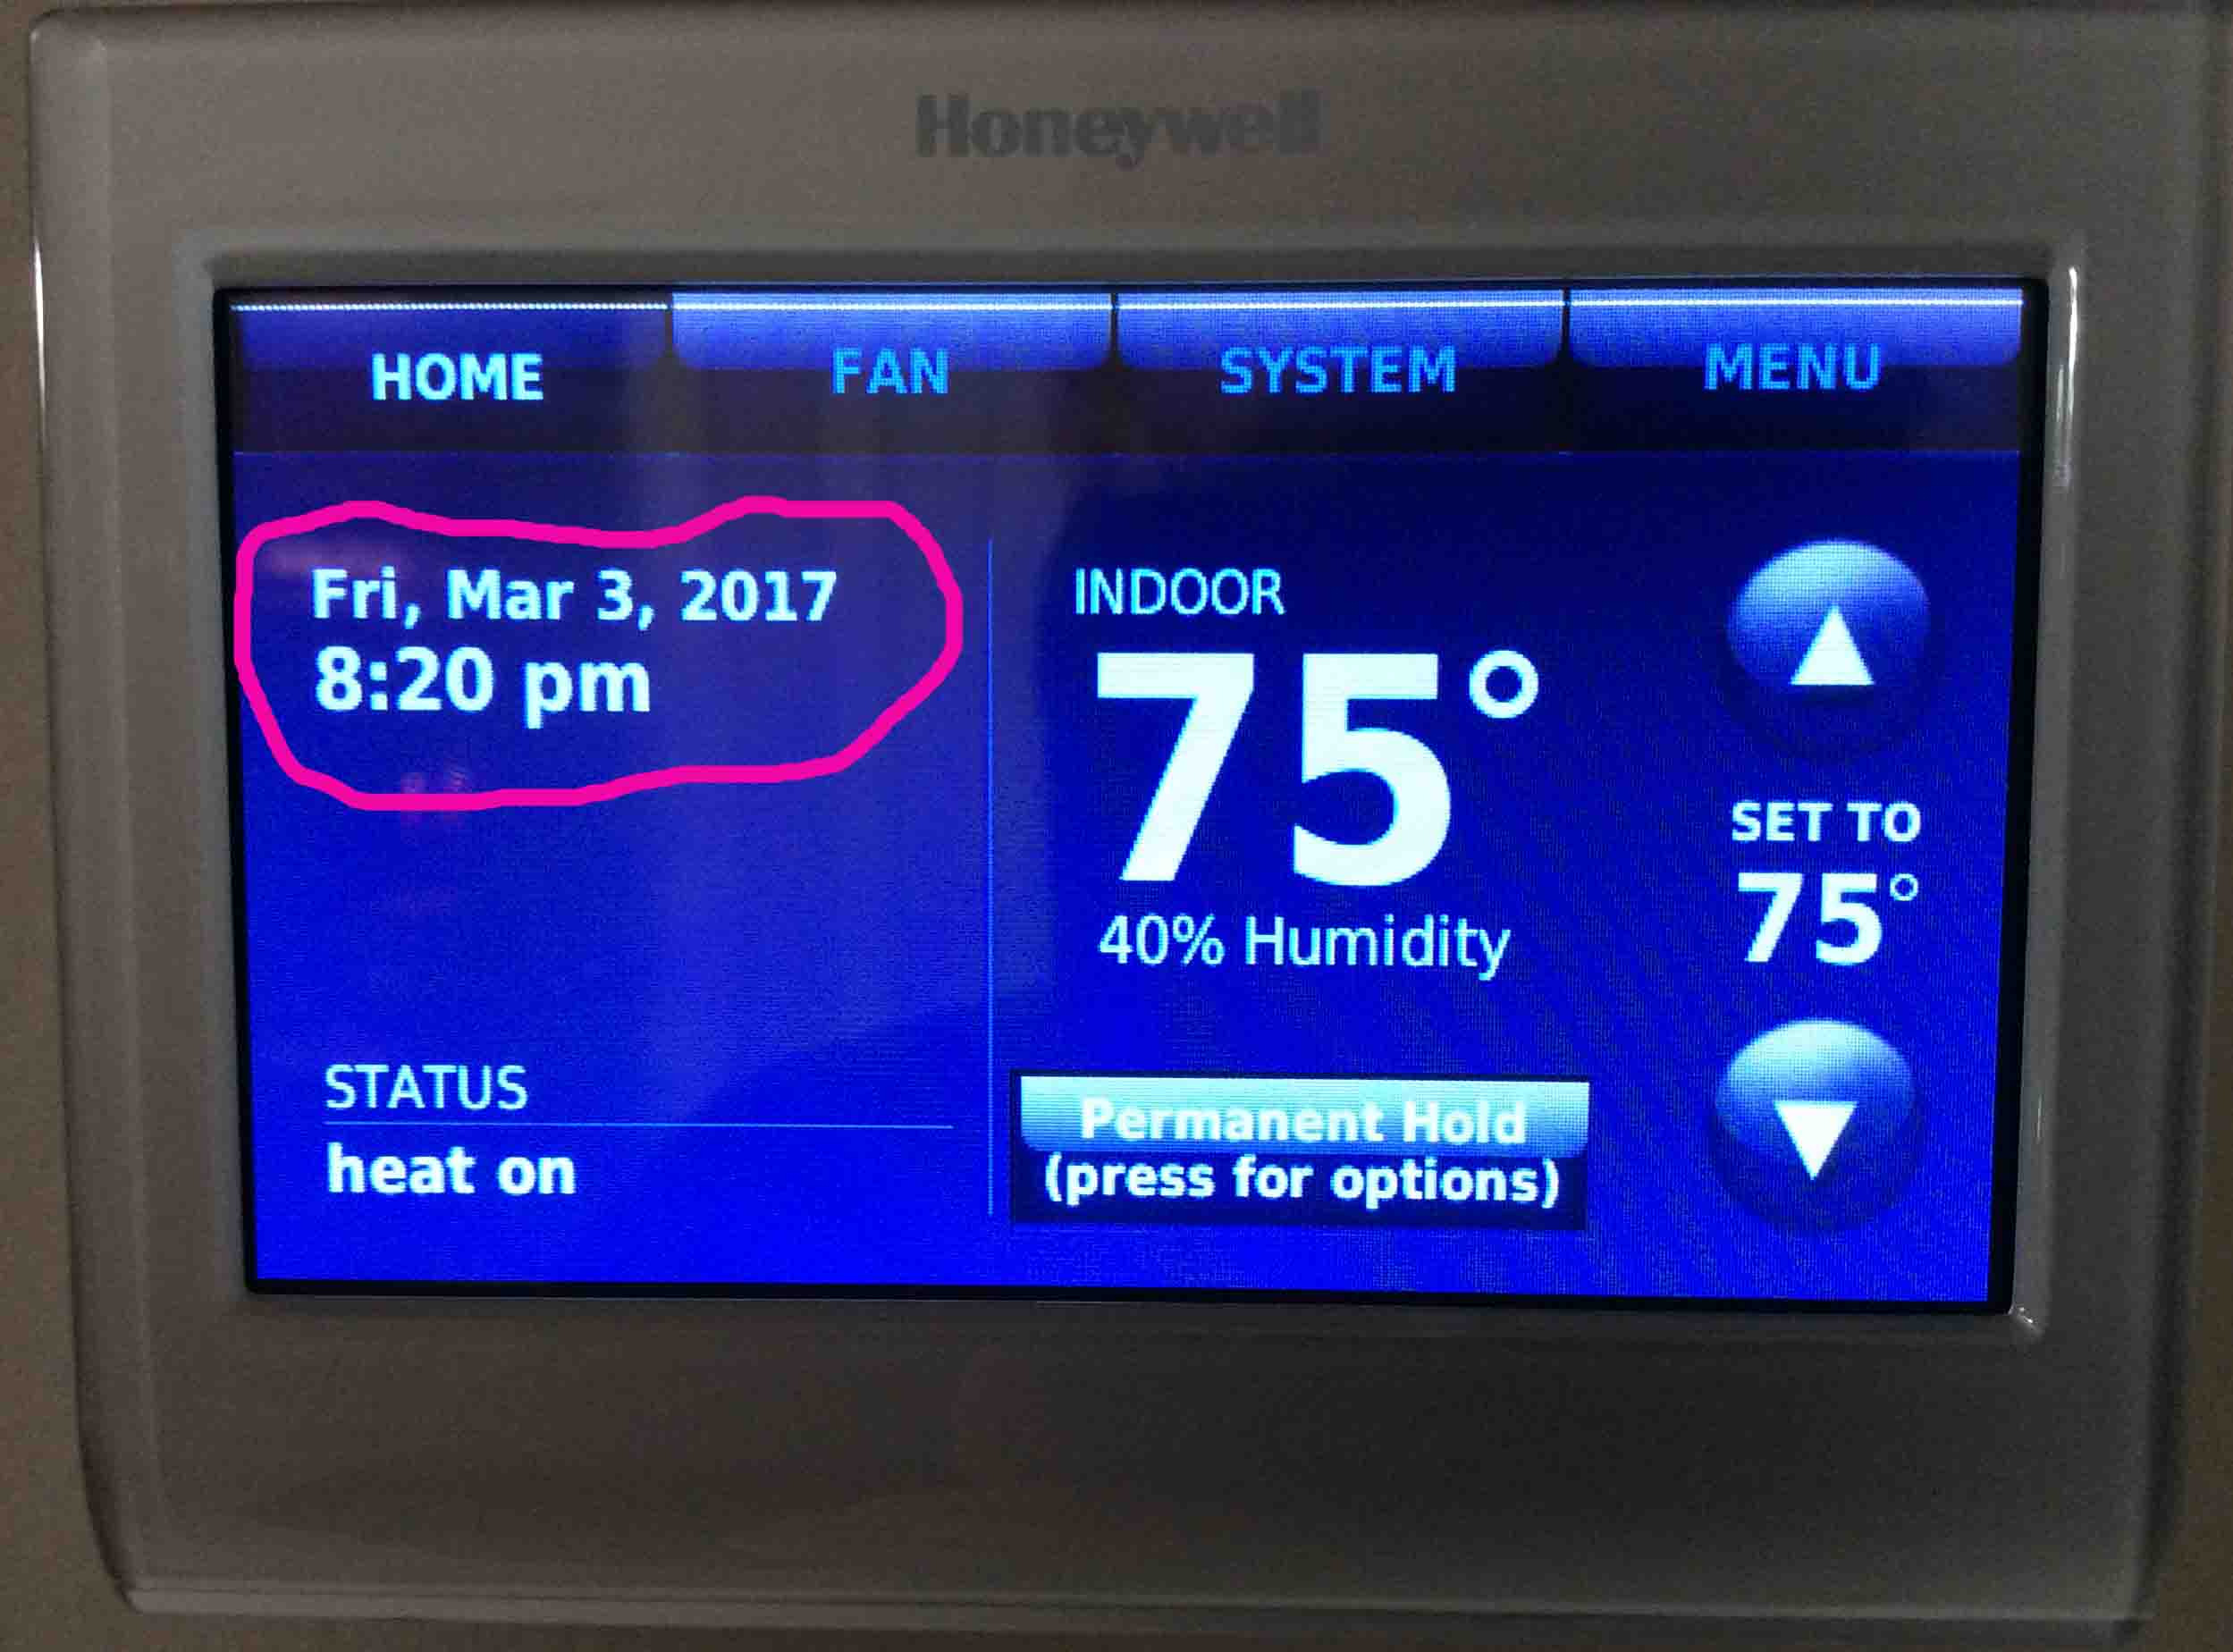
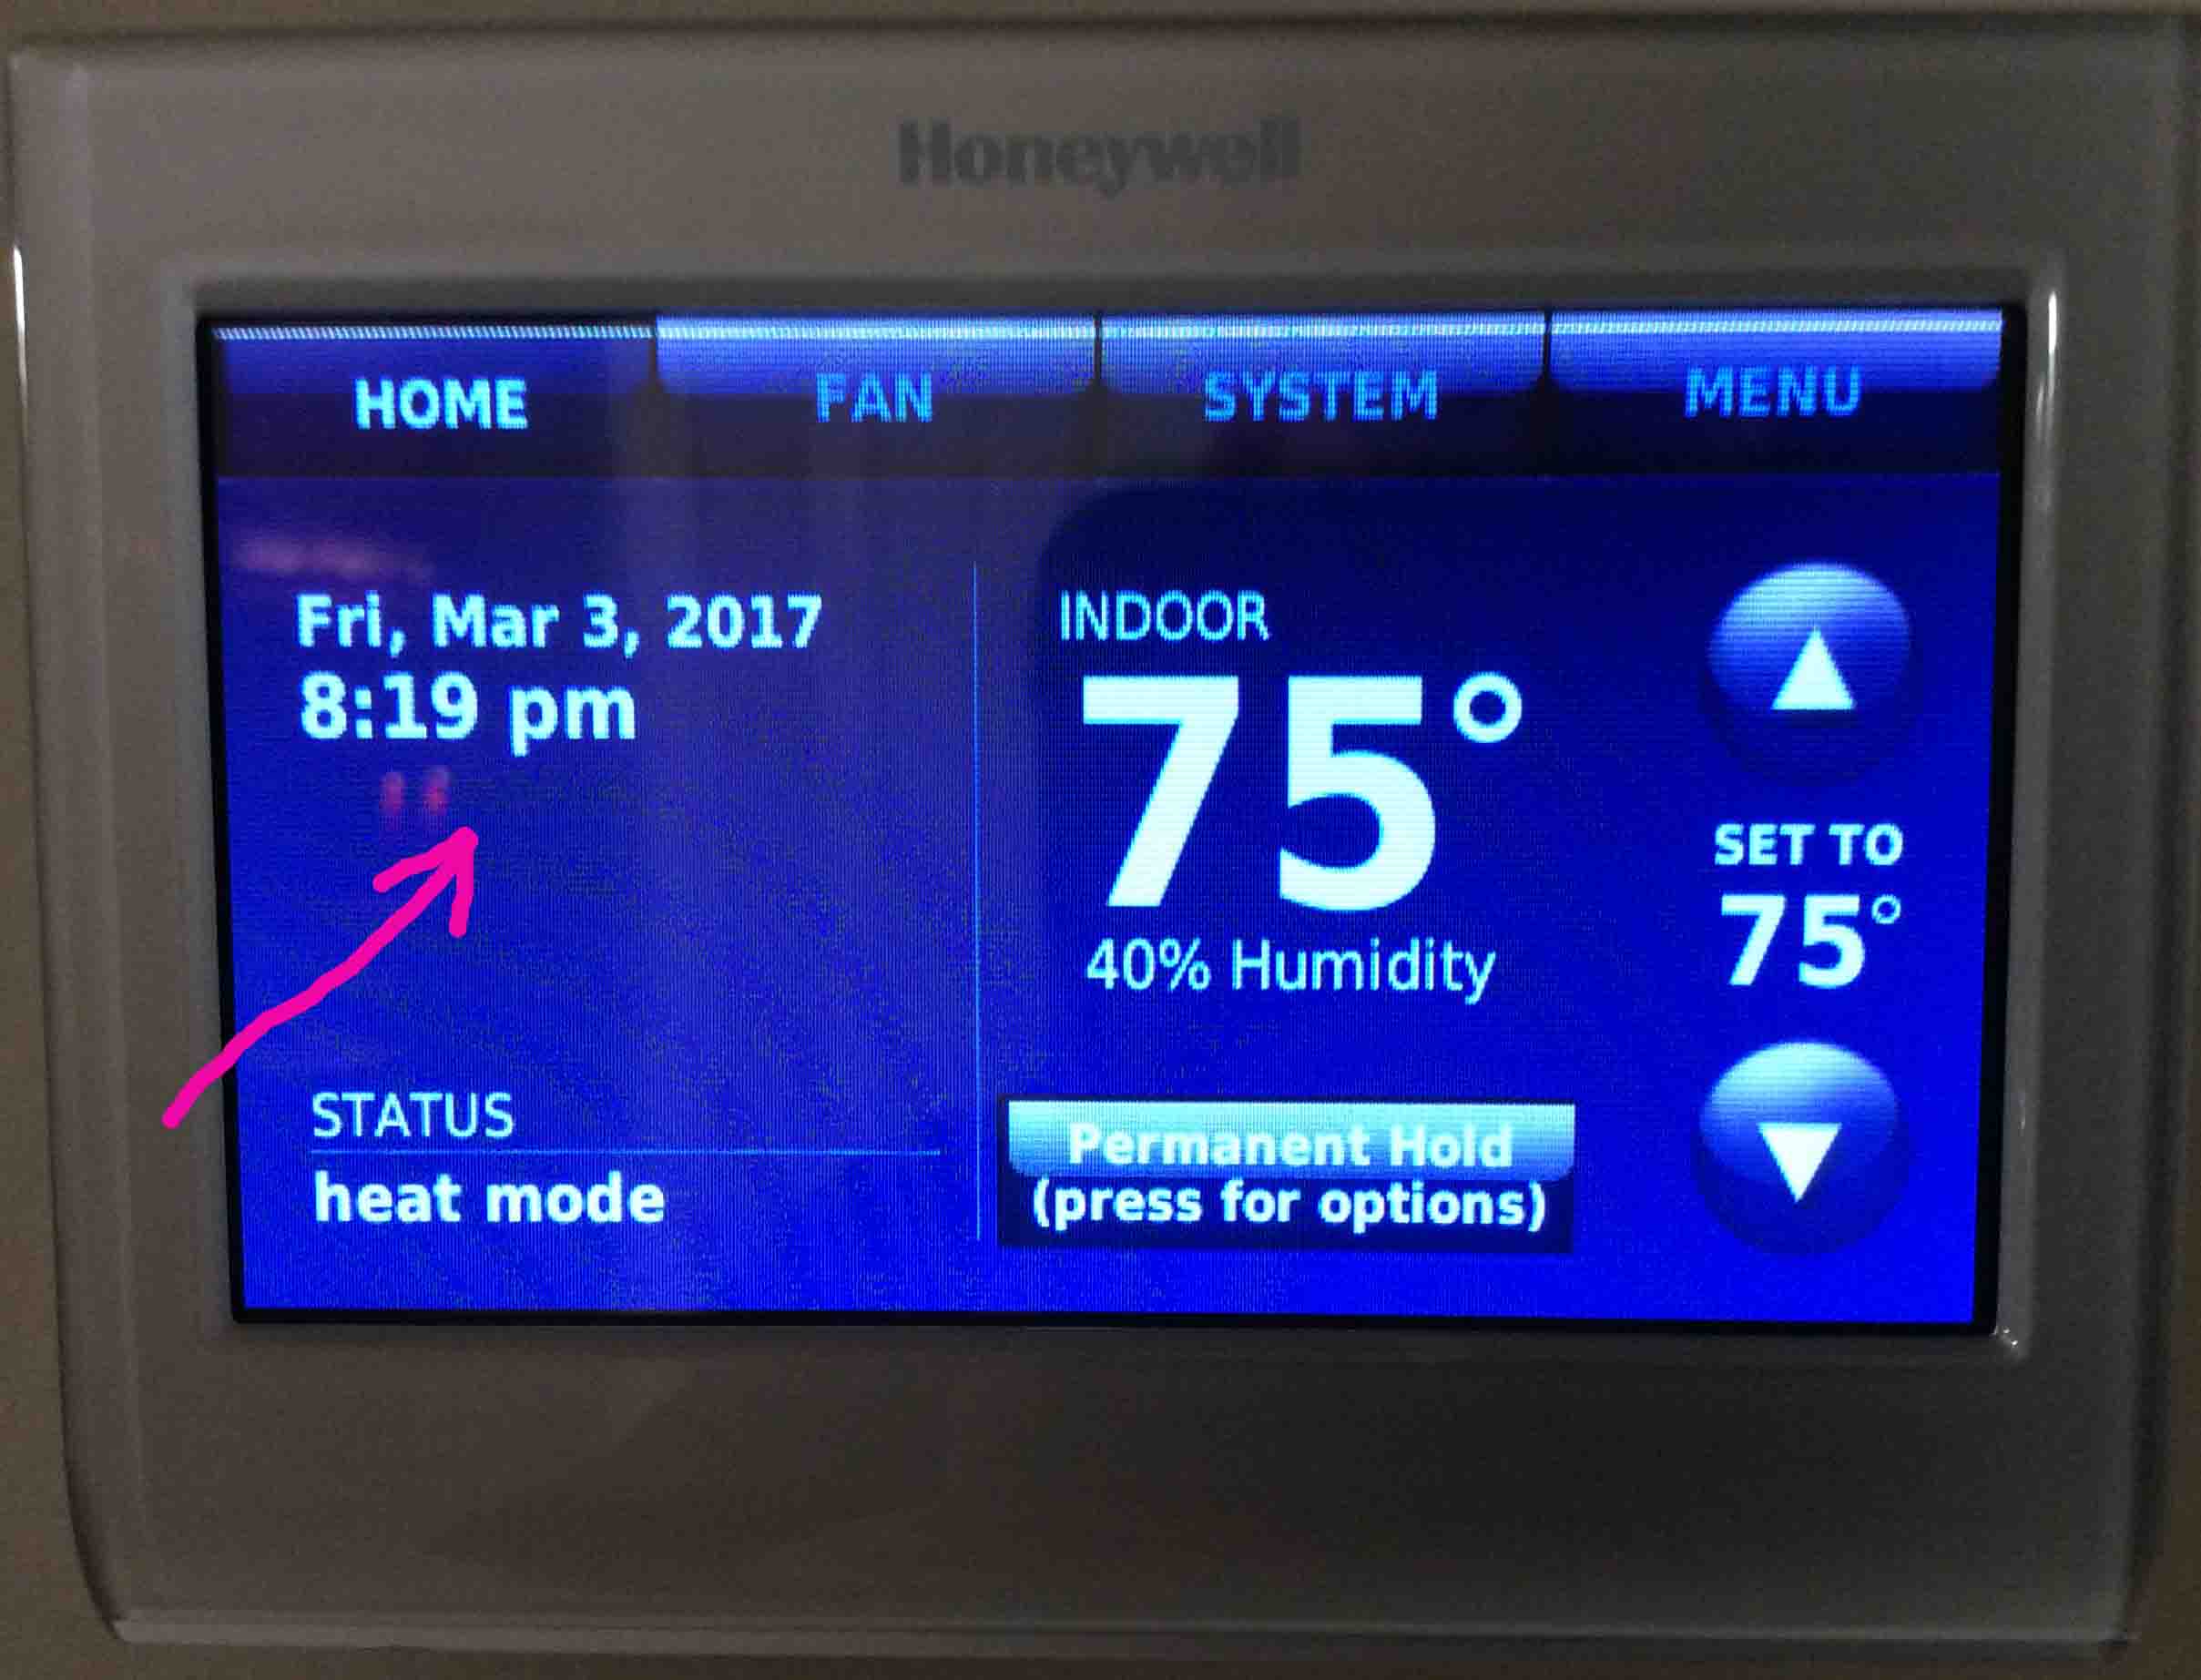
T-stat Home Screen with Current Date and Time Circled
The RTH9580WF Wi-Fi thermostat, displaying its -Home- screen, as it appears with no internet connection, with the manually set time and date highlighted.
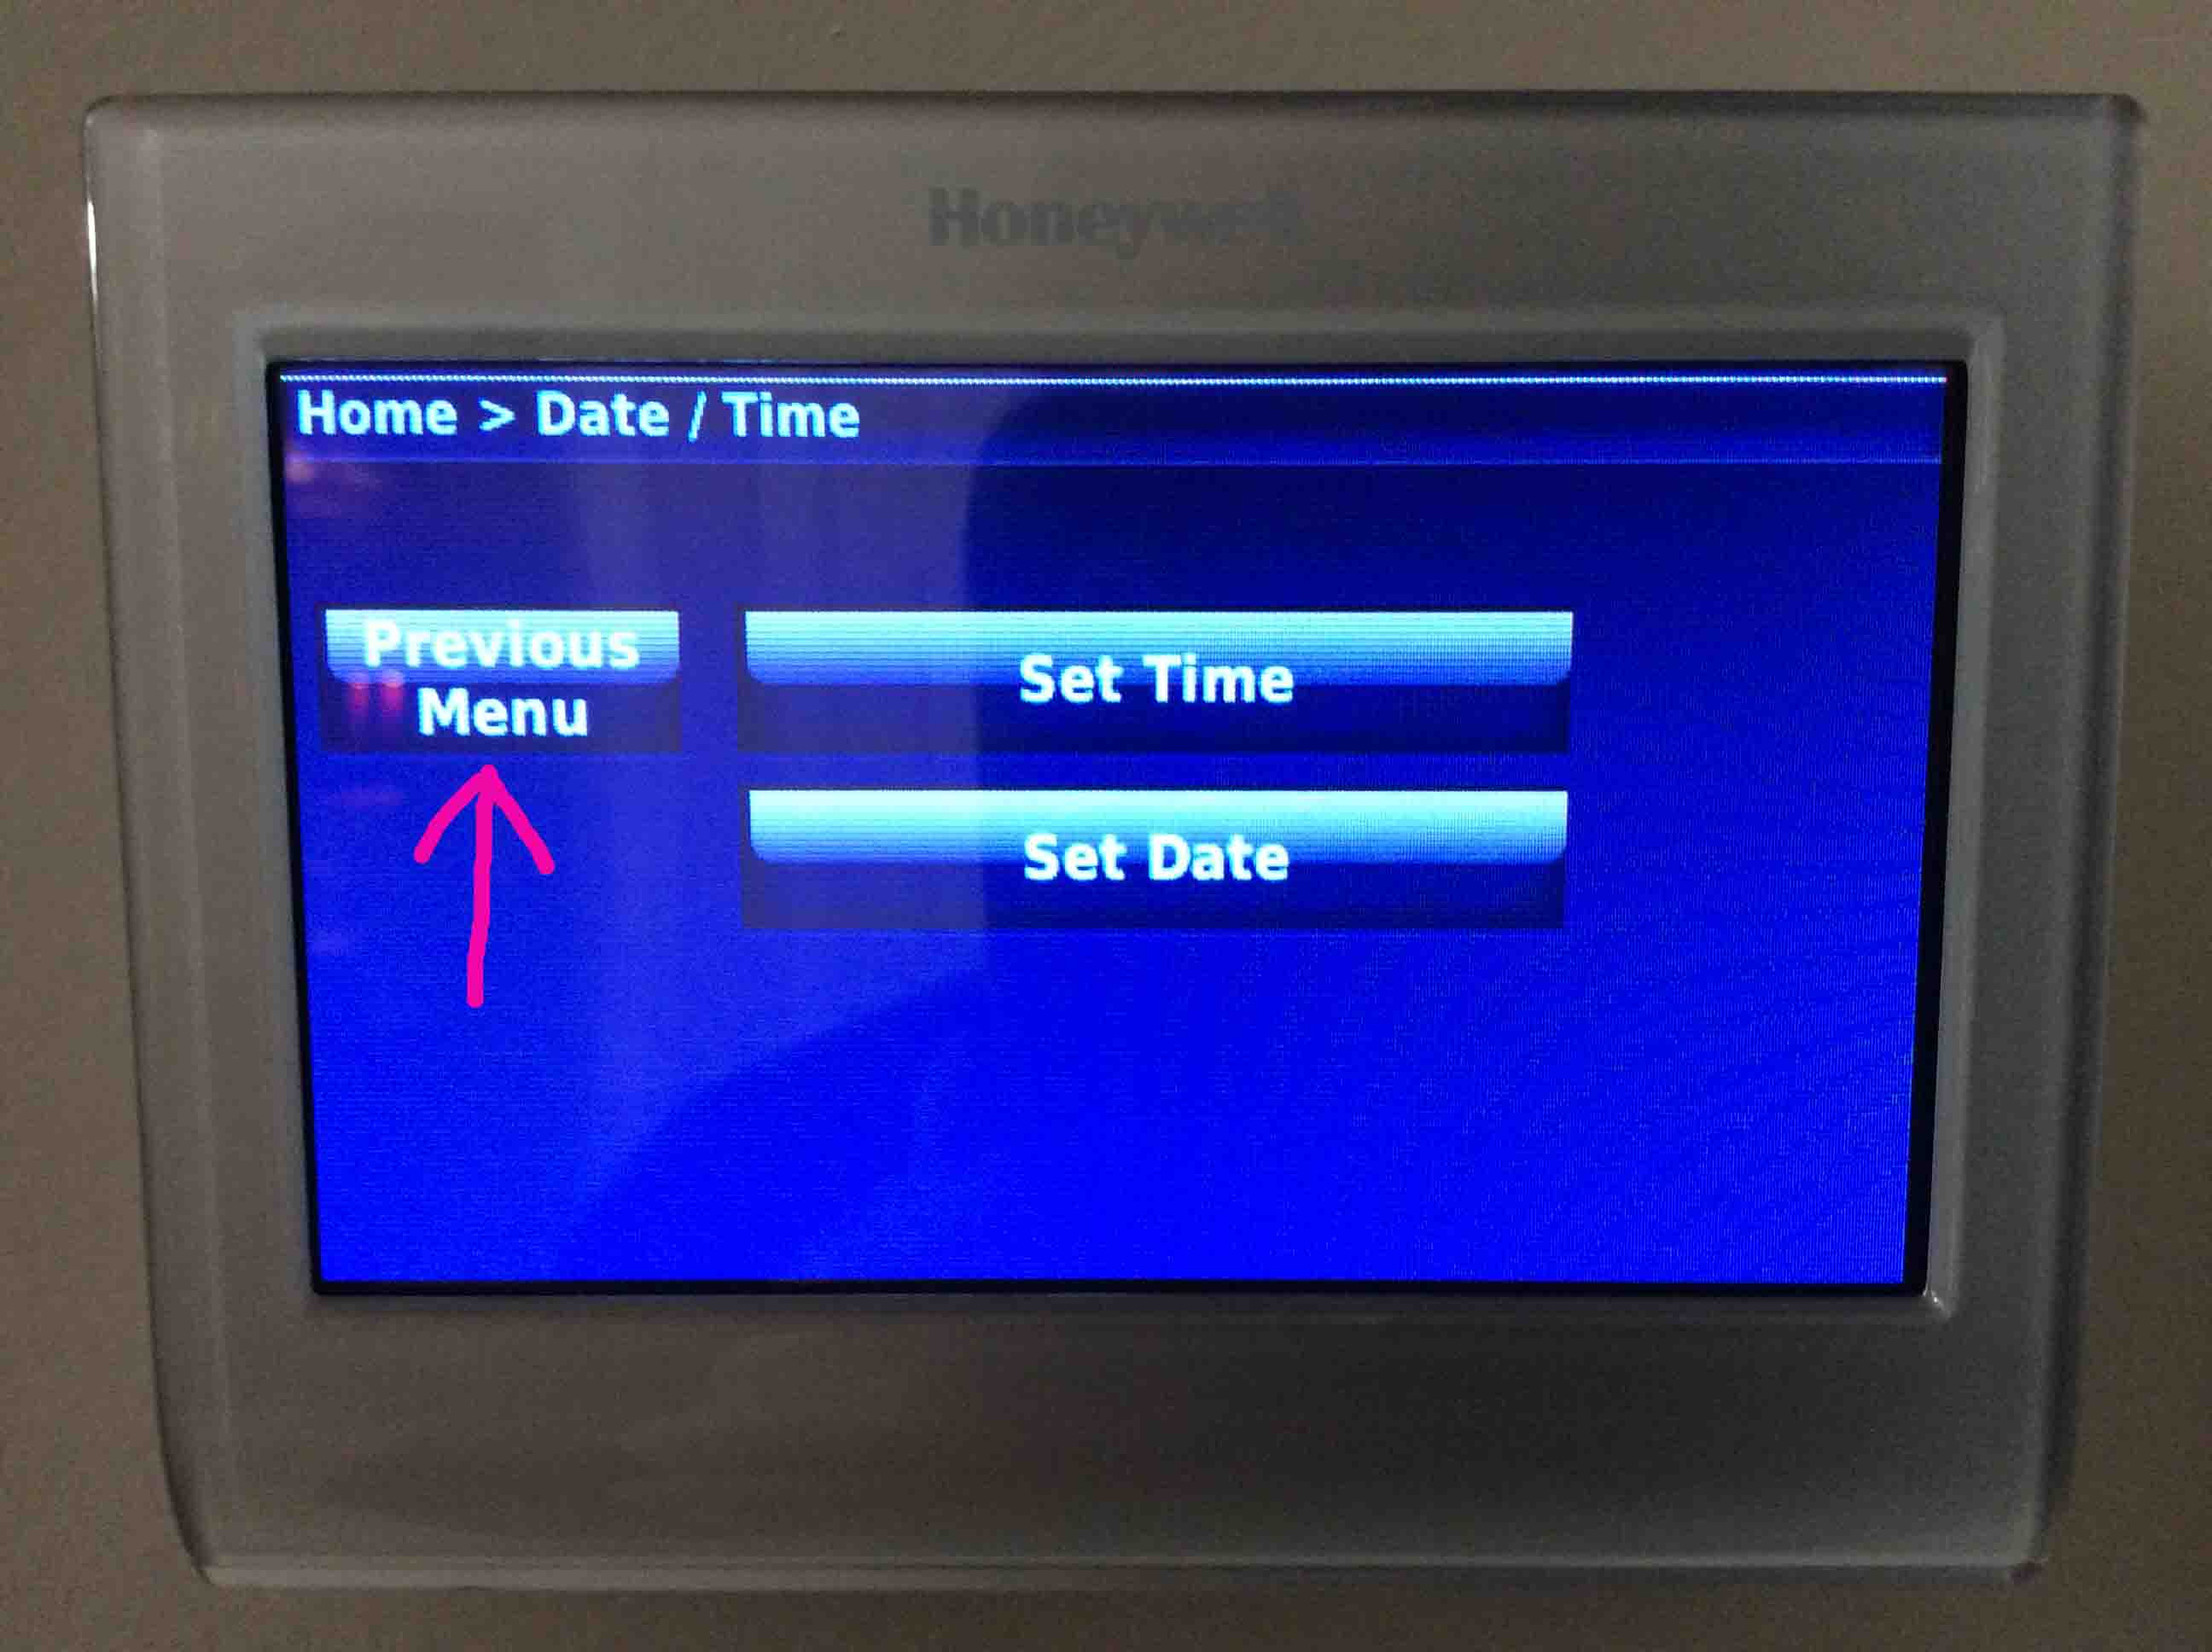
Honeywell RTH9580WF Wi-Fi thermostat, displaying its -Date/Time- screen, with the -Done- button highlighted.
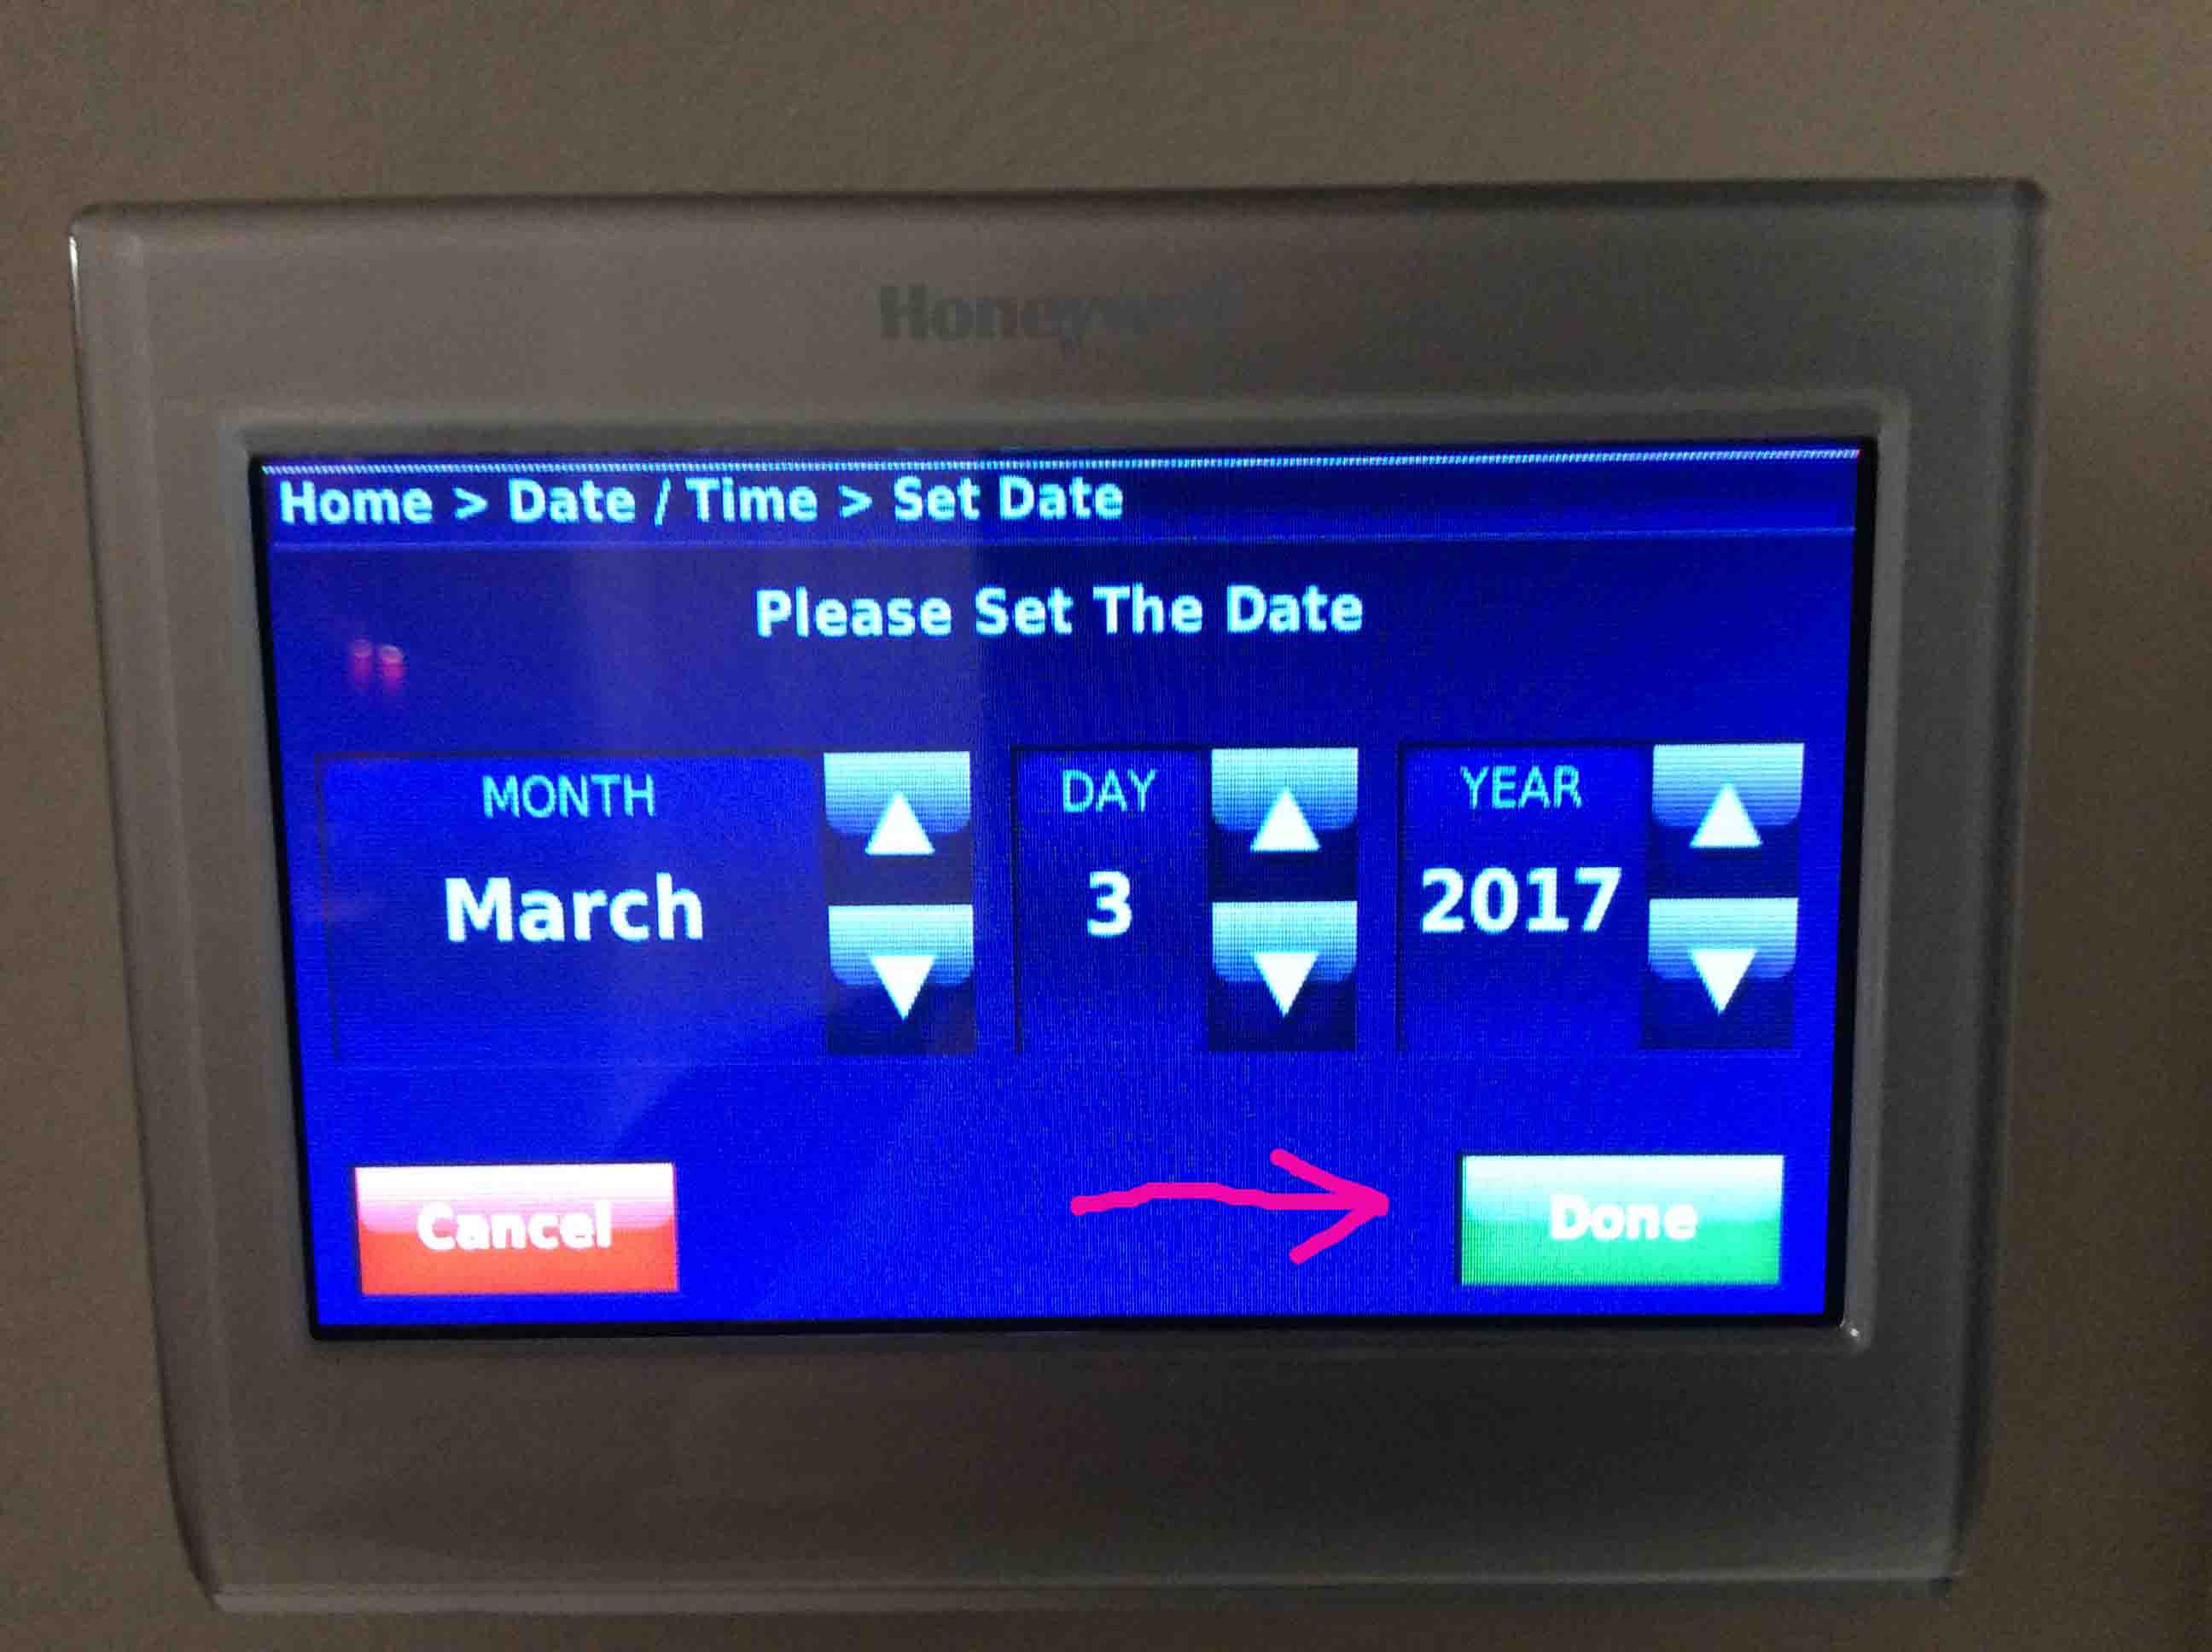
How to Set the Date
The Honeywell RTH9580WF WiFi thermostat, displaying the -Set Date- screen, with the -Done- button highlighted.
Honeywell RTH9580WF Wi-Fi thermostat, displaying the -Time / Date- screen with the -Set Date- button highlighted.
How to Set the Time
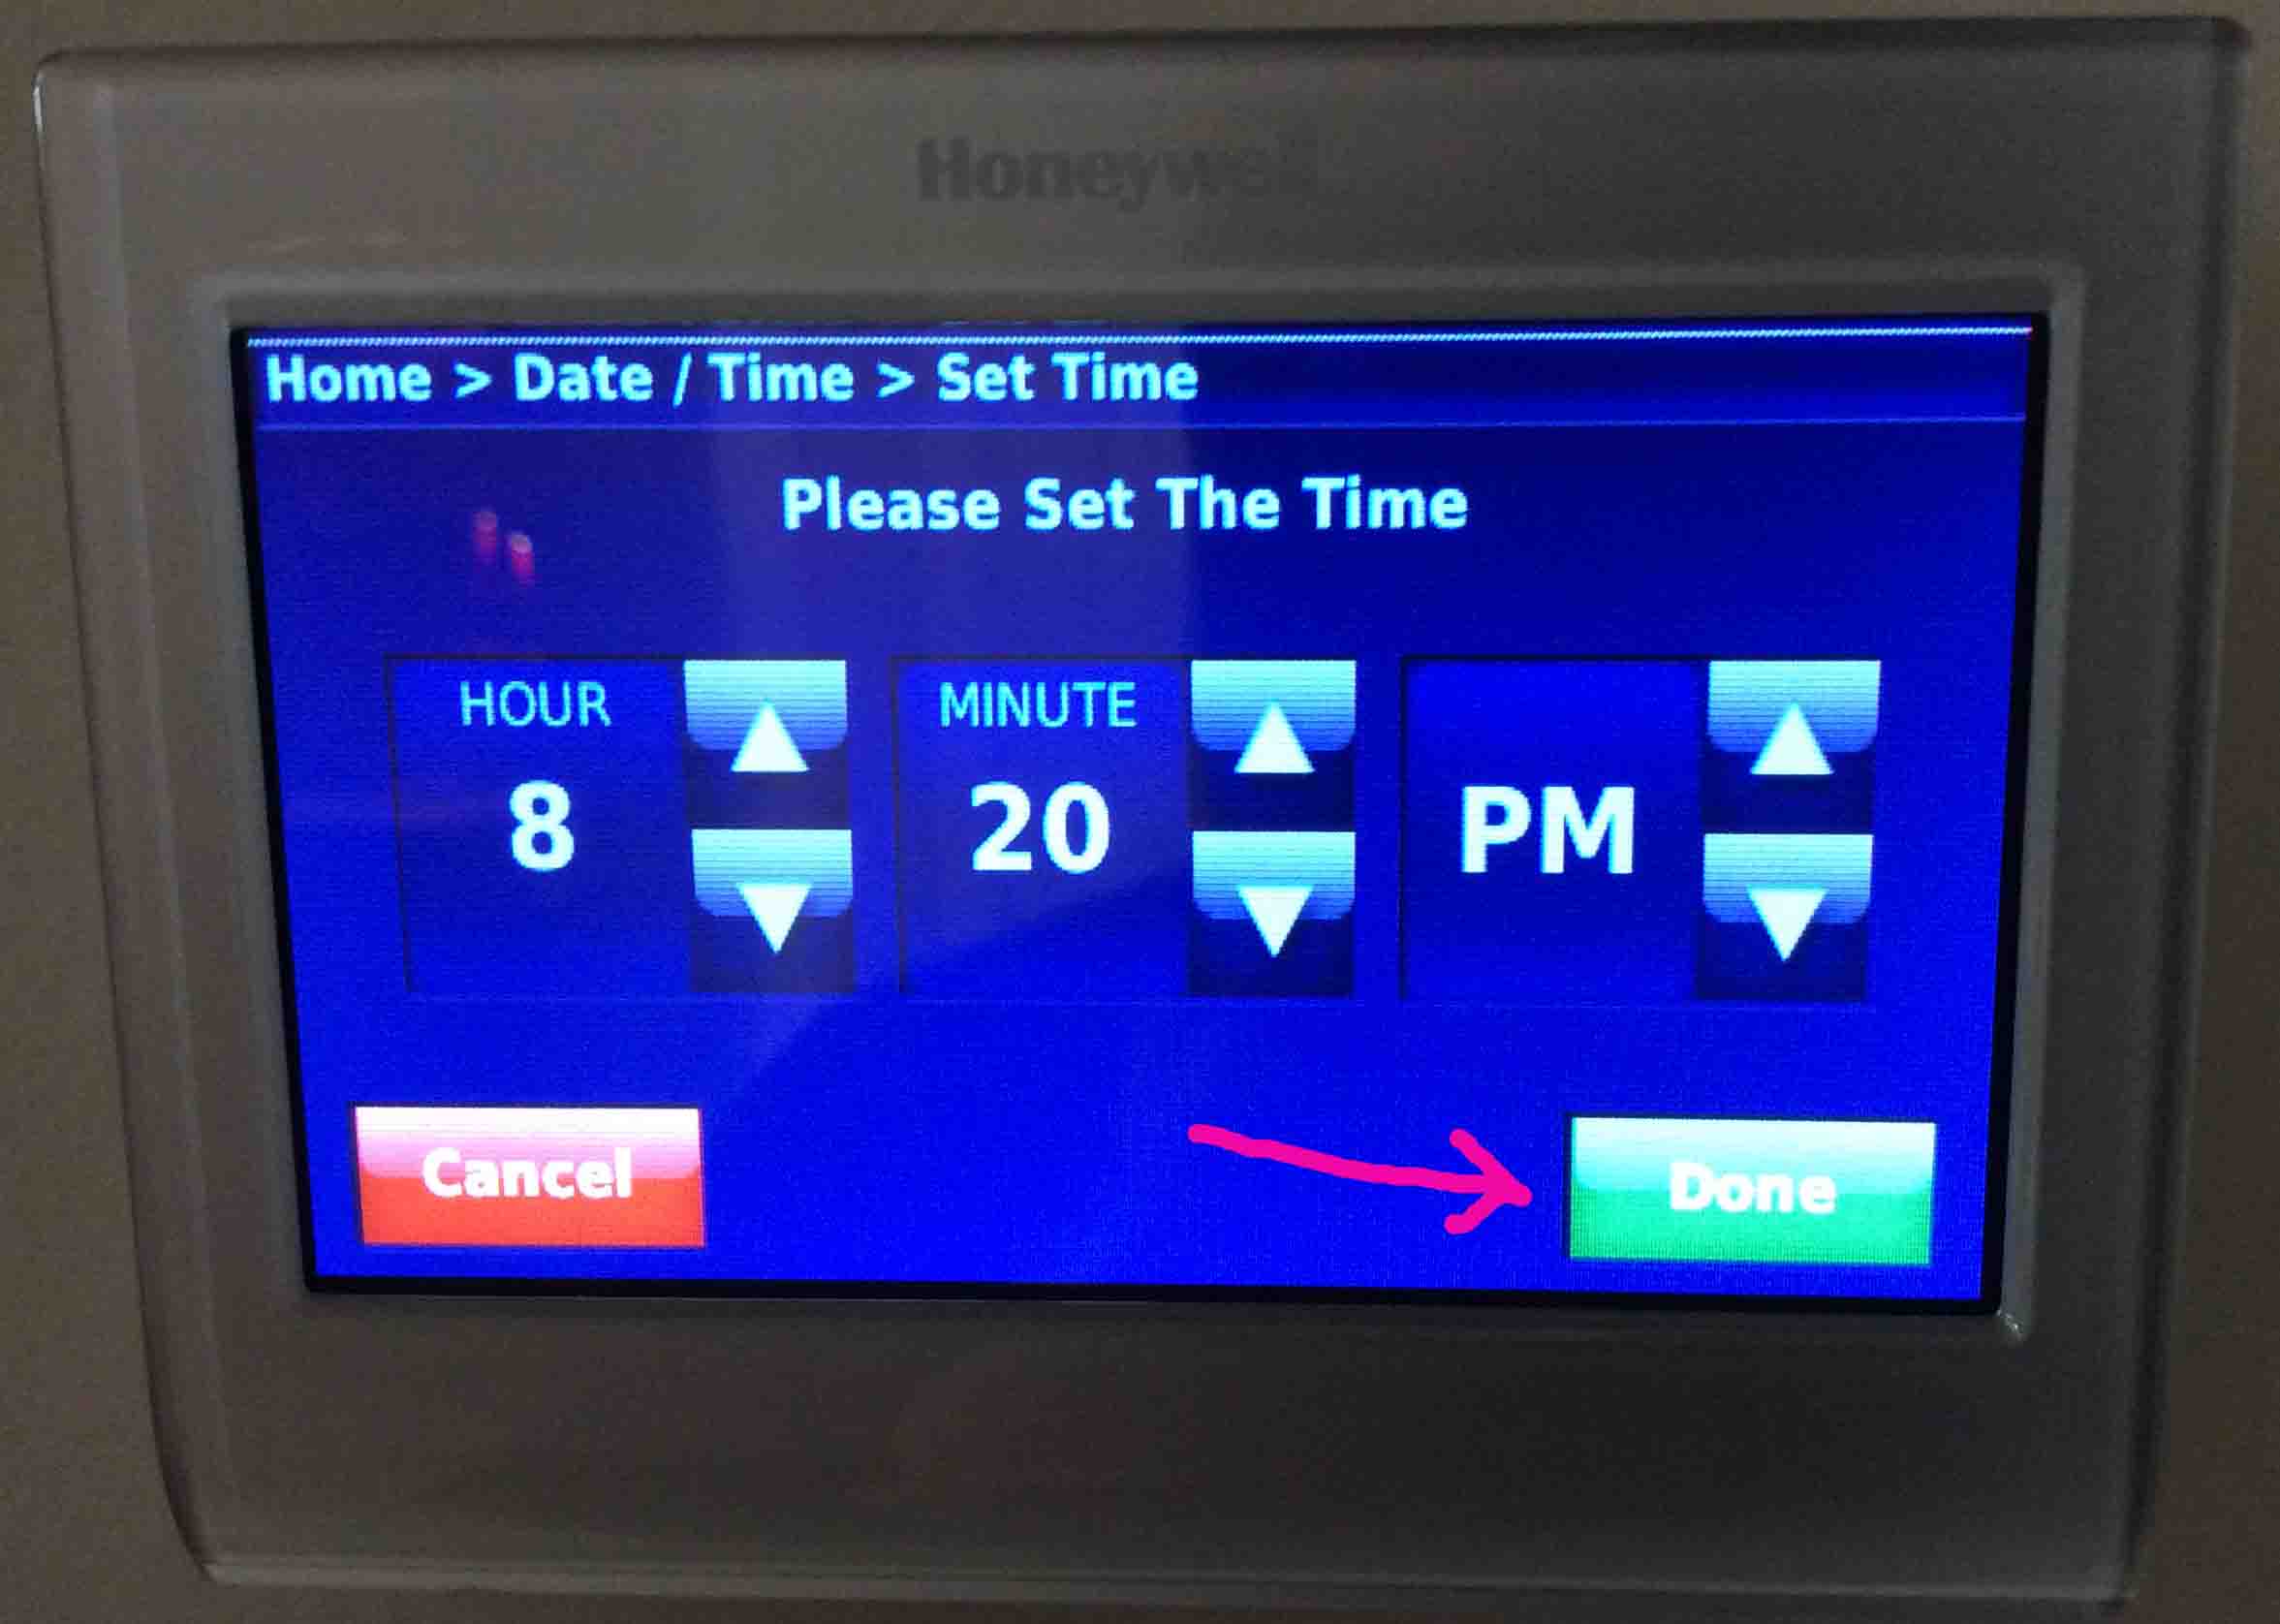
Additionally, on the Please Set The Time screen, you can set the hour, minute, and AM / PM values. But once you register the t-stat, it sets the time from the internet automatically. So you’ll rarely have to set the date and time by hand.
Honeywell RTH9580WF Wi-Fi thermostat, displaying its -Set Time- screen, with the -Done- button highlighted.
The RTH9580WF Wi-Fi thermostat, displaying its -Time / Date- screen, with the -Set Time- button highlighted.
Honeywell RTH9580WF Wi-Fi thermostat, displaying its Home screen as it appears when not connected to the Internet, with the Time Date area highlighted.
The t-stat also shows this amber message when it is currently not registered with the Honeywell Total Connect Comfort system.
The Honeywell RTH9580WF Wi-Fi thermostat, displaying the -Register Thermostat Online- message.
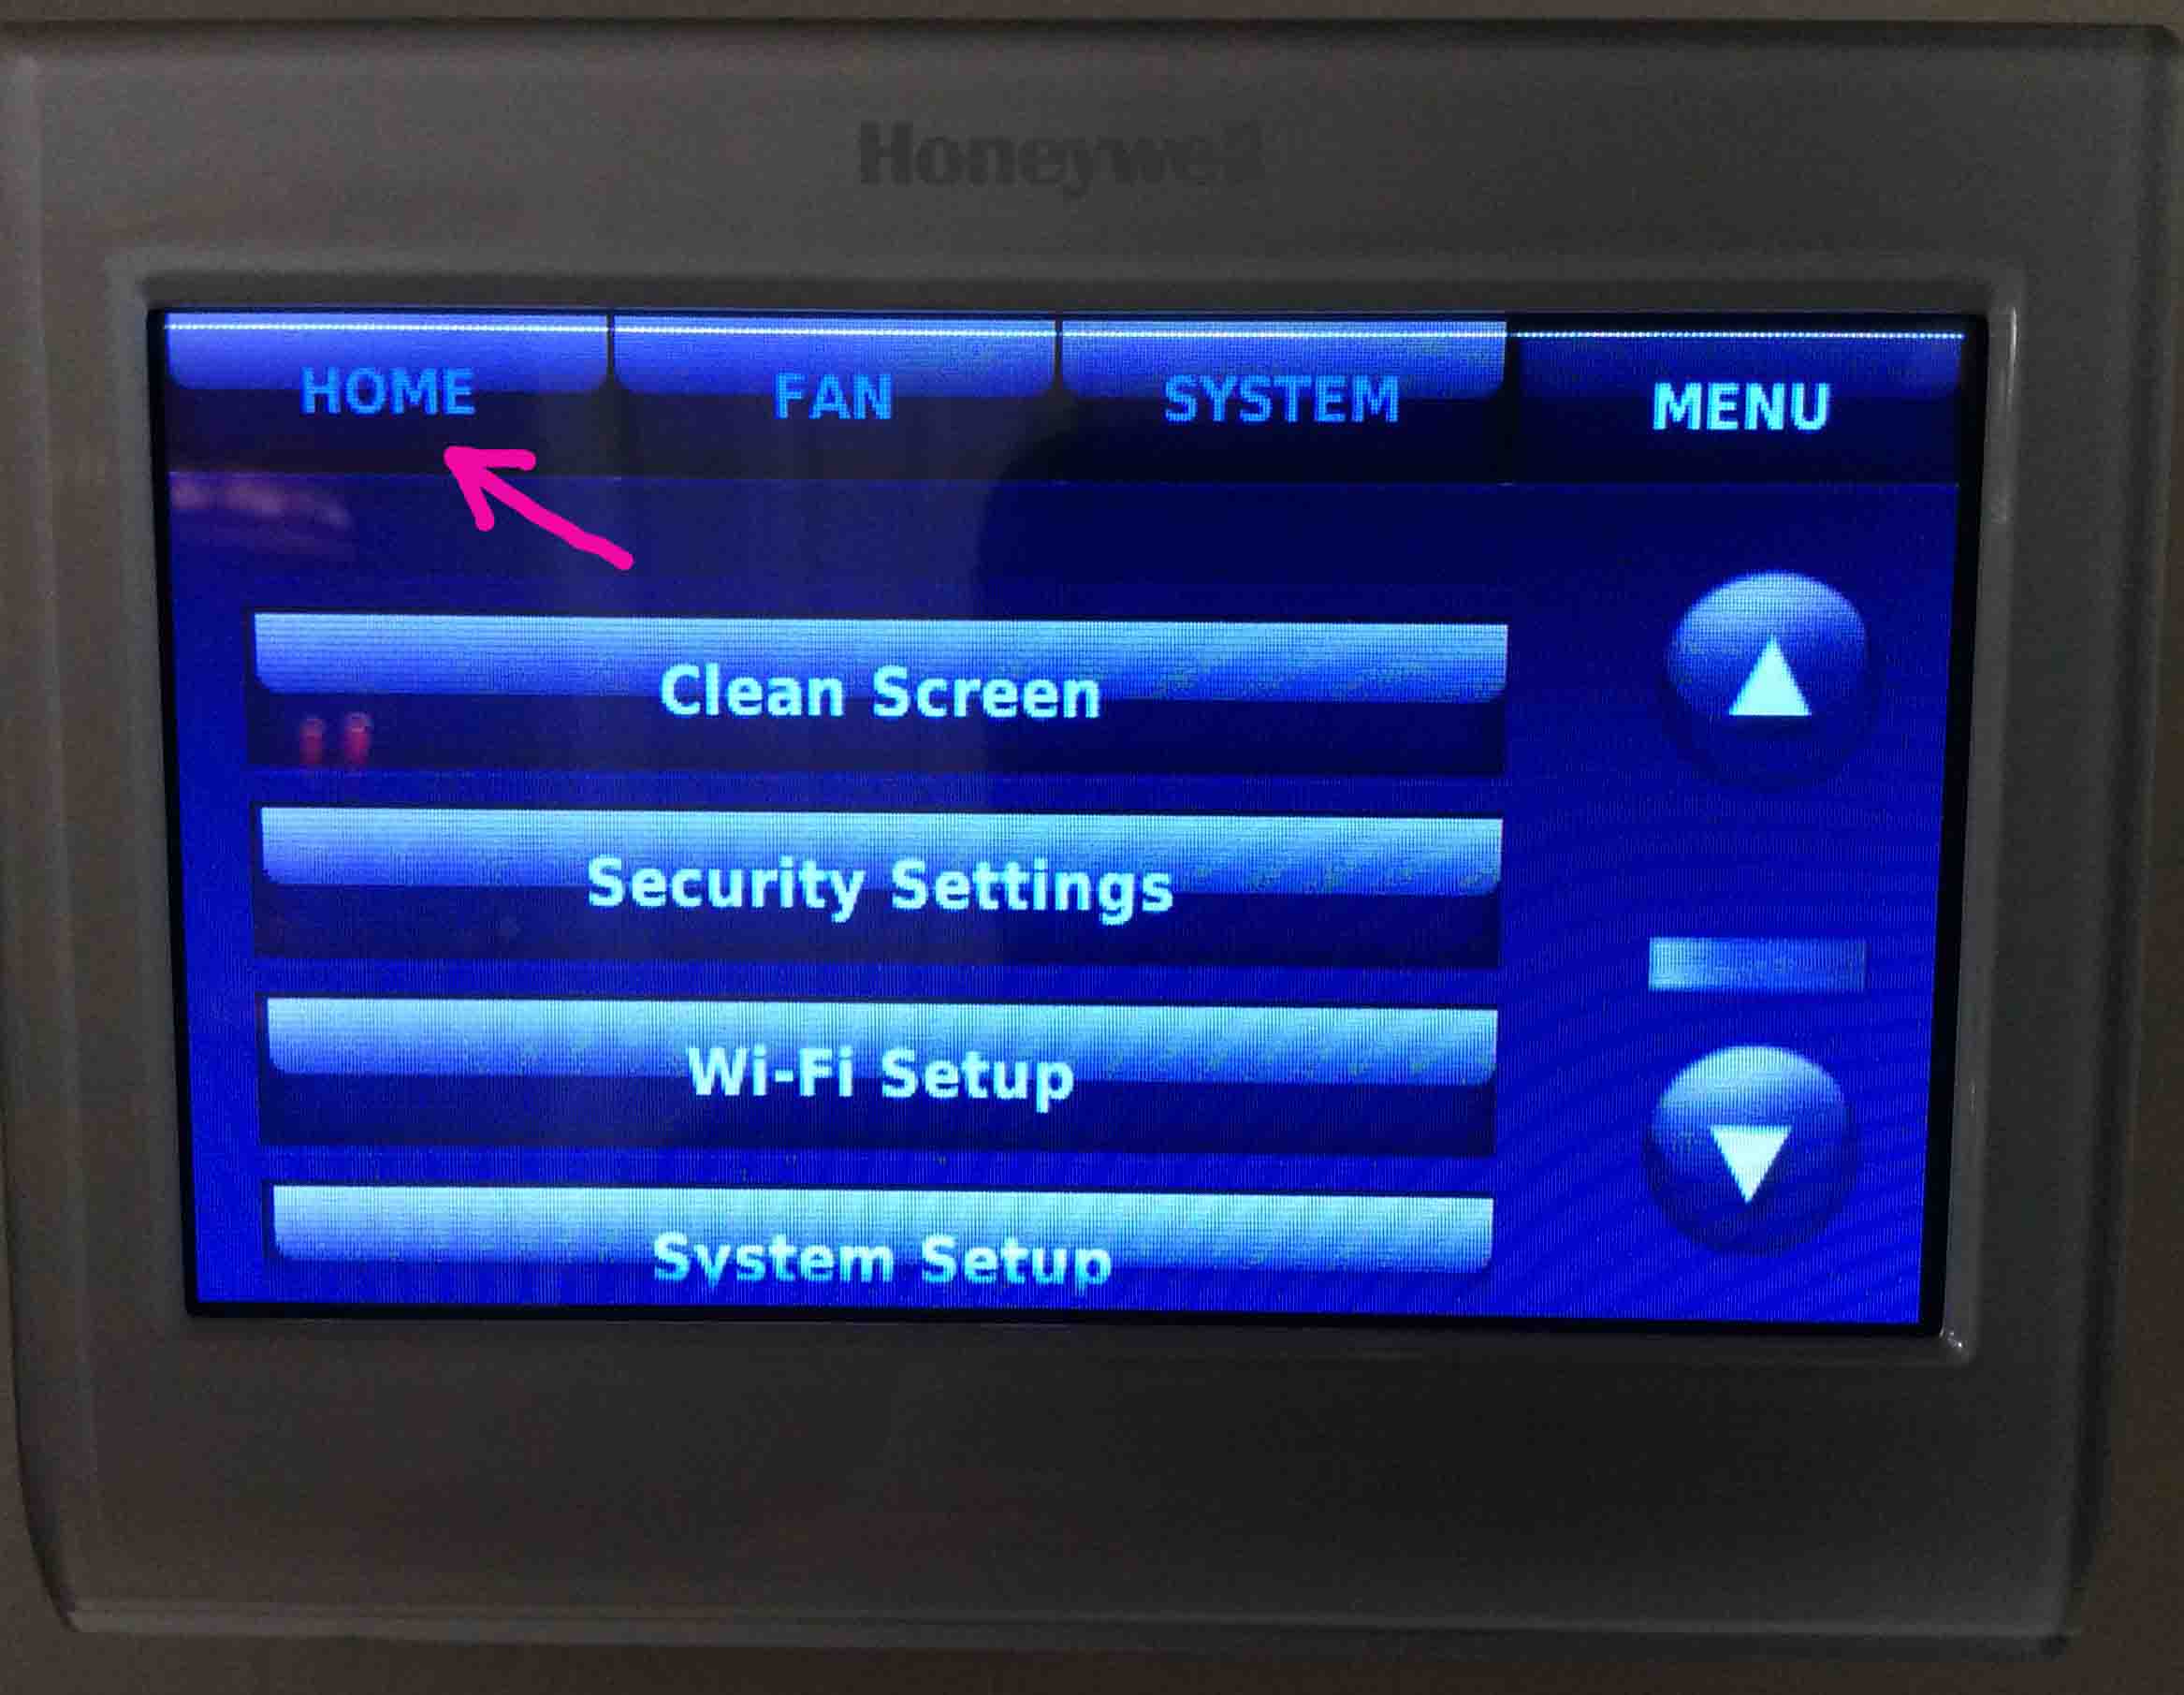
Note that some of the menus in this model have a HOME button, that you can tap to quickly get back to the Home screen.
Honeywell RTH9580WF WiFi thermostat, showing its -Main Menu- page, with the -Home- button highlighted.
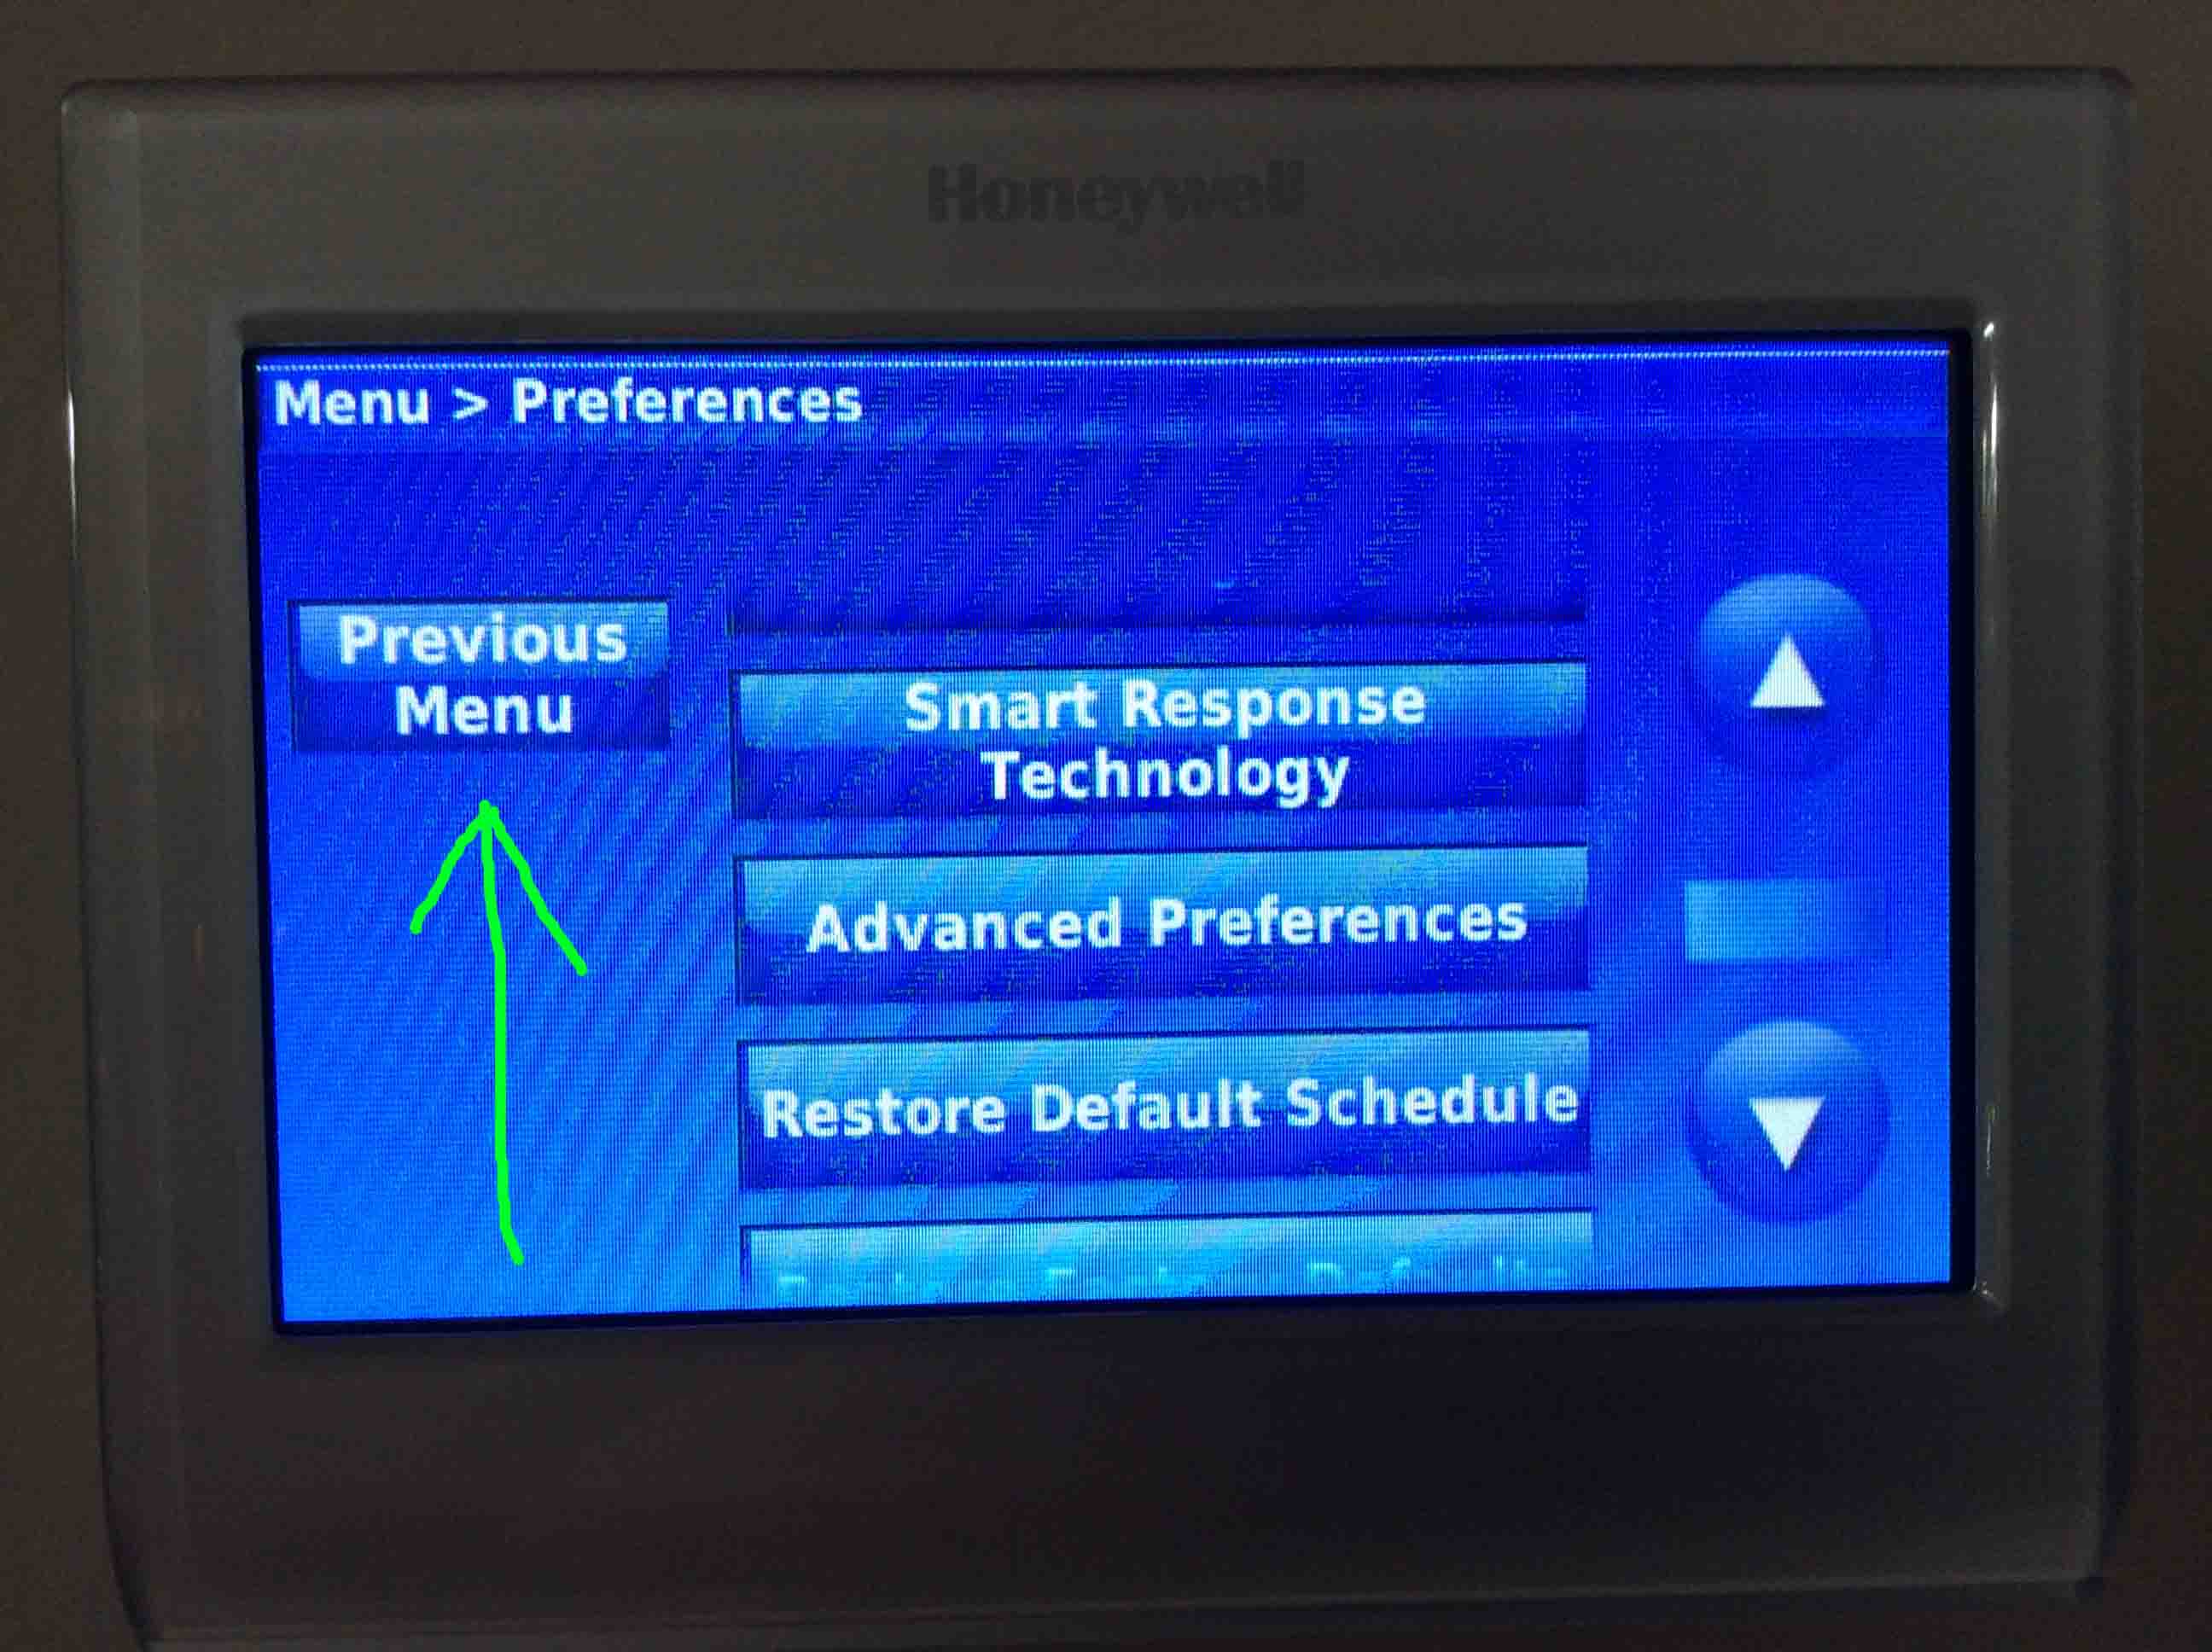
Then there are some menus, that allow you to return to the Previous Menu. In these, to get back to the HOME screen, just keep touching the Previous Menu button until you see the HOME button. Thus at that point, just press HOME to get back to the Home screen.
Honeywell RTH9580WF WiFi thermostat, showing its -Preferences- page, with the -Previous Menu- button highlighted.
Setting Temperature Limits
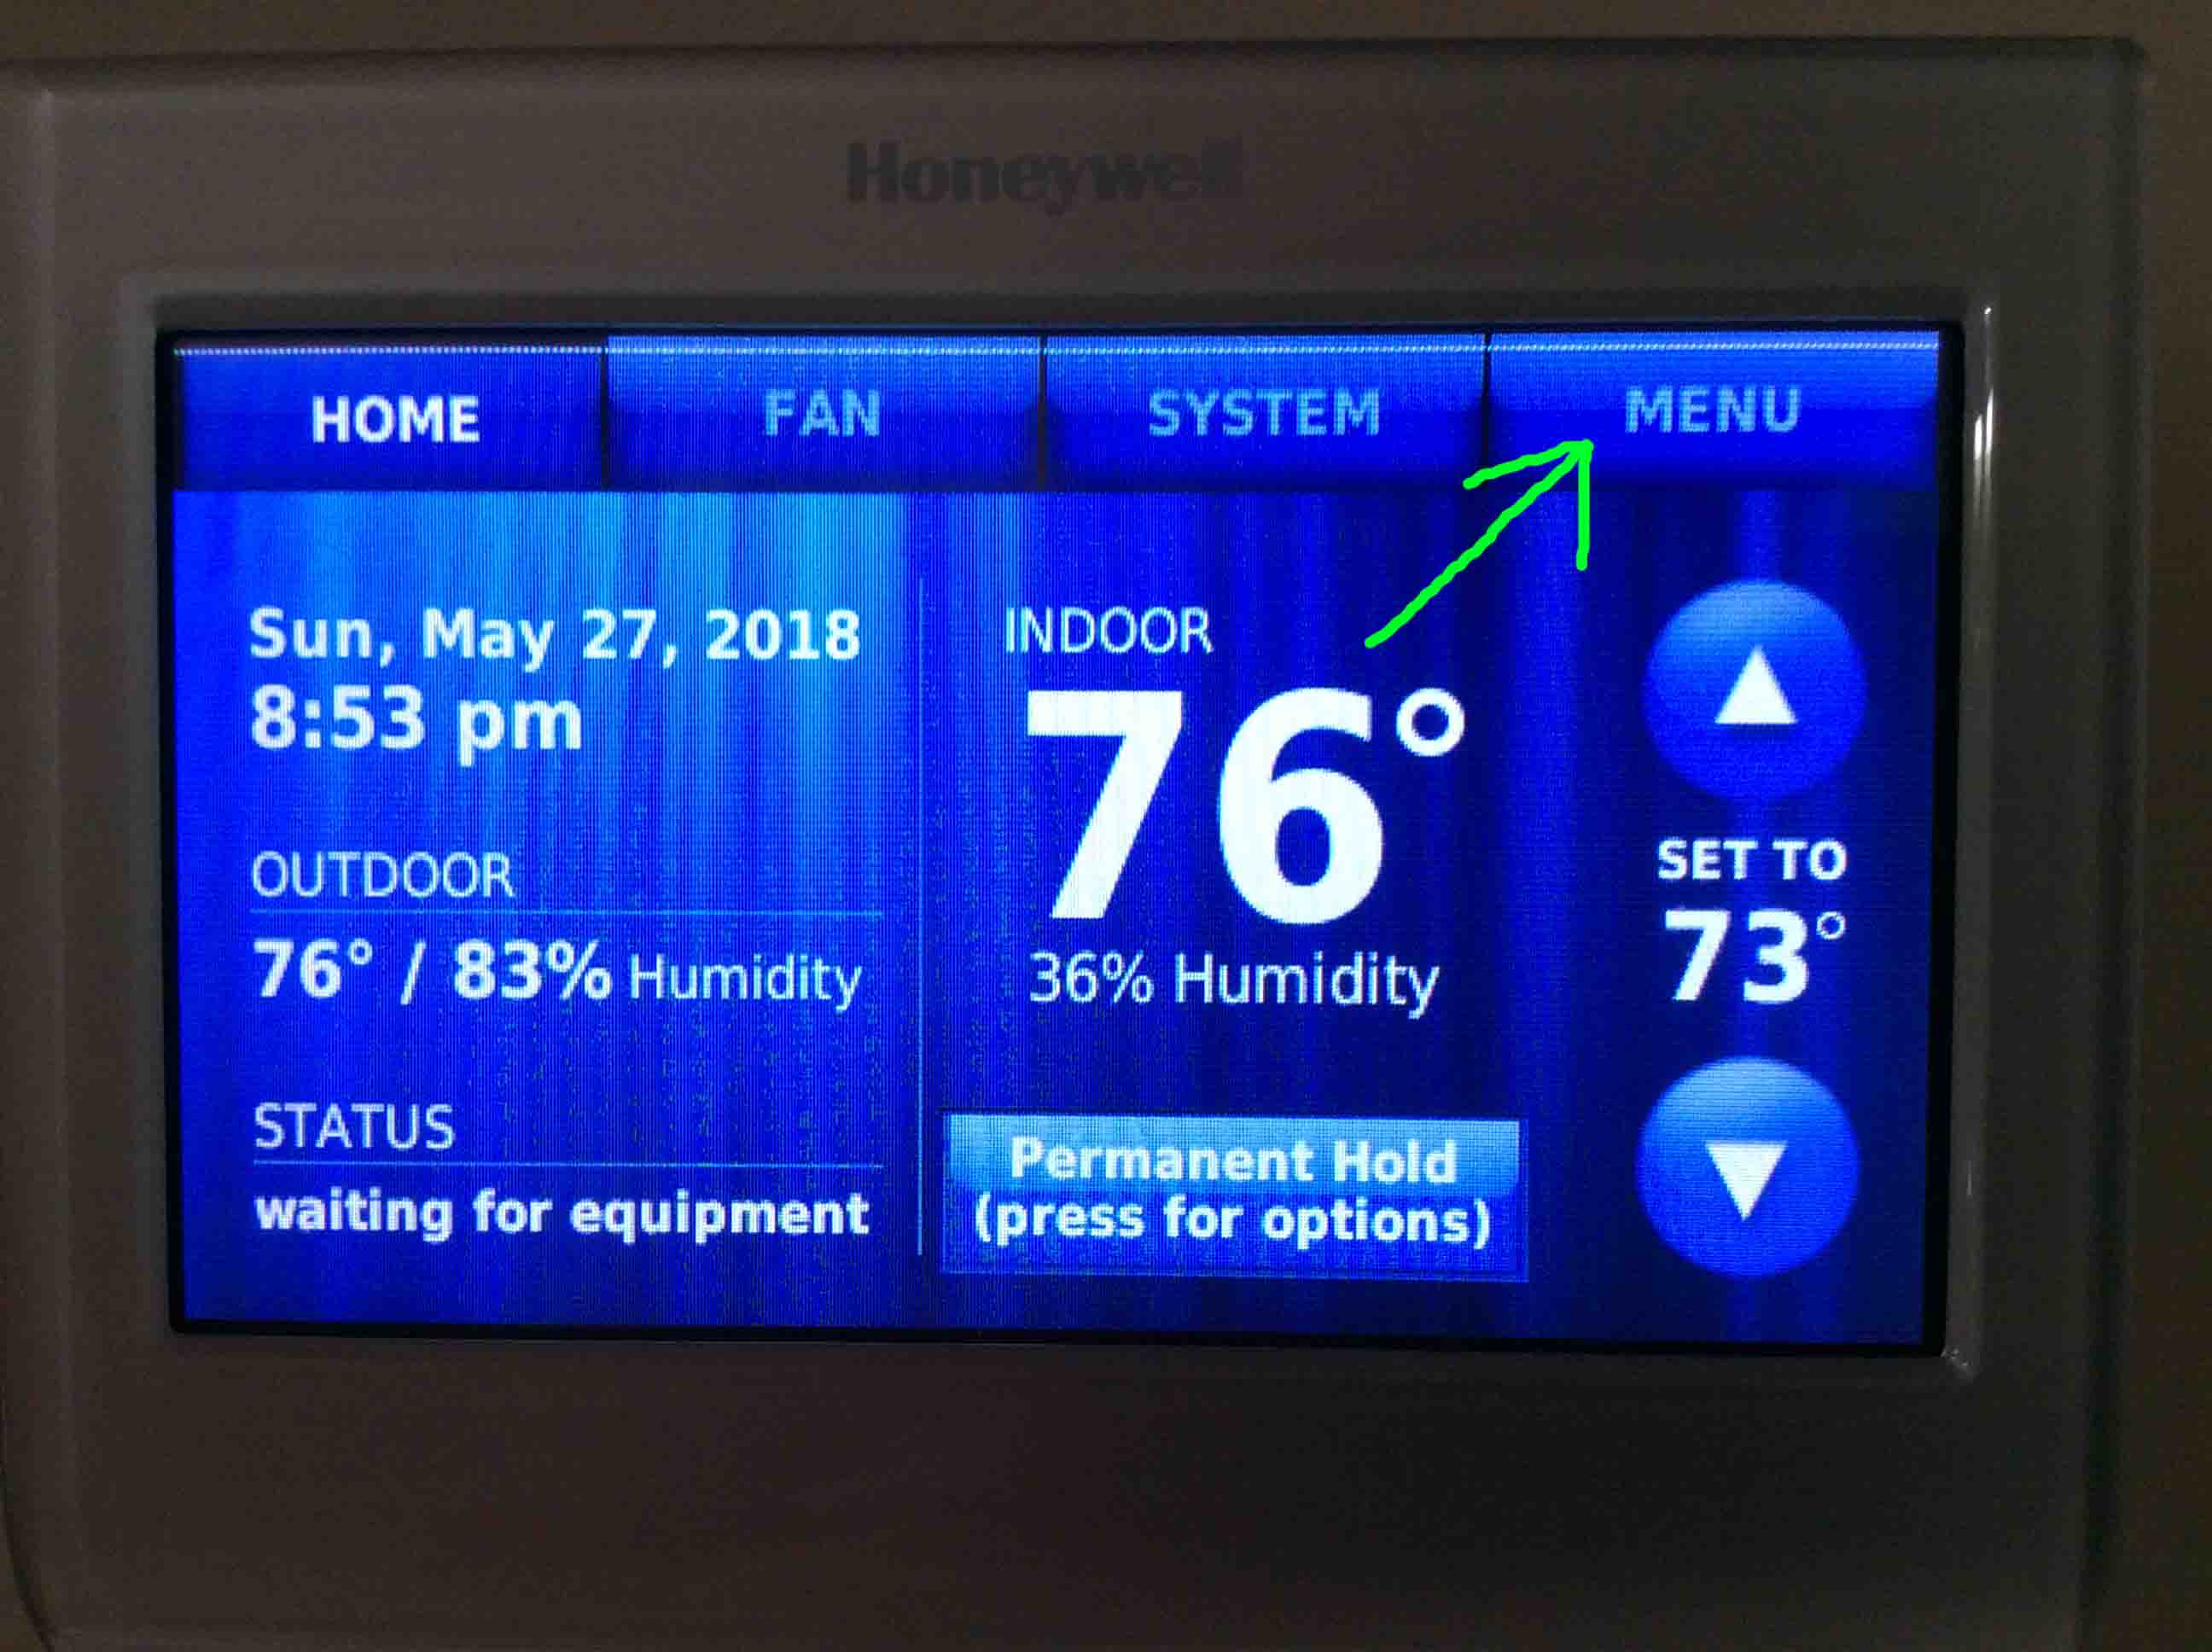
To adjust temp limits for this t-stat, tap the MENU item as shown in the next picture.
Honeywell RTH9580WF WiFi thermostat, showing its -Home- screen, with the -Menu-button highlighted.
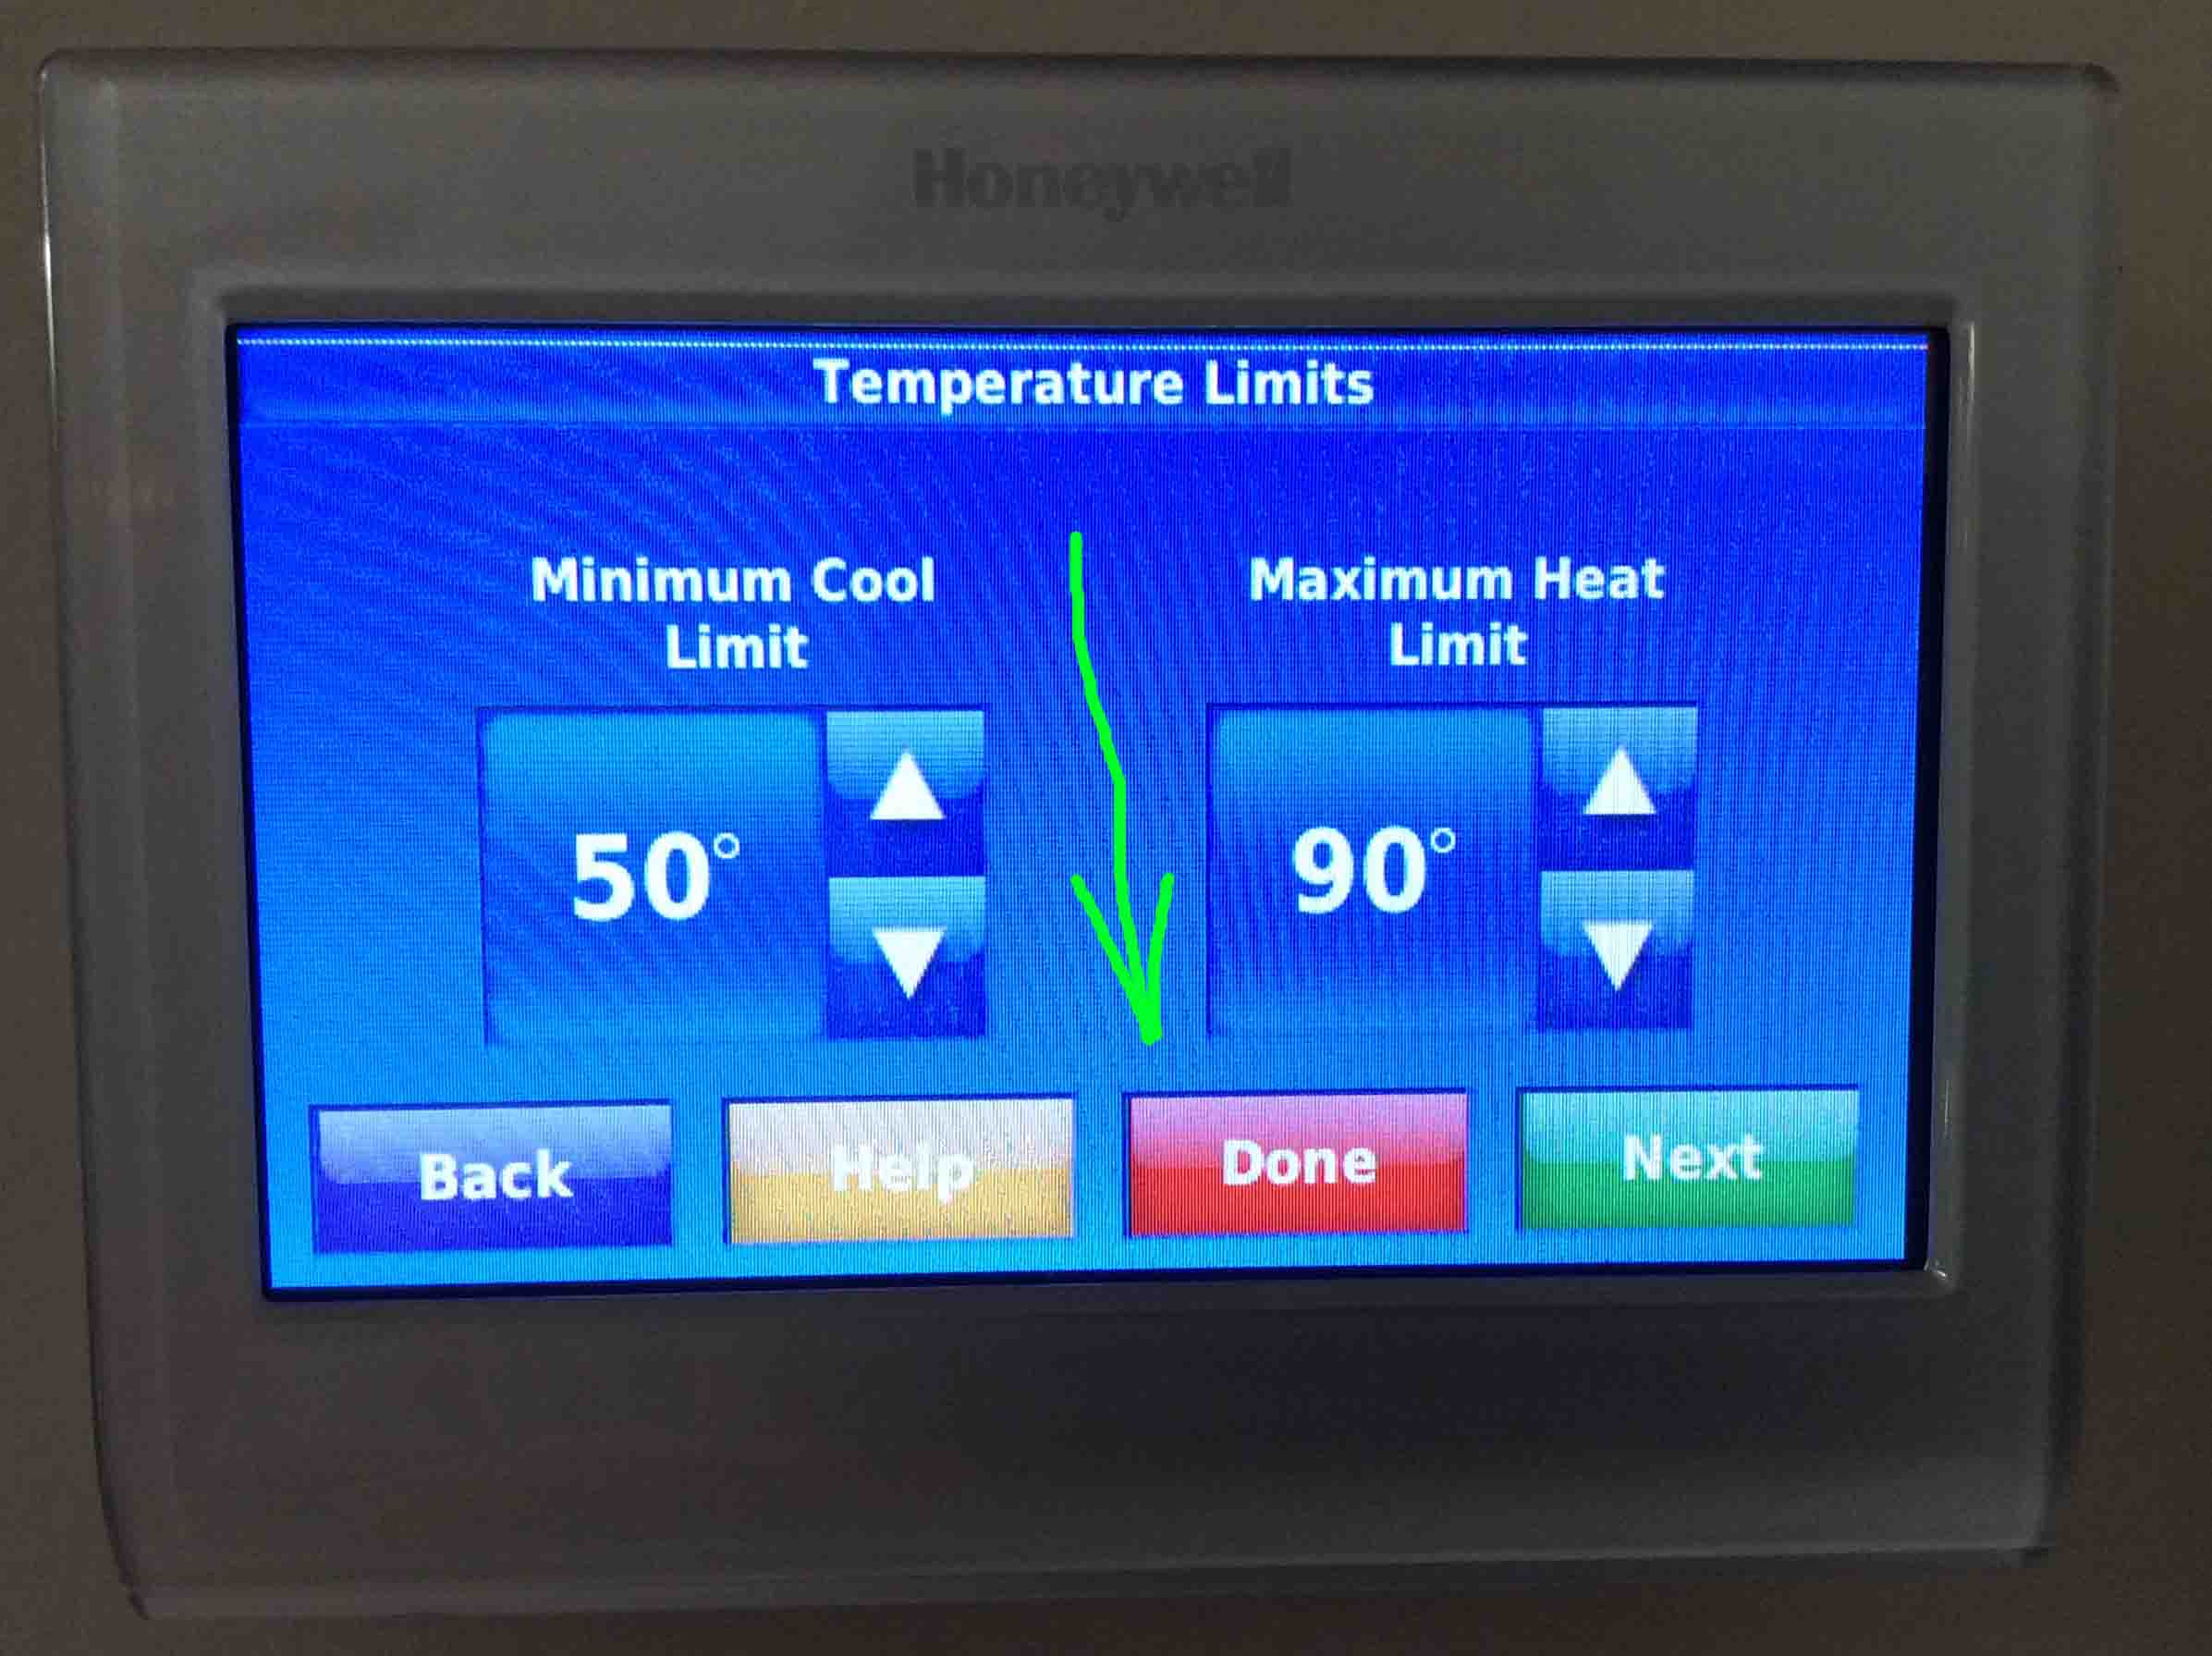
Also, the temp limits screen allows you to set the lowest and highest temperatures that this thermostat will attempt to control in your home.
The RTH9580WF WiFi thermostat, displaying its -Temperature Limits- screen, with the red -Done- button highlighted.
The max and min settings appear highlighted in the next pictures.
Honeywell RTH9580WF WiFi thermostat, showing its -Temperature Limits- screen, with the -Maximum Heat Limit- adjustment highlighted.
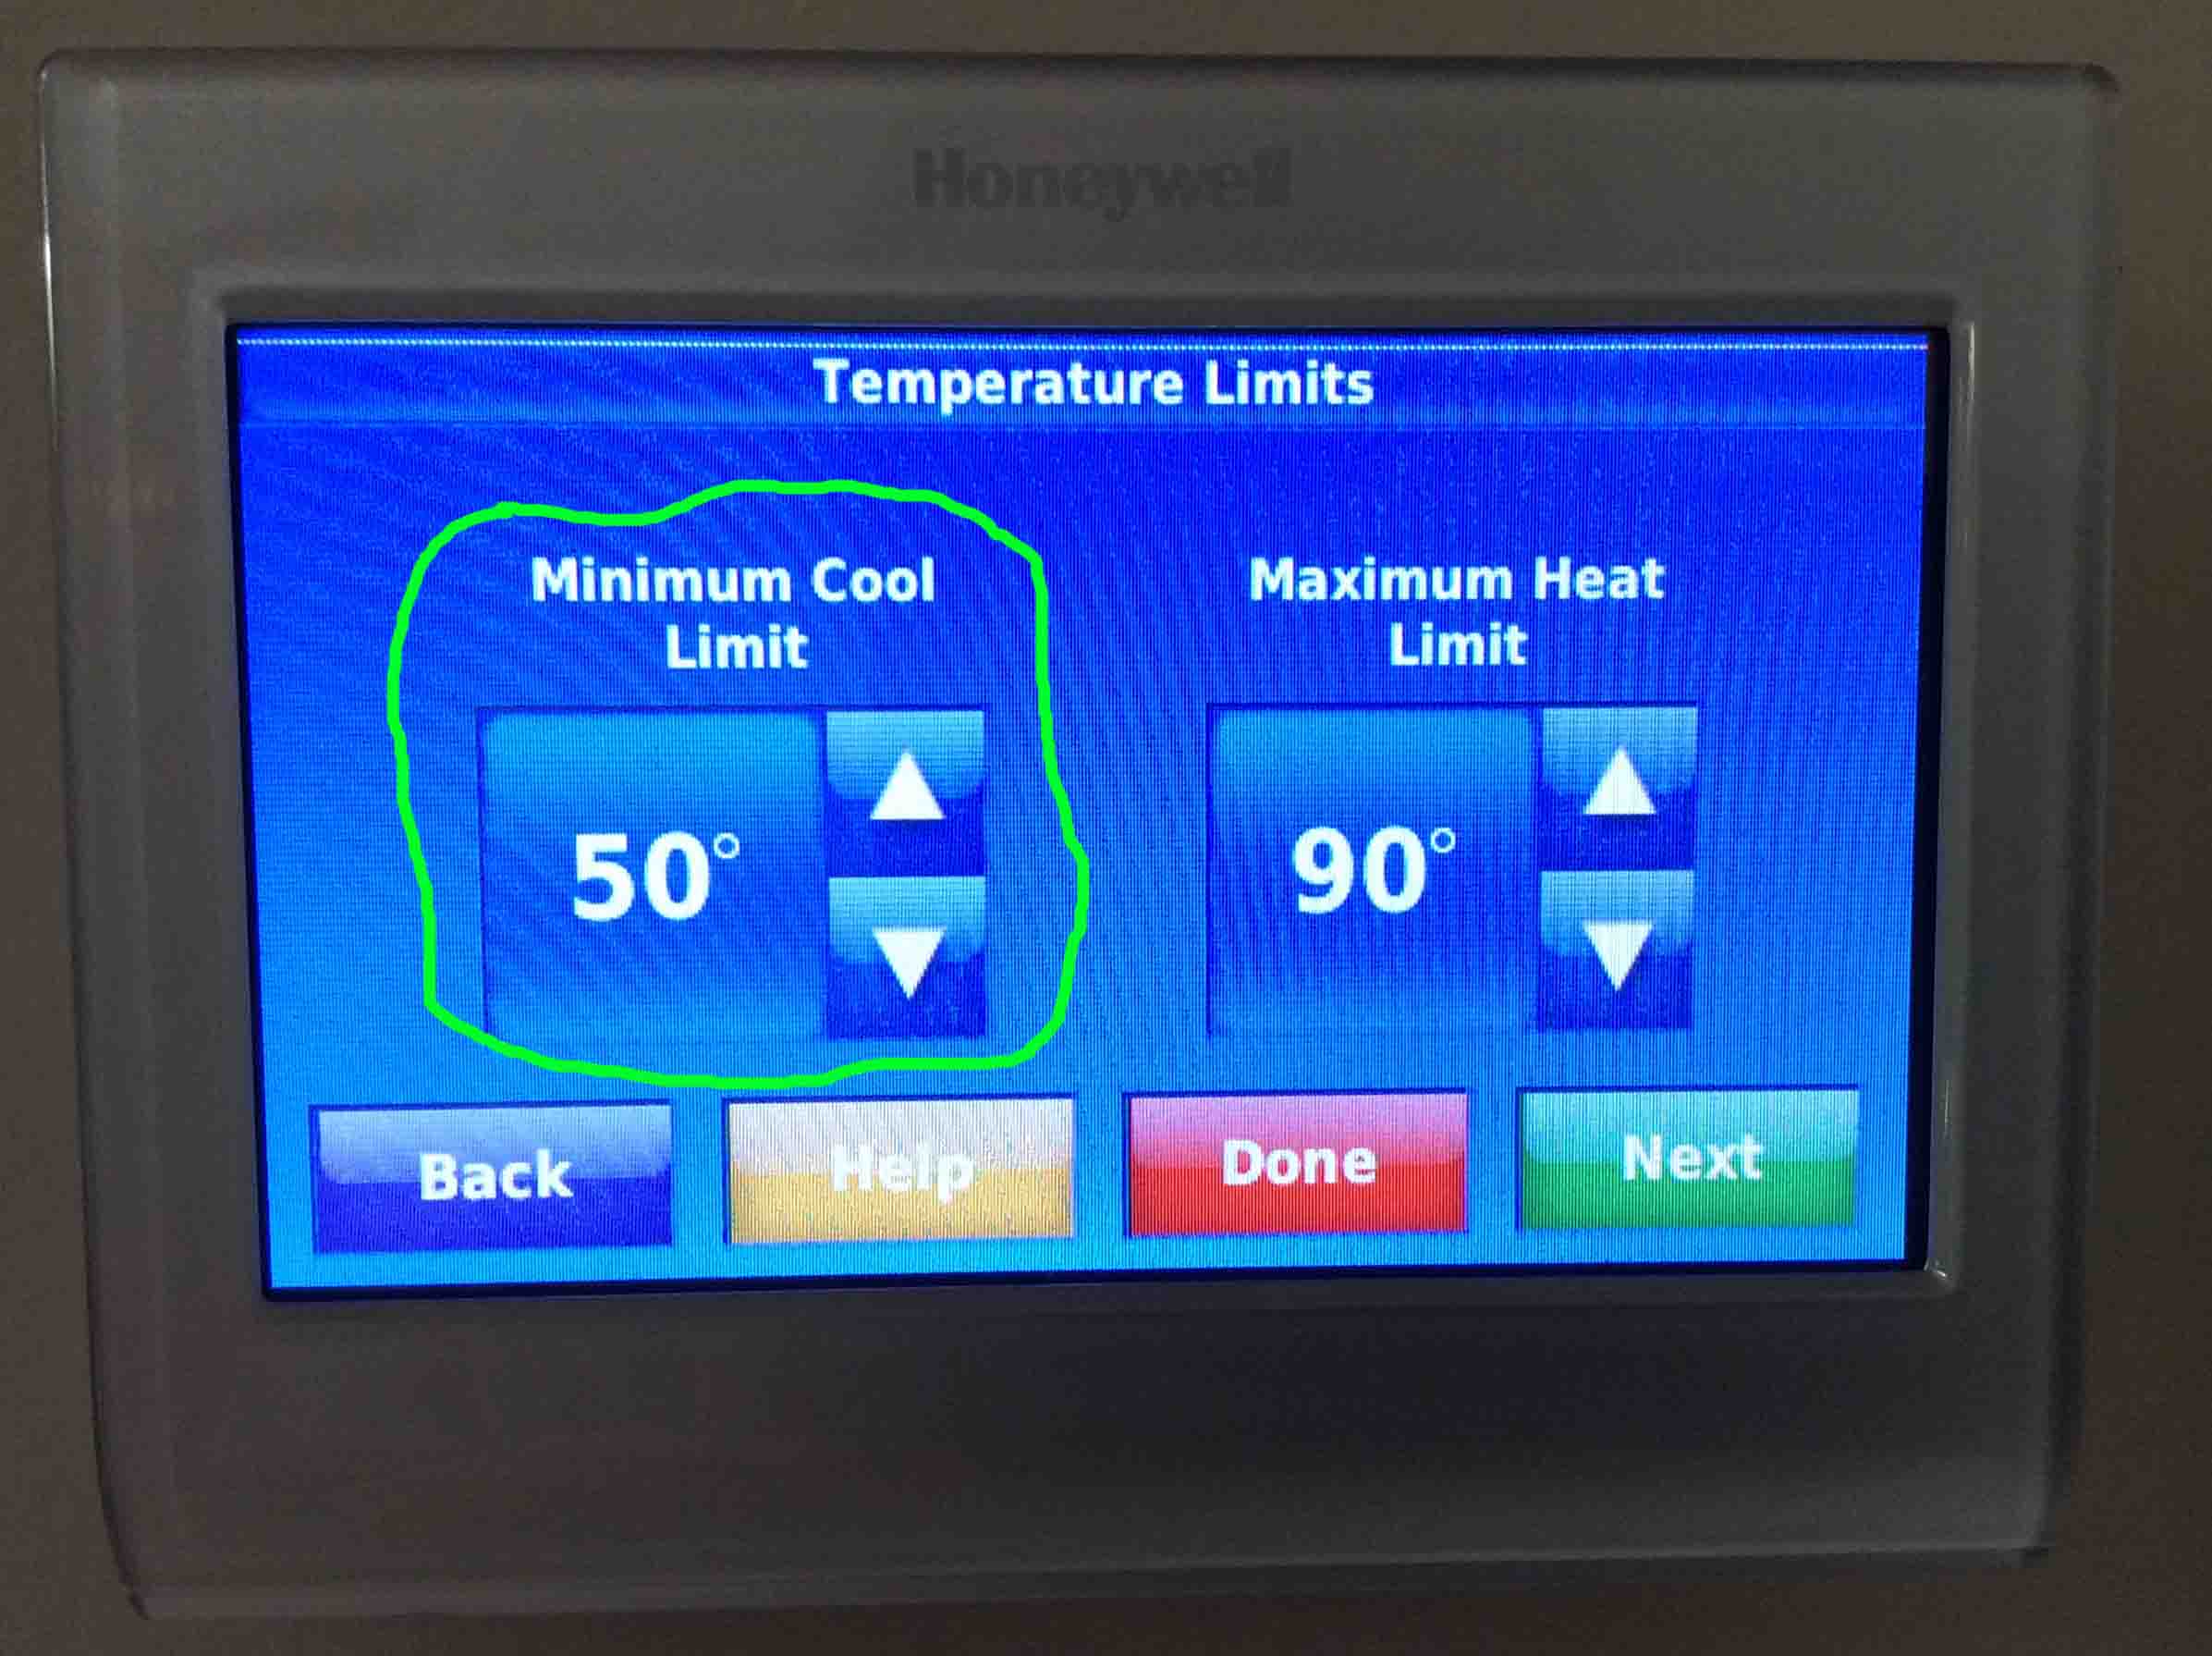
Furthermore on this t-stat, you can set the lowest possible temperature that it will try to cool the room down to. Once you set this, you will not be able to lower the t-stat temperature setting below this number.
The Honeywell RTH9580WF WiFi thermostat, showing its -Temperature Limits- screen, with the -Minimum Cool Limit- adjustment highlighted.
Honeywell RTH9580WF WiFi thermostat, showing its -Temperature Limits- screen.
Honeywell Thermostat Picture Gallery: The Cool On Message
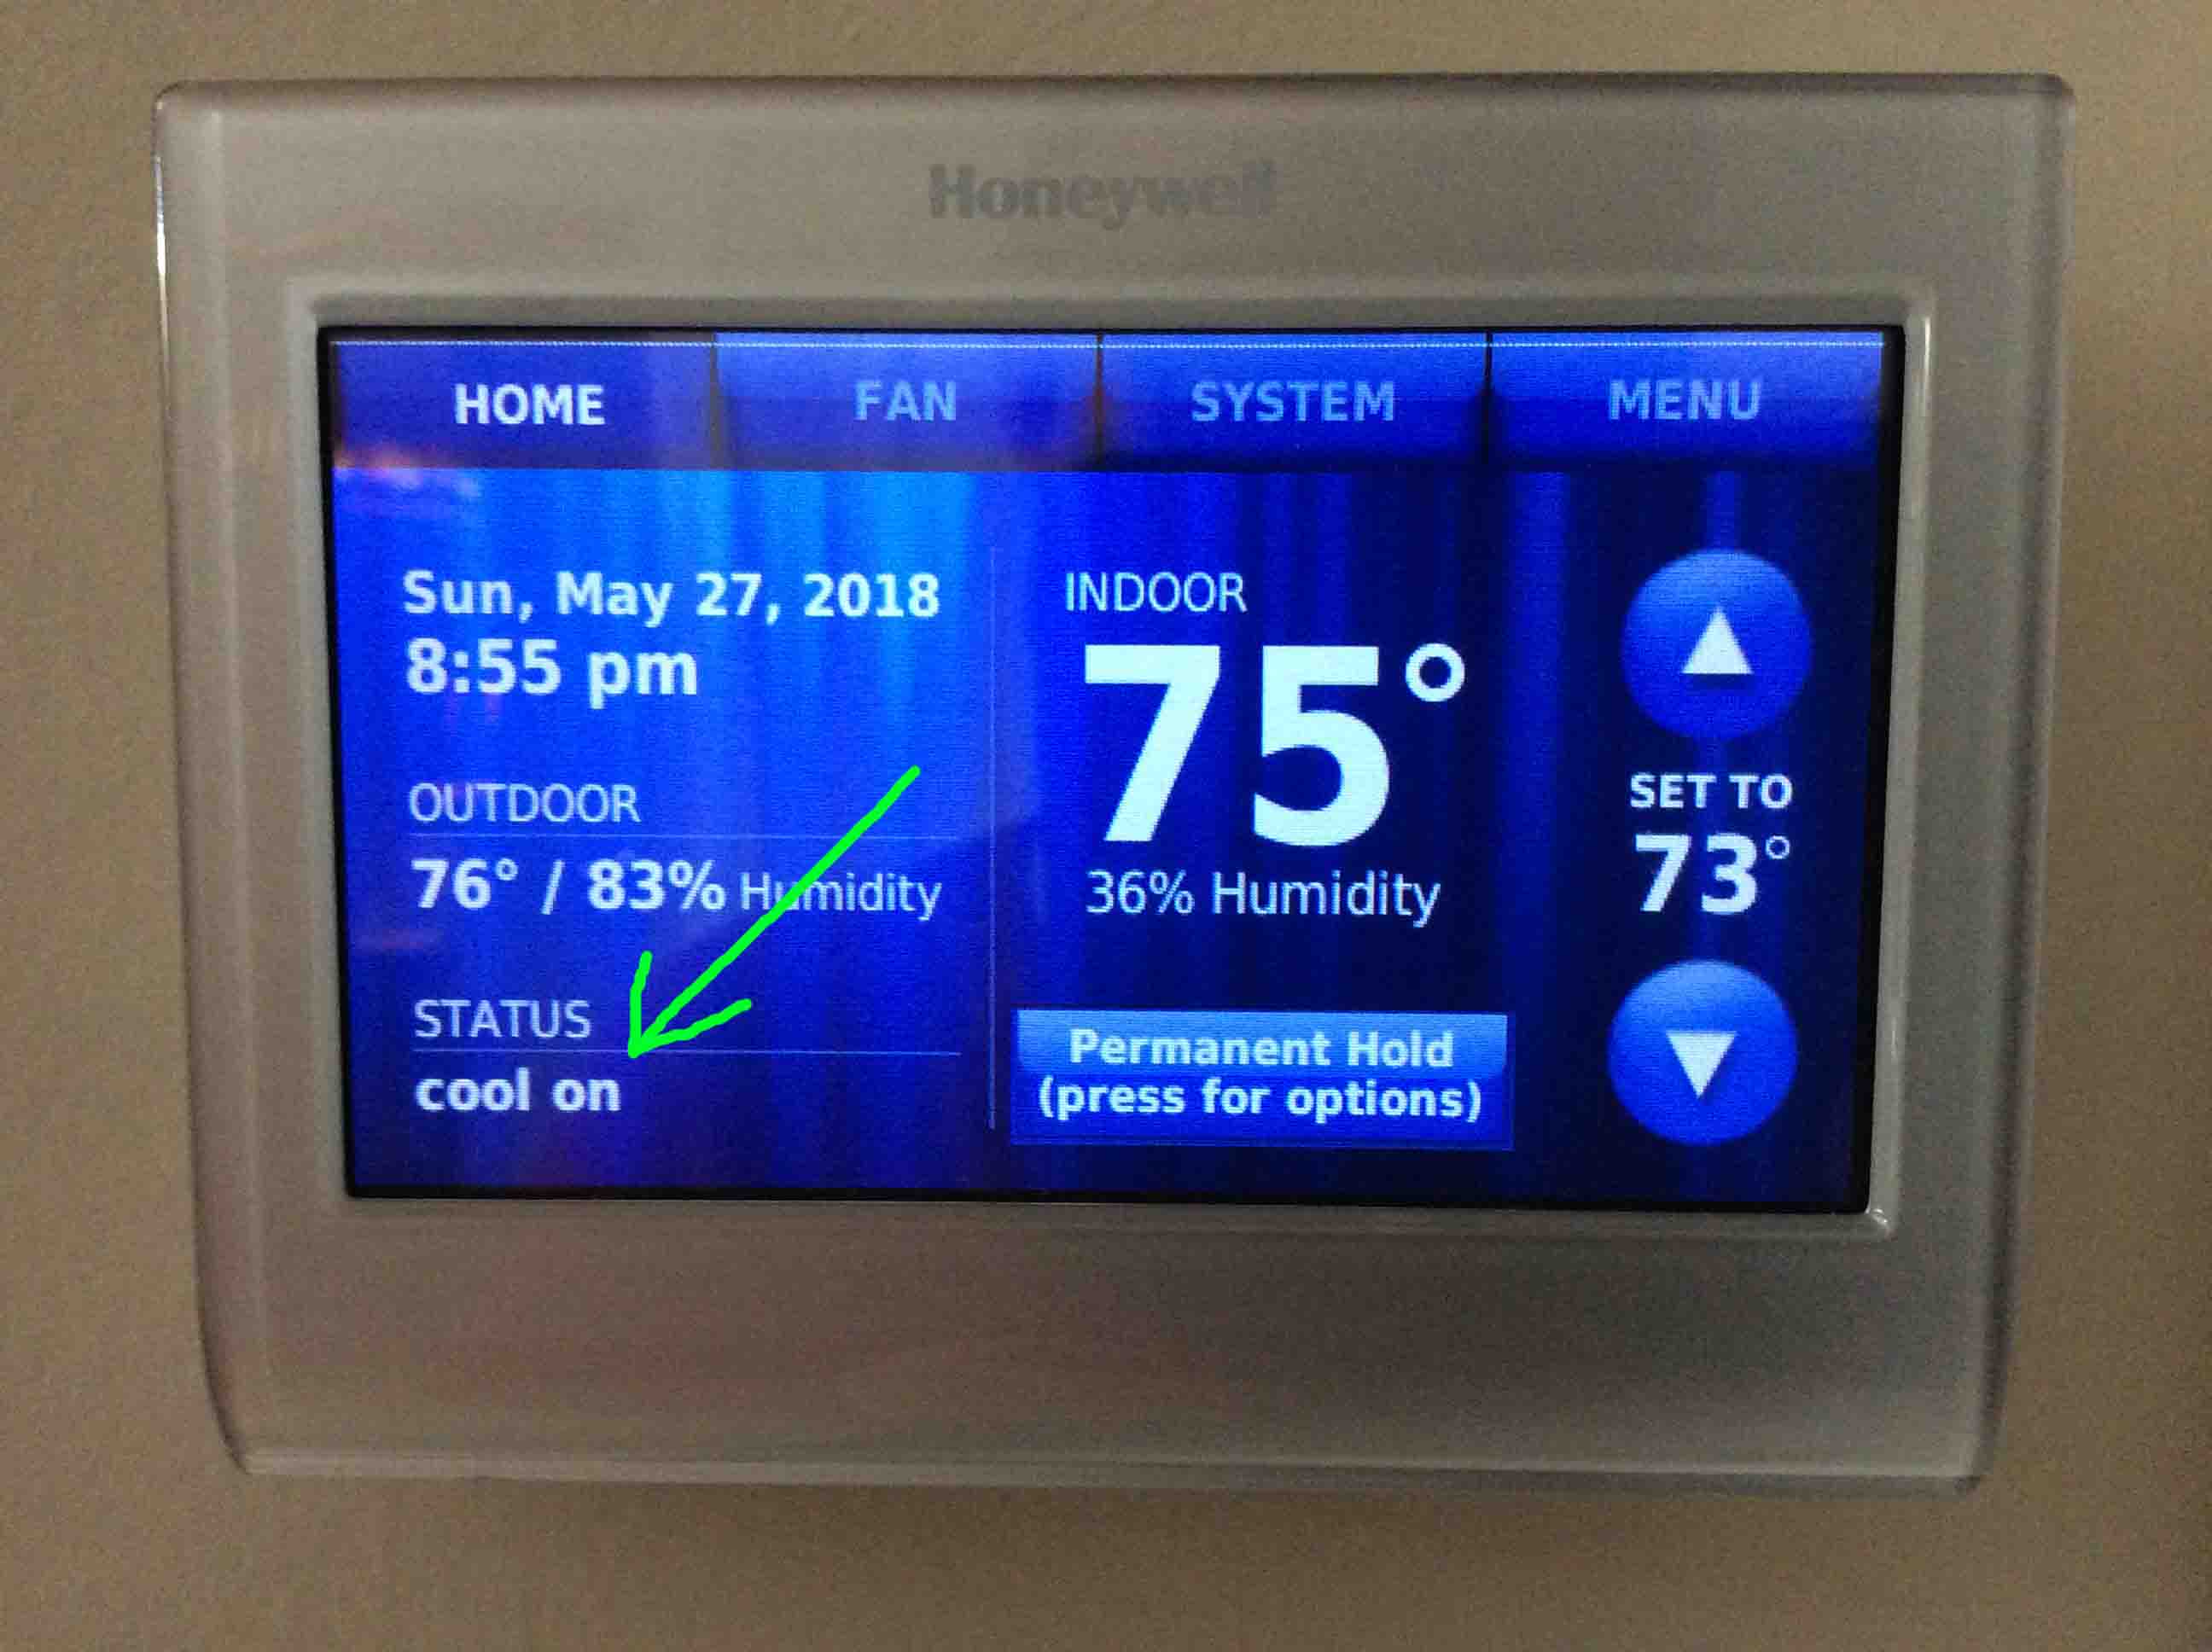
Now this t-stat shows this message when the HVAC AC is running. This happens when the room warms above the set temp, and then the t-stat calls for cooling.
The RTH9580WF WiFi thermostat, showing its -Cool On- message highlighted.
Waiting for Equipment Message
This t-stat displays this message right after power up, should the set temperature and actual room temperature call for the HVAC system to run. You also get this if the HVAC system has just turned off, but you set the temperature so that the t-stat calls for more HVAC heating or cooling. The message clears after several minutes, allowing normal operation to resume.
Honeywell RTH9580WF thermostat, displaying its -Waiting for Equipment- message, highlighted.
Honeywell Thermostat Picture Gallery: Waiting for Update Message
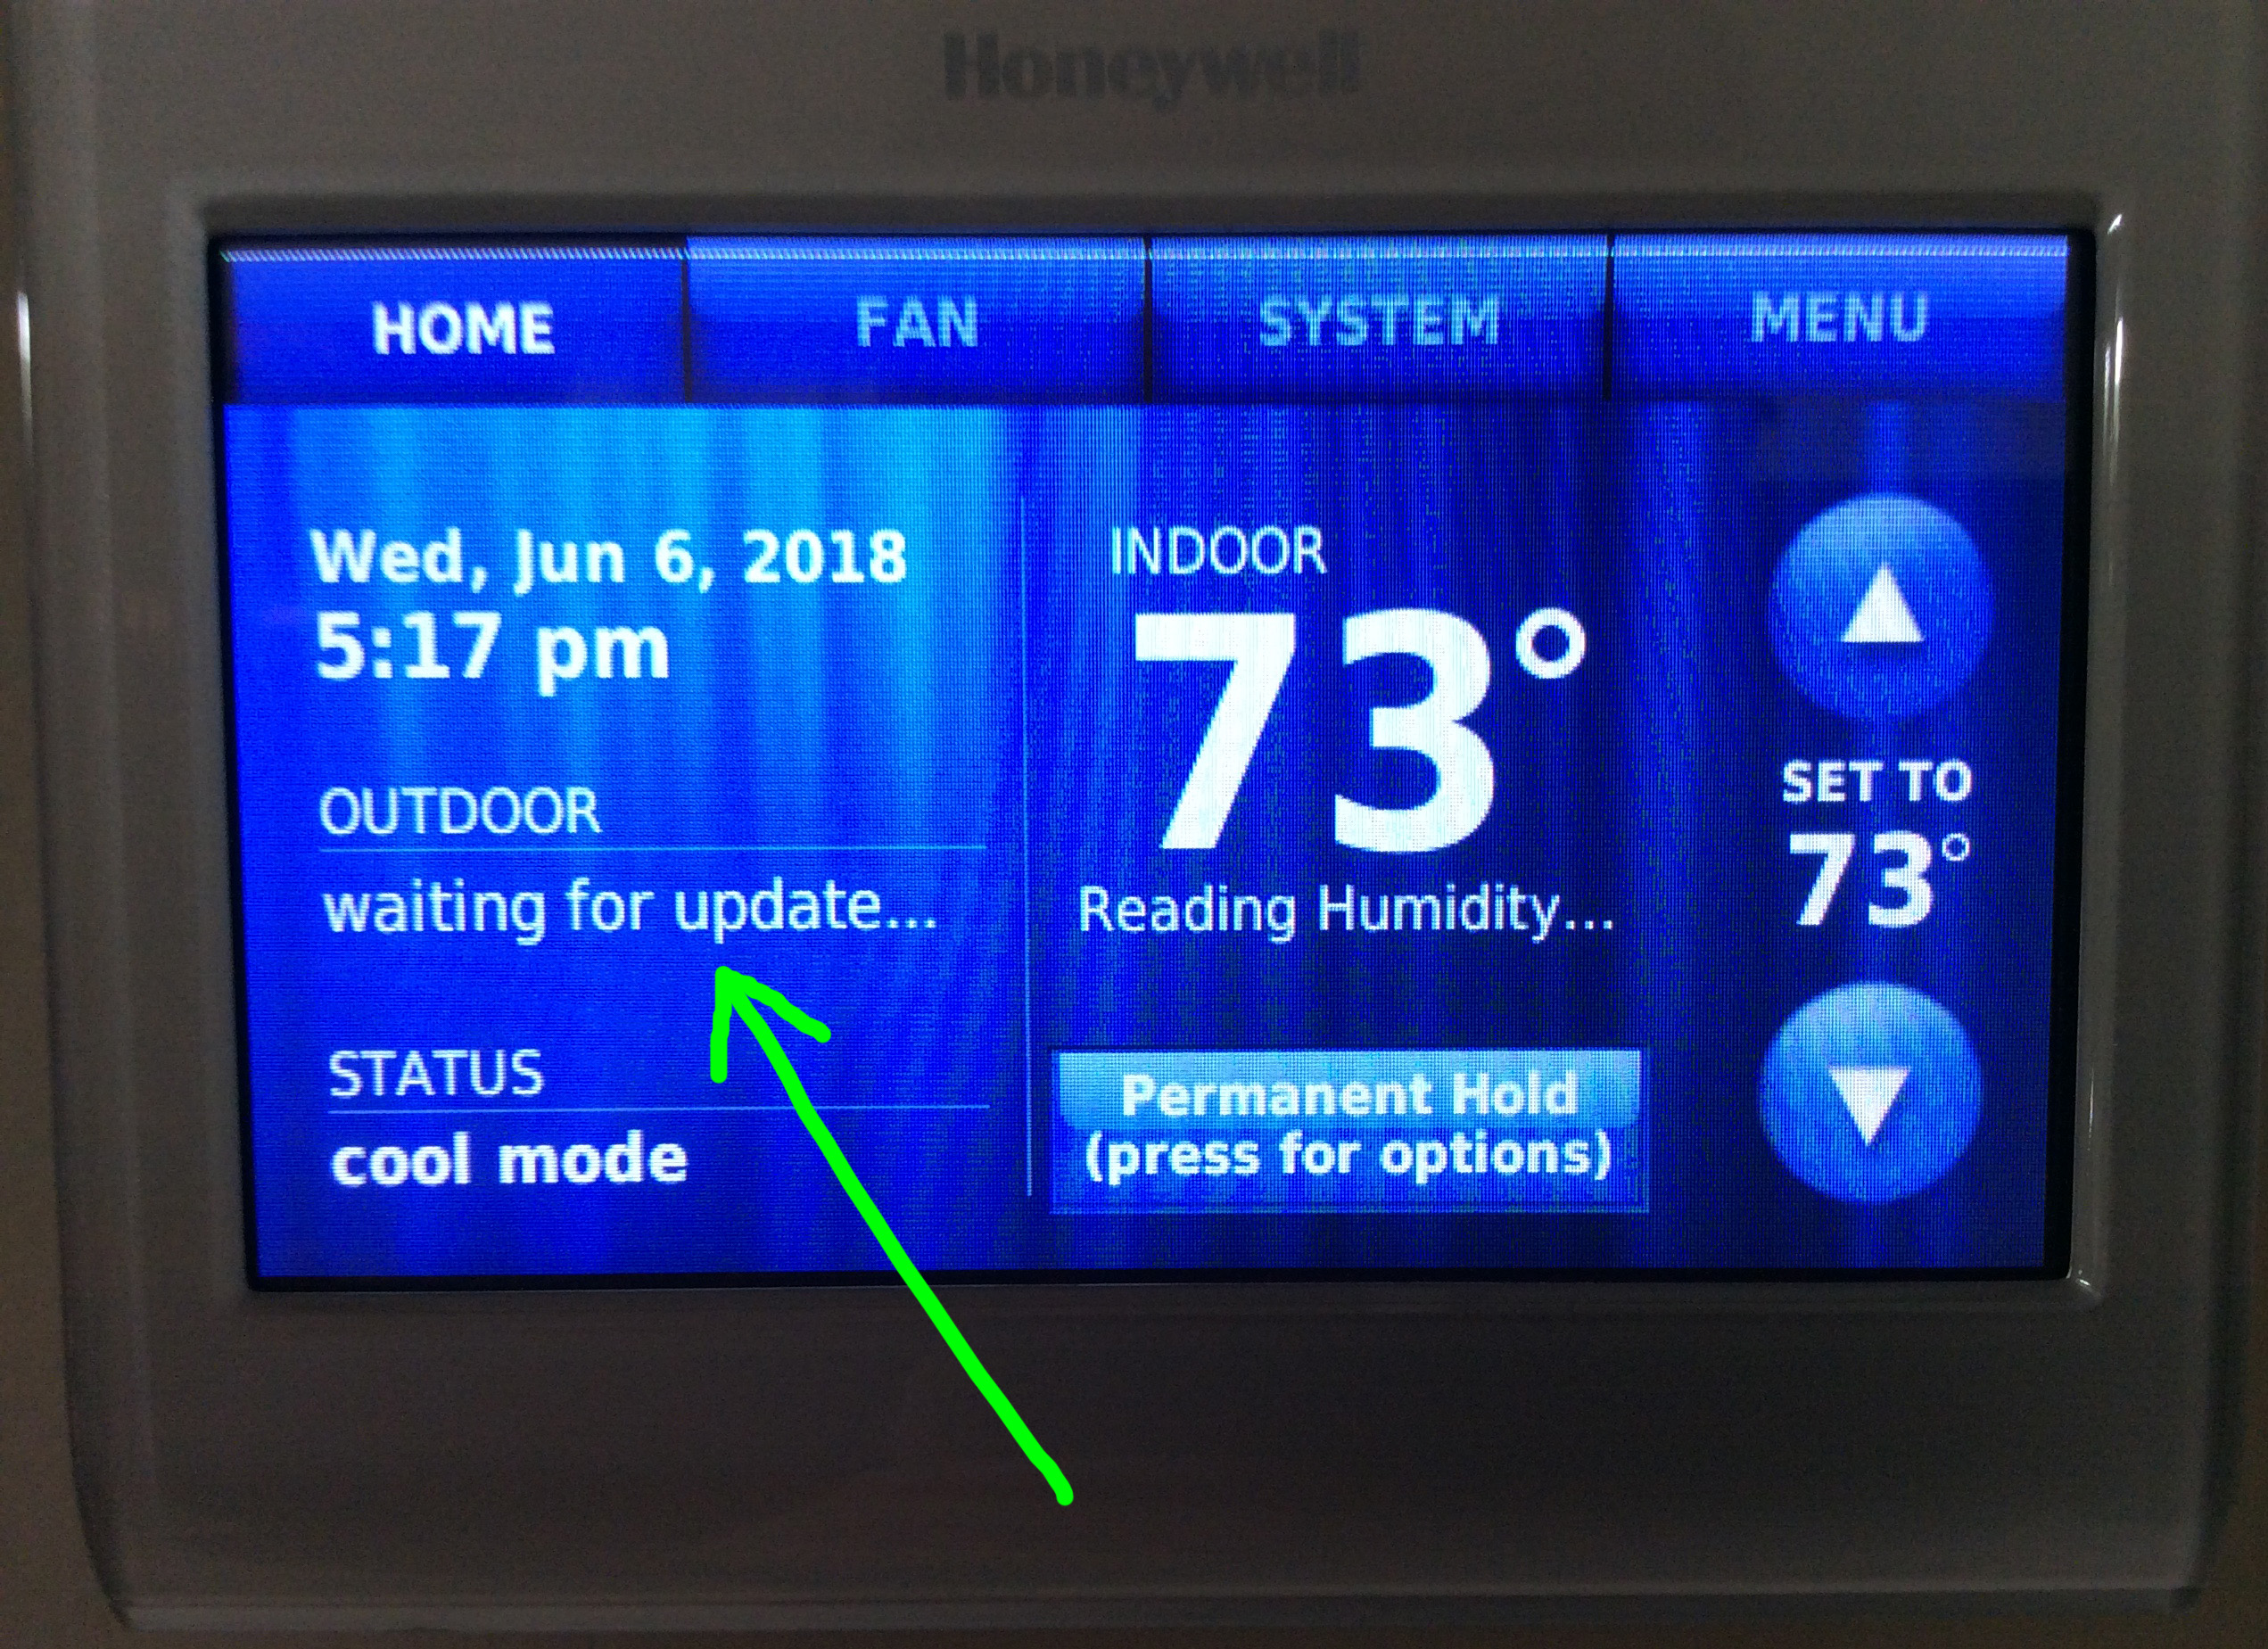
This t-stat displays this message right after power up, and before it receives the next outdoor temperature update from the internet.
The RTH9580WF thermostat, showing its -Waiting for Update- message immediately after power up.
Then, once it does get it, the t-stat shows the outdoor temperature and humidity it received. Note that these numbers do not come from any sensors attached to this t-stat. There are no such sensors.
Honeywell RTH9580WF thermostat, showing outdoor temperature and humidity, the -Waiting for Update- message gone.
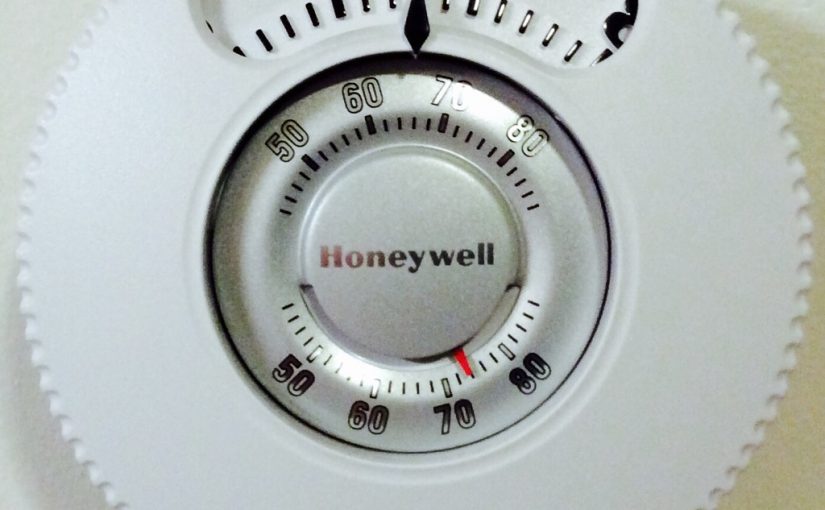
Honeywell Thermostat Picture Gallery: T87N1026 Large Dial Thermostat Pictures
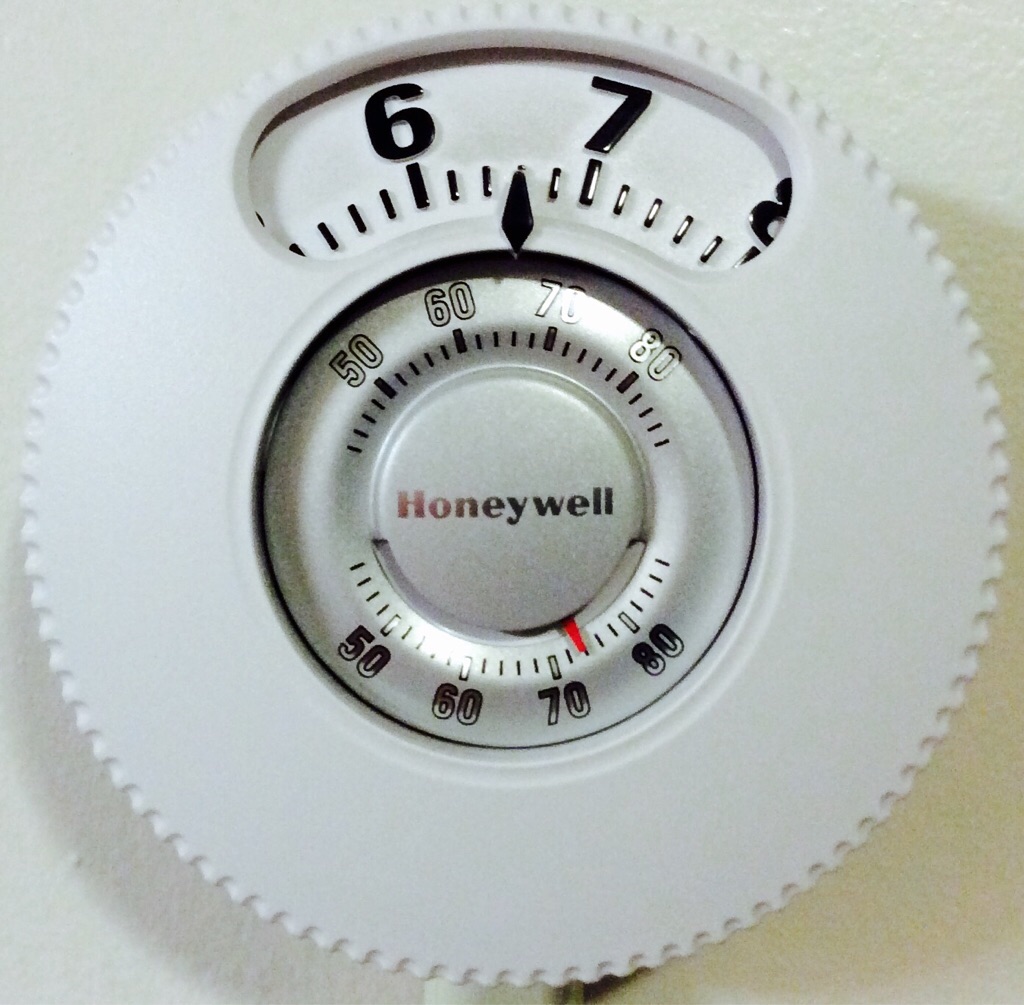
An old fashioned looking yet digital thermostat.
Honeywell large dial thermostat, model T87N1026.
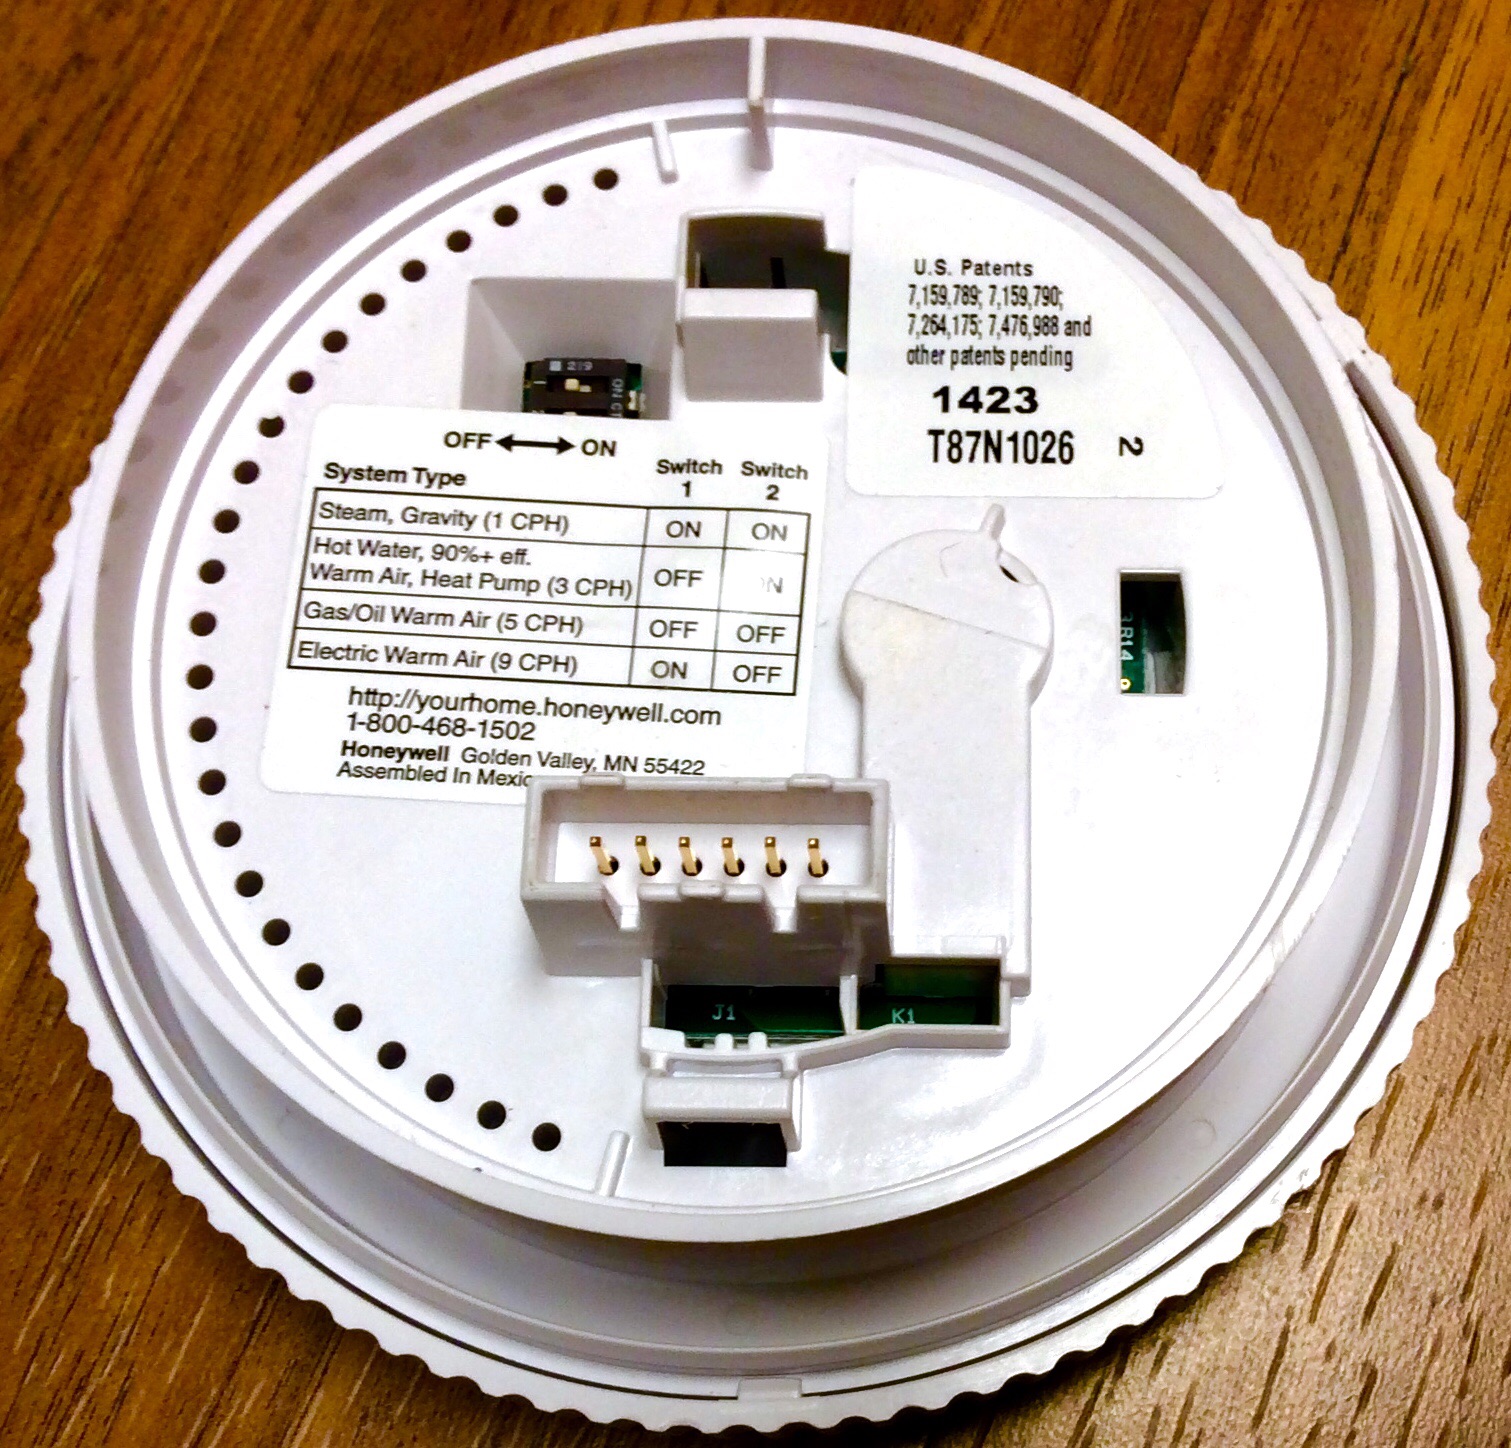
Next, we have the T87N1026 main unit, separated from the accompanying mounting plate.
Rear of the control unit for the Honeywell large dial thermostat T87N1026.
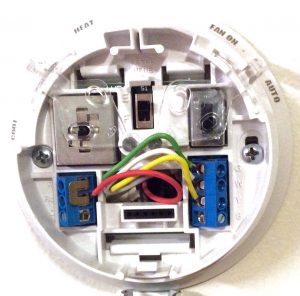
Then, there’s the mounting plate with wires connected in a typical thermostat installation.
Wired mounting plate of the Honeywell thermostat, model T87N1026.
Related Posts to Honeywell Thermostat Picture Gallery