
You can recharge the JBL Flip 5 party-on-the-beach speakers through their top-panel USB charging ports. To summarize how to charge the JBL Flip 5 : First, pick a right size USB power adapter. Why? Because the Flip 5 does not ship with one.
Next, connect the black USB-C cable included between the Flip 5 and the power supply you’re going to use. Next, insert the adapter into a working mains outlet. Finally after two and a half to three hours, your speaker will completely recharge. Then, you’ll have music again for up to twelve hours (about), before you must charge it anew.

How to Charge JBL Flip 5: Step by Step
1. Choose Right Size Charger
We suggest that the charger you use can deliver 15 watts (5 volts at 3 amps). This gives the quickest charging times. Plus, so you can use the cord that comes with the Flip 5, pick a USB-A charger.
For this demo however, we use the adapter that came with our Charge 3. But though it doesn’t output quite the max current, the Flip 5 still charges in about the same time.
2. Plug in the USB-C Cord to Continue with How to Charge JBL Flip 5
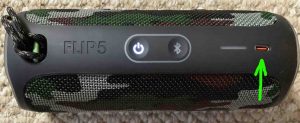
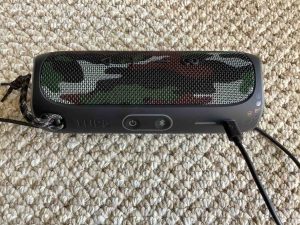
Insert the small end of the black USB-C charging cable into the matching port in the front.
3. Plug the Other End of the Cord into the Charger
Next, connect the A end of the USB charge cable to your charger of choice.
4. Plug that Charger into a Working Outlet
Then we plug the charger into a working AC outlet.
At least a small part of the battery bar gauge should light up when you connect a charger. Then as charging progresses, more of the bar lights.
5. Allow the Flip 5 to Charge Until All Battery Indicator Lamps Go Dark
Recharging is almost complete when all but the last of the battery gauge lights glow solid. The last one continues flashing though, for a few minutes more while the system tops off the charging.
After that, the battery recharge cycle finishes when the gauge goes out completely.
6. Unplug the Charging Cable
7. Done with How to Charge JBL Flip 5 !
We have now fully charged our speaker. To further check this, look at the battery indicator just after turning on the speaker afterwards. The entire battery gauge bar should glow, as shown next. This means that the speaker has indeed fully charged.
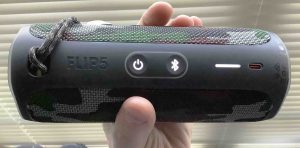
The battery gauge bar is to the right on the front panel, as shown in the last picture.
Repeat this recharging every twelve hours of music play, to keep its battery in top condition. We charge ours when the battery indicator shows only one light glowing.