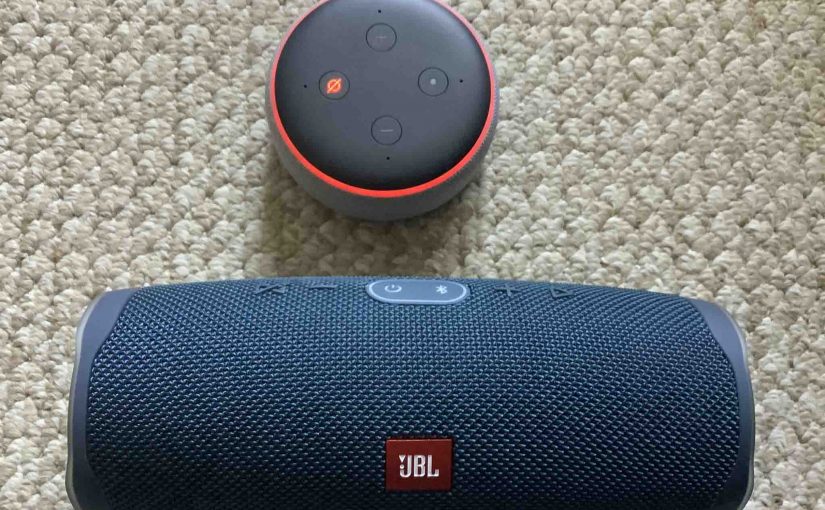
Shows how to connect the JBL Charge 4 with Alexa smart devices. These include the Echo, Dot, Input, Show, and Spot models. Now this connecting happens right between the JBL Charge 4 and Alexa. So you need not turn BT on in the mobile device you’re using to set this up.
How to Connect JBL Charge 4 to Alexa: Step by Step
With your speaker OFF (power button is dark), run through this routine to pair it to your Alexa device. We use an iPad Air 2 tablet here to set up this BT connection.
1. Find the Alexa App on your Mobile Device
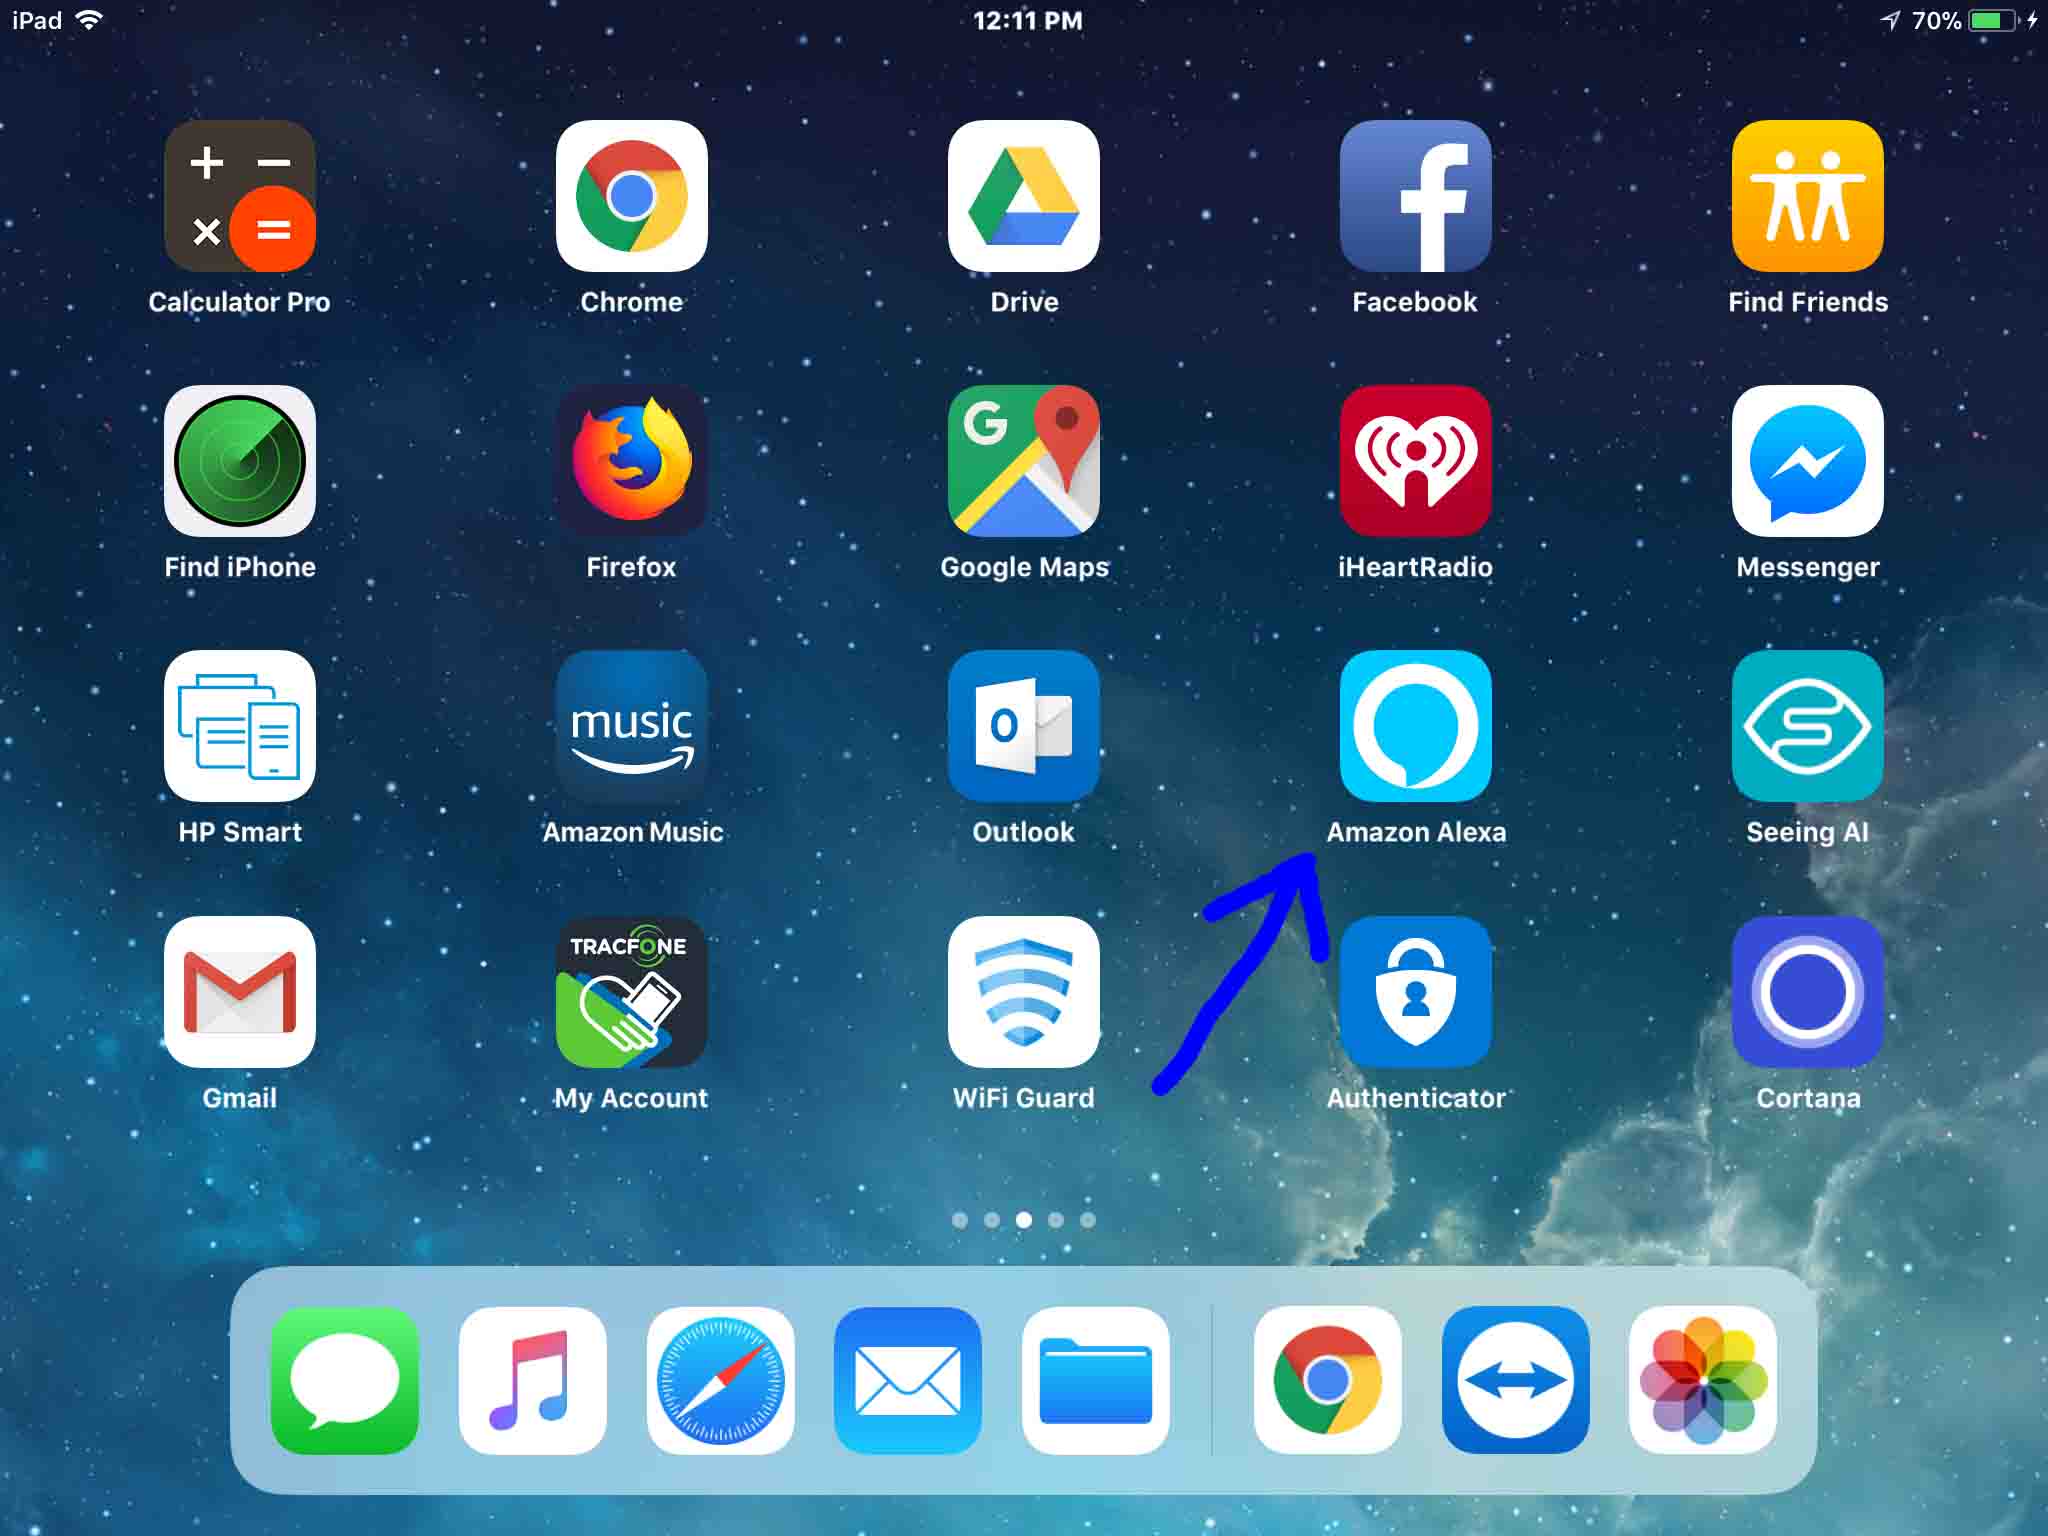
We find the Alexa app on an iPad Air 2 as seen in the next picture. In this demo, the app is on the third home screen page.
2. Run the Alexa App
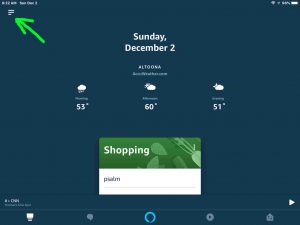
The app then displays its Home screen as shown in the next screenshot.
3. Tap the Hamburger Control
Find the hamburger item in the top left corner of the screen.
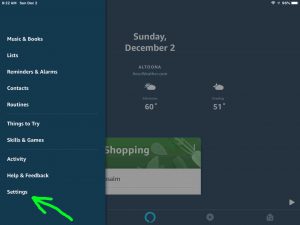
This brings up the Alexa app’s main menu.
4. Tap the Settings Option on the App’s Main Menu to Continue with How to Connect JBL Charge 4 to Alexa
We point at the Settings item with the green arrow in the last screenshot.
This brings up the Settings screen.
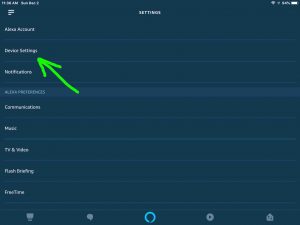
5, Tap the Device Settings Option
This brings up the All Devices screen, where all of your connected Amazon Alexa enabled devices appear in a list.
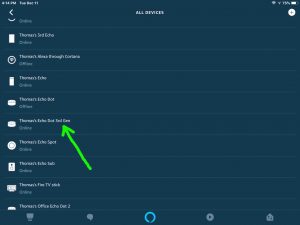
6. Tap the Alexa Device you Wish to Connect
For this demo, we chose the Thomas’s Echo Dot 3rd Gen Alexa speaker. But pairing works similarly with all the other Bluetooth Alexa speaker models.
Anyway, touching the speaker to pair then takes you to the device-specific settings screen.
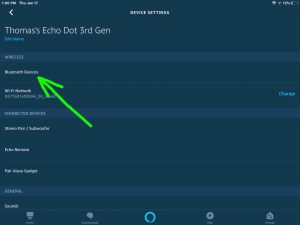
7. Tap the Bluetooth Devices Item to Continue with How to Connect JBL Charge 4 to Alexa
Find the Bluetooth Devices option pointed at by the green arrow in the last screenshot.
This brings up the Bluetooth Settings screen.
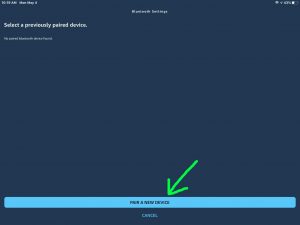
At this point, your Alexa app is ready to begin a BT scan by your chosen Alexa speaker. We picked our Alexa Dot 3 in the last step. So, that Dot will be the one that scans when we press the blue Pair a New Device bar.
BUT WAIT A MINUTE! Don’t press that bar just yet. We must turn on the JBL Charge 4 speaker first, and then put it in Bluetooth discovery mode. But if your Charge is ON and ready to pair, then skip the next step. Move on to step 9 below.
8. Turn On your JBL Charge 4
Put down your mobile device for a second, and turn on the 4 by quickly pressing its Power button. See this button circled in the next picture.
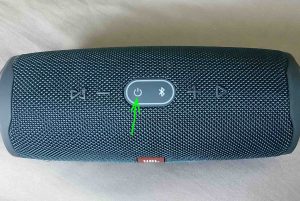
The speaker then powers up.
But since our Alexa Dot 3 has never connected with this speaker prior, it has no connection information for it. Thus the JBL Charge 4 will not yet connect with this Alexa automatically.
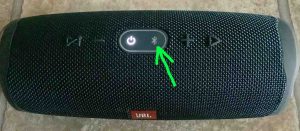
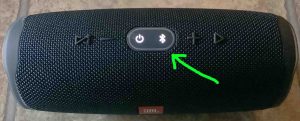
9. Put your JBL Charge 4 into Pairing Mode
Now, to allow an Alexa smart speaker to find the Charge, place your speaker into BT discovery mode. E.g. Press and release in the the Bluetooth button on the speaker. Find this button in the last picture, pointed at by the green arrow.
Then, the JBL speaker makes a plucking guitar note sound. Also, the Bluetooth button starts flashing white.
10. Now Go Back to the Alexa App to Continue with How to Connect JBL Charge 4 to Alexa
The screen with the blue Pair a New Device button should still be there.
11. Touch the Pair a New Device Button
This starts your Alexa speaker scanning for nearby Bluetooth devices that are in BT discovery mode. Since your JBL Charge 4 is itself now in discovery mode, the Dot should find it. Our BT speaker is indeed close enough for the Gen 3 Dot to pick up.
Thus, after a short time, you should get something like the screen we got.

In our demo, the Alexa app, through our 3rd generation Dot, found our JBL speaker, named Tom’s Charge 4.
12. Find your JBL Charge 4 in the Discovered Devices List
Our scan found one device, which is the JBL Charge 4.
13. Finally, Connect your Alexa with the JBL Charge 4
Connect with the JBL 4 by touching that speaker entry on the Bluetooth Setup screen.
Alexa then connects with this BT speaker.
Shortly thereafter, the app again displays the Bluetooth Settings screen, that now shows the JBL Charge 4 connected.

Also, the JBL Charge 4 plays the Speaker Connected rising guitar sound. Note also that the Bluetooth symbol and speaker name text turns blue as well. This means that you now have a successful pairing. And the blue speaker name text shows you which speaker in the Previously Paired Bluetooth Devices list has the connection.
The JBL Charge 4 speaker’s Bluetooth button now glows solid white. This means that a successful connection is now working.
14. Done with How to Connect JBL Charge 4 to Alexa
We have now successfully connected our JBL Charge 4 with our Alexa Echo Dot 3 speaker. So now, we may ask Alexa to play music on this Dot, and she’ll stream it to the BT speaker. Thus, that music will play on the very “big sounding” JBL portable speaker instead of the Echo. This speaker offers a louder, fuller sound than your run-of-the-mill Alexa speakers. So linking these devices has definite sound advantages.