These JBl Flip 3 charging instructions show how to recharge this speaker through its hidden USB input port. In short: First, pick a right sized USB adapter. Why? Because the Flip 3 does not come with this off the shelf.
JBL Flip 3 Charging: Summary
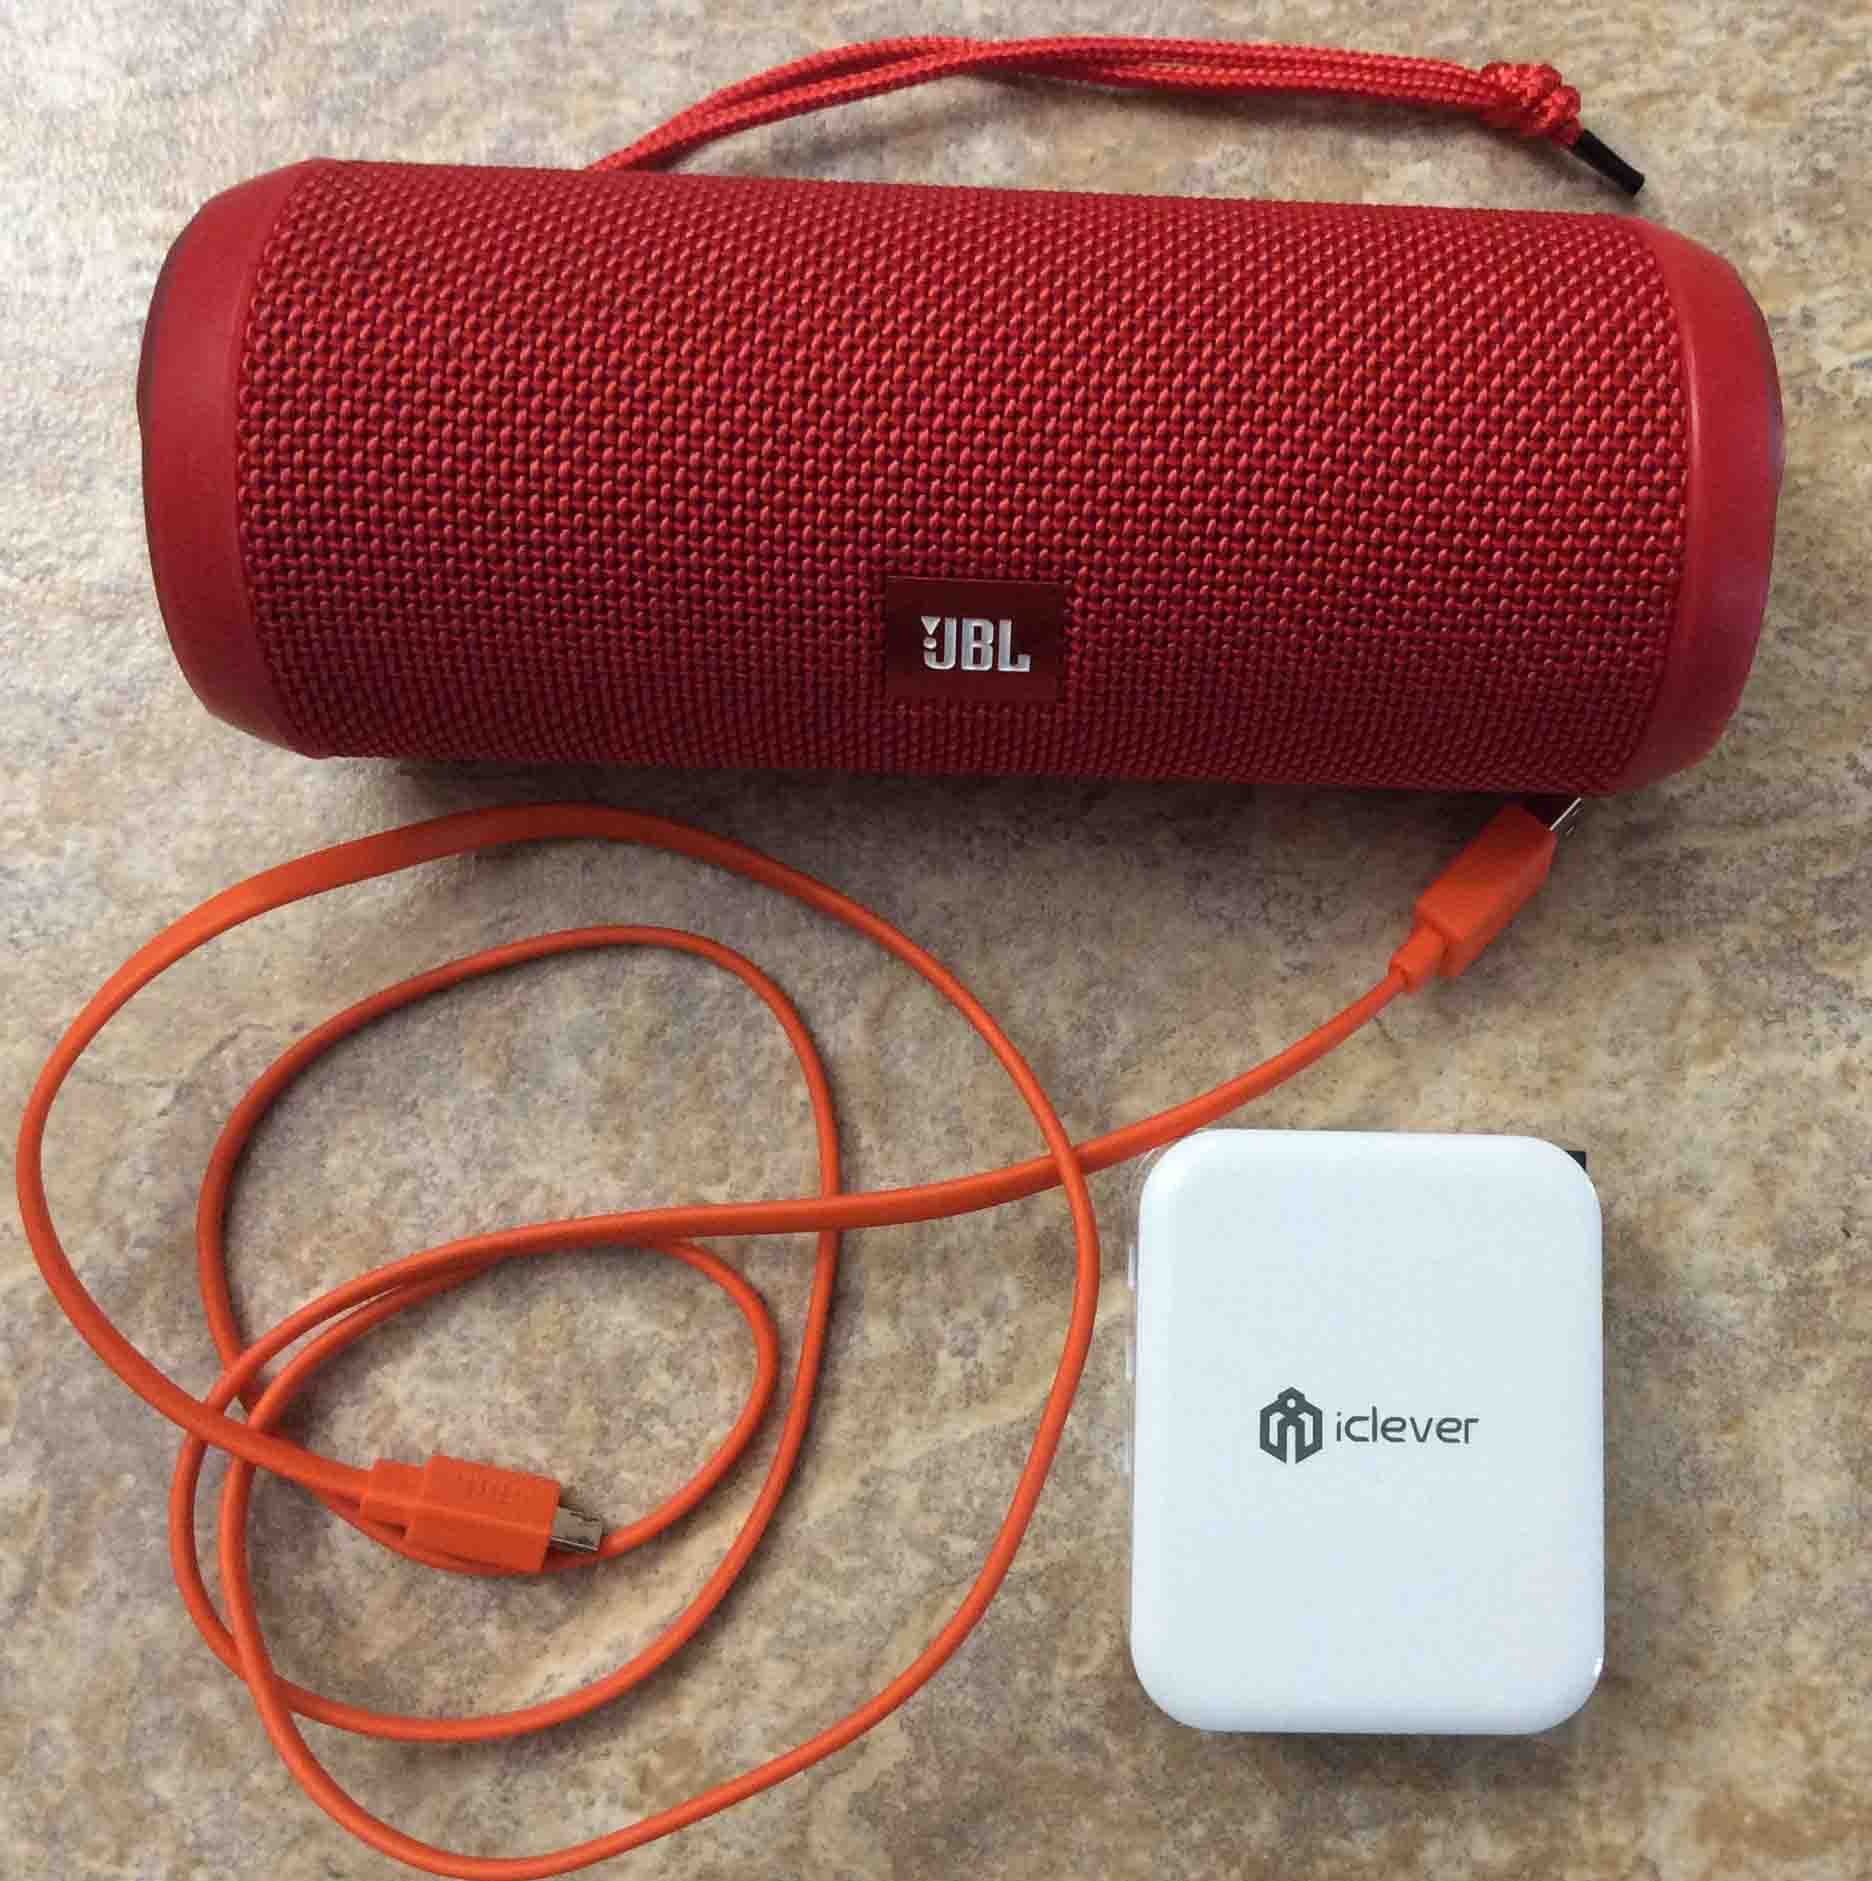
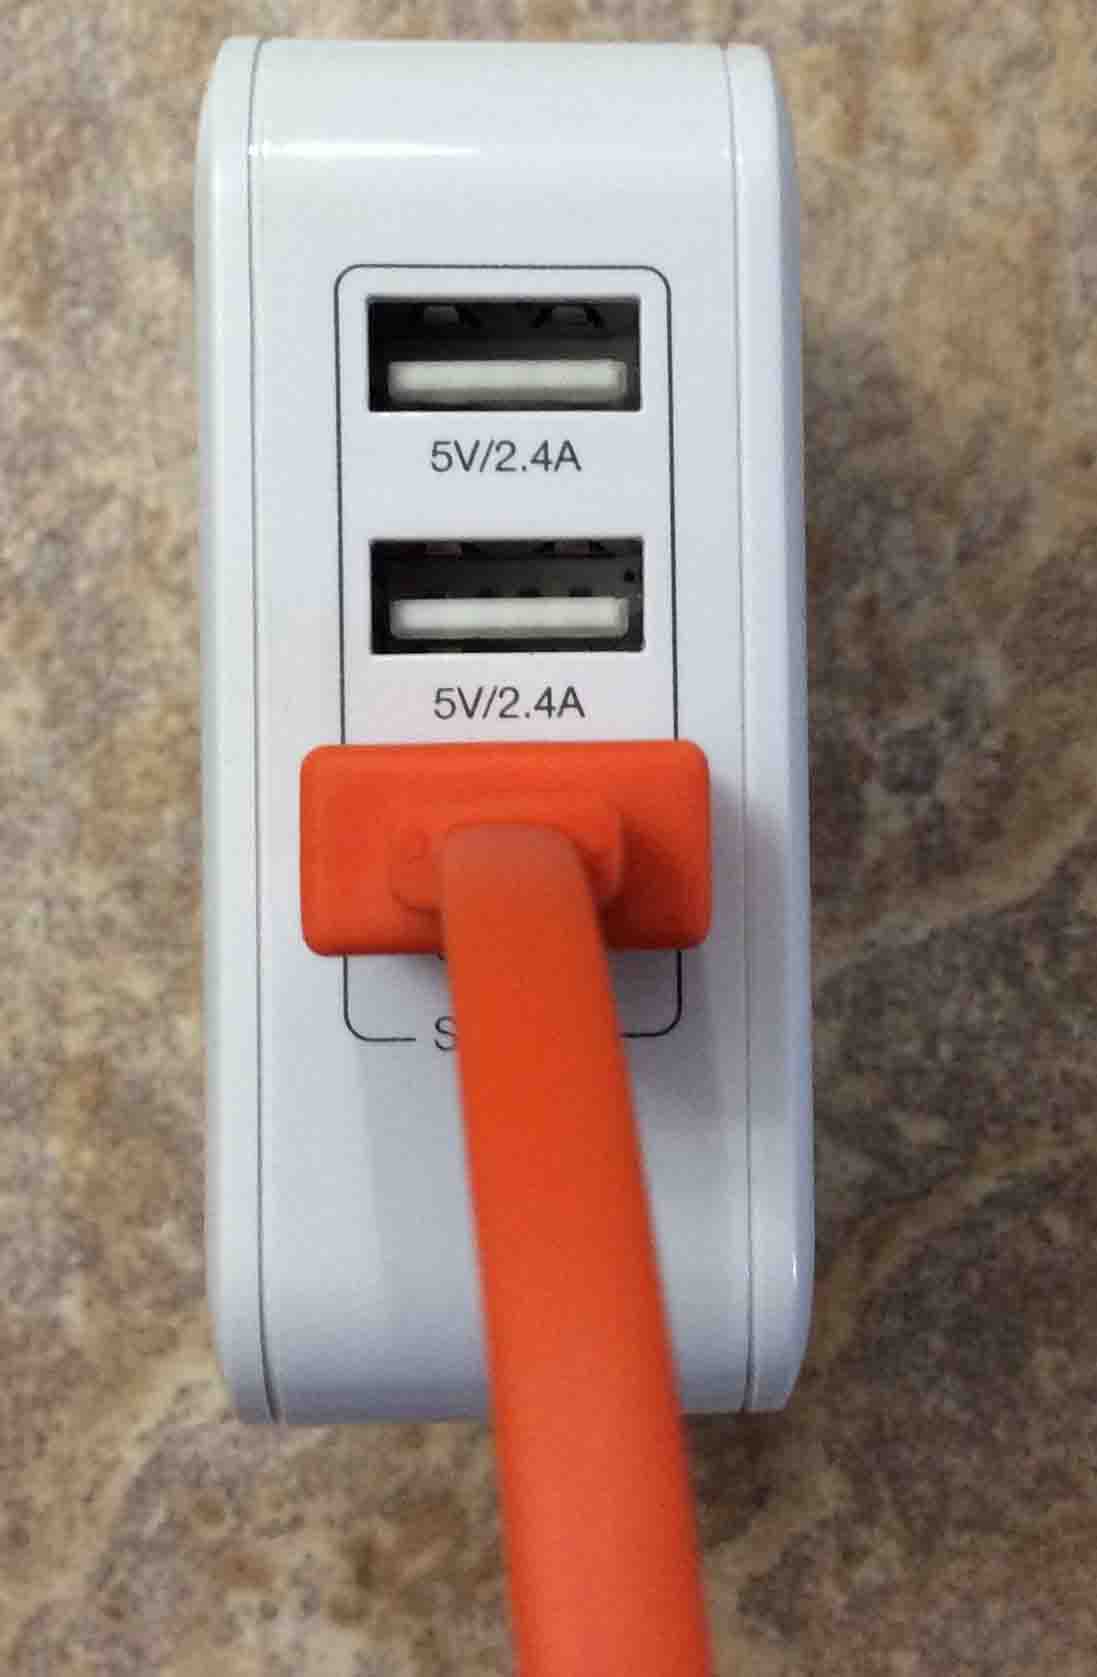
In this demo, we chose the iClever 3-port USB wall charger, model IC-TC03. Plus, the Flip 3 needs a high power USB power source to charge fully in a short time, and the IC-TC03 fills this need well.
Next, connect the orange micro USB cable included with the speaker between it and that iClever adapter.
Then, plug the adapter into a working wall outlet.
Finally after a few to five hours, your Flip 3 fully charges. Then, you can play it again for up to ten hours (about), before you must charge it again.
JBL Flip 3 Charging: Step by Step
1. Choose Right Size Power Adapter
Firstly, as mentioned above, we’re using the iClever 36 watt three port USB wall charger AC adapter, as shown next.

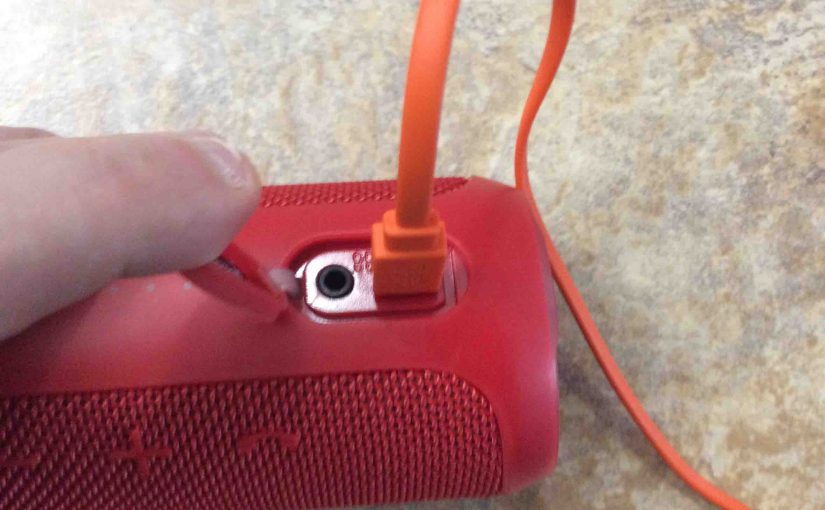
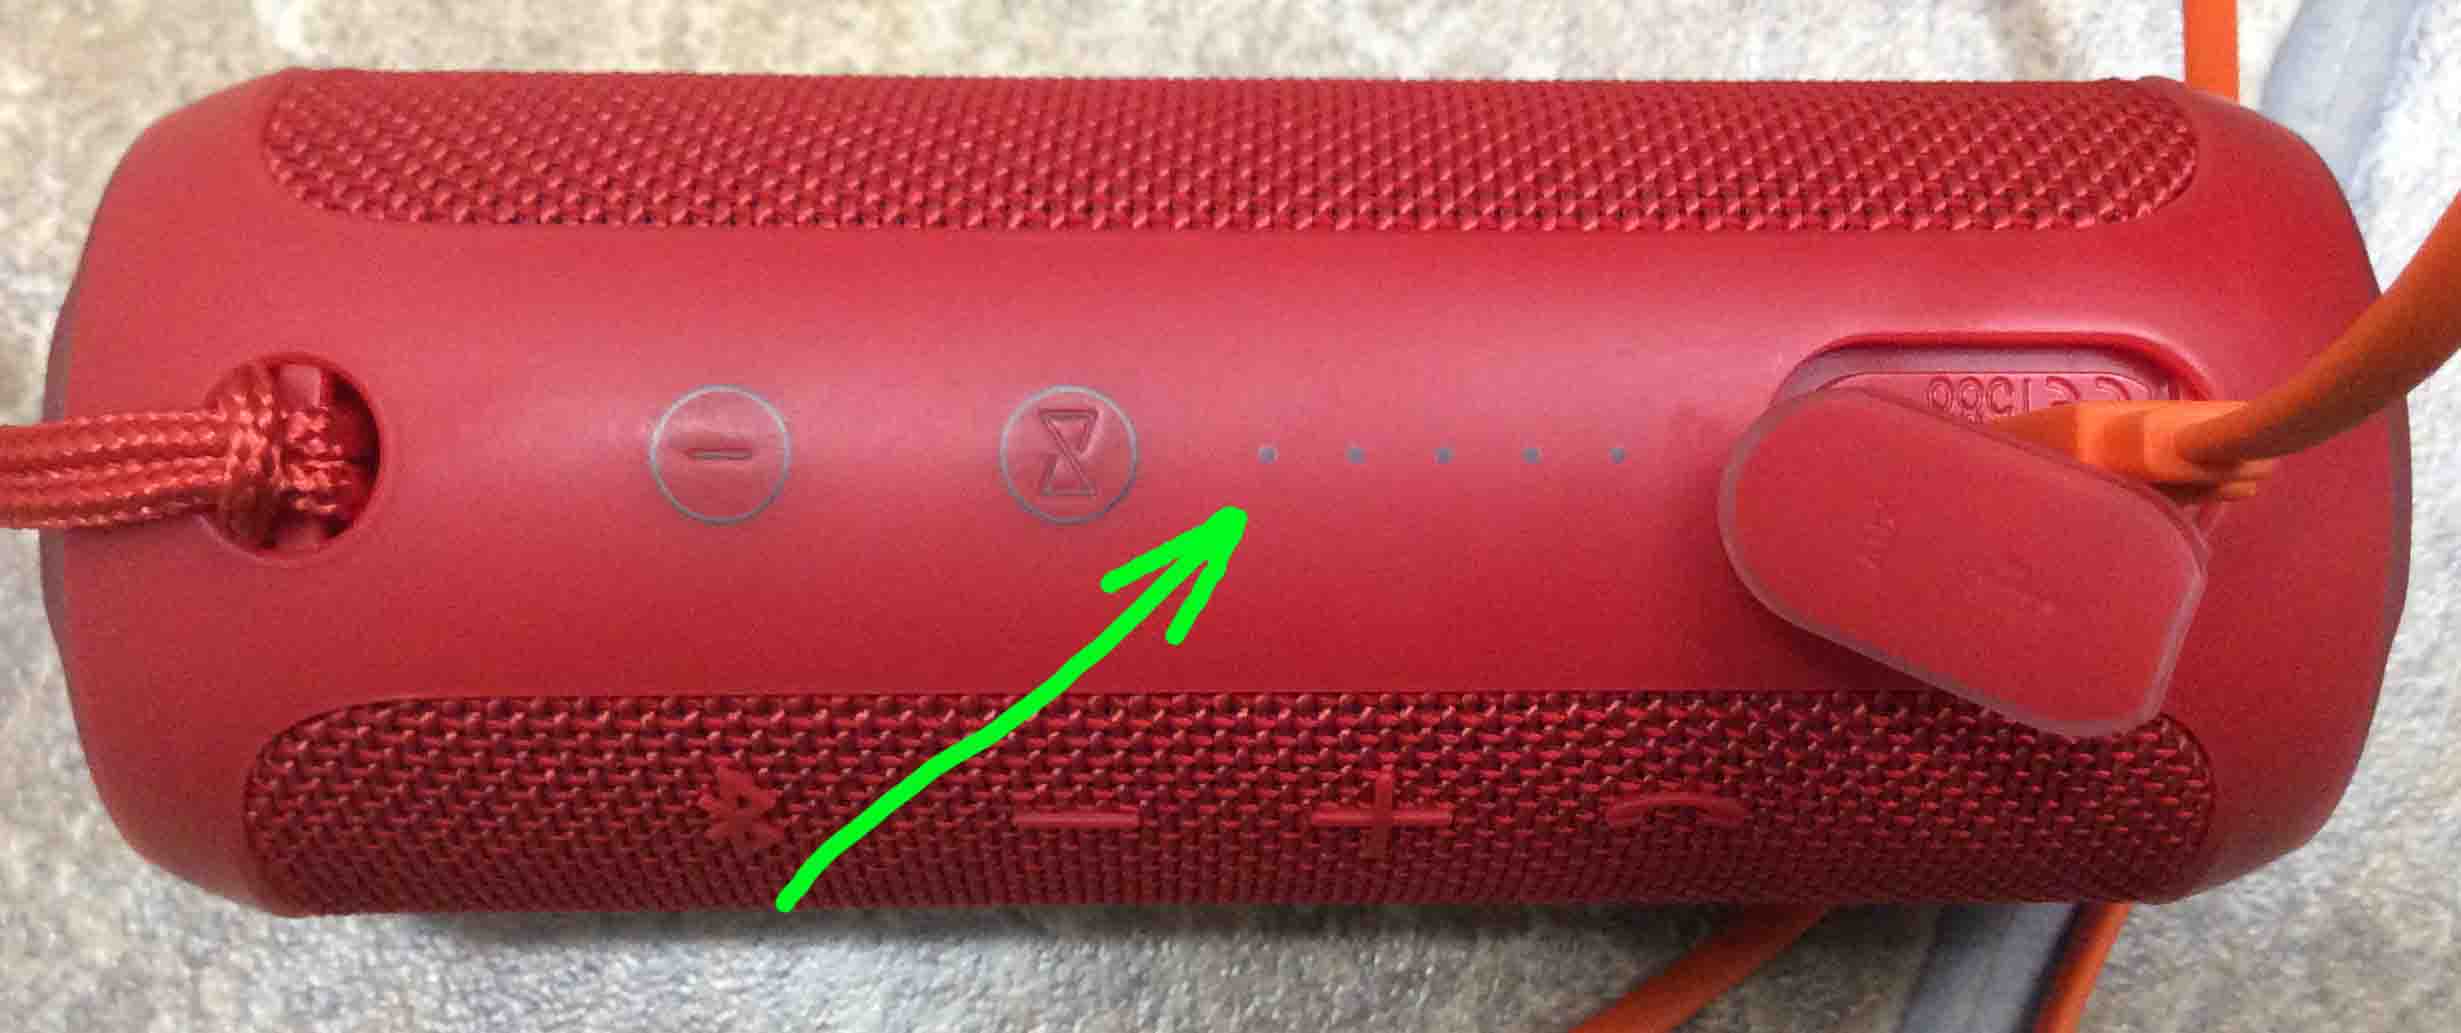
2. Open the Flip 3 Port Cover
Secondly, use a penny or a dime to pry open the waterproof seal port cover. This exposes the micro USB charging port inside, as shown next.

3. Plug in the Micro USB Cord
Thirdly, plug the small end of the orange micro USB charge cord into the matching micro USB port in the speaker, as shown next.
4. Plug the Other End of the USB Cord into your USB Power Adapter
Next, connect the A end of the USB charge cable to the power adapter, as pictured next.
5. Plug the AC USB Power Adapter into a Working Wall Outlet
Now that the Flip 3 and iClever charger adapter are linked, we plug the adapter into a live AC outlet, as shown next. In this scenario, we plugged ours into an energized Tripp-Lite surge protector.
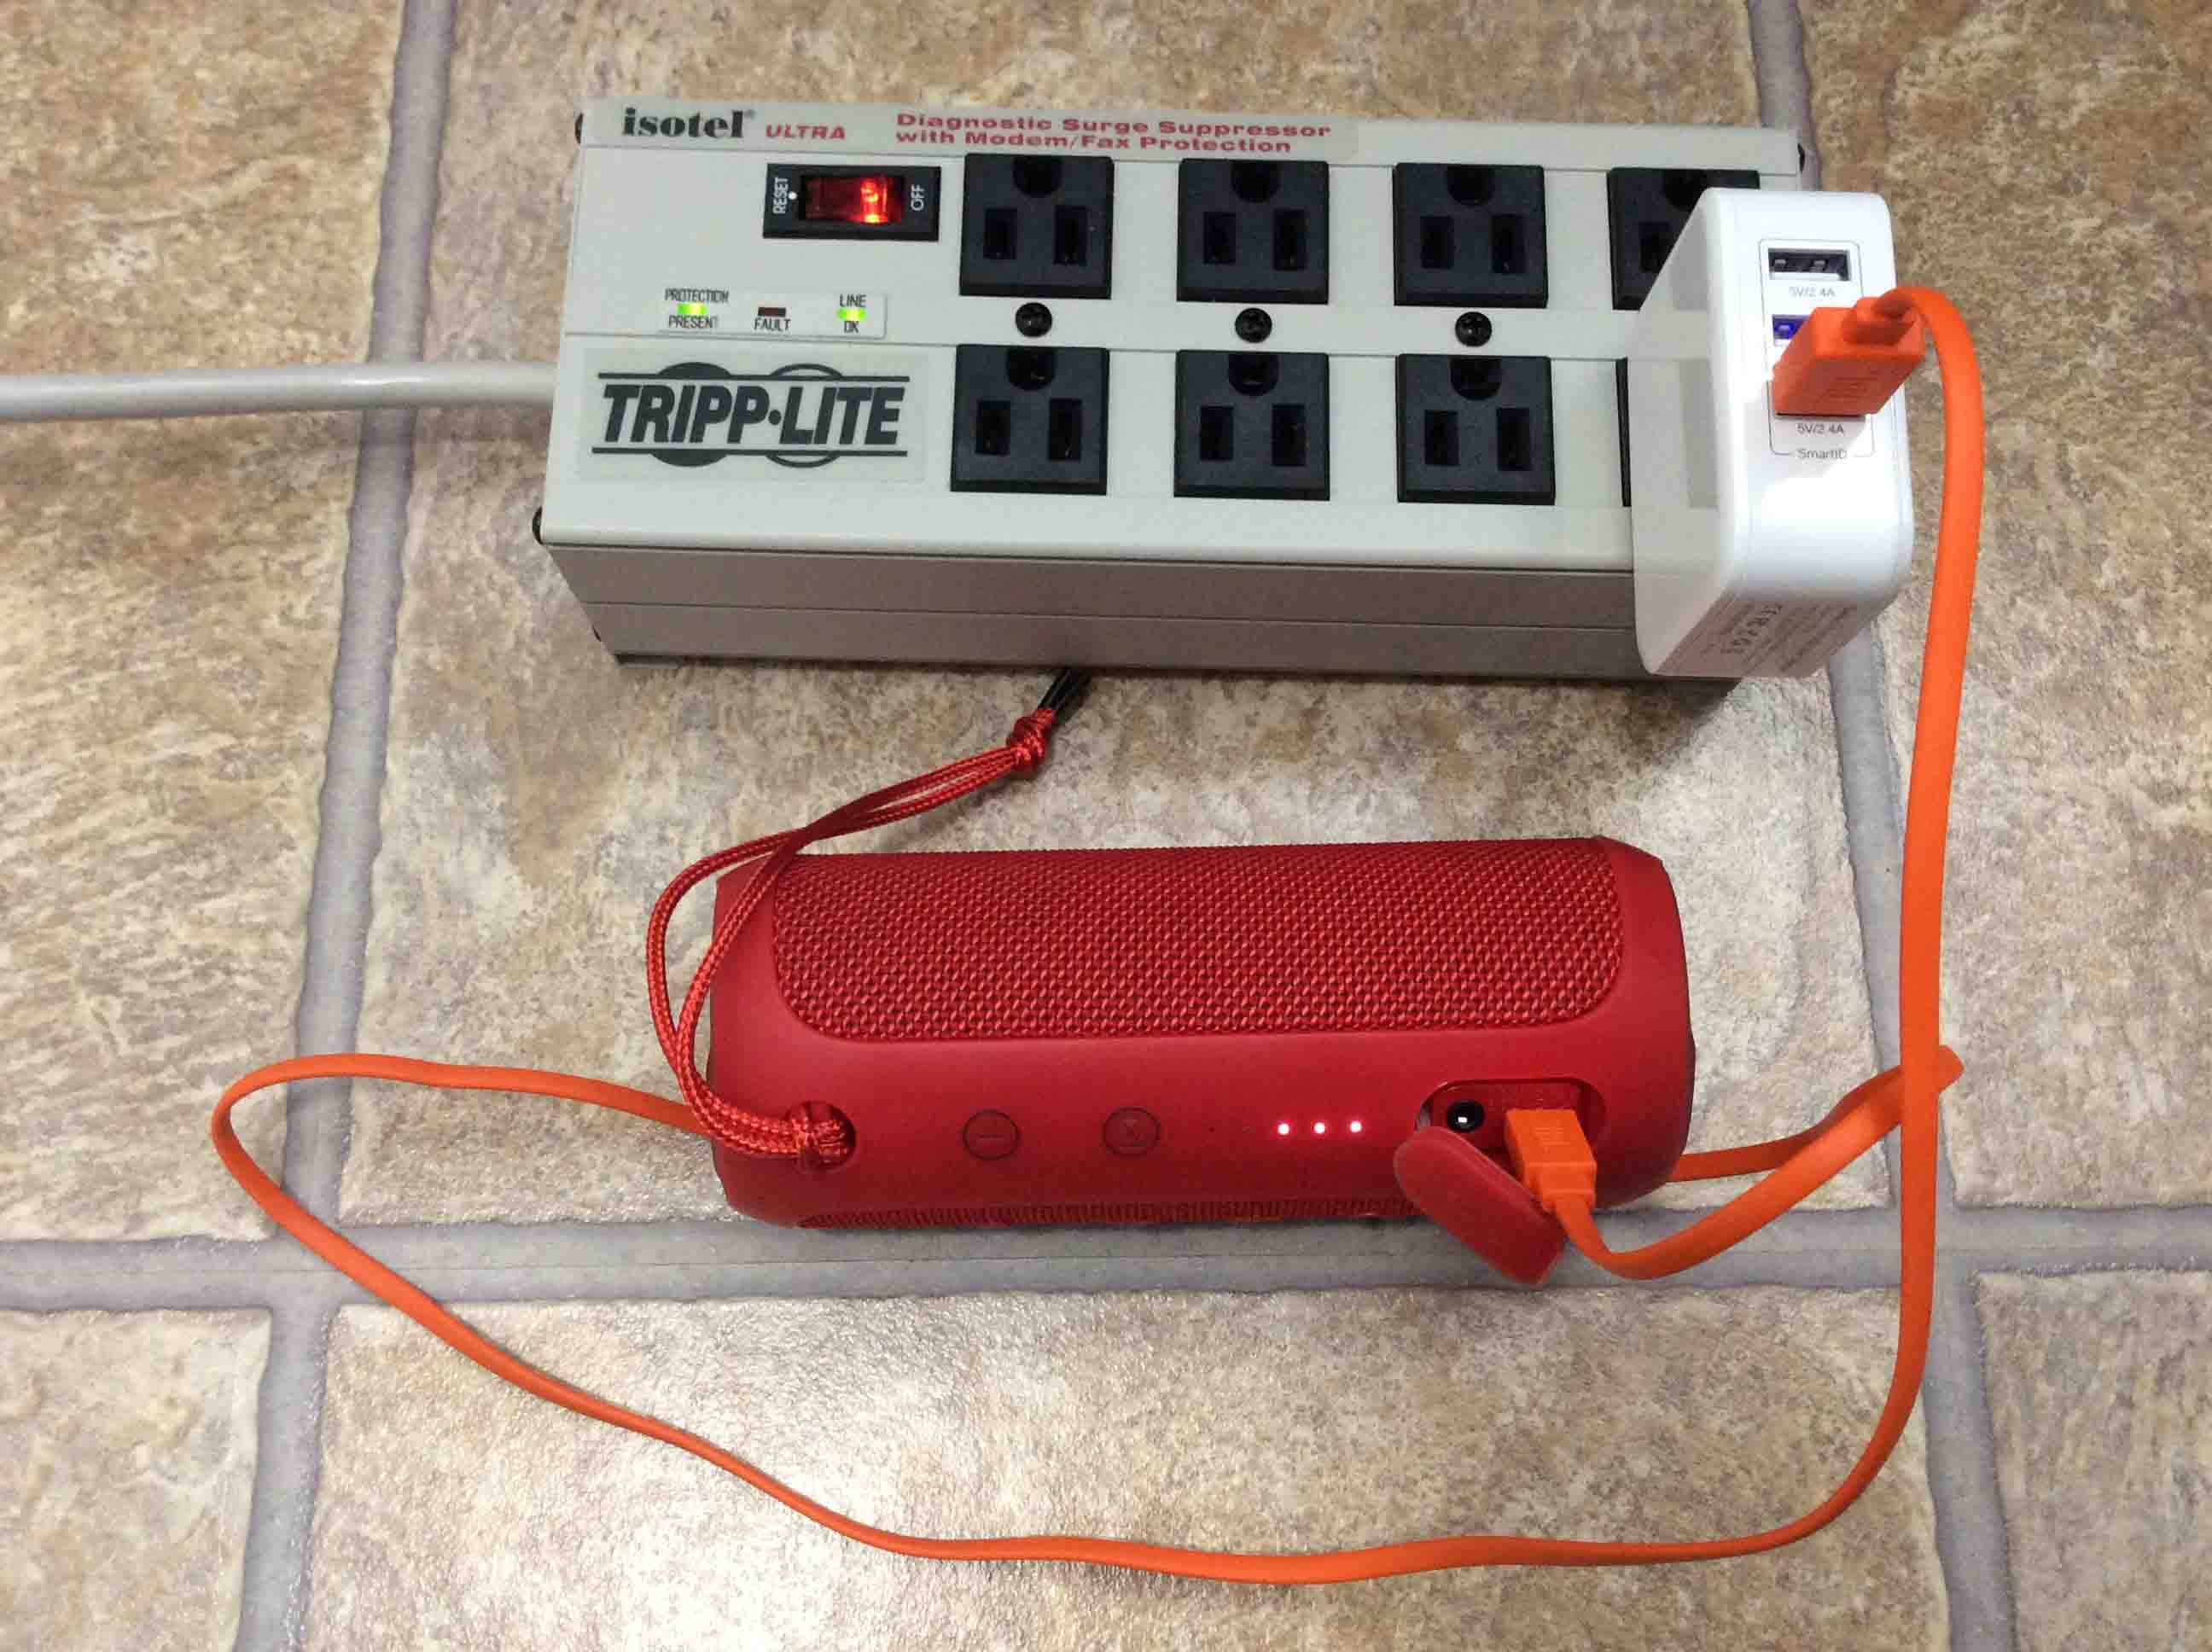
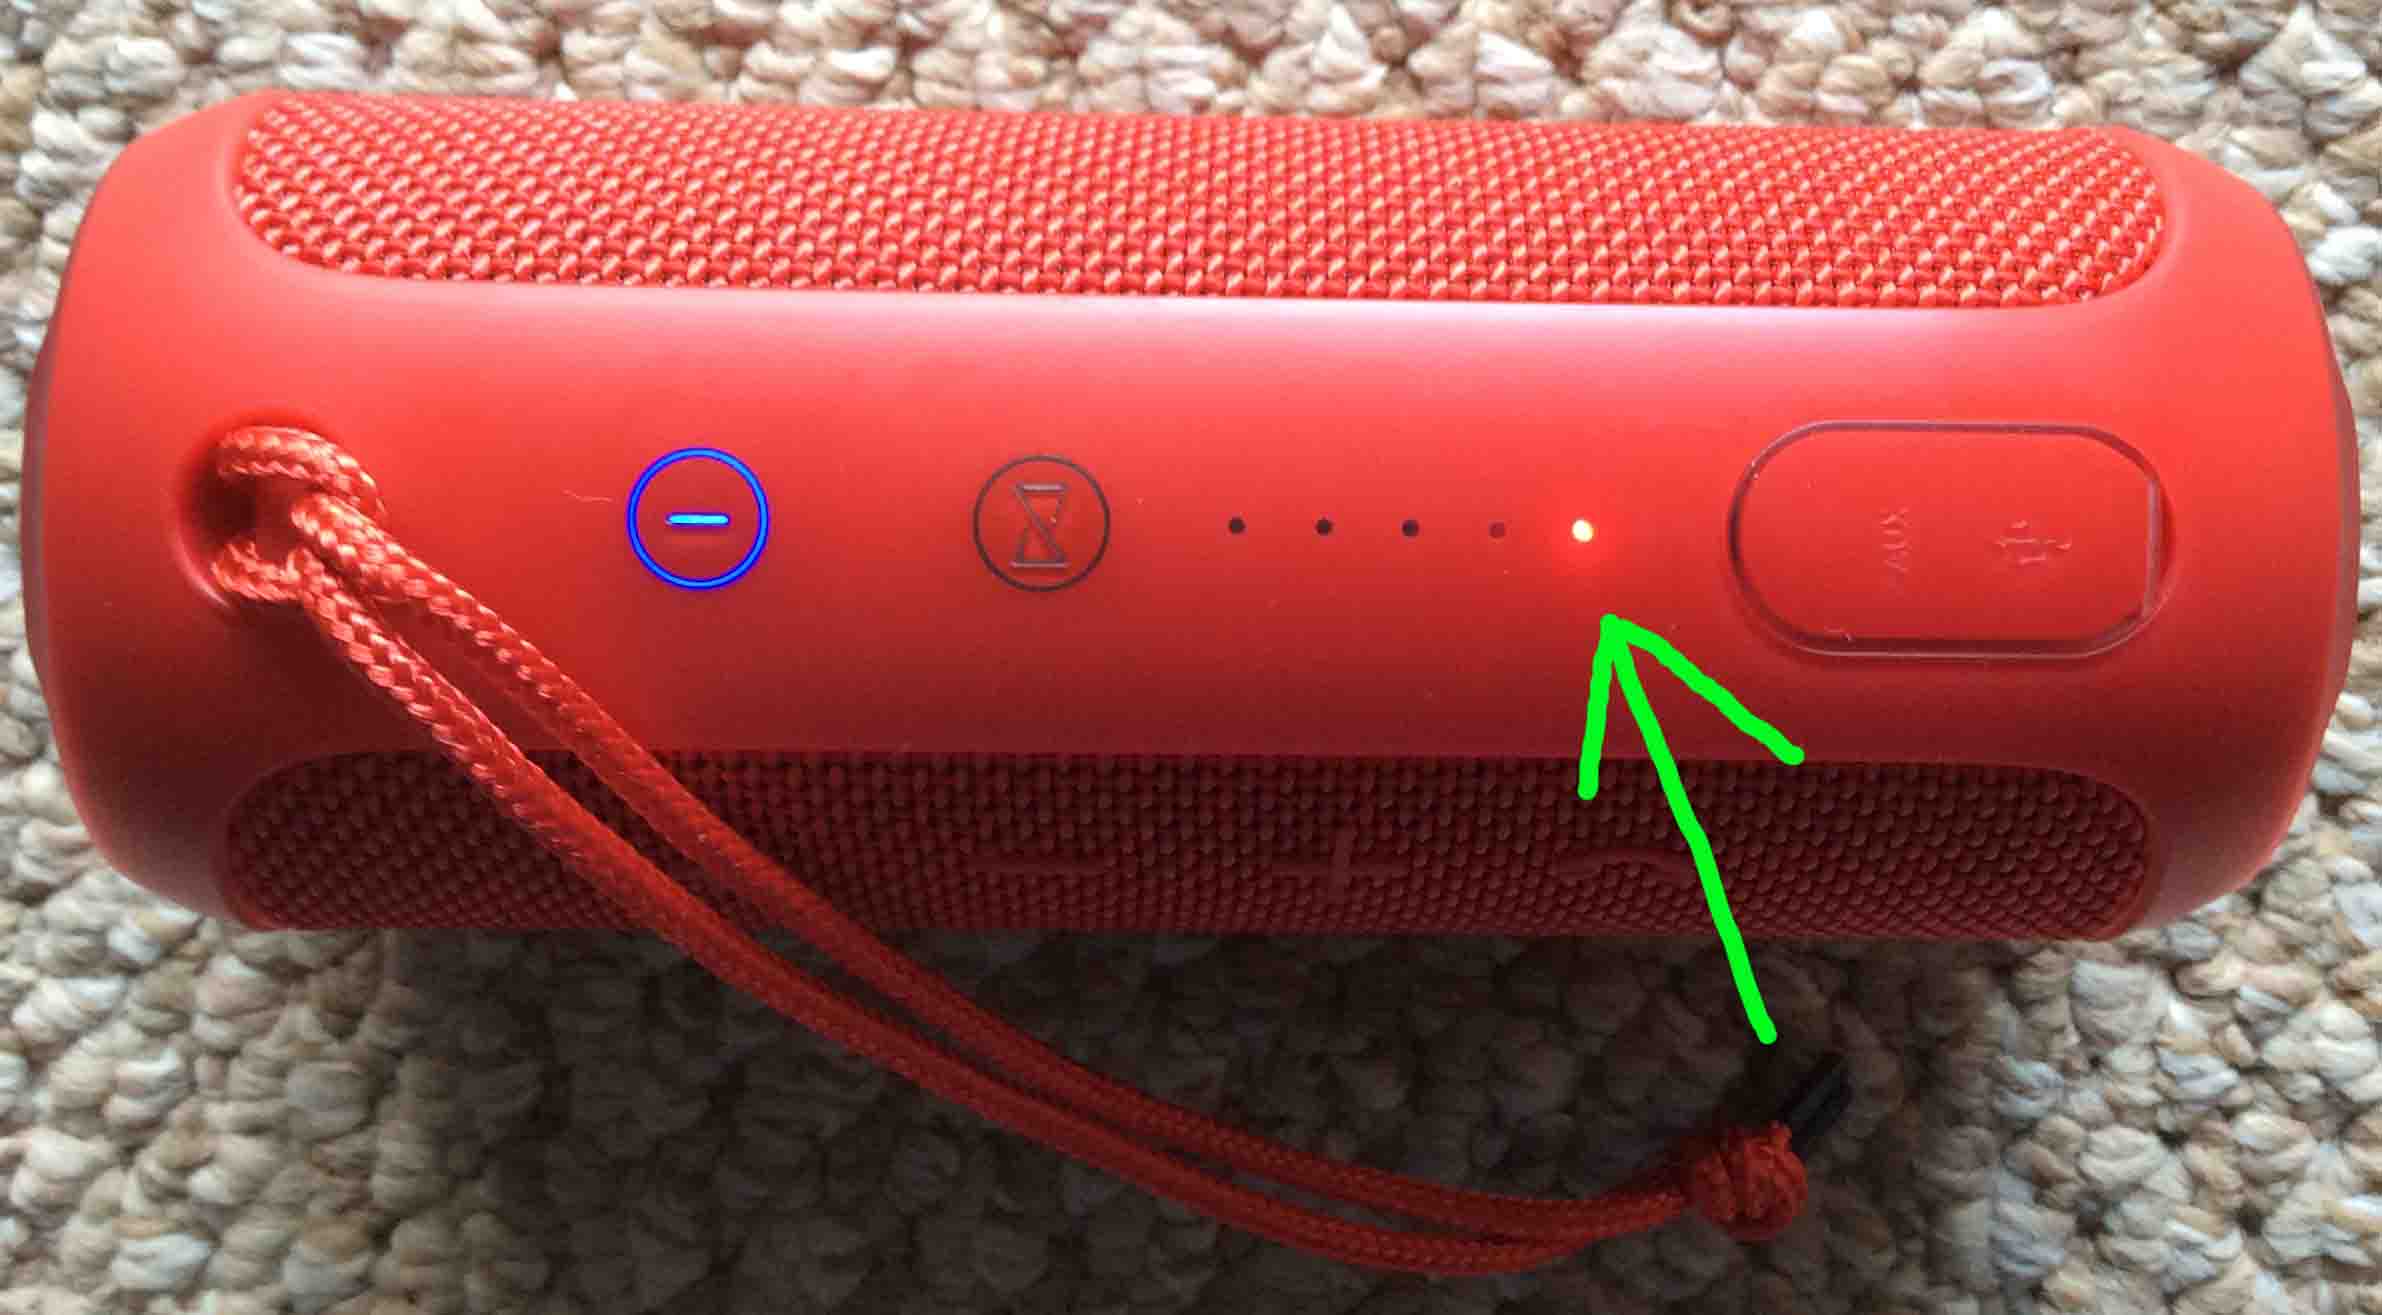
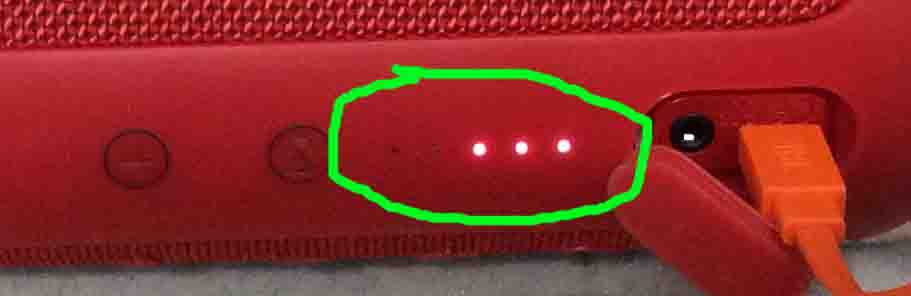
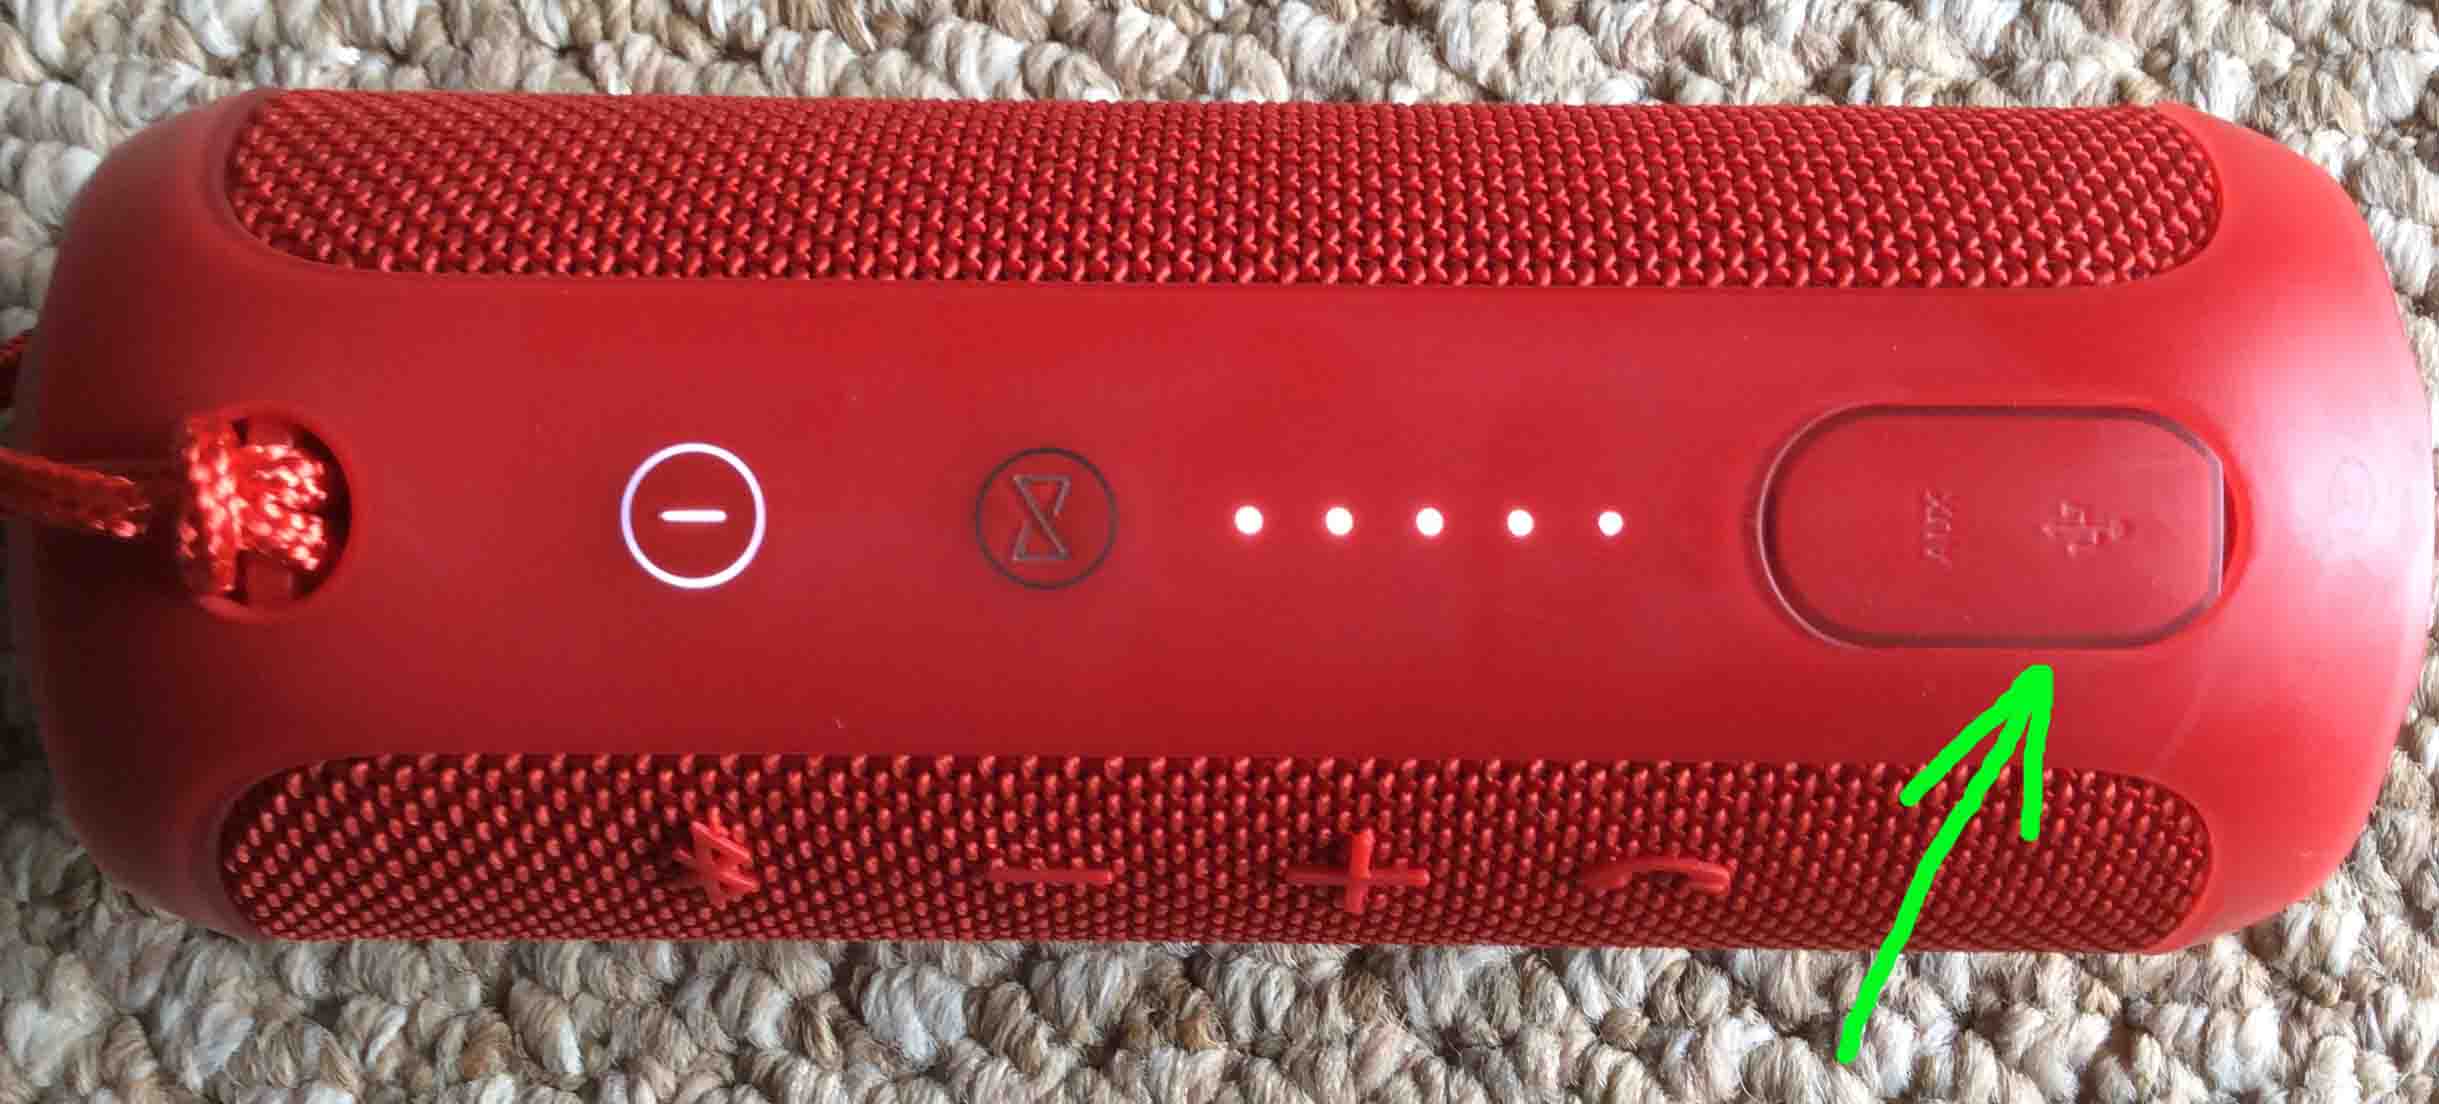
At least one of the battery status lamps lights up on the speaker when powered. The five lamps on this speaker light up in succession as battery recharging happens, as pictured next.
6. Let the Flip 3 Charge Until All Battery Status Lamps Go Off
Battery charge is almost complete when all but the last battery status lights glow solid white. Then, the last one blinks for several minutes more to top off the charge, as shown next.
The battery charge cycle finishes when all battery status gauge lights go out, as shown next.
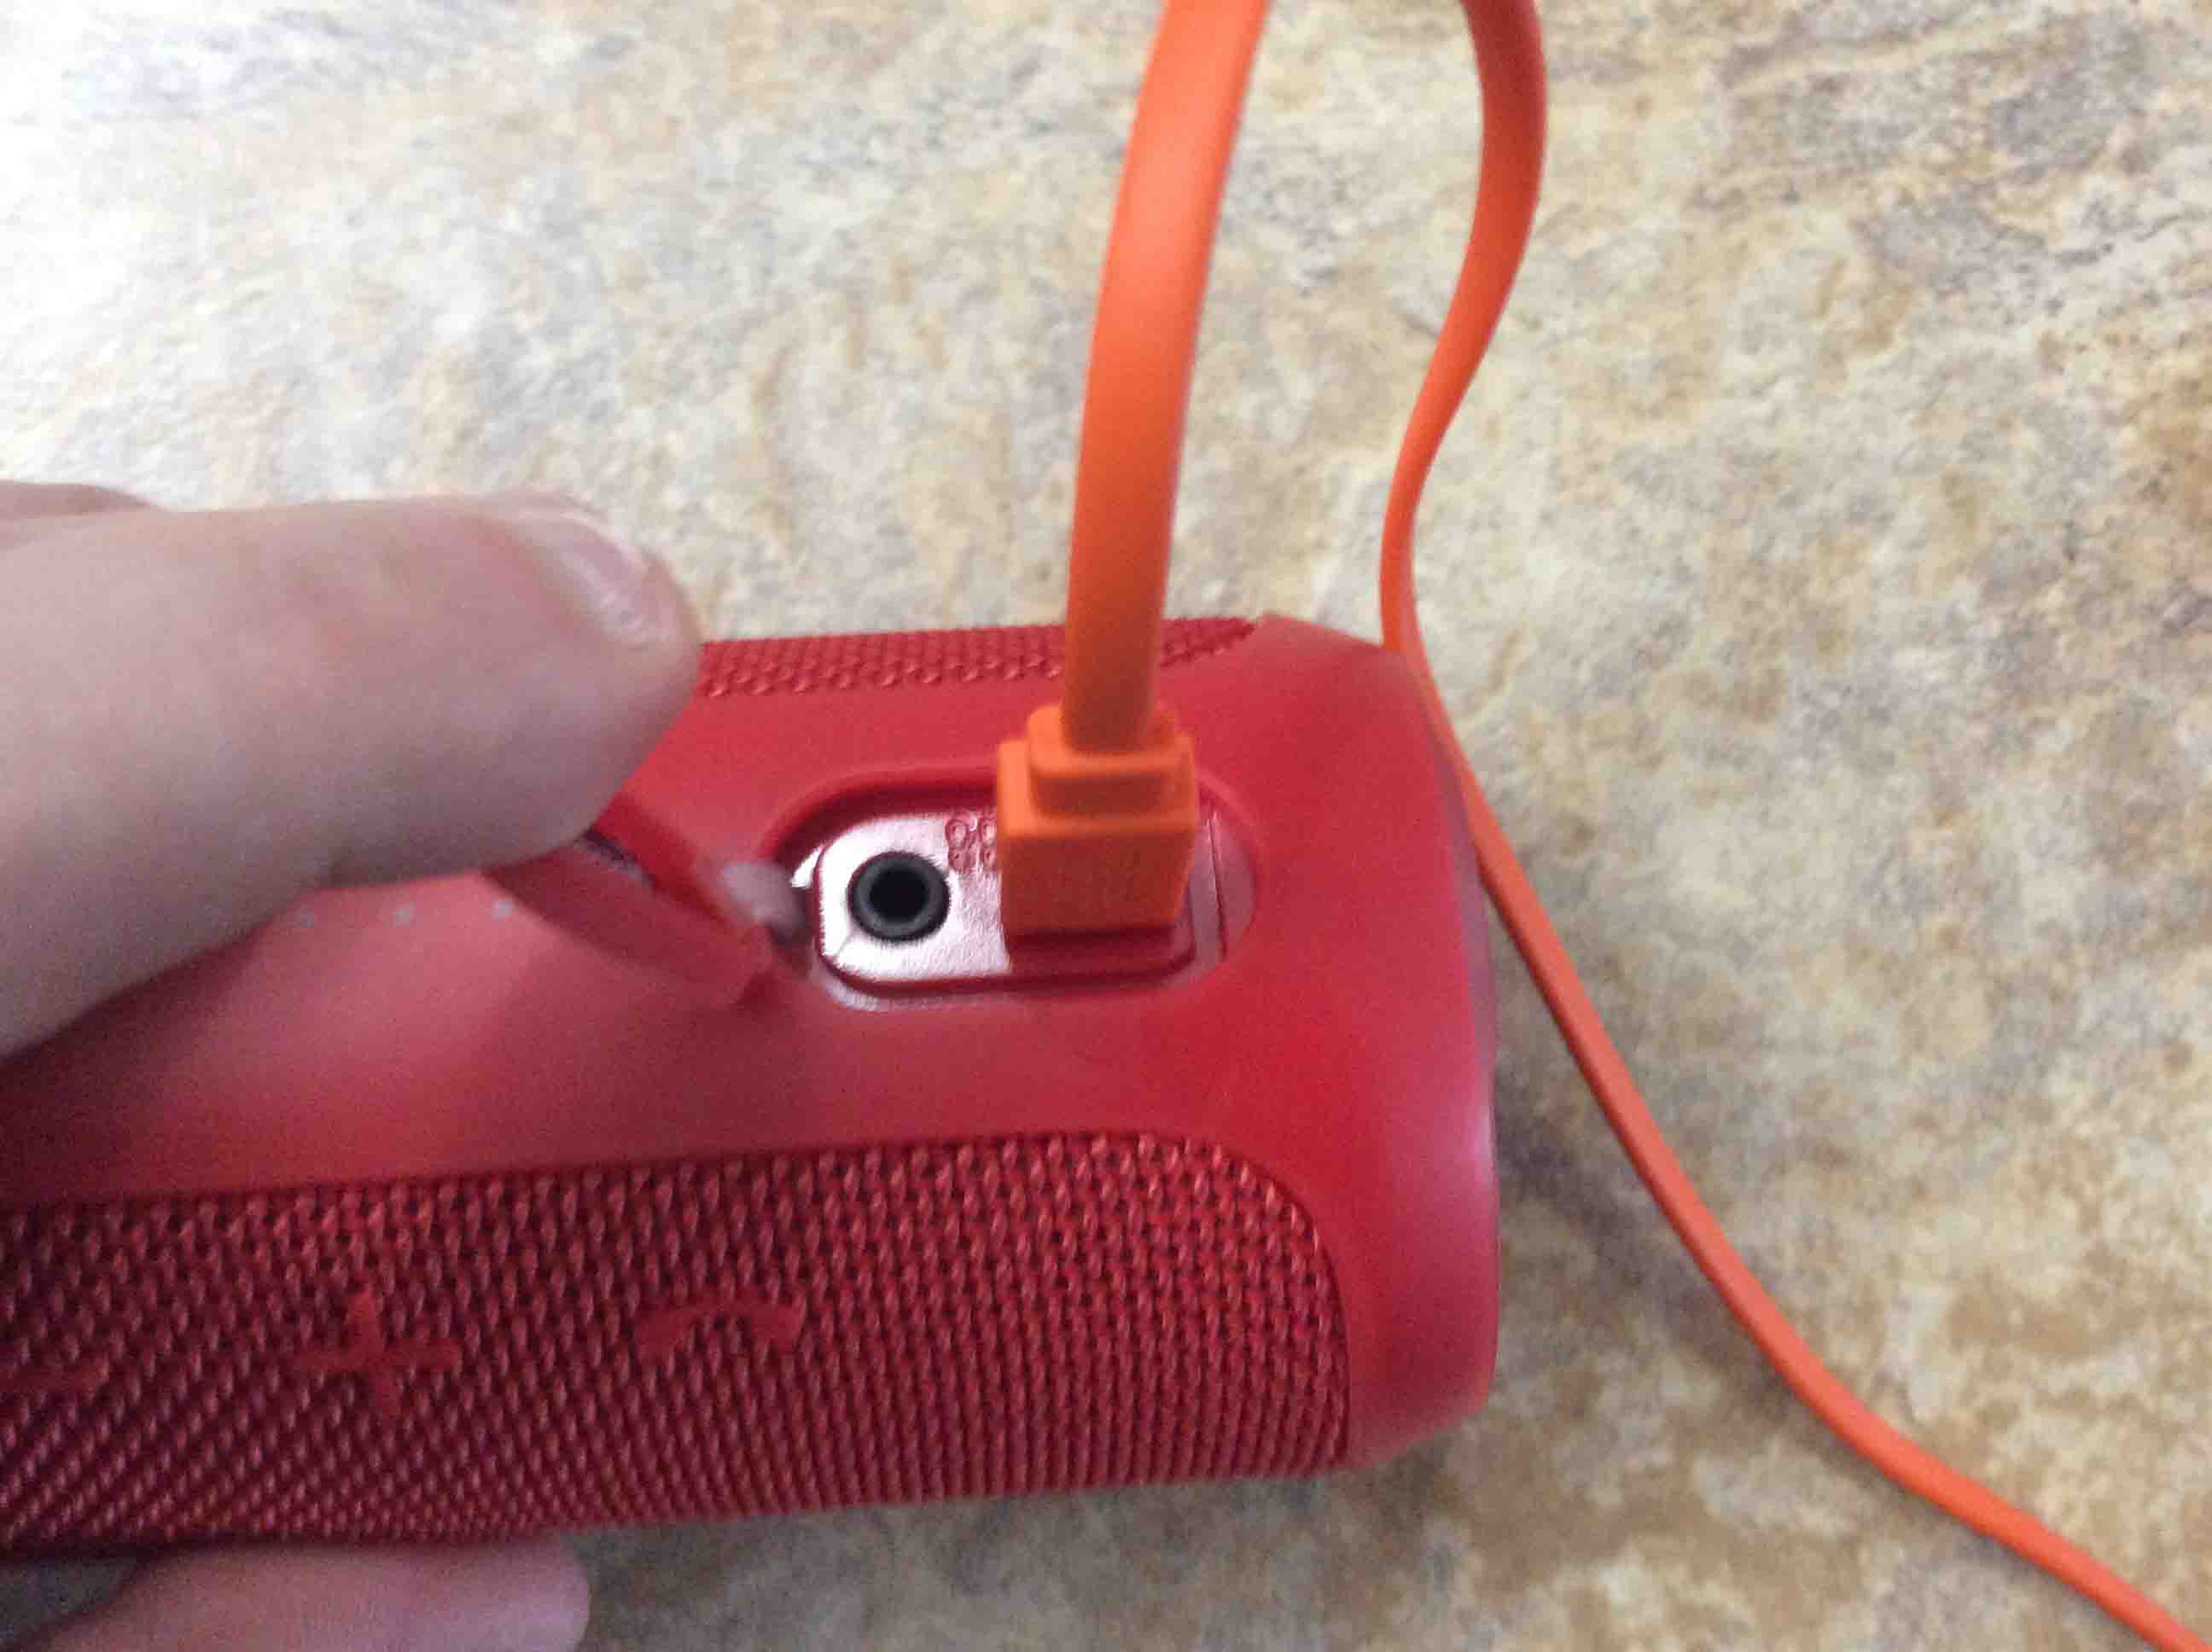
7. Unplug the USB Charge Cable from the Speaker
The next picture shows the micro USB charging port on the Flip 3 after we removed the charge wire.
8. Fully Close the Waterproof Port Door
Note that unless you snap this this flap securely in place, water may enter the port area the next time you take the speaker poolside. This might damage the electronics. So, be careful to press the port door fully closed. Use enough force to correctly seat it for maximum water resistance. See how this port door looks when sealed in the next picture.
9. Done with JBL Flip 3 Charging
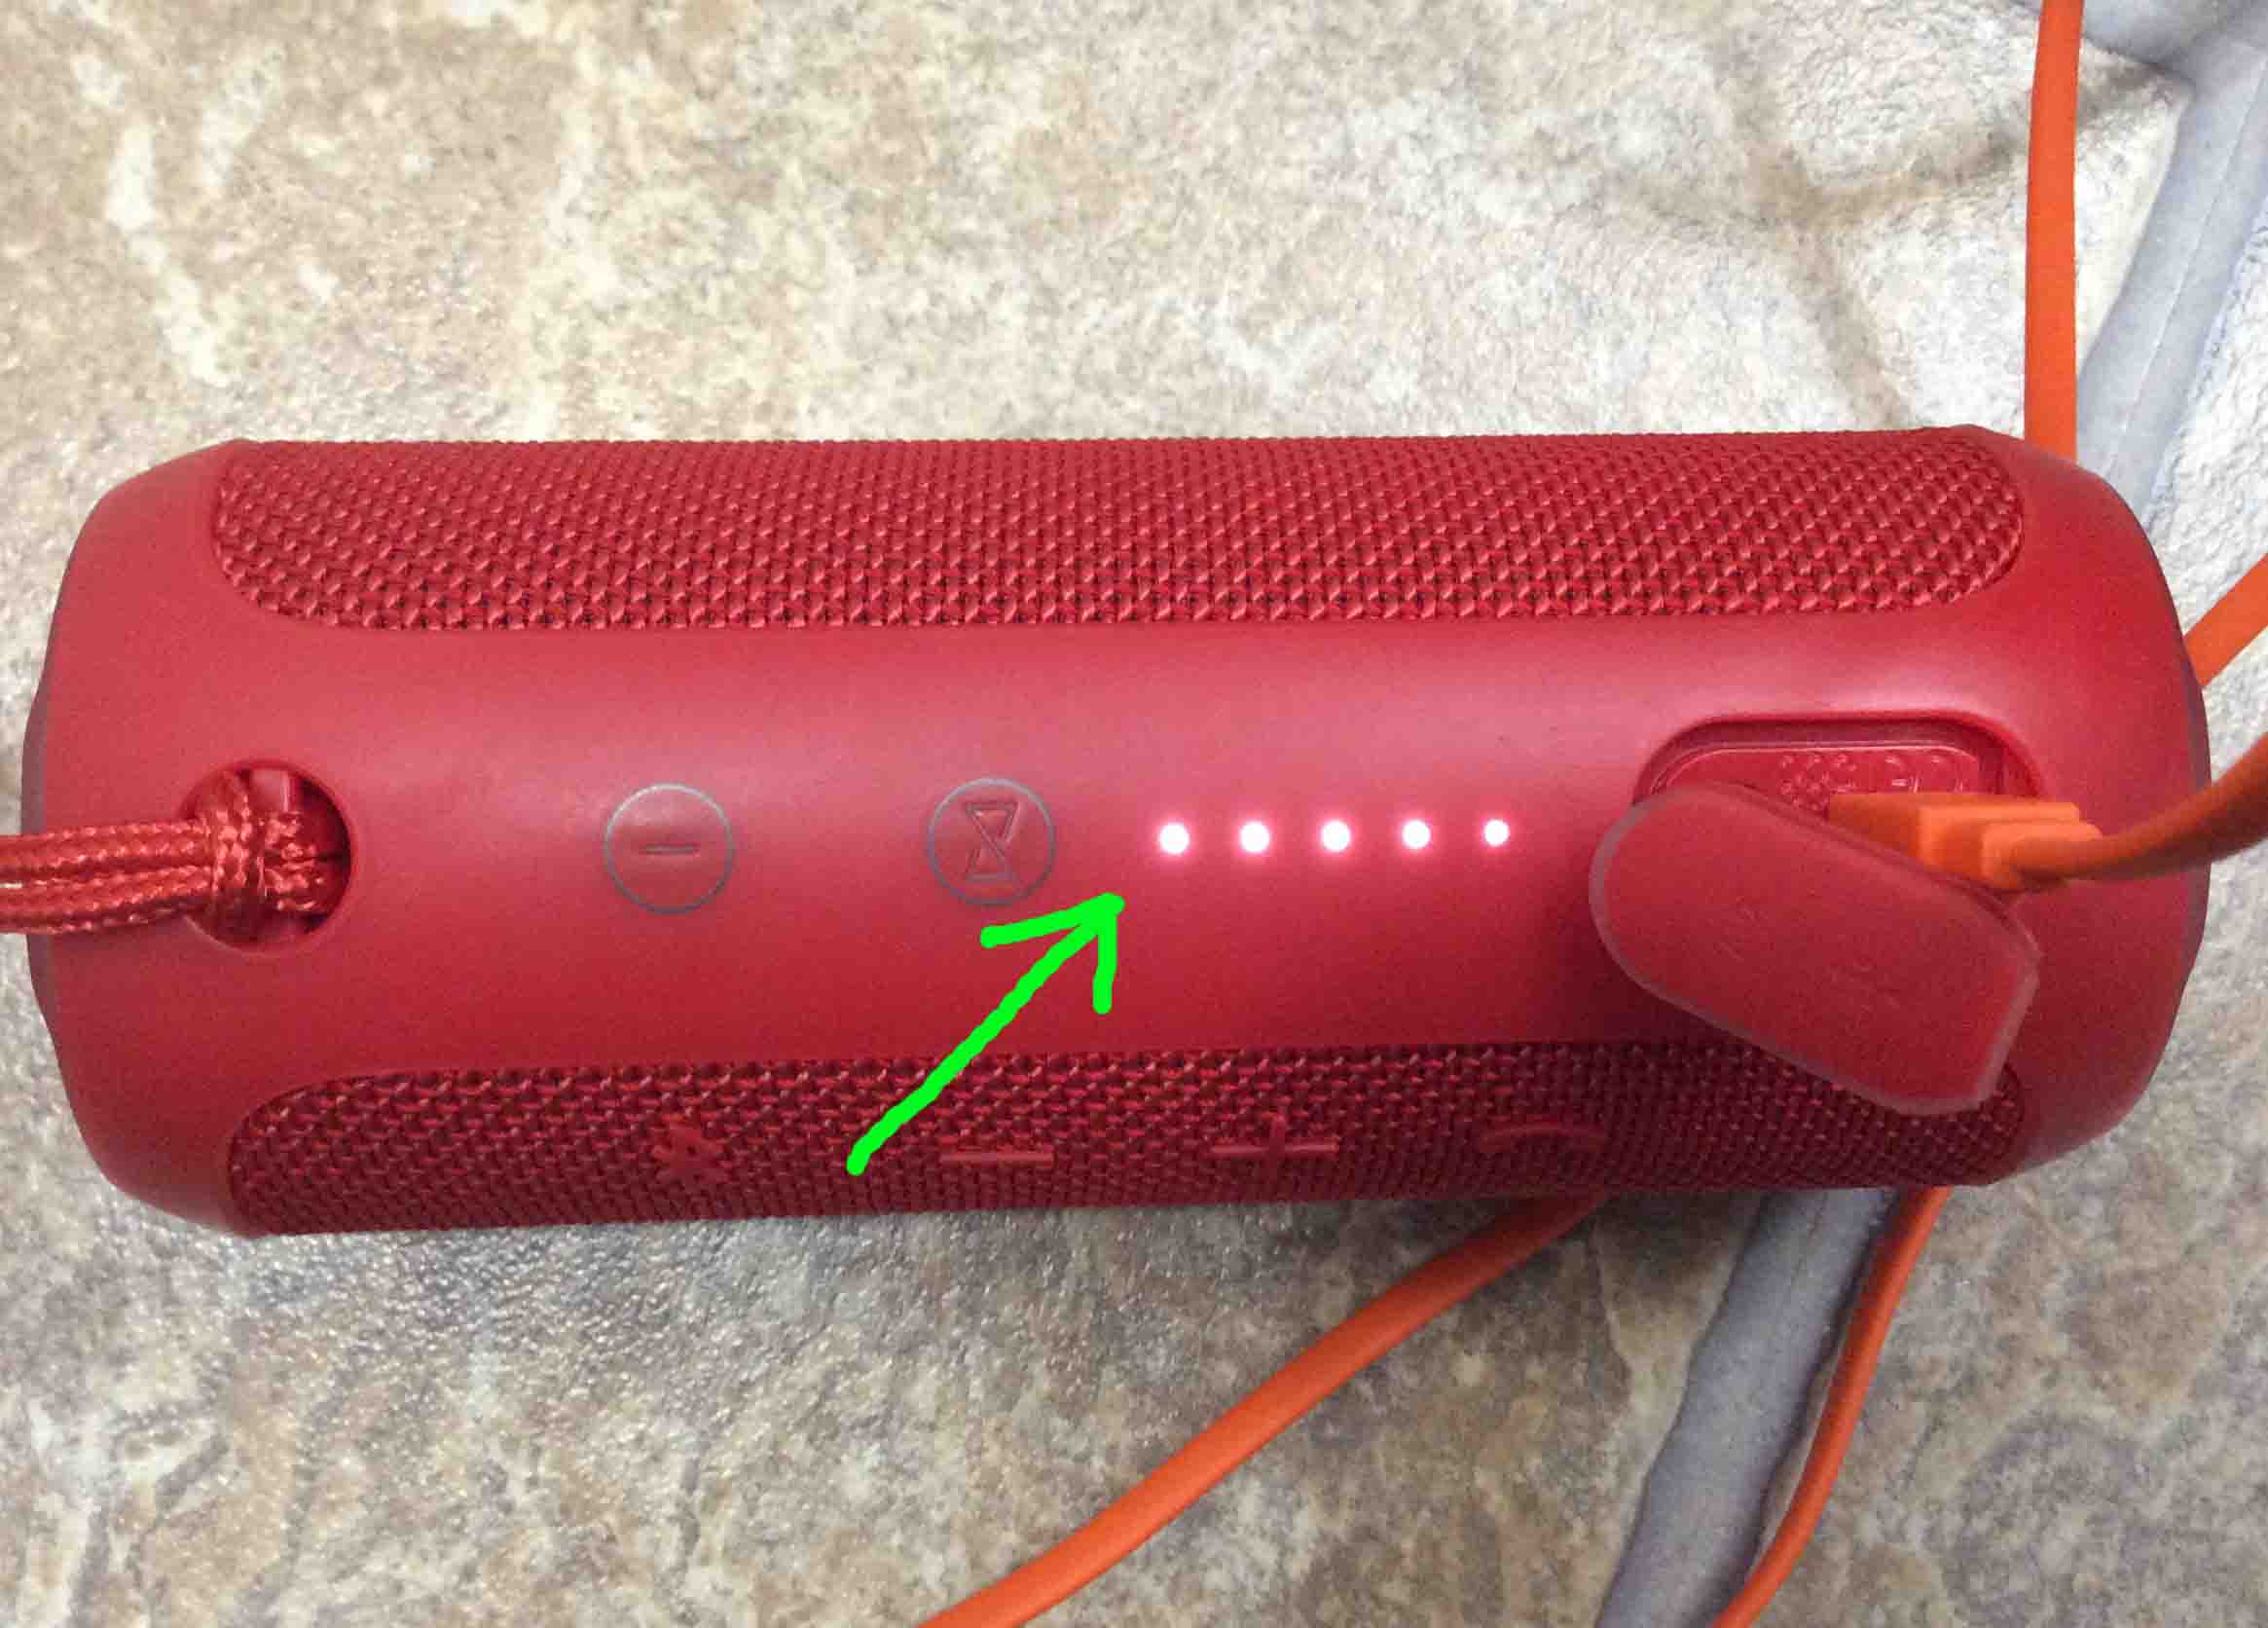
Lastly, we have now fully charged our JBL Flip 3 wireless Bluetooth speaker. Note that the battery charge status gauge just after a full recharge. All lamps glow steady white. This means that the Flip 3 is charged all the way up, as shown in the last picture above.
Repeat this process every ten to twelve hours of music play to keep its battery in top shape. We charge ours when only the one battery gauge light flashes.
Related Posts to JBL Flip 3 Charging
Other Posts About the JBL Flip 3
References
Revision History
-
- 2021-08-08: Fixed some broken links.
- 2020-04-08: Added tags.
- 2019-05-14: Tweaked the targeting for ‘JBL Flip 3 charging’.
- 2019-02-24: First published.