You can charge JBL Clip 3 wireless Bluetooth speakers conveniently via the hidden USB charge port. Here, we supply a step by step list of JBL Clip 3 charging instructions.
In short: First, select an adequate USB charging adapter. Why this? Because the Clip 3 does not come with this as a standard accessory.
Next, connect a micro USB charge cable between the Clip 3 and that adapter. Then, plug the adapter into a working wall outlet. Finally after a few hours, your JBL Clip 3 speaker fully charges, and you’ll be able to play it again for up to ten hours before needing to charge it again.
JBL Clip 3 Charging Instructions, Step by Step
1. Choose Right Size Power Adapter
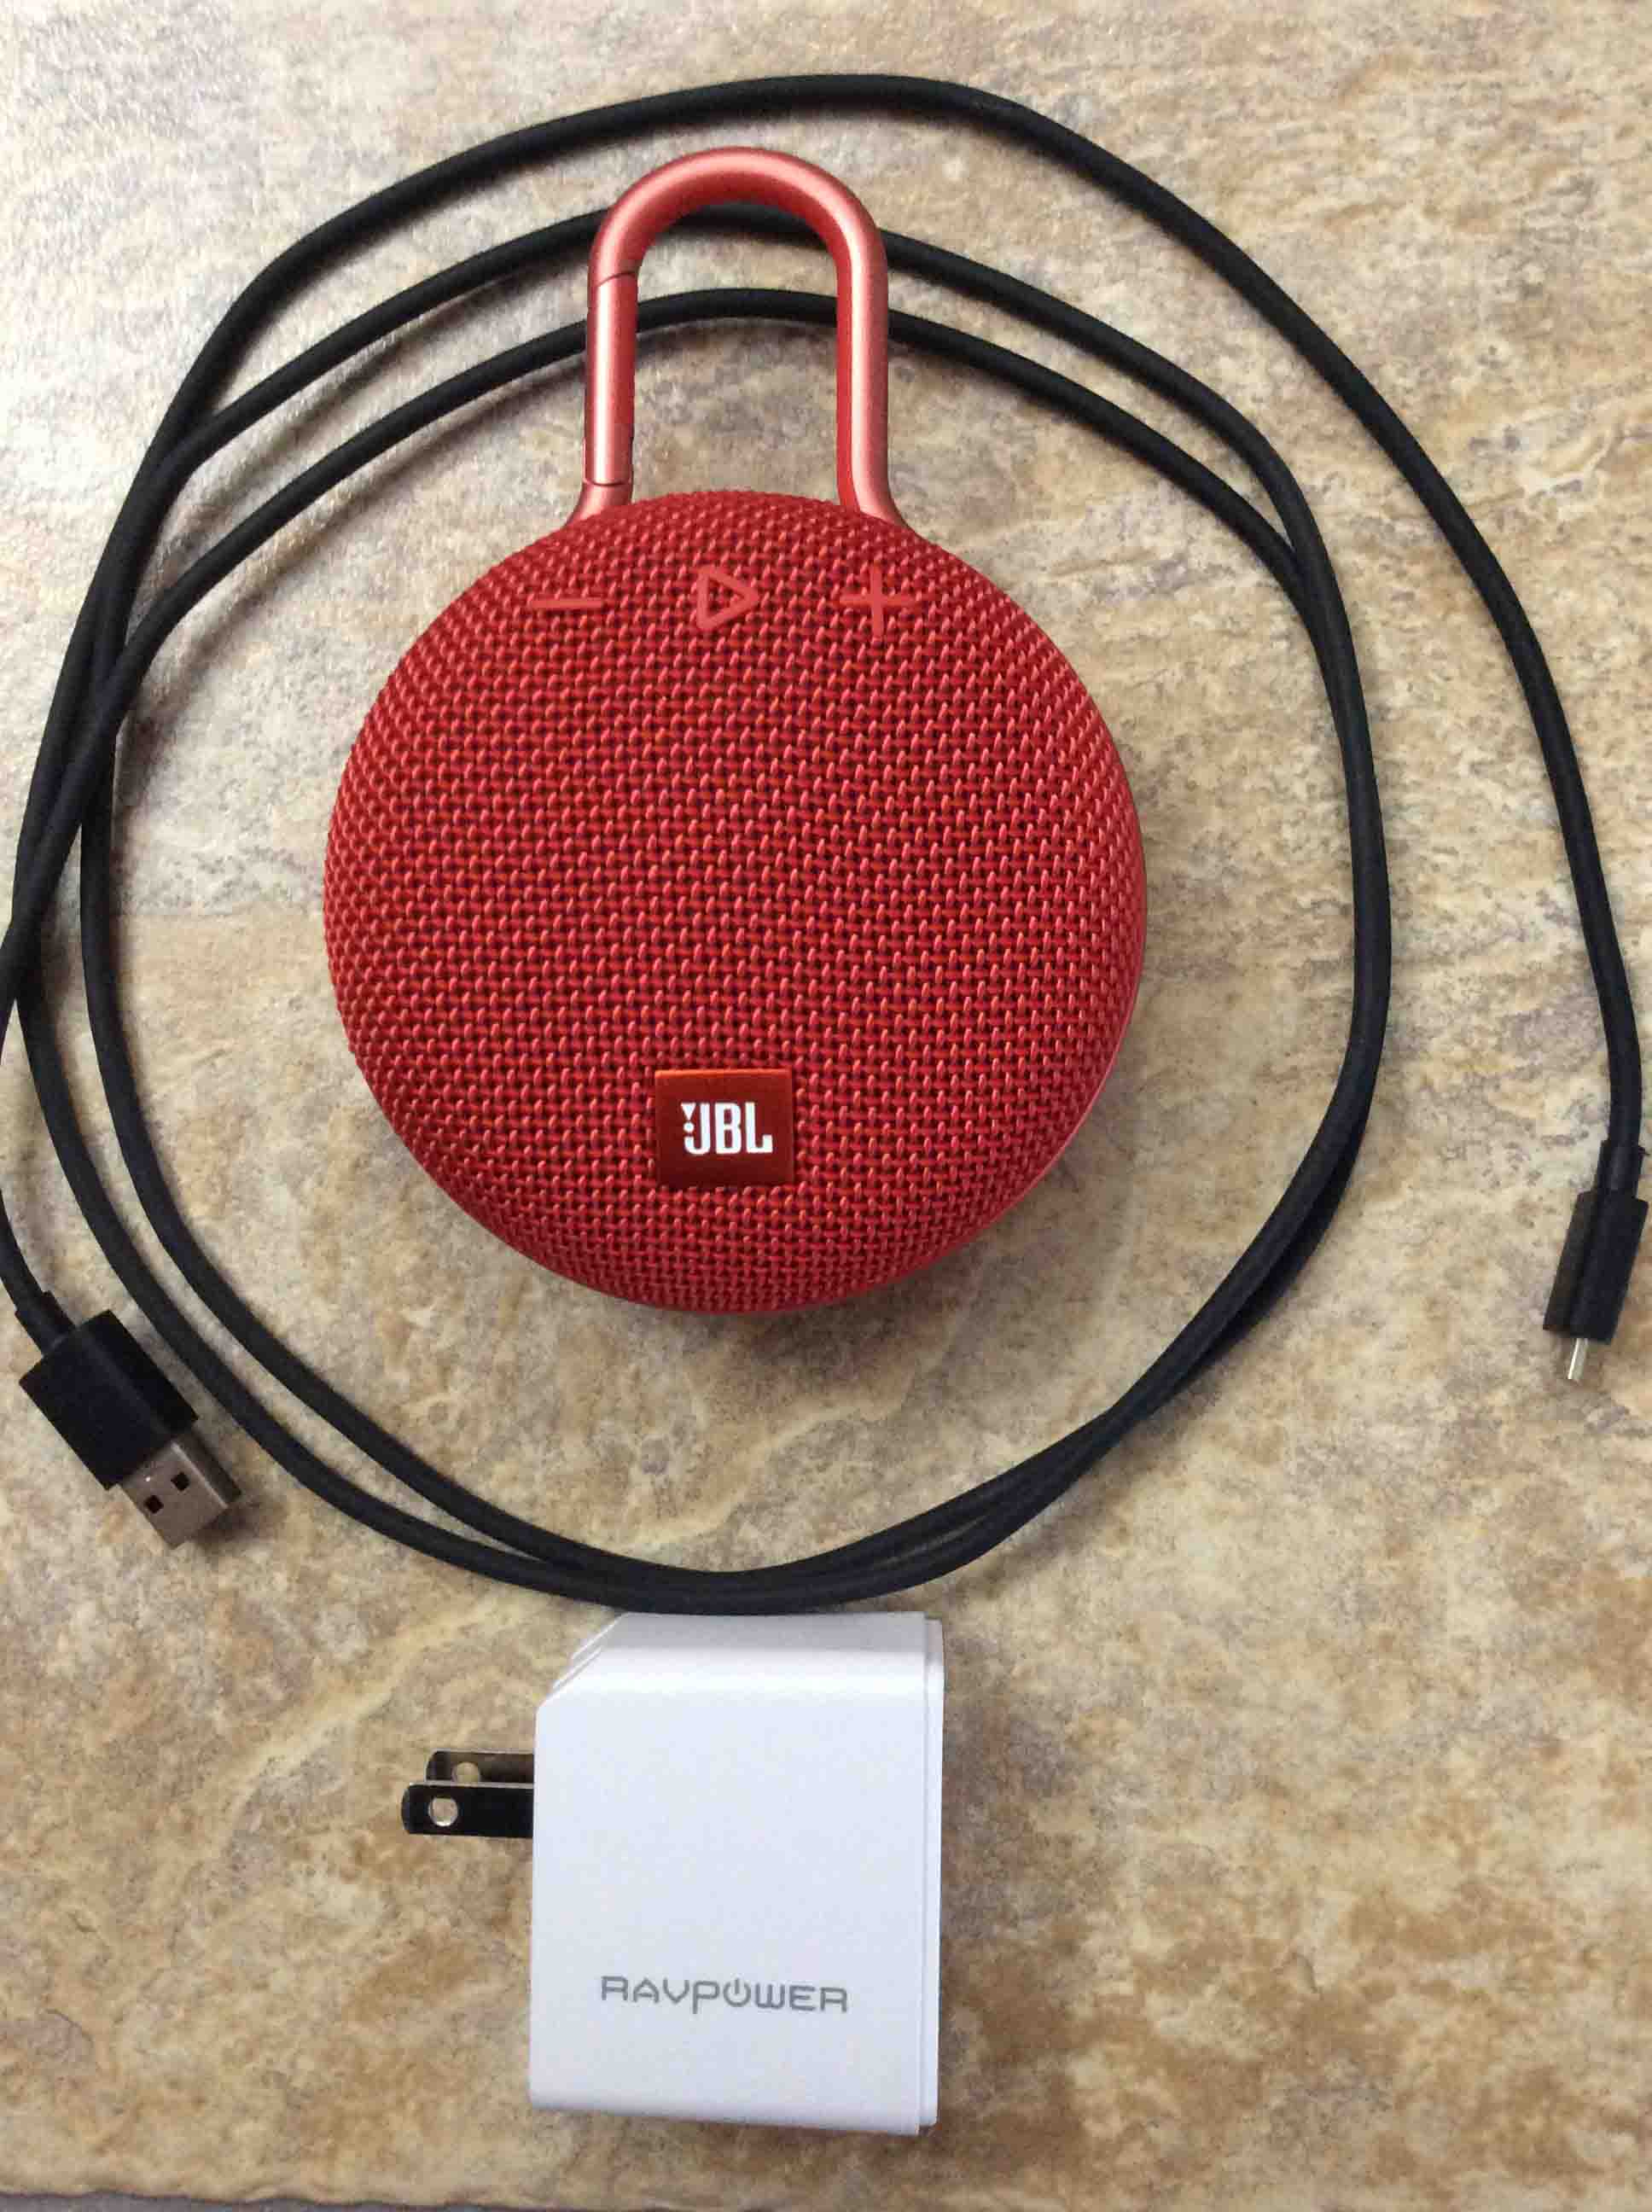
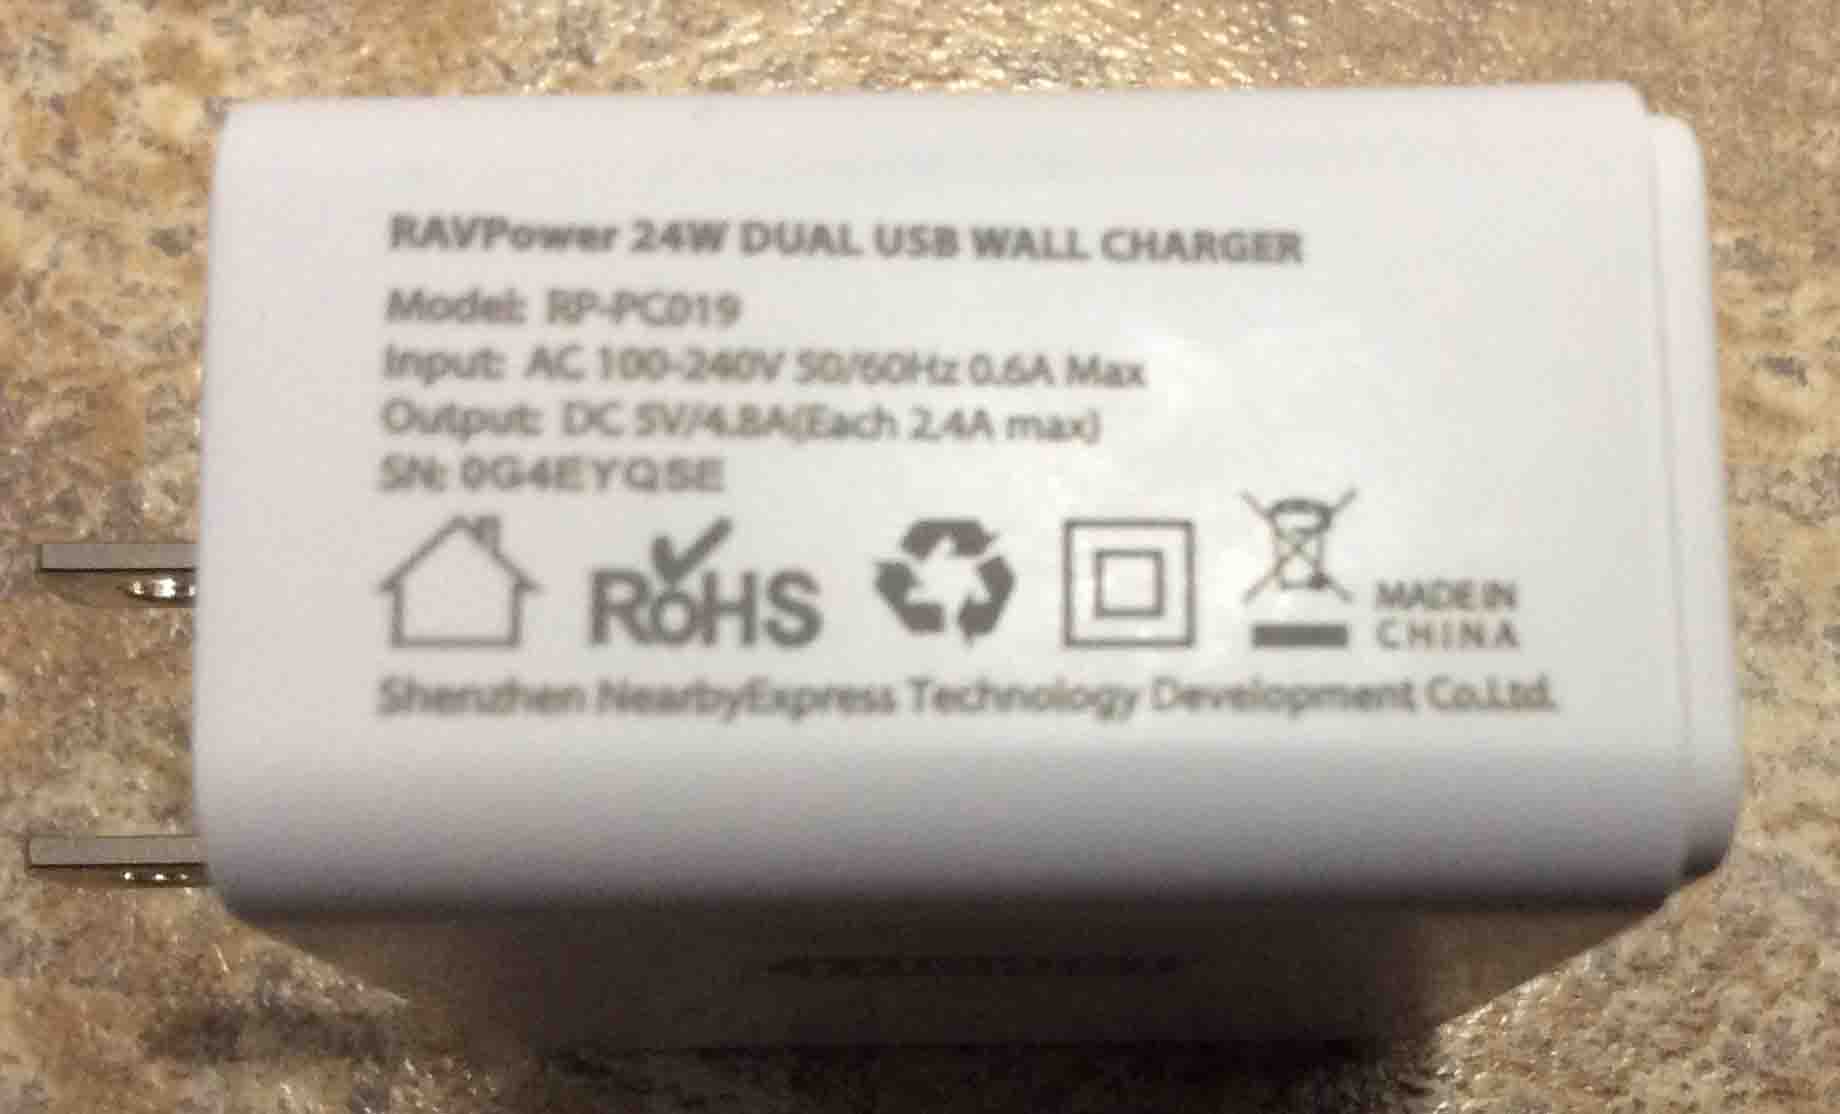
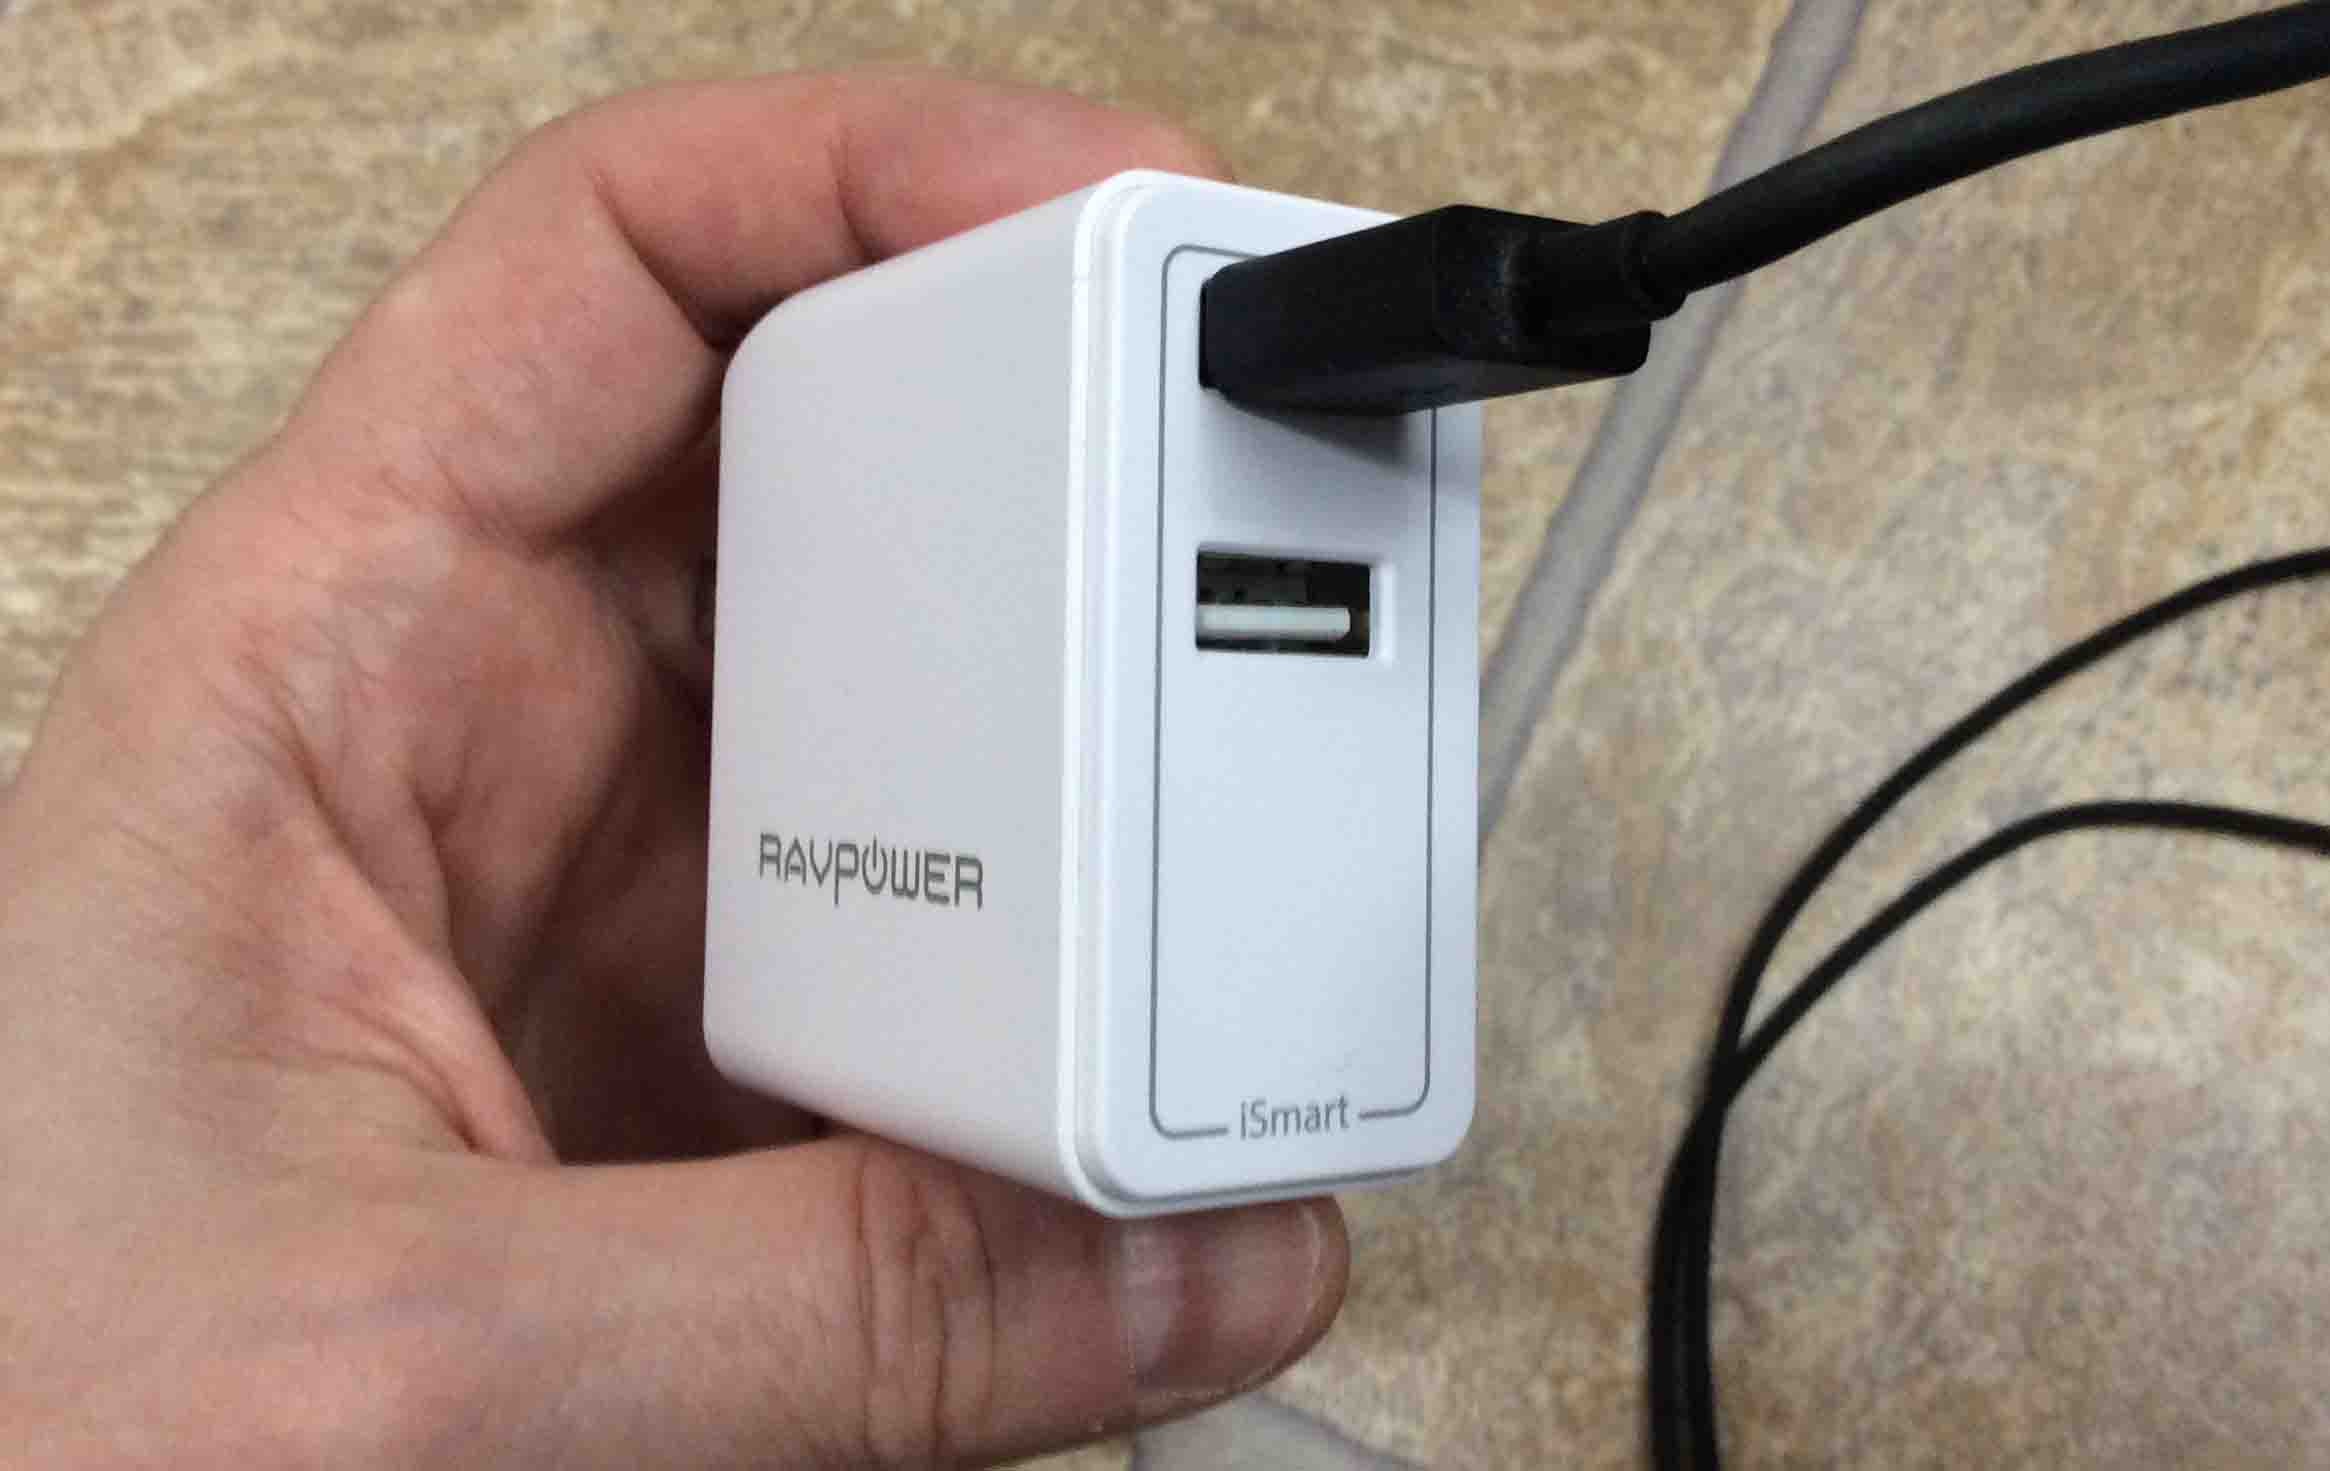
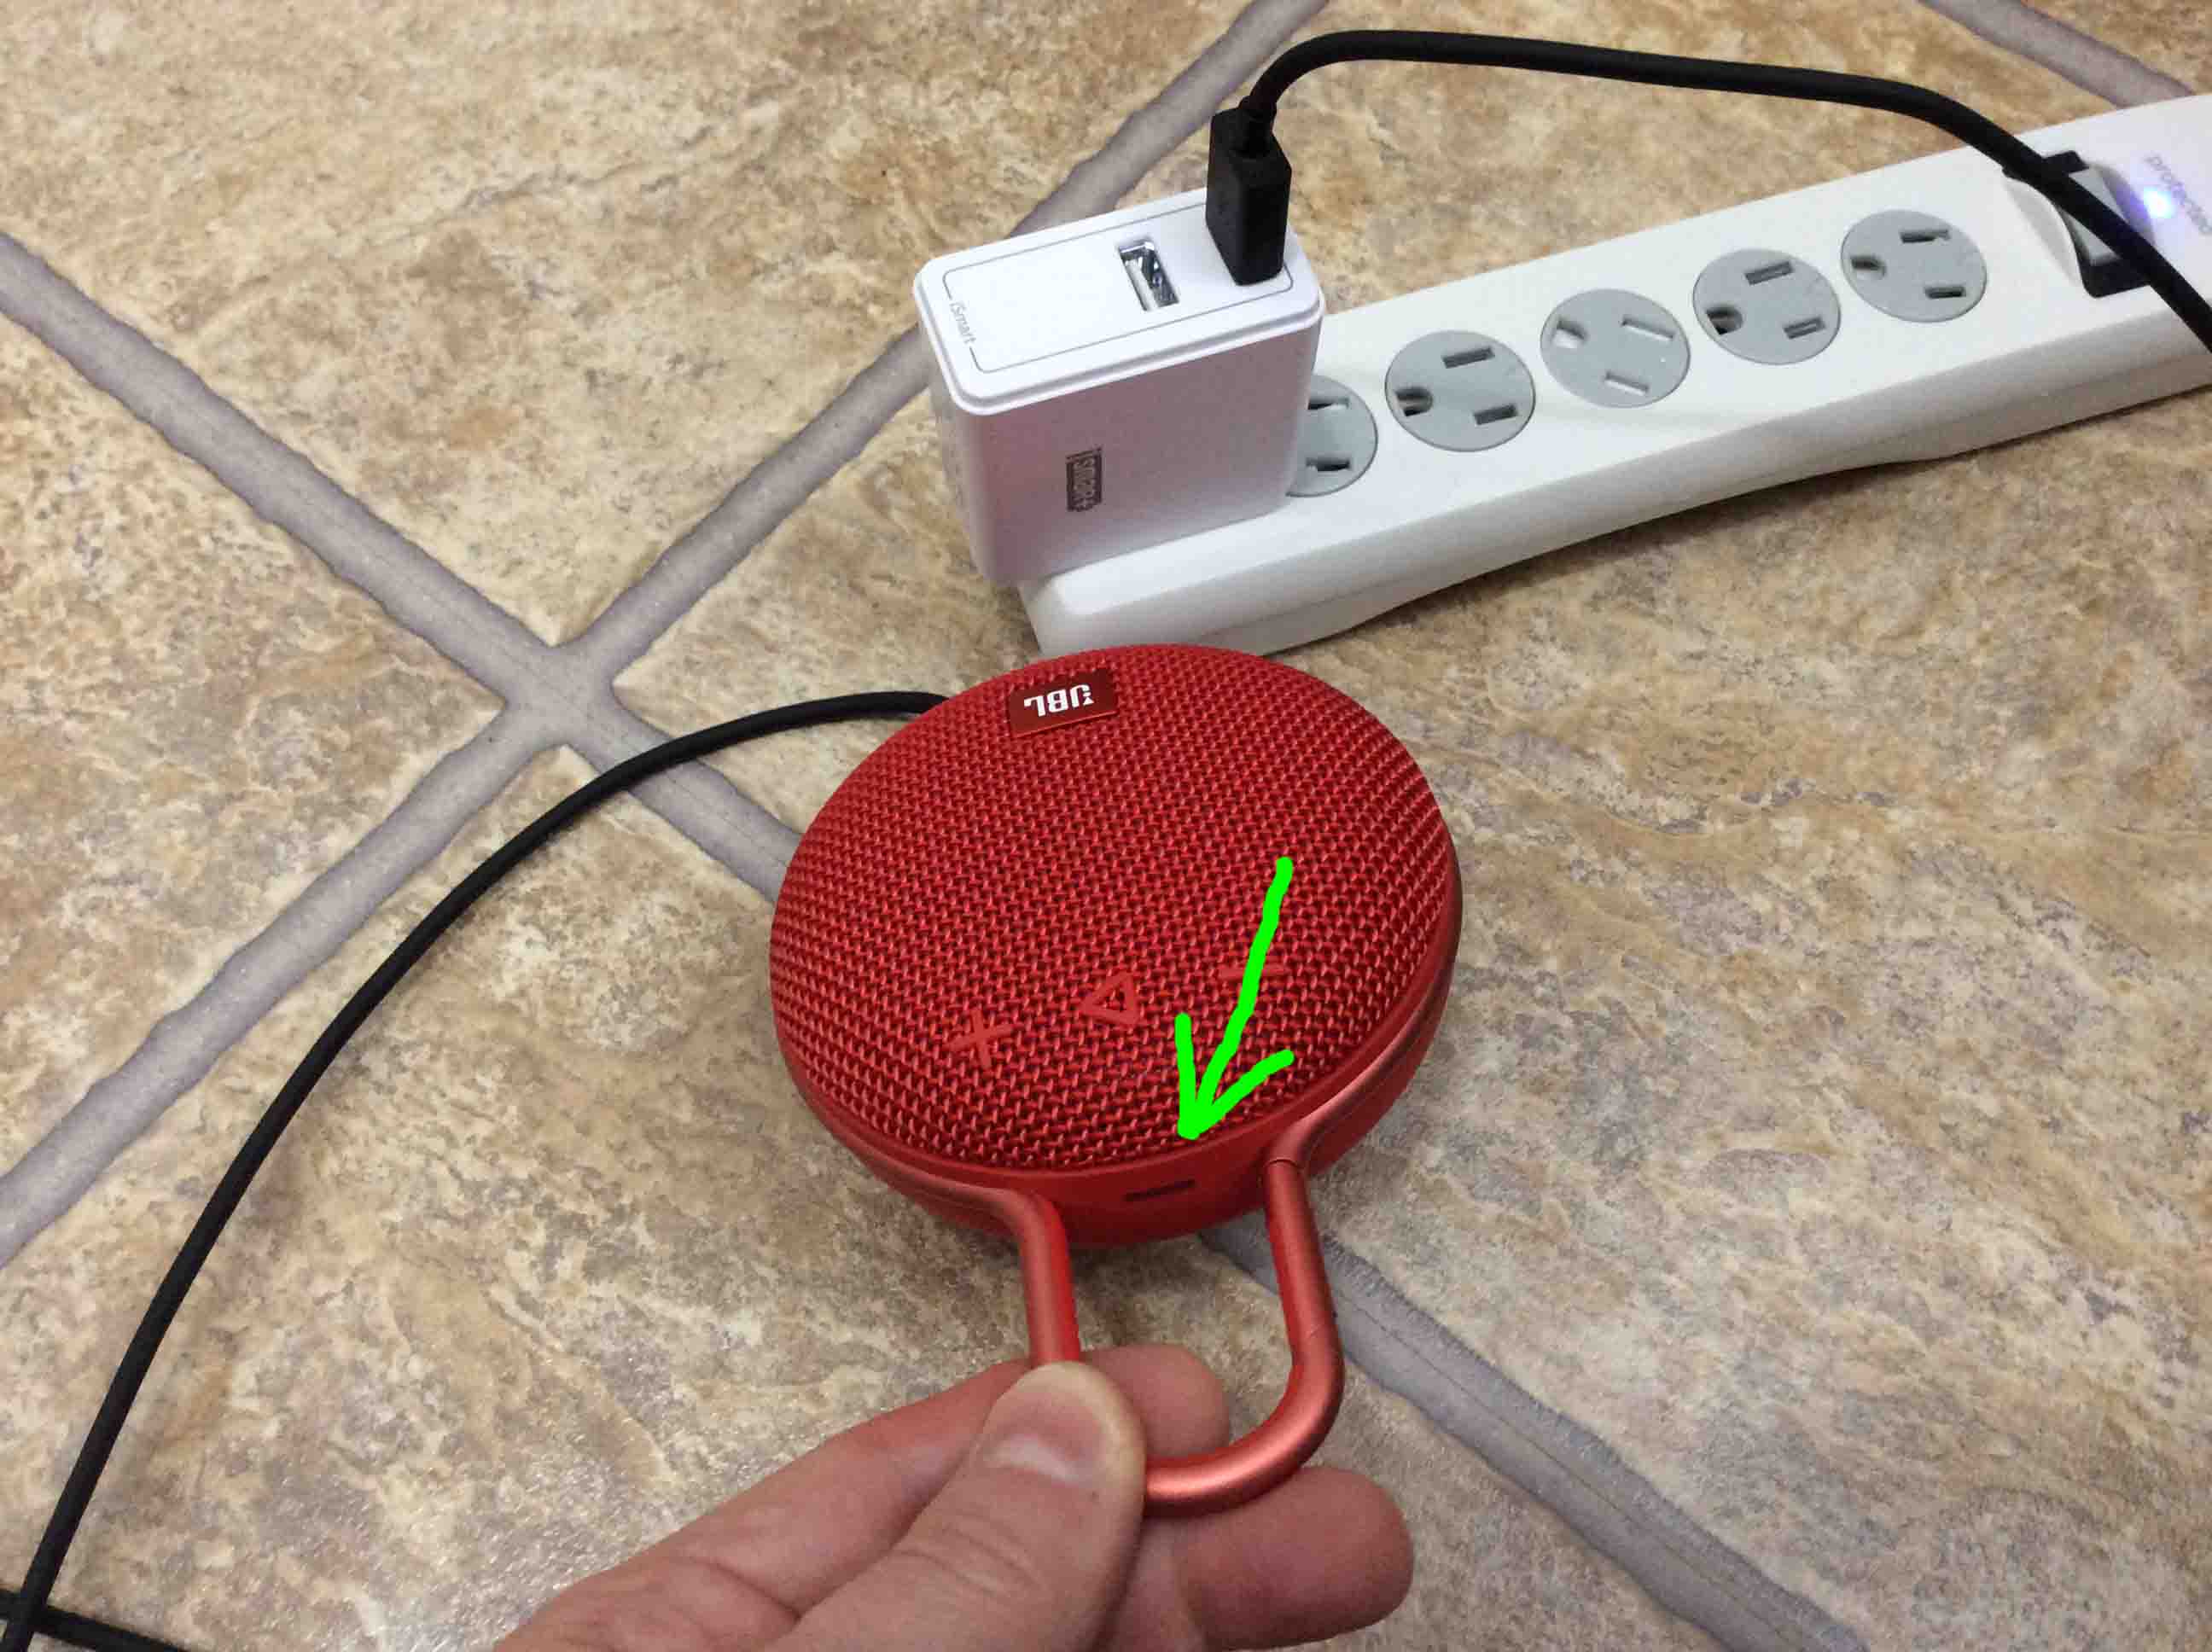
In this demo, we use the RavPower 24 watt USB charger, as shown next. The JBL Clip 3 requires 5 volts at 600 milliamps to charge fully. So this RavPower USB adapter is indeed beefy enough to get the job done.
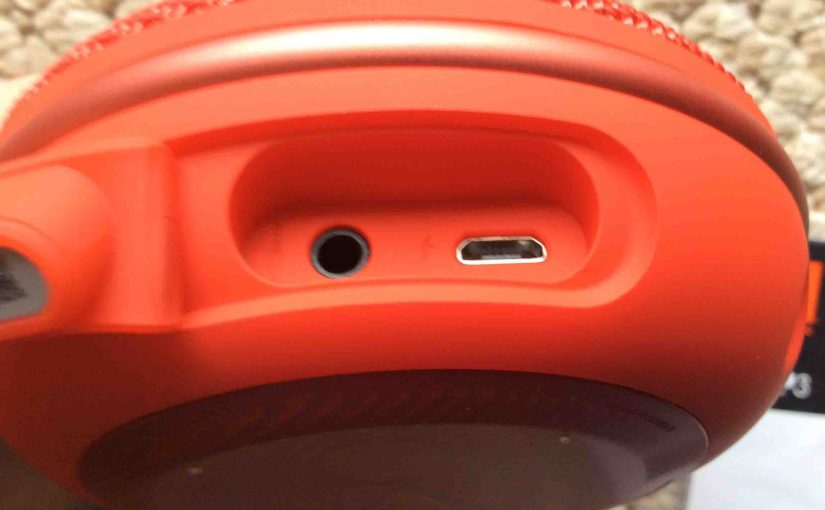
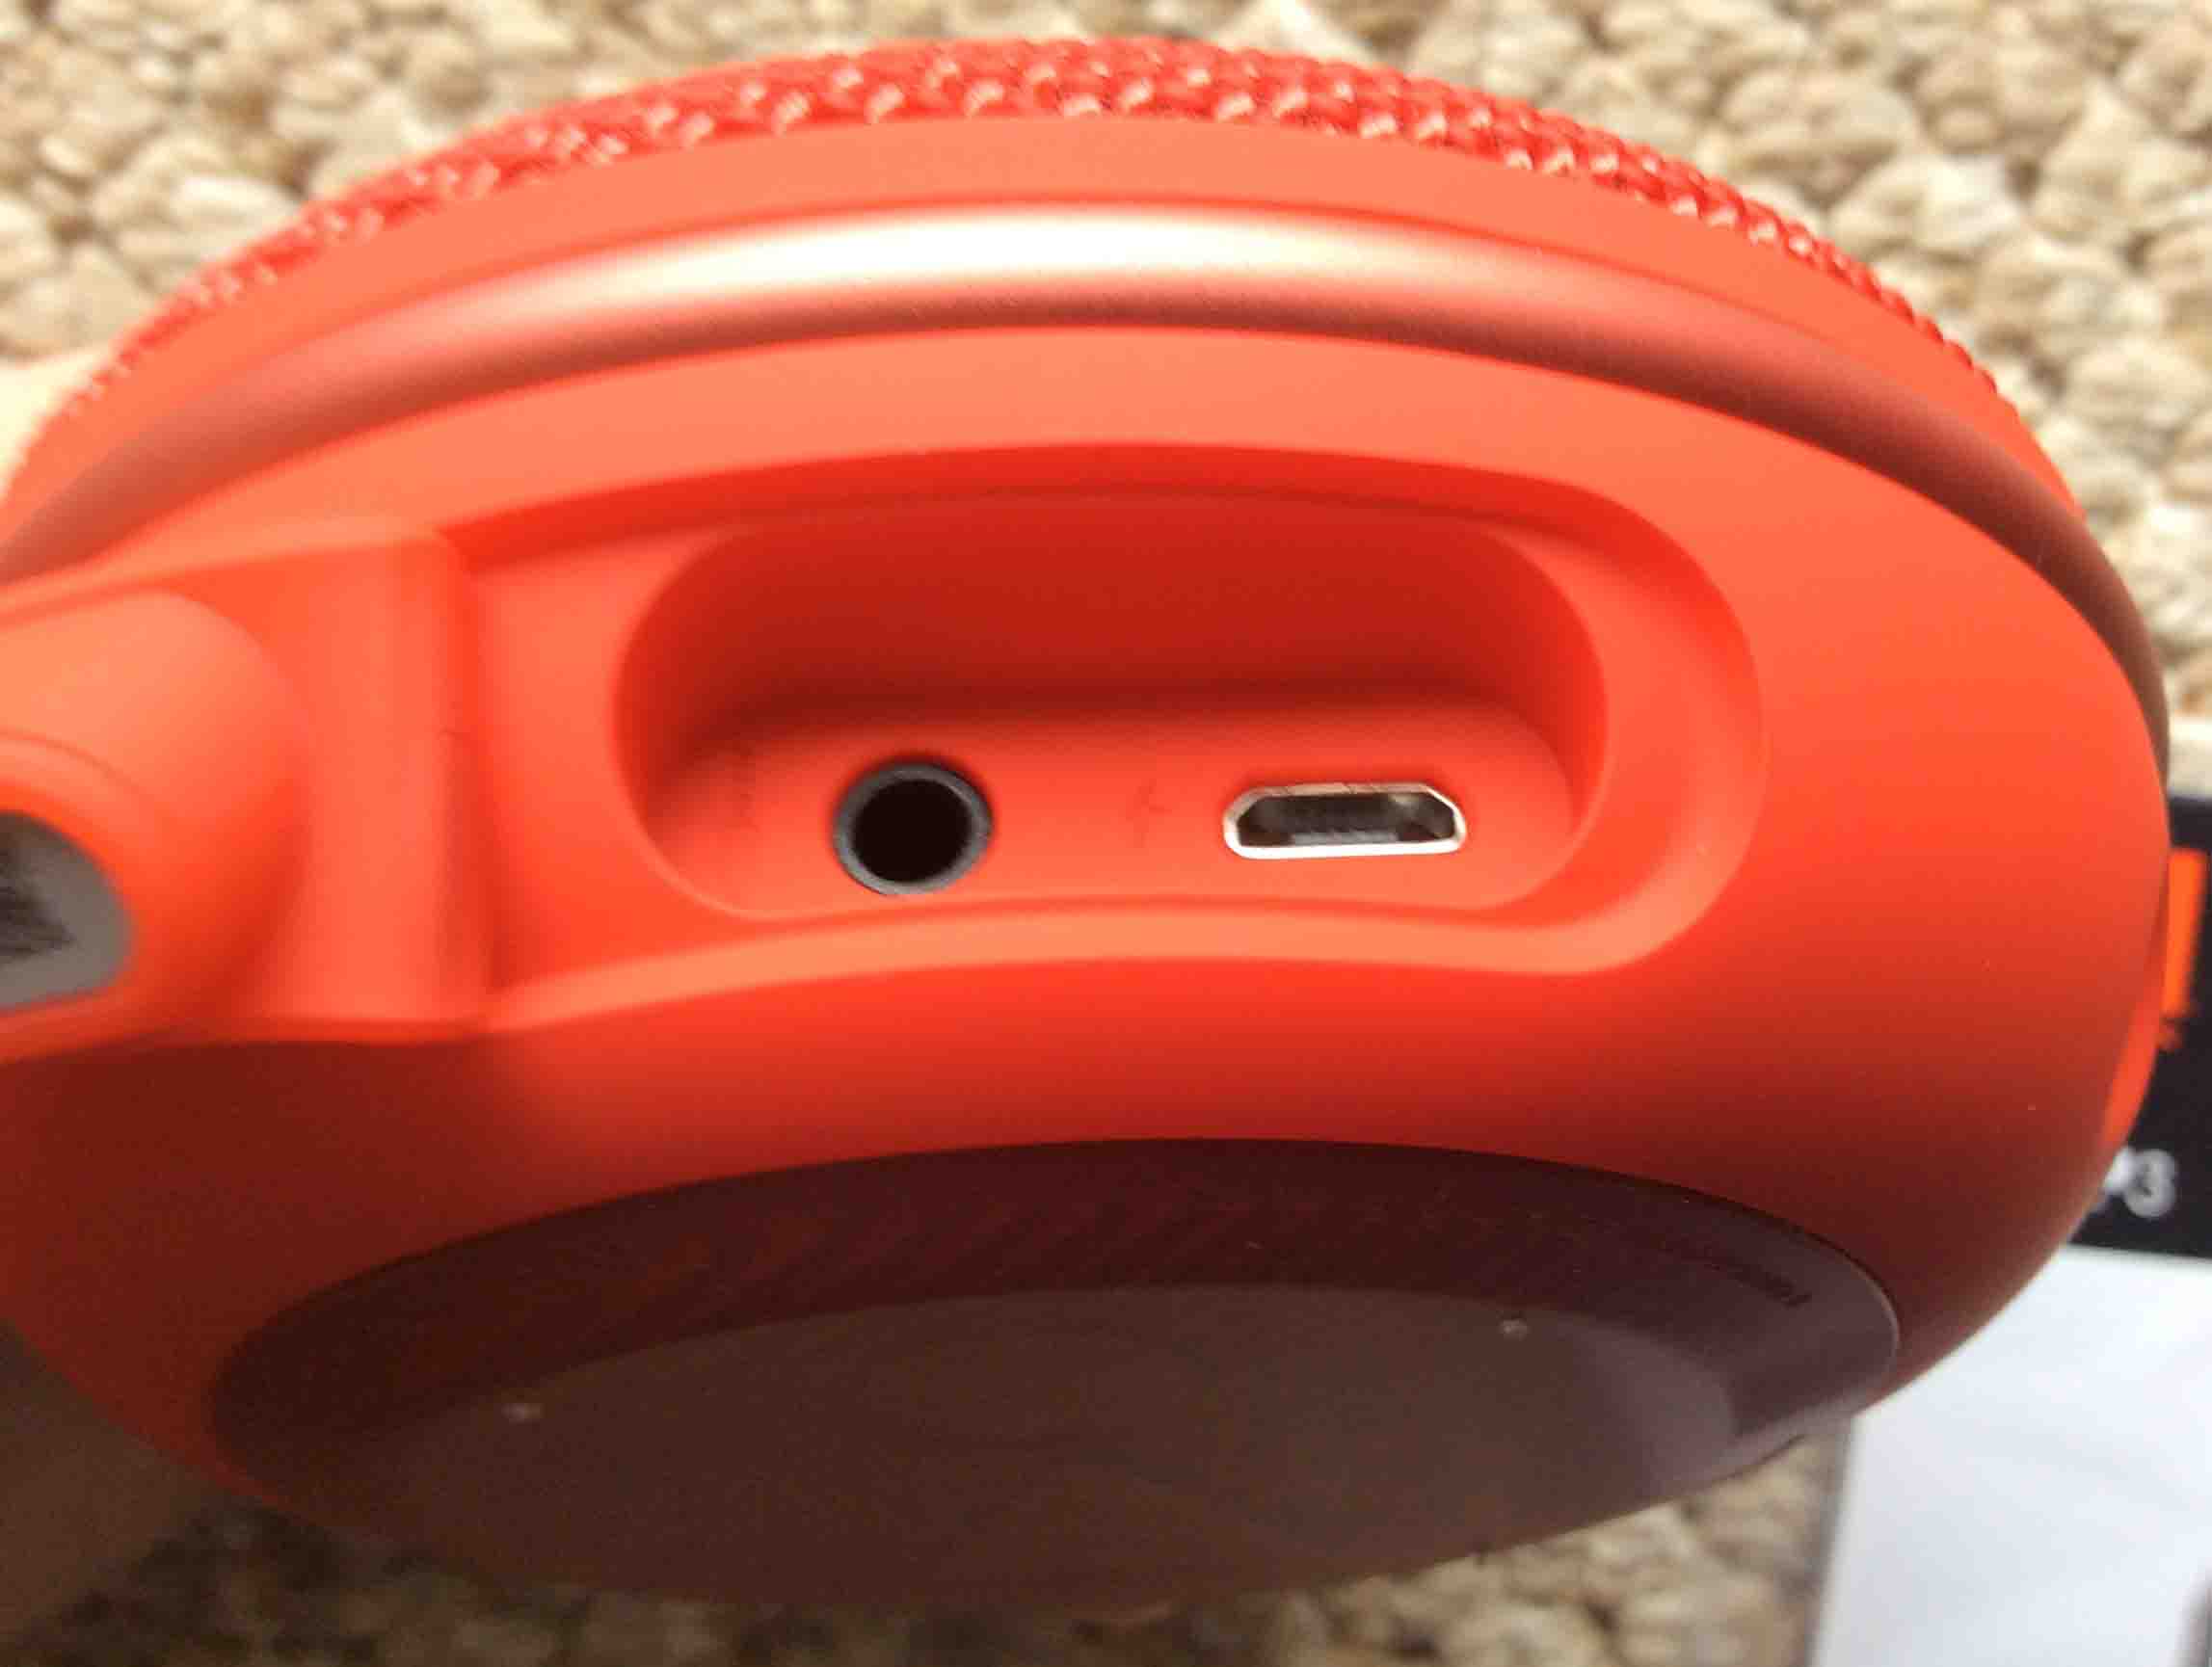
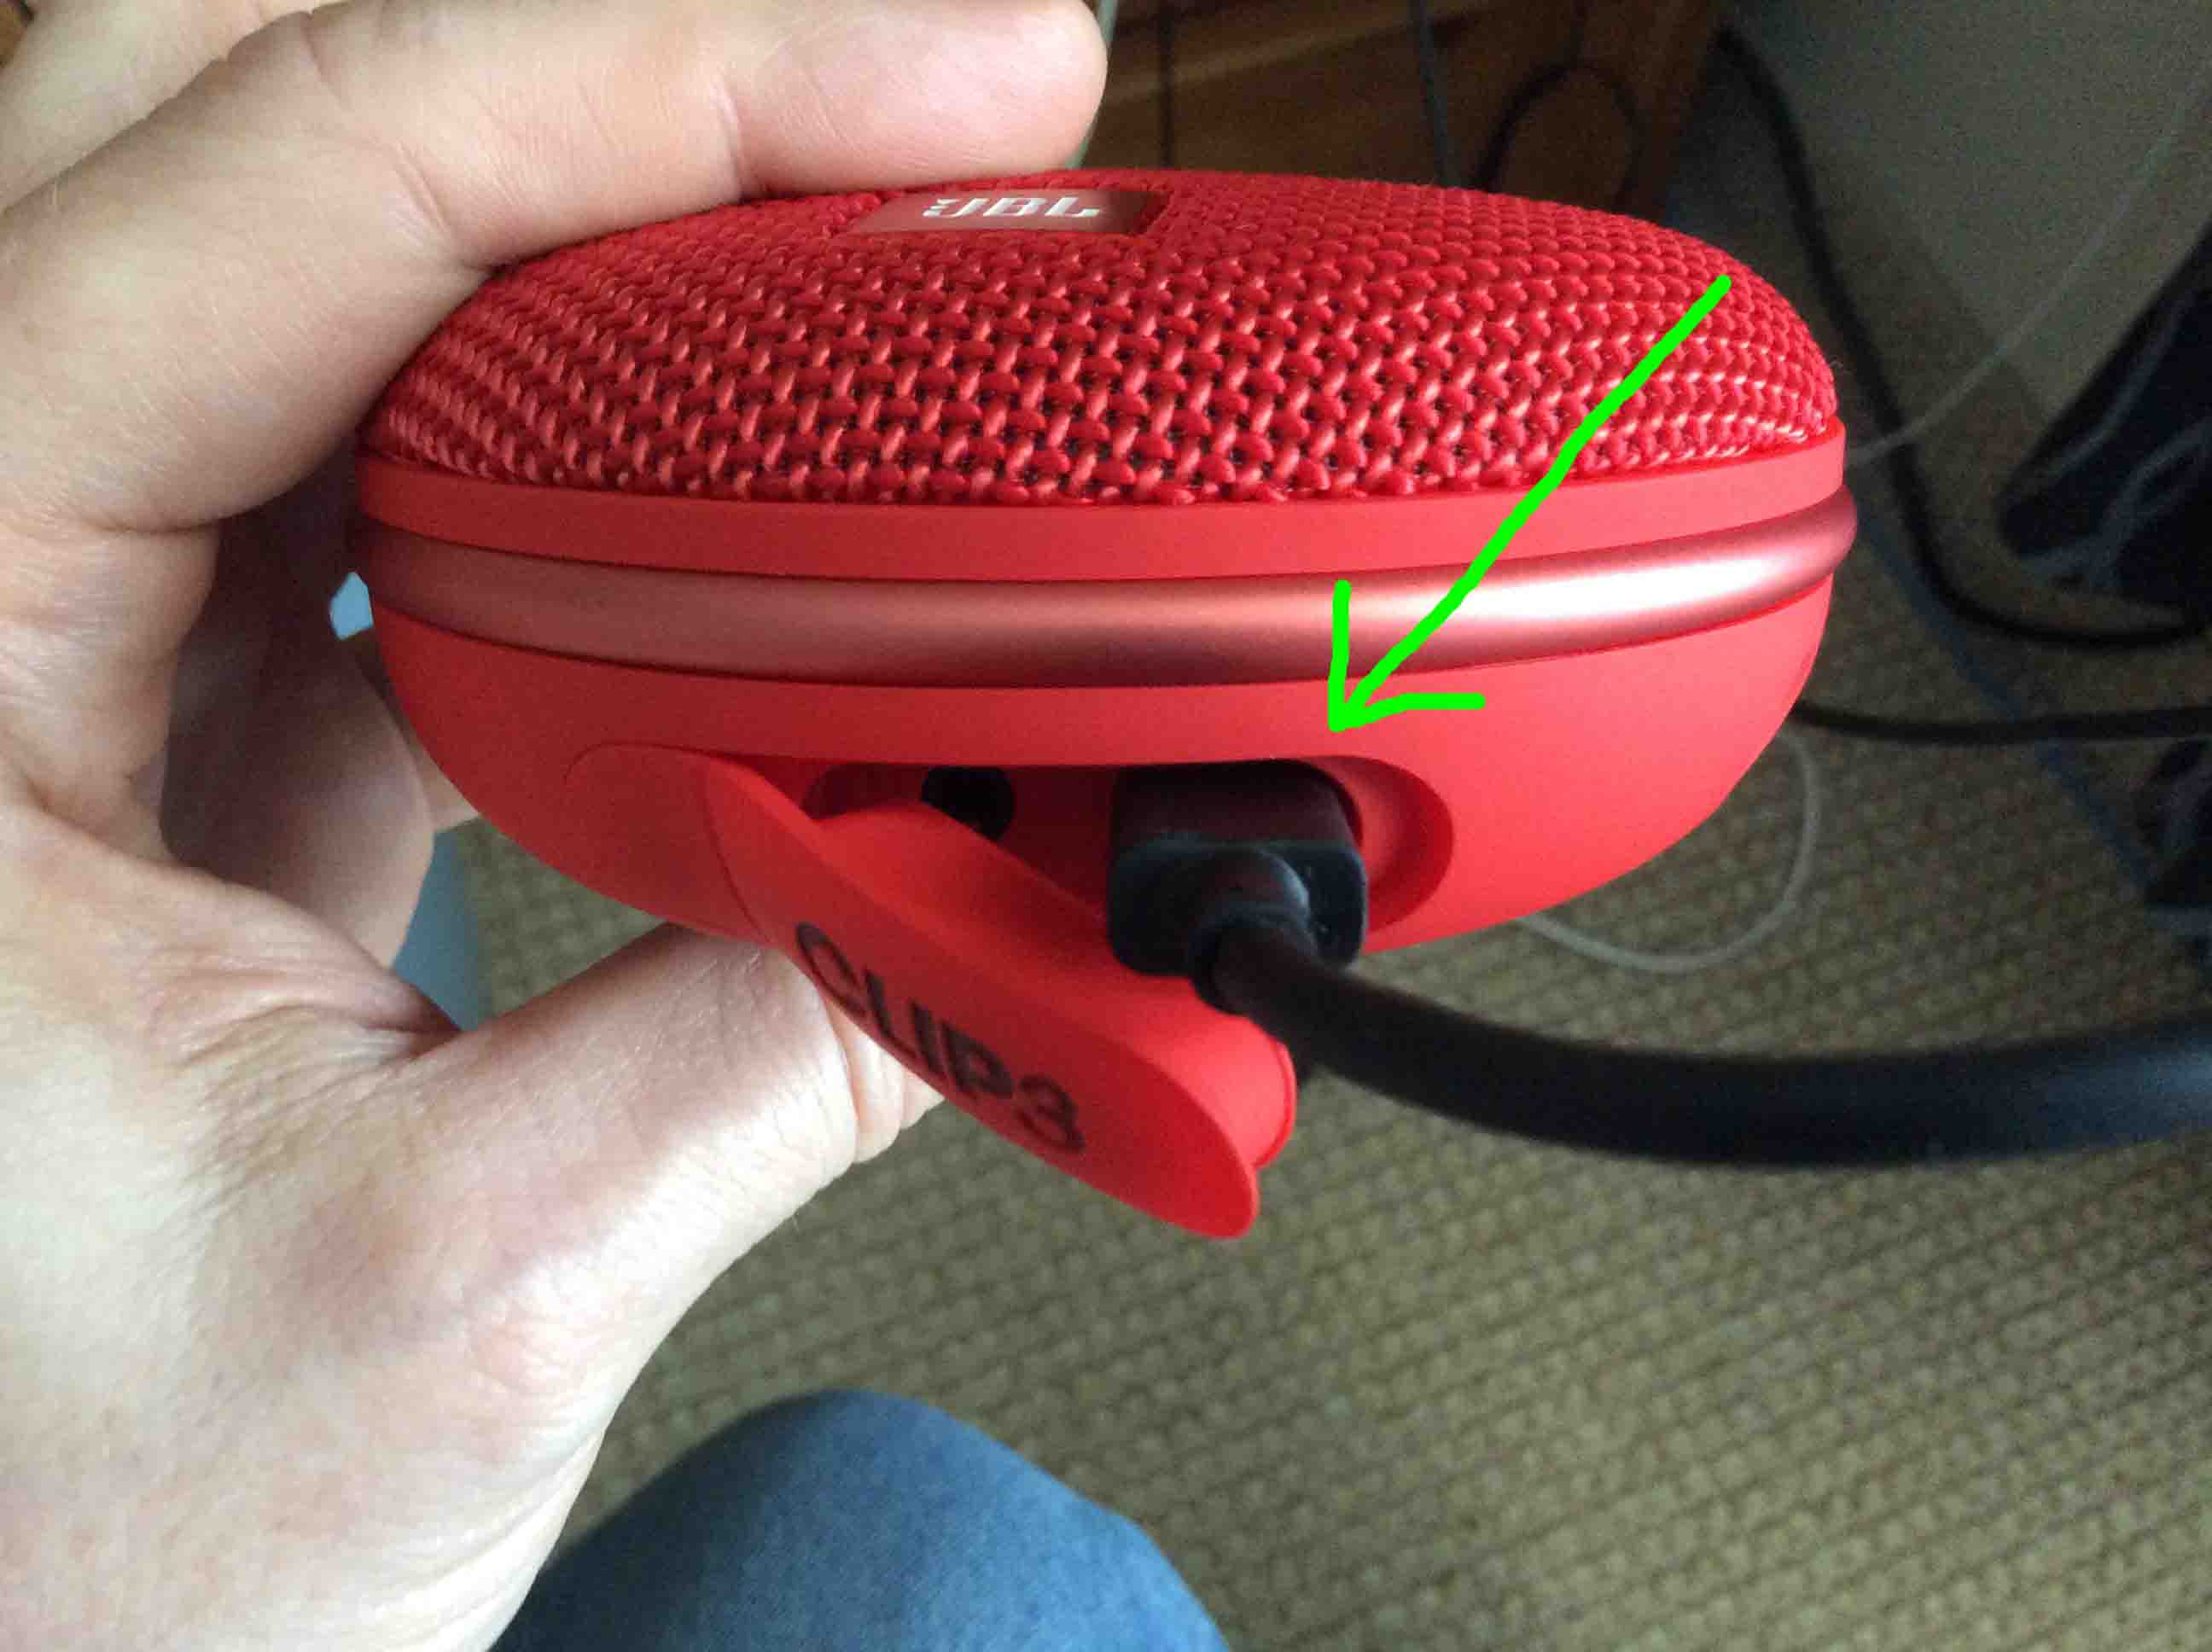
2. Open the Port Cover on the JBL Clip 3
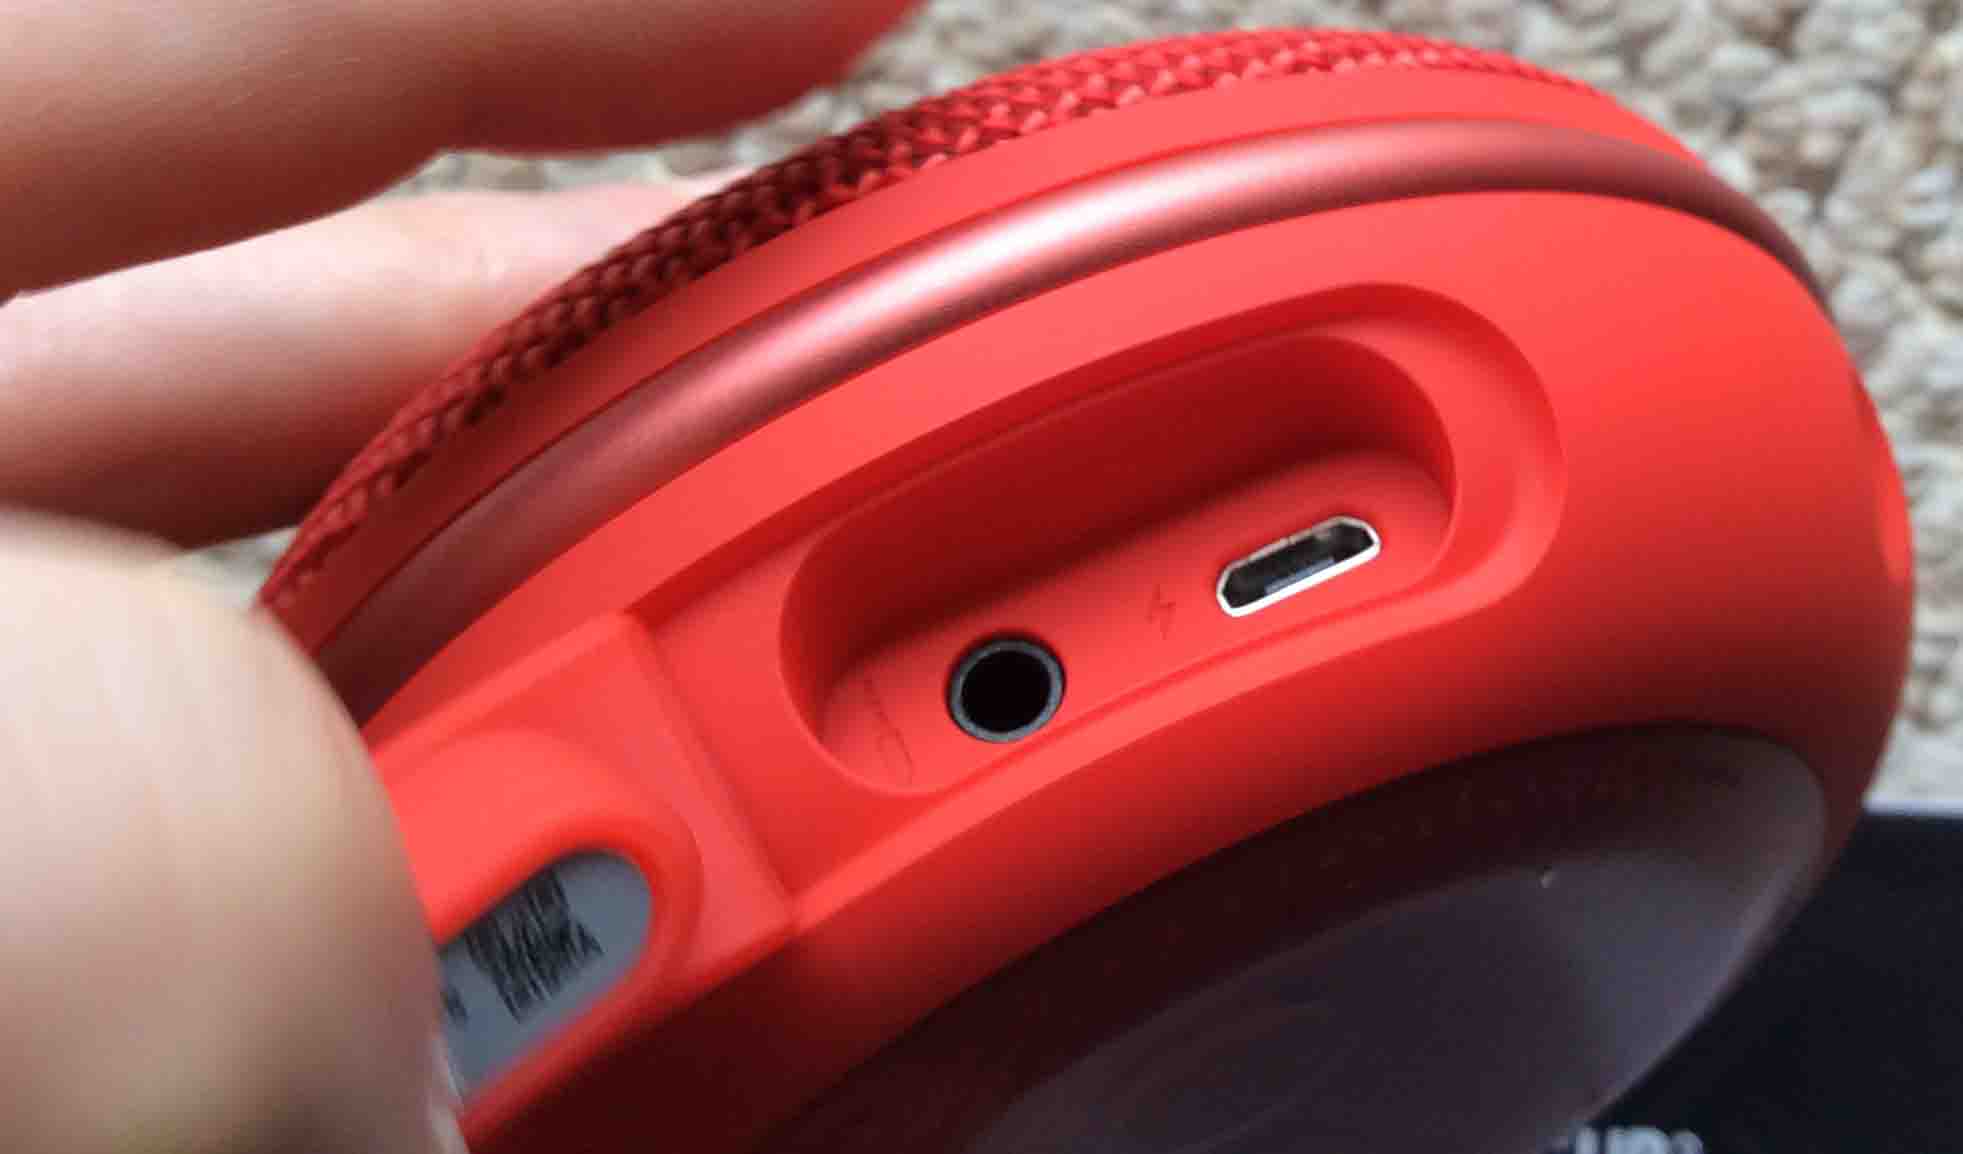
Then, use a penny or a dime to work open the waterproof seal port cover on the Clip 3. This exposes the micro USB charging port inside, as shown next.
3. Plug in the Micro USB Cord to the Clip 3 Speaker to Continue with JBL Clip 3 Charging Instructions
Next, plug the small end of your micro USB charge cable into the matching micro USB port in the Clip3 , as shown next.
4. Plug the Other End of the USB Cord into your USB Power Adapter
Furthermore, connect the A end of the USB charge cable to the power adapter, as pictured next.
5. Plug the AC USB Power Adapter into a Working Wall Outlet
Now that the Clip 3 and our RavPower USB adapter are connected, we plug the RavPower into a working AC outlet, as shown next. In this demo, we’ve plugged ours into a surge protector power strip.
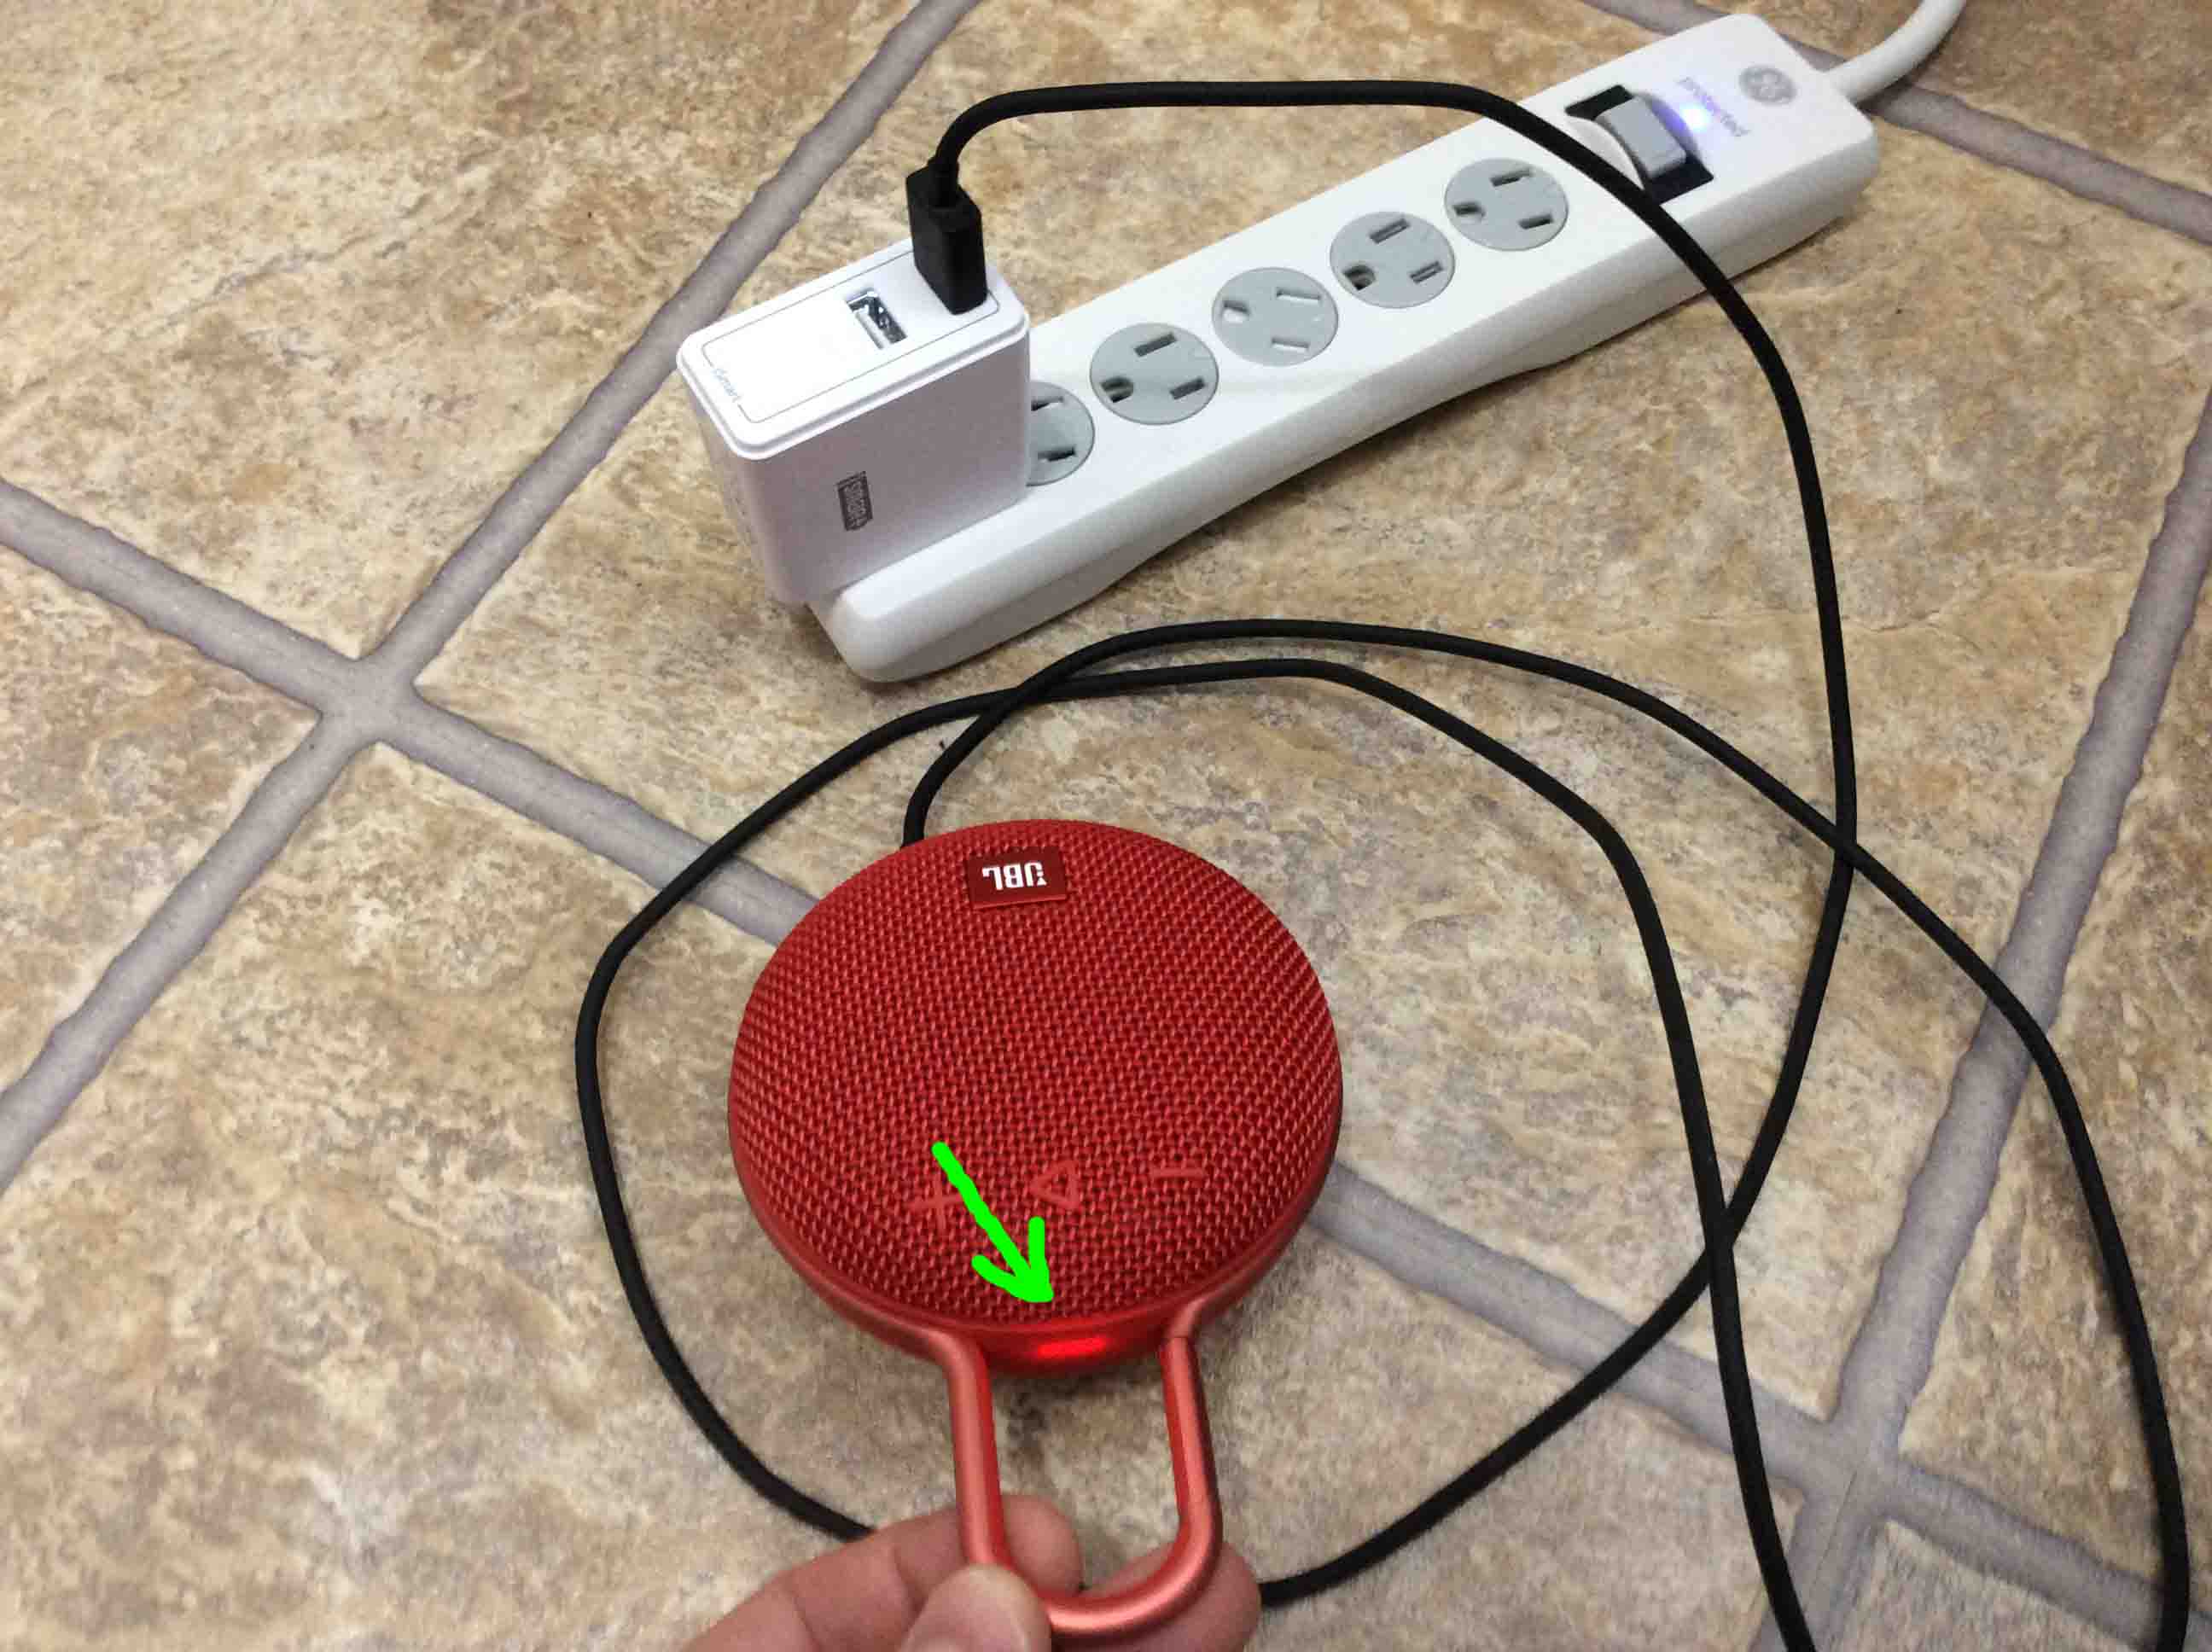
The status lamp lights up solid red on the Clip 3 when you apply enough USB power. There is no battery status gauge that shows percentage of charge. The red lamp means that charging is in progress, and it goes out when charging completes. But we know of no way to tell how far along the charging is on this speaker model.
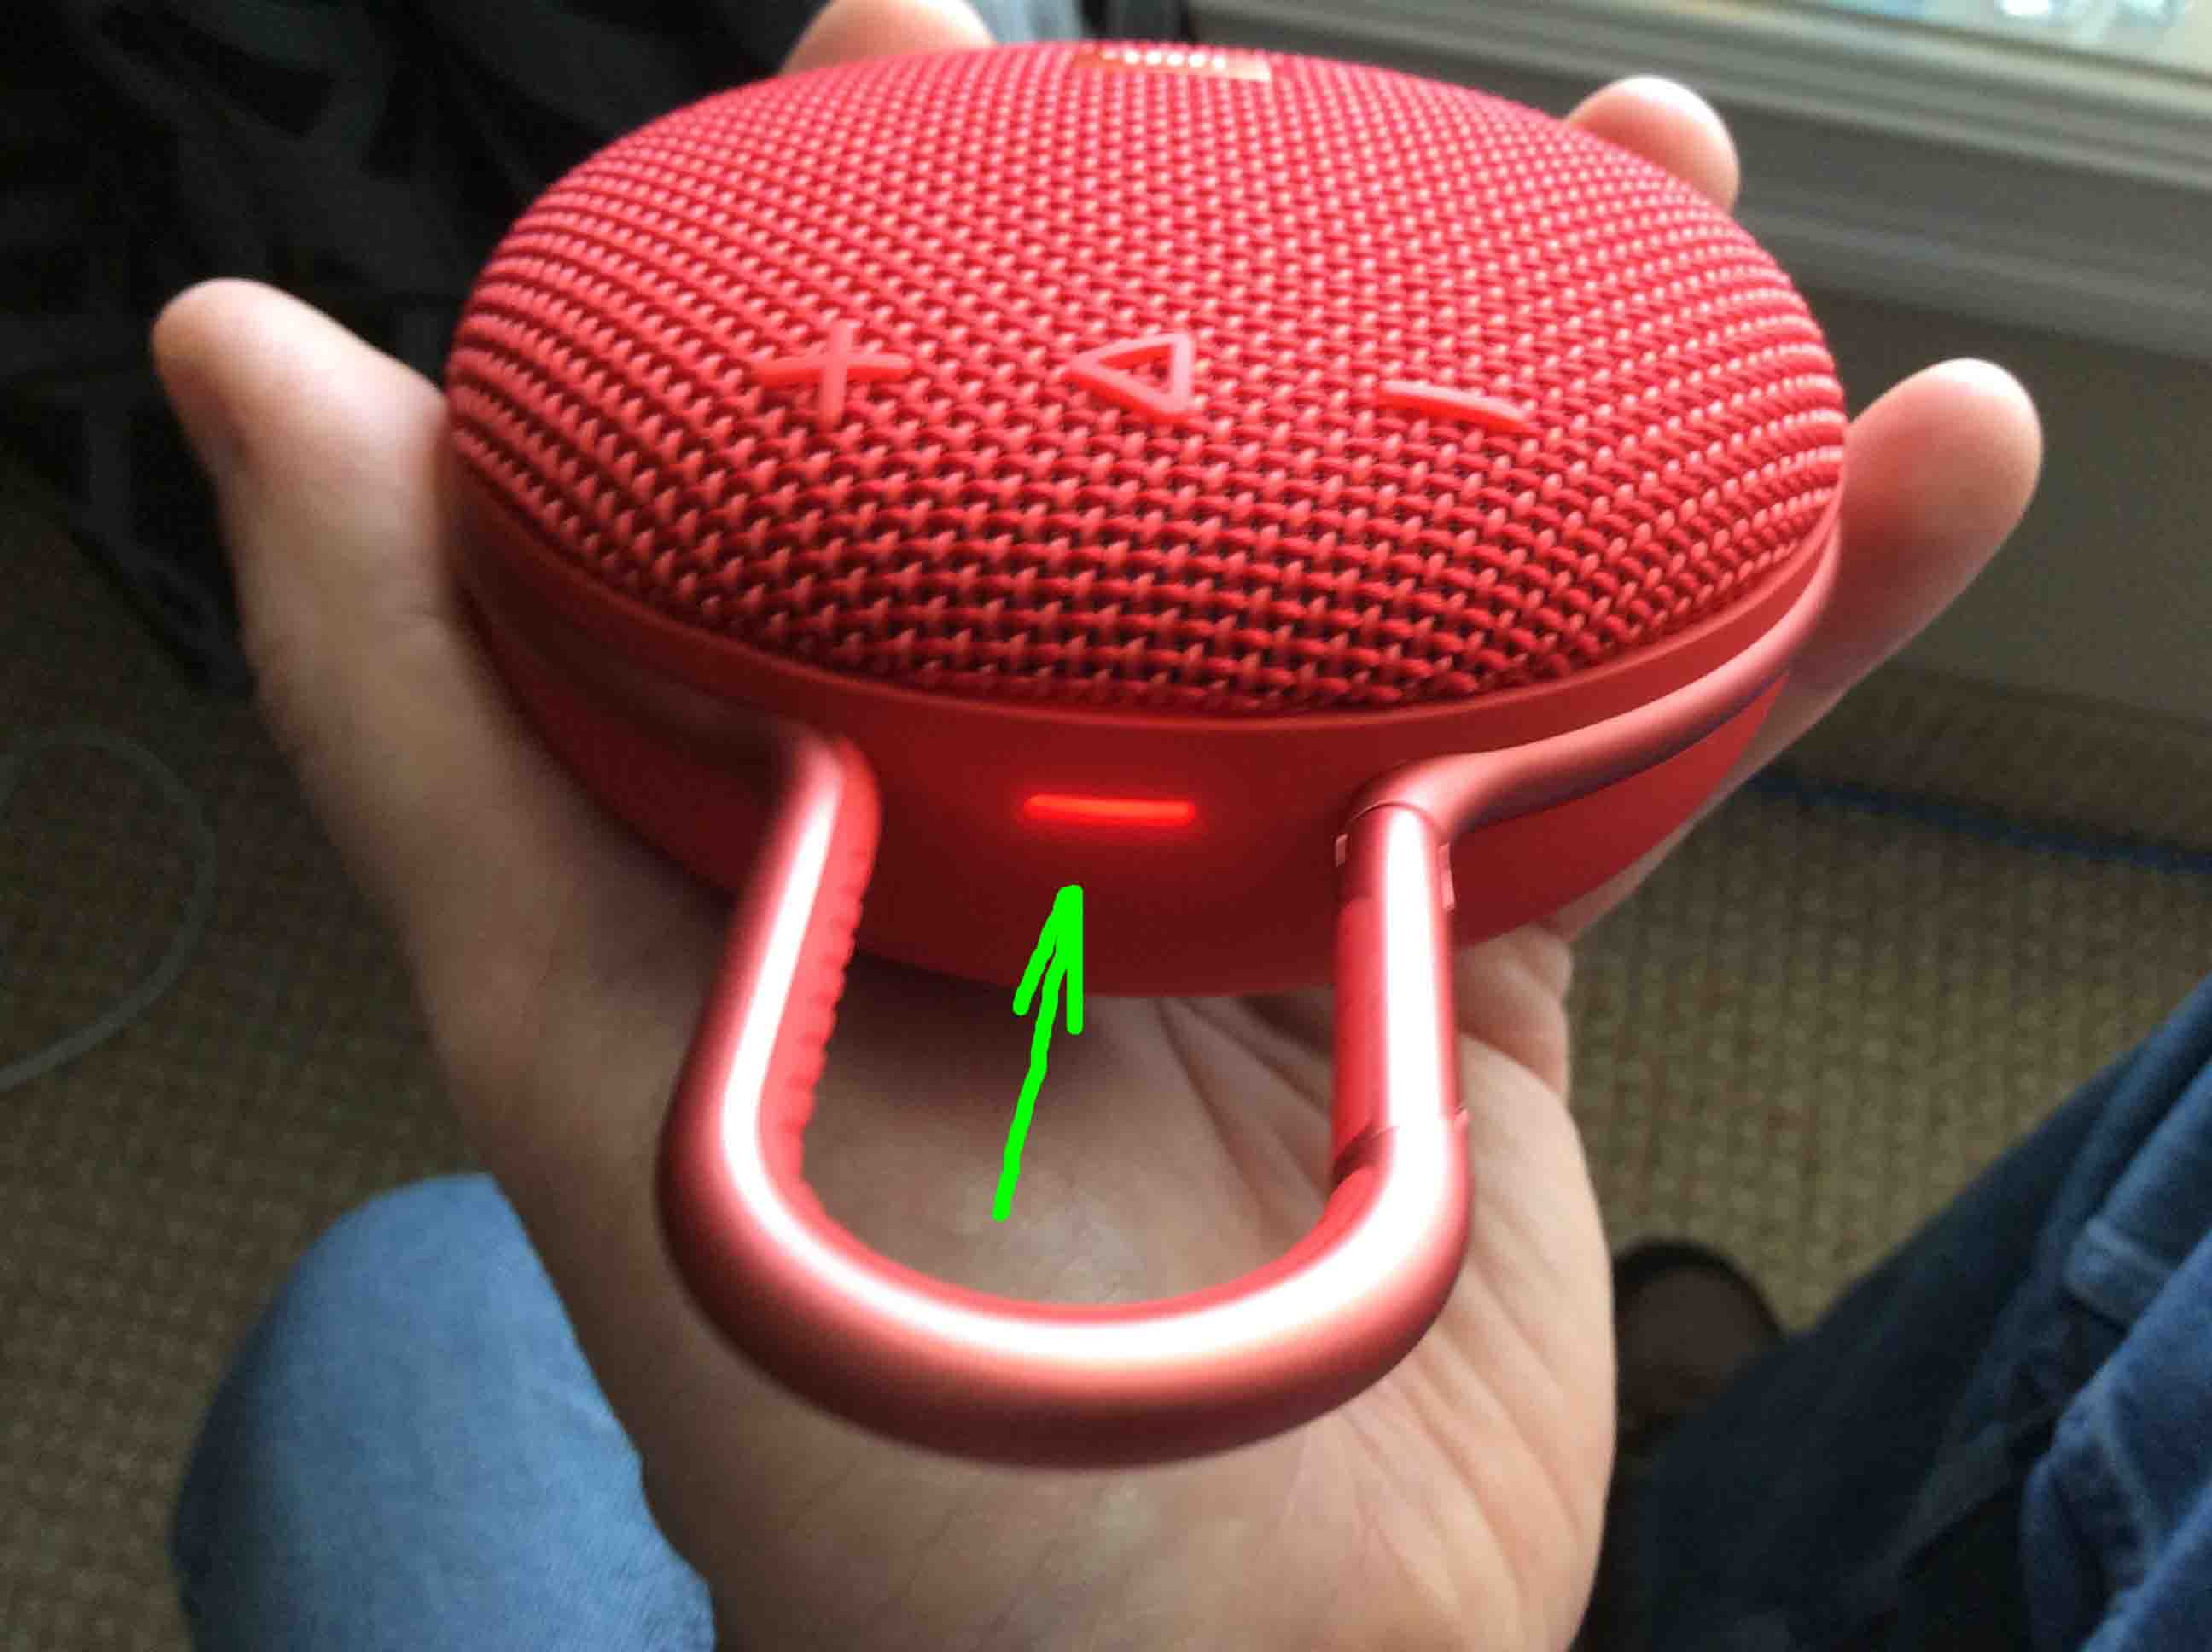
6. Let the Clip 3 Charge Until the Red Light Go Out to Continue with JBL Clip 3 Charging Instructions
Battery charging is complete when the solid red lamp goes dark, as shown next.
7. Unplug the USB Charge Cable from the JBL Clip 3
8. Fully Close the Waterproof Port Door
Note that unless you snap this flap securely and completely in place, water could enter the port are. Thus, damage to the contacts inside could result. So, be sure to press the port door closed with enough pressure to properly seat it, for full water resistance.
9. Done with JBL Clip 3 Charging Instructions !
Finally, we have now fully charged our JBL Clip 3 wireless Bluetooth speaker.
Repeat this process every ten to twelve hours of music play through the Clip 3, to keep its battery in top condition.
Related Posts to JBL Clip 3 Charging Instructions
- JBL Flip 3 Charging Instructions for Longest Battery Life
- UE Roll 1 Charging Instructions, How to Charge Speaker
- Logitech Wonderboom Charging Instructions
- Charging JBL Flip 3 Instructions for Fully Recharging
- JBL Xtreme Charging Instructions, Speaker Charging Time
Other Posts About the JBL Clip 3 Bluetooth Speaker
- How to Pair JBL Clip 3 with Google Home Speakers
- Pairing JBL Clip 3 with Echo Dot Speakers
- JBL Clip 3 Reset Instructions, How to Hard Factory Reset JBL Clip 3 Portable Bluetooth Speaker
- How to Charge JBL Clip 3 Wireless Bluetooth Speakers
- JBL Clip 3 Pairing Instructions, Pairing Clip 3 JBL
References for JBL Clip 3 Charging Instructions
Change History
- 2020-04-20: Added tags.
- 2019-04-28: Fixed a few typos.
- 2019-03-12: First released.